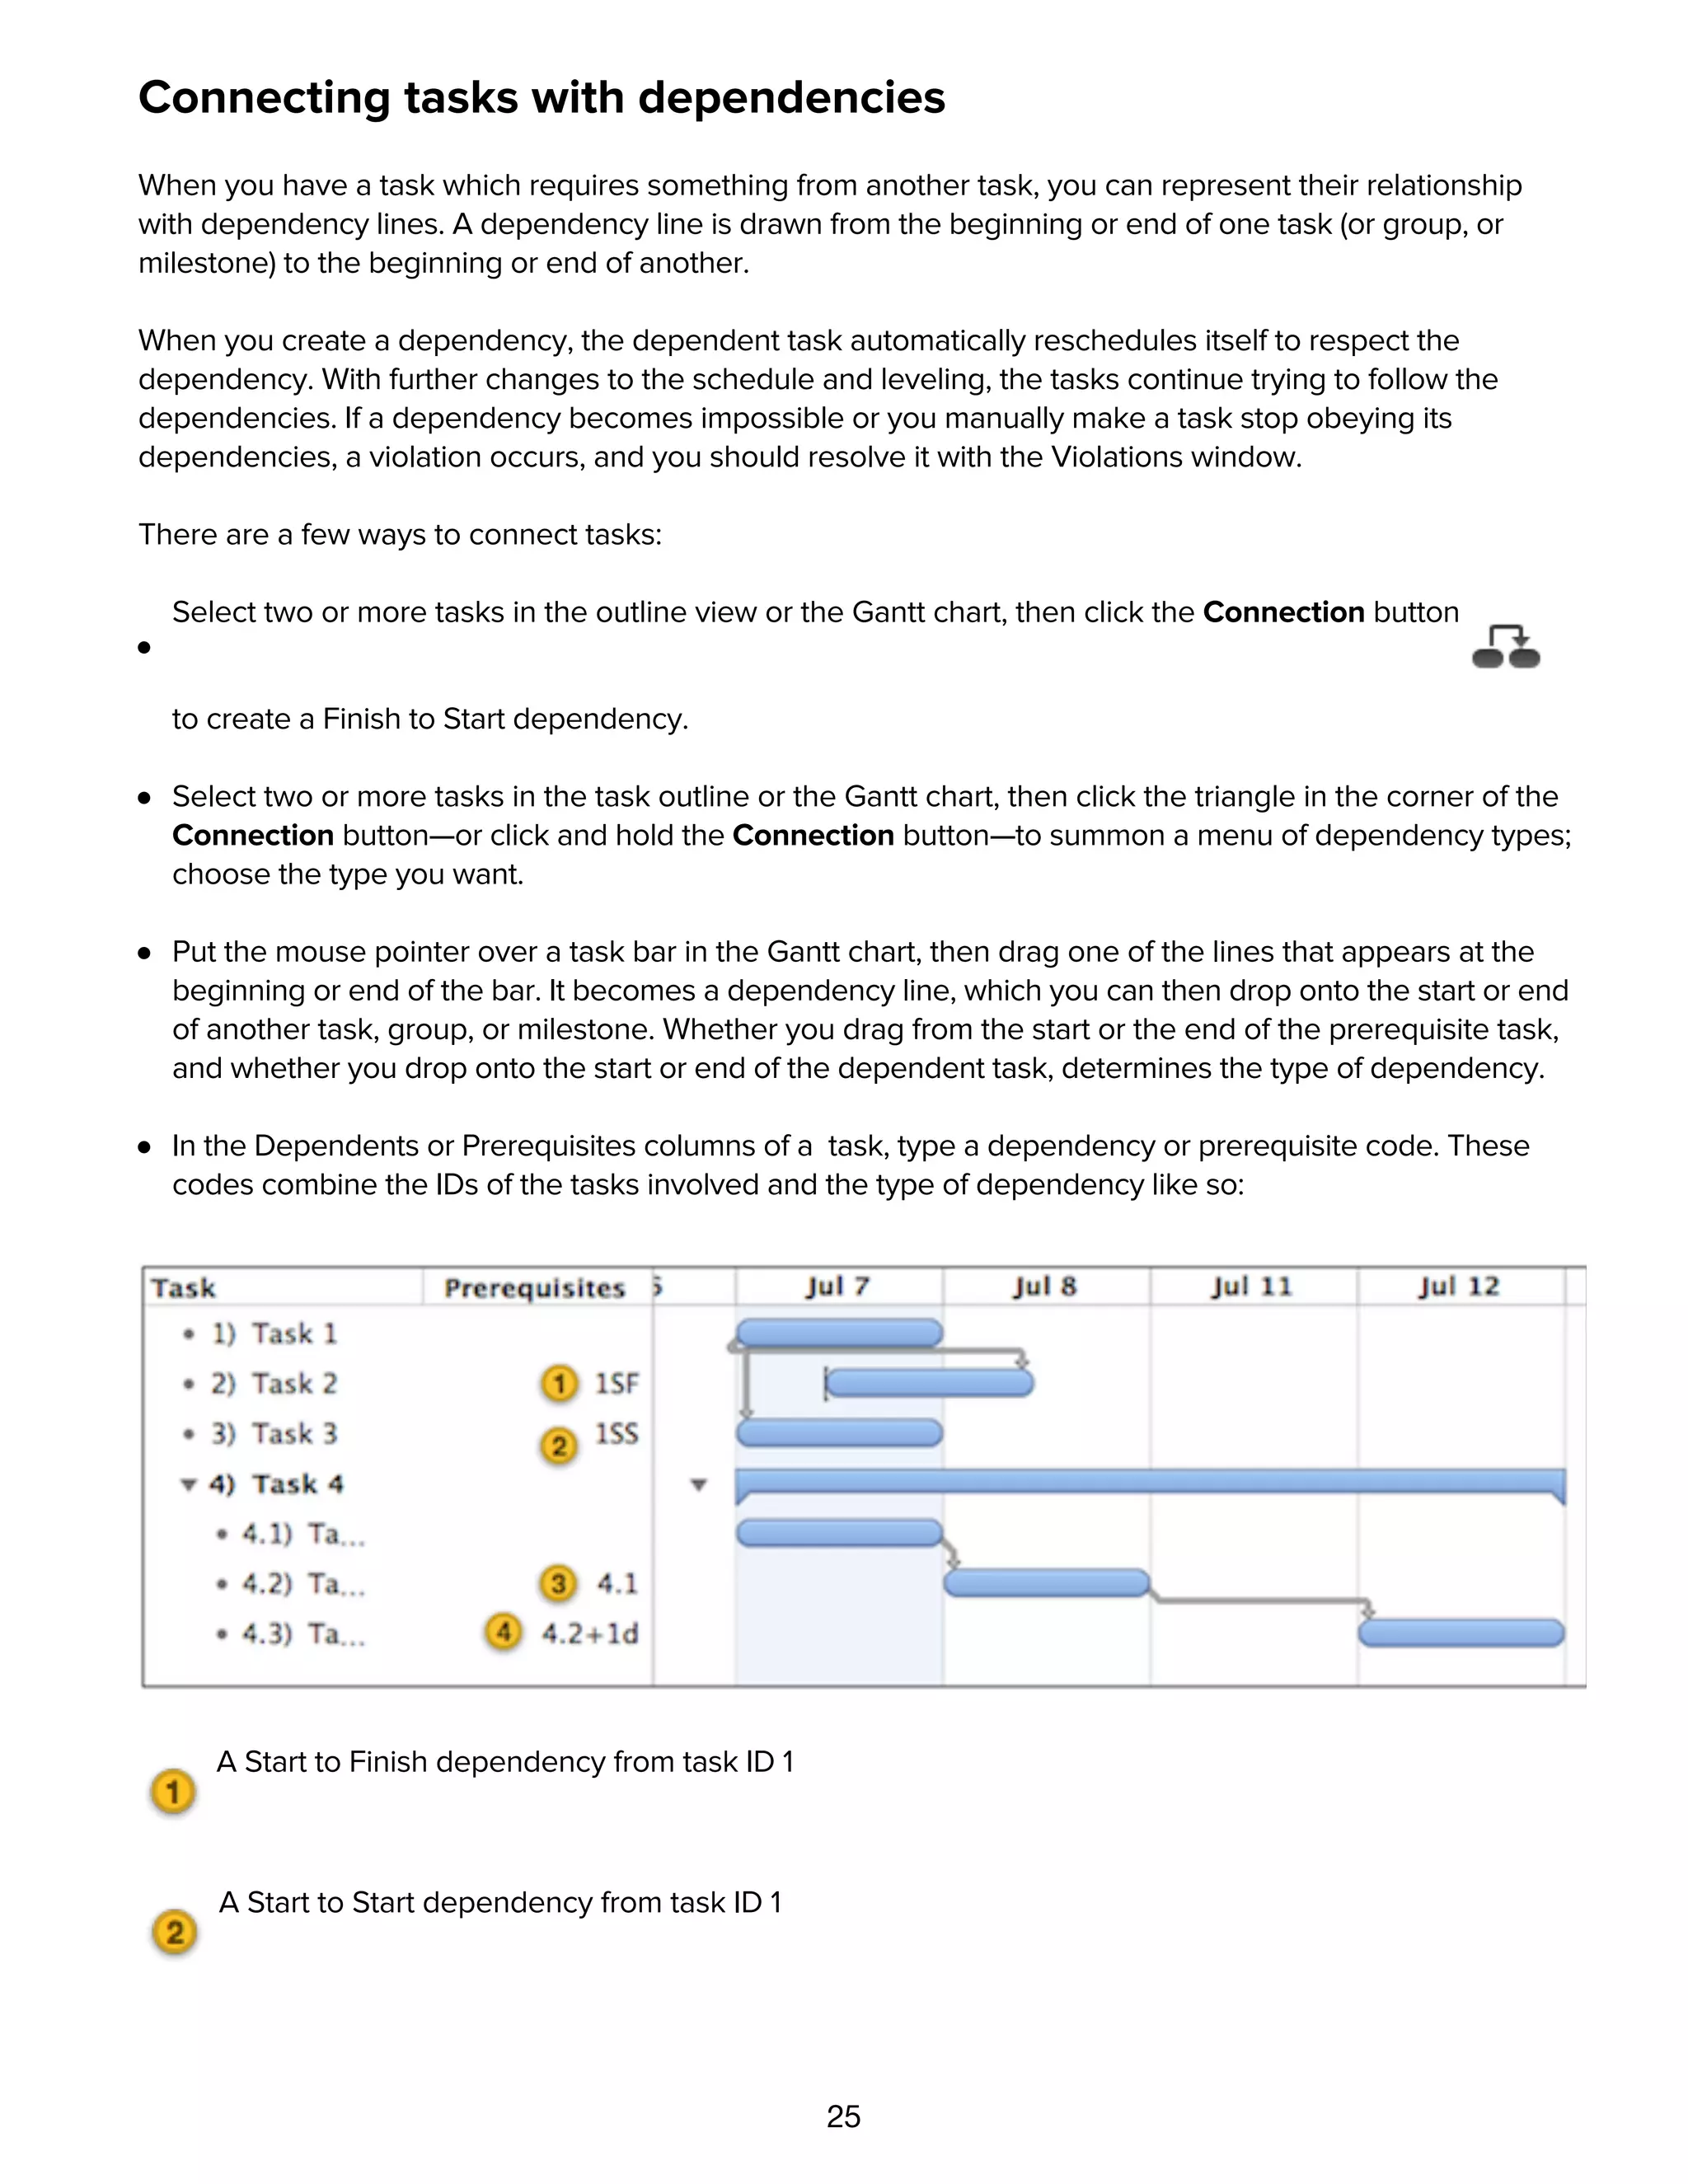
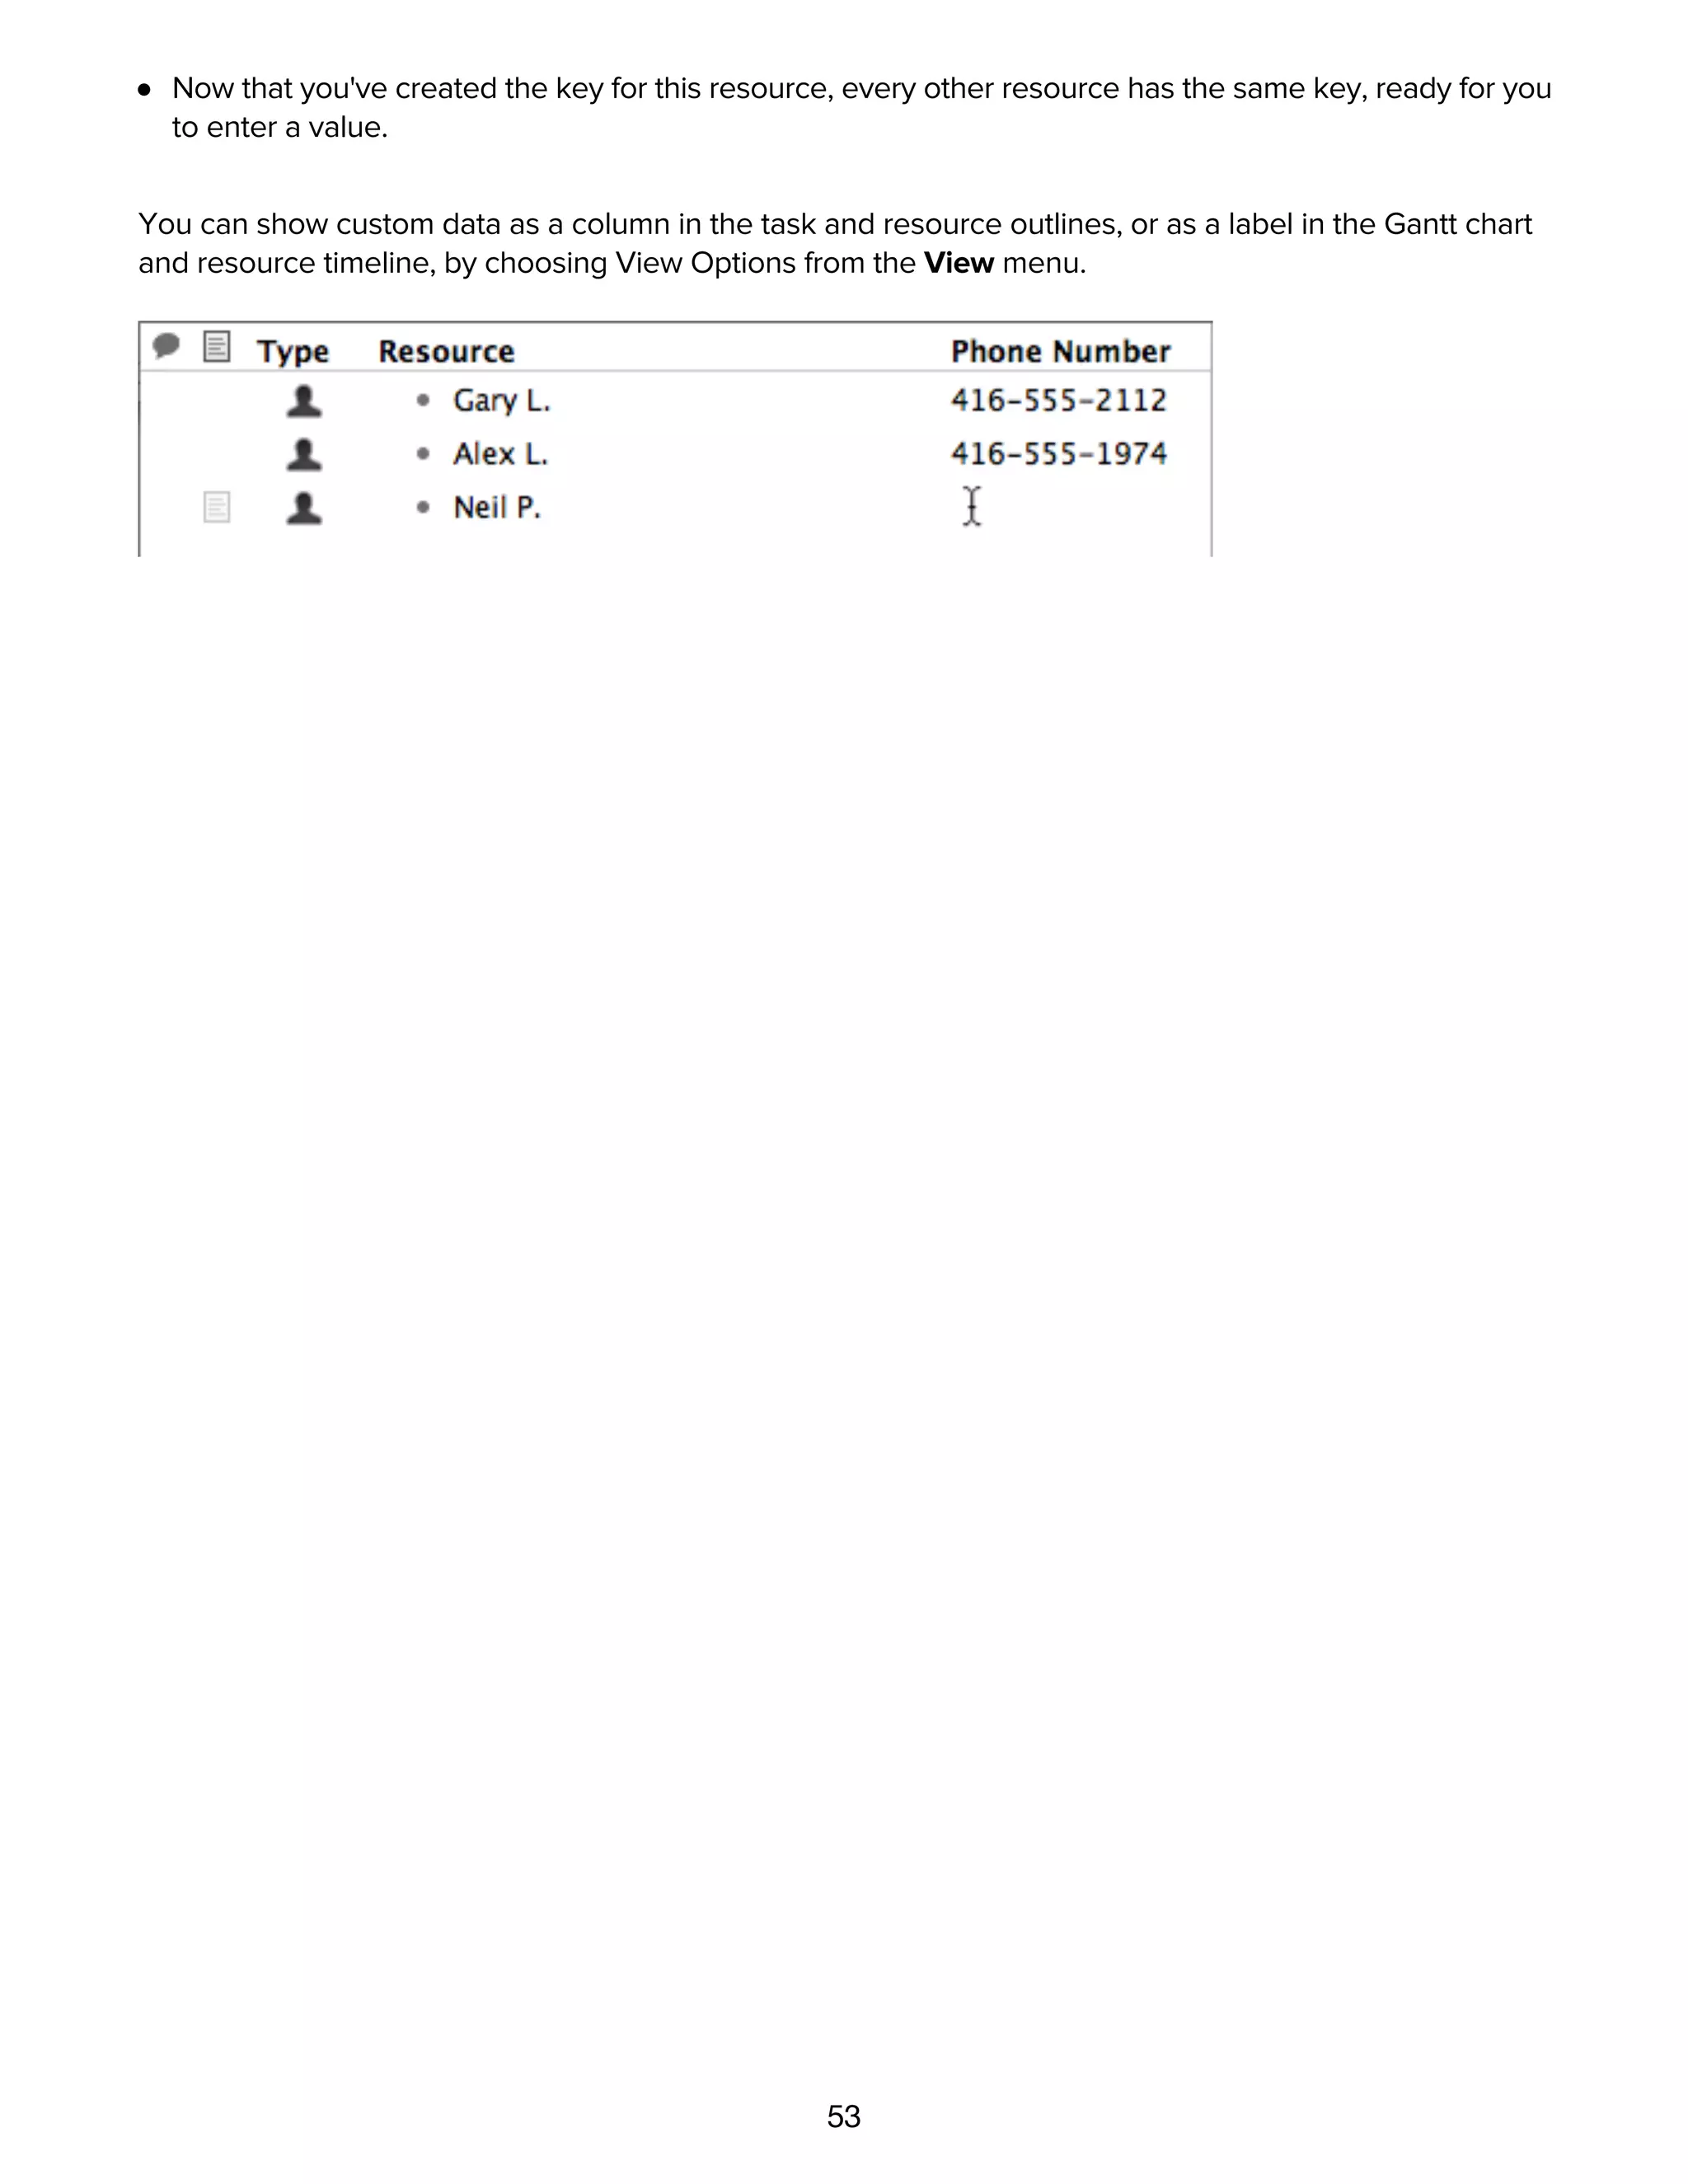
Downloaded 46 times


![15
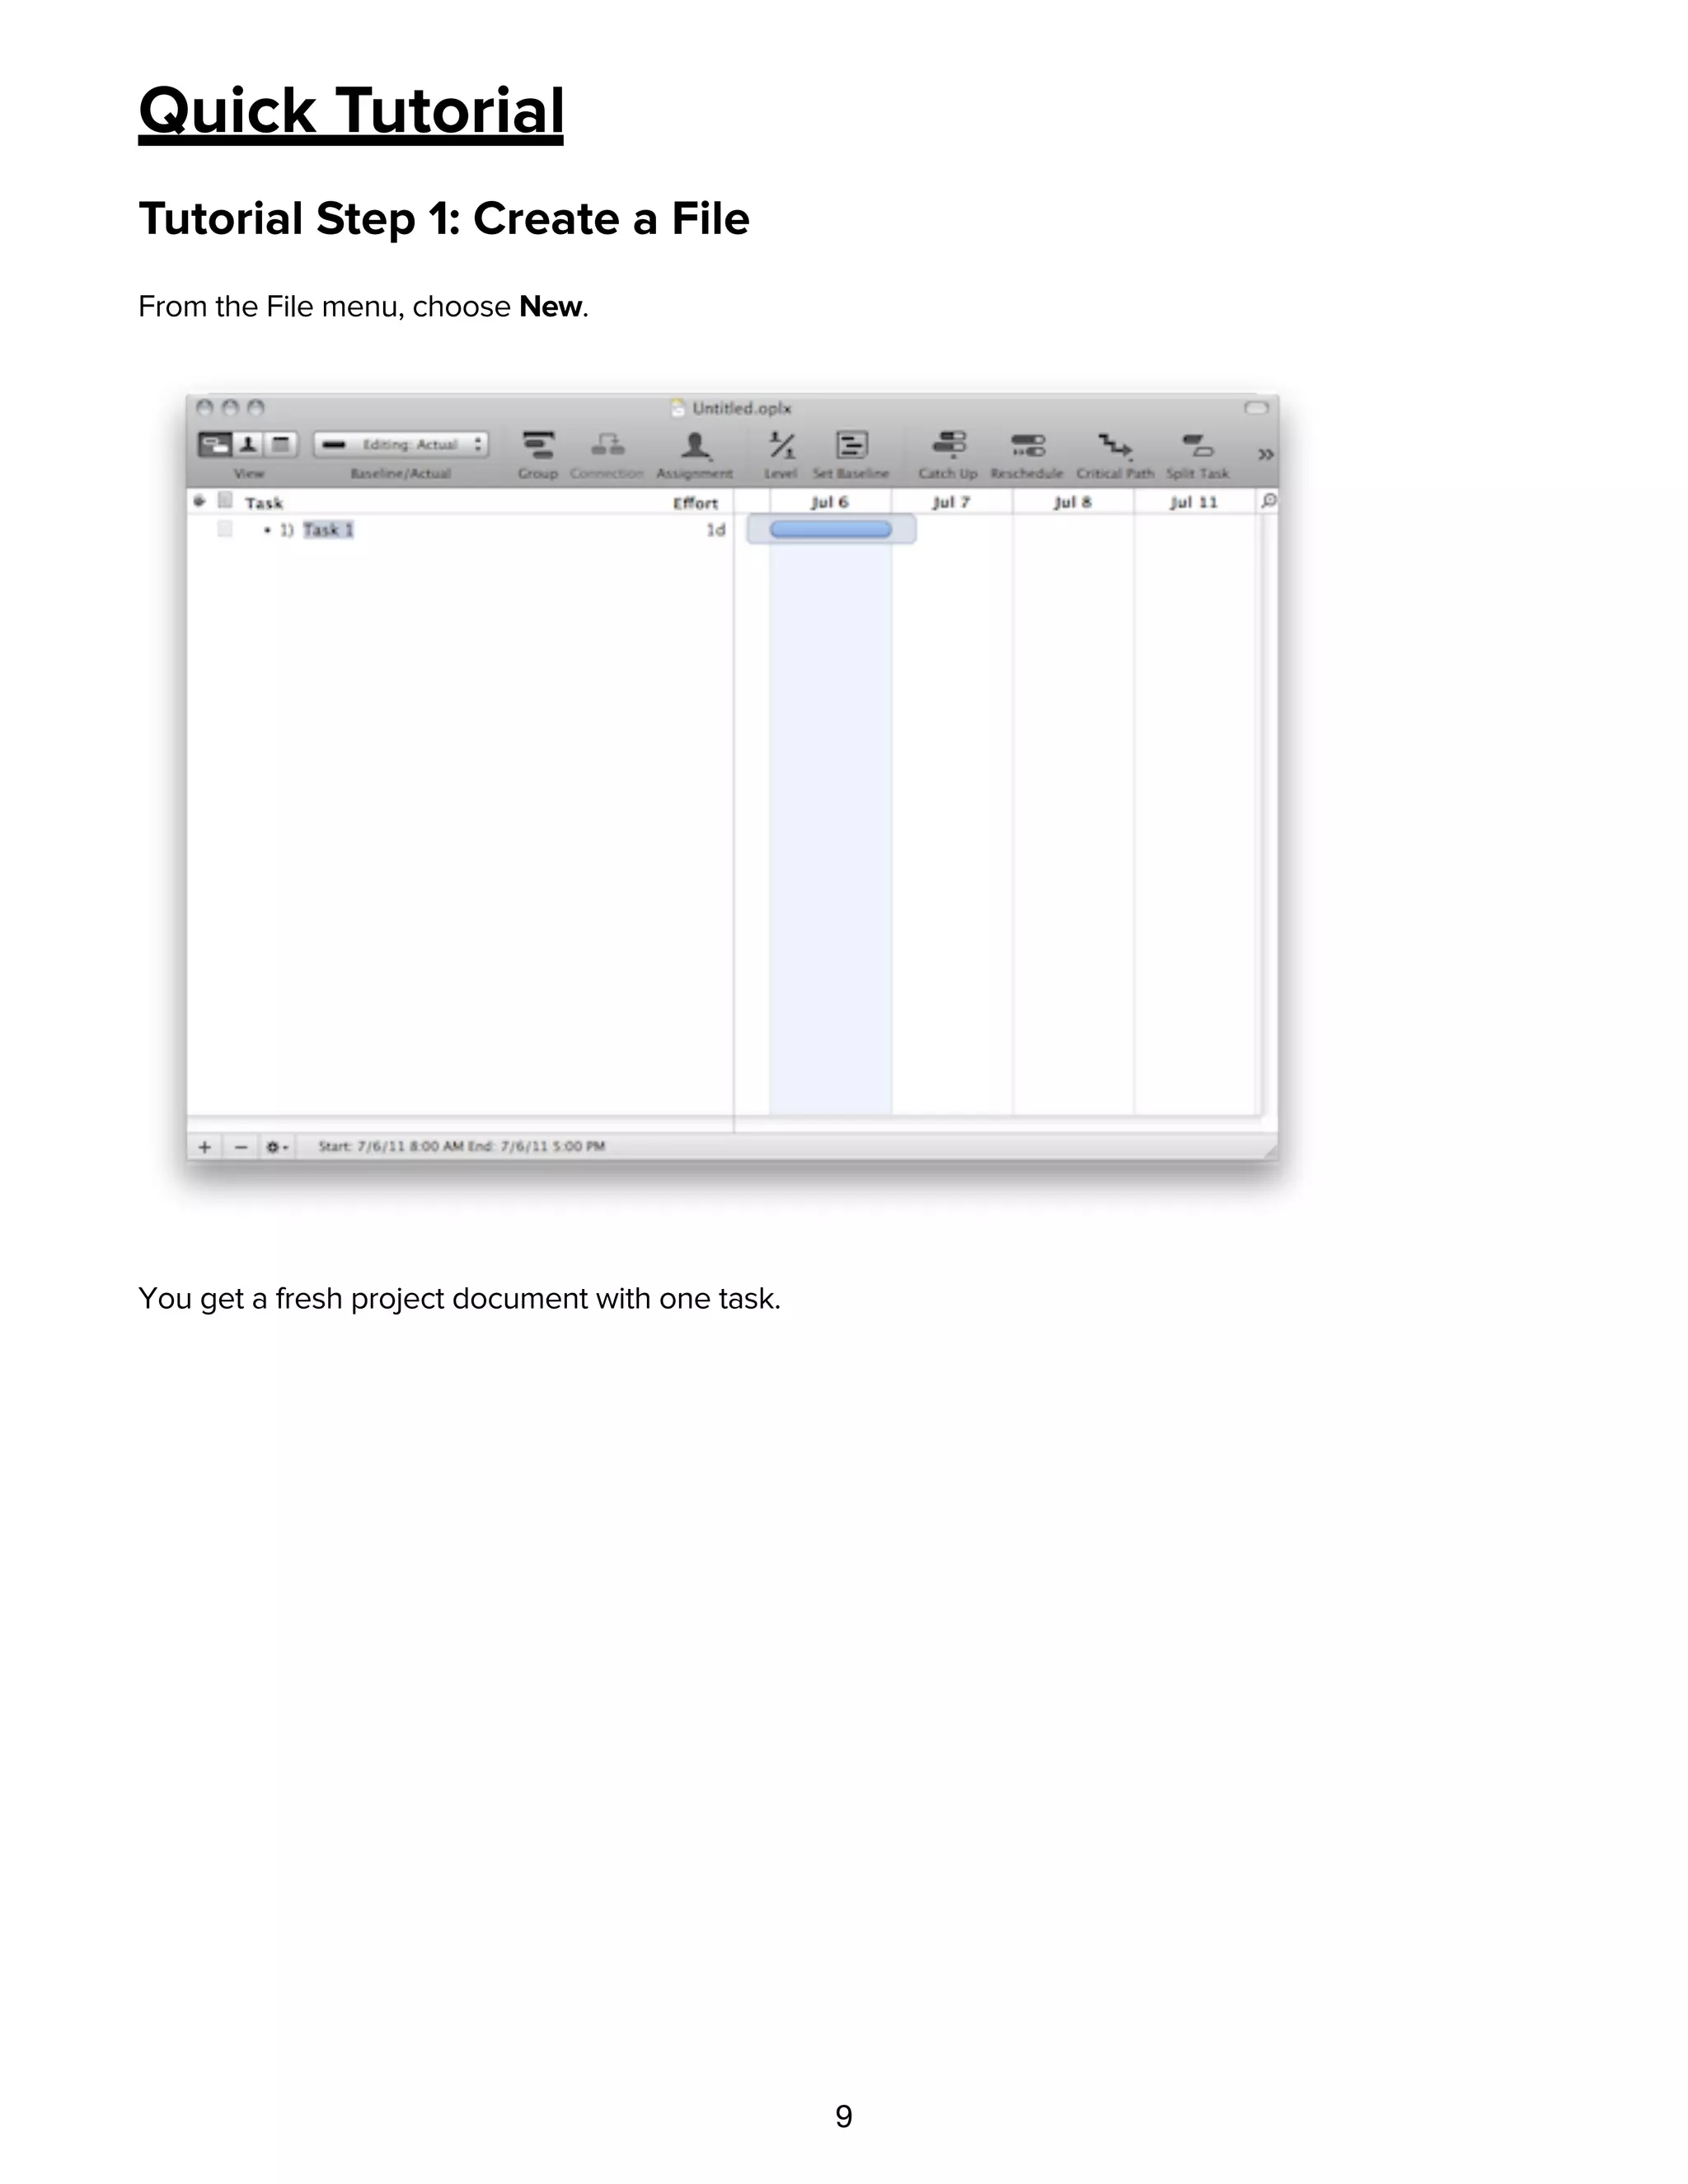
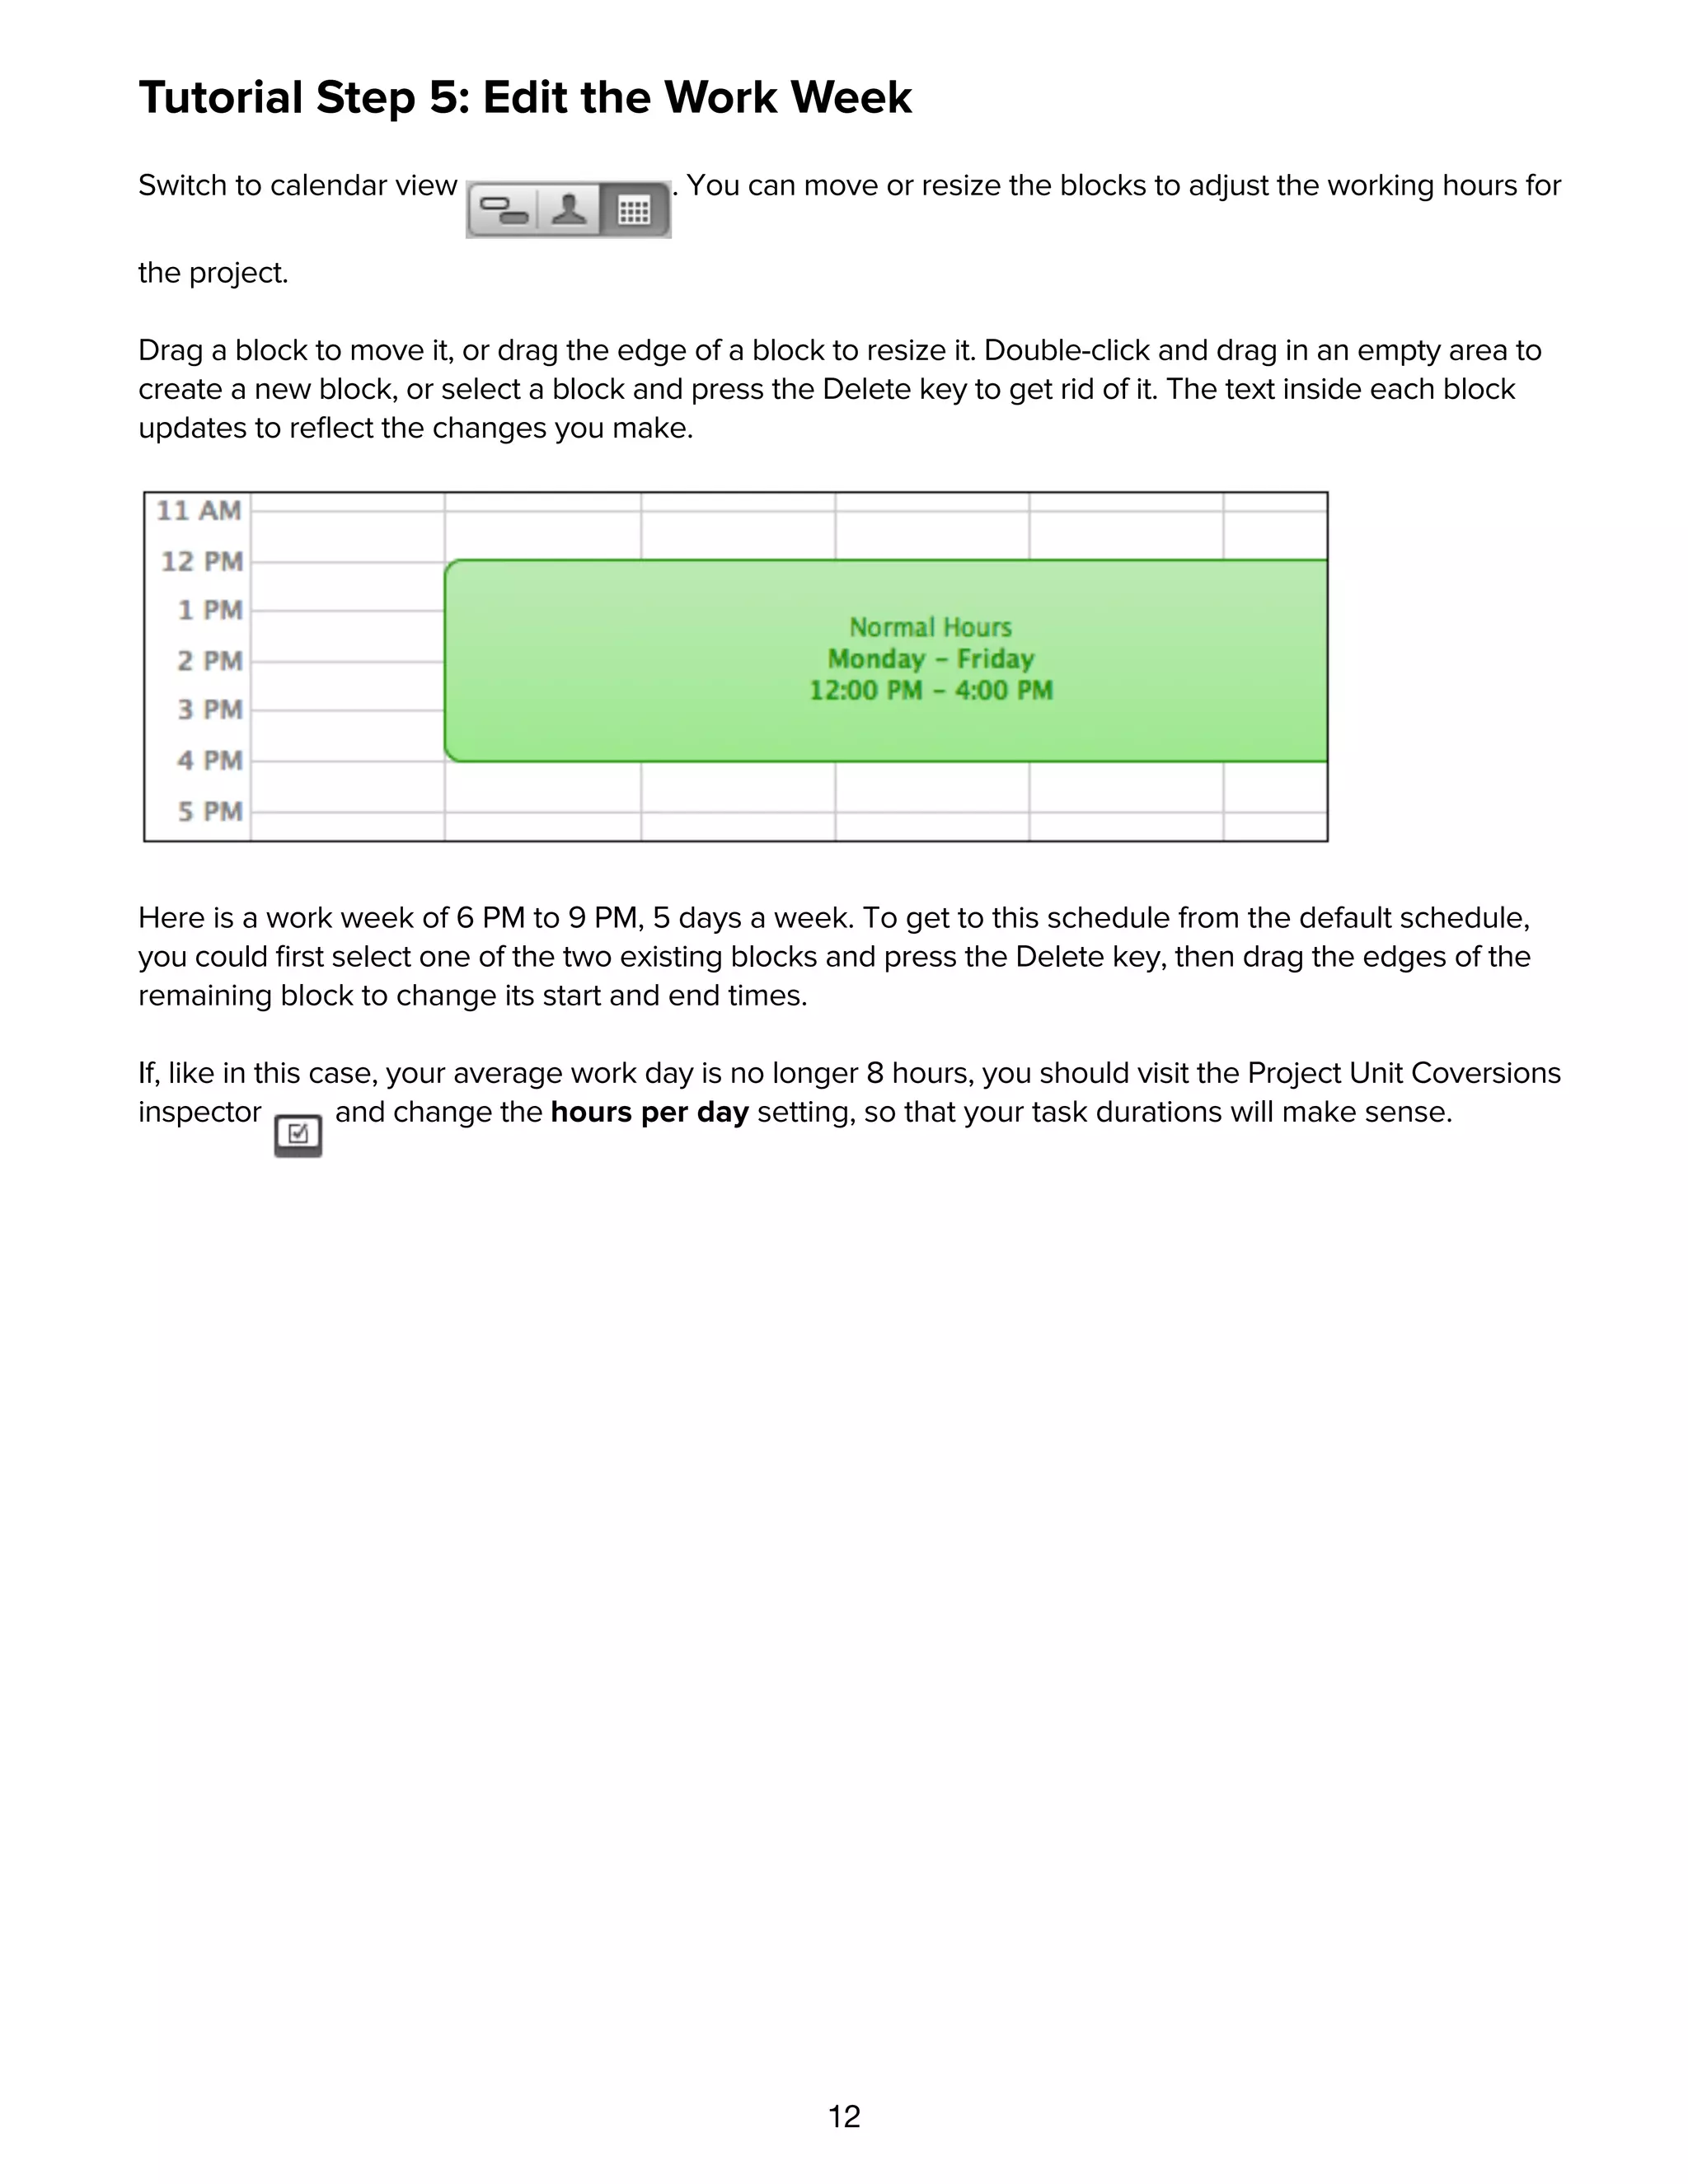
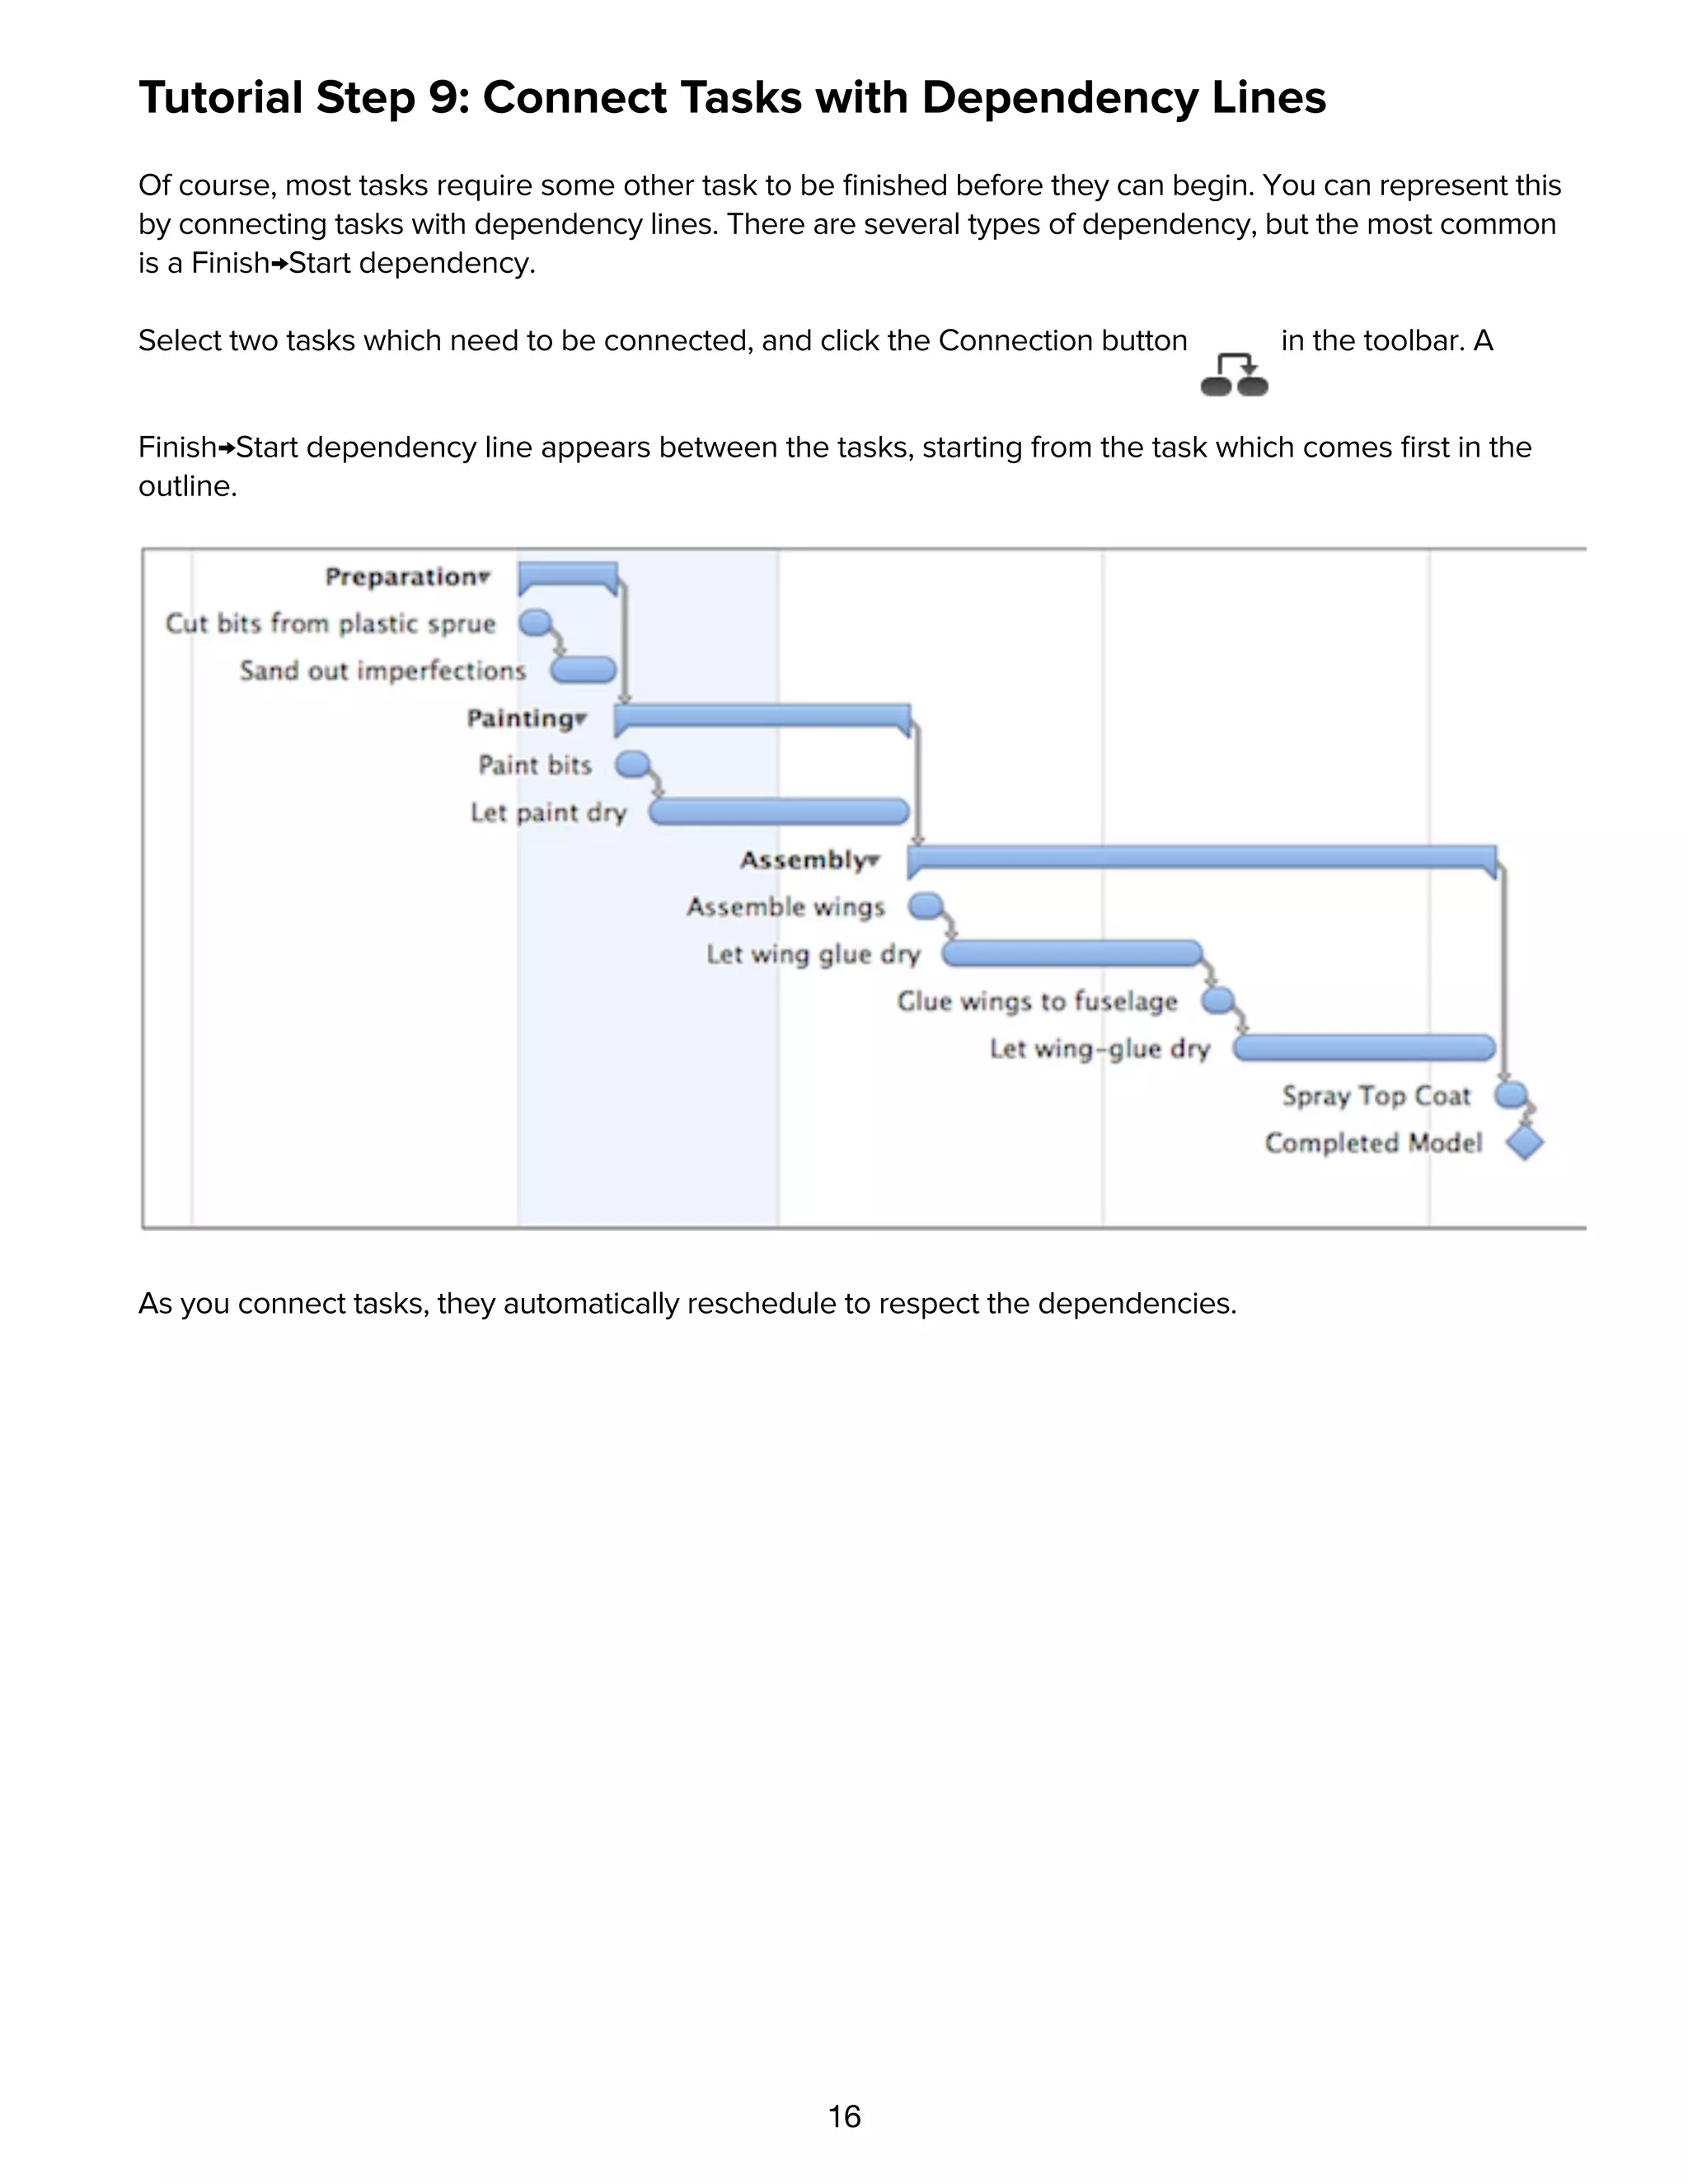
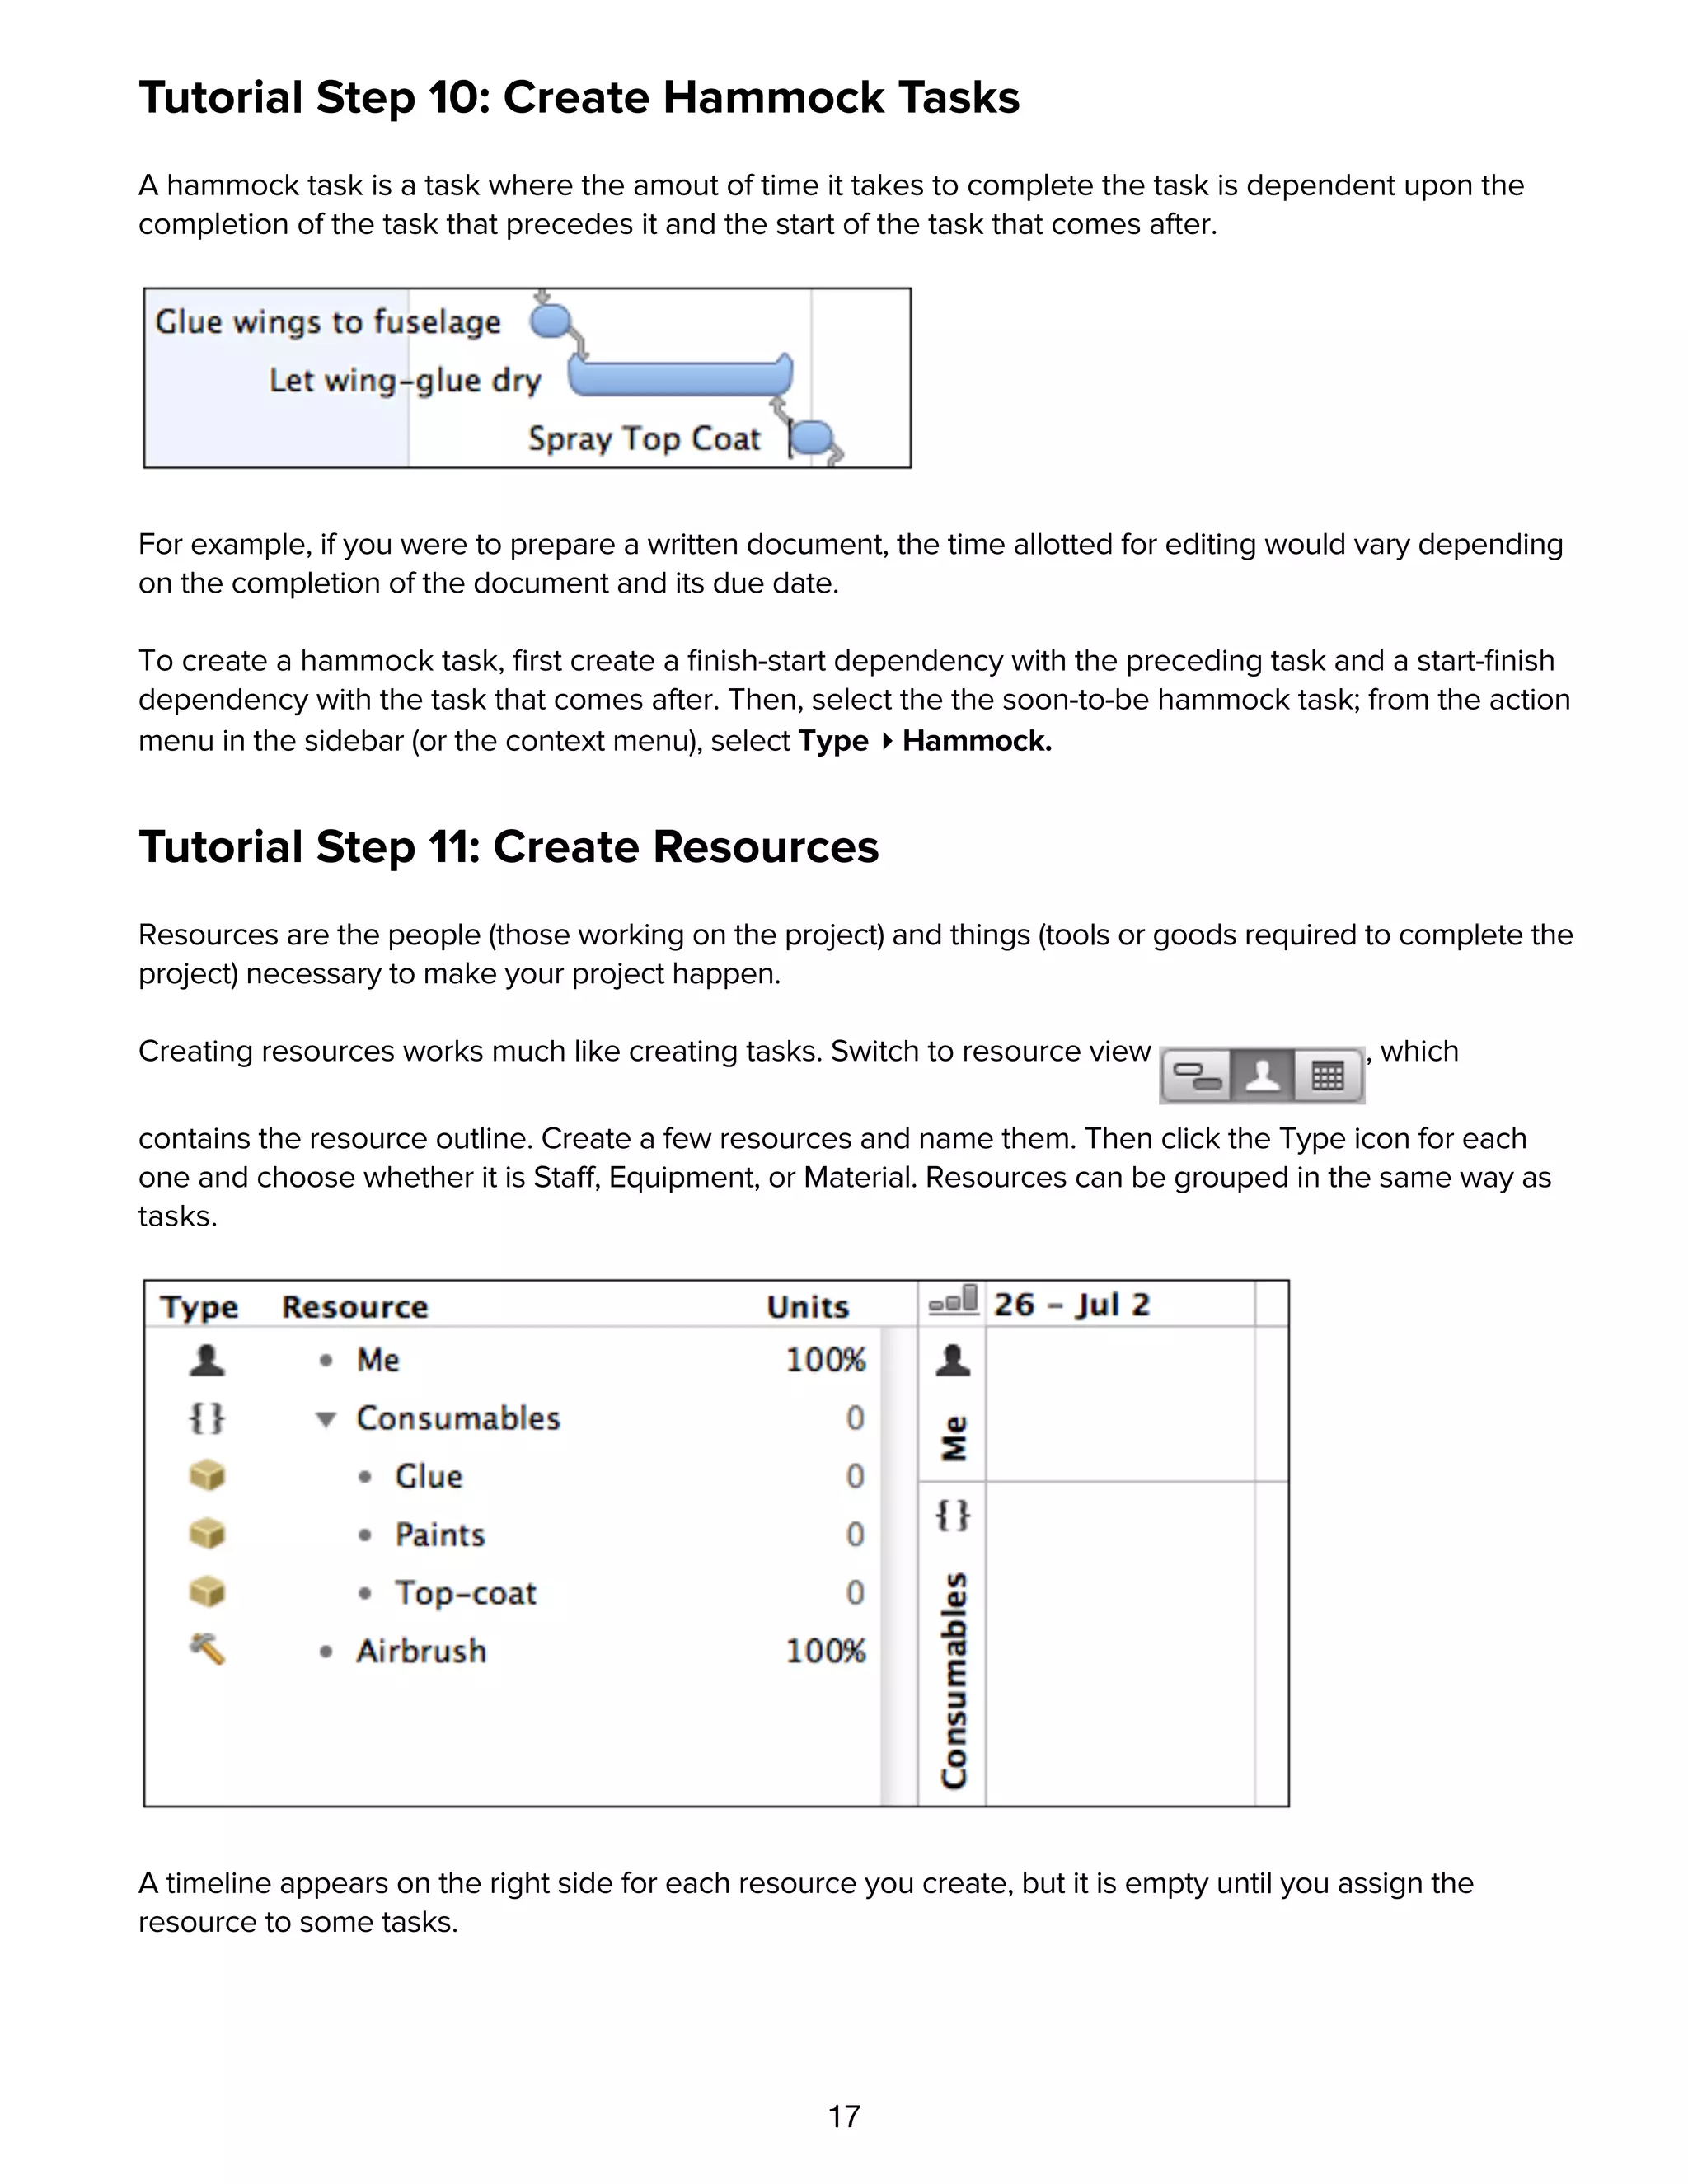
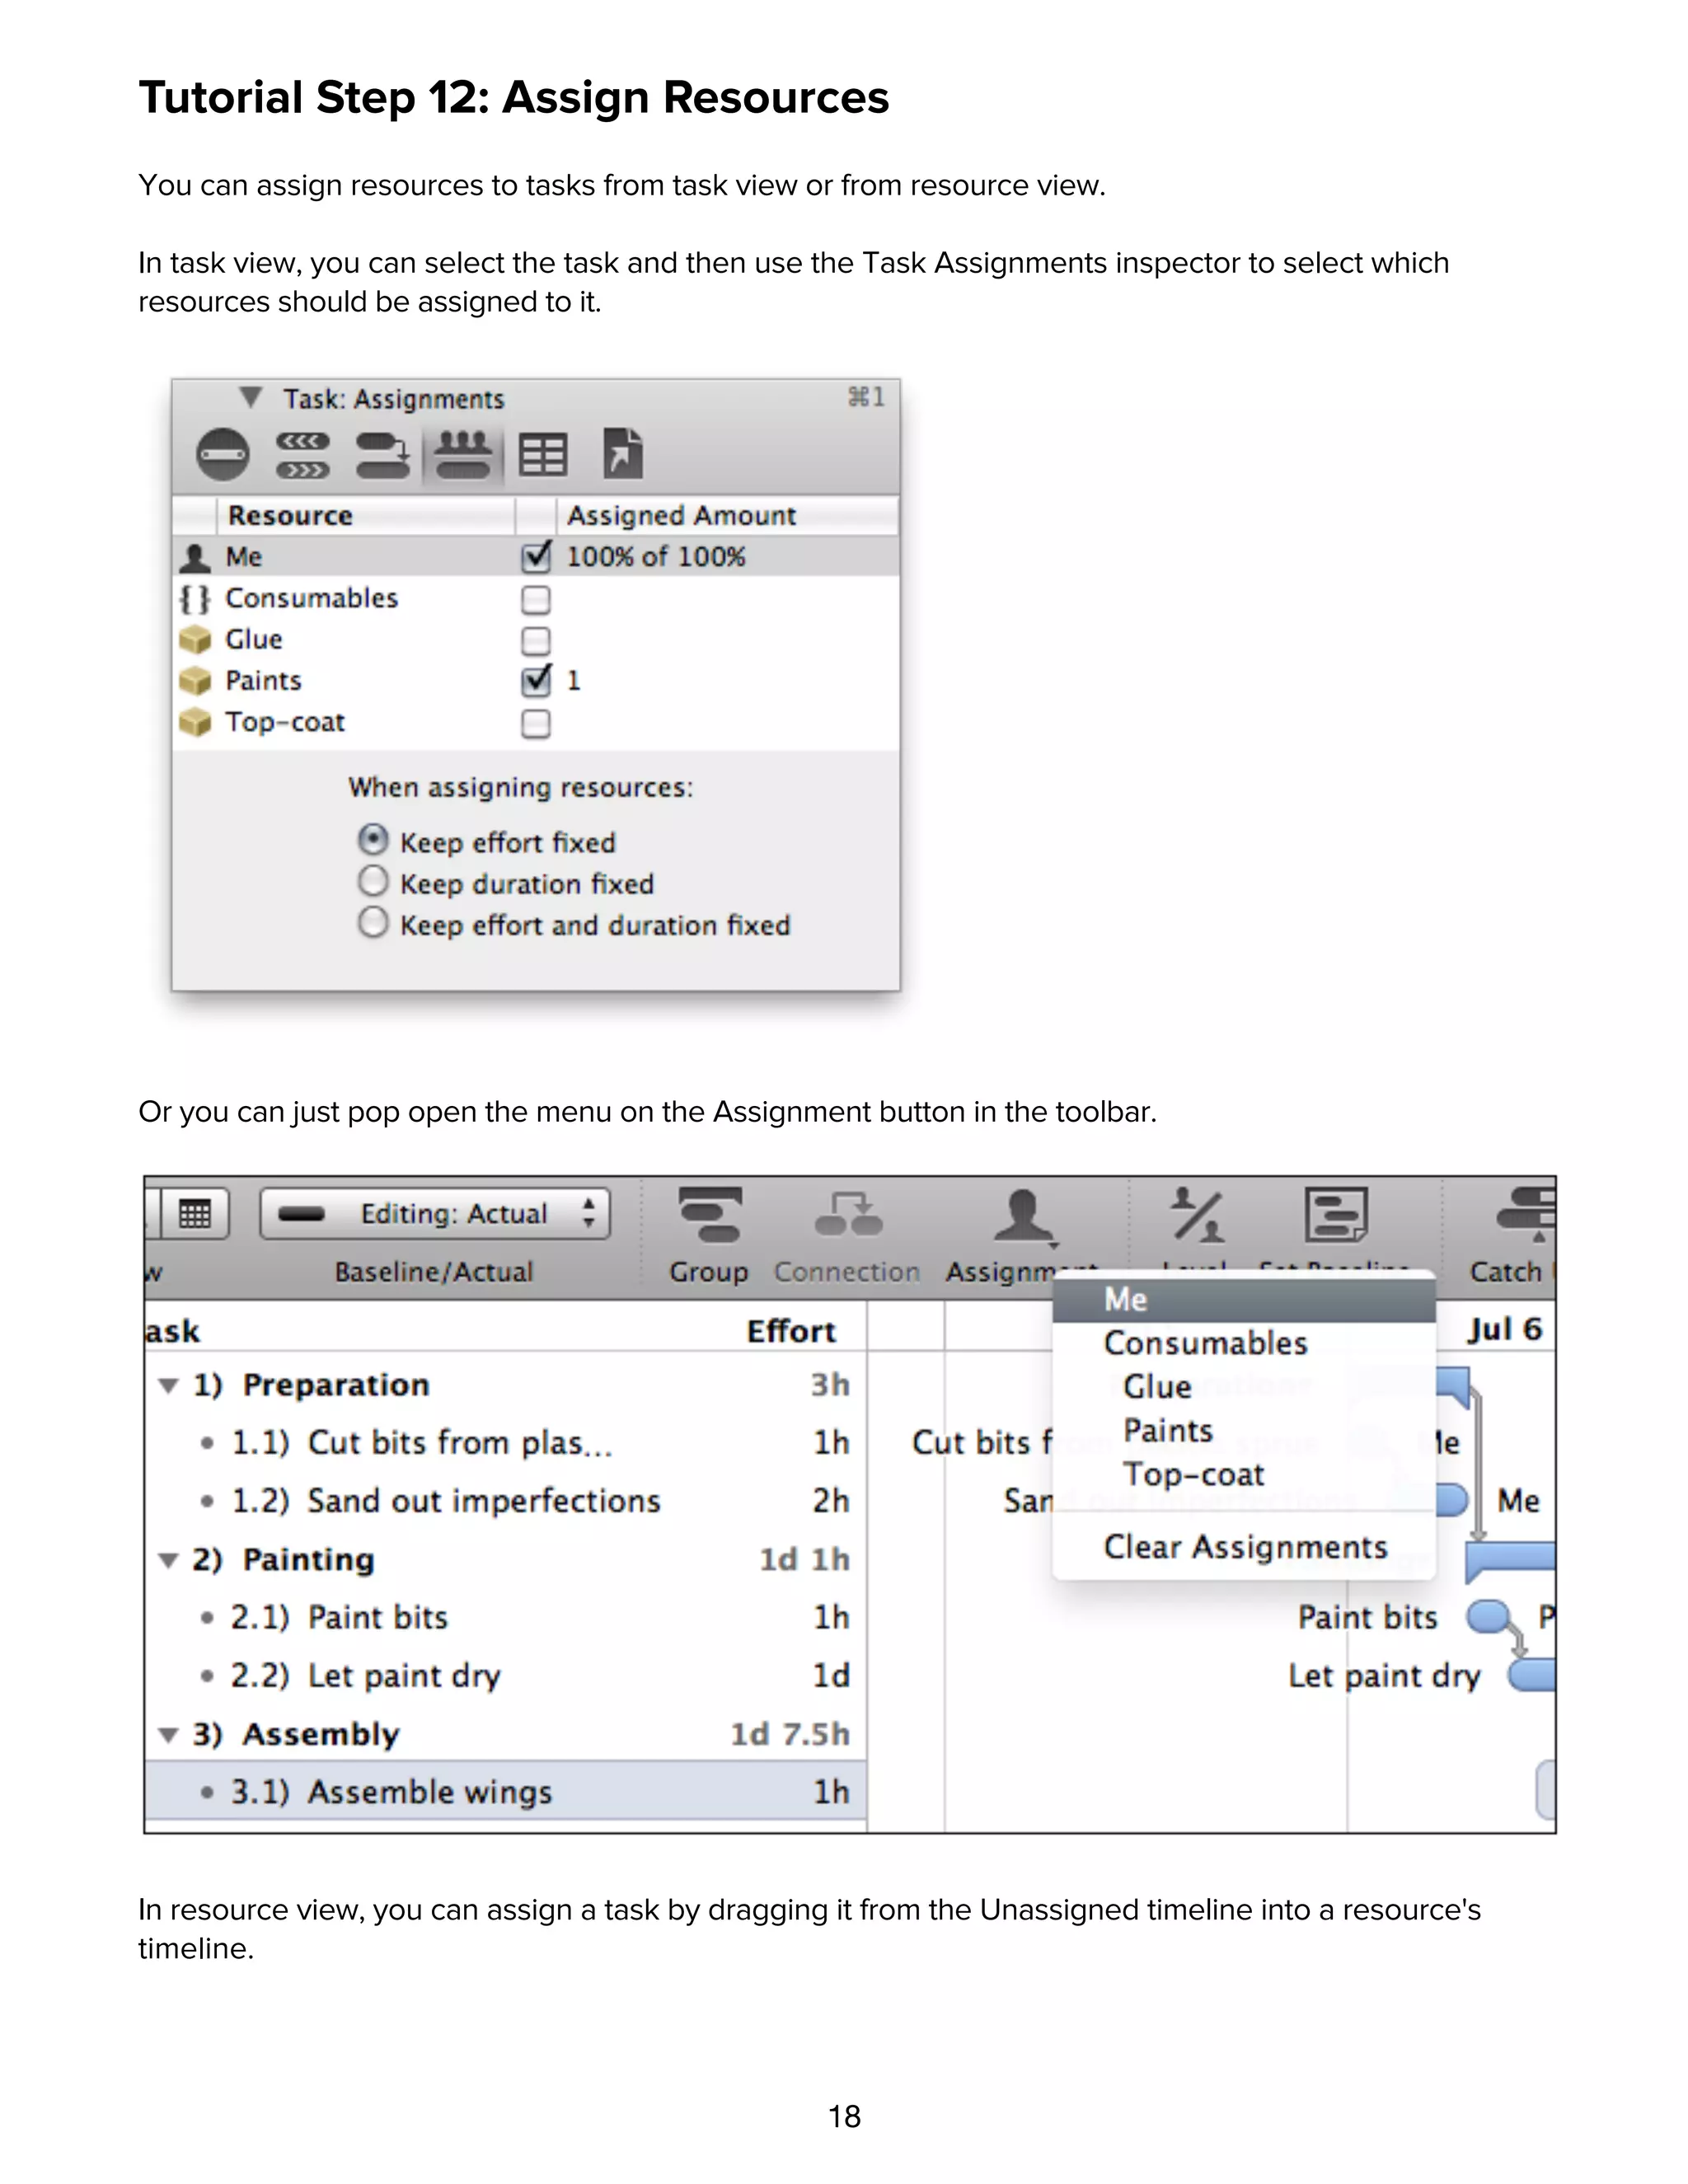
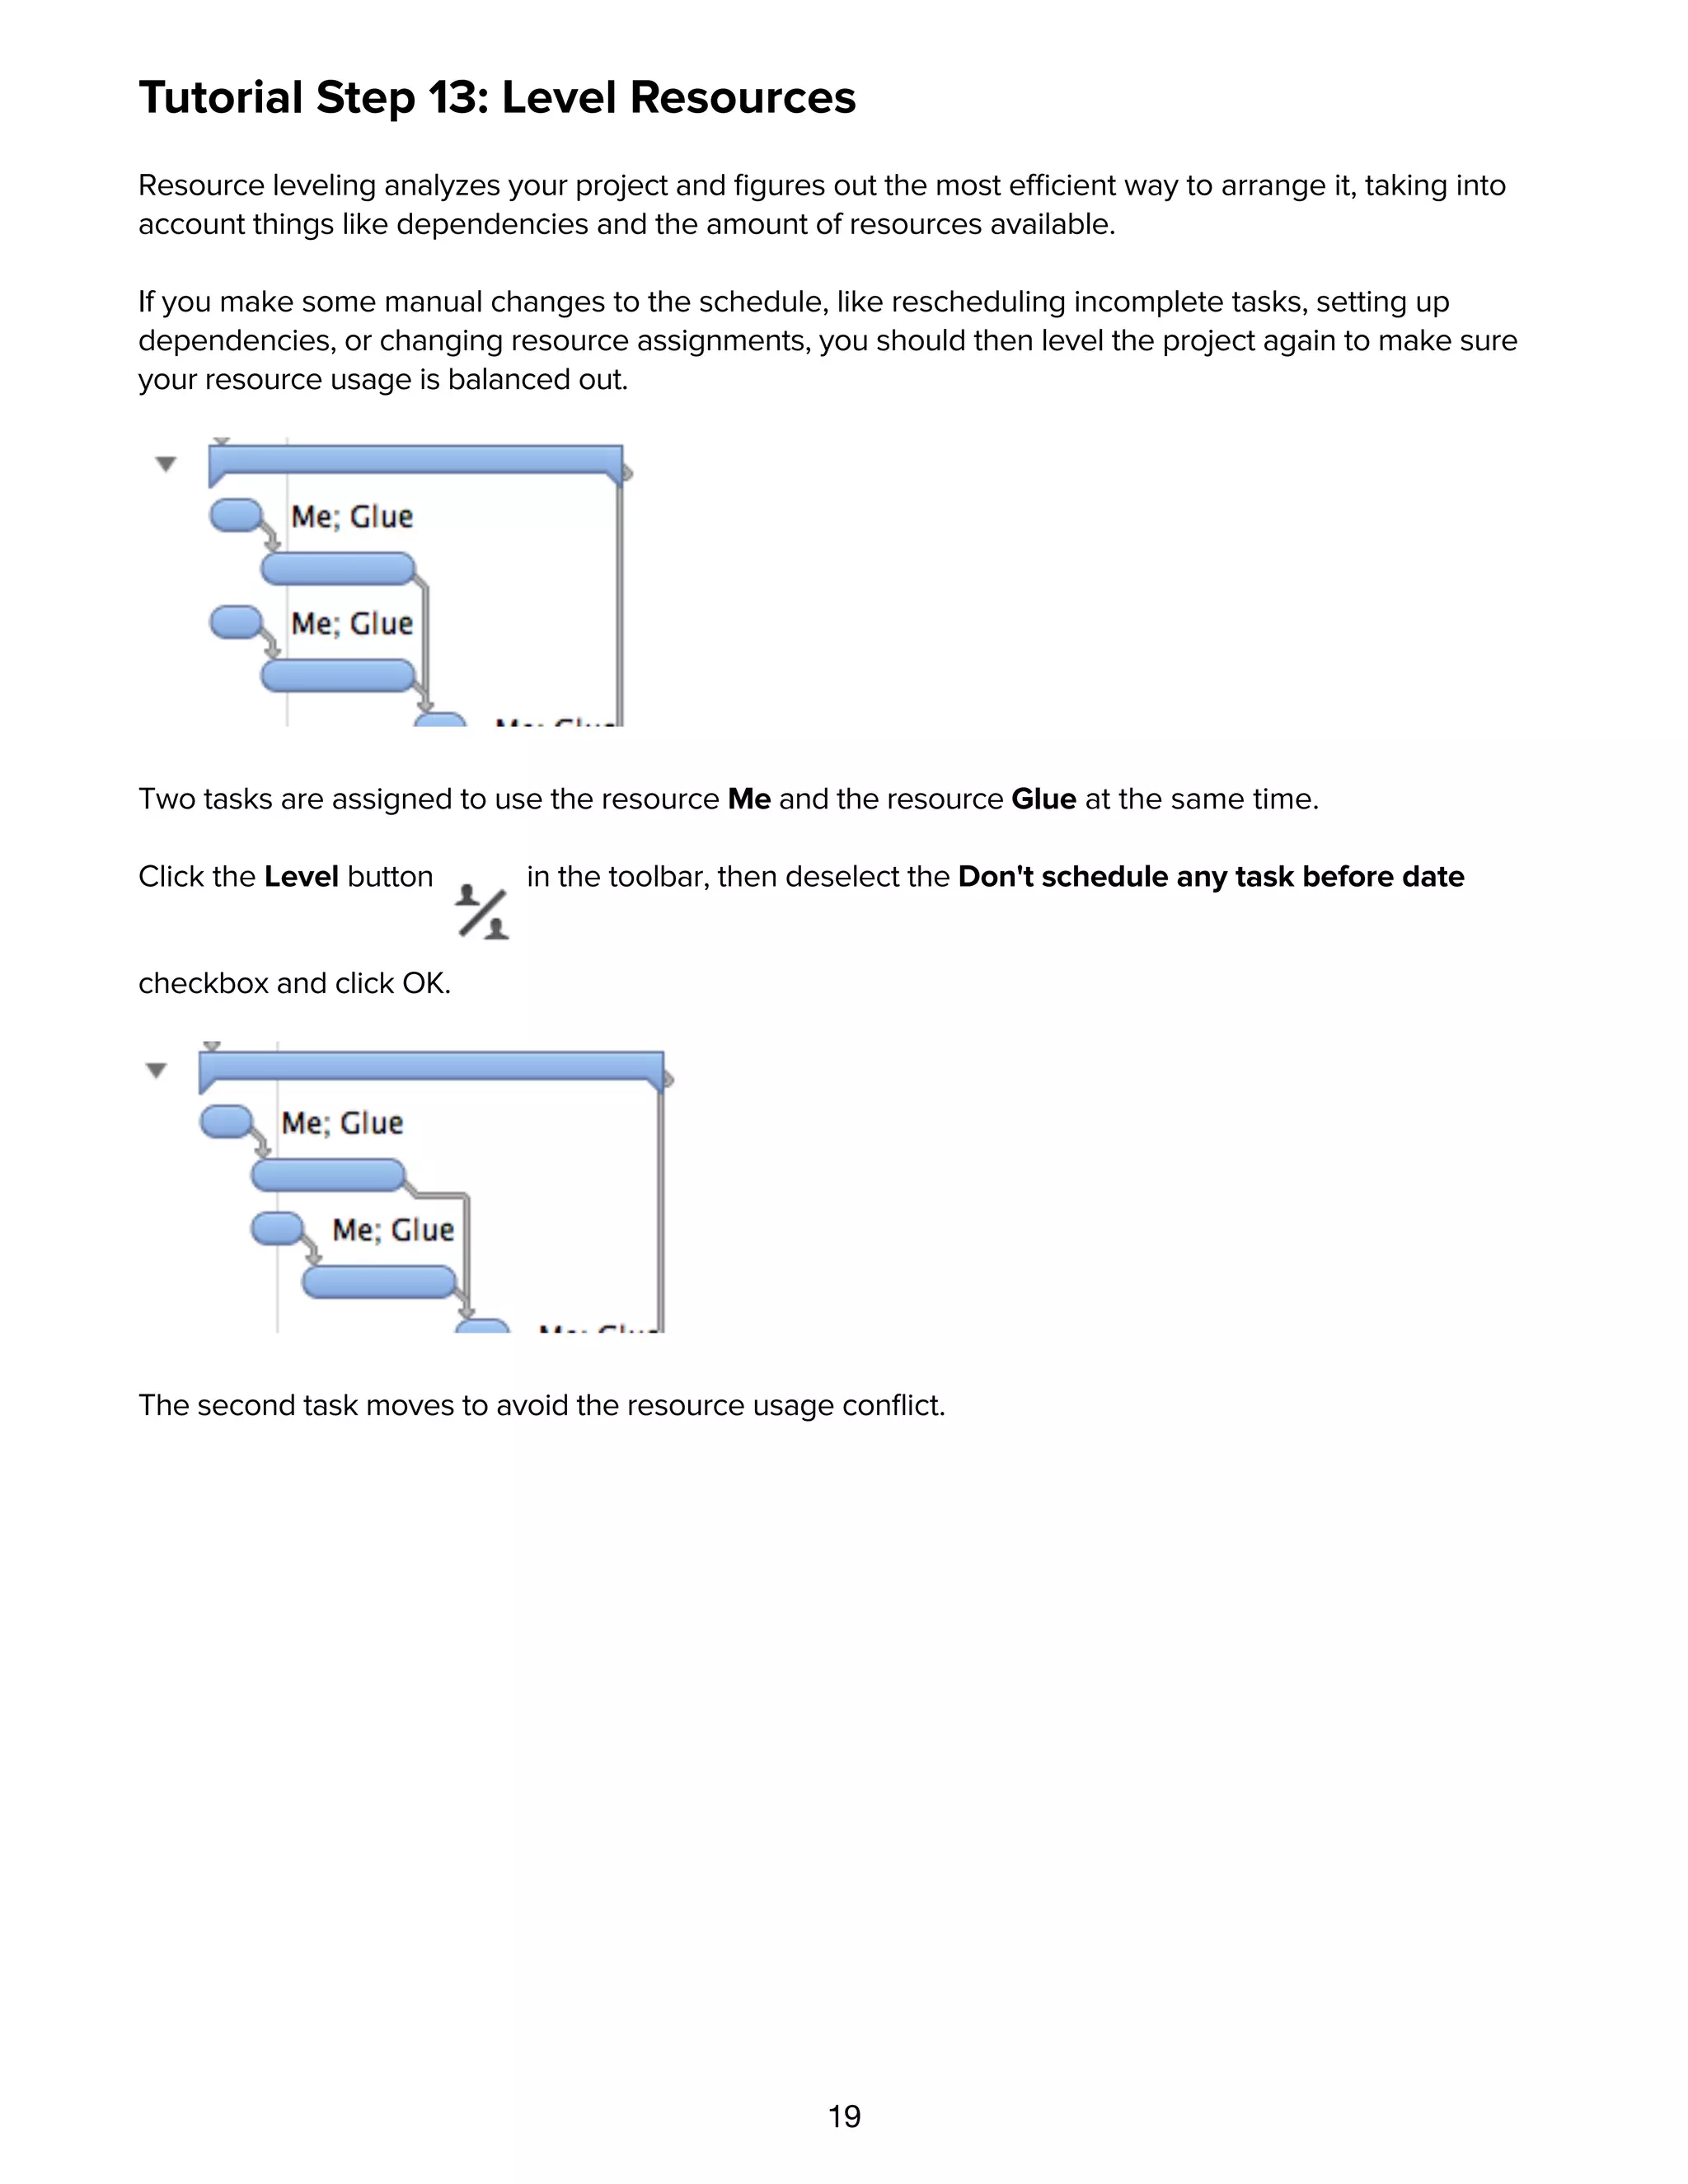
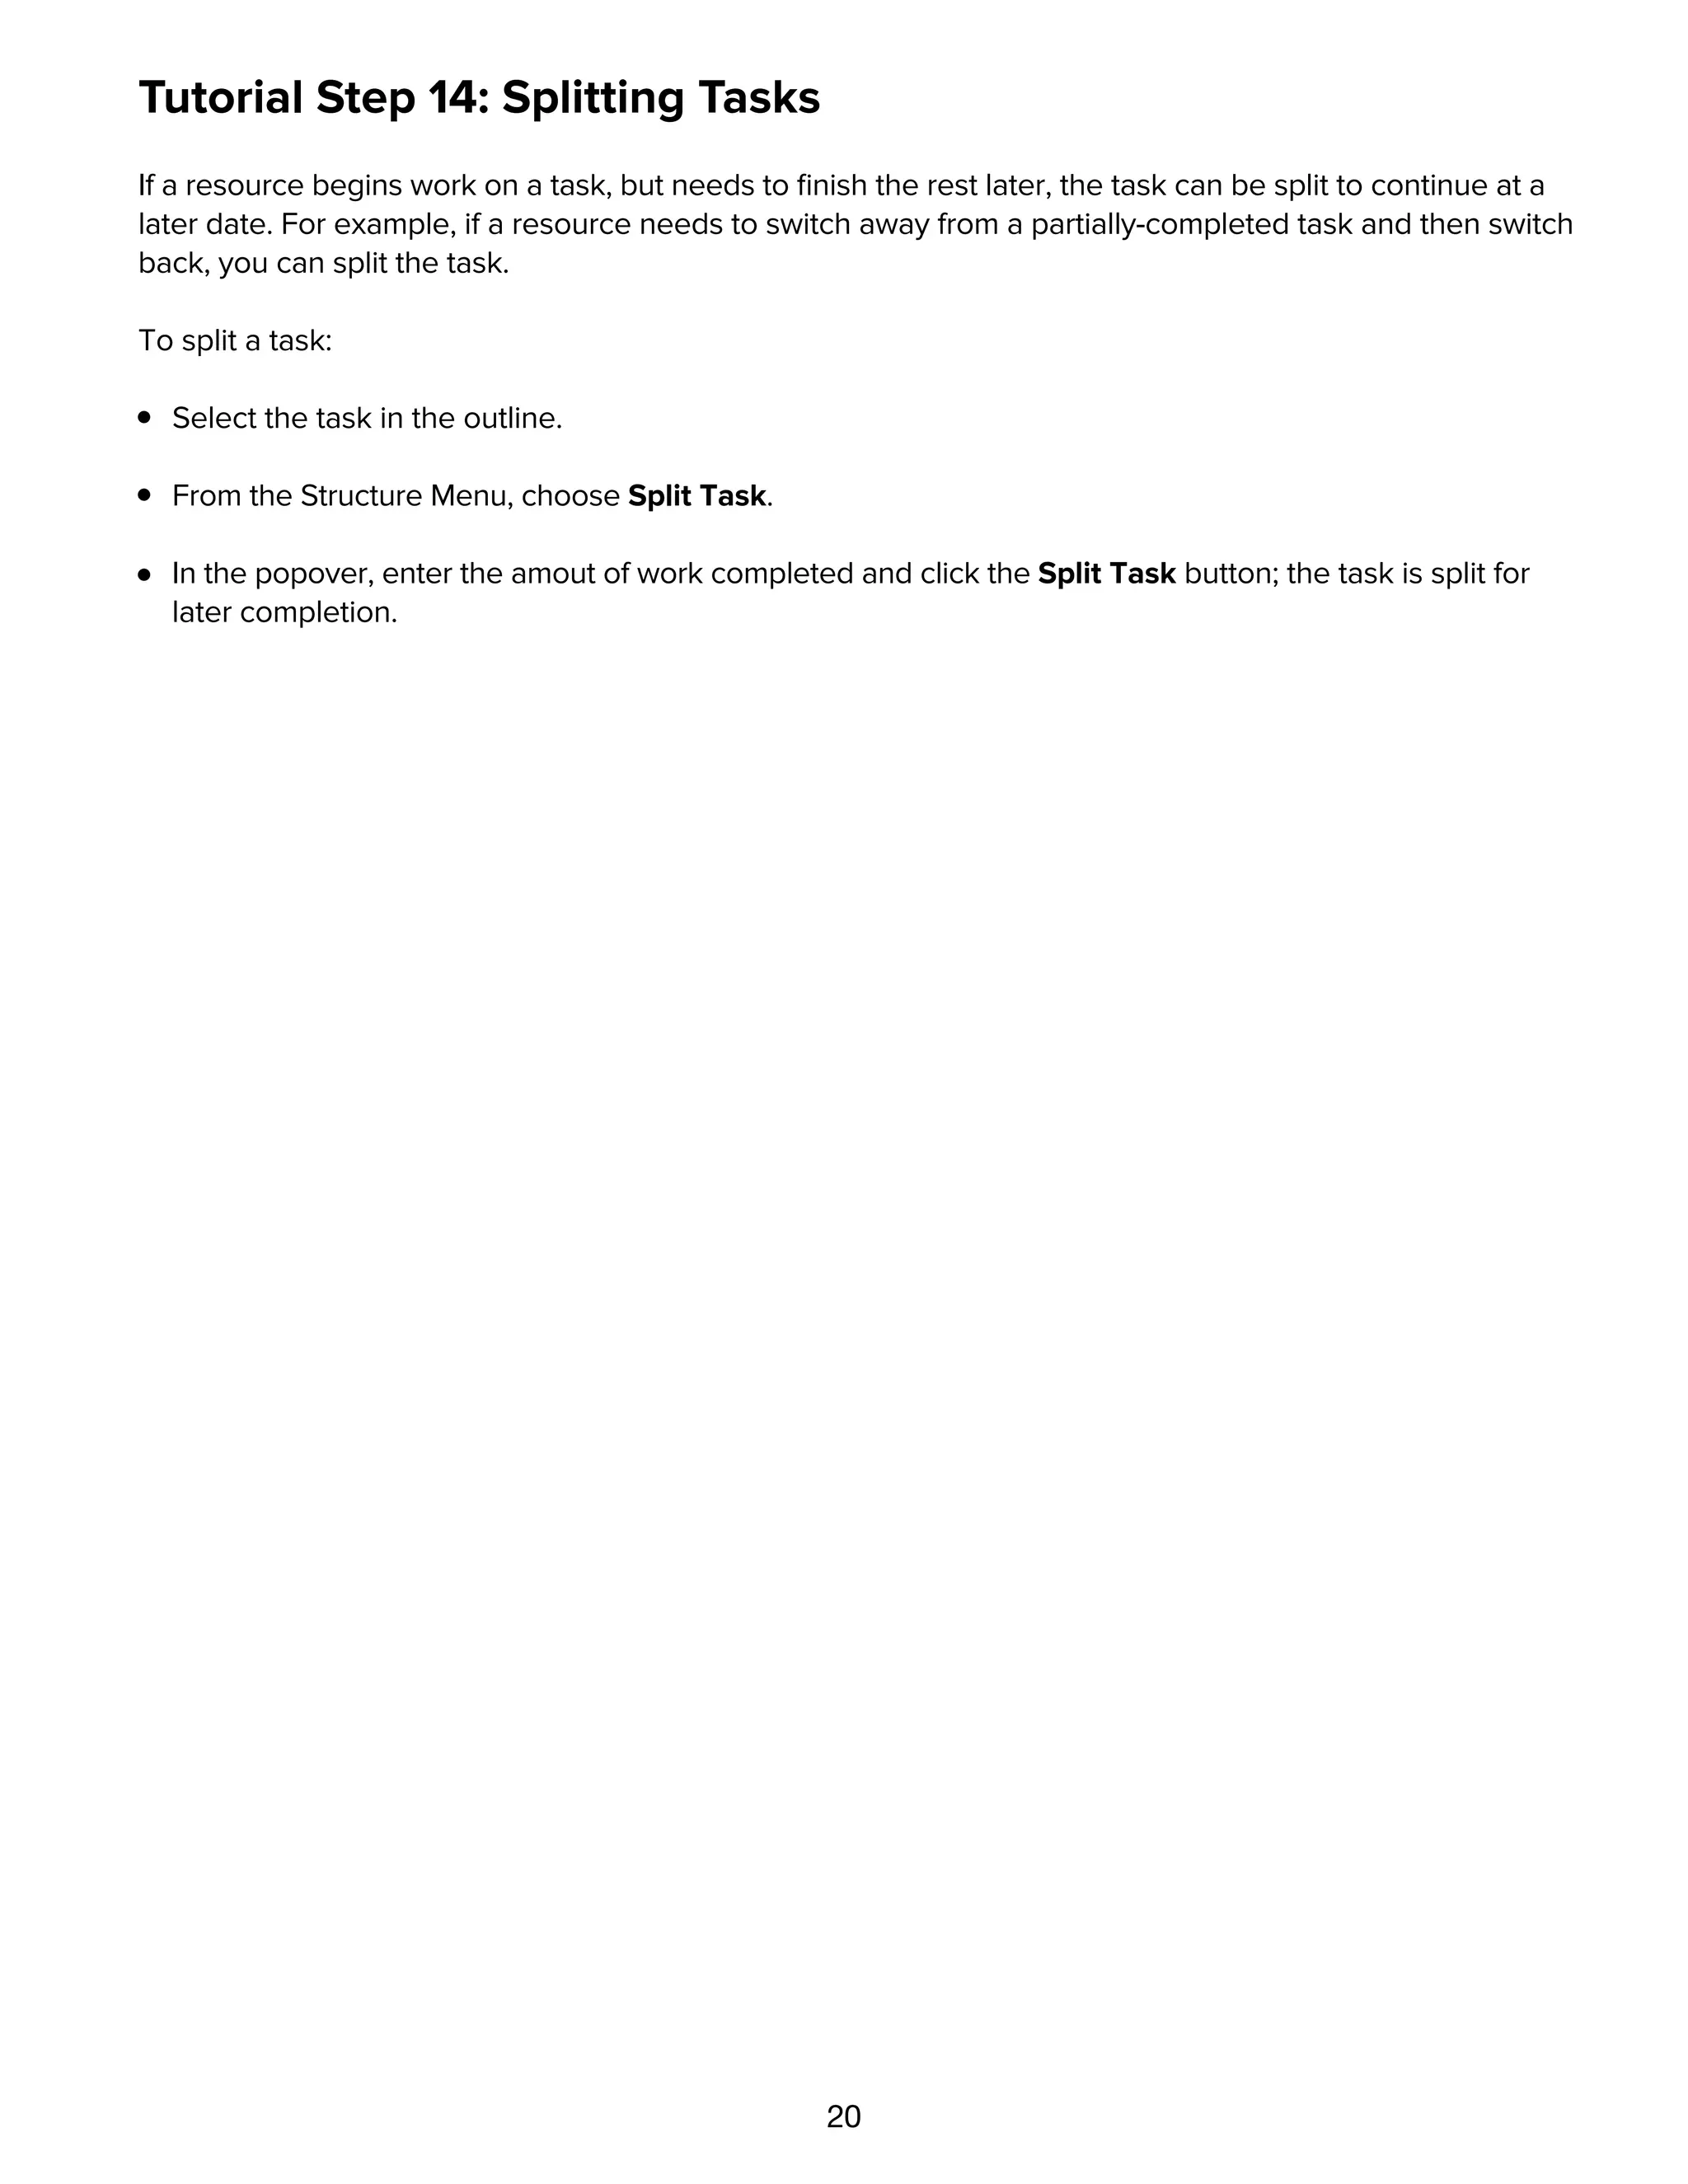
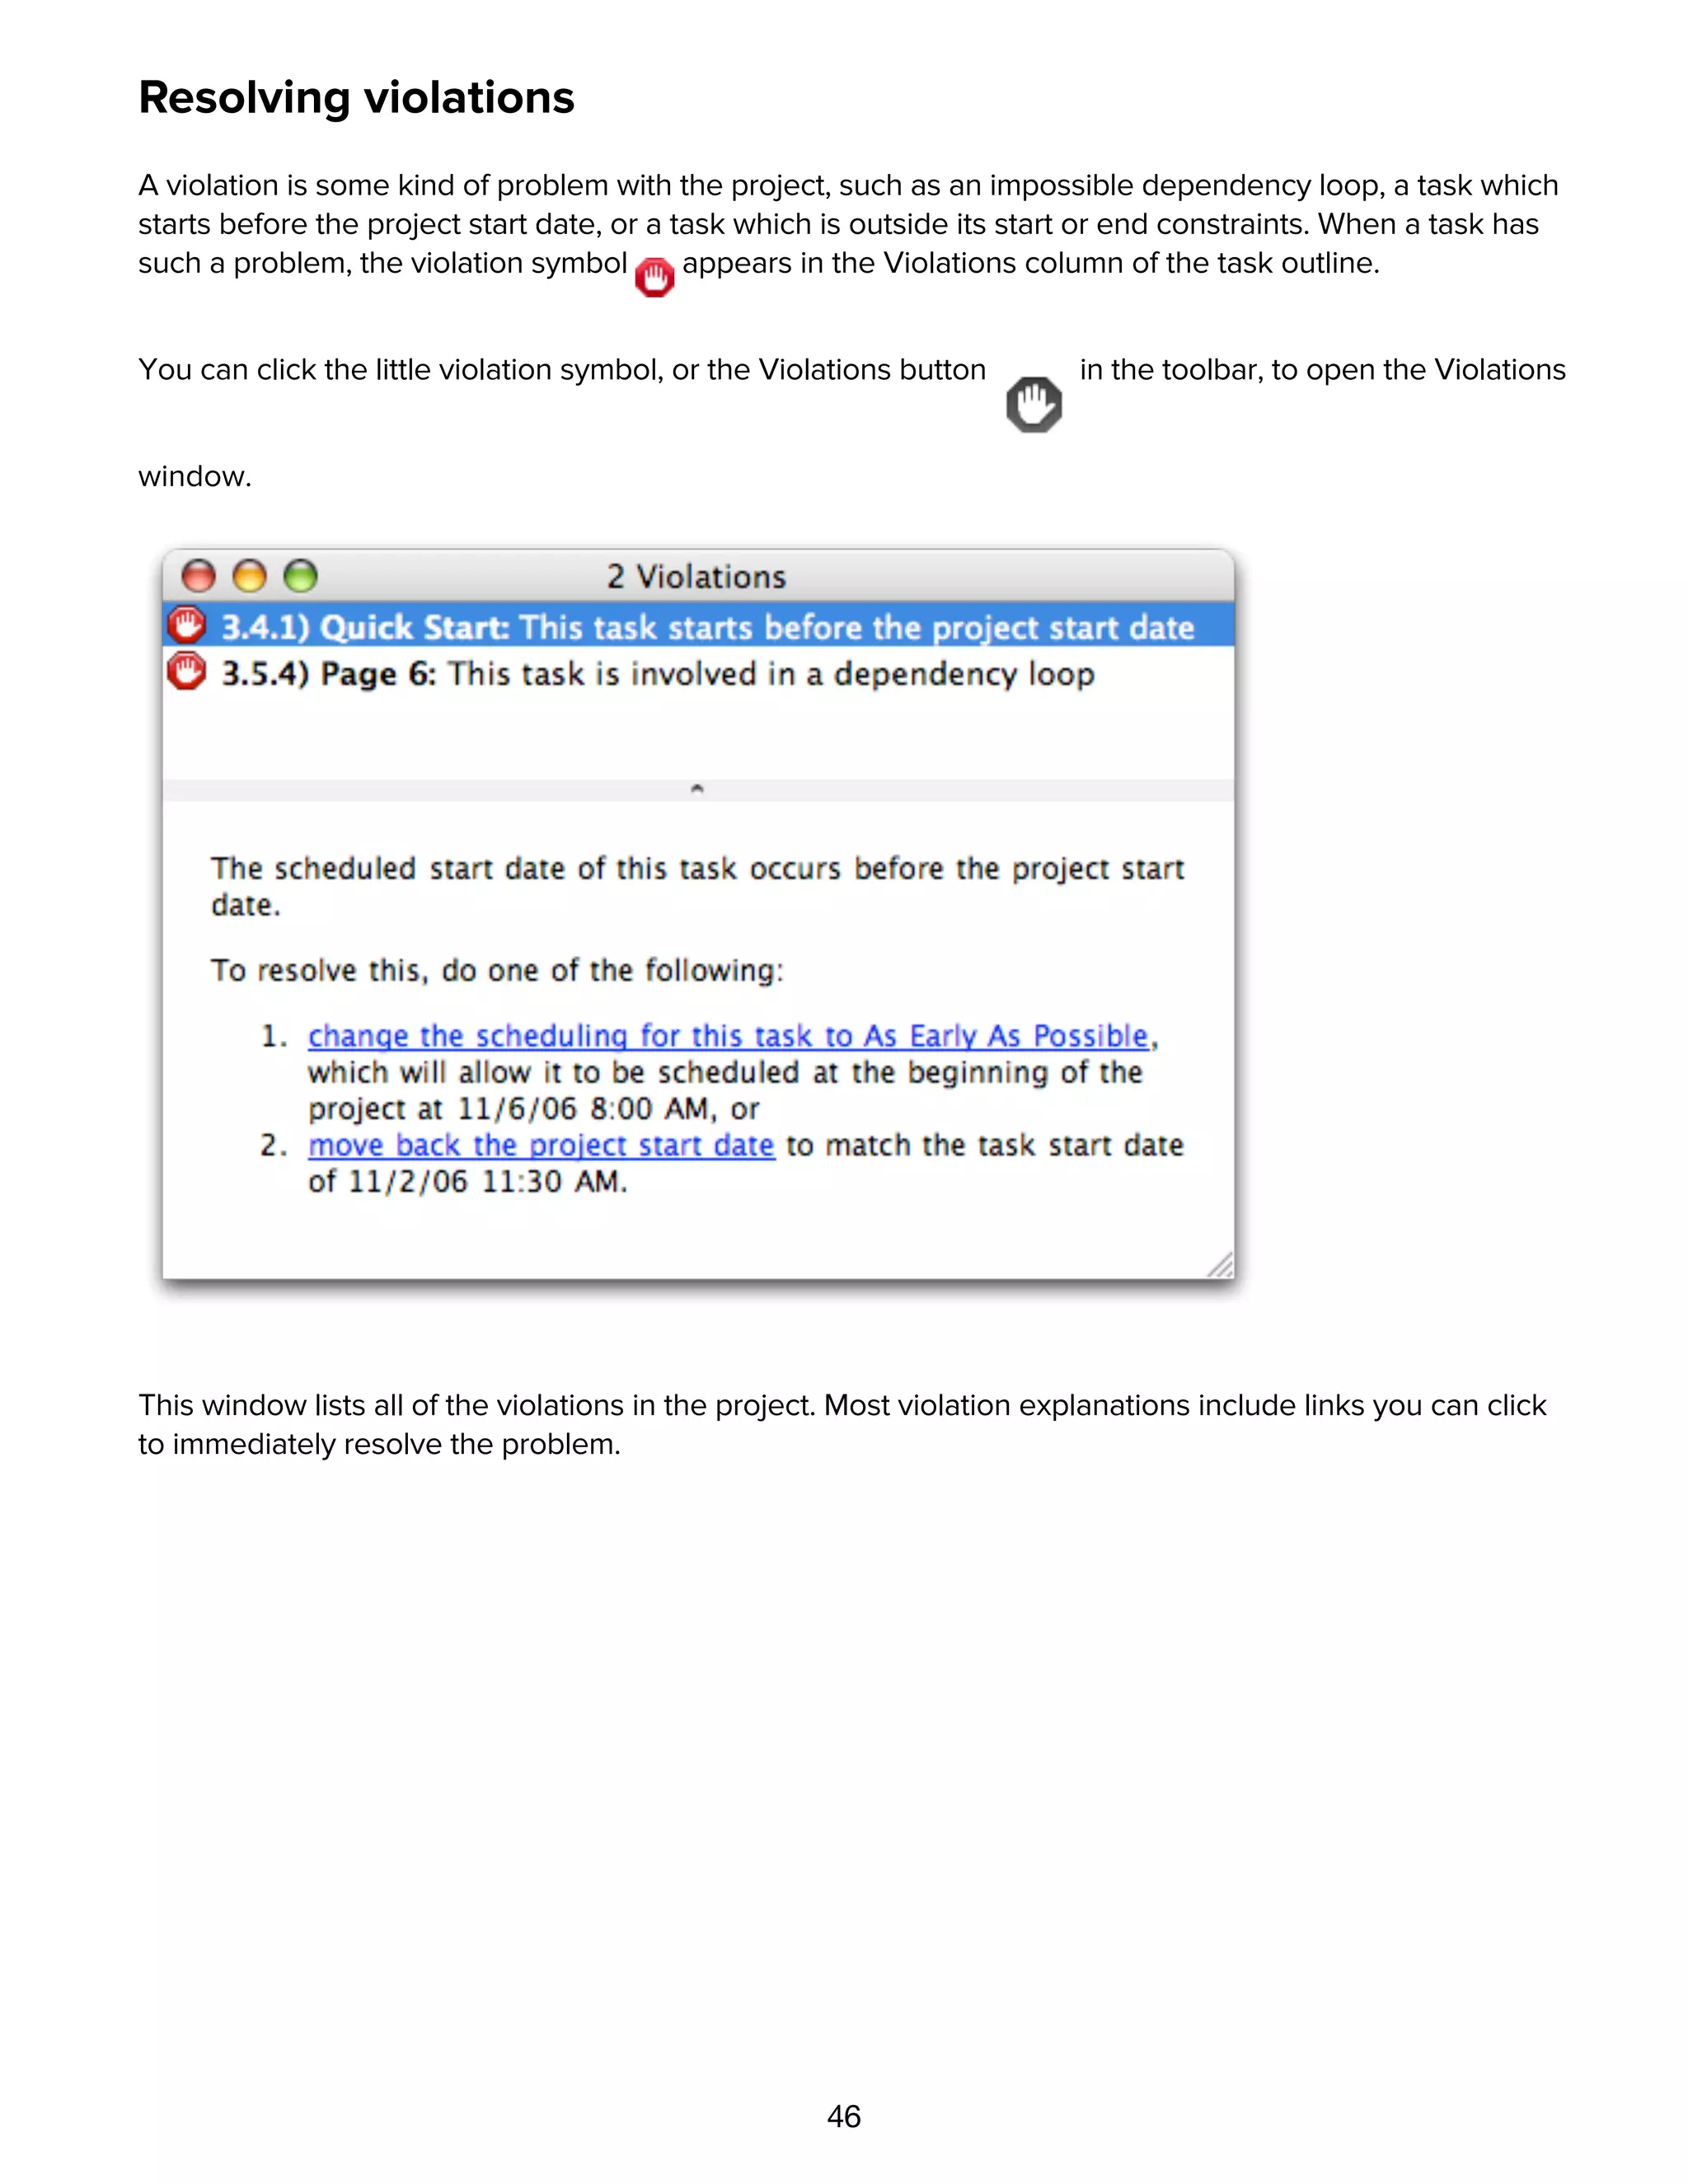
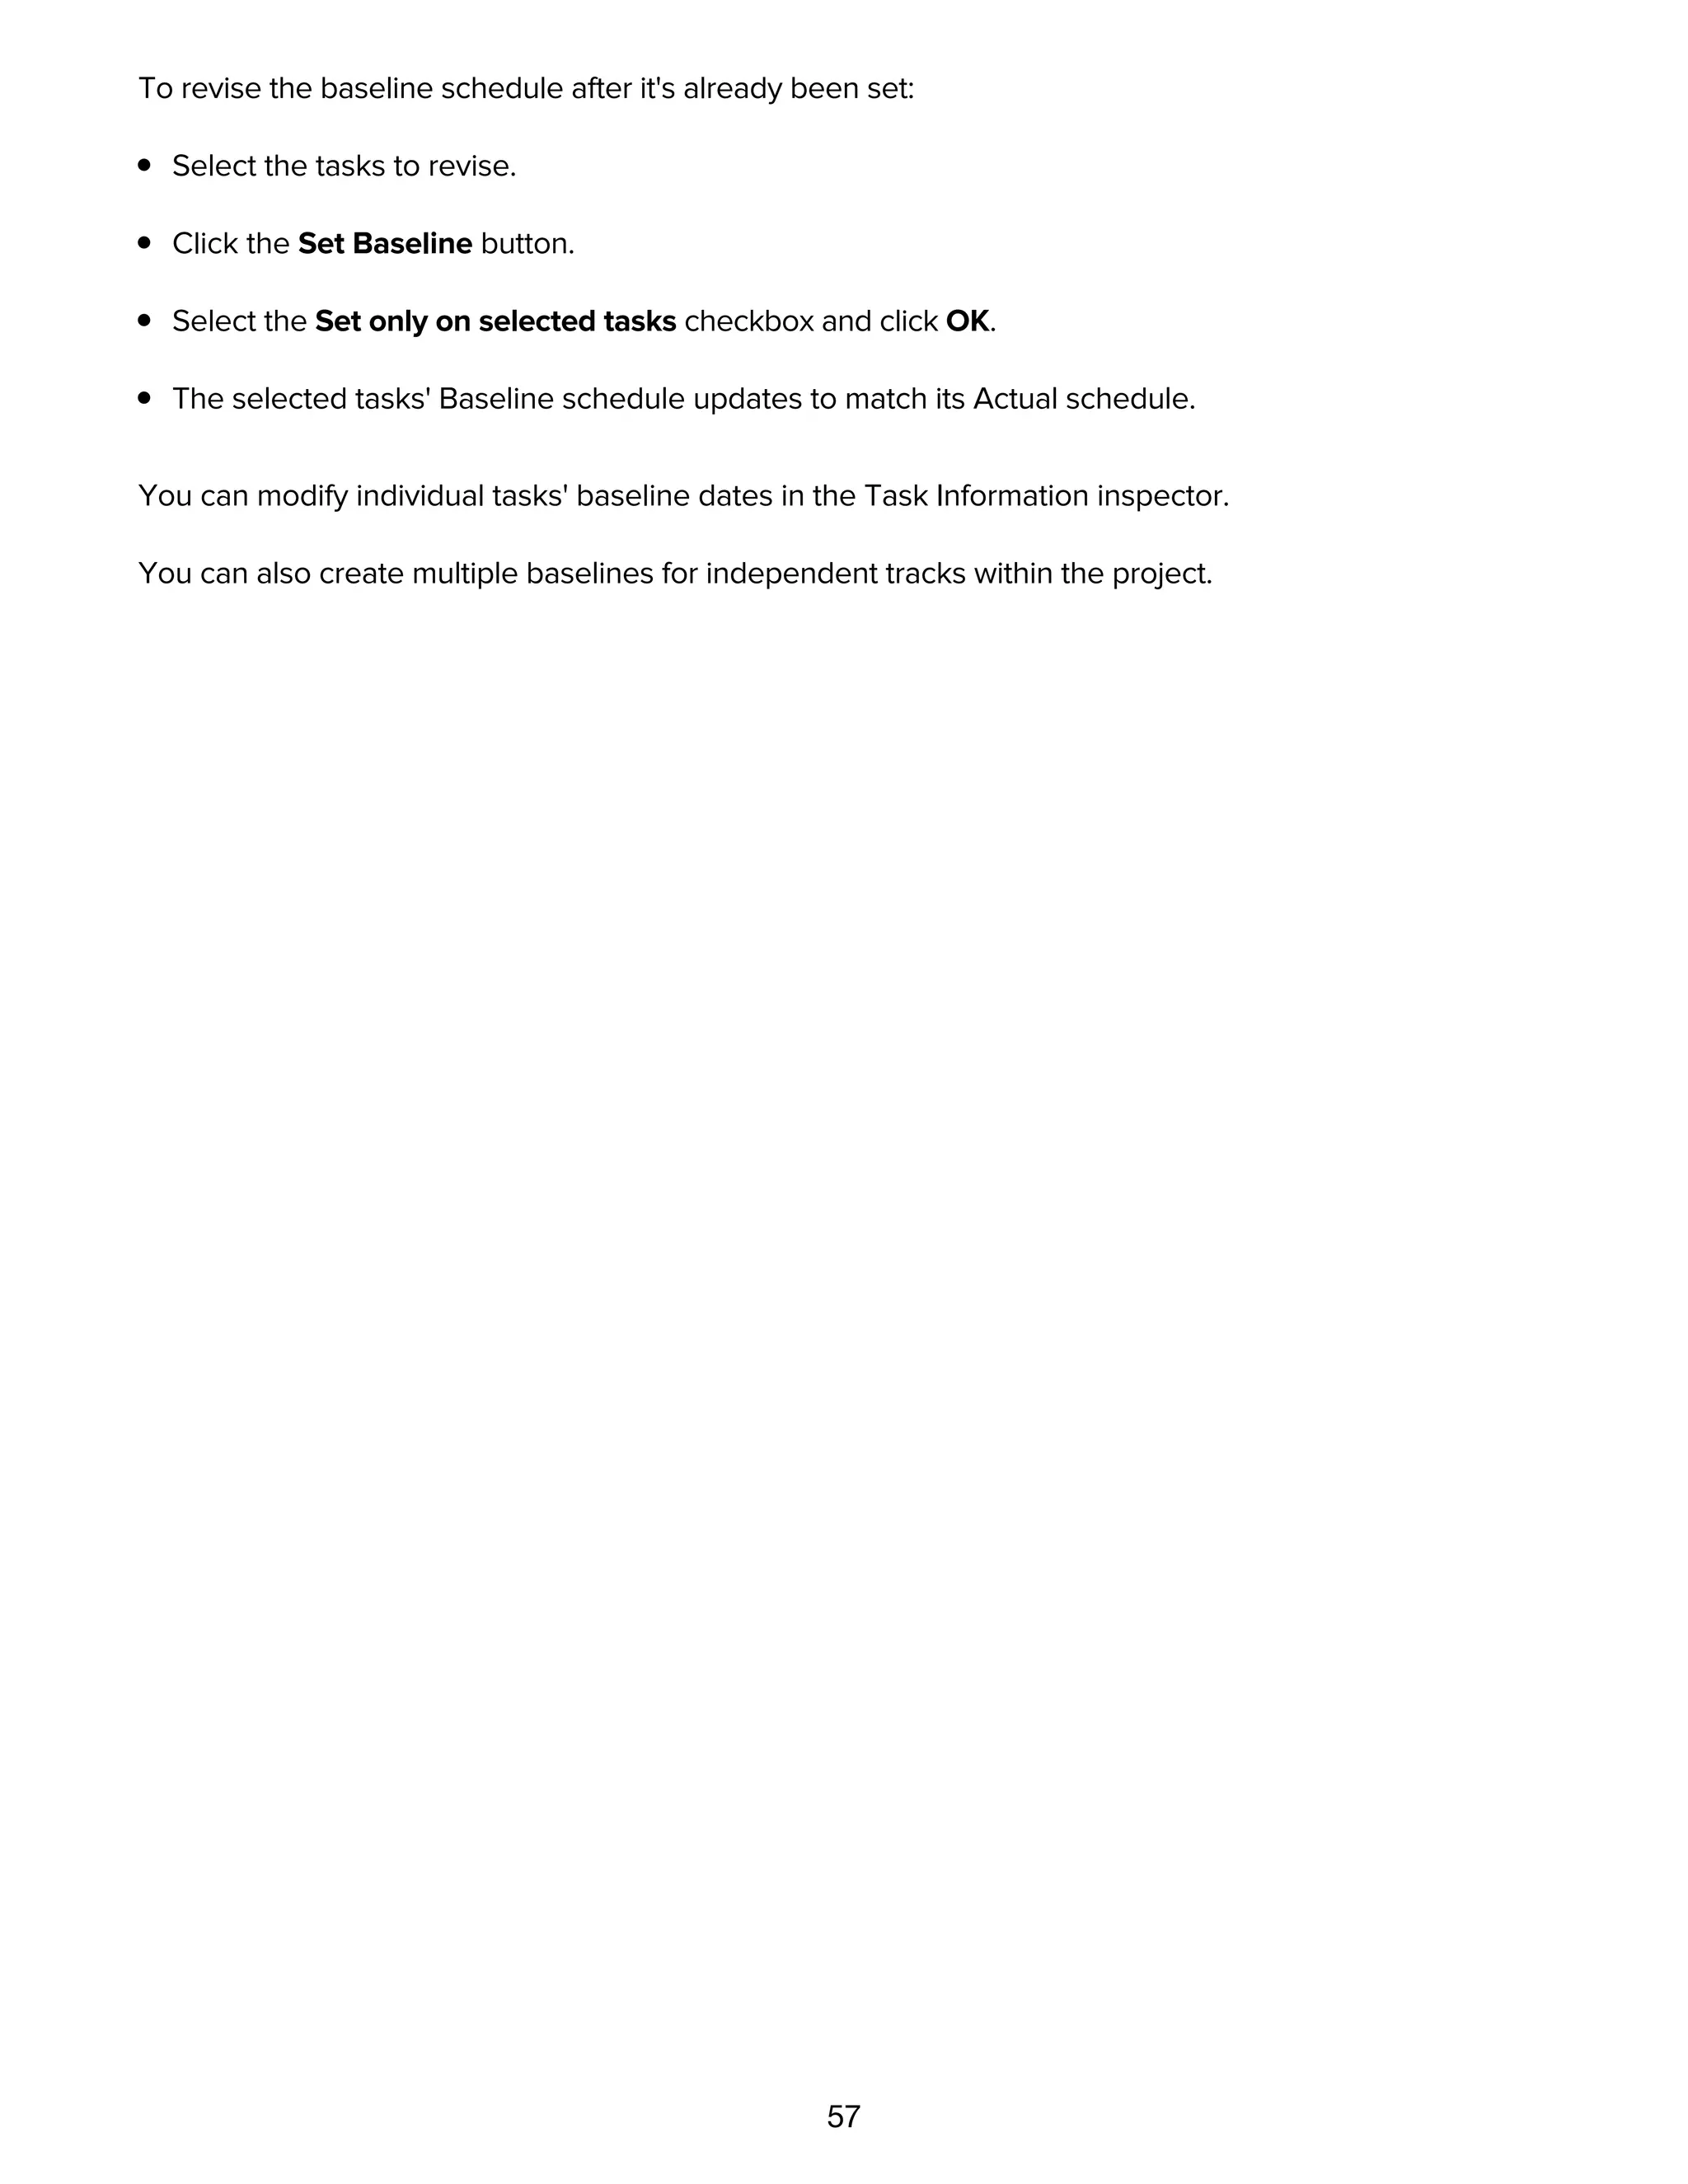
Tutorial Step 8: Group Tasks
You can associate related tasks together into groups. Select some tasks and use the action menu to
group them. Or just press Command-] to indent the selected tasks as children of the task immediately
above them in the outline.
Grouped tasks are indented in the outline.
Tutorial Step 9: Connect Tasks with Dependency Lines](https://image.slidesharecdn.com/omniplan-2-manual-130602014402-phpapp02/75/Omni-plan-2-manual-15-2048.jpg)
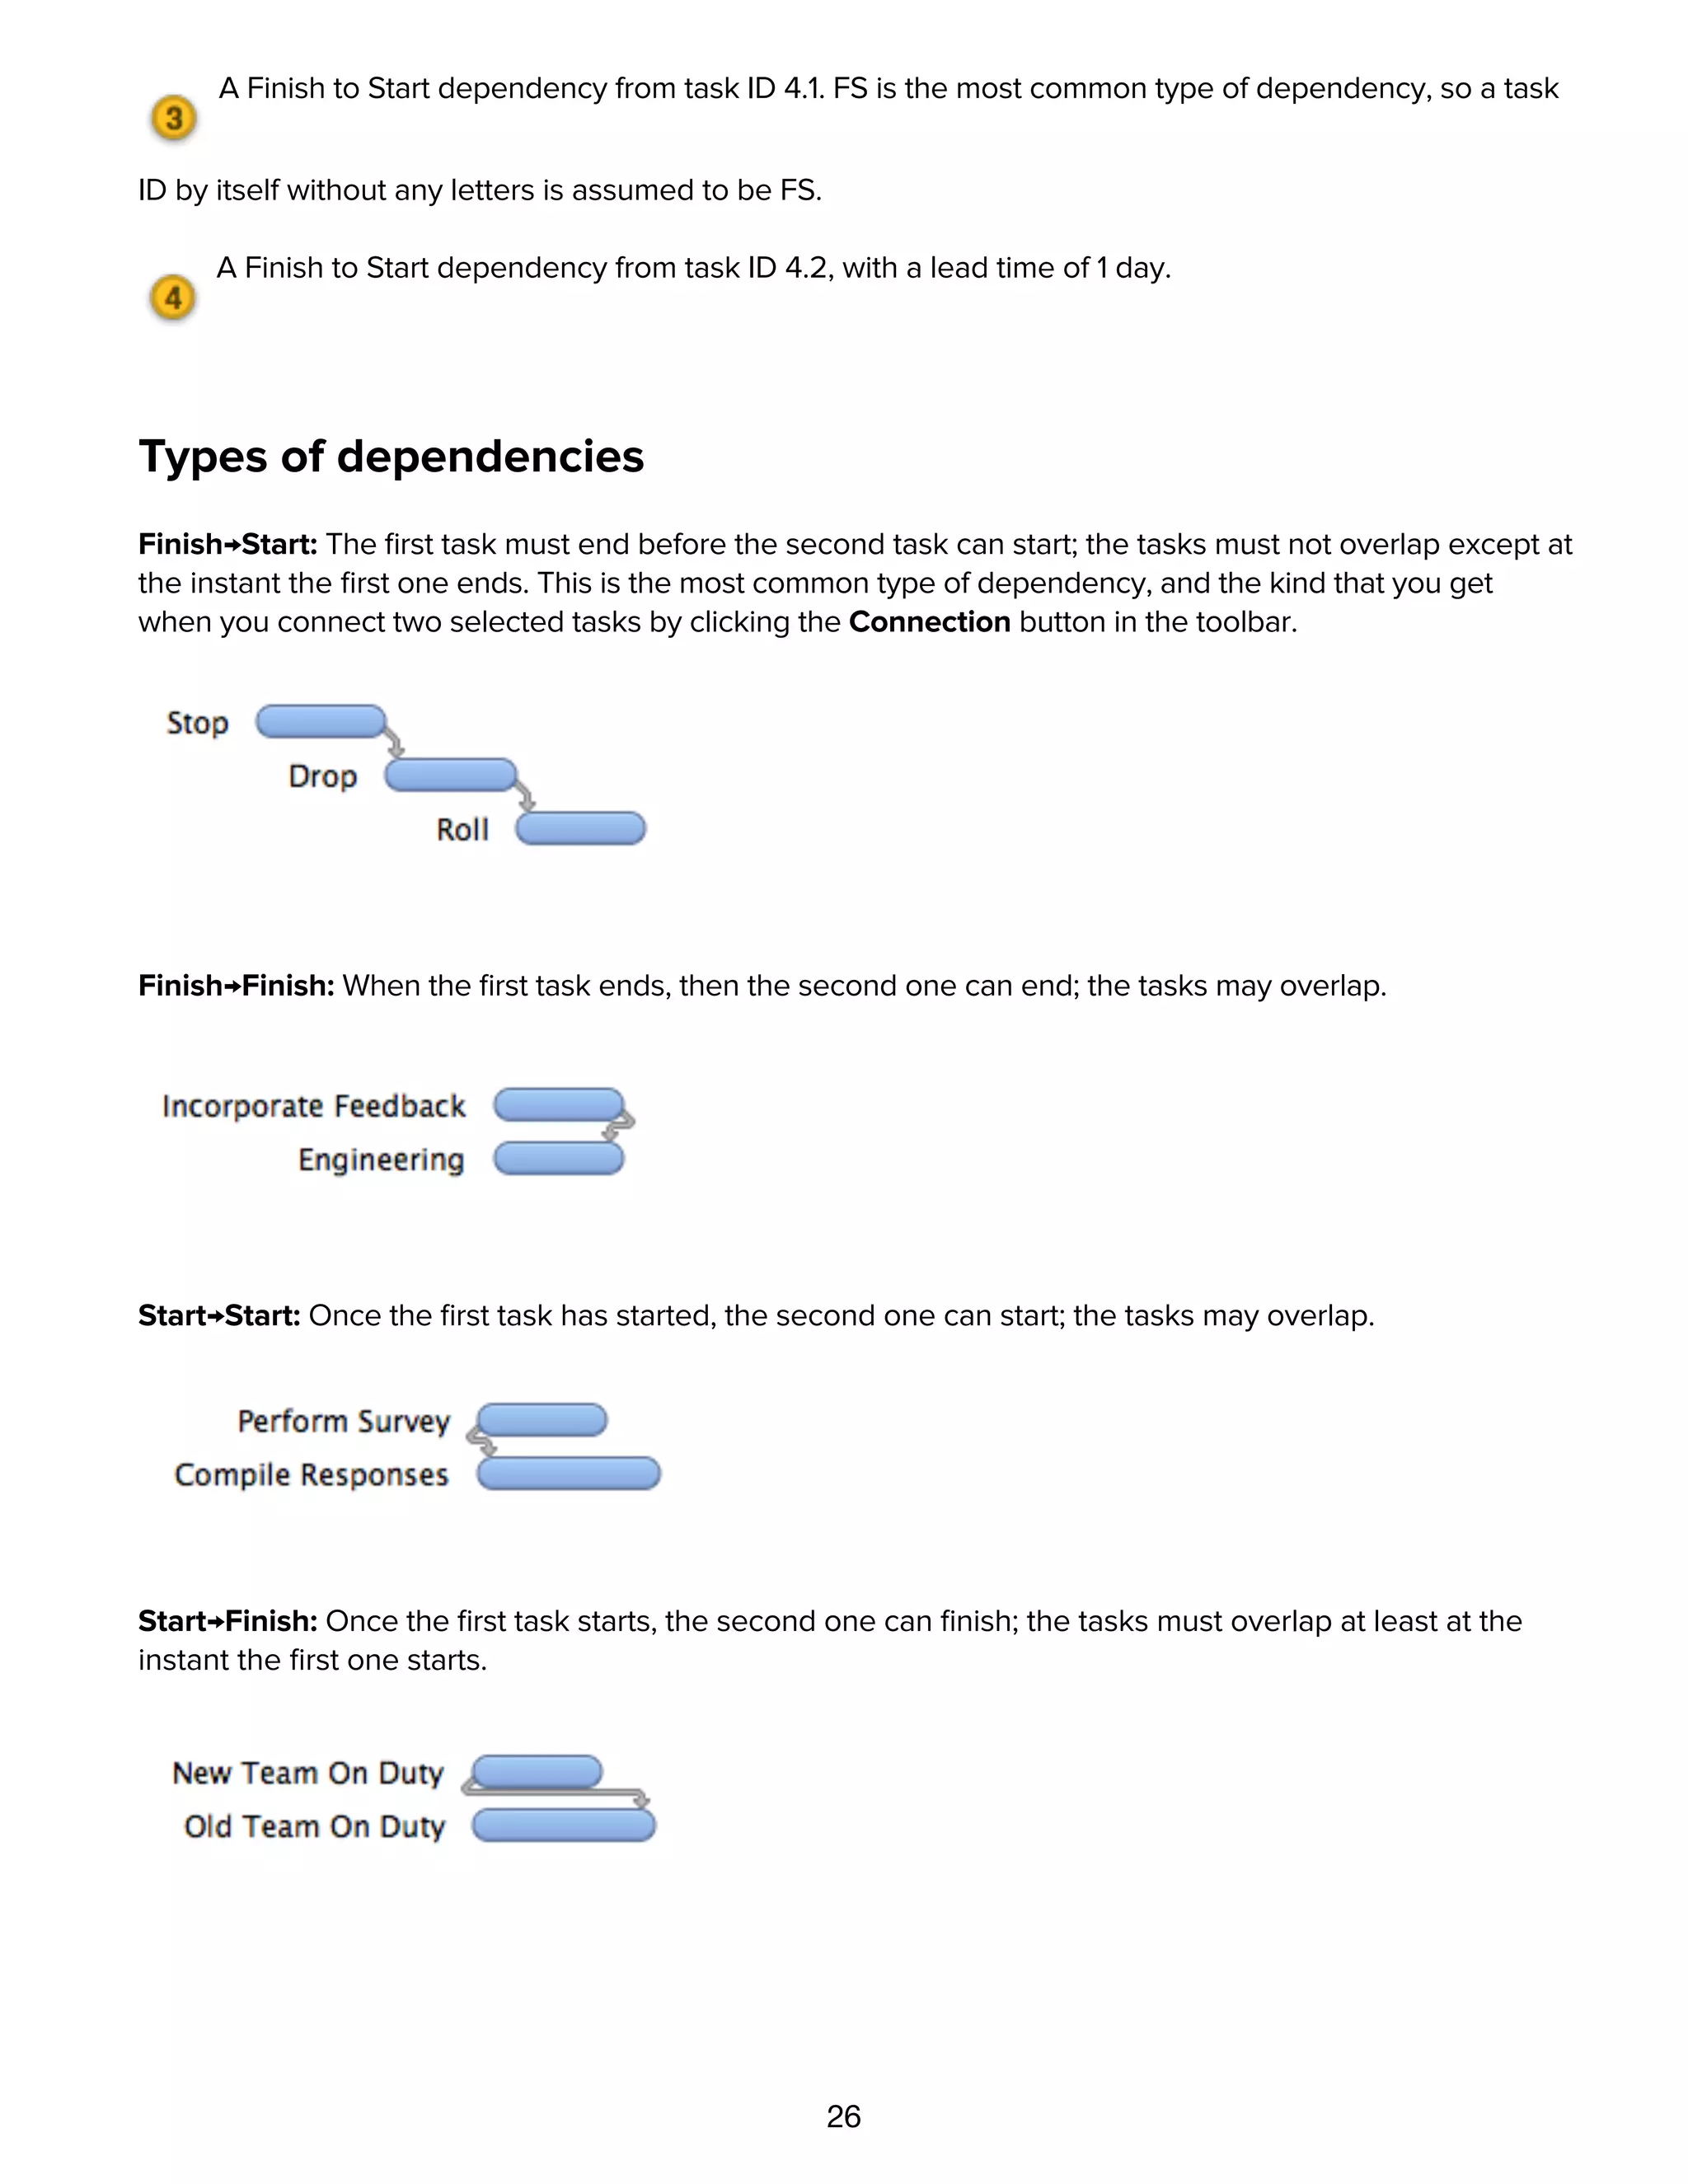
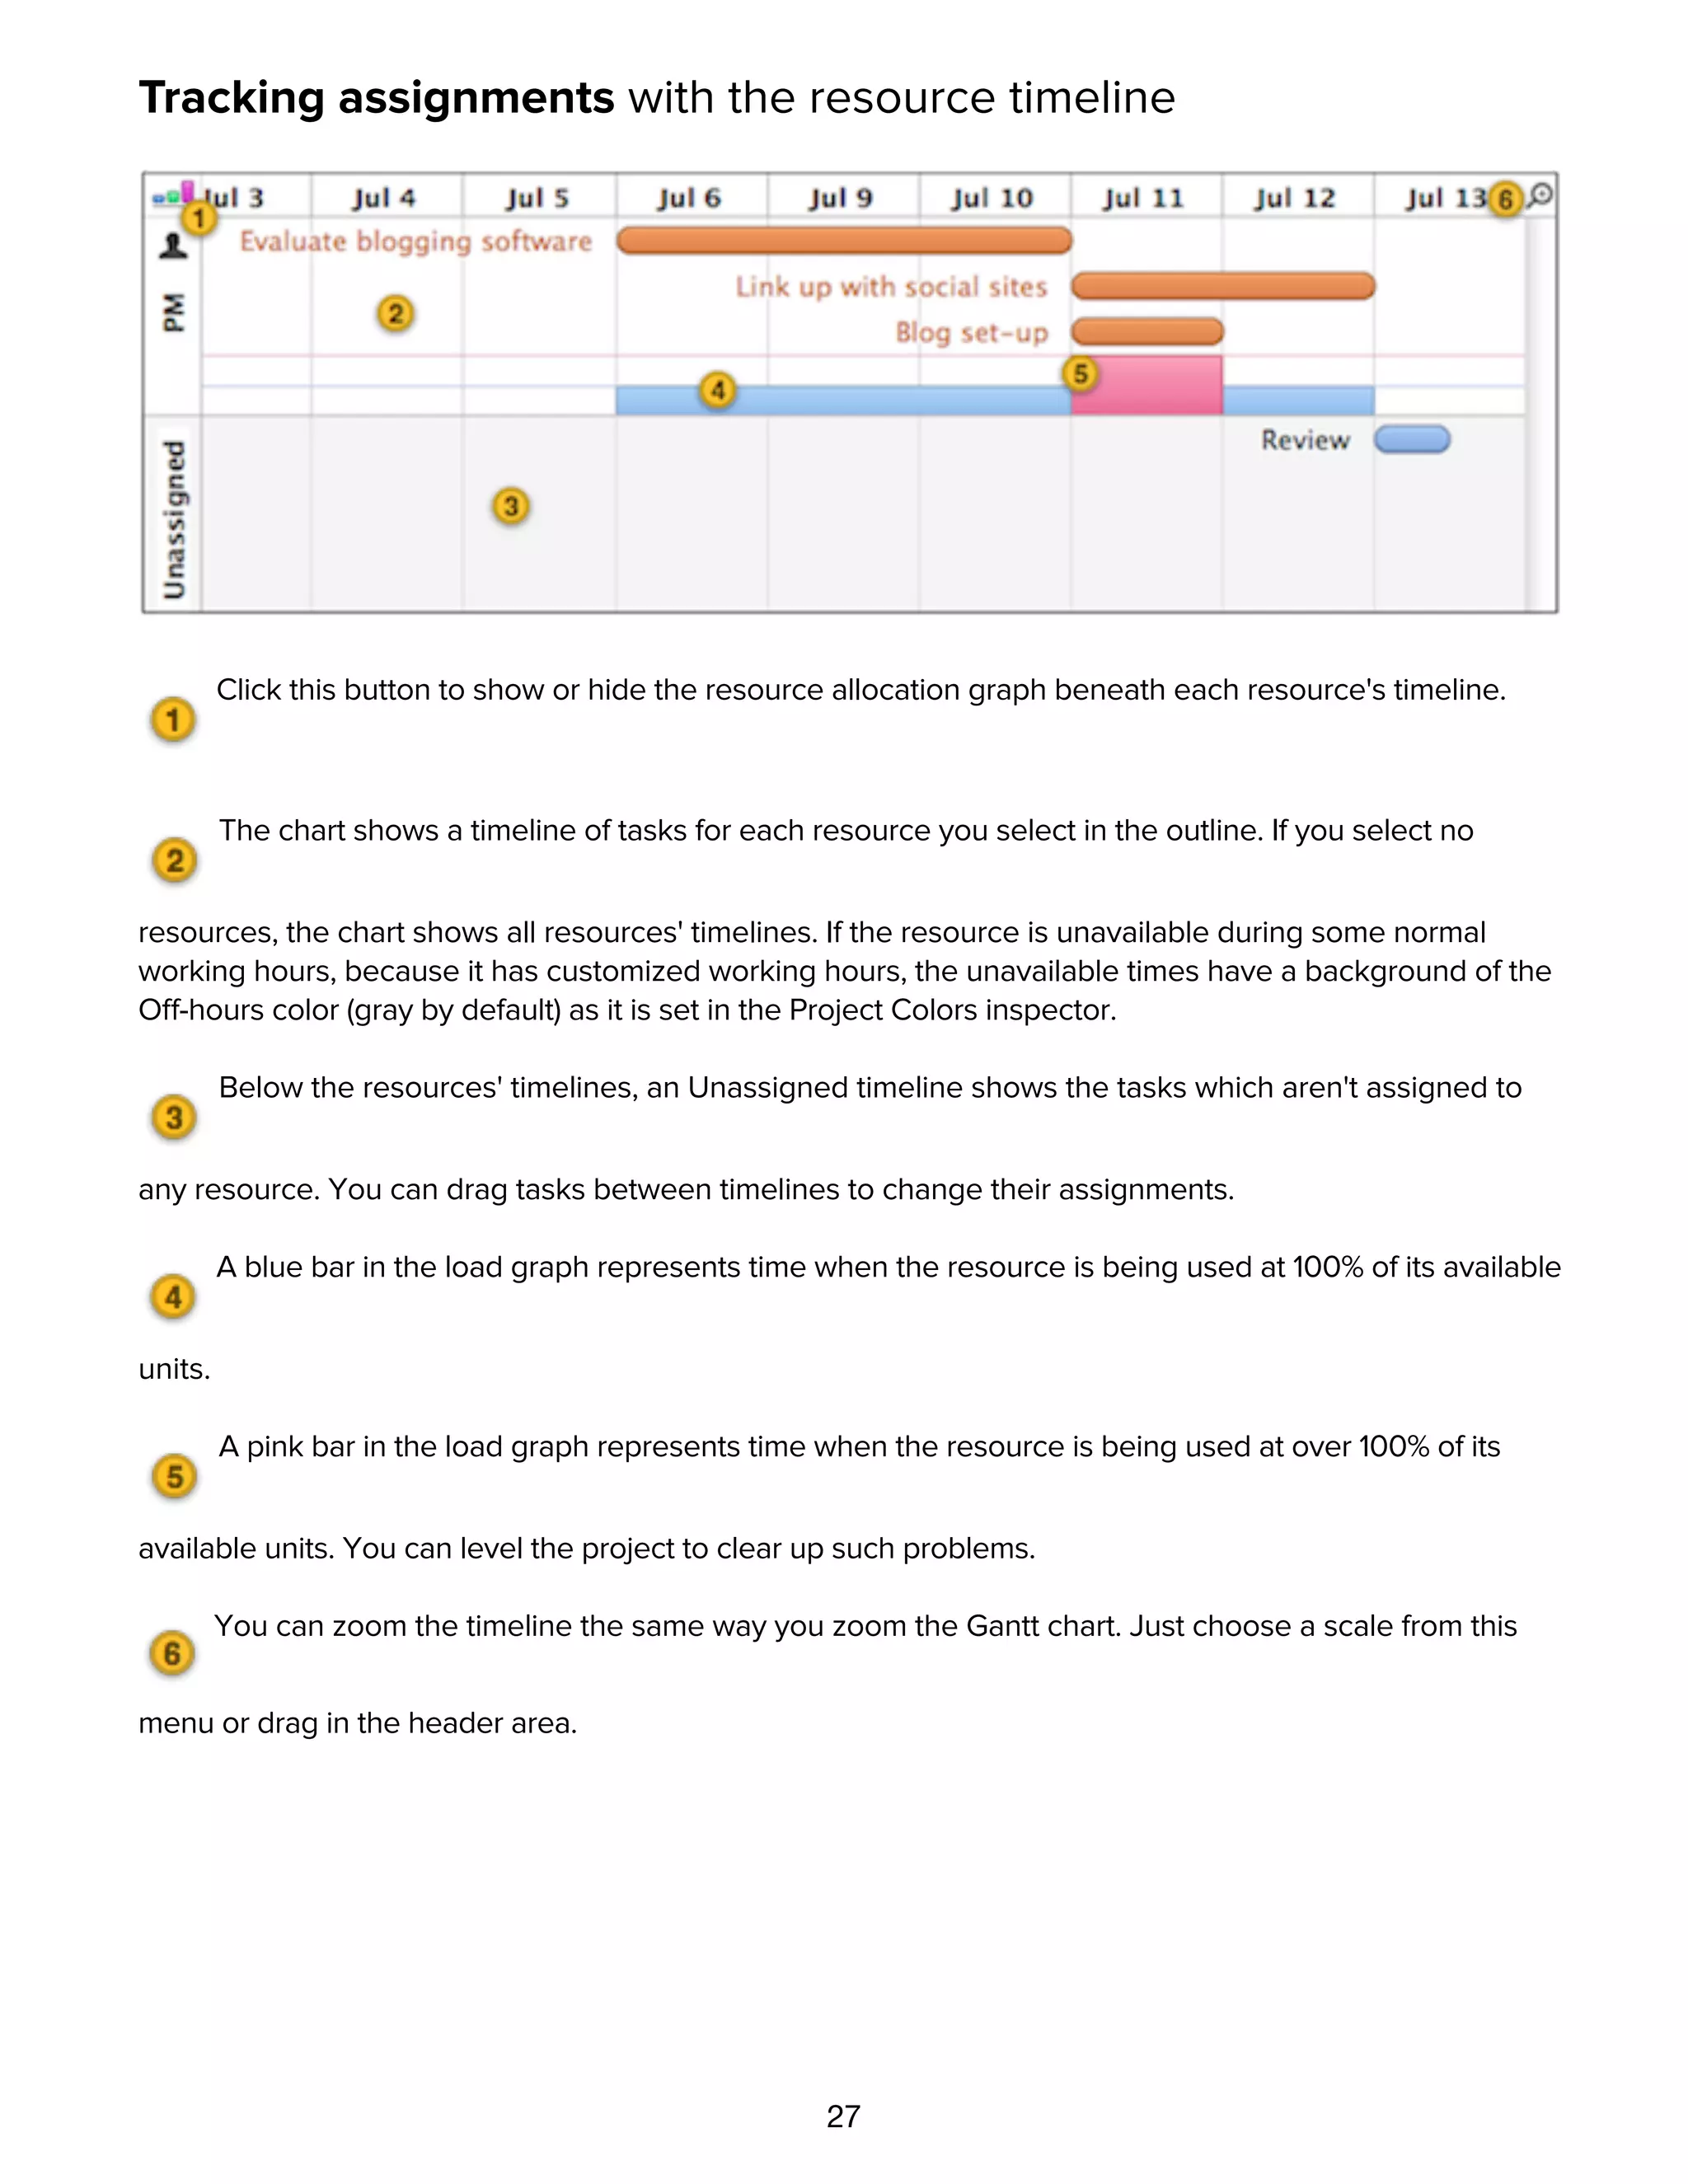
![28
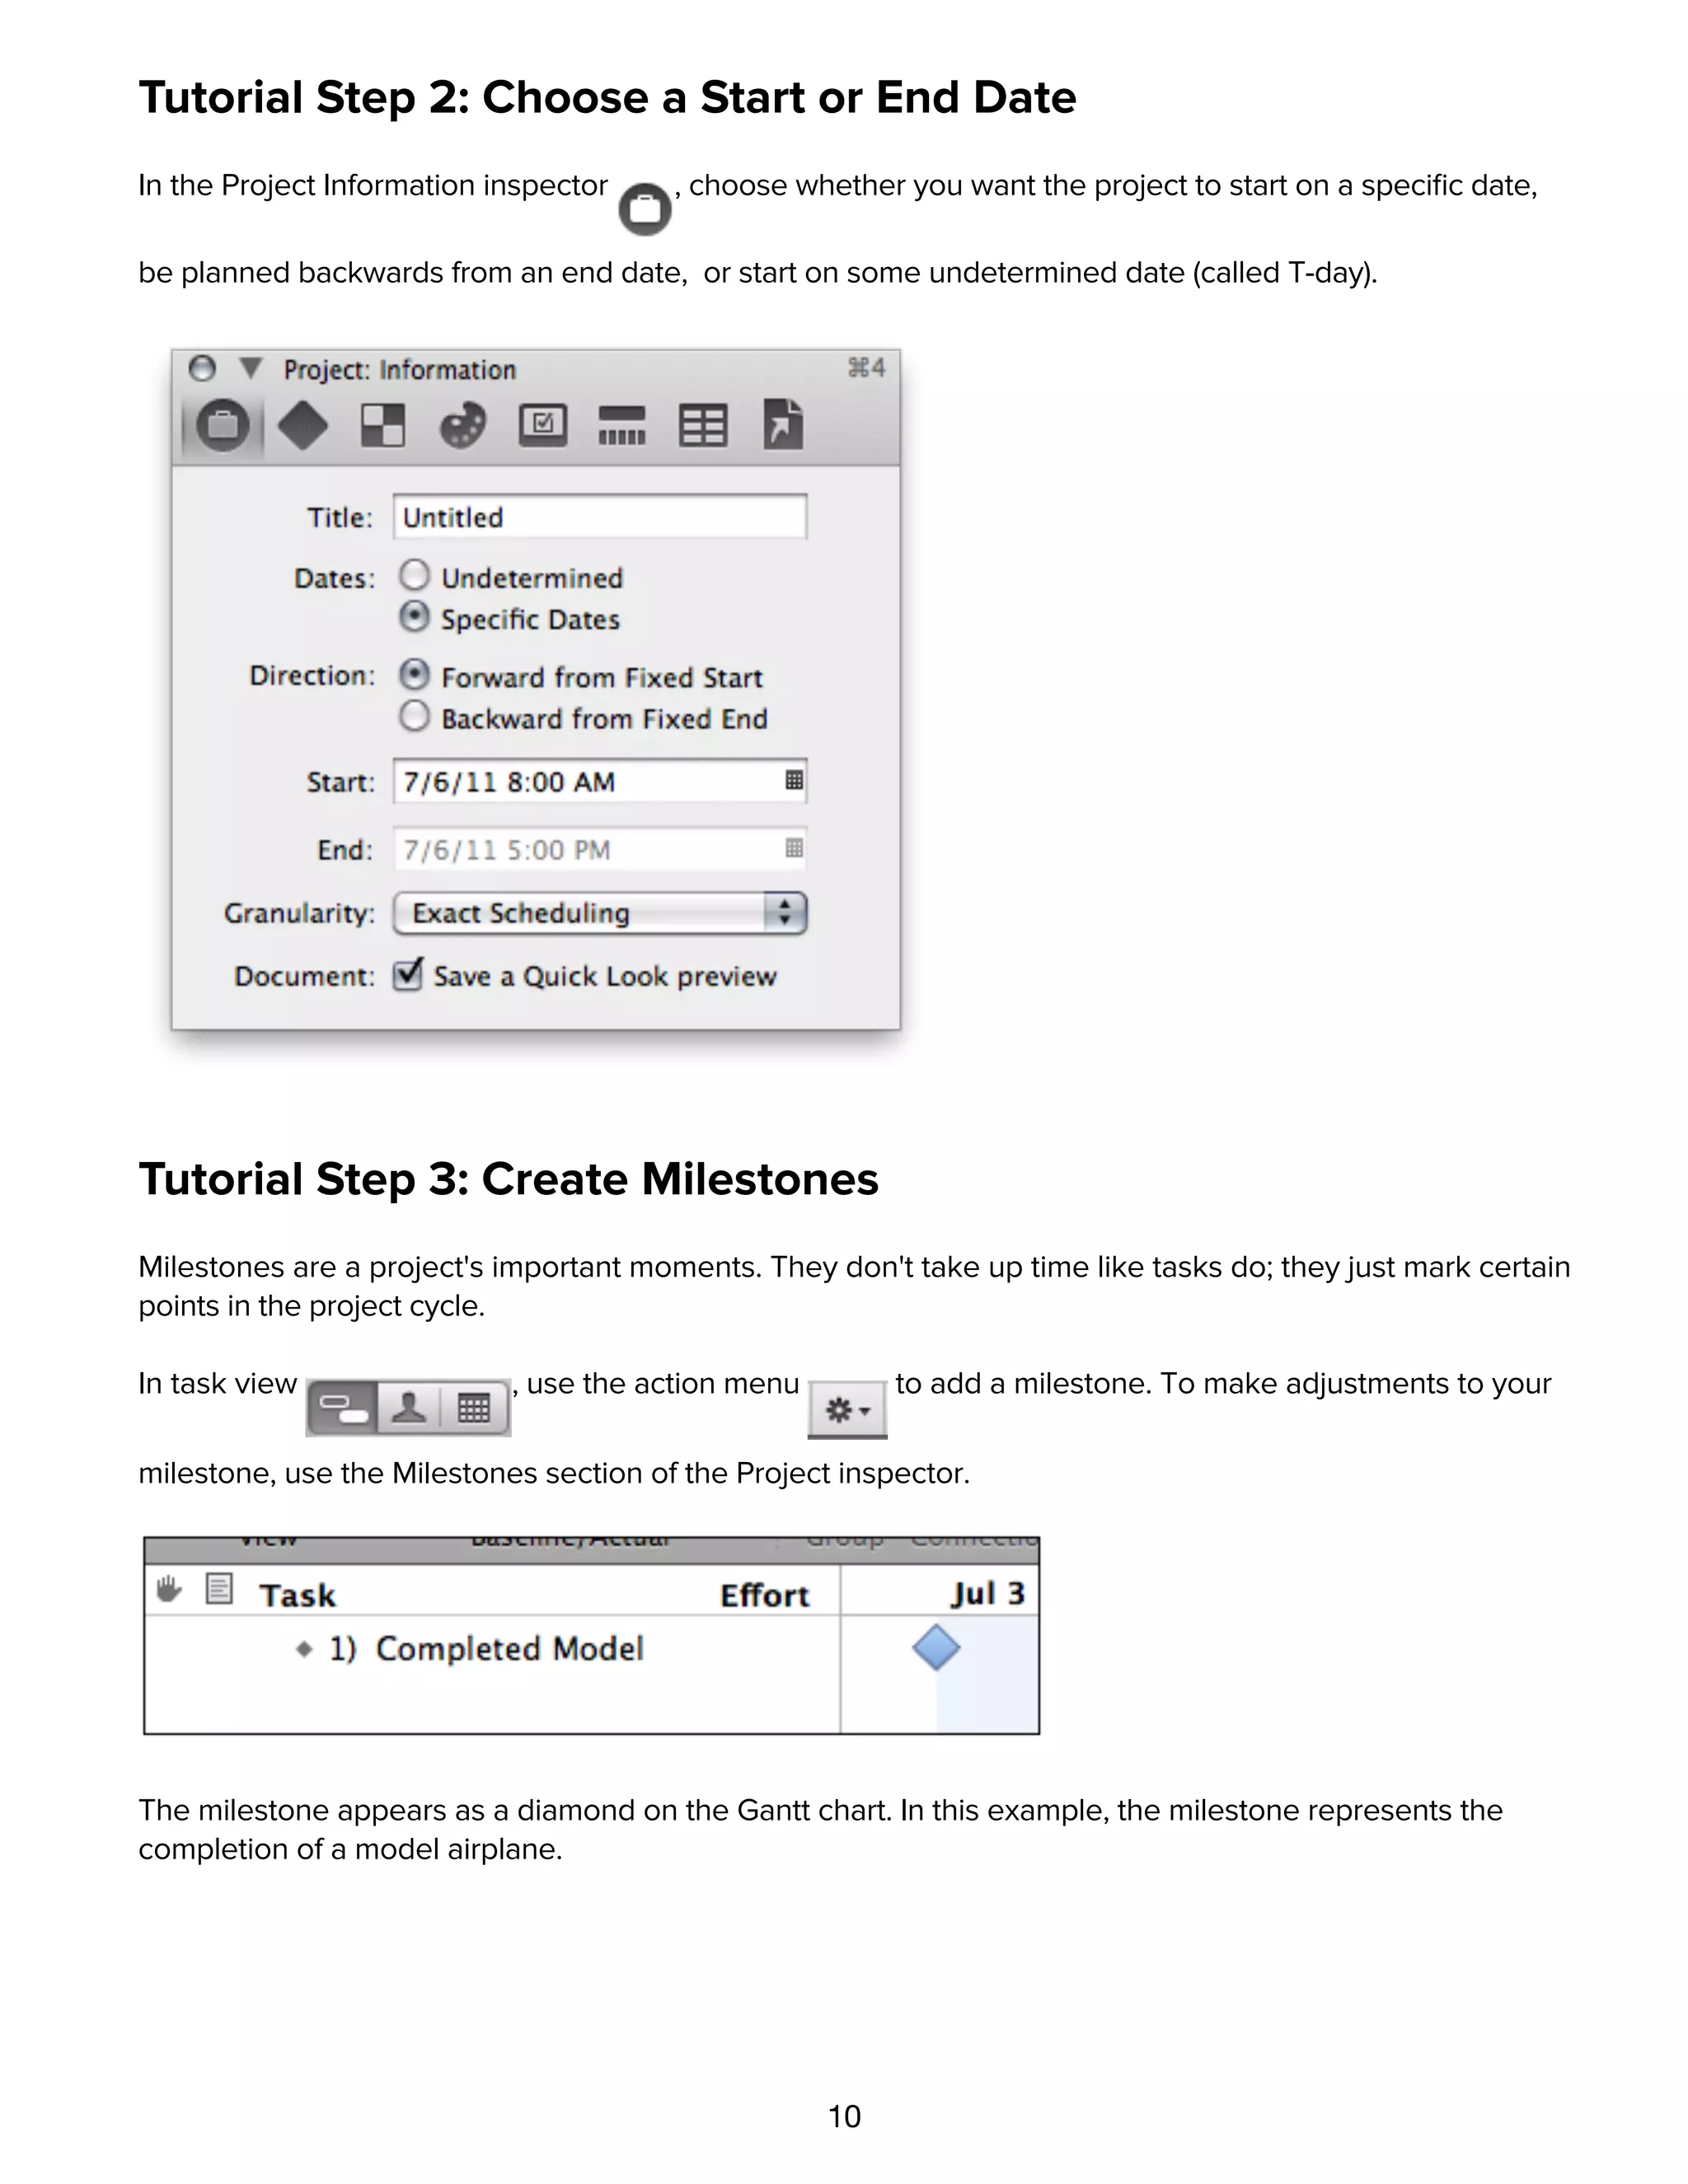
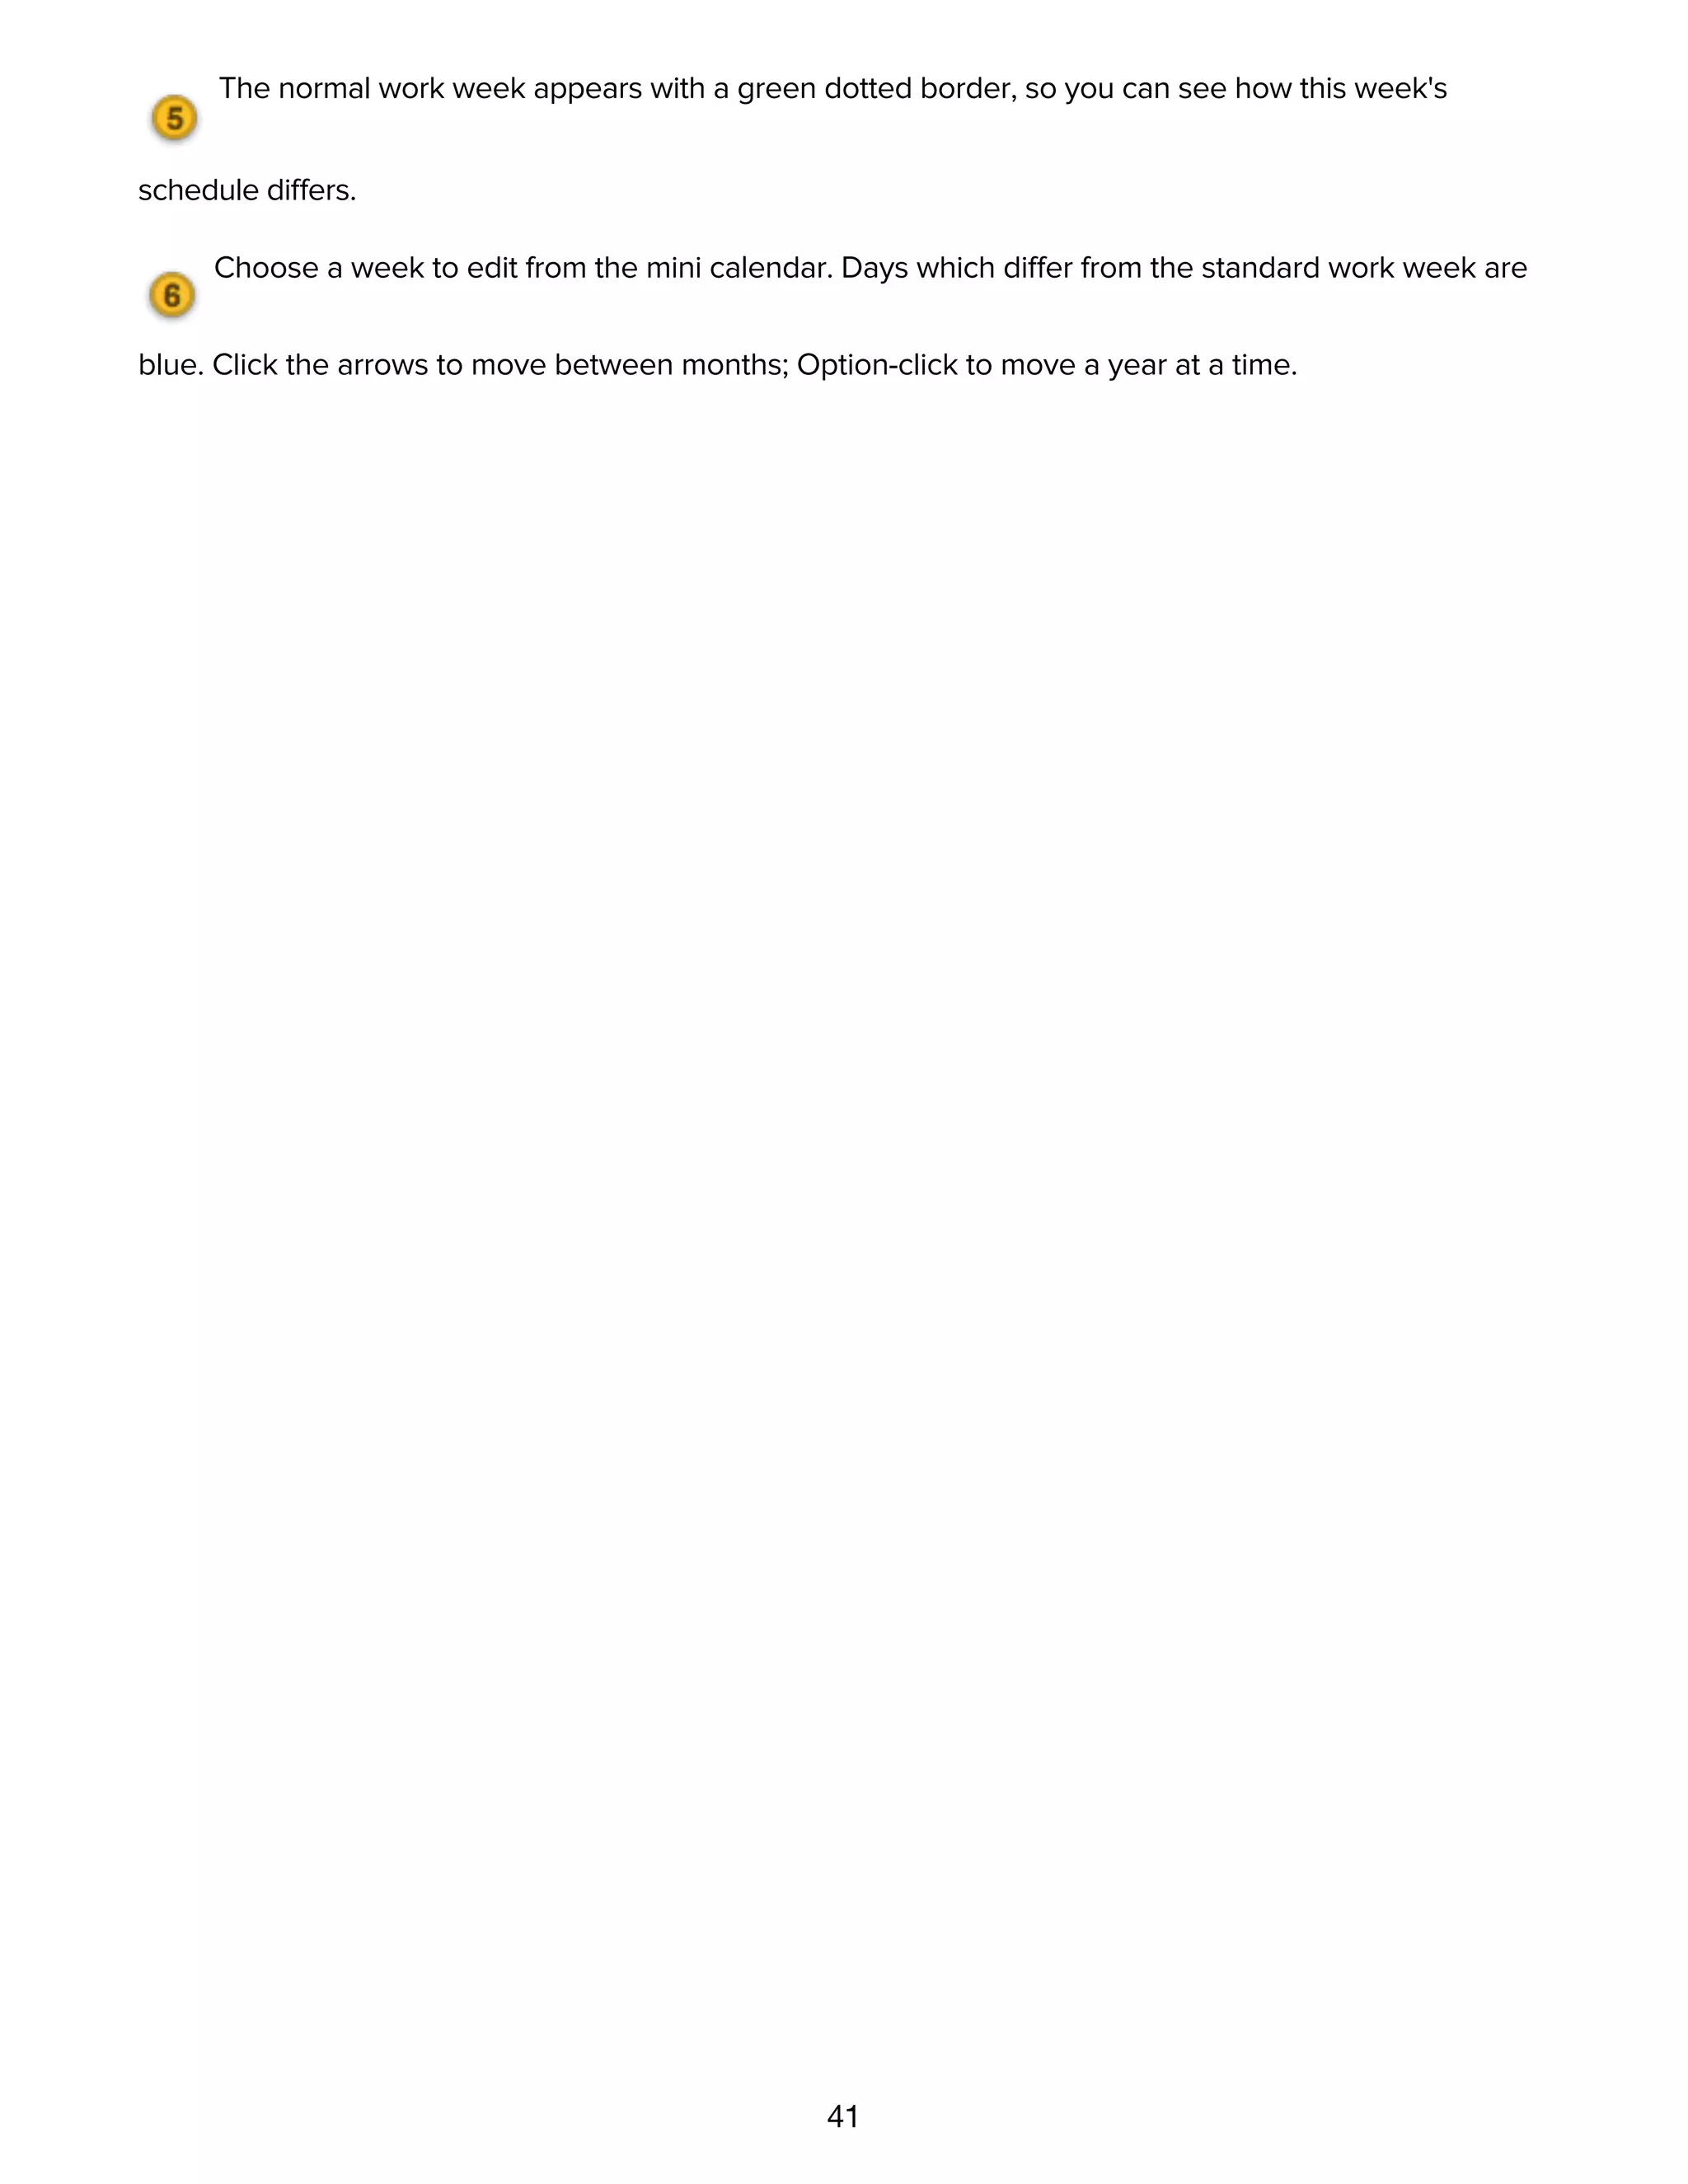
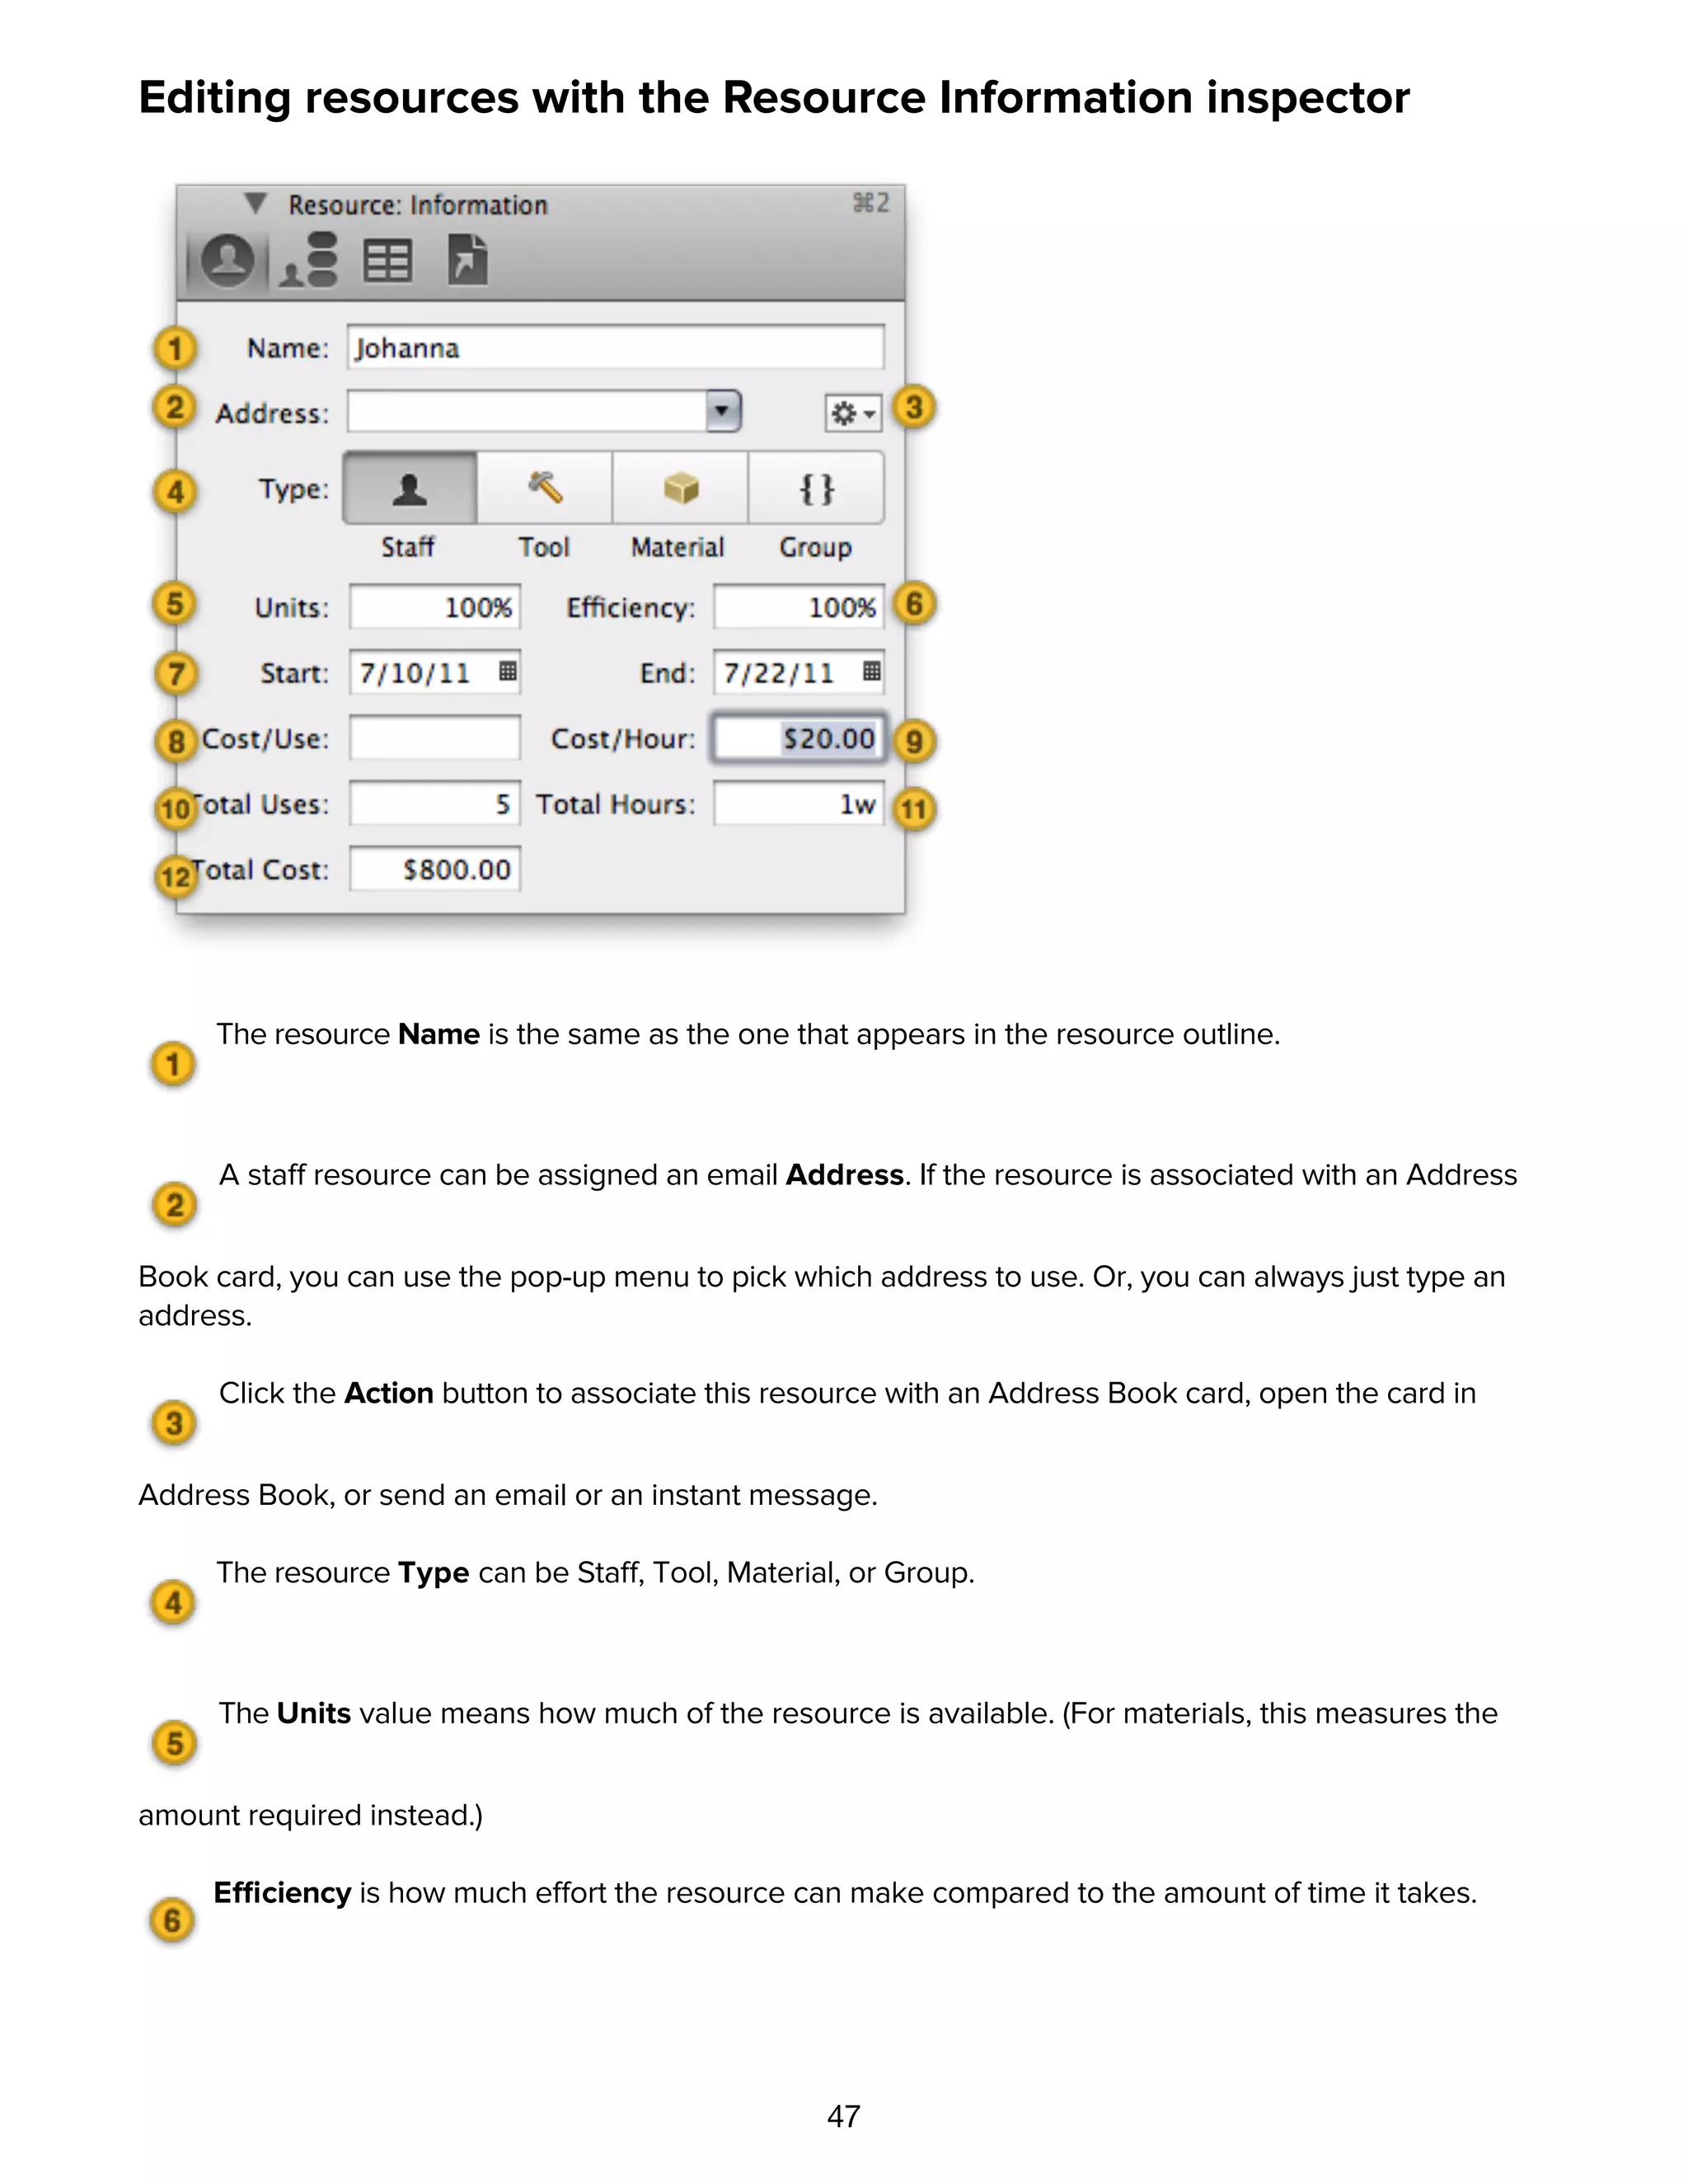
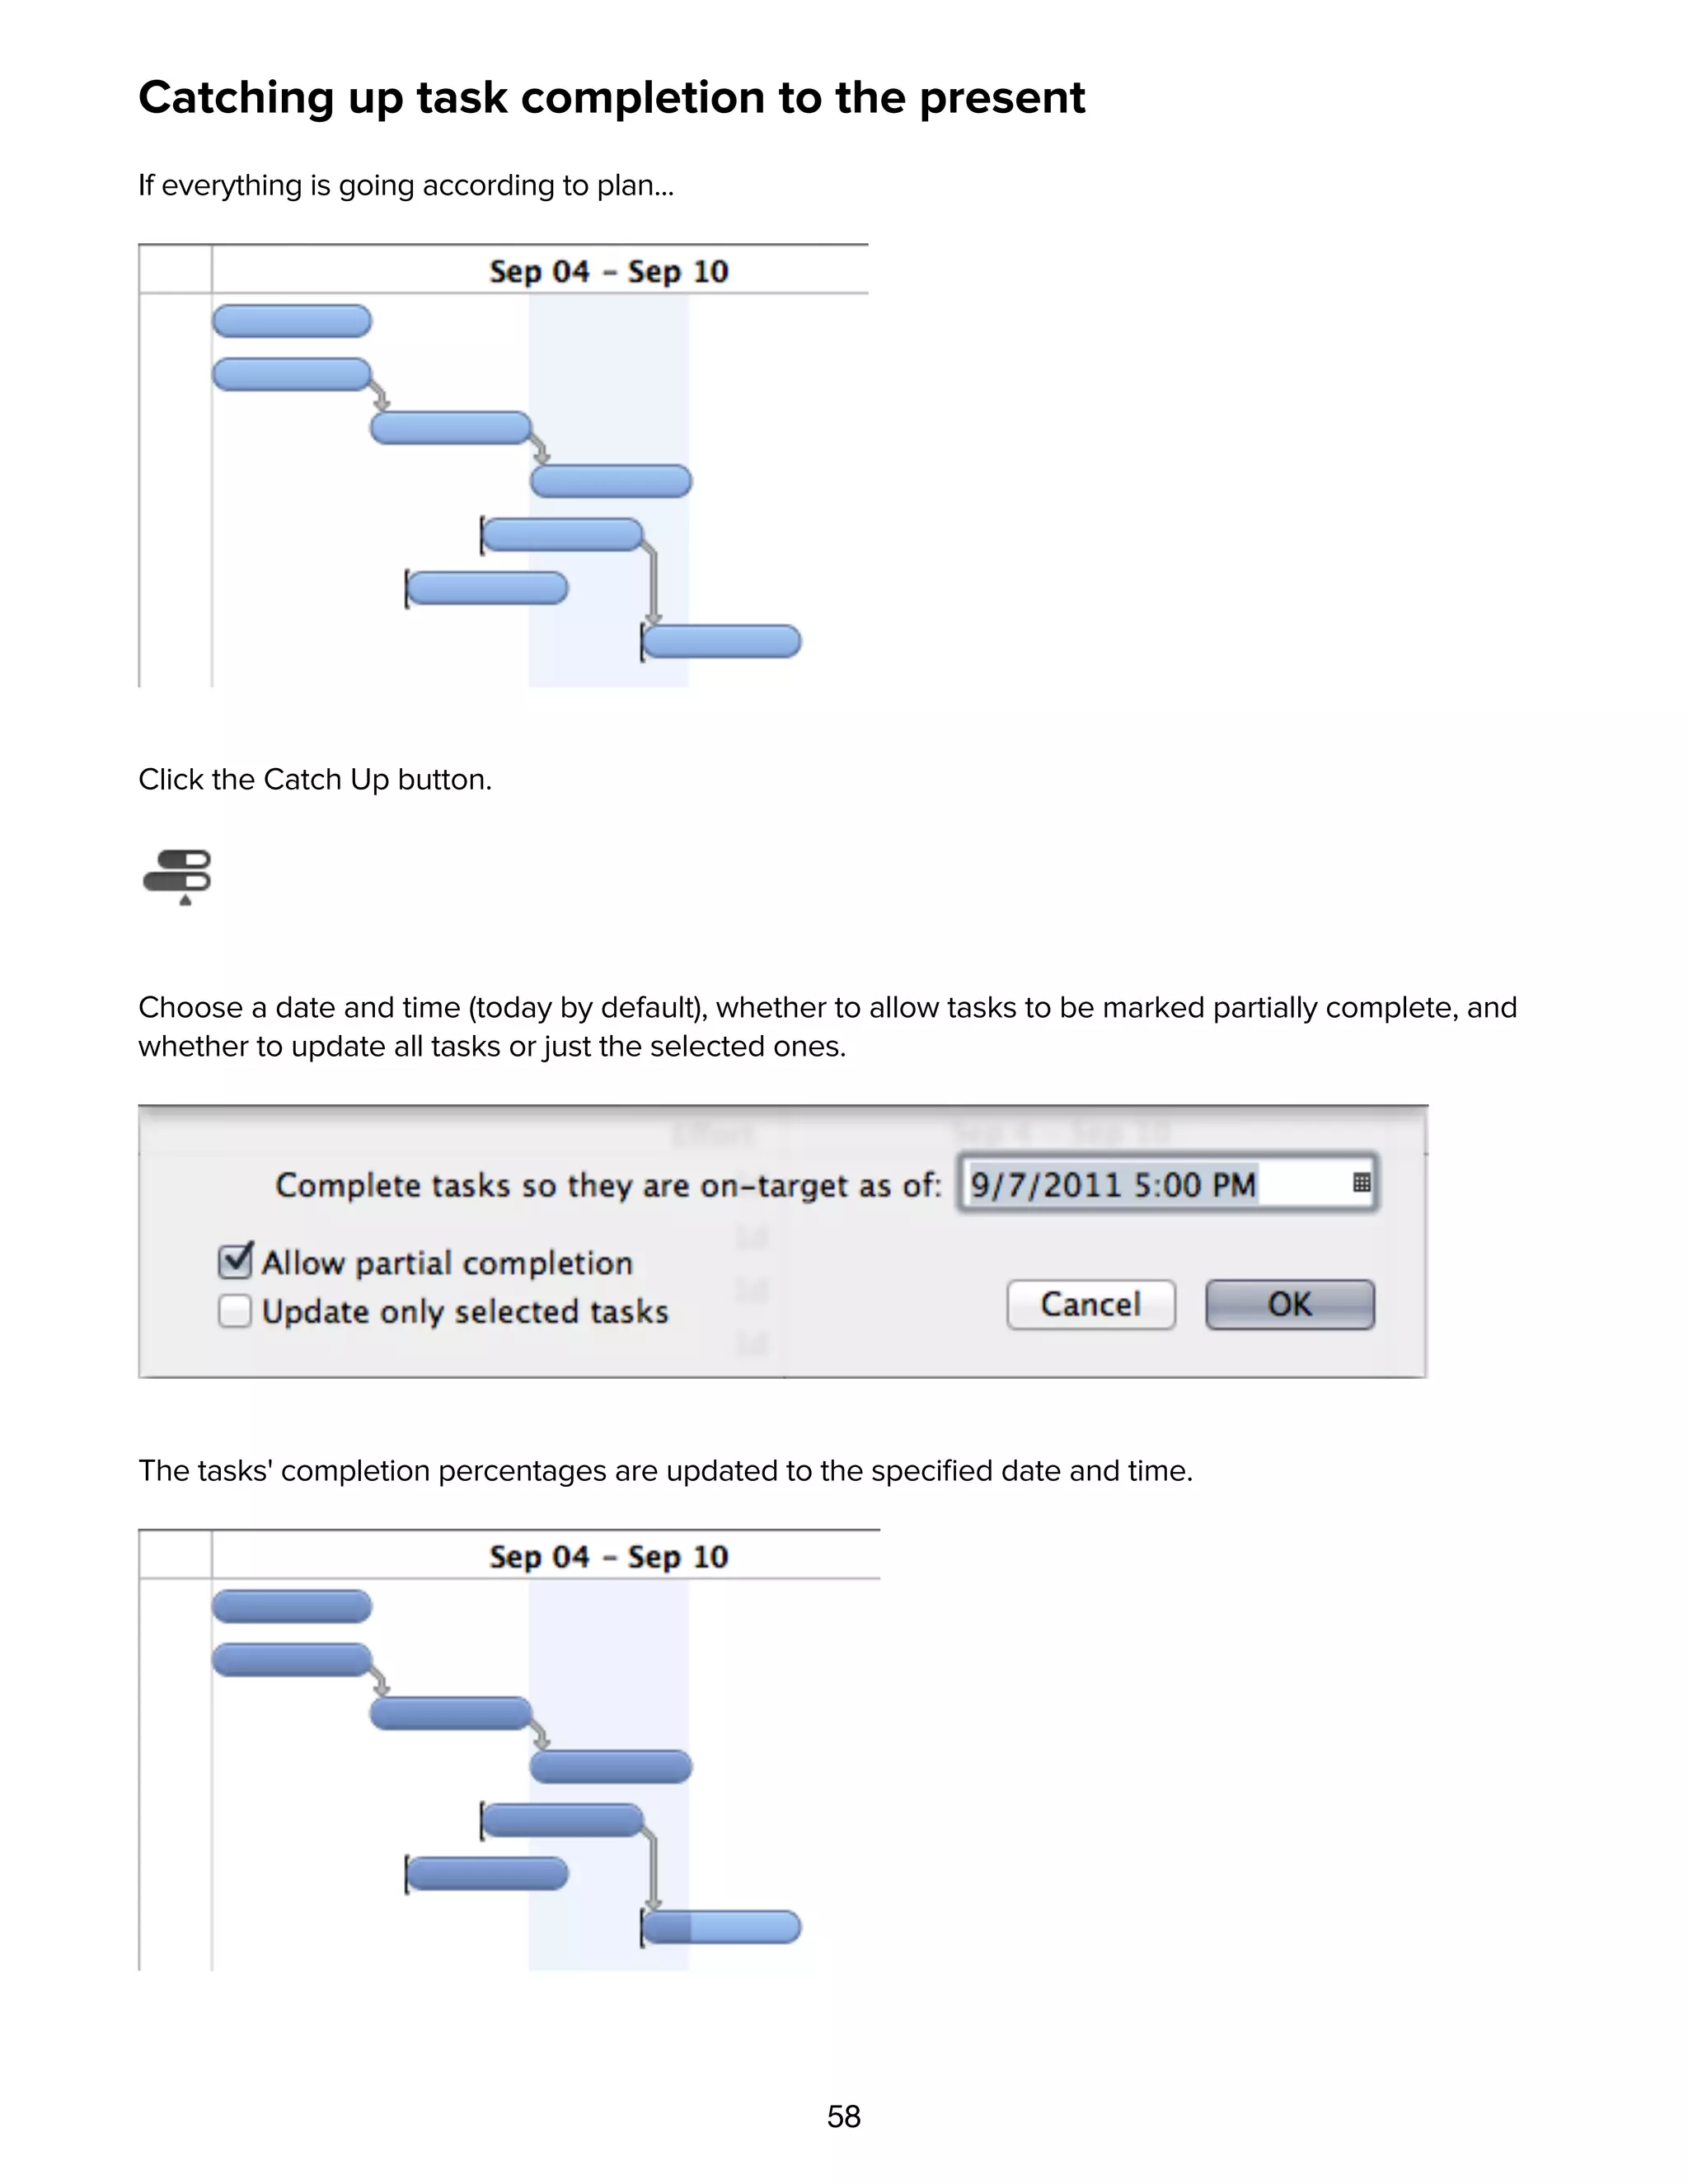
Grouping tasks and resources
There are a few ways to approach grouping.
Select an item
Add Child — Command-}
Item becomes a group
Add more items to the group
Or:
Select some items
Indent — Command-] (or Tab, depending on preference setting)
Items become children of previous item](https://image.slidesharecdn.com/omniplan-2-manual-130602014402-phpapp02/75/Omni-plan-2-manual-28-2048.jpg)
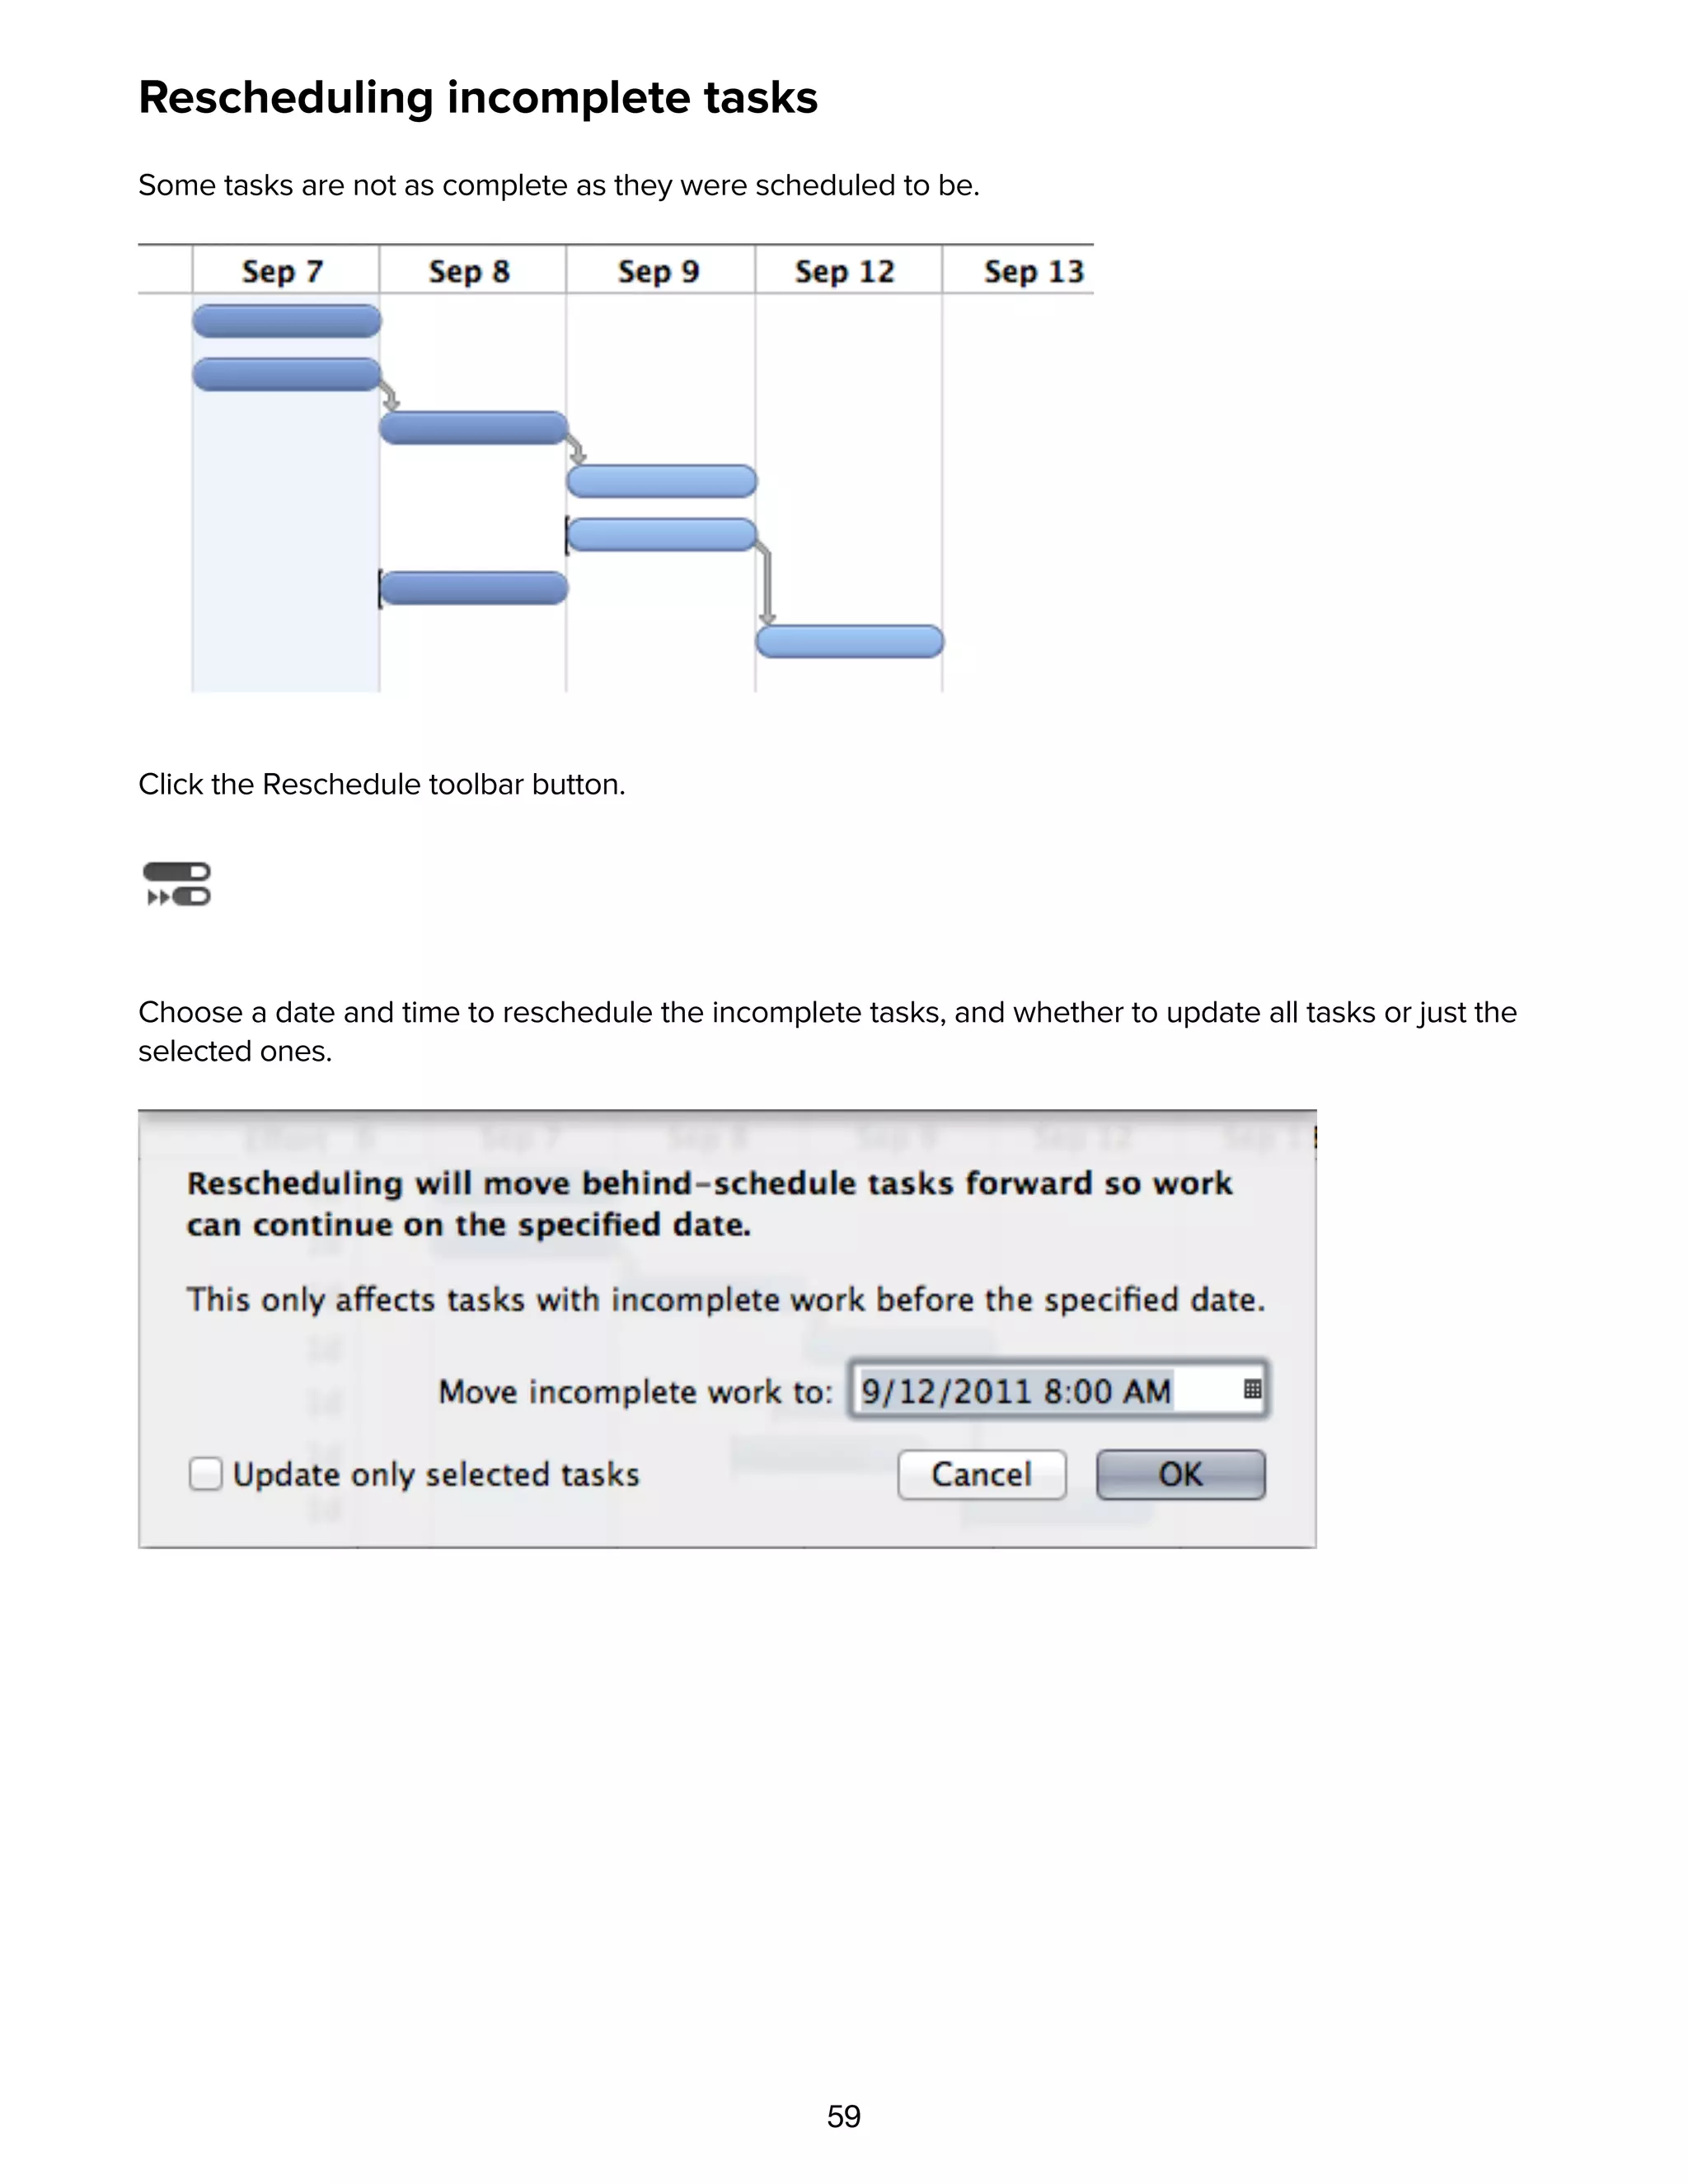
![29
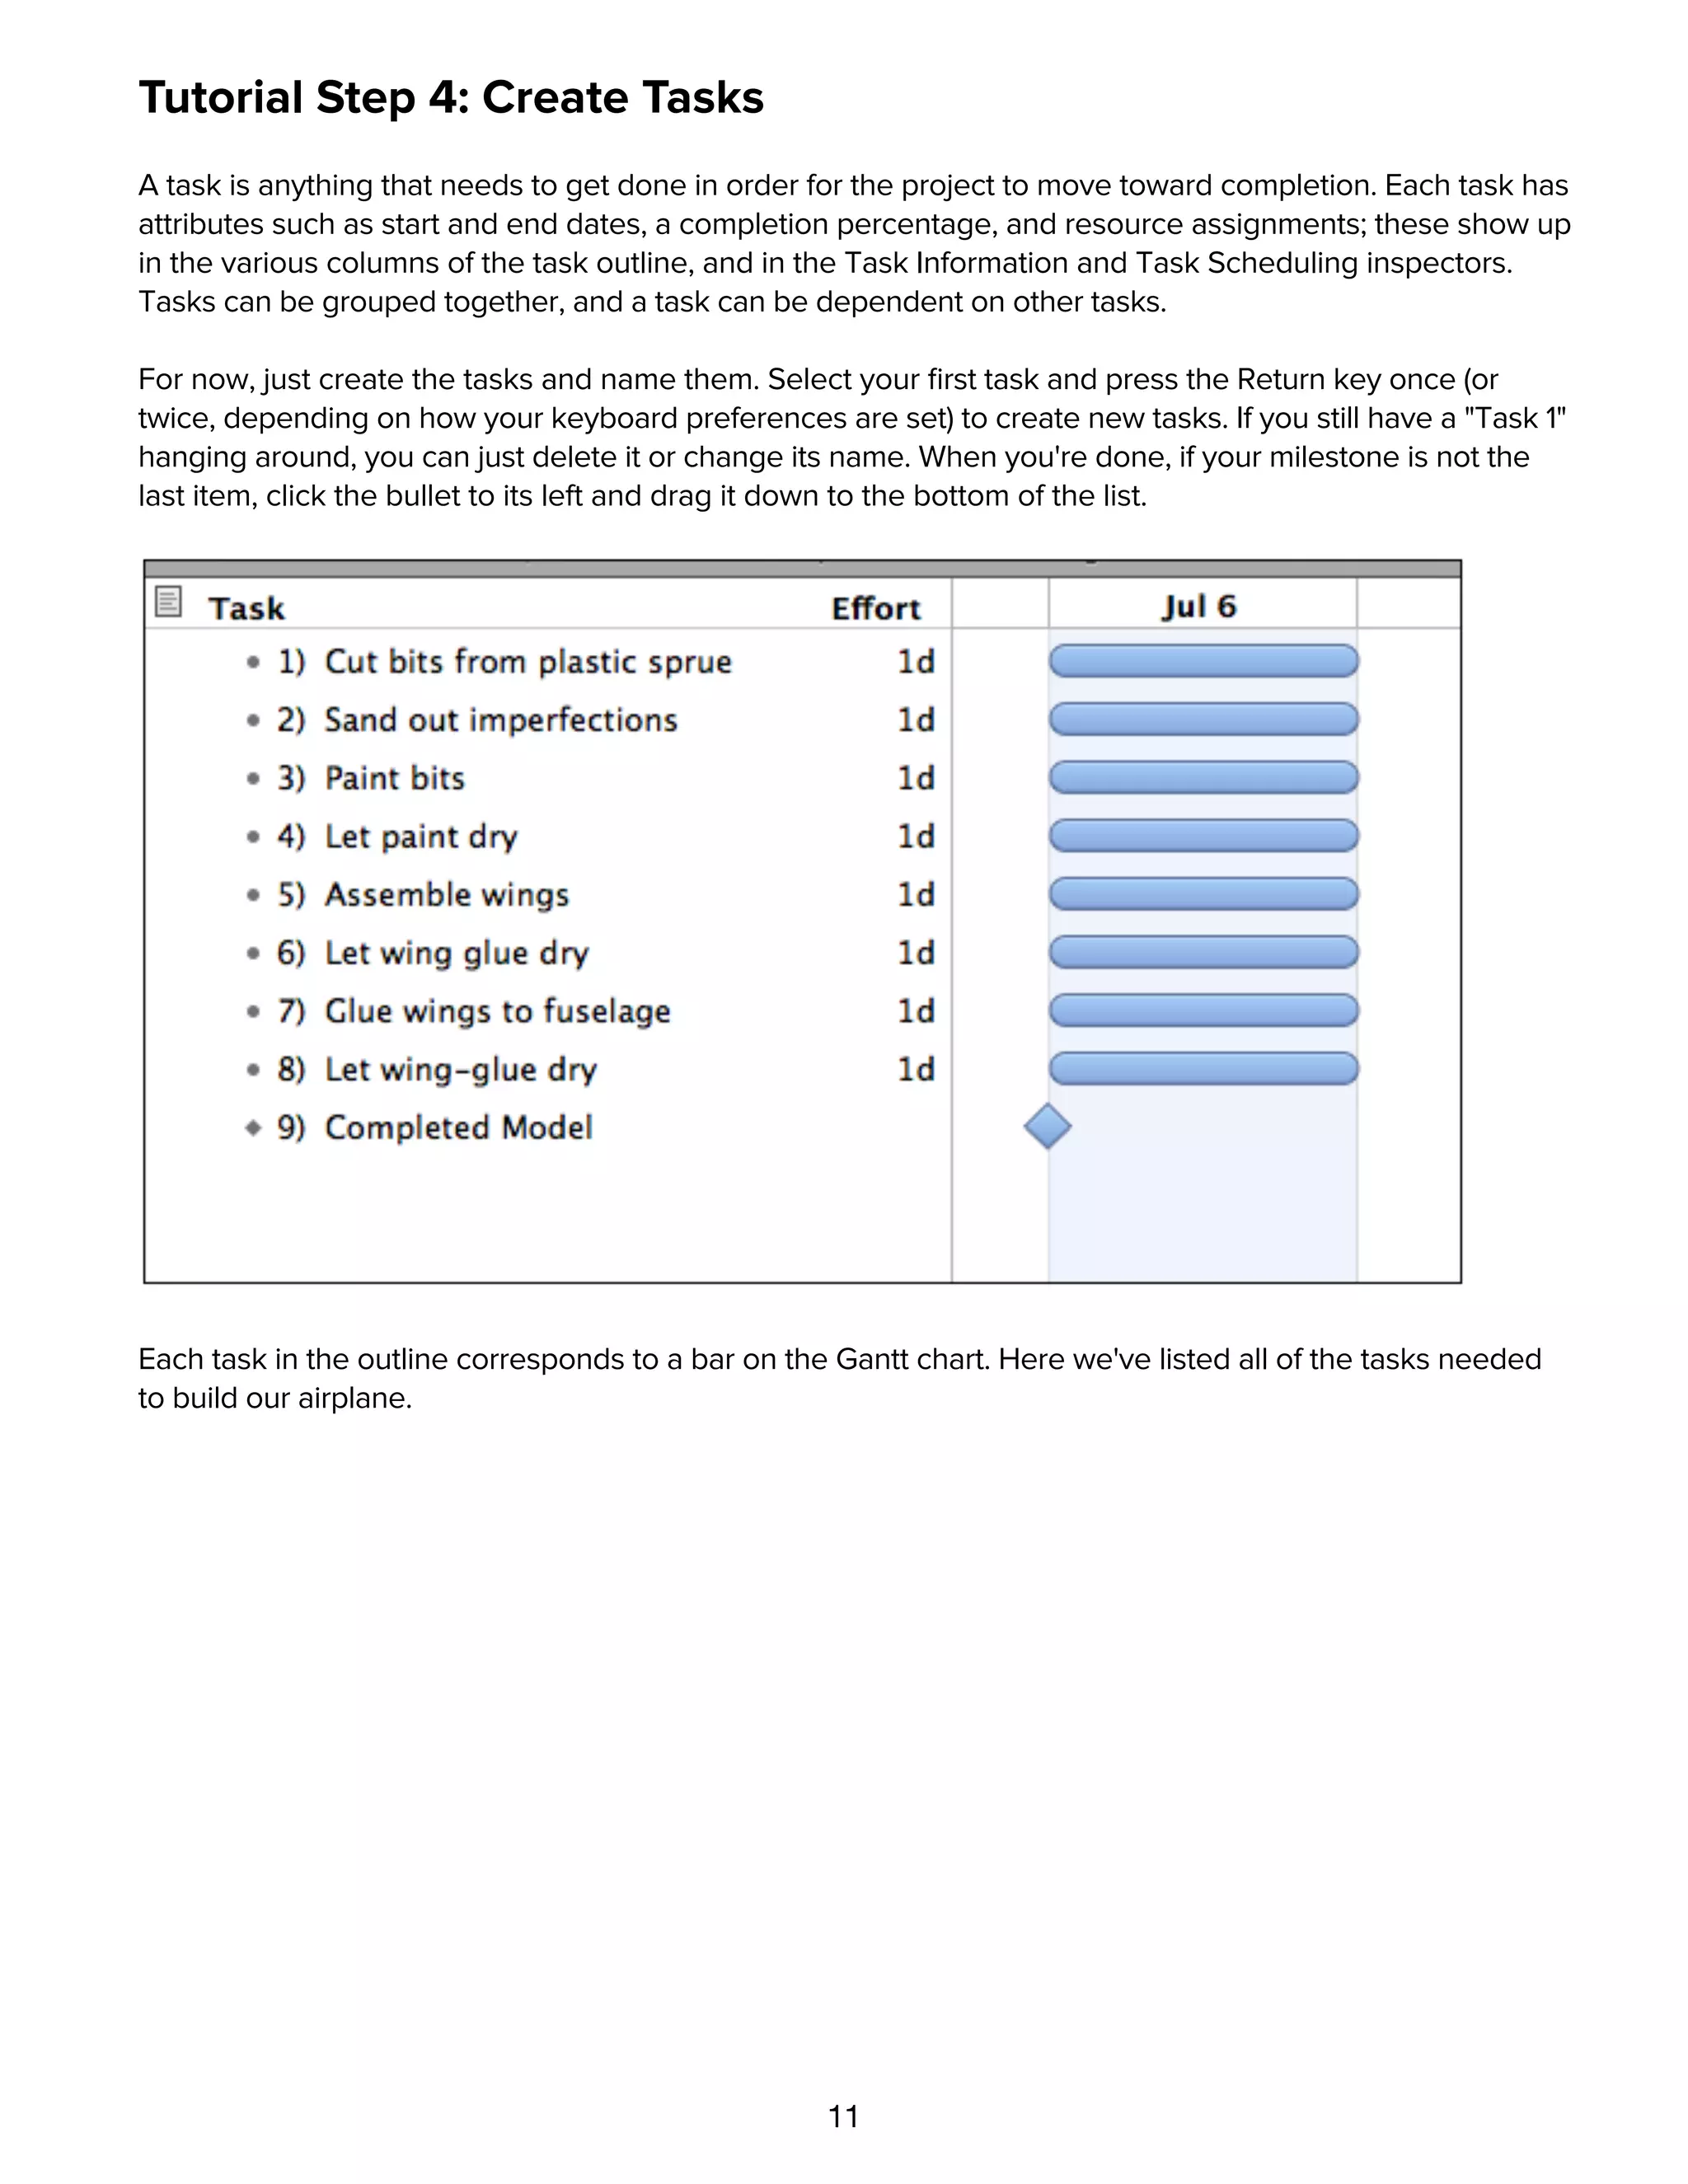
Indent — Command-] (or Tab, depending on preference setting)
Items become children of previous item
Or:
Select some items
Group — Command-Option-L
Items become children of new group
Characteristics of task groups](https://image.slidesharecdn.com/omniplan-2-manual-130602014402-phpapp02/75/Omni-plan-2-manual-29-2048.jpg)


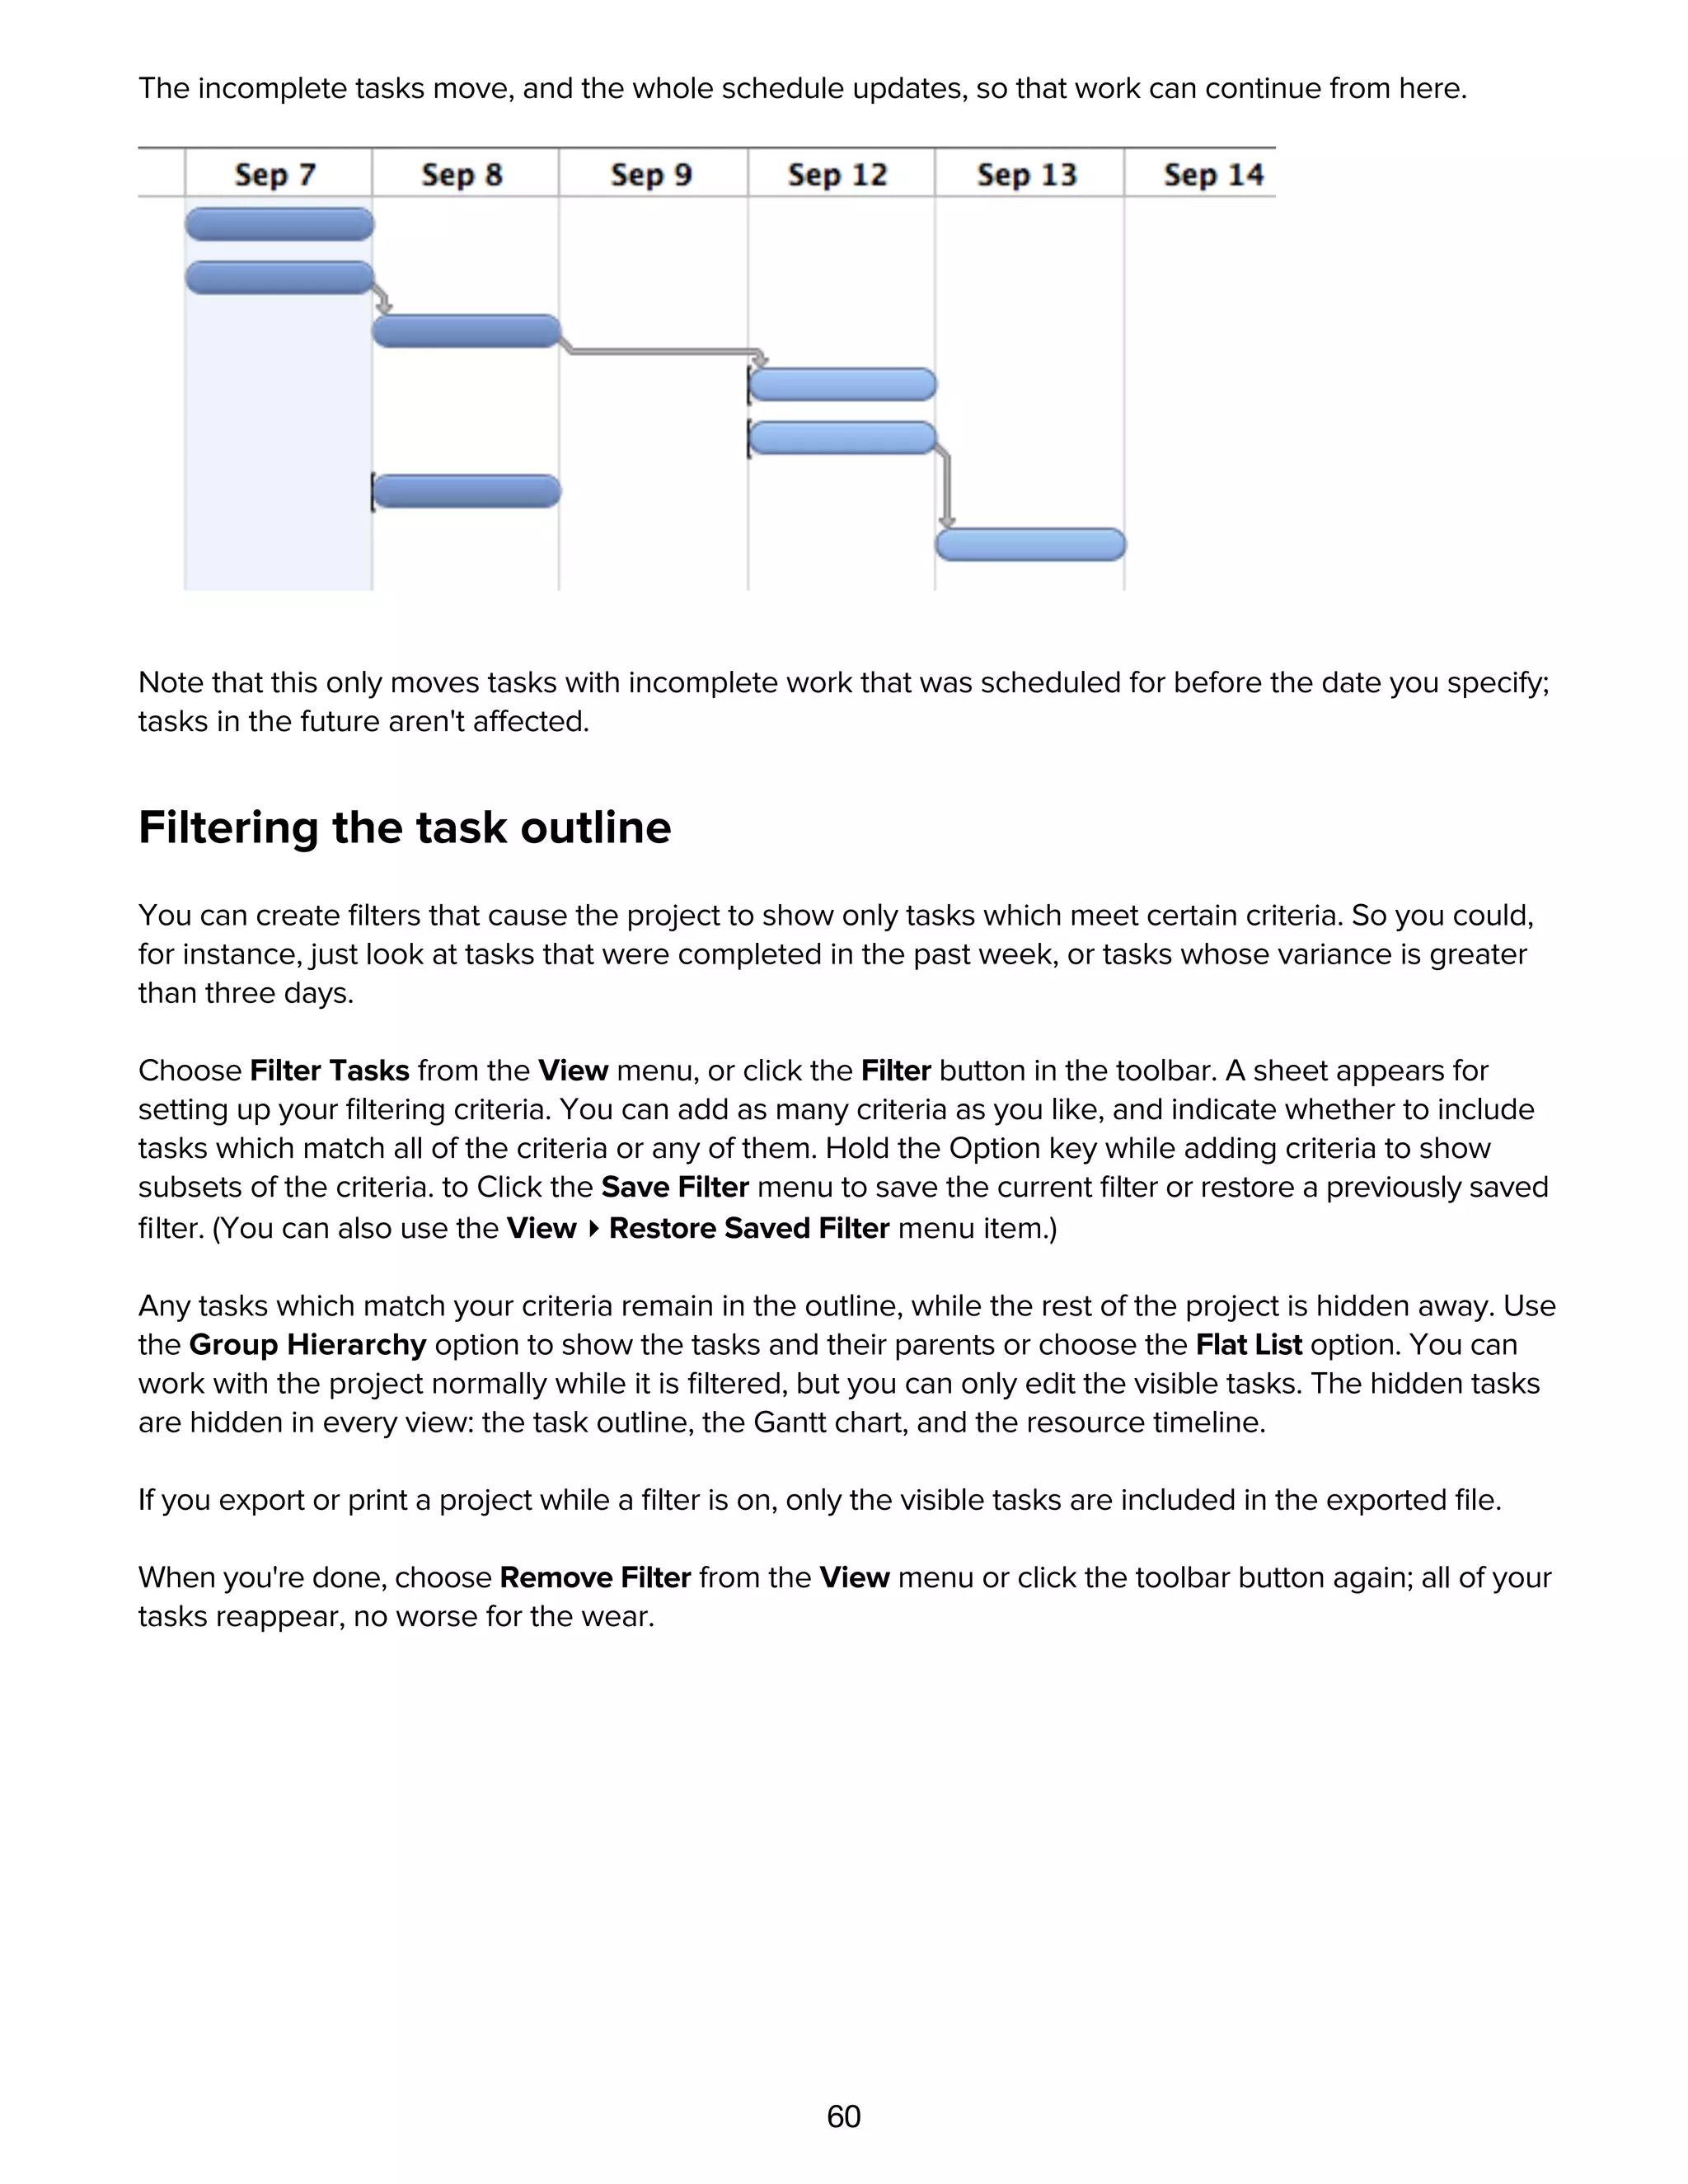
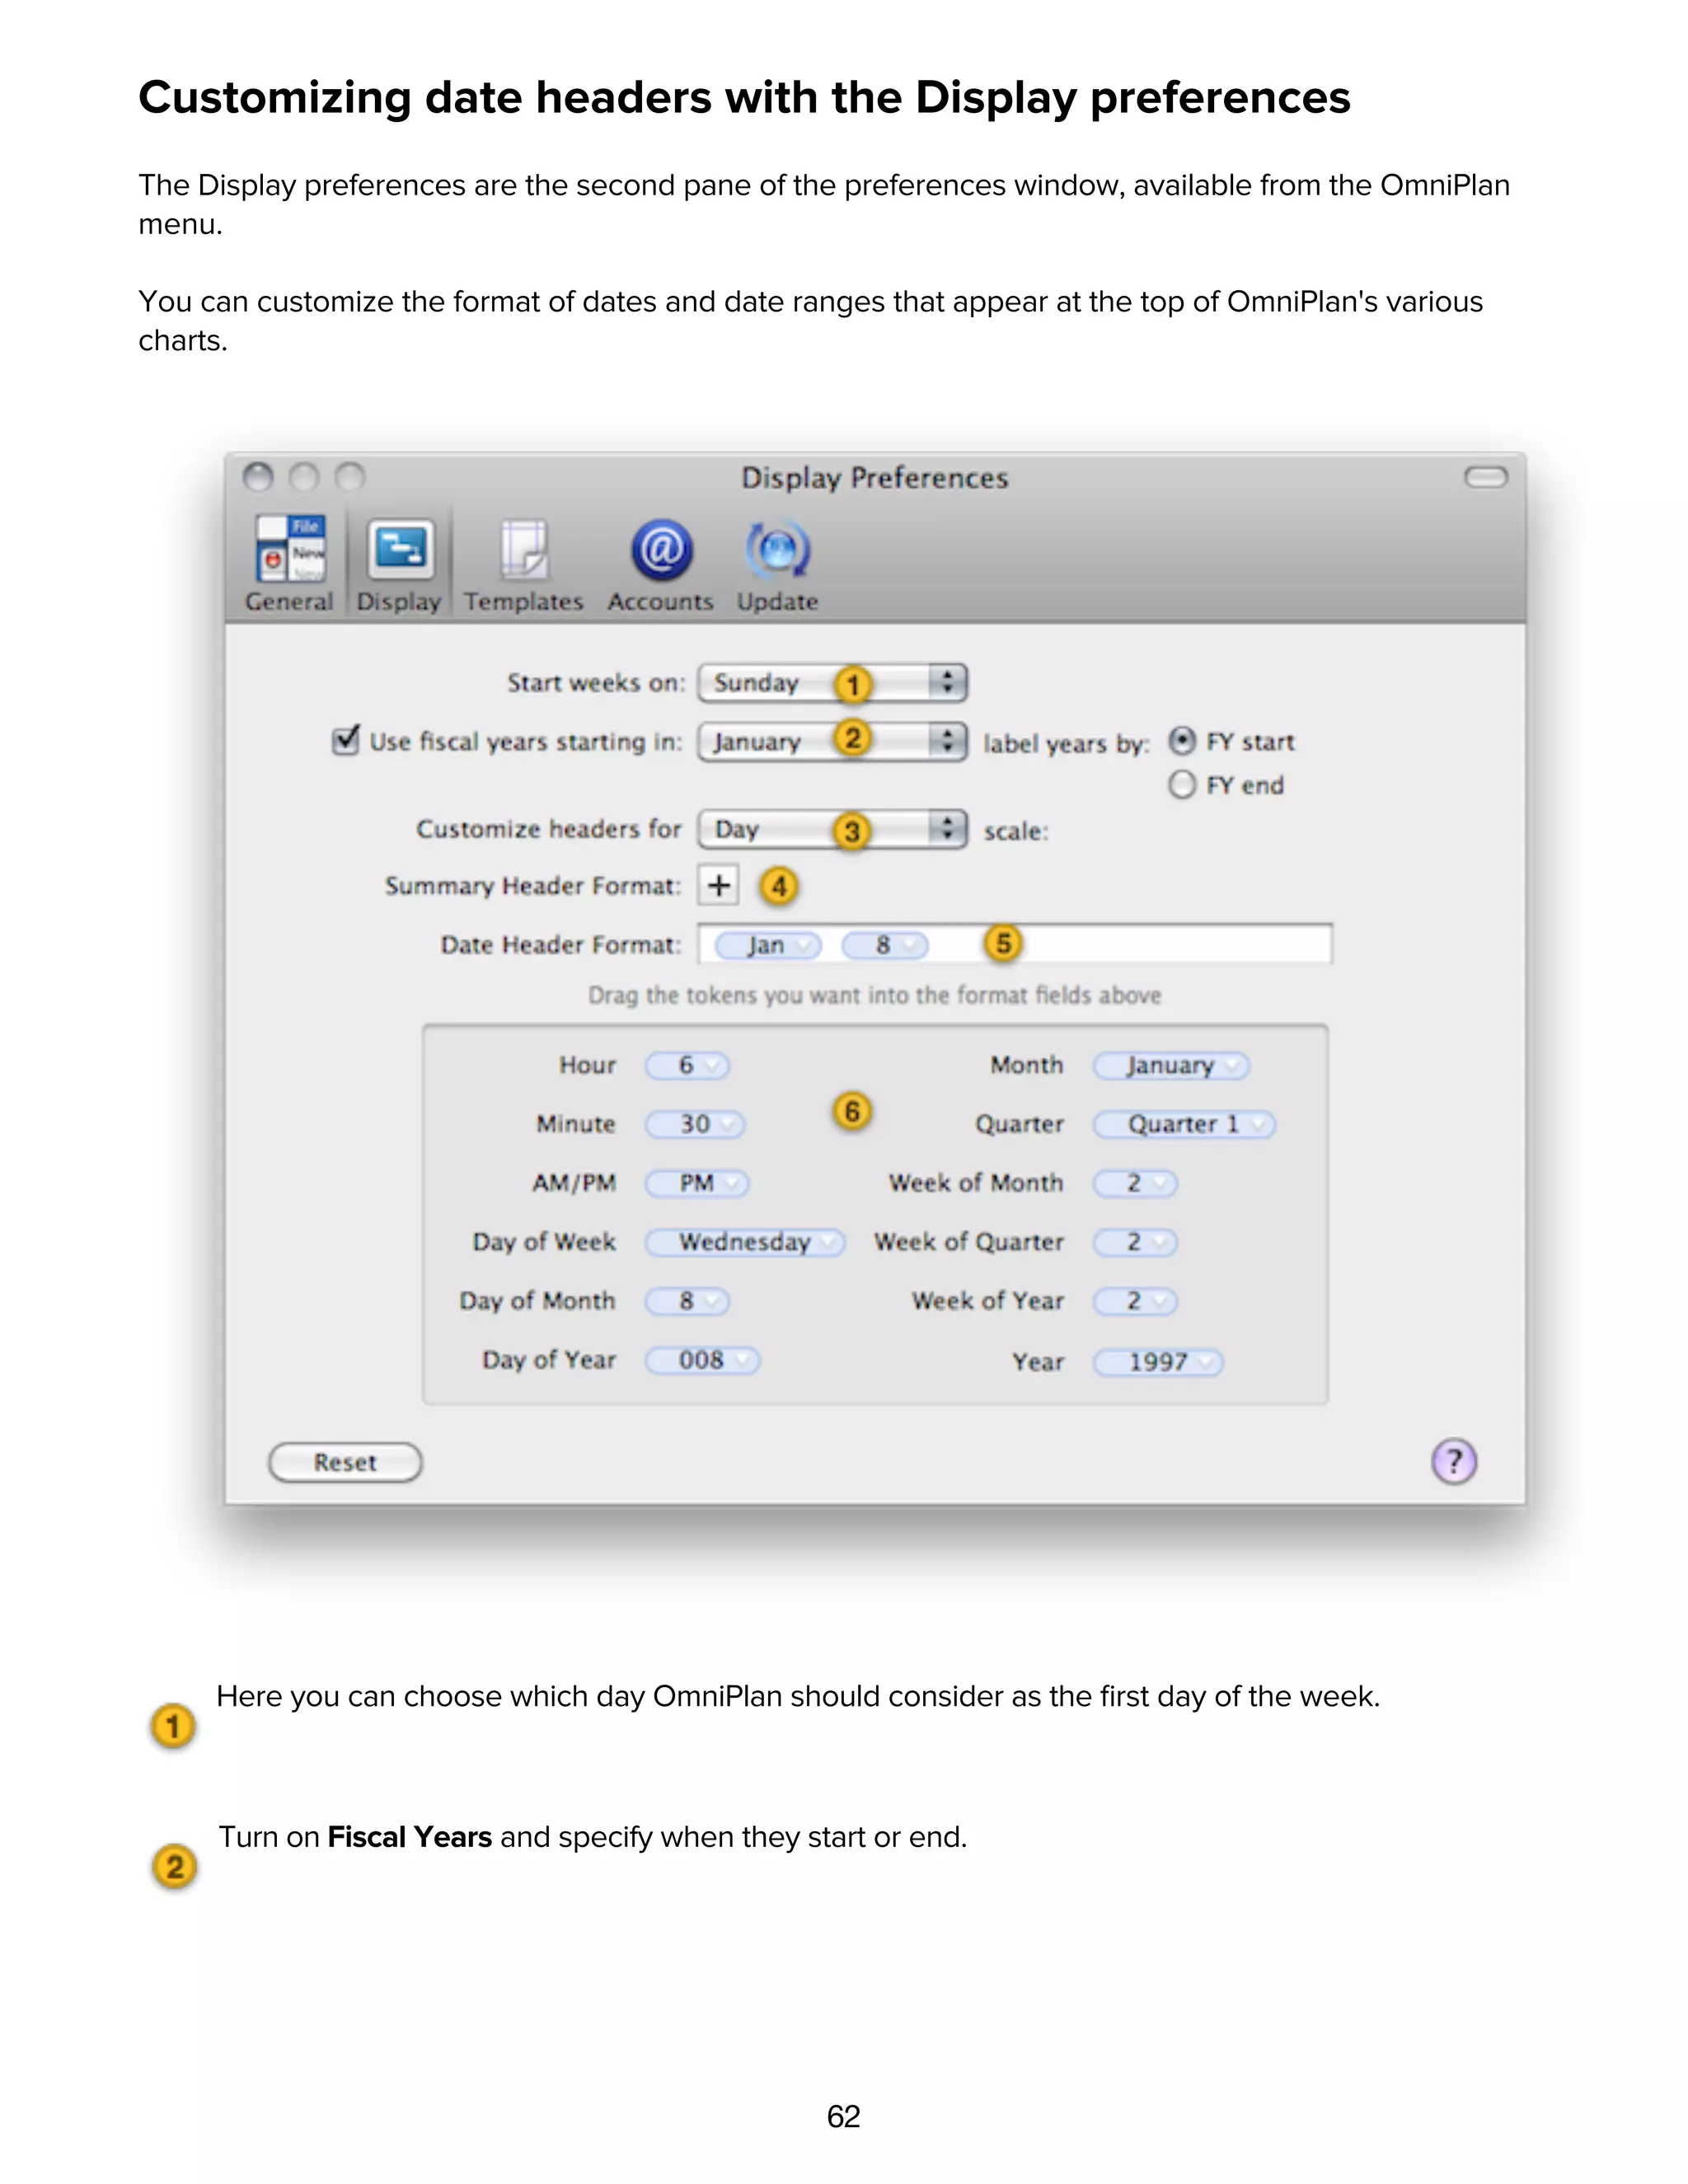
![61
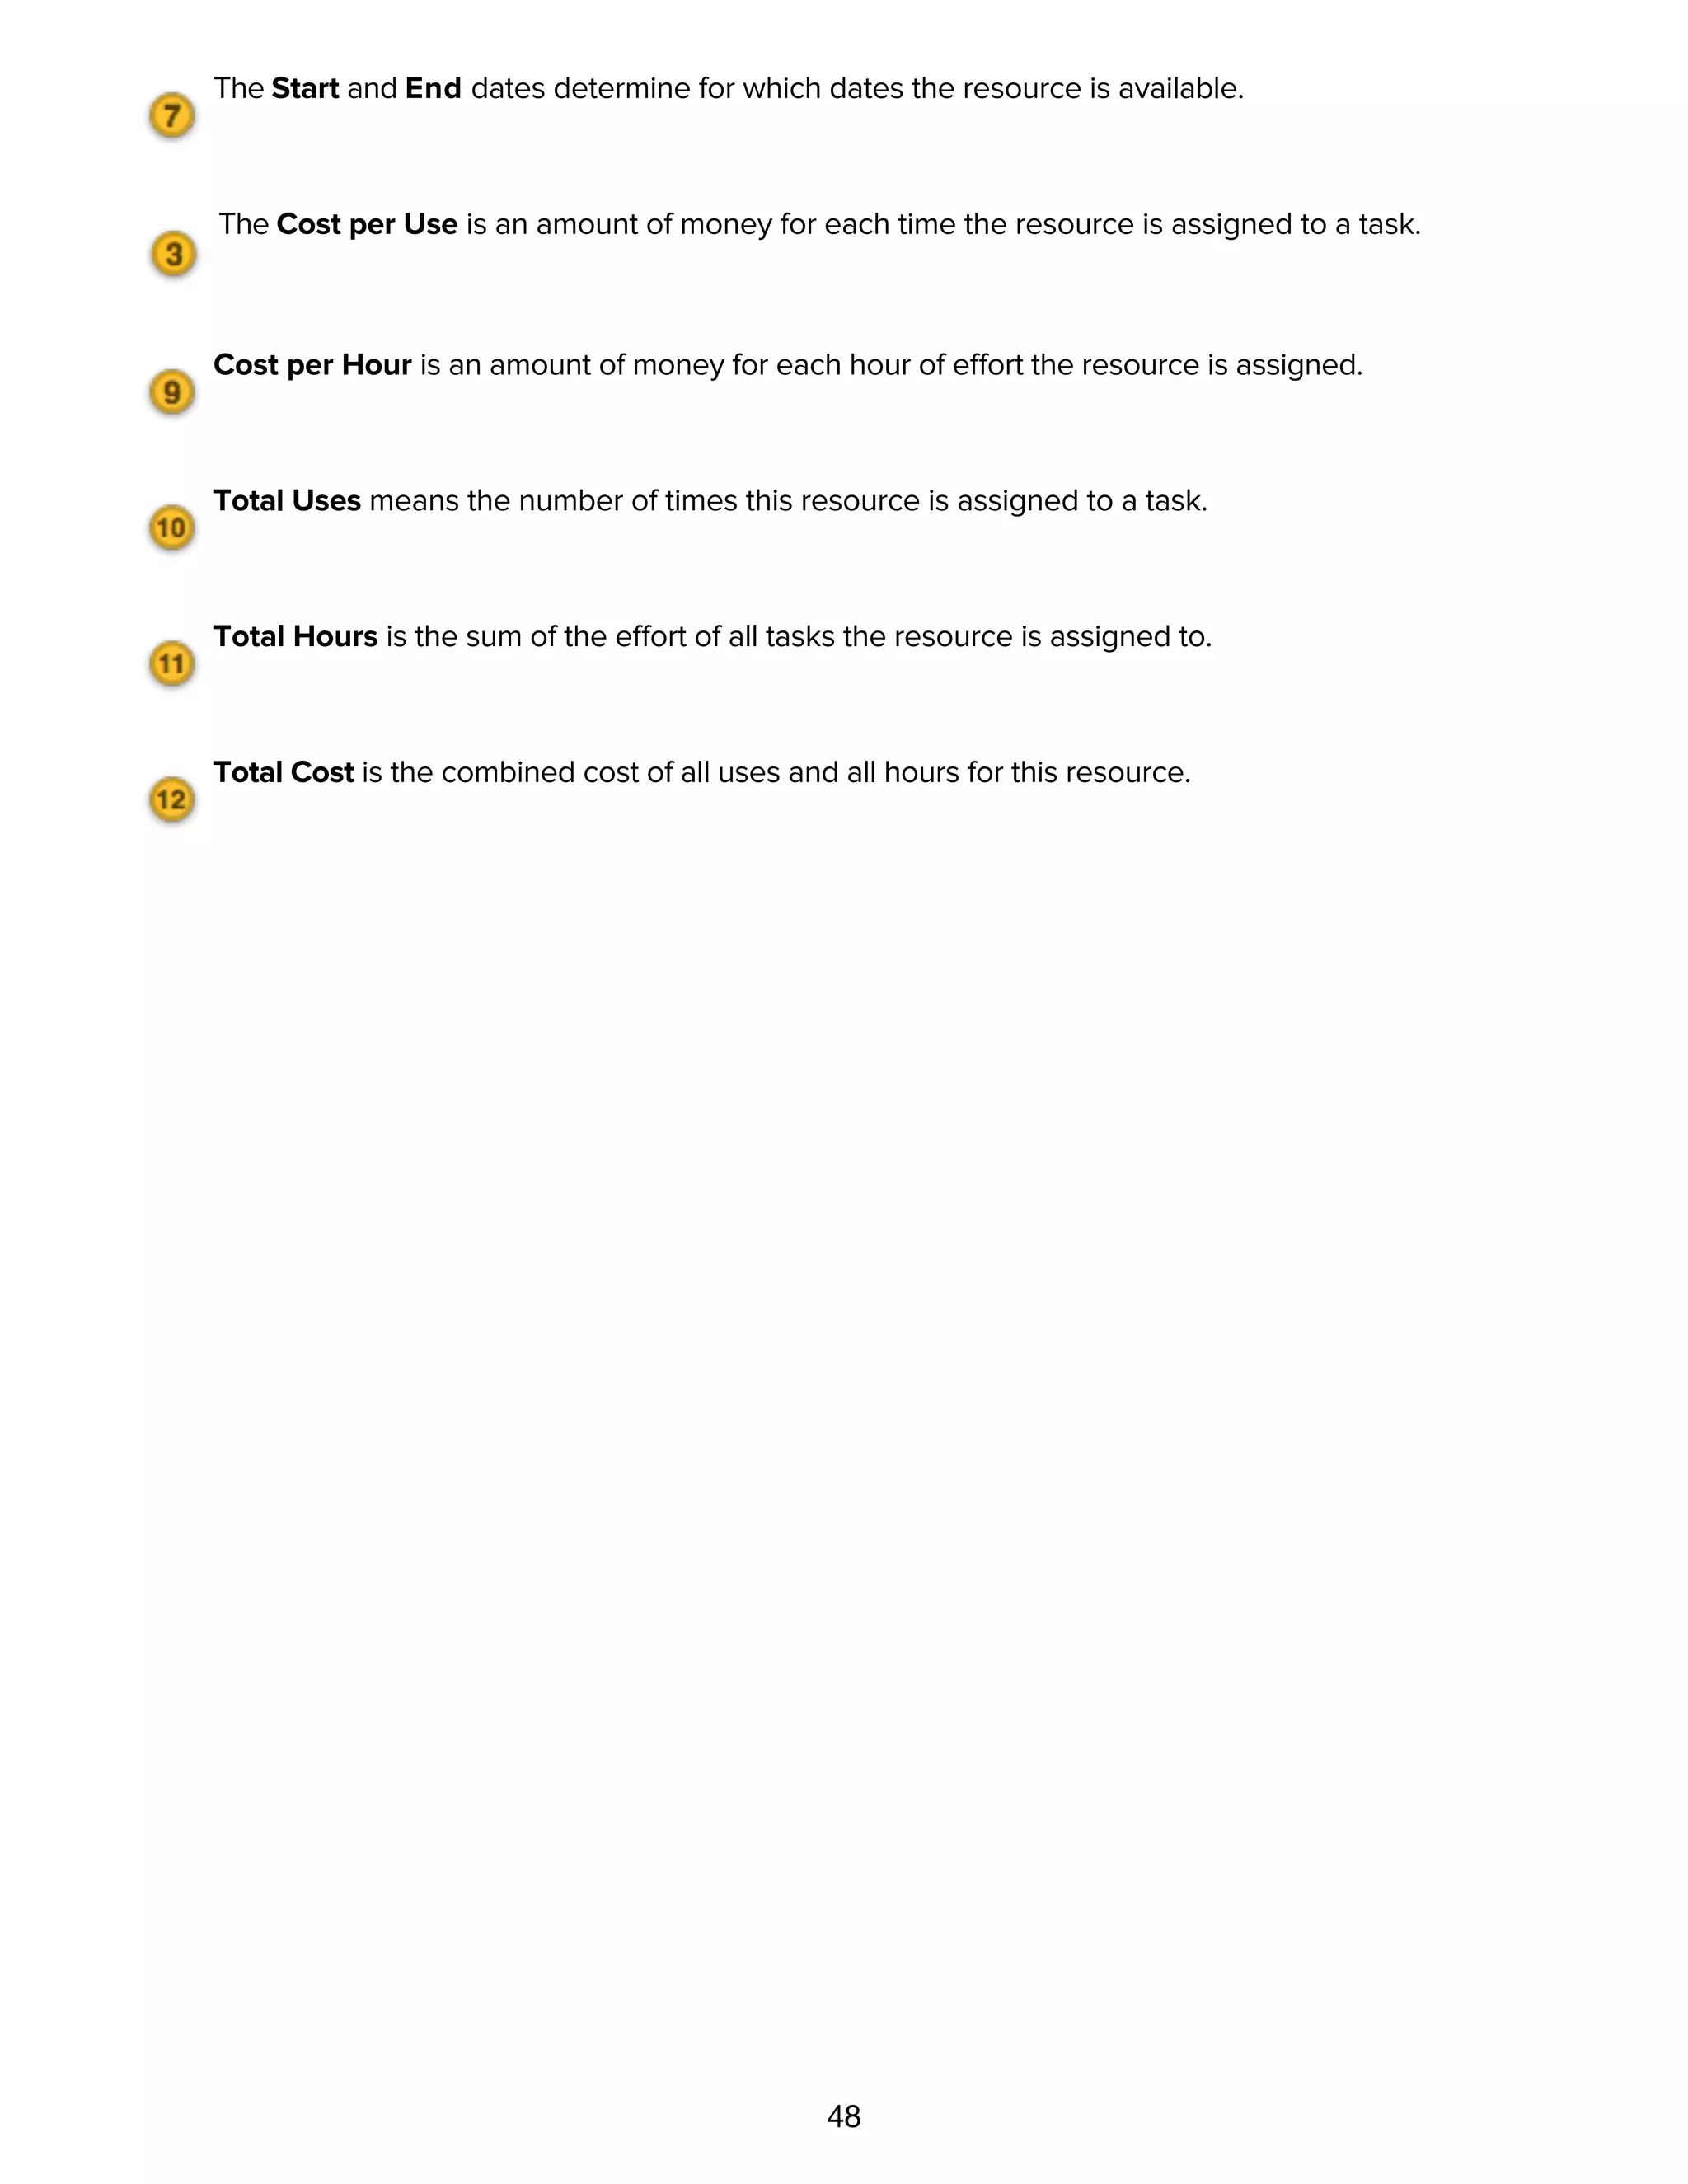
Customizing keyboard behaviors with the General preferences
The way that the Tab and Return keys work can be customized to suit the way you work. These options are
in the General pane of the preferences, available from the OmniPlan menu.
When pressing Tab
You can set the Tab key to do one of two things:
Indent the currently selected item in the outline, thus making it a child of the item above it; pressing Shift-
Tab outdents the selected item.
Move to the next cell in the outline; pressing Shift-Tab moves to the previous cell.
Either way, the Indent and Outdent commands in the Structure menu (and their keyboard shortcuts,
Command-[ or Command-] by default) will always work.
You can always press Option-Tab to type a tab character at the insertion point.
When pressing Return in a cell, create a new row
When you are done editing the contents of a cell in the outline, you might press Return to finish editing. If
this preference is turned on, a new item is then created. Otherwise, the editing just ends and the current
item becomes selected.
Whether this setting is on or off, pressing Return while not editing a cell always creates a new item.
You can hold Command while pressing Return to temporarily change the setting; for example you could
press Command-Return to finish editing and create a new item, even if the setting was turned off.
Customizing date headers with the Display preferences](https://image.slidesharecdn.com/omniplan-2-manual-130602014402-phpapp02/75/Omni-plan-2-manual-61-2048.jpg)


![90
Stylesheet token
{@ApplyStyleSheet include/style.css@} — This token applies a CSS stylesheet to the page,
by specifying the path to the stylesheet. When the export happens, this token is replaced by one of two
things:
If exporting a full HTML report, a link to the stylesheet as an external file. This lets all of the exported HTML
files link to the same stylesheet. <link rel="stylesheet" href="include/style.css"
type="text/css" />
If exporting just one HTML page (a task list or resource list), an embedded copy of the stylesheet. This
keeps everything in one HTML file. <style type="text/css"> [...] </style>
Loop tokens
These work like open/close HTML or XML tags. When the export happens, OmniPlan cycles through
everything between the opening and closing tokens, inserting data about each task or resource. The
Assignments loop has to happen inside the Resources loop, as it lists tasks that are assigned to a particular
resource. Make sure that you include the closing token, and that your task-specific or resource-specific
tokens are between the appropriate loop tokens.
{@Tasks@} and {@/Tasks@} — Lists all tasks in the export; inside this loop you can use task-specific
tokens.
{@Resources@} and {@/Resources@} — Lists all resources in the project; inside this loop you can use
resource-specific tokens and Assignments loops.
{@Assignments@} and {@/Assignments@} — Lists all assigned tasks for a resource; this can only be
used inside the Resources loop. Inside this loop you can use task-specific tokens.
Tokens for tasks
These tokens can be used inside the Tasks loop or the Assignments loop of a resource.
{@ID@} — The task's number in the outline.
{@Title@} — The task name.
{@Start@}, {@End@} — Actual start or end time of the task.
{@Time@} — Duration of the task.
{@Effort@} — Effort value for the task.
{@%Done@} — Completion percentage for the task.
{@Dependencies@} — A list of the task's dependencies, in the same format as the Dependencies
column in the task outline.
{@Cost@} — Cost of the task itself.
{@Resources Cost@} — Cost of the assigned resources.](https://image.slidesharecdn.com/omniplan-2-manual-130602014402-phpapp02/75/Omni-plan-2-manual-90-2048.jpg)


The document provides an overview of the interface and features of the OmniPlan project management software. It describes the toolbar, task view, resource view, calendar view, inspectors, and view options. It then provides a quick tutorial on how to set up a basic project plan by creating tasks, resources, setting durations and dependencies between tasks, and tracking progress. The details section further explains how to set start/end dates and create new tasks and resources.