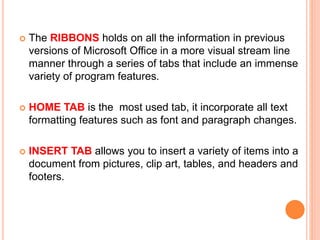
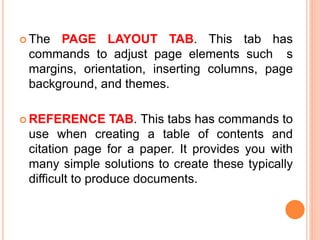
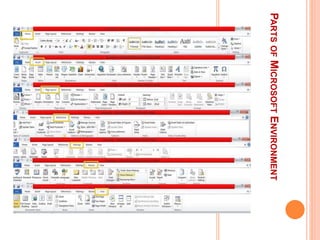
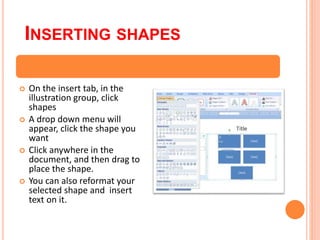
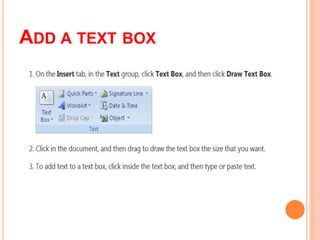
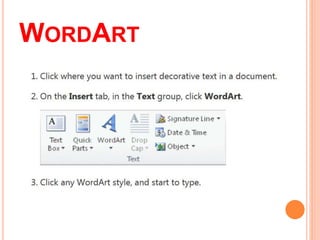
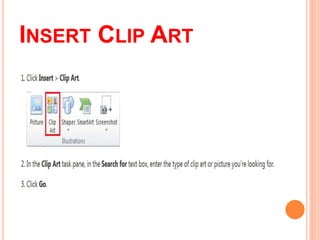
MS Word is a widely used word processing software that allows users to create professional-looking documents easily. It stores documents electronically, making it simple to revise and reuse text. Word's ribbon interface organizes commands into tabs like Home, Insert, and Page Layout. The Home tab contains formatting options while the Insert tab allows adding images, tables, and other items. Word enables customizing page margins, adding headers and footers, formatting text with styles and colors, inserting pictures and graphics, and checking spelling and grammar. Documents can be printed or saved for later use.
2. MICROSOFT WORD
MS Word is an essential software tool in creating a
well presented document. Its ease of use has made Word
as one of the most widely word processing applications
currently on the market
It allows you to create attractive and professional
looking documents quickly and easily. Word process offers
many advantages compared to the traditional typewriter.
Because of the information you enter in a word
processing, your computer stores documents
electronically. It is then easy to revise and reuse text
documents.
4. The RIBBONS holds on all the information in previous
versions of Microsoft Office in a more visual stream line
manner through a series of tabs that include an immense
variety of program features.
HOME TAB is the most used tab, it incorporate all text
formatting features such as font and paragraph changes.
INSERT TAB allows you to insert a variety of items into a
document from pictures, clip art, tables, and headers and
footers.
5. The PAGE LAYOUT TAB. This tab has
commands to adjust page elements such s
margins, orientation, inserting columns, page
background, and themes.
REFERENCE TAB. This tabs has commands to
use when creating a table of contents and
citation page for a paper. It provides you with
many simple solutions to create these typically
difficult to produce documents.
6. MAILING TAB. This tab allows you to create
documents to help when sending out mailings such
as printing envelops, labels and processing mail
merges.
REVIEW TAB. It allows you to create many
changes to your document due to spelling and
grammar issues. It also holds the track changes
features which provides people with the ability to
make notes and changes to a document of another
person.
VIEW TAB. This tab allows you to change the view
of your documents to a different tow page
document or zoom.
9. OPENING OUTLOOK
Click the START button.
Highlights Programs
Highlights Microsoft
Office
Click on MS Word 2010.
You may have a shortcut to Word on your desktop, if so, double click your
icon and MS Word will open. If not, follow the steps below:
10. CREATE A NEW DOCUMENT
Click the FILE TAB and then click NEW.
Under AVAILABLE TEMPLATES, click BLANK
DOCUMENT.
Click create.
11. OPENING DOCUMENT
Click the File tab, an the
click open.
In the left pane of the
open dialog box, click the
drive or the folder that
contains the document
In the right pane of the
Open dialog box, open
the folder that contains
the document that you
want.
Double click the
document to Open.
12. FORMATTING TEXT
Highlights the text you
would like to modify
Click on the drop down
arrow of font style and font
size and select the changes
you would like to make.
While text is highlighted,
you can also click on the
color, bold, italics, or
underline commands to
modify the text even more.
Modifying Fonts
13. CHANGE TEXT CASE
Highlight the text for which
you want to change the
case
On the Home Tab, in the
Font group, click change
case.
Choose an option from the
dropdown list which
includes Sentence case,
lowercase, UPPERCASE,
Capitalize Each Word, and
TOGGLE CASe
You can change the case of selected text in a document by clicking
a single button called Change case on the ribbon.
14. ADDING TEXT EFFECTS
Select the text you
want to add an effect to
On the Home tab, in
the font group, click the
Text Effect
Click the effects you
want.
15. REMOVING THE TEXT EFFECTS
Select the text that you
want to remove an
effect form.
On the Home tab, in
the Front Group, click
Clear Formatting.
16. FORMAT PAINTER
Select the text or graphic
that has the formatting that
you want to copy.
On the Home Tab, in the
clipboard group, single click
format painter.
Bring your cursor to the text.
To stop formatting, press
ESC or click the Format
Painter command again
This allows you to quickly copy the format that you already
applied on your document.
17. CLEAR FORMATTING
Select the text that you
want to clear the
formatting from. Or
press CTRL+A to
select everything in the
document.
On the Home tab, in
the Font group, click
Clear Formatting.
To get rid of all the styles, text effects, and font formatting in
your document, do the following:
19. ADJUSTING LINE SPACING
On the Home Tab, in the
Paragraph group, click Line
Spacing.
Choose your wanted
spacing for your documents.
20. PAGE ORIENTATION
On the Page
Layout tab, in the
Page setup group,
click Orientation.
Click portrait or
landscape.
Change the orientation of your entire document
21. USE DIFFERENT ORIENTATIONS IN THE SAME
DOCUMENT
Highlight the pages or
paragraph that you
want to change to
portrait or landscape
orientation.
22. GETTING PREDEFINED PAGE MARGINS
On the Page
Layout tab, in the
Page Setup group,
click Margins.
Click the margin
type that you want
to apply.
23. CREATE CUSTOM PAGE MARGIN
SETTINGS
On the Page Layout
tab, in the Page Setup
group, click Margins.
At the bottom of the
Margins gallery, click
Custom Margins. The
Page Setup dialog box
appears.
Enter new values for
the margins.
24. ADD HEADER OR FOOTER
On the insert tab, in the
header & footer group,
click Header Or Footer.
Click the header or the
footer you want add on
your document and your
header or footer area will
open.
Type text in the header or
footer area
To return to the body of your
document, click close
header and footer on the
design tab(under header
and footer tools)
25. REMOVE PAGE NUMBERS, HEADER,
AND FOOTER
Click on the header,
footer or page number
command
A drop down menu will
appear
Click remove at the
bottom of the menu.
26. BULLETED OR NUMBERED LIST
Click the area where
you would like your list
to appear or highlight
the text you would like
to be in a list
Go to home tab, in the
paragraph group, click
bullets, or numbering
A bullet(s) or number(s)
will be inserted
29. INSERTING SHAPES
On the insert tab, in the
illustration group, click
shapes
A drop down menu will
appear, click the shape you
want
Click anywhere in the
document, and then drag to
place the shape.
You can also reformat your
selected shape and insert
text on it.
36. ADVANCED FORMATTING
TECHNIQUES
Go to the page lay out
tab, in the page set up
group, click columns
Click the lay out that you
want. Your document will
be formatted in columns.
CREATE COLUMNS
37. SMART ART GRAPHIC
On the insert tab, in the
illustrations group, click
smart art
In the choose a smart
art graphic dialog box,
click the type of lay out
that you want
Enter your text.
38. INSERTING A TABLE
Click where you want
to insert a table.
On the insert tab, in
tables group. Click
table
Click and hold your
mouse then drag to
select the number of
your row and column.
39. FINALIZING DOCUMENT
Put your cursor over the misspelled
word and right click.
A drop box will appear with correct
spellings of the word.
Highlight and left click the word you
want to replace the incorrect word
with.
40. SPELLING AND GRAMMAR
Click on the Review
Tab.
Click on the Spelling
and Grammar
Command. It will
automatically appear
once you click it.
You can correct any
spelling or grammar
issue with the box.
41. PRINT PREVIEW
Click the File tab and
click Print. To go back
to your document, click
the File
A preview of your
document
automatically appears.
42. PRINT
The Print tab is the place
to go to make sure you
are printing what you
want.
Click the File Tab.
Click the print command
to print a document.
Click the Print button to
print your document.
43. SAVING DOCUMENT
To save your
document, click the
icon Save (for new
created document) and
go to the folder you
want to save your
document then click
SAVE.
To save a already
created document
(those document you
just edited and you
want to save it as a
new file) Click Save us
button on the File Tab
and go to the folder
you want to save your
file and click Save.
For more choices, point to outline, Shadow, Reflection, or glow, and then click the effects that you want to add.
Double click the Format Painter button if you want to change the format of multiple selections in your document.
The clear formatting command will not remove highlighting from your text. To clear highlighting, select the highlighted text, and then click the arrow next to Text Highlight Color and click ‘No Color’.
If your document contains multiple sections, the new margin type will only be applied to the current section. If your document contains multiple sections and you have multiple sections selected, the new margin type will be applied to each section you have selected.
Note :
To change the default margins, click Margins after you select a new margin, and then click Custom Margins. In the Page Setup dialog box, click the Set As Default button. The new default settings are saved in the template on which the document is based. Each new document based on that template automatically uses the new margin settings.
To change the margins for part of a document, select the text, and then set the margins that you want by entering the new margins in the Page Setup dialog box. In the Apply to box, click Selected text. Microsoft Word automatically inserts section breaks before and after the text that has the new margin settings. If your document is already divided into sections, you can click in a section or select multiple sections and then change the margins.
Most printers require a minimum width for margin settings, because they can't print all the way to the edge of the page. If you try to set margins that are too narrow, Microsoft Word displays the message One or more margins are set outside the printable area of the page.
To prevent text from being cut off, click Fix to automatically increase the margin width. If you ignore the message and try to print the document as it is, Word displays another message asking whether you want to continue.
The minimum margin settings depend on your printer, printer driver, and paper size. To learn about the minimum margin settings, check your printer manual.
A Left Tab stop sets the start position of text that will then run to the right as you type.
A Center Tab stop sets the position of the middle of the text. The text centers on this position as you type.
A Right Tab stop sets the right end of the text. As you type, the text moves to the left.
A Decimal Tab stop aligns numbers around a decimal point. Independent of the number of digits, the decimal point will be in the same position. (You can align numbers around a decimal character only; you cannot use the decimal tab to align numbers around a different character, such as a hyphen or an ampersand symbol.)
A Bar Tab stop doesn't position text. It inserts a vertical bar at the tab position.
Note To add multiple pictures, press and hold CTRL while you click the pictures, and then click Insert.