SlideShare a Scribd company logo
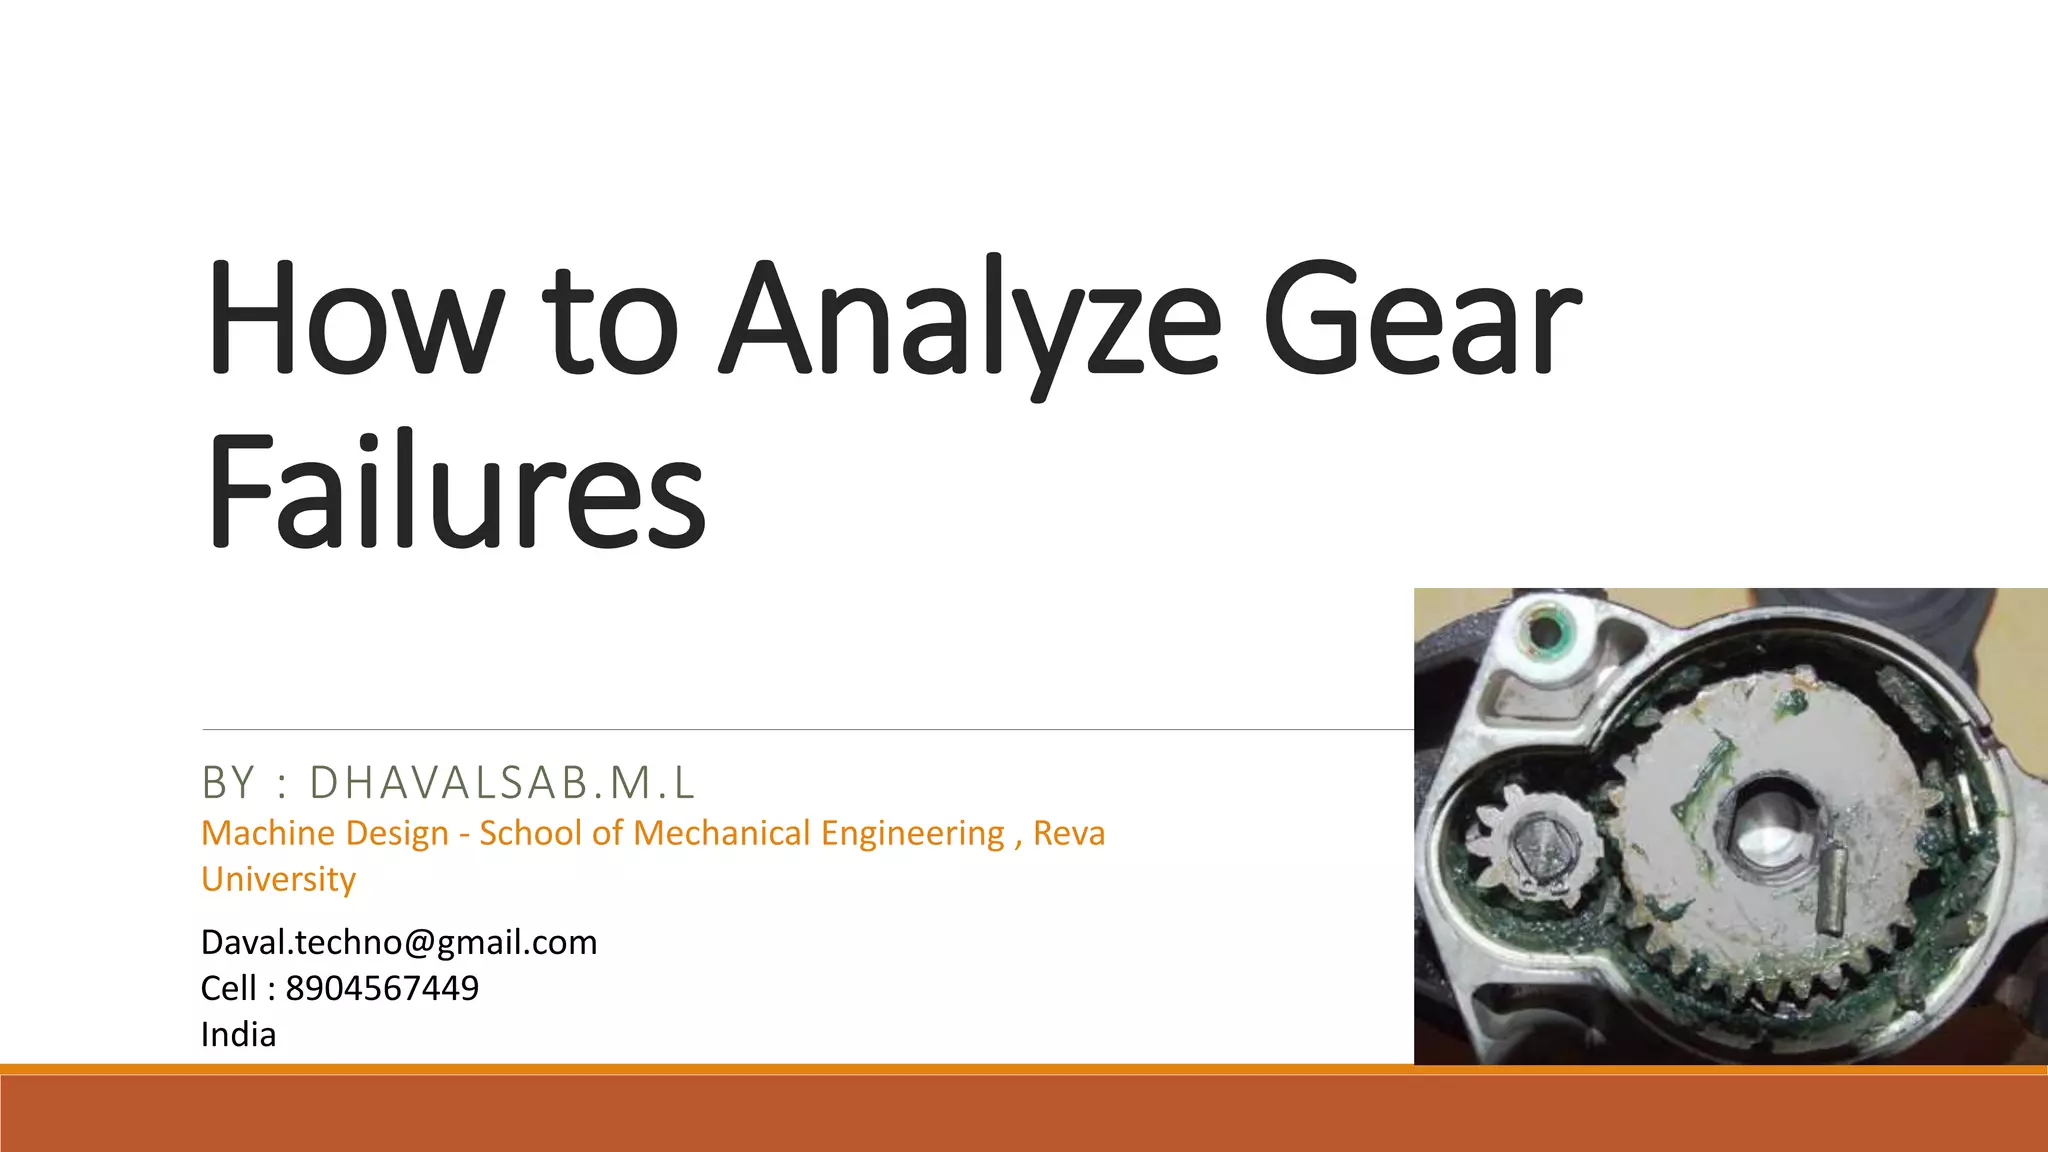
How to Analyze Gear
Failures
BY : DHAVALSAB.M.L
Daval.techno@gmail.com
Cell : 8904567449
India
Machine Design - School of Mechanical Engineering , Reva
University
When and where.
the engineer conducting the analysis should inspect the failed components as soon after failure as
possible. If an early inspection is not possible, someone at the site must preserve the evidence based on
instructions from the analyst.
Nature of failure
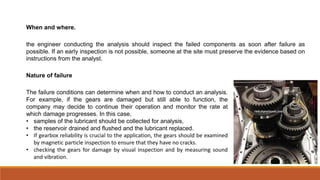
The failure conditions can determine when and how to conduct an analysis.
For example, if the gears are damaged but still able to function, the
company may decide to continue their operation and monitor the rate at
which damage progresses. In this case,
• samples of the lubricant should be collected for analysis,
• the reservoir drained and flushed and the lubricant replaced.
• If gearbox reliability is crucial to the application, the gears should be examined
by magnetic particle inspection to ensure that they have no cracks.
• checking the gears for damage by visual inspection and by measuring sound
and vibration.
Preparing for Inspection
Verify that the gearbox drawings, disassembly tools and adequate inspection facilities are available.
Ask for as much background information as possible, including manufacturer’s
• Part numbers,
• Gear and bearing runtime (hr),
• Service history and
• Lubricant type.
Failure Inspection
review the background information and service history with the contact person. Then interview those
involved in the design, installation, operation, maintenance and failure of the gearbox.
Visual examination
Before disassembling the gearbox, thoroughly inspect its exterior. For example, the condition of seals and
keyways must be recorded before disassembly. Otherwise, it will be impossible to determine when any damage may
have occurred to these parts. Gear tooth contact patterns should be taken before completely disassembling the
gearbox.
Continued next page
Bearing :
It is important to inspect the bearings because they often provide clues as to
the cause of gear failure. For example:
•Bearing wear can cause excessive radial clearance or end play that
misaligns the gears.
•Bearing damage may indicate corrosion, contamination, electrical
discharge or lack of lubrication.
•Plastic deformation between rollers and raceways may indicate overloads.
•Gear failure often follows bearing failure.
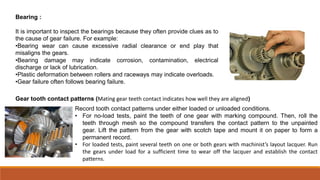
Gear tooth contact patterns (Mating gear teeth contact indicates how well they are aligned)
Record tooth contact patterns under either loaded or unloaded conditions.
• For no-load tests, paint the teeth of one gear with marking compound. Then, roll the
teeth through mesh so the compound transfers the contact pattern to the unpainted
gear. Lift the pattern from the gear with scotch tape and mount it on paper to form a
permanent record.
• For loaded tests, paint several teeth on one or both gears with machinist’s layout lacquer. Run
the gears under load for a sufficient time to wear off the lacquer and establish the contact
patterns.
Document observations
Describe all important observations in writing, using sketches and photographs where
needed. Identify and mark each component (including gear teeth and bearing rollers), so
it is clearly identified in the written description, sketches and photographs. It is especially
important to mark all bearings, including inboard and outboard sides, so their location
and position in the gearbox can be determined later.
Gear geometry.
obtain the following geometry data, either from the gears and gear housing or their drawings:
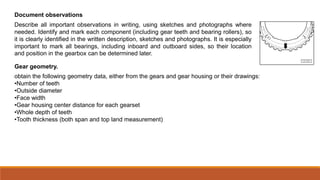
•Number of teeth
•Outside diameter
•Face width
•Gear housing center distance for each gearset
•Whole depth of teeth
•Tooth thickness (both span and top land measurement)
Specimens for laboratory tests
Formulate hypotheses regarding the cause of failure
• select specimens for laboratory testing. Take broken parts for laboratory evaluation or, if this is not possible, ensure
that they will be preserved for later analysis.
• Oil samples can be very helpful. But, an effective lubricant analysis depends on how well the sample represents the
operating lubricant
• To take samples from a gearbox drain valve, first discard stagnant oil from the valve. Then take a sample at the start,
middle and end of a drain to avoid stratification. Examine the oil filter and magnetic plug for wear debris and
contaminants.
Determine Type of Failure
Now it’s time to examine all of the information and determine how the gear (or gears) failed.
Several failure modes may be present and you need to identify which is the primary mode, and which are
secondary modes that may have contributed to failure
An understanding of these four common modes will enable you to
identify the cause of failure.
Bending fatigue.
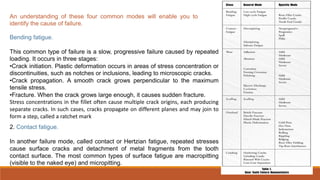
This common type of failure is a slow, progressive failure caused by repeated
loading. It occurs in three stages:
•Crack initiation. Plastic deformation occurs in areas of stress concentration or
discontinuities, such as notches or inclusions, leading to microscopic cracks.
•Crack propagation. A smooth crack grows perpendicular to the maximum
tensile stress.
•Fracture. When the crack grows large enough, it causes sudden fracture.
Stress concentrations in the fillet often cause multiple crack origins, each producing
separate cracks. In such cases, cracks propagate on different planes and may join to
form a step, called a ratchet mark
2. Contact fatigue.
In another failure mode, called contact or Hertzian fatigue, repeated stresses
cause surface cracks and detachment of metal fragments from the tooth
contact surface. The most common types of surface fatigue are macropitting
(visible to the naked eye) and micropitting.
3. Wear.
Gear tooth surface wear involves removal or displacement of material due to mechanical, chemical or
electrical action. The three major types of wear are adhesion, abrasion and polishing.
• Adhesion is the transfer of material from the surface of one tooth to that of another due to welding and tearing. It
is confined to oxide layers on the tooth surface
• Adhesion is categorized as mild or moderate,
• whereas severe adhesion is termed scuffing
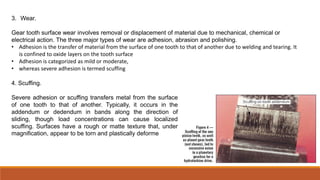
4. Scuffing.
Severe adhesion or scuffing transfers metal from the surface
of one tooth to that of another. Typically, it occurs in the
addendum or dedendum in bands along the direction of
sliding, though load concentrations can cause localized
scuffing. Surfaces have a rough or matte texture that, under
magnification, appear to be torn and plastically deforme
Tests and Calculations Aid Analysis
In many cases, failed parts and inspection data don’t yield enough information to determine the cause of
failure. When this happens, gear design calculations and laboratory tests are usually needed to develop and
confirm a hypothesis for the probable cause.
Gear design calculations. The gear geometry data collected earlier aids in estimating tooth contact stress,
bending stress, lubricant film thickness, and gear tooth contact temperature based on transmitted loads for
each gear. These values are calculated according to American Gear Manufacturers Association standards such
as ANSI/AGMA 2001-B88 for spur and helical gears. Comparing these calculated values with AGMA allowable
values helps to determine the risk of macropitting, bending fatigue and scuffing.
Conduct nondestructive tests before any destructive tests.
These nondestructive tests, which aid in detecting material or manufacturing defects and provide rating
information, include:
•Surface hardness and roughness.
•Magnetic particle inspection.
•Acid etch inspection.
•Gear tooth accuracy inspection.
Then conduct destructive tests to evaluate material and heat treatment. These tests include:
•Microhardness survey.
•Microstructural determination using various acid etches.
•Determination of grain size.
•Determination of nonmetallic inclusions.
•SEM microscopy to study fracture surfaces.
Finally, after thoroughly testing the hypotheses against the evidence, you reach a conclusion about the most
probable cause of failure. In addition, you may identify secondary factors that contributed to the failure
Reporting Results
A failure analysis report should describe all relevant facts found
during the analysis, the inspections and tests, weighing of
evidence, conclusions and recommendations. Present the data
succinctly, preferably in tables or figures. Good photos are
especially helpful for portraying failure characteristics.
The report usually contains recommendations for repairing the
equipment or making changes in equipment design or
operation to prevent future failures.
Any Questions ?
Thank you

More Related Content

What's hot

Failure analysis of helical gear
Failure analysis of  helical gearFailure analysis of  helical gear
Failure analysis of helical gear
Er. BHUSHAN SARISE
 
Oil Analysis Fundamentals Lubricant Condition Monitoring
Oil Analysis FundamentalsLubricant Condition MonitoringOil Analysis FundamentalsLubricant Condition Monitoring
Oil Analysis Fundamentals Lubricant Condition Monitoring
Sirat Mahmood
 
Lubrication,Types & Stribeck Curve
Lubrication,Types & Stribeck CurveLubrication,Types & Stribeck Curve
Lubrication,Types & Stribeck Curve
Tarique Memon
 
Gas welding and Gas cutting Basics
Gas welding and Gas cutting BasicsGas welding and Gas cutting Basics
Gas welding and Gas cutting Basics
Melwin Dmello
 
5 common types of bearing damage
5 common types of bearing damage5 common types of bearing damage
5 common types of bearing damage
Matt Schroeder
 
Different types of gear & maintenance By Md. Raijul Islam
Different types of gear & maintenance By Md. Raijul IslamDifferent types of gear & maintenance By Md. Raijul Islam
Different types of gear & maintenance By Md. Raijul Islam
Md Raijul Islam
 
Lubrication and its types
Lubrication and its typesLubrication and its types
Lubrication and its types
Amr Seif
 
Failure analysis & test procedure #1 rev
Failure analysis & test procedure #1 revFailure analysis & test procedure #1 rev
Failure analysis & test procedure #1 rev
Bambang Afrinaldi
 
Friction and wear
Friction and wearFriction and wear
Friction and wear
Tarique Memon
 
Shaft alignment
Shaft alignmentShaft alignment
Shaft alignment
dinusha imanka
 
Fag roller bearing damages (excellent)
Fag   roller bearing damages (excellent)Fag   roller bearing damages (excellent)
Fag roller bearing damages (excellent)
Mohd Zin Mohd Amin
 
Coupling Alignment
Coupling Alignment Coupling Alignment
Coupling Alignment
Ashish Kumar Jain
 
Failure analysis
Failure analysisFailure analysis
Tribology Aspects .Cause of friction,stick and slip phenomenon,sliding and ro...
Tribology Aspects .Cause of friction,stick and slip phenomenon,sliding and ro...Tribology Aspects .Cause of friction,stick and slip phenomenon,sliding and ro...
Tribology Aspects .Cause of friction,stick and slip phenomenon,sliding and ro...
somesh123patani
 
Fundamentals of Lubrication, Tribology of Materials.pptx
Fundamentals of Lubrication, Tribology of Materials.pptxFundamentals of Lubrication, Tribology of Materials.pptx
Fundamentals of Lubrication, Tribology of Materials.pptx
ChandraMouliP4
 
Presentation on Condition Monitoring
Presentation on Condition MonitoringPresentation on Condition Monitoring
Presentation on Condition Monitoring
Md. Shahin Manjurul Alam
 
Afton Chemical STLE 2017
Afton Chemical STLE 2017Afton Chemical STLE 2017
Afton Chemical STLE 2017
Afton Chemical
 
Braking system
Braking systemBraking system
Braking system
Yashodhan Agarwal
 
Timken bearing fundamentals
Timken   bearing fundamentalsTimken   bearing fundamentals
Timken bearing fundamentals
zapada06
 
1.2 bearing life
1.2 bearing life1.2 bearing life
1.2 bearing life
Chetan vadodariya
 

What's hot (20)

Failure analysis of helical gear
Failure analysis of  helical gearFailure analysis of  helical gear
Failure analysis of helical gear
 
Oil Analysis Fundamentals Lubricant Condition Monitoring
Oil Analysis FundamentalsLubricant Condition MonitoringOil Analysis FundamentalsLubricant Condition Monitoring
Oil Analysis Fundamentals Lubricant Condition Monitoring
 
Lubrication,Types & Stribeck Curve
Lubrication,Types & Stribeck CurveLubrication,Types & Stribeck Curve
Lubrication,Types & Stribeck Curve
 
Gas welding and Gas cutting Basics
Gas welding and Gas cutting BasicsGas welding and Gas cutting Basics
Gas welding and Gas cutting Basics
 
5 common types of bearing damage
5 common types of bearing damage5 common types of bearing damage
5 common types of bearing damage
 
Different types of gear & maintenance By Md. Raijul Islam
Different types of gear & maintenance By Md. Raijul IslamDifferent types of gear & maintenance By Md. Raijul Islam
Different types of gear & maintenance By Md. Raijul Islam
 
Lubrication and its types
Lubrication and its typesLubrication and its types
Lubrication and its types
 
Failure analysis & test procedure #1 rev
Failure analysis & test procedure #1 revFailure analysis & test procedure #1 rev
Failure analysis & test procedure #1 rev
 
Friction and wear
Friction and wearFriction and wear
Friction and wear
 
Shaft alignment
Shaft alignmentShaft alignment
Shaft alignment
 
Fag roller bearing damages (excellent)
Fag   roller bearing damages (excellent)Fag   roller bearing damages (excellent)
Fag roller bearing damages (excellent)
 
Coupling Alignment
Coupling Alignment Coupling Alignment
Coupling Alignment
 
Failure analysis
Failure analysisFailure analysis
Failure analysis
 
Tribology Aspects .Cause of friction,stick and slip phenomenon,sliding and ro...
Tribology Aspects .Cause of friction,stick and slip phenomenon,sliding and ro...Tribology Aspects .Cause of friction,stick and slip phenomenon,sliding and ro...
Tribology Aspects .Cause of friction,stick and slip phenomenon,sliding and ro...
 
Fundamentals of Lubrication, Tribology of Materials.pptx
Fundamentals of Lubrication, Tribology of Materials.pptxFundamentals of Lubrication, Tribology of Materials.pptx
Fundamentals of Lubrication, Tribology of Materials.pptx
 
Presentation on Condition Monitoring
Presentation on Condition MonitoringPresentation on Condition Monitoring
Presentation on Condition Monitoring
 
Afton Chemical STLE 2017
Afton Chemical STLE 2017Afton Chemical STLE 2017
Afton Chemical STLE 2017
 
Braking system
Braking systemBraking system
Braking system
 
Timken bearing fundamentals
Timken   bearing fundamentalsTimken   bearing fundamentals
Timken bearing fundamentals
 
1.2 bearing life
1.2 bearing life1.2 bearing life
1.2 bearing life
 

Similar to Gear failure analysis

REPAIR METHODS FOR BASIC MACHINE ELEMENTS
REPAIR METHODS FOR BASIC MACHINE ELEMENTSREPAIR METHODS FOR BASIC MACHINE ELEMENTS
REPAIR METHODS FOR BASIC MACHINE ELEMENTS
laxtwinsme
 
Mill & Kiln Gear Asset Management
Mill & Kiln Gear Asset ManagementMill & Kiln Gear Asset Management
Mill & Kiln Gear Asset Management
Global Physical Asset Management
 
Repair methods for basic machine elements
Repair methods for basic machine elementsRepair methods for basic machine elements
Repair methods for basic machine elements
Devalakshmanperumal1991
 
Radial tire conditions_analysis_guide / Guia de Analisis de Condiciones en Ll...
Radial tire conditions_analysis_guide / Guia de Analisis de Condiciones en Ll...Radial tire conditions_analysis_guide / Guia de Analisis de Condiciones en Ll...
Radial tire conditions_analysis_guide / Guia de Analisis de Condiciones en Ll...
Juan Padron
 
Impact and Shock Loading in Engineering Failure analysis
Impact and Shock Loading in Engineering Failure analysisImpact and Shock Loading in Engineering Failure analysis
Impact and Shock Loading in Engineering Failure analysis
Padmanabhan Krishnan
 
CH-2,3&4 Maintenance (1).pptx
CH-2,3&4 Maintenance (1).pptxCH-2,3&4 Maintenance (1).pptx
CH-2,3&4 Maintenance (1).pptx
Barsena
 
Misalignment
Misalignment Misalignment
Misalignment
Dennis Manawatao
 
Analysis of Wear Rate of Internal Combustion Engine using Ferrography Technique
Analysis of Wear Rate of Internal Combustion Engine using Ferrography TechniqueAnalysis of Wear Rate of Internal Combustion Engine using Ferrography Technique
Analysis of Wear Rate of Internal Combustion Engine using Ferrography Technique
IRJET Journal
 
Fatigue and fracture of safety critical equipment Walker Penniment
Fatigue and fracture of safety critical equipment Walker PennimentFatigue and fracture of safety critical equipment Walker Penniment
Fatigue and fracture of safety critical equipment Walker Penniment
NSW Environment and Planning
 
Adhesion test- Pull off adhesion testings.ppt
Adhesion test- Pull off adhesion testings.pptAdhesion test- Pull off adhesion testings.ppt
Adhesion test- Pull off adhesion testings.ppt
SwaminathanBoopathi
 
Bearing over greasing failures ]
Bearing over greasing failures ]Bearing over greasing failures ]
Bearing over greasing failures ]
Udhayakumar Venkataraman
 
Report on Industrial visit at Aditya Auto products, Doddballapura, Bangalore.
Report on Industrial visit at Aditya Auto products, Doddballapura, Bangalore.Report on Industrial visit at Aditya Auto products, Doddballapura, Bangalore.
Report on Industrial visit at Aditya Auto products, Doddballapura, Bangalore.
abhishekPatne2
 
Quality control and inspection of tyres
Quality control and inspection of tyresQuality control and inspection of tyres
Quality control and inspection of tyres
sai anjaneya
 
Engineering metallurgy non destructive testing ppt.pptx
Engineering metallurgy non destructive testing ppt.pptxEngineering metallurgy non destructive testing ppt.pptx
Engineering metallurgy non destructive testing ppt.pptx
Amey88
 
Forensic engineering
Forensic engineeringForensic engineering
Forensic engineering
Don Caeiro
 
unit-5.pptx
unit-5.pptxunit-5.pptx
unit-5.pptx
SaurabhKumarGupta25
 
Debonding of orhtodontic brackets
Debonding of orhtodontic bracketsDebonding of orhtodontic brackets
Debonding of orhtodontic brackets
Safa Eltabey
 
Maintanace of machinery assignment
Maintanace of machinery assignmentMaintanace of machinery assignment
Maintanace of machinery assignment
TesfaTsiha
 
Mechanical Face Seals Design for Differential Pressure Applications
Mechanical Face Seals Design for Differential Pressure ApplicationsMechanical Face Seals Design for Differential Pressure Applications
Mechanical Face Seals Design for Differential Pressure Applications
sapparts
 
Chapter09 seals
Chapter09 sealsChapter09 seals
Chapter09 seals
mirhadizadeh
 

Similar to Gear failure analysis (20)

REPAIR METHODS FOR BASIC MACHINE ELEMENTS
REPAIR METHODS FOR BASIC MACHINE ELEMENTSREPAIR METHODS FOR BASIC MACHINE ELEMENTS
REPAIR METHODS FOR BASIC MACHINE ELEMENTS
 
Mill & Kiln Gear Asset Management
Mill & Kiln Gear Asset ManagementMill & Kiln Gear Asset Management
Mill & Kiln Gear Asset Management
 
Repair methods for basic machine elements
Repair methods for basic machine elementsRepair methods for basic machine elements
Repair methods for basic machine elements
 
Radial tire conditions_analysis_guide / Guia de Analisis de Condiciones en Ll...
Radial tire conditions_analysis_guide / Guia de Analisis de Condiciones en Ll...Radial tire conditions_analysis_guide / Guia de Analisis de Condiciones en Ll...
Radial tire conditions_analysis_guide / Guia de Analisis de Condiciones en Ll...
 
Impact and Shock Loading in Engineering Failure analysis
Impact and Shock Loading in Engineering Failure analysisImpact and Shock Loading in Engineering Failure analysis
Impact and Shock Loading in Engineering Failure analysis
 
CH-2,3&4 Maintenance (1).pptx
CH-2,3&4 Maintenance (1).pptxCH-2,3&4 Maintenance (1).pptx
CH-2,3&4 Maintenance (1).pptx
 
Misalignment
Misalignment Misalignment
Misalignment
 
Analysis of Wear Rate of Internal Combustion Engine using Ferrography Technique
Analysis of Wear Rate of Internal Combustion Engine using Ferrography TechniqueAnalysis of Wear Rate of Internal Combustion Engine using Ferrography Technique
Analysis of Wear Rate of Internal Combustion Engine using Ferrography Technique
 
Fatigue and fracture of safety critical equipment Walker Penniment
Fatigue and fracture of safety critical equipment Walker PennimentFatigue and fracture of safety critical equipment Walker Penniment
Fatigue and fracture of safety critical equipment Walker Penniment
 
Adhesion test- Pull off adhesion testings.ppt
Adhesion test- Pull off adhesion testings.pptAdhesion test- Pull off adhesion testings.ppt
Adhesion test- Pull off adhesion testings.ppt
 
Bearing over greasing failures ]
Bearing over greasing failures ]Bearing over greasing failures ]
Bearing over greasing failures ]
 
Report on Industrial visit at Aditya Auto products, Doddballapura, Bangalore.
Report on Industrial visit at Aditya Auto products, Doddballapura, Bangalore.Report on Industrial visit at Aditya Auto products, Doddballapura, Bangalore.
Report on Industrial visit at Aditya Auto products, Doddballapura, Bangalore.
 
Quality control and inspection of tyres
Quality control and inspection of tyresQuality control and inspection of tyres
Quality control and inspection of tyres
 
Engineering metallurgy non destructive testing ppt.pptx
Engineering metallurgy non destructive testing ppt.pptxEngineering metallurgy non destructive testing ppt.pptx
Engineering metallurgy non destructive testing ppt.pptx
 
Forensic engineering
Forensic engineeringForensic engineering
Forensic engineering
 
unit-5.pptx
unit-5.pptxunit-5.pptx
unit-5.pptx
 
Debonding of orhtodontic brackets
Debonding of orhtodontic bracketsDebonding of orhtodontic brackets
Debonding of orhtodontic brackets
 
Maintanace of machinery assignment
Maintanace of machinery assignmentMaintanace of machinery assignment
Maintanace of machinery assignment
 
Mechanical Face Seals Design for Differential Pressure Applications
Mechanical Face Seals Design for Differential Pressure ApplicationsMechanical Face Seals Design for Differential Pressure Applications
Mechanical Face Seals Design for Differential Pressure Applications
 
Chapter09 seals
Chapter09 sealsChapter09 seals
Chapter09 seals
 

More from Davalsab M.L

BEML Bharath Earth Movers Limited
BEML Bharath Earth Movers Limited BEML Bharath Earth Movers Limited
BEML Bharath Earth Movers Limited
Davalsab M.L
 
Explicit Dynamic Analysis of Automotive Bus Body Structure During Catastrophi...
Explicit Dynamic Analysis of Automotive Bus Body Structure During Catastrophi...Explicit Dynamic Analysis of Automotive Bus Body Structure During Catastrophi...
Explicit Dynamic Analysis of Automotive Bus Body Structure During Catastrophi...
Davalsab M.L
 
Fracture mechanics CTOD Crack Tip Opening Displacement
Fracture mechanics CTOD Crack Tip Opening DisplacementFracture mechanics CTOD Crack Tip Opening Displacement
Fracture mechanics CTOD Crack Tip Opening Displacement
Davalsab M.L
 
Vibration measuring instrument
Vibration measuring instrumentVibration measuring instrument
Vibration measuring instrument
Davalsab M.L
 
Non linear bending & tor equation
Non linear bending & tor equationNon linear bending & tor equation
Non linear bending & tor equation
Davalsab M.L
 
Birfringent coatings daval
Birfringent coatings  davalBirfringent coatings  daval
Birfringent coatings daval
Davalsab M.L
 
Brittle coating and test
Brittle coating and testBrittle coating and test
Brittle coating and test
Davalsab M.L
 

More from Davalsab M.L (7)

BEML Bharath Earth Movers Limited
BEML Bharath Earth Movers Limited BEML Bharath Earth Movers Limited
BEML Bharath Earth Movers Limited
 
Explicit Dynamic Analysis of Automotive Bus Body Structure During Catastrophi...
Explicit Dynamic Analysis of Automotive Bus Body Structure During Catastrophi...Explicit Dynamic Analysis of Automotive Bus Body Structure During Catastrophi...
Explicit Dynamic Analysis of Automotive Bus Body Structure During Catastrophi...
 
Fracture mechanics CTOD Crack Tip Opening Displacement
Fracture mechanics CTOD Crack Tip Opening DisplacementFracture mechanics CTOD Crack Tip Opening Displacement
Fracture mechanics CTOD Crack Tip Opening Displacement
 
Vibration measuring instrument
Vibration measuring instrumentVibration measuring instrument
Vibration measuring instrument
 
Non linear bending & tor equation
Non linear bending & tor equationNon linear bending & tor equation
Non linear bending & tor equation
 
Birfringent coatings daval
Birfringent coatings  davalBirfringent coatings  daval
Birfringent coatings daval
 
Brittle coating and test
Brittle coating and testBrittle coating and test
Brittle coating and test
 

Recently uploaded

Use PyCharm for remote debugging of WSL on a Windo cf5c162d672e4e58b4dde5d797...
Use PyCharm for remote debugging of WSL on a Windo cf5c162d672e4e58b4dde5d797...Use PyCharm for remote debugging of WSL on a Windo cf5c162d672e4e58b4dde5d797...
Use PyCharm for remote debugging of WSL on a Windo cf5c162d672e4e58b4dde5d797...
shadow0702a
 
AI + Data Community Tour - Build the Next Generation of Apps with the Einstei...
AI + Data Community Tour - Build the Next Generation of Apps with the Einstei...AI + Data Community Tour - Build the Next Generation of Apps with the Einstei...
AI + Data Community Tour - Build the Next Generation of Apps with the Einstei...
Paris Salesforce Developer Group
 
Electric vehicle and photovoltaic advanced roles in enhancing the financial p...
Electric vehicle and photovoltaic advanced roles in enhancing the financial p...Electric vehicle and photovoltaic advanced roles in enhancing the financial p...
Electric vehicle and photovoltaic advanced roles in enhancing the financial p...
IJECEIAES
 
2008 BUILDING CONSTRUCTION Illustrated - Ching Chapter 08 Doors and Windows.pdf
2008 BUILDING CONSTRUCTION Illustrated - Ching Chapter 08 Doors and Windows.pdf2008 BUILDING CONSTRUCTION Illustrated - Ching Chapter 08 Doors and Windows.pdf
2008 BUILDING CONSTRUCTION Illustrated - Ching Chapter 08 Doors and Windows.pdf
Yasser Mahgoub
 
CEC 352 - SATELLITE COMMUNICATION UNIT 1
CEC 352 - SATELLITE COMMUNICATION UNIT 1CEC 352 - SATELLITE COMMUNICATION UNIT 1
CEC 352 - SATELLITE COMMUNICATION UNIT 1
PKavitha10
 
Design and optimization of ion propulsion drone
Design and optimization of ion propulsion droneDesign and optimization of ion propulsion drone
Design and optimization of ion propulsion drone
bjmsejournal
 
SCALING OF MOS CIRCUITS m .pptx
SCALING OF MOS CIRCUITS m                 .pptxSCALING OF MOS CIRCUITS m                 .pptx
SCALING OF MOS CIRCUITS m .pptx
harshapolam10
 
Engineering Standards Wiring methods.pdf
Engineering Standards Wiring methods.pdfEngineering Standards Wiring methods.pdf
Engineering Standards Wiring methods.pdf
edwin408357
 
An Introduction to the Compiler Designss
An Introduction to the Compiler DesignssAn Introduction to the Compiler Designss
An Introduction to the Compiler Designss
ElakkiaU
 
Rainfall intensity duration frequency curve statistical analysis and modeling...
Rainfall intensity duration frequency curve statistical analysis and modeling...Rainfall intensity duration frequency curve statistical analysis and modeling...
Rainfall intensity duration frequency curve statistical analysis and modeling...
bijceesjournal
 
Mechanical Engineering on AAI Summer Training Report-003.pdf
Mechanical Engineering on AAI Summer Training Report-003.pdfMechanical Engineering on AAI Summer Training Report-003.pdf
Mechanical Engineering on AAI Summer Training Report-003.pdf
21UME003TUSHARDEB
 
Generative AI Use cases applications solutions and implementation.pdf
Generative AI Use cases applications solutions and implementation.pdfGenerative AI Use cases applications solutions and implementation.pdf
Generative AI Use cases applications solutions and implementation.pdf
mahaffeycheryld
 
原版制作(Humboldt毕业证书)柏林大学毕业证学位证一模一样
原版制作(Humboldt毕业证书)柏林大学毕业证学位证一模一样原版制作(Humboldt毕业证书)柏林大学毕业证学位证一模一样
原版制作(Humboldt毕业证书)柏林大学毕业证学位证一模一样
ydzowc
 
DEEP LEARNING FOR SMART GRID INTRUSION DETECTION: A HYBRID CNN-LSTM-BASED MODEL
DEEP LEARNING FOR SMART GRID INTRUSION DETECTION: A HYBRID CNN-LSTM-BASED MODELDEEP LEARNING FOR SMART GRID INTRUSION DETECTION: A HYBRID CNN-LSTM-BASED MODEL
DEEP LEARNING FOR SMART GRID INTRUSION DETECTION: A HYBRID CNN-LSTM-BASED MODEL
ijaia
 
1FIDIC-CONSTRUCTION-CONTRACT-2ND-ED-2017-RED-BOOK.pdf
1FIDIC-CONSTRUCTION-CONTRACT-2ND-ED-2017-RED-BOOK.pdf1FIDIC-CONSTRUCTION-CONTRACT-2ND-ED-2017-RED-BOOK.pdf
1FIDIC-CONSTRUCTION-CONTRACT-2ND-ED-2017-RED-BOOK.pdf
MadhavJungKarki
 
学校原版美国波士顿大学毕业证学历学位证书原版一模一样
学校原版美国波士顿大学毕业证学历学位证书原版一模一样学校原版美国波士顿大学毕业证学历学位证书原版一模一样
学校原版美国波士顿大学毕业证学历学位证书原版一模一样
171ticu
 
Software Engineering and Project Management - Introduction, Modeling Concepts...
Software Engineering and Project Management - Introduction, Modeling Concepts...Software Engineering and Project Management - Introduction, Modeling Concepts...
Software Engineering and Project Management - Introduction, Modeling Concepts...
Prakhyath Rai
 
Welding Metallurgy Ferrous Materials.pdf
Welding Metallurgy Ferrous Materials.pdfWelding Metallurgy Ferrous Materials.pdf
Welding Metallurgy Ferrous Materials.pdf
AjmalKhan50578
 
Comparative analysis between traditional aquaponics and reconstructed aquapon...
Comparative analysis between traditional aquaponics and reconstructed aquapon...Comparative analysis between traditional aquaponics and reconstructed aquapon...
Comparative analysis between traditional aquaponics and reconstructed aquapon...
bijceesjournal
 
4. Mosca vol I -Fisica-Tipler-5ta-Edicion-Vol-1.pdf
4. Mosca vol I -Fisica-Tipler-5ta-Edicion-Vol-1.pdf4. Mosca vol I -Fisica-Tipler-5ta-Edicion-Vol-1.pdf
4. Mosca vol I -Fisica-Tipler-5ta-Edicion-Vol-1.pdf
Gino153088
 

Recently uploaded (20)

Use PyCharm for remote debugging of WSL on a Windo cf5c162d672e4e58b4dde5d797...
Use PyCharm for remote debugging of WSL on a Windo cf5c162d672e4e58b4dde5d797...Use PyCharm for remote debugging of WSL on a Windo cf5c162d672e4e58b4dde5d797...
Use PyCharm for remote debugging of WSL on a Windo cf5c162d672e4e58b4dde5d797...
 
AI + Data Community Tour - Build the Next Generation of Apps with the Einstei...
AI + Data Community Tour - Build the Next Generation of Apps with the Einstei...AI + Data Community Tour - Build the Next Generation of Apps with the Einstei...
AI + Data Community Tour - Build the Next Generation of Apps with the Einstei...
 
Electric vehicle and photovoltaic advanced roles in enhancing the financial p...
Electric vehicle and photovoltaic advanced roles in enhancing the financial p...Electric vehicle and photovoltaic advanced roles in enhancing the financial p...
Electric vehicle and photovoltaic advanced roles in enhancing the financial p...
 
2008 BUILDING CONSTRUCTION Illustrated - Ching Chapter 08 Doors and Windows.pdf
2008 BUILDING CONSTRUCTION Illustrated - Ching Chapter 08 Doors and Windows.pdf2008 BUILDING CONSTRUCTION Illustrated - Ching Chapter 08 Doors and Windows.pdf
2008 BUILDING CONSTRUCTION Illustrated - Ching Chapter 08 Doors and Windows.pdf
 
CEC 352 - SATELLITE COMMUNICATION UNIT 1
CEC 352 - SATELLITE COMMUNICATION UNIT 1CEC 352 - SATELLITE COMMUNICATION UNIT 1
CEC 352 - SATELLITE COMMUNICATION UNIT 1
 
Design and optimization of ion propulsion drone
Design and optimization of ion propulsion droneDesign and optimization of ion propulsion drone
Design and optimization of ion propulsion drone
 
SCALING OF MOS CIRCUITS m .pptx
SCALING OF MOS CIRCUITS m                 .pptxSCALING OF MOS CIRCUITS m                 .pptx
SCALING OF MOS CIRCUITS m .pptx
 
Engineering Standards Wiring methods.pdf
Engineering Standards Wiring methods.pdfEngineering Standards Wiring methods.pdf
Engineering Standards Wiring methods.pdf
 
An Introduction to the Compiler Designss
An Introduction to the Compiler DesignssAn Introduction to the Compiler Designss
An Introduction to the Compiler Designss
 
Rainfall intensity duration frequency curve statistical analysis and modeling...
Rainfall intensity duration frequency curve statistical analysis and modeling...Rainfall intensity duration frequency curve statistical analysis and modeling...
Rainfall intensity duration frequency curve statistical analysis and modeling...
 
Mechanical Engineering on AAI Summer Training Report-003.pdf
Mechanical Engineering on AAI Summer Training Report-003.pdfMechanical Engineering on AAI Summer Training Report-003.pdf
Mechanical Engineering on AAI Summer Training Report-003.pdf
 
Generative AI Use cases applications solutions and implementation.pdf
Generative AI Use cases applications solutions and implementation.pdfGenerative AI Use cases applications solutions and implementation.pdf
Generative AI Use cases applications solutions and implementation.pdf
 
原版制作(Humboldt毕业证书)柏林大学毕业证学位证一模一样
原版制作(Humboldt毕业证书)柏林大学毕业证学位证一模一样原版制作(Humboldt毕业证书)柏林大学毕业证学位证一模一样
原版制作(Humboldt毕业证书)柏林大学毕业证学位证一模一样
 
DEEP LEARNING FOR SMART GRID INTRUSION DETECTION: A HYBRID CNN-LSTM-BASED MODEL
DEEP LEARNING FOR SMART GRID INTRUSION DETECTION: A HYBRID CNN-LSTM-BASED MODELDEEP LEARNING FOR SMART GRID INTRUSION DETECTION: A HYBRID CNN-LSTM-BASED MODEL
DEEP LEARNING FOR SMART GRID INTRUSION DETECTION: A HYBRID CNN-LSTM-BASED MODEL
 
1FIDIC-CONSTRUCTION-CONTRACT-2ND-ED-2017-RED-BOOK.pdf
1FIDIC-CONSTRUCTION-CONTRACT-2ND-ED-2017-RED-BOOK.pdf1FIDIC-CONSTRUCTION-CONTRACT-2ND-ED-2017-RED-BOOK.pdf
1FIDIC-CONSTRUCTION-CONTRACT-2ND-ED-2017-RED-BOOK.pdf
 
学校原版美国波士顿大学毕业证学历学位证书原版一模一样
学校原版美国波士顿大学毕业证学历学位证书原版一模一样学校原版美国波士顿大学毕业证学历学位证书原版一模一样
学校原版美国波士顿大学毕业证学历学位证书原版一模一样
 
Software Engineering and Project Management - Introduction, Modeling Concepts...
Software Engineering and Project Management - Introduction, Modeling Concepts...Software Engineering and Project Management - Introduction, Modeling Concepts...
Software Engineering and Project Management - Introduction, Modeling Concepts...
 
Welding Metallurgy Ferrous Materials.pdf
Welding Metallurgy Ferrous Materials.pdfWelding Metallurgy Ferrous Materials.pdf
Welding Metallurgy Ferrous Materials.pdf
 
Comparative analysis between traditional aquaponics and reconstructed aquapon...
Comparative analysis between traditional aquaponics and reconstructed aquapon...Comparative analysis between traditional aquaponics and reconstructed aquapon...
Comparative analysis between traditional aquaponics and reconstructed aquapon...
 
4. Mosca vol I -Fisica-Tipler-5ta-Edicion-Vol-1.pdf
4. Mosca vol I -Fisica-Tipler-5ta-Edicion-Vol-1.pdf4. Mosca vol I -Fisica-Tipler-5ta-Edicion-Vol-1.pdf
4. Mosca vol I -Fisica-Tipler-5ta-Edicion-Vol-1.pdf
 

Gear failure analysis

  • 1. How to Analyze Gear Failures BY : DHAVALSAB.M.L Daval.techno@gmail.com Cell : 8904567449 India Machine Design - School of Mechanical Engineering , Reva University
  • 2. When and where. the engineer conducting the analysis should inspect the failed components as soon after failure as possible. If an early inspection is not possible, someone at the site must preserve the evidence based on instructions from the analyst. Nature of failure The failure conditions can determine when and how to conduct an analysis. For example, if the gears are damaged but still able to function, the company may decide to continue their operation and monitor the rate at which damage progresses. In this case, • samples of the lubricant should be collected for analysis, • the reservoir drained and flushed and the lubricant replaced. • If gearbox reliability is crucial to the application, the gears should be examined by magnetic particle inspection to ensure that they have no cracks. • checking the gears for damage by visual inspection and by measuring sound and vibration.
  • 3. Preparing for Inspection Verify that the gearbox drawings, disassembly tools and adequate inspection facilities are available. Ask for as much background information as possible, including manufacturer’s • Part numbers, • Gear and bearing runtime (hr), • Service history and • Lubricant type. Failure Inspection review the background information and service history with the contact person. Then interview those involved in the design, installation, operation, maintenance and failure of the gearbox. Visual examination Before disassembling the gearbox, thoroughly inspect its exterior. For example, the condition of seals and keyways must be recorded before disassembly. Otherwise, it will be impossible to determine when any damage may have occurred to these parts. Gear tooth contact patterns should be taken before completely disassembling the gearbox. Continued next page
  • 4. Bearing : It is important to inspect the bearings because they often provide clues as to the cause of gear failure. For example: •Bearing wear can cause excessive radial clearance or end play that misaligns the gears. •Bearing damage may indicate corrosion, contamination, electrical discharge or lack of lubrication. •Plastic deformation between rollers and raceways may indicate overloads. •Gear failure often follows bearing failure. Gear tooth contact patterns (Mating gear teeth contact indicates how well they are aligned) Record tooth contact patterns under either loaded or unloaded conditions. • For no-load tests, paint the teeth of one gear with marking compound. Then, roll the teeth through mesh so the compound transfers the contact pattern to the unpainted gear. Lift the pattern from the gear with scotch tape and mount it on paper to form a permanent record. • For loaded tests, paint several teeth on one or both gears with machinist’s layout lacquer. Run the gears under load for a sufficient time to wear off the lacquer and establish the contact patterns.
  • 5. Document observations Describe all important observations in writing, using sketches and photographs where needed. Identify and mark each component (including gear teeth and bearing rollers), so it is clearly identified in the written description, sketches and photographs. It is especially important to mark all bearings, including inboard and outboard sides, so their location and position in the gearbox can be determined later. Gear geometry. obtain the following geometry data, either from the gears and gear housing or their drawings: •Number of teeth •Outside diameter •Face width •Gear housing center distance for each gearset •Whole depth of teeth •Tooth thickness (both span and top land measurement)
  • 6. Specimens for laboratory tests Formulate hypotheses regarding the cause of failure • select specimens for laboratory testing. Take broken parts for laboratory evaluation or, if this is not possible, ensure that they will be preserved for later analysis. • Oil samples can be very helpful. But, an effective lubricant analysis depends on how well the sample represents the operating lubricant • To take samples from a gearbox drain valve, first discard stagnant oil from the valve. Then take a sample at the start, middle and end of a drain to avoid stratification. Examine the oil filter and magnetic plug for wear debris and contaminants. Determine Type of Failure Now it’s time to examine all of the information and determine how the gear (or gears) failed. Several failure modes may be present and you need to identify which is the primary mode, and which are secondary modes that may have contributed to failure
  • 7. An understanding of these four common modes will enable you to identify the cause of failure. Bending fatigue. This common type of failure is a slow, progressive failure caused by repeated loading. It occurs in three stages: •Crack initiation. Plastic deformation occurs in areas of stress concentration or discontinuities, such as notches or inclusions, leading to microscopic cracks. •Crack propagation. A smooth crack grows perpendicular to the maximum tensile stress. •Fracture. When the crack grows large enough, it causes sudden fracture. Stress concentrations in the fillet often cause multiple crack origins, each producing separate cracks. In such cases, cracks propagate on different planes and may join to form a step, called a ratchet mark 2. Contact fatigue. In another failure mode, called contact or Hertzian fatigue, repeated stresses cause surface cracks and detachment of metal fragments from the tooth contact surface. The most common types of surface fatigue are macropitting (visible to the naked eye) and micropitting.
  • 8. 3. Wear. Gear tooth surface wear involves removal or displacement of material due to mechanical, chemical or electrical action. The three major types of wear are adhesion, abrasion and polishing. • Adhesion is the transfer of material from the surface of one tooth to that of another due to welding and tearing. It is confined to oxide layers on the tooth surface • Adhesion is categorized as mild or moderate, • whereas severe adhesion is termed scuffing 4. Scuffing. Severe adhesion or scuffing transfers metal from the surface of one tooth to that of another. Typically, it occurs in the addendum or dedendum in bands along the direction of sliding, though load concentrations can cause localized scuffing. Surfaces have a rough or matte texture that, under magnification, appear to be torn and plastically deforme
  • 9. Tests and Calculations Aid Analysis In many cases, failed parts and inspection data don’t yield enough information to determine the cause of failure. When this happens, gear design calculations and laboratory tests are usually needed to develop and confirm a hypothesis for the probable cause. Gear design calculations. The gear geometry data collected earlier aids in estimating tooth contact stress, bending stress, lubricant film thickness, and gear tooth contact temperature based on transmitted loads for each gear. These values are calculated according to American Gear Manufacturers Association standards such as ANSI/AGMA 2001-B88 for spur and helical gears. Comparing these calculated values with AGMA allowable values helps to determine the risk of macropitting, bending fatigue and scuffing. Conduct nondestructive tests before any destructive tests. These nondestructive tests, which aid in detecting material or manufacturing defects and provide rating information, include: •Surface hardness and roughness. •Magnetic particle inspection. •Acid etch inspection. •Gear tooth accuracy inspection.
  • 10. Then conduct destructive tests to evaluate material and heat treatment. These tests include: •Microhardness survey. •Microstructural determination using various acid etches. •Determination of grain size. •Determination of nonmetallic inclusions. •SEM microscopy to study fracture surfaces. Finally, after thoroughly testing the hypotheses against the evidence, you reach a conclusion about the most probable cause of failure. In addition, you may identify secondary factors that contributed to the failure
  • 11. Reporting Results A failure analysis report should describe all relevant facts found during the analysis, the inspections and tests, weighing of evidence, conclusions and recommendations. Present the data succinctly, preferably in tables or figures. Good photos are especially helpful for portraying failure characteristics. The report usually contains recommendations for repairing the equipment or making changes in equipment design or operation to prevent future failures.