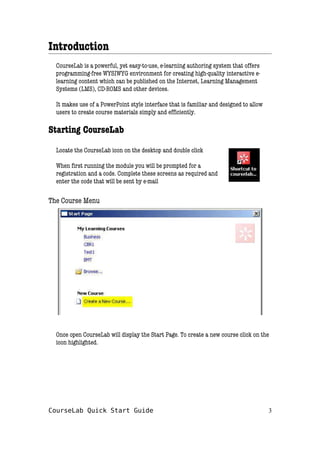
CourseLab Quick Start Guide 1
CourseLab
Quick Start
Guide
Table of contents
Introduction..............................................................................................................3
Starting CourseLab .........................................................................................3
The Course Menu..................................................................................................3
The Module Wizard...............................................................................................4
Anatomy of a Course.............................................................................................6
The Default Screen..........................................................................................6
Front Page and Master Pages.......................................................................7
Slides v Frames ................................................................................................7
Using Components..................................................................................................8
Adding text.......................................................................................................8
Adding Graphics..............................................................................................9
Insert from file.........................................................................................................9
Insert from Clip Art.................................................................................................9
Insert from AutoShpes...........................................................................................9
Using objects..................................................................................................10
Complex Objects................................................................................................10
Formatting Objects........................................................................................11
Adding questions..................................................................................................13
Question Properties.......................................................................................14
Question...............................................................................................................14
Limitations.............................................................................................................14
Scoring..................................................................................................................15
Feedback.............................................................................................................15
Display...................................................................................................................17
Messages..............................................................................................................18
Using Actions..........................................................................................................19
Display...................................................................................................................20
Goto......................................................................................................................21
If and Else.............................................................................................................22
Navigation............................................................................................................22
Publishing a module.............................................................................................23
CourseLab Quick Start Guide 2
Introduction
CourseLab is a powerful, yet easy-to-use, e-learning authoring system that offers
programming-free WYSIWYG environment for creating high-quality interactive e-
learning content which can be published on the Internet, Learning Management
Systems (LMS), CD-ROMS and other devices.
It makes use of a PowerPoint style interface that is familiar and designed to allow
users to create course materials simply and efficiently.
Starting CourseLab
Locate the CourseLab icon on the desktop and double click
When first running the module you will be prompted for a
registration and a code. Complete these screens as required and
enter the code that will be sent by e-mail
The Course Menu
Once open CourseLab will display the Start Page. To create a new course click on the
icon highlighted.
CourseLab Quick Start Guide 3
The Module Wizard
Once the course creation button has been clicked, CourseLab will display a wizard to
help you create the module.
The Introduction screen
Enter the following:
1. The name of the
module to be
created
2. The folder that the
module is to be
created in
3. The location of the
folder
CourseLab Quick Start Guide 4
At this stage you can choose
the template that you will be
using for the module.
Choose from a series of
default templates from a
drop down menu or select a
user created one.
After a short delay, the
package will be created.
CourseLab Quick Start Guide 5
Anatomy of a Course
The Default Screen
Once created you will be presented with a default front screen as follows:
CourseLab Quick Start Guide 6
Course
Structure
Slide
Thumbnails
Template
Buttons
Toolbars
Main Editing
area
Front Page and Master Pages
For every module it is possible to create a title page and a master page.
The master page will contain elements that will be displayed one every slide.
The title page will contain information that will be displayed on starting the module.
To switch between the three sections, use the template buttons
Slides v Frames
Each slide can contain content made up of text, graphics and/or CourseLab objects.
In addition a slide can be broken down into frames that allow step by step processes
to be displayed.
An example frame structure can be seen below. Most modules that are created will
make use of a slide by slide basis, but frames can be used when trying to simulate
software.
CourseLab Quick Start Guide 7
Title Master Normal
Using Components
Adding text
To insert text onto a slide, click the text box on the toolbar
This will display a text box on the screen. Double click this box to open the text
editor
The text editor has functions similar to Microsoft Word. However it does not have
any language tools such as Spell Check or Thesaurus. In order to make sure that
your text is correct, copy and paste from the Editor to Word, spell check and the copy
back again.
CourseLab Quick Start Guide 8
Adding Graphics
There are three methods of inserting graphics into CourseLab modules.
Insert from file
This allows you to import graphic files in common formats. The main formats used
are JPEG, GIF and BMP.
Once imported, resized files will often pixilate and distort if resized. Therefore it is
better to resize them outside of the program.
Insert from
file button
Insert from Clip Art
There is no built in clip art in Courselab. Instead it will collate all the imported
graphic files into a clip art catalogue.
Whilst this can sound a good method to access graphic files, after you have created a
few modules, it will take some amount of time to produce the clip art catalogue for
use.
Insert from
clip art button
Insert from AutoShpes
CourseLab has a number of built in AutoShapes similar to Microsoft products.
This is inserted via the insert menu (no button) and produces a side menu with a
selection of shapes.
CourseLab Quick Start Guide 9
Using objects
All graphic and text items are classed as objects and, as we will see later, can have
actions applied to them. In addition there are a number of other complex objects that
are available by clicking on the insert object button.
Insert
Object
Complex Objects
CourseLab is a very powerful and very feature rich application. As a result there are
a number of very useful objects that have been included into the package to help
develop lessons.
A summary of these are as follows.
External Elements The ability to open documents, links and a browser
within a lesson.
This includes “External File” Objects such as Word,
Excel etc, external URLs which open in a sepearte
browser and the use of iFrame. This allows a browser
window to be opened within the CourseLab
environment.
Popup Windows Use to display ‘help’ or other comments that can be
overlaid onto a lesson
Balloons Speech and though bubbles that can be applied to
pictures or other objects.
Design Elements These are objects that help with decoration and/or
functionality. They include a colour gradient to be used
in the background of a module and click areas, to be
used when constructing menus.
Rich Media Objects This allows you to import various media objects
including Flash-Movies, Shockwave-animations, java
applets and video clips. The latter should allow
standard Windows Media and Quicktime formats.
Navigation Objects A series of extra navigation objects that allow pop up
help screens
CourseLab Quick Start Guide 10
Characters Flash based characters including “Agent” characters
and “Talking Head” characters. These can be animated
by a series of actions that allow some complex moves to
be made.
Lists Allow list of items to be displayed in various formats.
Good to uncover items step by step
Text Boxes Text boxes that offer a higher level of complexity than
simple text boxes. Various means of displaying text and
border size/styles are available.
Form Controls Allows the input of data into variables for later
calculation and display
Simulations
Questions Allows a range of question types to be used and results
calculated
Tests Allows a series of questions to be displayed in one go
and the results calculated
Scenarios Allows you to build complex scenarios using agents and
an online catalogue
Cursors Allows you to move cursors and other objects around
the screen using frames
Formatting Objects
Each object allows formatting via a format box similar to that used in Word and
PowerPoint.
Right clicking the object will allow access to the menu as follows:
CourseLab Quick Start Guide 11
The format Colors, size and position options are identical to Microsoft Word.
The Display option allows you to decide if an object is to be displayed (or called via an
Action), shown for a specified time or shown after a period of time.
In addition options are available for the way an object is displayed or erased from
the slide.
The Sound tab allows you to bind a sound to an object. This can then be played
automatically or called later via an Action
CourseLab Quick Start Guide 12
Adding questions
One of the key components of CourseLab is the ability to setup and use questions.
Single choice of answer
Multiple choice of answer
Place each element in order
Enter numbers as answers
Match text as answers
Match pairs
For each question type, drag and drop from the Object menu to the slide.
CourseLab Quick Start Guide 13
Question Properties
To open the question properties double click the question. The following tabs are
available:
Question
This area is where the question text is entered.
Limitations
Limits the number of attempts that can be made to answer a question. Also allows a
time limit to be set to any question.
CourseLab Quick Start Guide 14
Click to enter the question
text – opens the text editor
Click to add or remove
questions
Scoring
Allows an objective to be set to hold the score for a question or series of questions
Feedback
Sets the text and position of the message delivered to the user on answering a
question. Can be turned off if required.
CourseLab Quick Start Guide 15
CourseLab Quick Start Guide 16
Display
Allows you to change the look and feel of the questions being created.
CourseLab Quick Start Guide 17
Messages
These are the default feedback messages that will appear on the question text.
CourseLab Quick Start Guide 18
Using Actions
One of the most powerful elements of CourseLab is the ability to assign
actions to objects.
For example, when a user clicks on a button, it moves it to another
screen, plays a sound or displays a message.
These actions can be accessed by right clicking on any object and
selecting Actions from the menu.
This will open an Actions box as follows:
Notice that there are a list of options that can be used to initiate an action on the left
of the box. The Actions that can be initiated are on the right.
CourseLab Quick Start Guide 19
A series of Actions can carried out, if necessary using logic commands (eg: IF, ELSE
and FOR). For example:
Notice that indentation is required to allow the logic to work.
The options for actions are wide and allow Mouse Overs, left and right button clicks
and the ability to assign actions to whole slides before they are displayed.
The most useful Actions are as follows:
Display
This Action allows any object to be displayed and hidden.
This is useful for popup boxes on mouseovers, displaying correct/incorrect answers
or help text.
For example:
This would need to have a Display=Hide for the same object attached to the
onmouseout command.
CourseLab Quick Start Guide 20
Goto
This allows navigation to another frame or slide. It is useful to allow quick
navigation around a module. It can be used with the click area Object.
For example the following menu has click objects over each area.
Each ‘onclick’ has a Goto command to move to a different part of the module.
CourseLab Quick Start Guide 21
If and Else
The logical Actions allow certain Actions to happen if specific conditions to be met.
There are a number of IF statements, including
 IF
 IF COMPLETION STATUS
 IF SCORE
 IF SUCCESS STATUS
The last three will be dependent on the outcome of questions. For example if a
question is answer correctly then the success started will be set to completed. On
this basis actions can be taken.
IF on its own can be combined with variables are set as a separate Action.
For example, if a section of a module has been completed a variable can be set to 1. If
this is set then another section can be completed, allowing control of the order that a
module is worked through.
The Actions for this scenario could look like this:
Navigation
Navigation is simply the forward and back arrows and the drop down menu. These
can be turned on and off to stop users jumping forward when they need to answer
questions etc.
CourseLab Quick Start Guide 22
Publishing a module
After completing a Course it needs to be published. This process makes it available
for use and ready for review.
Having saved the course, select Publish Course from the File menu:
This will then produce a wizard to work through.
CourseLab Quick Start Guide 23
You will be asked for course and lesson parameters which should be entered before
pressing ‘Next’
CourseLab Quick Start Guide 24
The type of course will then be requested. All courses running via the portal are
published as ‘Run from CD’ Courses for the Moodle LMS will need to be formatted as
SCORM 2004 LMS.
Finally select the destination for the published course and then click next to confirm.
CourseLab Quick Start Guide 25
About the Author
Bob Price has been involved with learning and development for nearly 20 years. He
lives and works in South Wales where he uses CourseLab to develop module for use in
call centres.
For more details and to see some pictures of some of Bobs training in action, go to:
http://homepage.ntlworld.com/bob.price1/Home.html
If you use this manual, please drop me a line via the website
CourseLab Quick Start Guide 26

Courselab Quick start guide

  • 1.
    CourseLab Quick StartGuide 1 CourseLab Quick Start Guide
  • 2.
    Table of contents Introduction..............................................................................................................3 StartingCourseLab .........................................................................................3 The Course Menu..................................................................................................3 The Module Wizard...............................................................................................4 Anatomy of a Course.............................................................................................6 The Default Screen..........................................................................................6 Front Page and Master Pages.......................................................................7 Slides v Frames ................................................................................................7 Using Components..................................................................................................8 Adding text.......................................................................................................8 Adding Graphics..............................................................................................9 Insert from file.........................................................................................................9 Insert from Clip Art.................................................................................................9 Insert from AutoShpes...........................................................................................9 Using objects..................................................................................................10 Complex Objects................................................................................................10 Formatting Objects........................................................................................11 Adding questions..................................................................................................13 Question Properties.......................................................................................14 Question...............................................................................................................14 Limitations.............................................................................................................14 Scoring..................................................................................................................15 Feedback.............................................................................................................15 Display...................................................................................................................17 Messages..............................................................................................................18 Using Actions..........................................................................................................19 Display...................................................................................................................20 Goto......................................................................................................................21 If and Else.............................................................................................................22 Navigation............................................................................................................22 Publishing a module.............................................................................................23 CourseLab Quick Start Guide 2
  • 3.
    Introduction CourseLab is apowerful, yet easy-to-use, e-learning authoring system that offers programming-free WYSIWYG environment for creating high-quality interactive e- learning content which can be published on the Internet, Learning Management Systems (LMS), CD-ROMS and other devices. It makes use of a PowerPoint style interface that is familiar and designed to allow users to create course materials simply and efficiently. Starting CourseLab Locate the CourseLab icon on the desktop and double click When first running the module you will be prompted for a registration and a code. Complete these screens as required and enter the code that will be sent by e-mail The Course Menu Once open CourseLab will display the Start Page. To create a new course click on the icon highlighted. CourseLab Quick Start Guide 3
  • 4.
    The Module Wizard Oncethe course creation button has been clicked, CourseLab will display a wizard to help you create the module. The Introduction screen Enter the following: 1. The name of the module to be created 2. The folder that the module is to be created in 3. The location of the folder CourseLab Quick Start Guide 4
  • 5.
    At this stageyou can choose the template that you will be using for the module. Choose from a series of default templates from a drop down menu or select a user created one. After a short delay, the package will be created. CourseLab Quick Start Guide 5
  • 6.
    Anatomy of aCourse The Default Screen Once created you will be presented with a default front screen as follows: CourseLab Quick Start Guide 6 Course Structure Slide Thumbnails Template Buttons Toolbars Main Editing area
  • 7.
    Front Page andMaster Pages For every module it is possible to create a title page and a master page. The master page will contain elements that will be displayed one every slide. The title page will contain information that will be displayed on starting the module. To switch between the three sections, use the template buttons Slides v Frames Each slide can contain content made up of text, graphics and/or CourseLab objects. In addition a slide can be broken down into frames that allow step by step processes to be displayed. An example frame structure can be seen below. Most modules that are created will make use of a slide by slide basis, but frames can be used when trying to simulate software. CourseLab Quick Start Guide 7 Title Master Normal
  • 8.
    Using Components Adding text Toinsert text onto a slide, click the text box on the toolbar This will display a text box on the screen. Double click this box to open the text editor The text editor has functions similar to Microsoft Word. However it does not have any language tools such as Spell Check or Thesaurus. In order to make sure that your text is correct, copy and paste from the Editor to Word, spell check and the copy back again. CourseLab Quick Start Guide 8
  • 9.
    Adding Graphics There arethree methods of inserting graphics into CourseLab modules. Insert from file This allows you to import graphic files in common formats. The main formats used are JPEG, GIF and BMP. Once imported, resized files will often pixilate and distort if resized. Therefore it is better to resize them outside of the program. Insert from file button Insert from Clip Art There is no built in clip art in Courselab. Instead it will collate all the imported graphic files into a clip art catalogue. Whilst this can sound a good method to access graphic files, after you have created a few modules, it will take some amount of time to produce the clip art catalogue for use. Insert from clip art button Insert from AutoShpes CourseLab has a number of built in AutoShapes similar to Microsoft products. This is inserted via the insert menu (no button) and produces a side menu with a selection of shapes. CourseLab Quick Start Guide 9
  • 10.
    Using objects All graphicand text items are classed as objects and, as we will see later, can have actions applied to them. In addition there are a number of other complex objects that are available by clicking on the insert object button. Insert Object Complex Objects CourseLab is a very powerful and very feature rich application. As a result there are a number of very useful objects that have been included into the package to help develop lessons. A summary of these are as follows. External Elements The ability to open documents, links and a browser within a lesson. This includes “External File” Objects such as Word, Excel etc, external URLs which open in a sepearte browser and the use of iFrame. This allows a browser window to be opened within the CourseLab environment. Popup Windows Use to display ‘help’ or other comments that can be overlaid onto a lesson Balloons Speech and though bubbles that can be applied to pictures or other objects. Design Elements These are objects that help with decoration and/or functionality. They include a colour gradient to be used in the background of a module and click areas, to be used when constructing menus. Rich Media Objects This allows you to import various media objects including Flash-Movies, Shockwave-animations, java applets and video clips. The latter should allow standard Windows Media and Quicktime formats. Navigation Objects A series of extra navigation objects that allow pop up help screens CourseLab Quick Start Guide 10
  • 11.
    Characters Flash basedcharacters including “Agent” characters and “Talking Head” characters. These can be animated by a series of actions that allow some complex moves to be made. Lists Allow list of items to be displayed in various formats. Good to uncover items step by step Text Boxes Text boxes that offer a higher level of complexity than simple text boxes. Various means of displaying text and border size/styles are available. Form Controls Allows the input of data into variables for later calculation and display Simulations Questions Allows a range of question types to be used and results calculated Tests Allows a series of questions to be displayed in one go and the results calculated Scenarios Allows you to build complex scenarios using agents and an online catalogue Cursors Allows you to move cursors and other objects around the screen using frames Formatting Objects Each object allows formatting via a format box similar to that used in Word and PowerPoint. Right clicking the object will allow access to the menu as follows: CourseLab Quick Start Guide 11
  • 12.
    The format Colors,size and position options are identical to Microsoft Word. The Display option allows you to decide if an object is to be displayed (or called via an Action), shown for a specified time or shown after a period of time. In addition options are available for the way an object is displayed or erased from the slide. The Sound tab allows you to bind a sound to an object. This can then be played automatically or called later via an Action CourseLab Quick Start Guide 12
  • 13.
    Adding questions One ofthe key components of CourseLab is the ability to setup and use questions. Single choice of answer Multiple choice of answer Place each element in order Enter numbers as answers Match text as answers Match pairs For each question type, drag and drop from the Object menu to the slide. CourseLab Quick Start Guide 13
  • 14.
    Question Properties To openthe question properties double click the question. The following tabs are available: Question This area is where the question text is entered. Limitations Limits the number of attempts that can be made to answer a question. Also allows a time limit to be set to any question. CourseLab Quick Start Guide 14 Click to enter the question text – opens the text editor Click to add or remove questions
  • 15.
    Scoring Allows an objectiveto be set to hold the score for a question or series of questions Feedback Sets the text and position of the message delivered to the user on answering a question. Can be turned off if required. CourseLab Quick Start Guide 15
  • 16.
  • 17.
    Display Allows you tochange the look and feel of the questions being created. CourseLab Quick Start Guide 17
  • 18.
    Messages These are thedefault feedback messages that will appear on the question text. CourseLab Quick Start Guide 18
  • 19.
    Using Actions One ofthe most powerful elements of CourseLab is the ability to assign actions to objects. For example, when a user clicks on a button, it moves it to another screen, plays a sound or displays a message. These actions can be accessed by right clicking on any object and selecting Actions from the menu. This will open an Actions box as follows: Notice that there are a list of options that can be used to initiate an action on the left of the box. The Actions that can be initiated are on the right. CourseLab Quick Start Guide 19
  • 20.
    A series ofActions can carried out, if necessary using logic commands (eg: IF, ELSE and FOR). For example: Notice that indentation is required to allow the logic to work. The options for actions are wide and allow Mouse Overs, left and right button clicks and the ability to assign actions to whole slides before they are displayed. The most useful Actions are as follows: Display This Action allows any object to be displayed and hidden. This is useful for popup boxes on mouseovers, displaying correct/incorrect answers or help text. For example: This would need to have a Display=Hide for the same object attached to the onmouseout command. CourseLab Quick Start Guide 20
  • 21.
    Goto This allows navigationto another frame or slide. It is useful to allow quick navigation around a module. It can be used with the click area Object. For example the following menu has click objects over each area. Each ‘onclick’ has a Goto command to move to a different part of the module. CourseLab Quick Start Guide 21
  • 22.
    If and Else Thelogical Actions allow certain Actions to happen if specific conditions to be met. There are a number of IF statements, including  IF  IF COMPLETION STATUS  IF SCORE  IF SUCCESS STATUS The last three will be dependent on the outcome of questions. For example if a question is answer correctly then the success started will be set to completed. On this basis actions can be taken. IF on its own can be combined with variables are set as a separate Action. For example, if a section of a module has been completed a variable can be set to 1. If this is set then another section can be completed, allowing control of the order that a module is worked through. The Actions for this scenario could look like this: Navigation Navigation is simply the forward and back arrows and the drop down menu. These can be turned on and off to stop users jumping forward when they need to answer questions etc. CourseLab Quick Start Guide 22
  • 23.
    Publishing a module Aftercompleting a Course it needs to be published. This process makes it available for use and ready for review. Having saved the course, select Publish Course from the File menu: This will then produce a wizard to work through. CourseLab Quick Start Guide 23
  • 24.
    You will beasked for course and lesson parameters which should be entered before pressing ‘Next’ CourseLab Quick Start Guide 24
  • 25.
    The type ofcourse will then be requested. All courses running via the portal are published as ‘Run from CD’ Courses for the Moodle LMS will need to be formatted as SCORM 2004 LMS. Finally select the destination for the published course and then click next to confirm. CourseLab Quick Start Guide 25
  • 26.
    About the Author BobPrice has been involved with learning and development for nearly 20 years. He lives and works in South Wales where he uses CourseLab to develop module for use in call centres. For more details and to see some pictures of some of Bobs training in action, go to: http://homepage.ntlworld.com/bob.price1/Home.html If you use this manual, please drop me a line via the website CourseLab Quick Start Guide 26