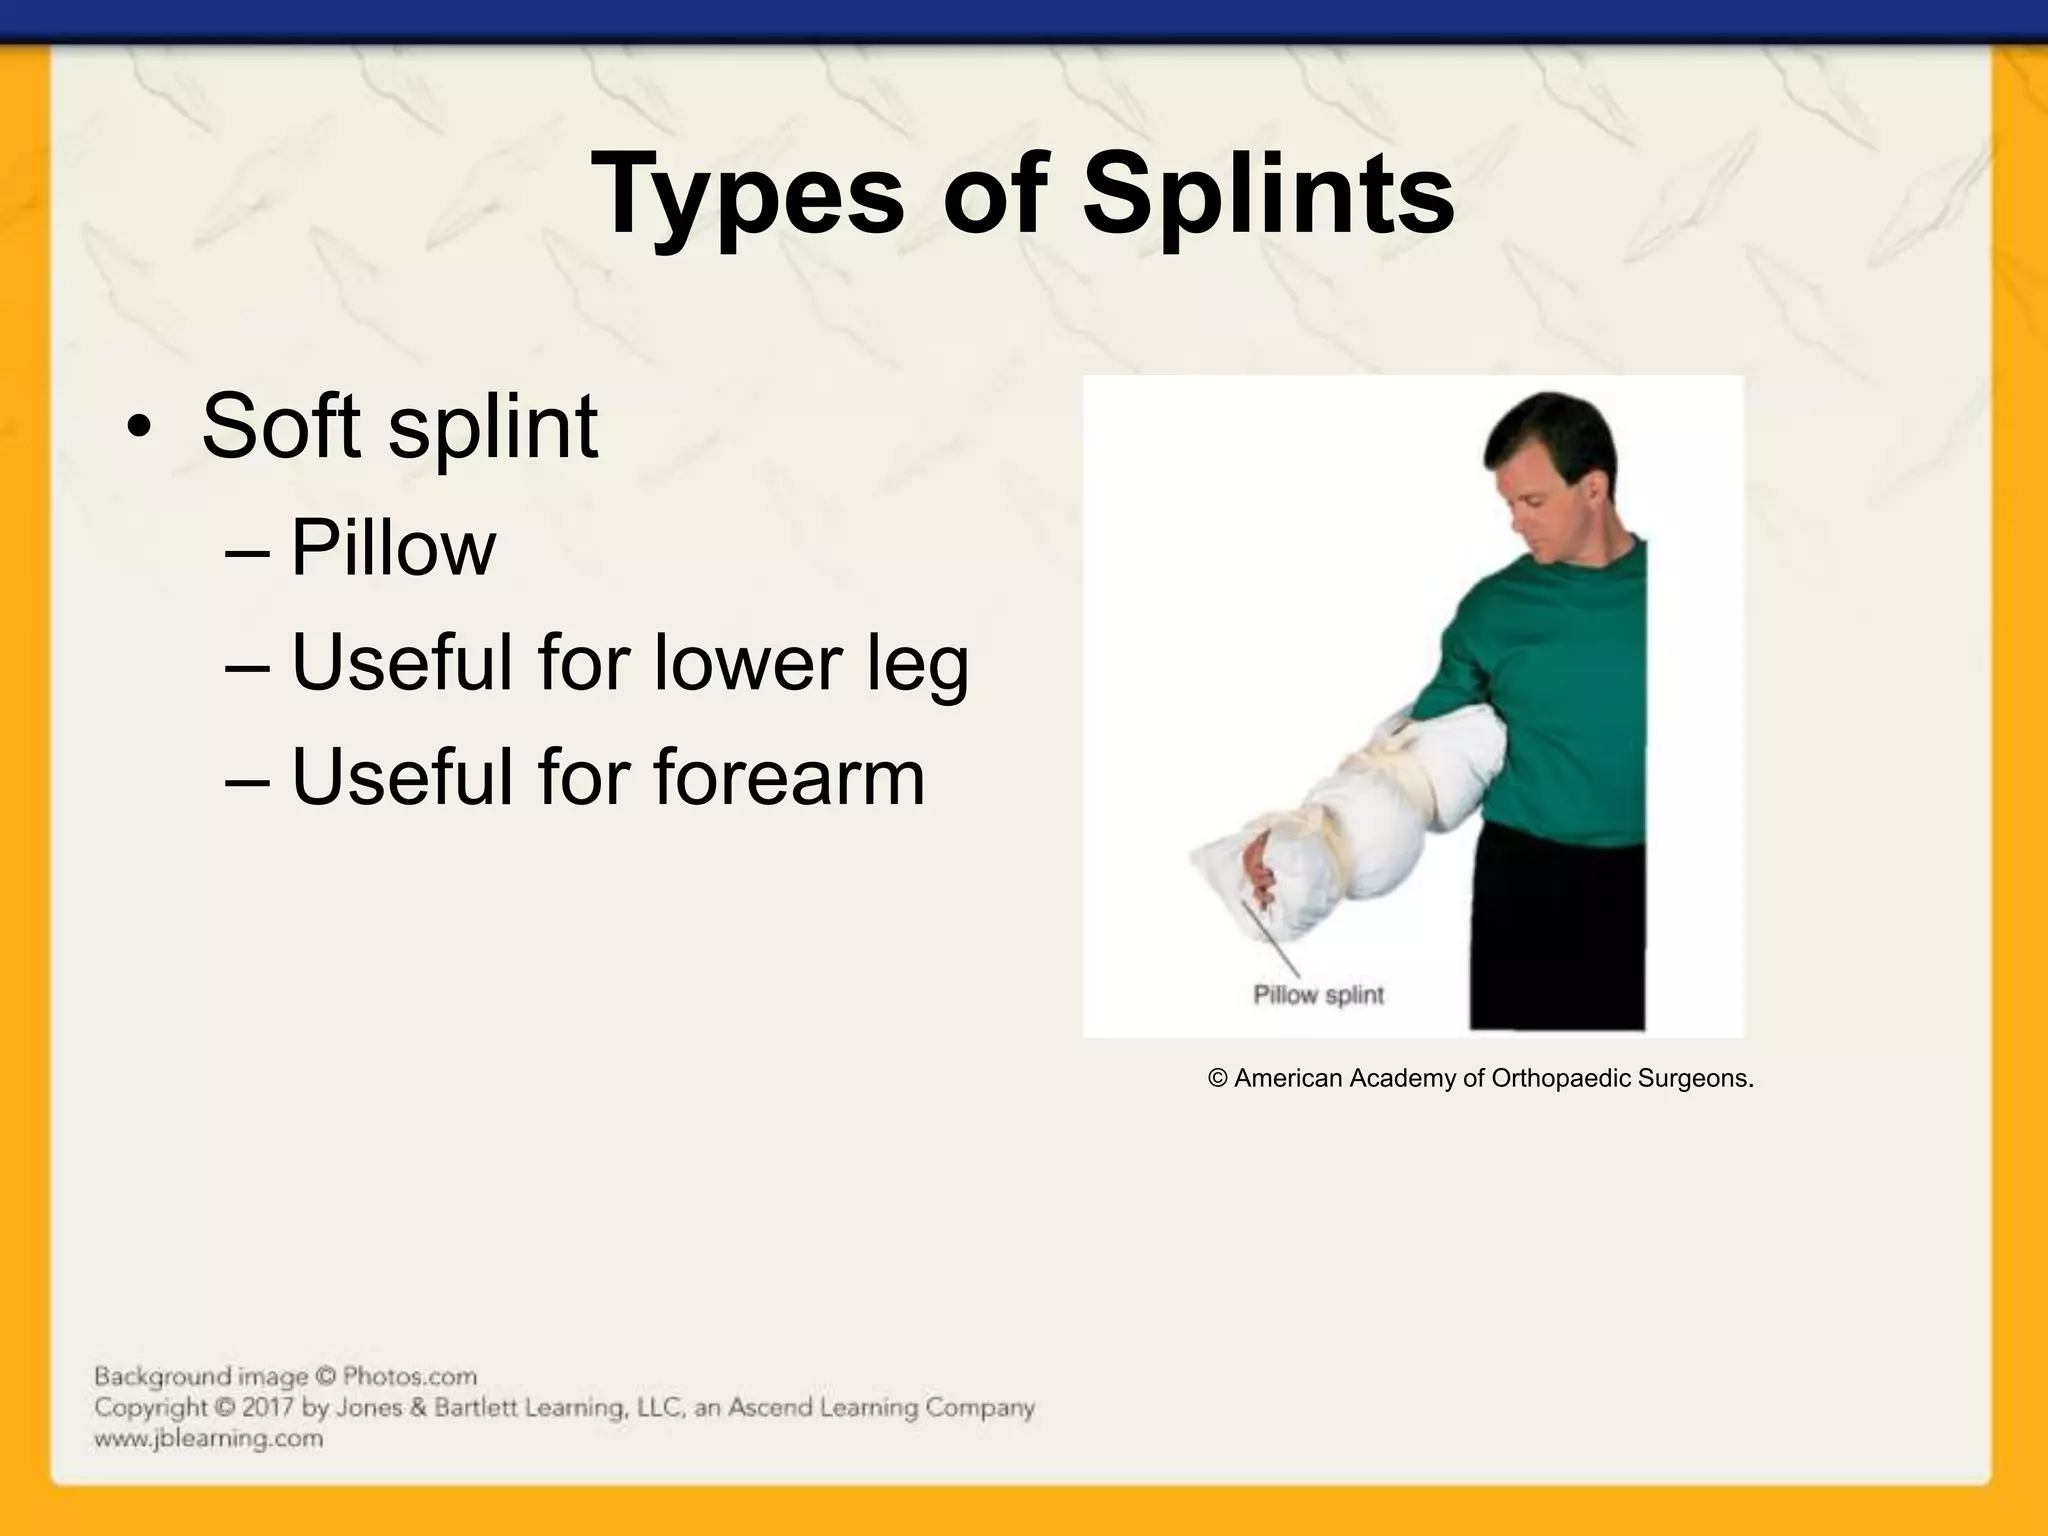
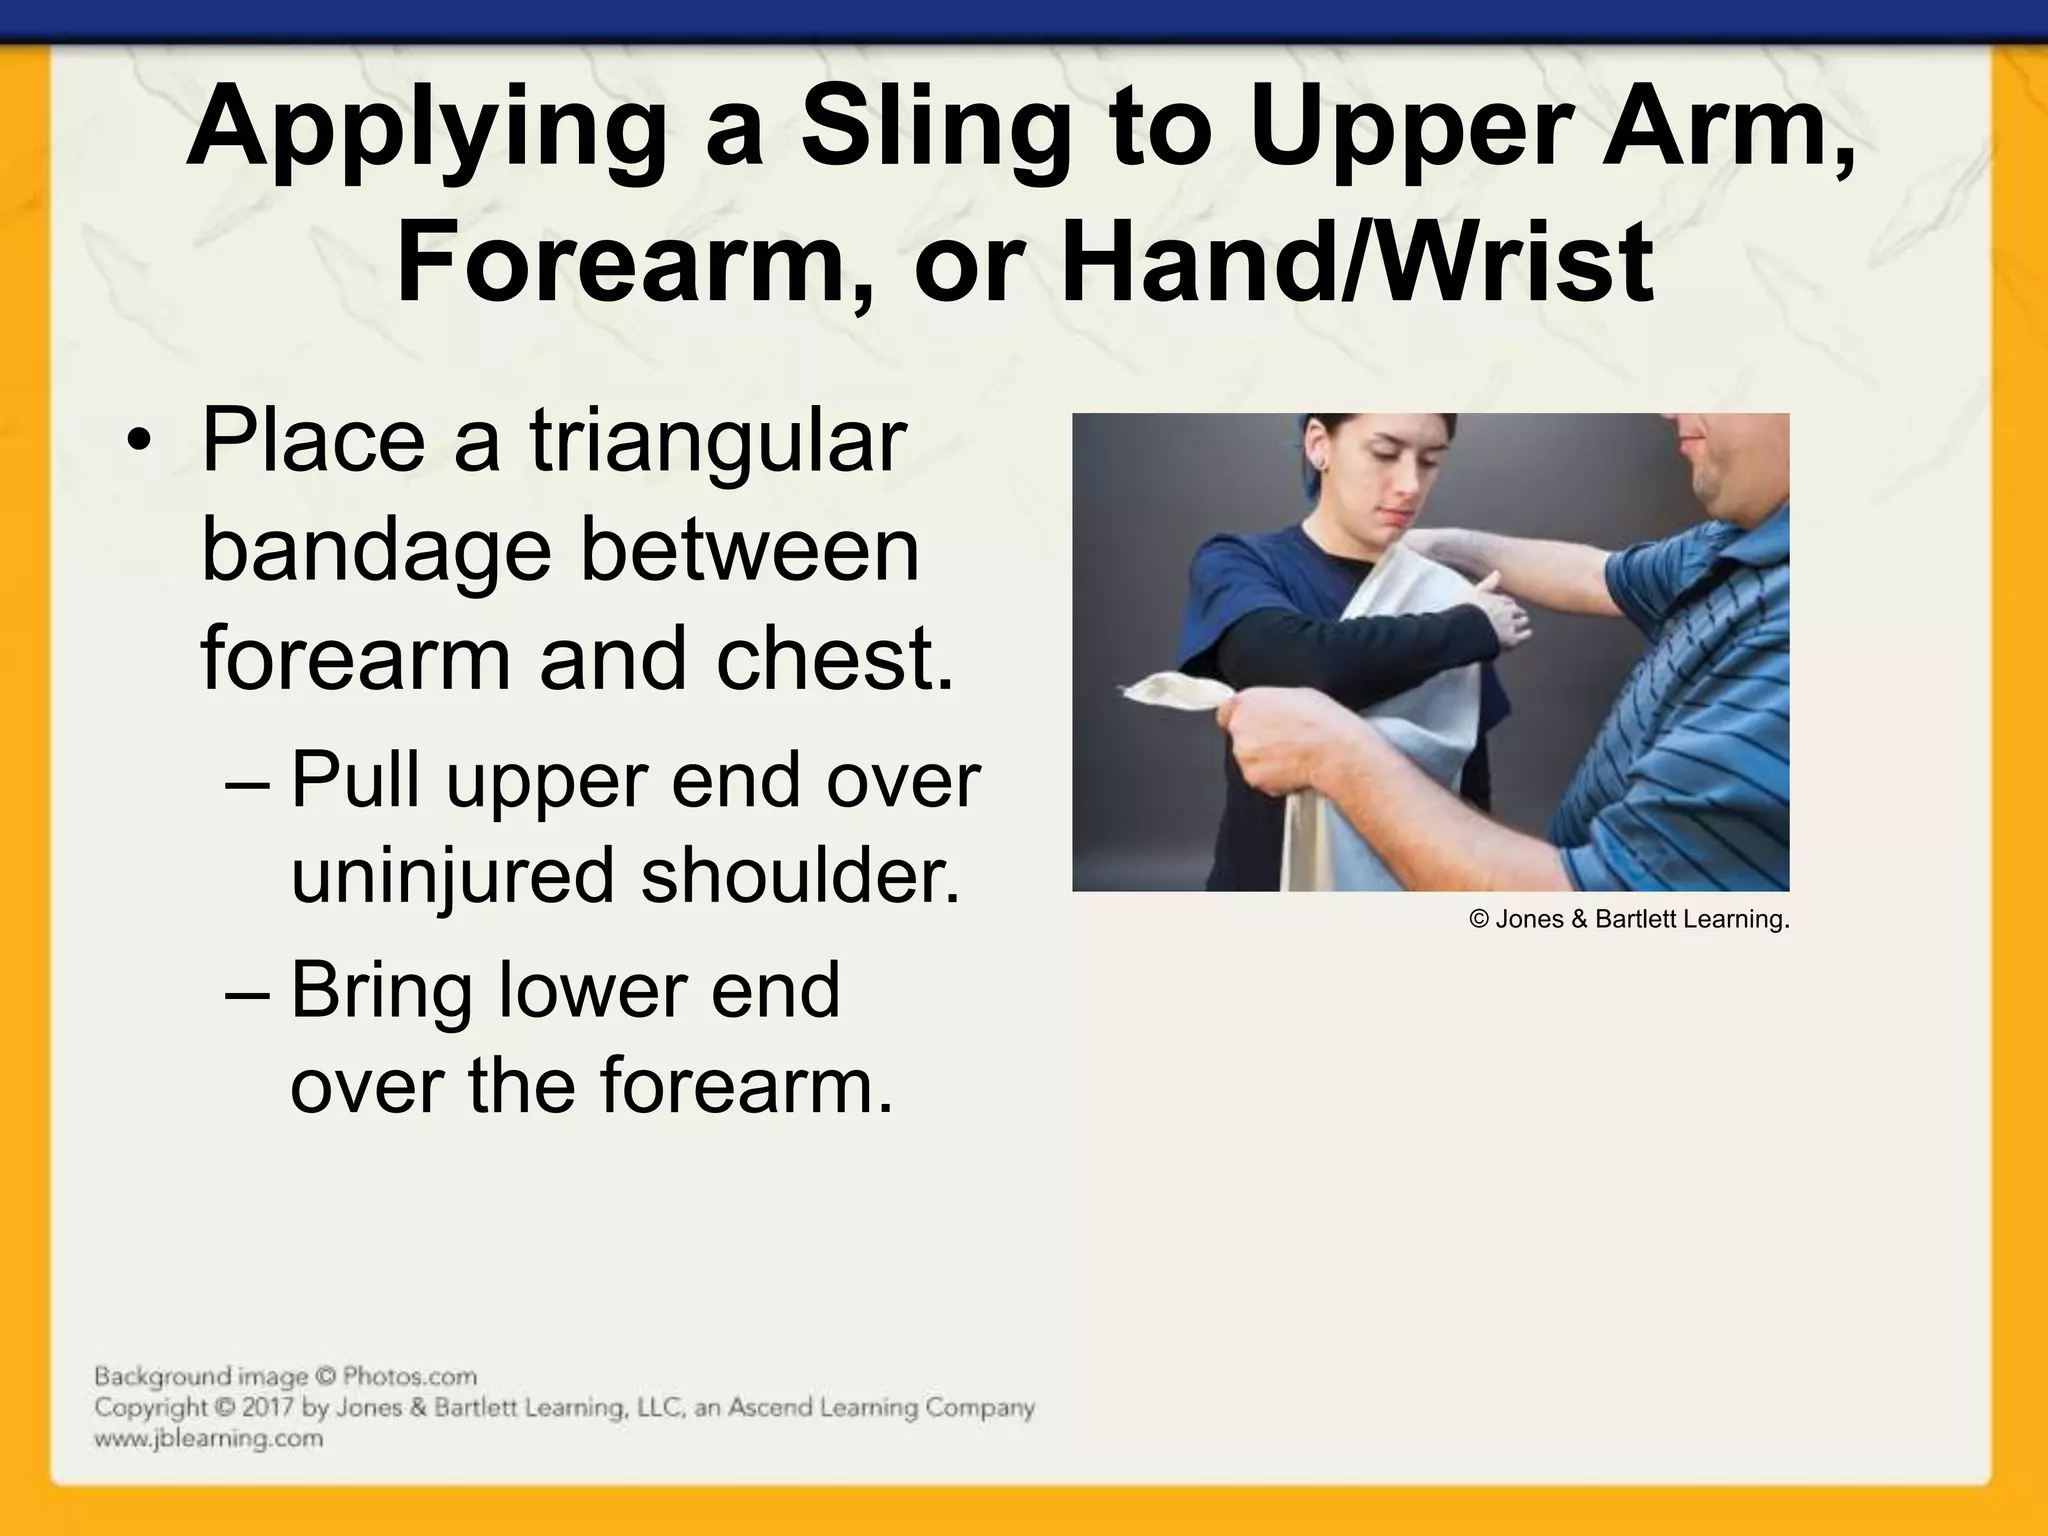
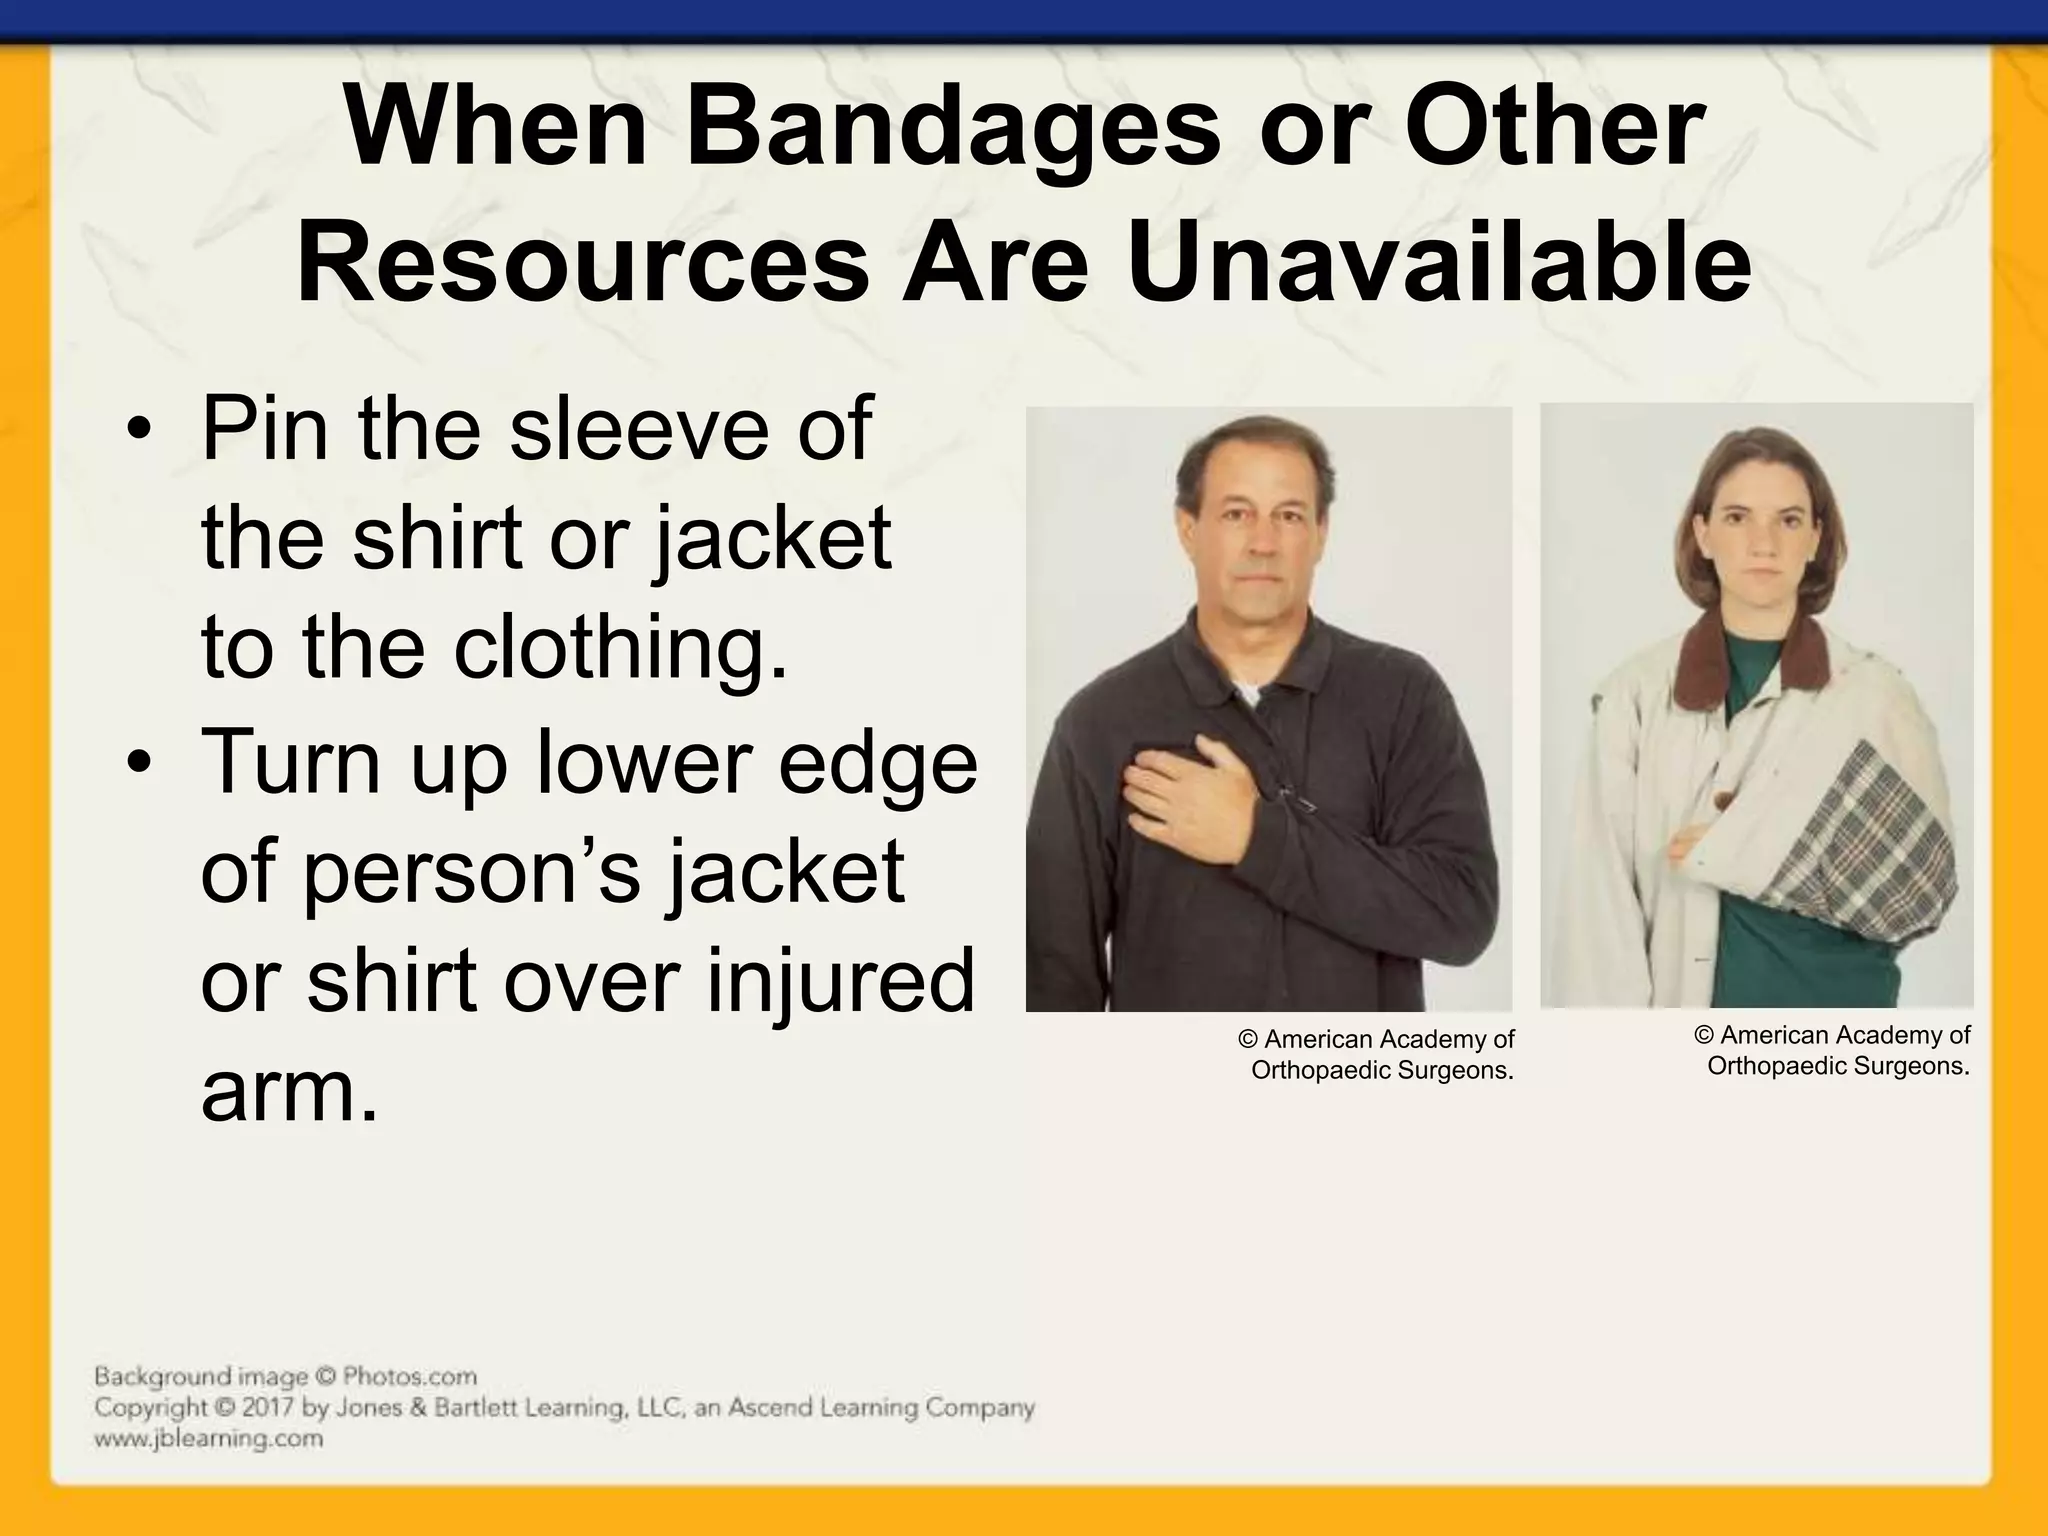
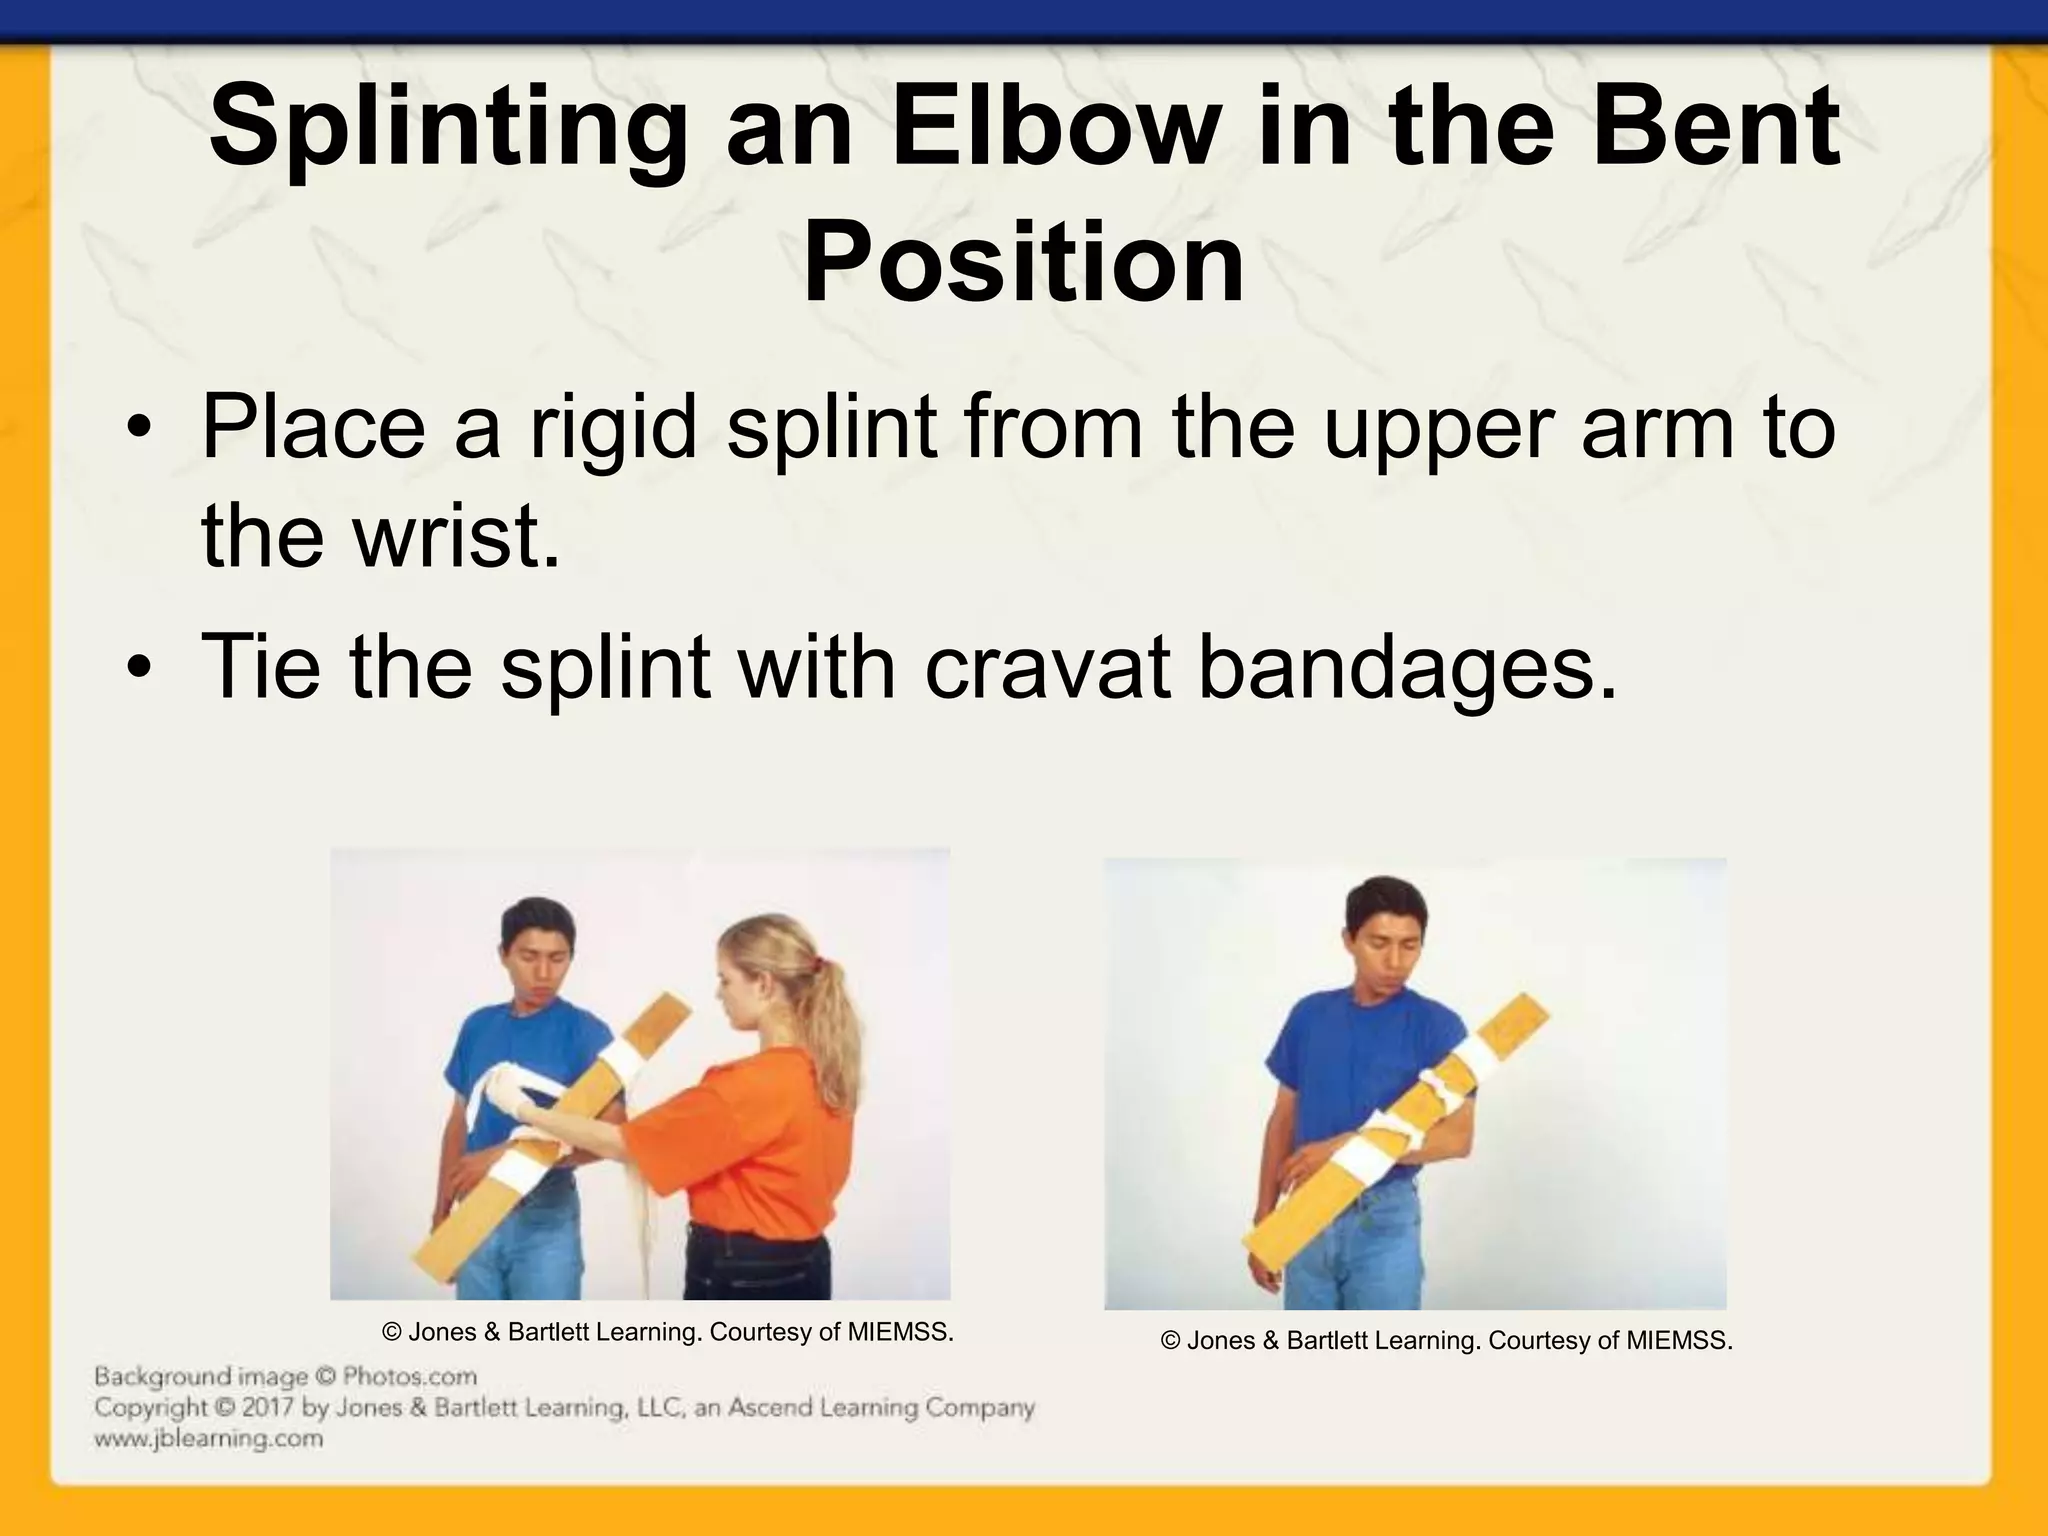
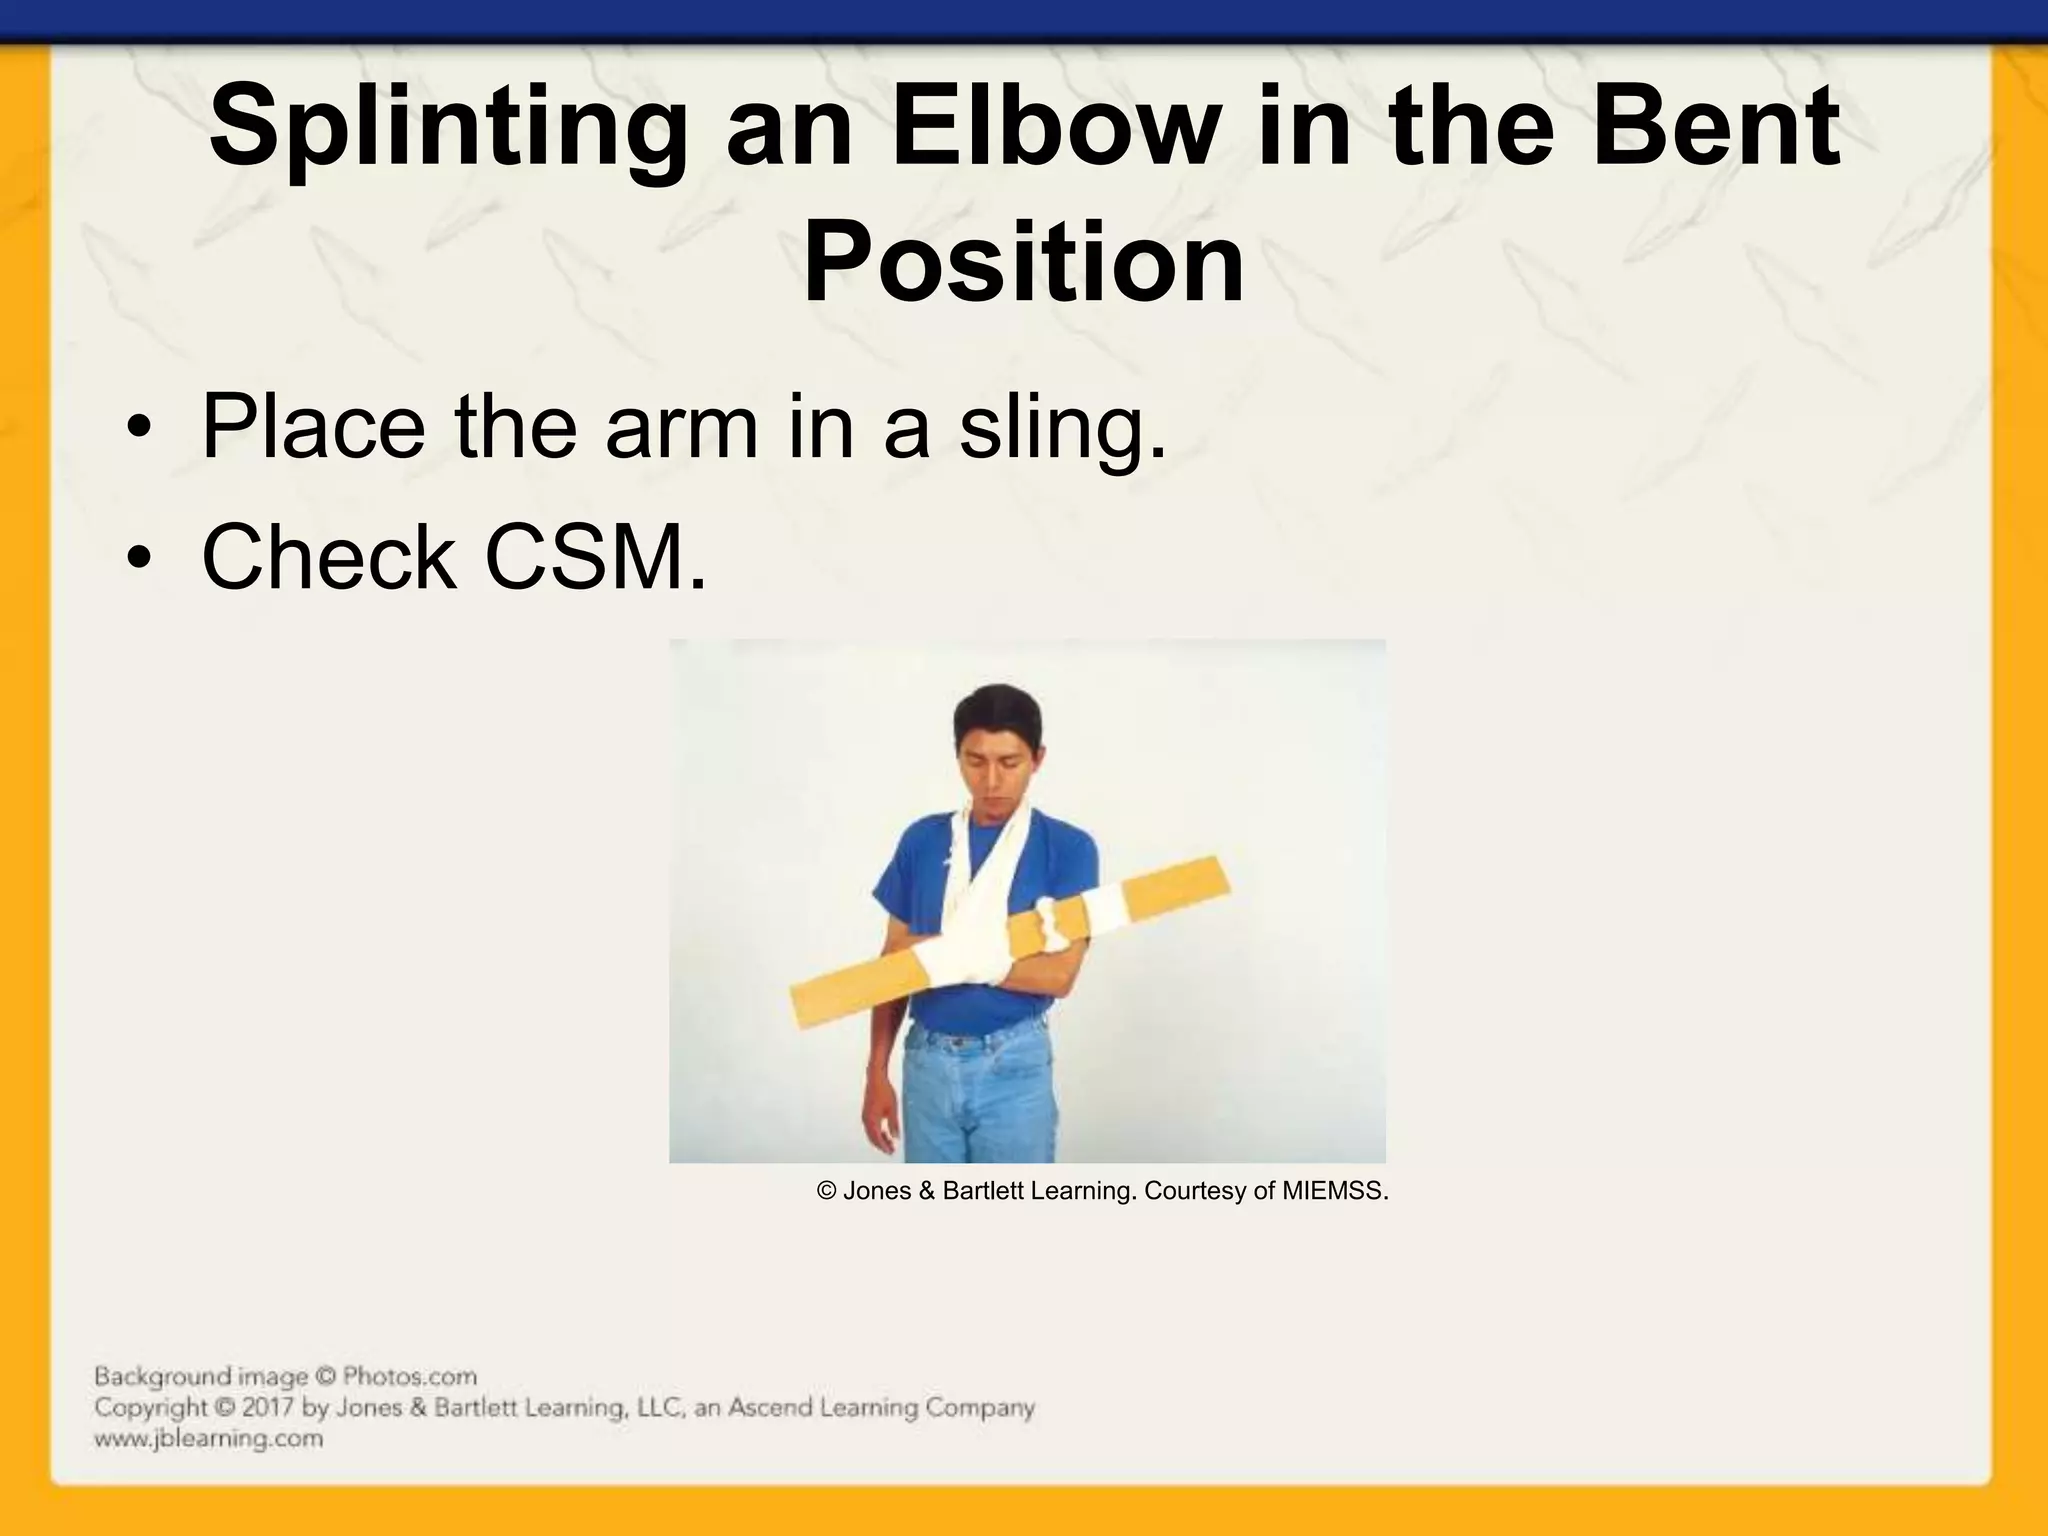
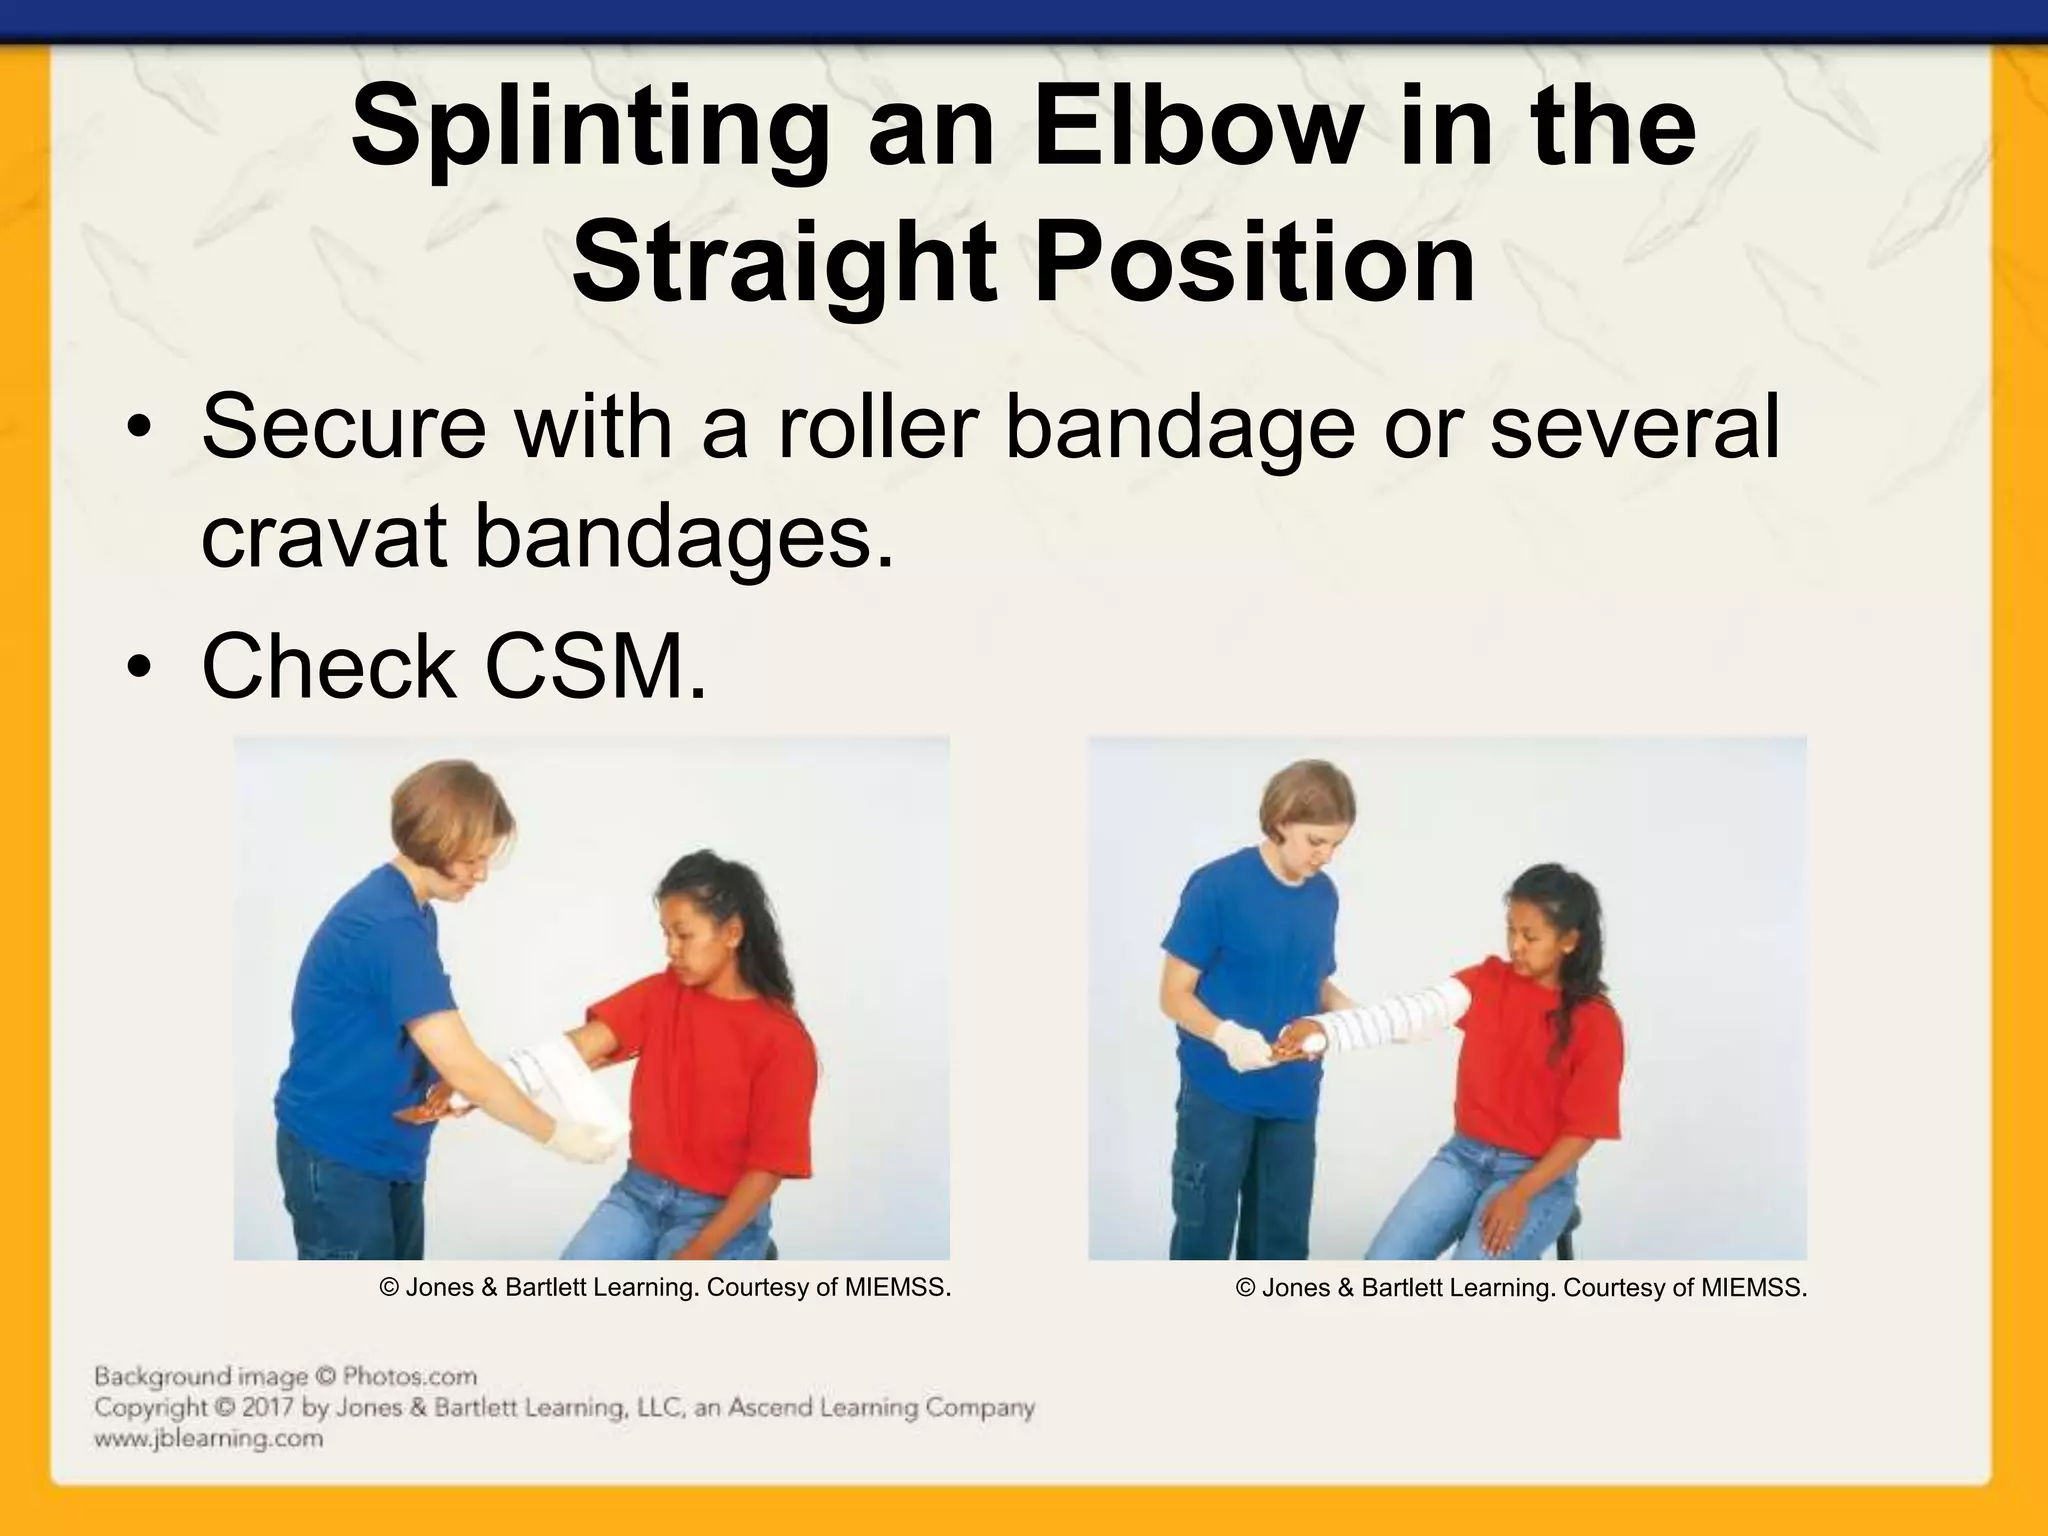
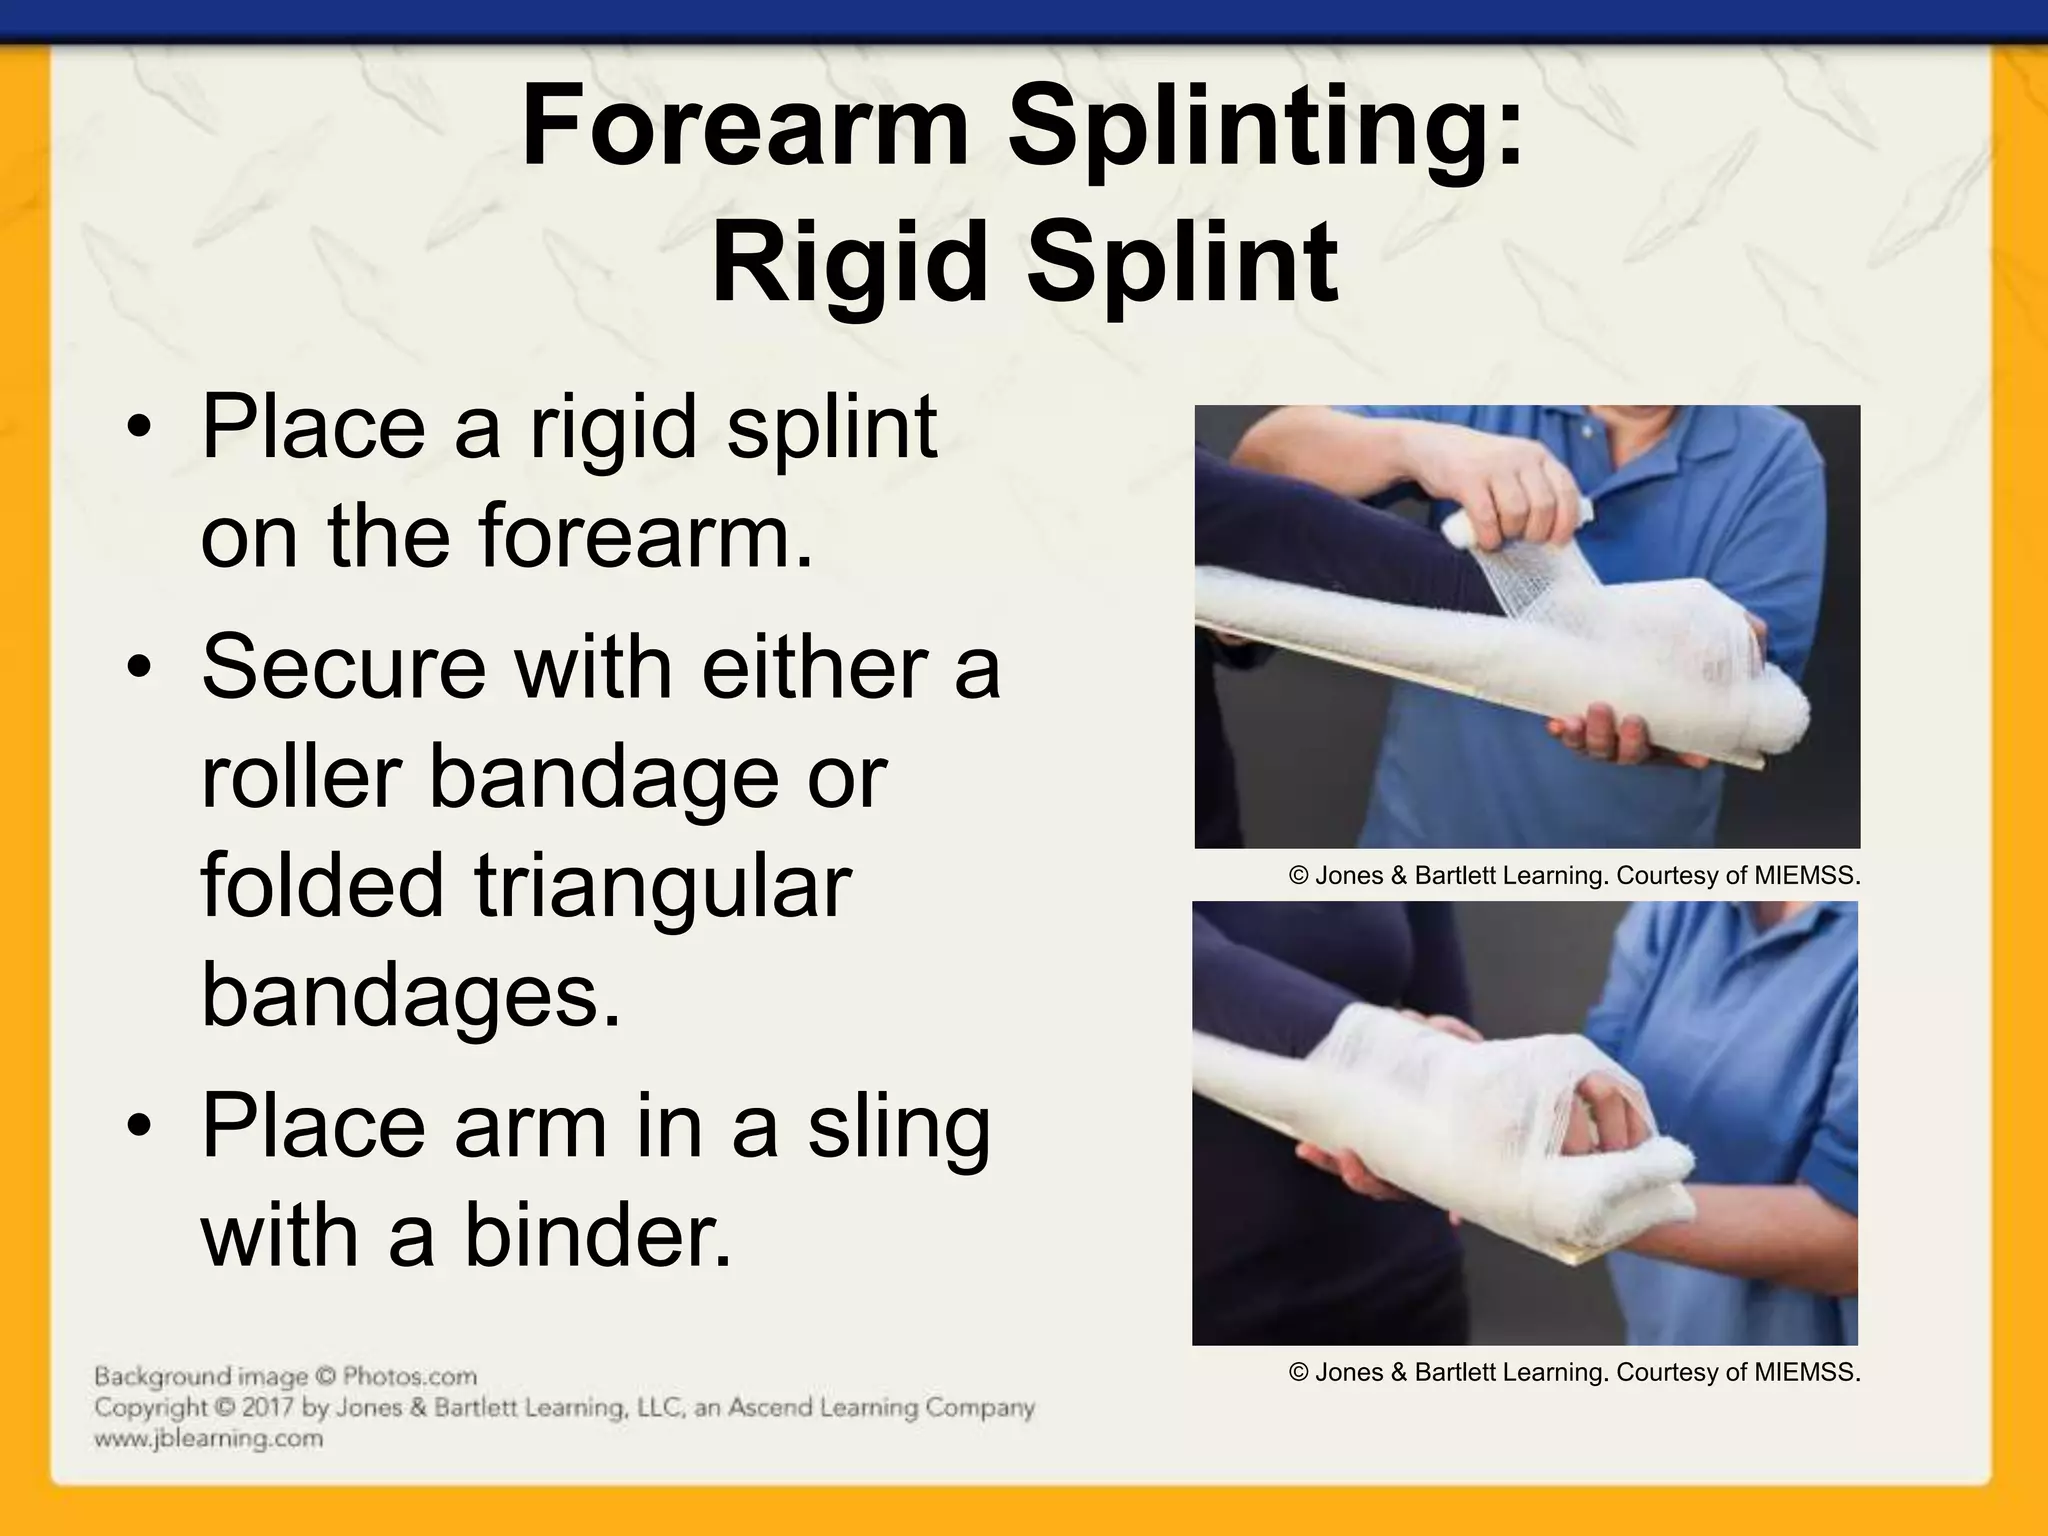
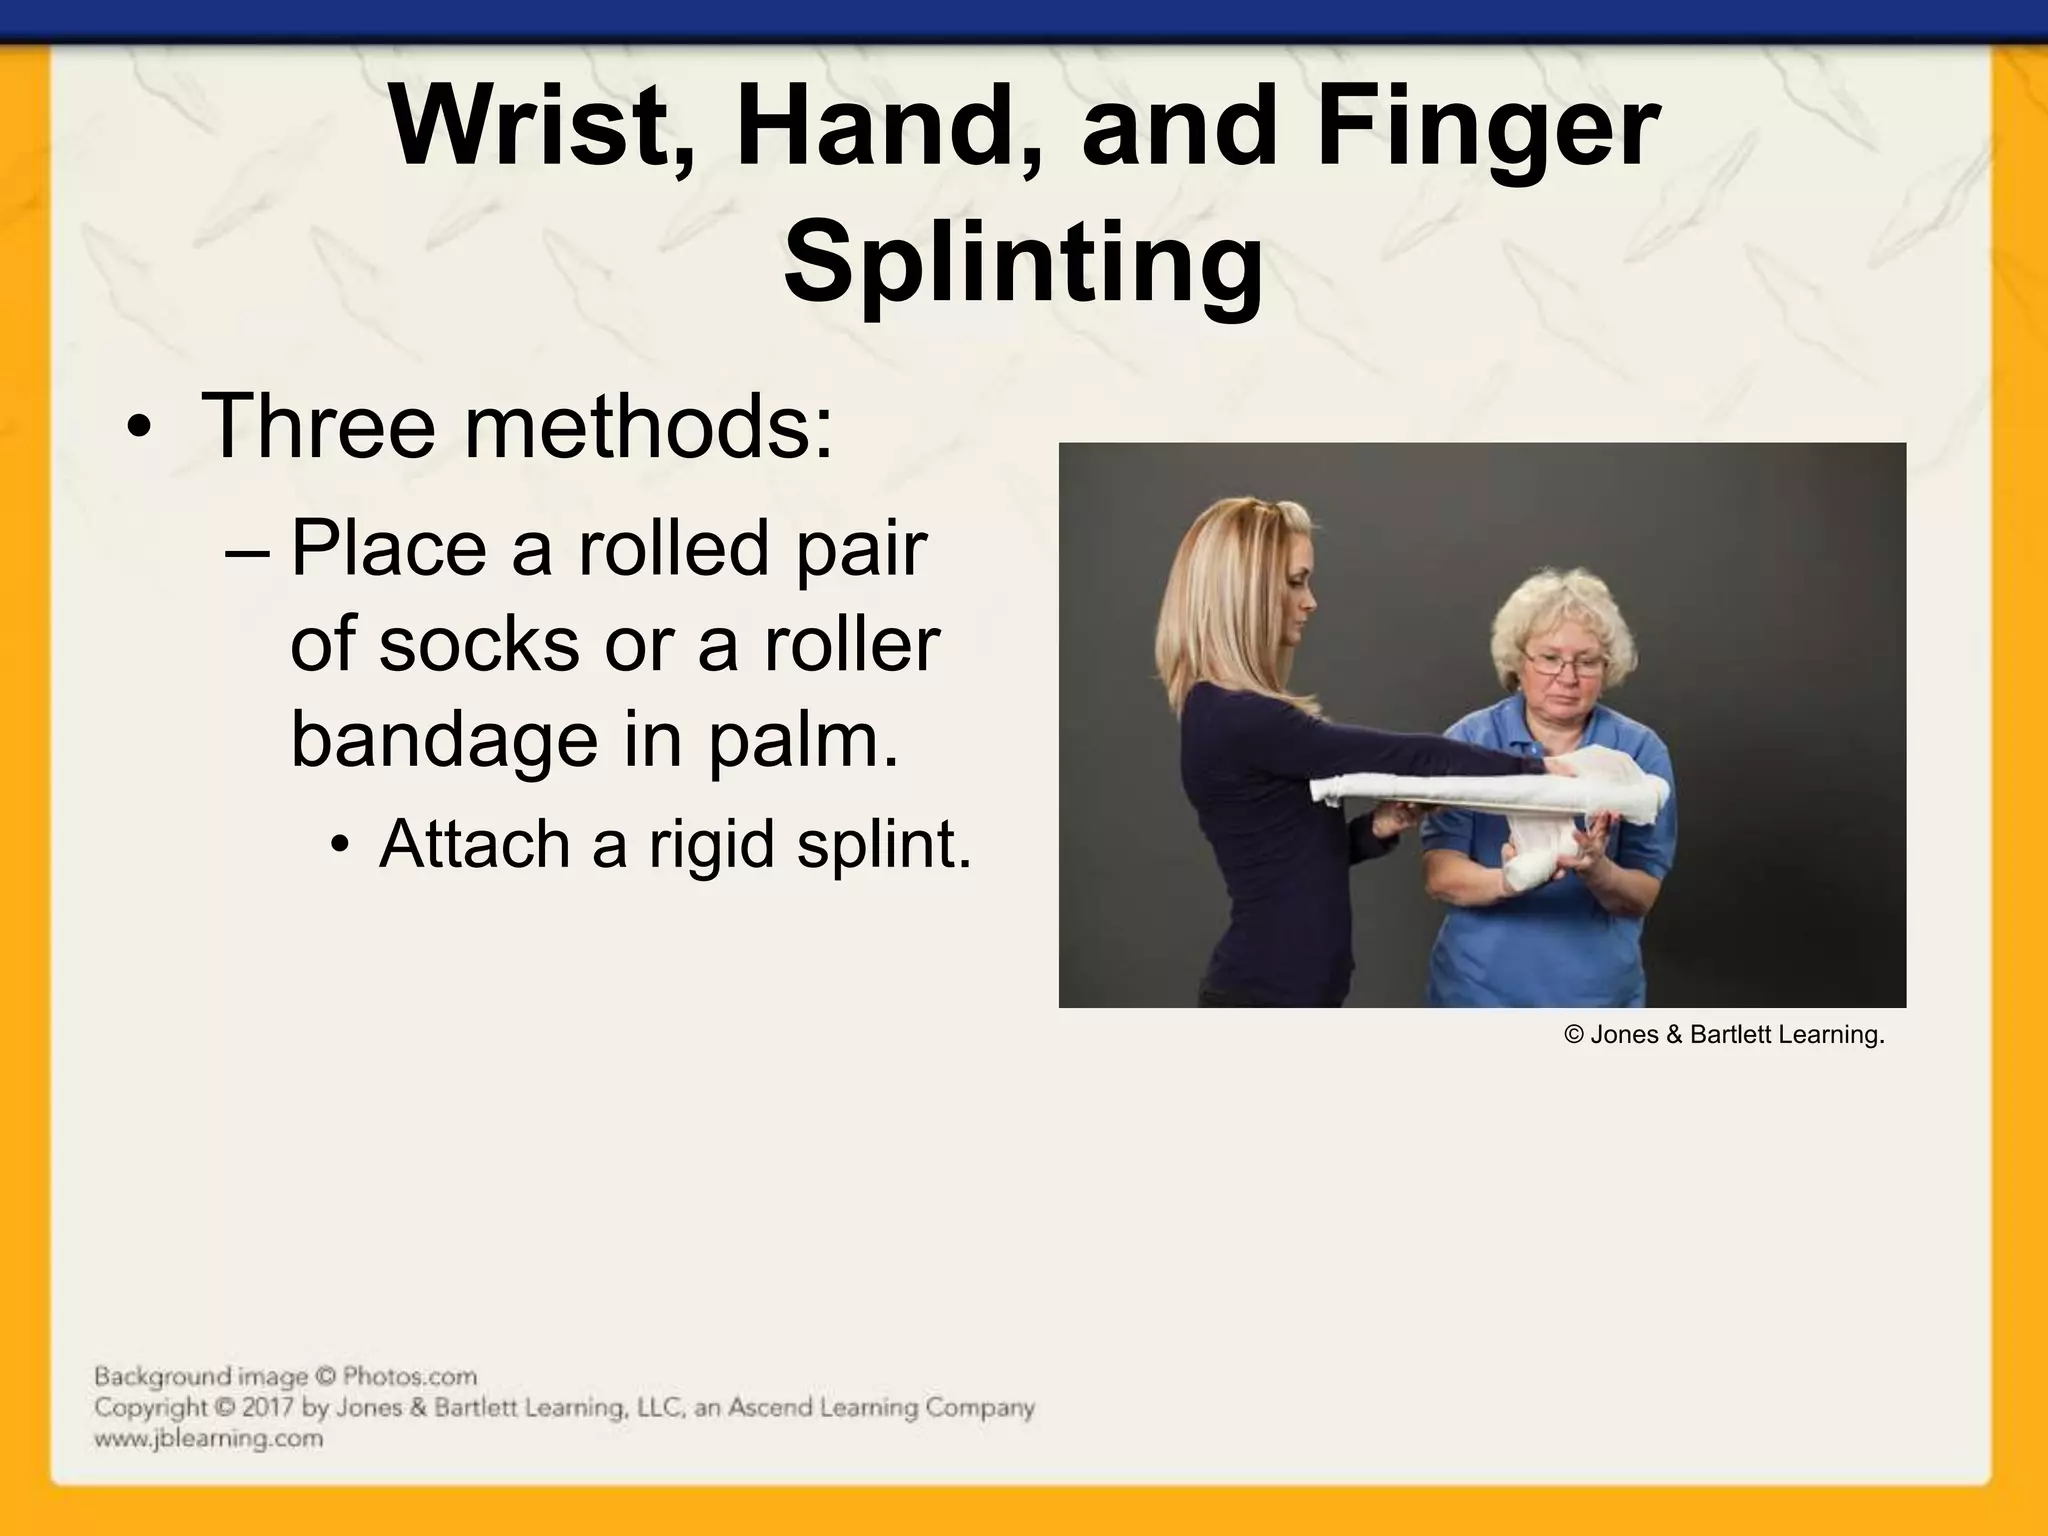
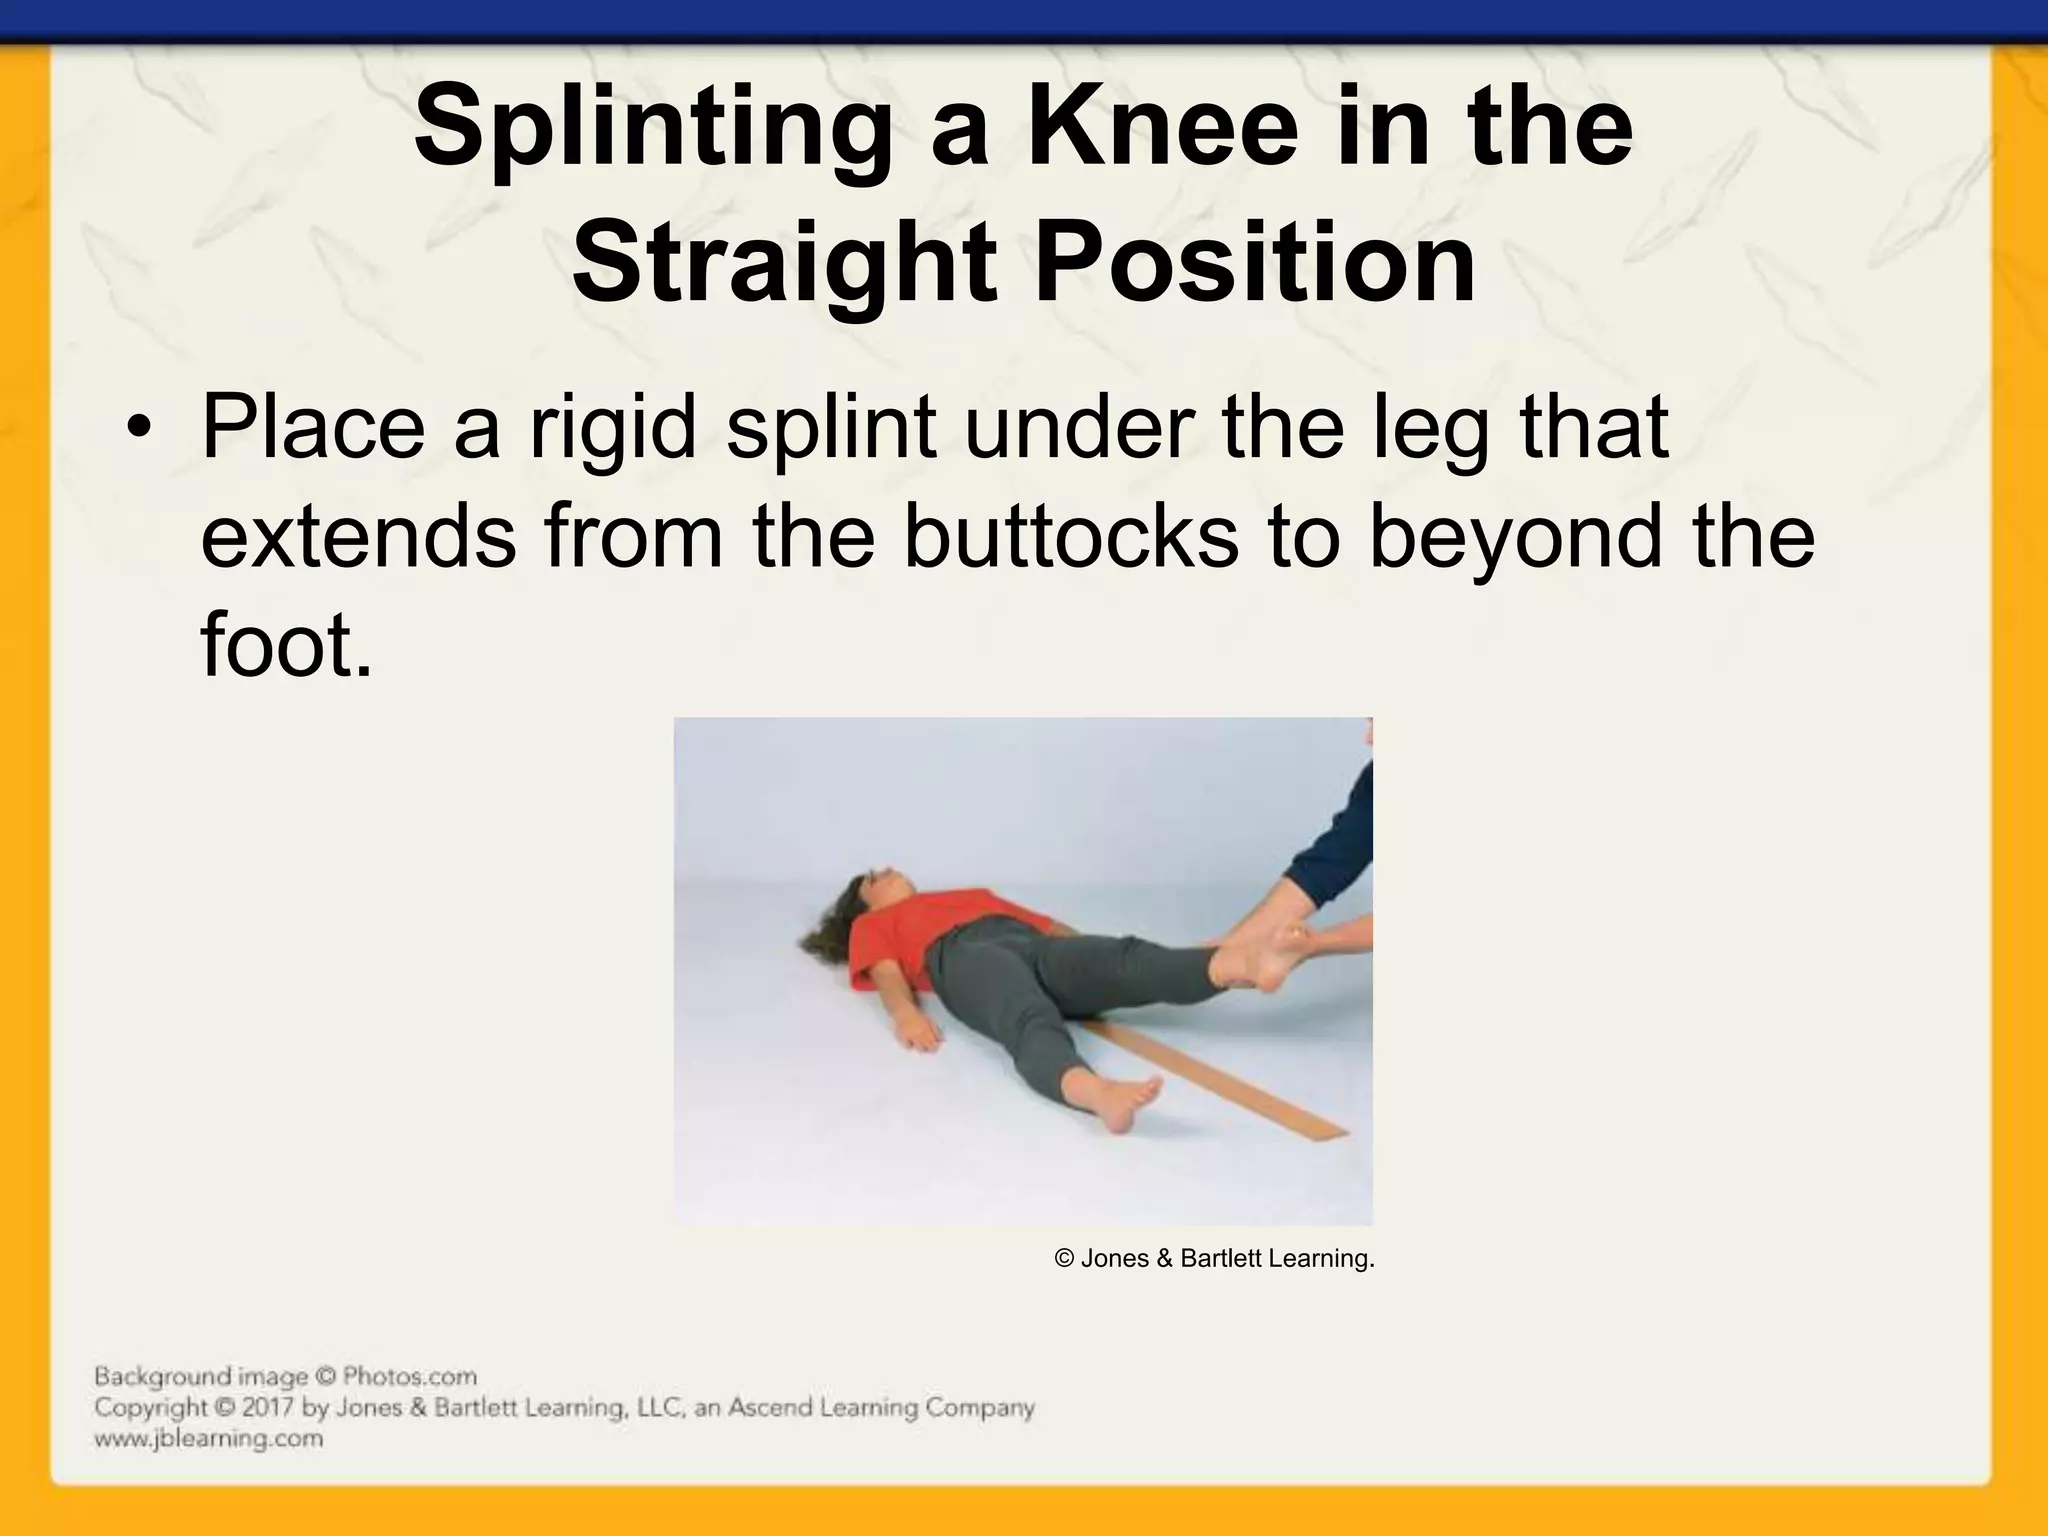
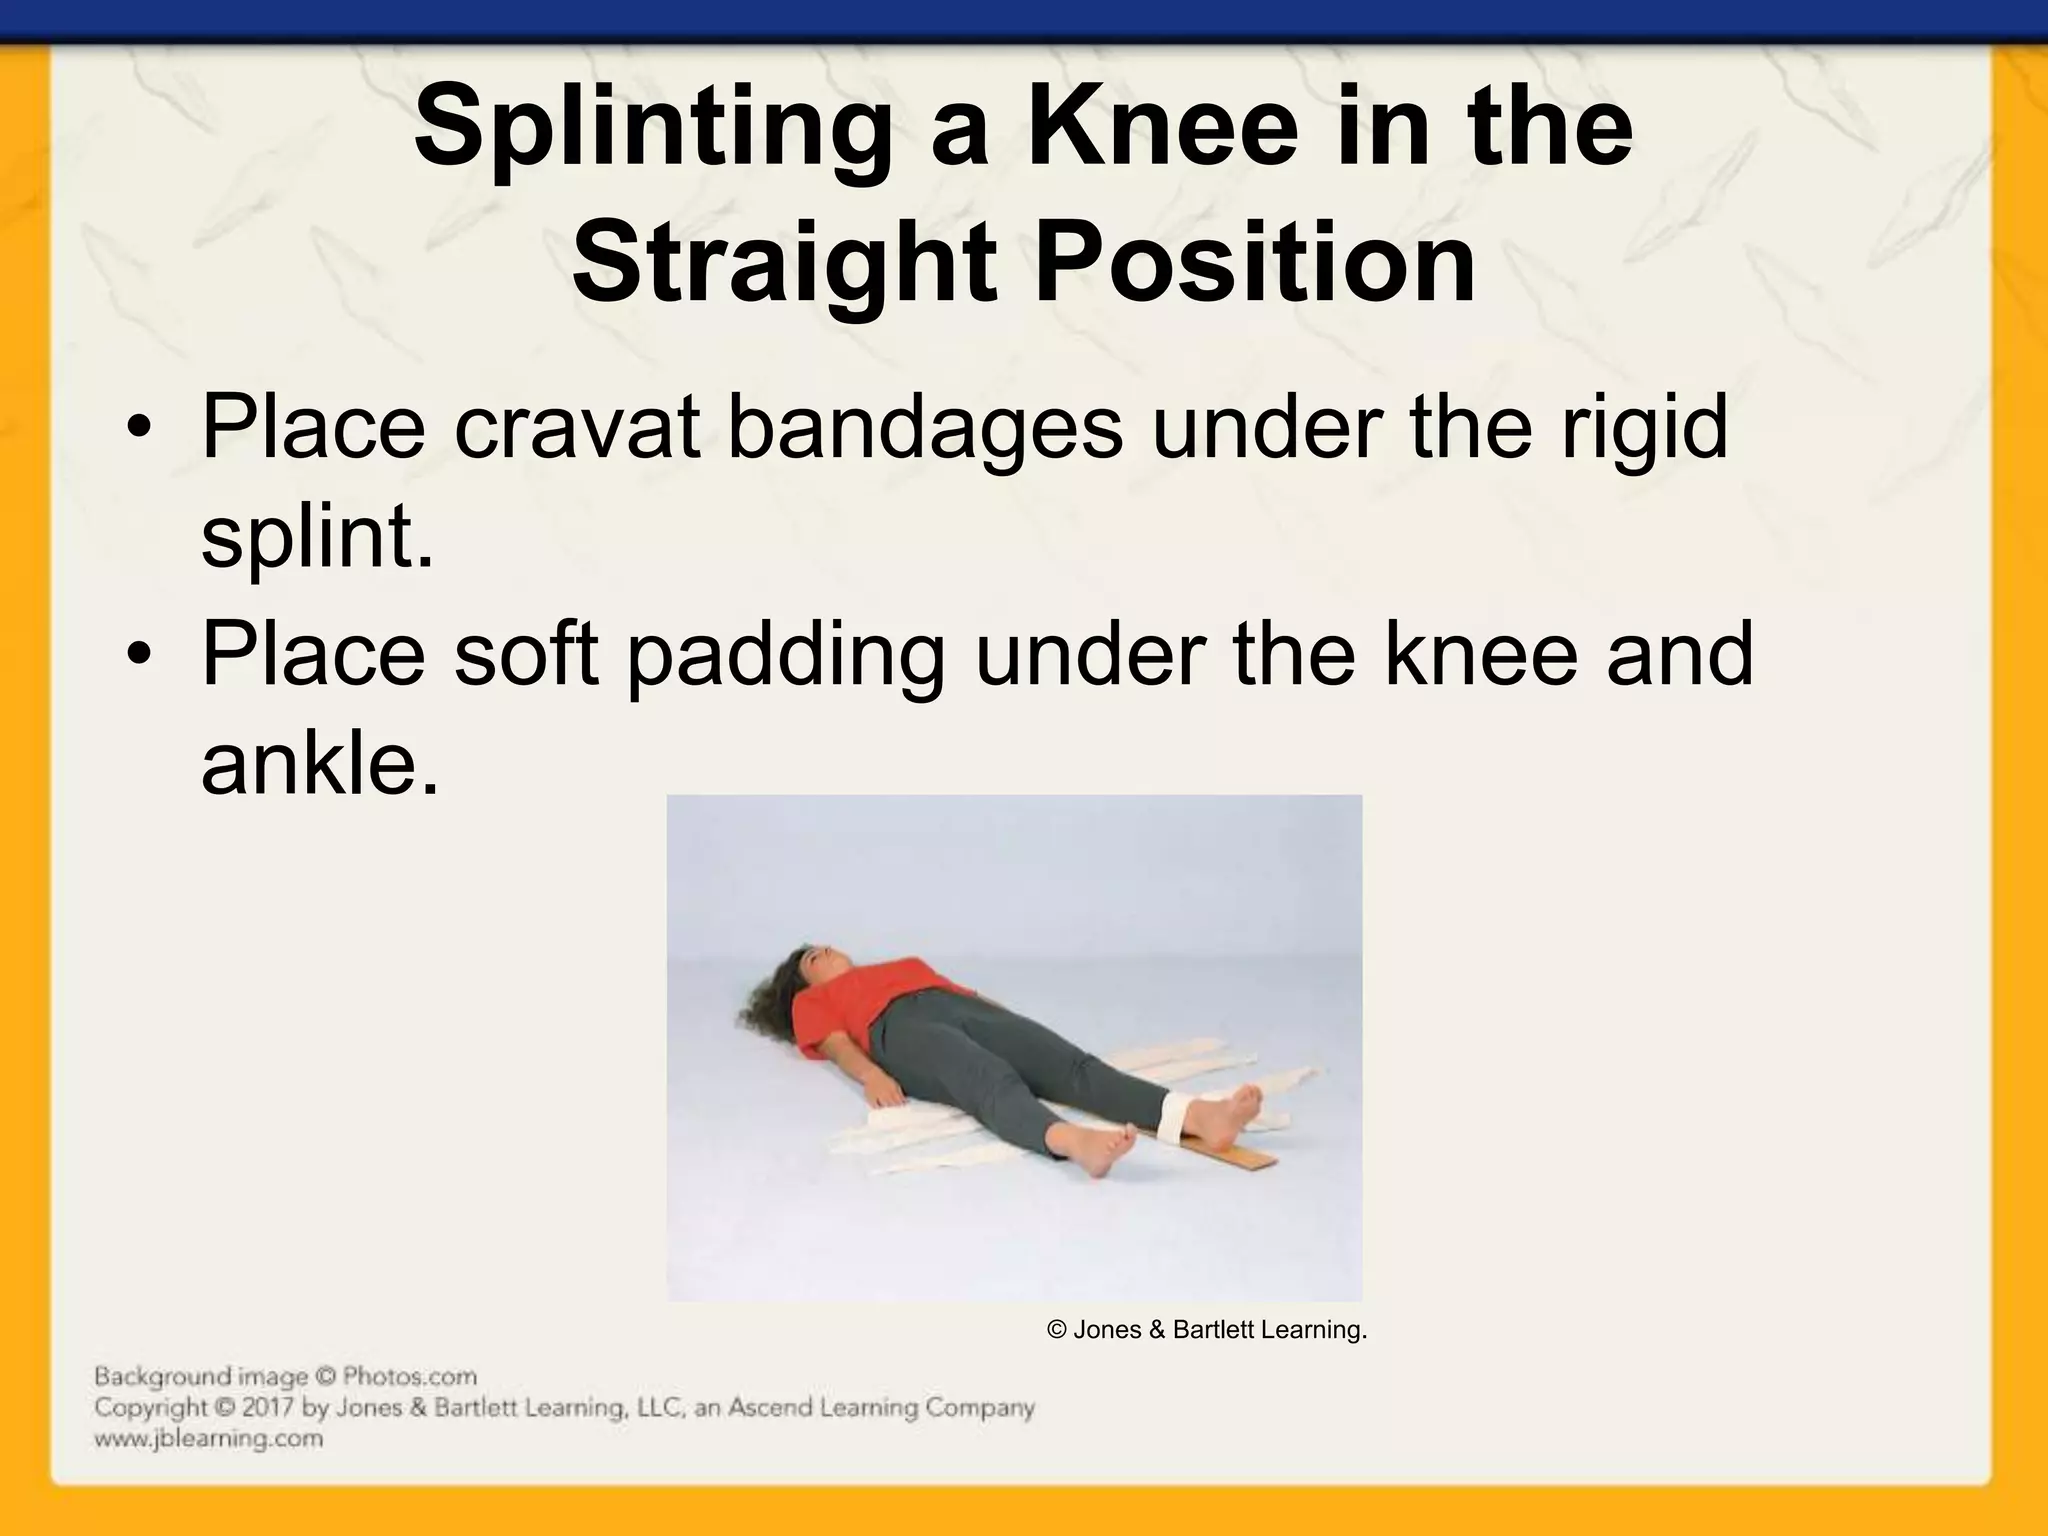
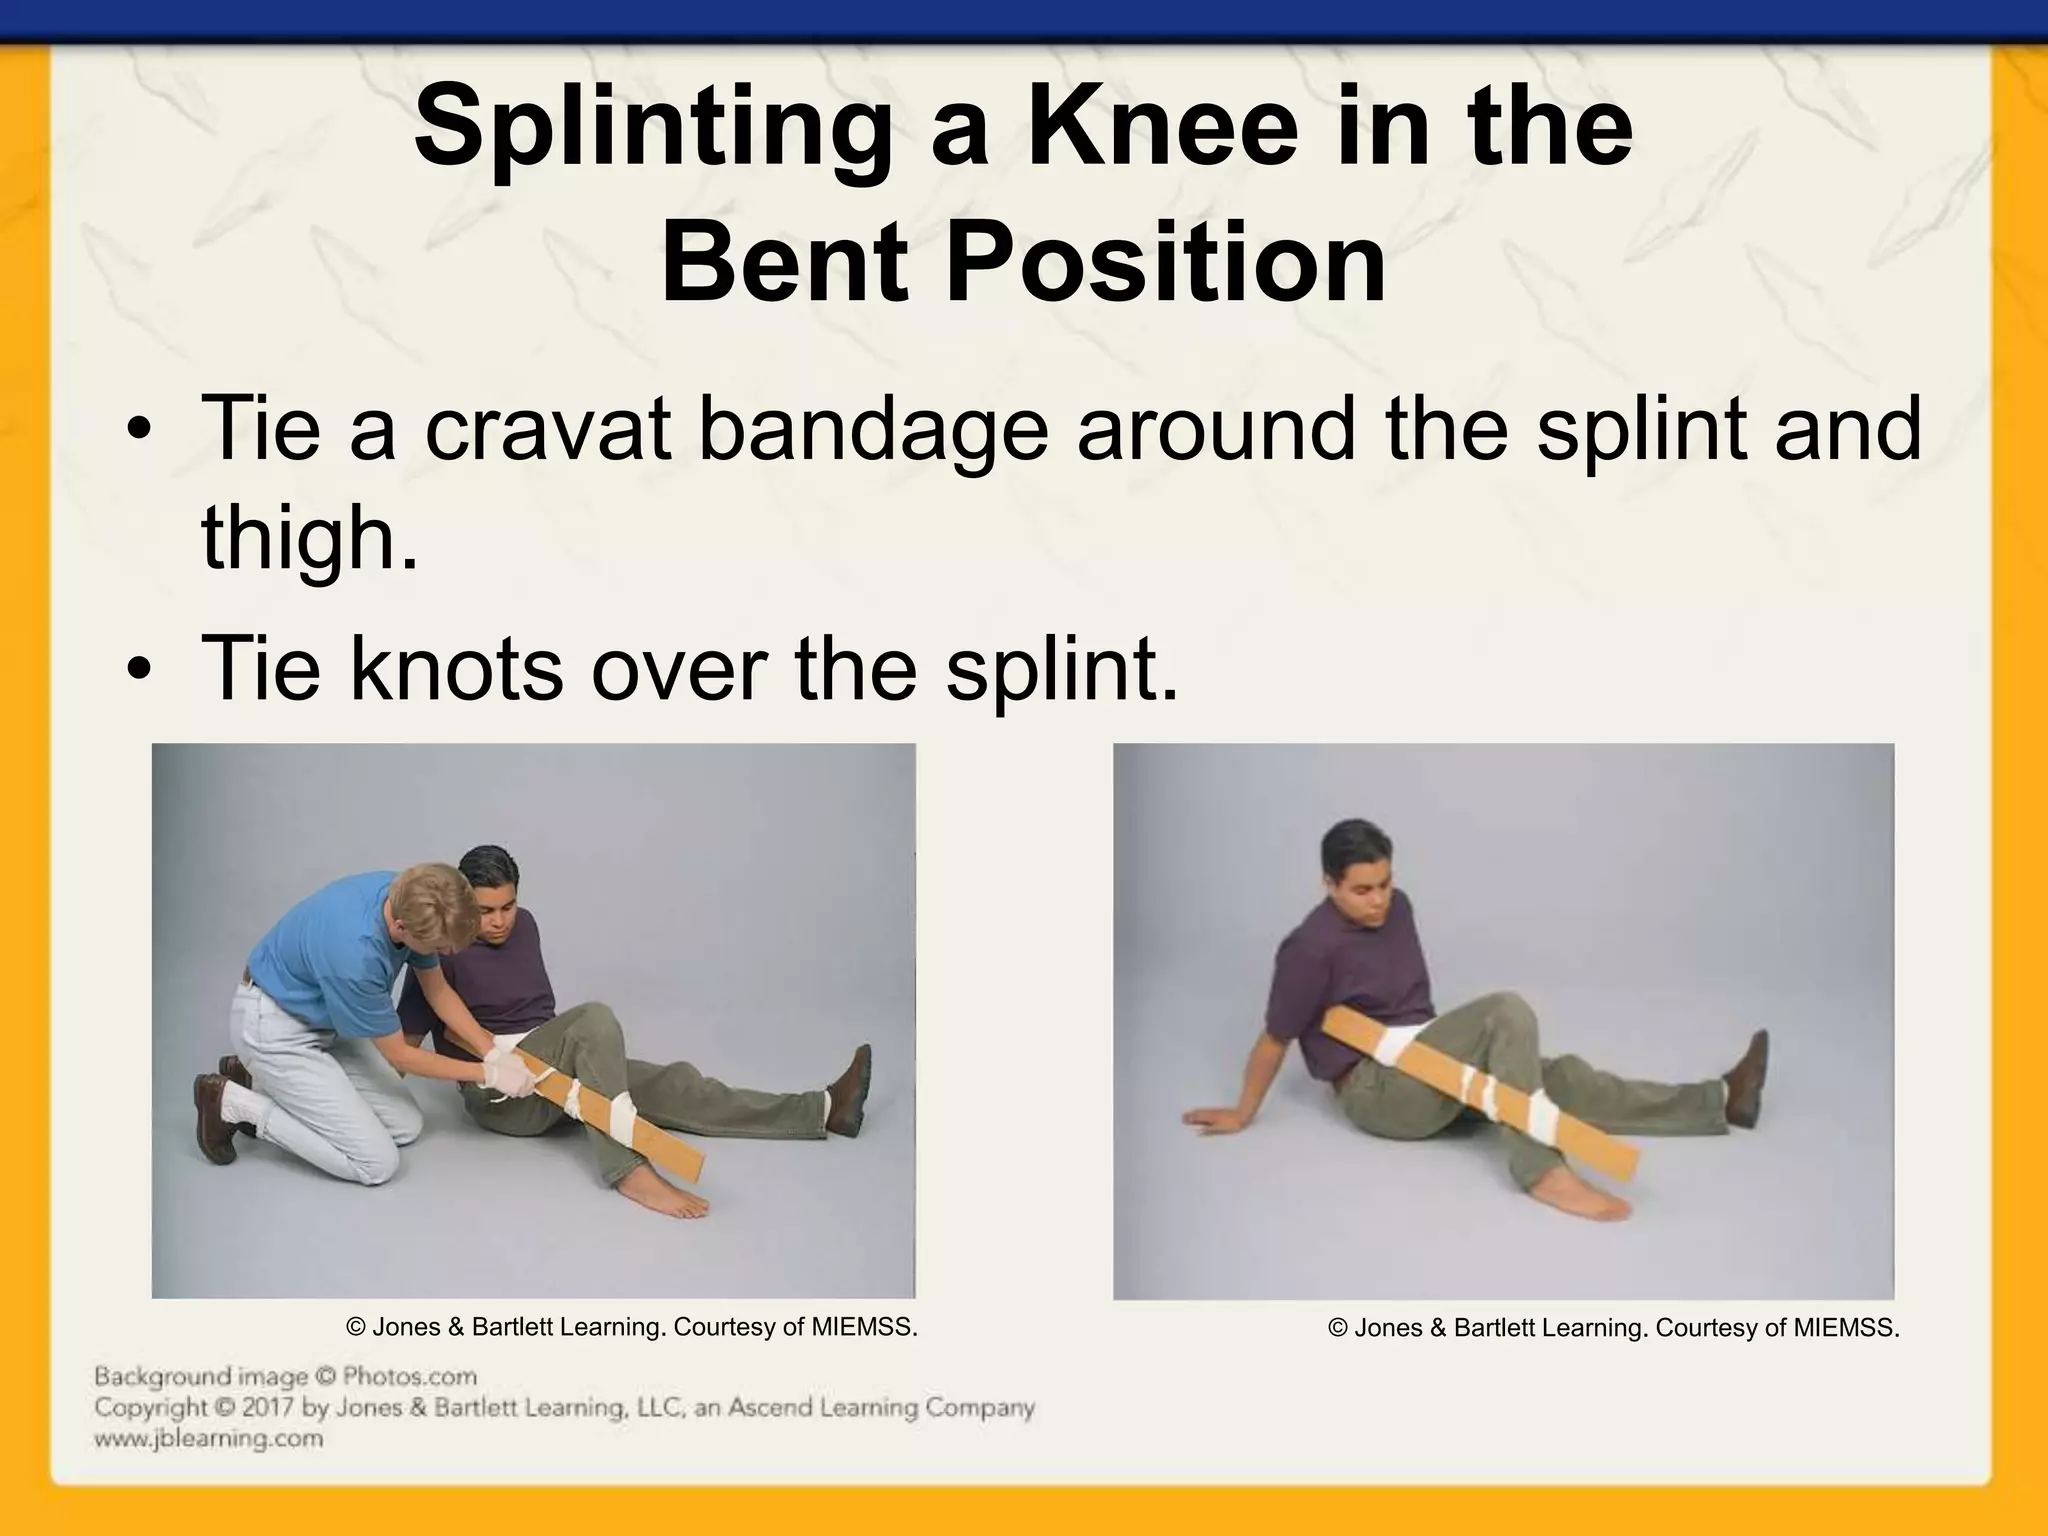
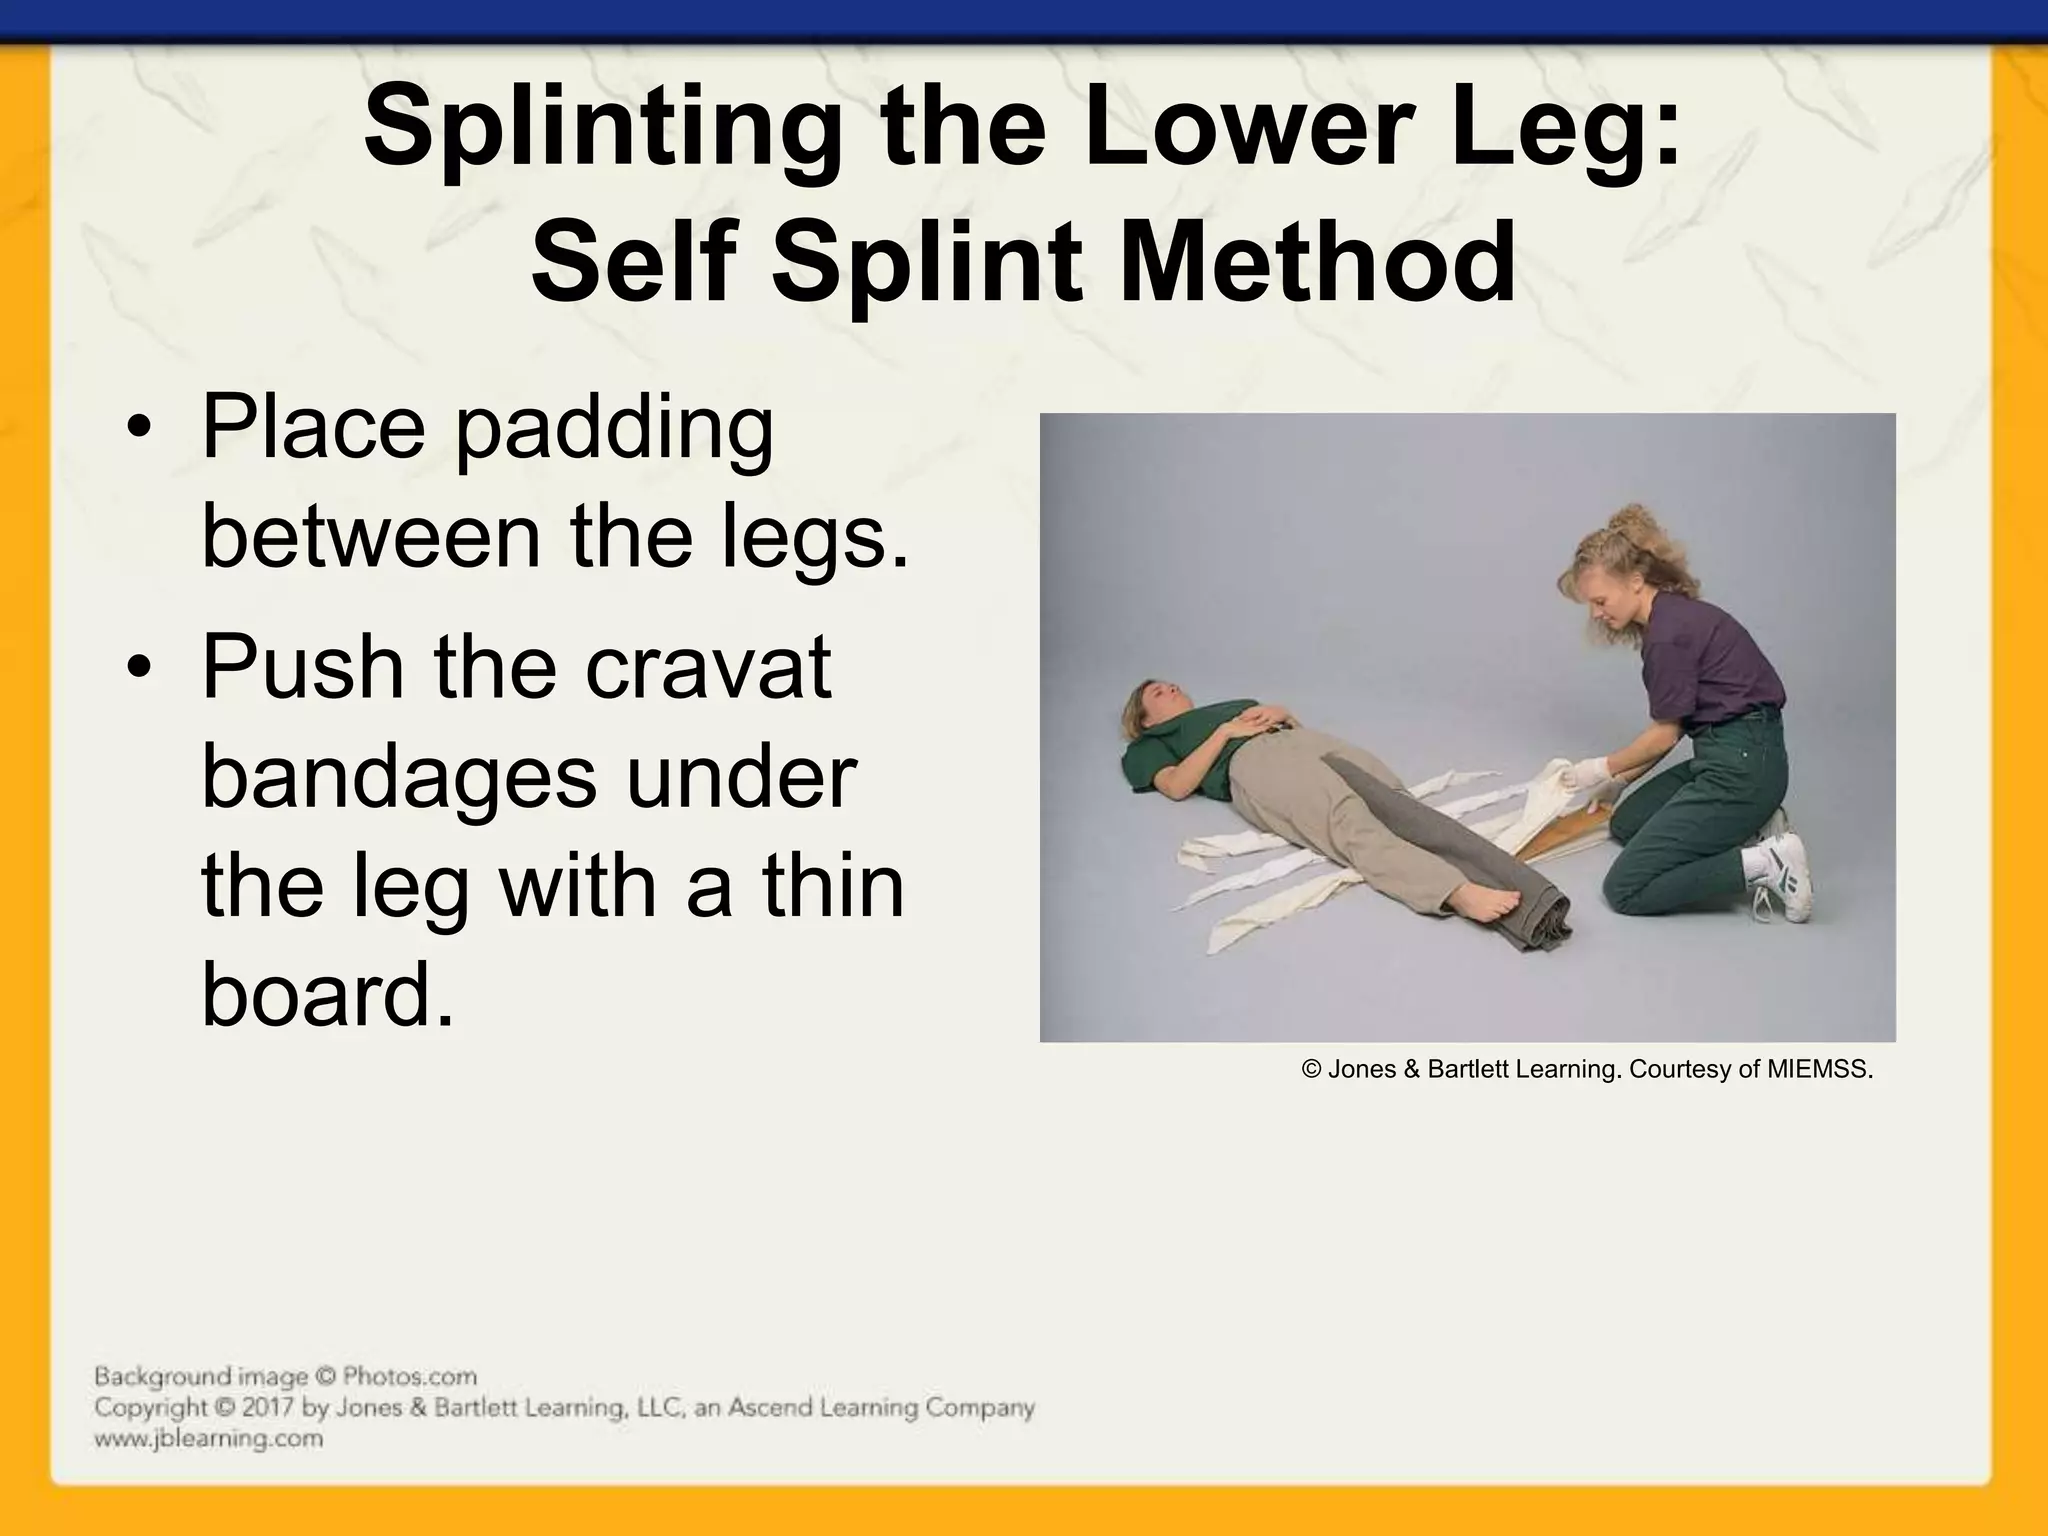
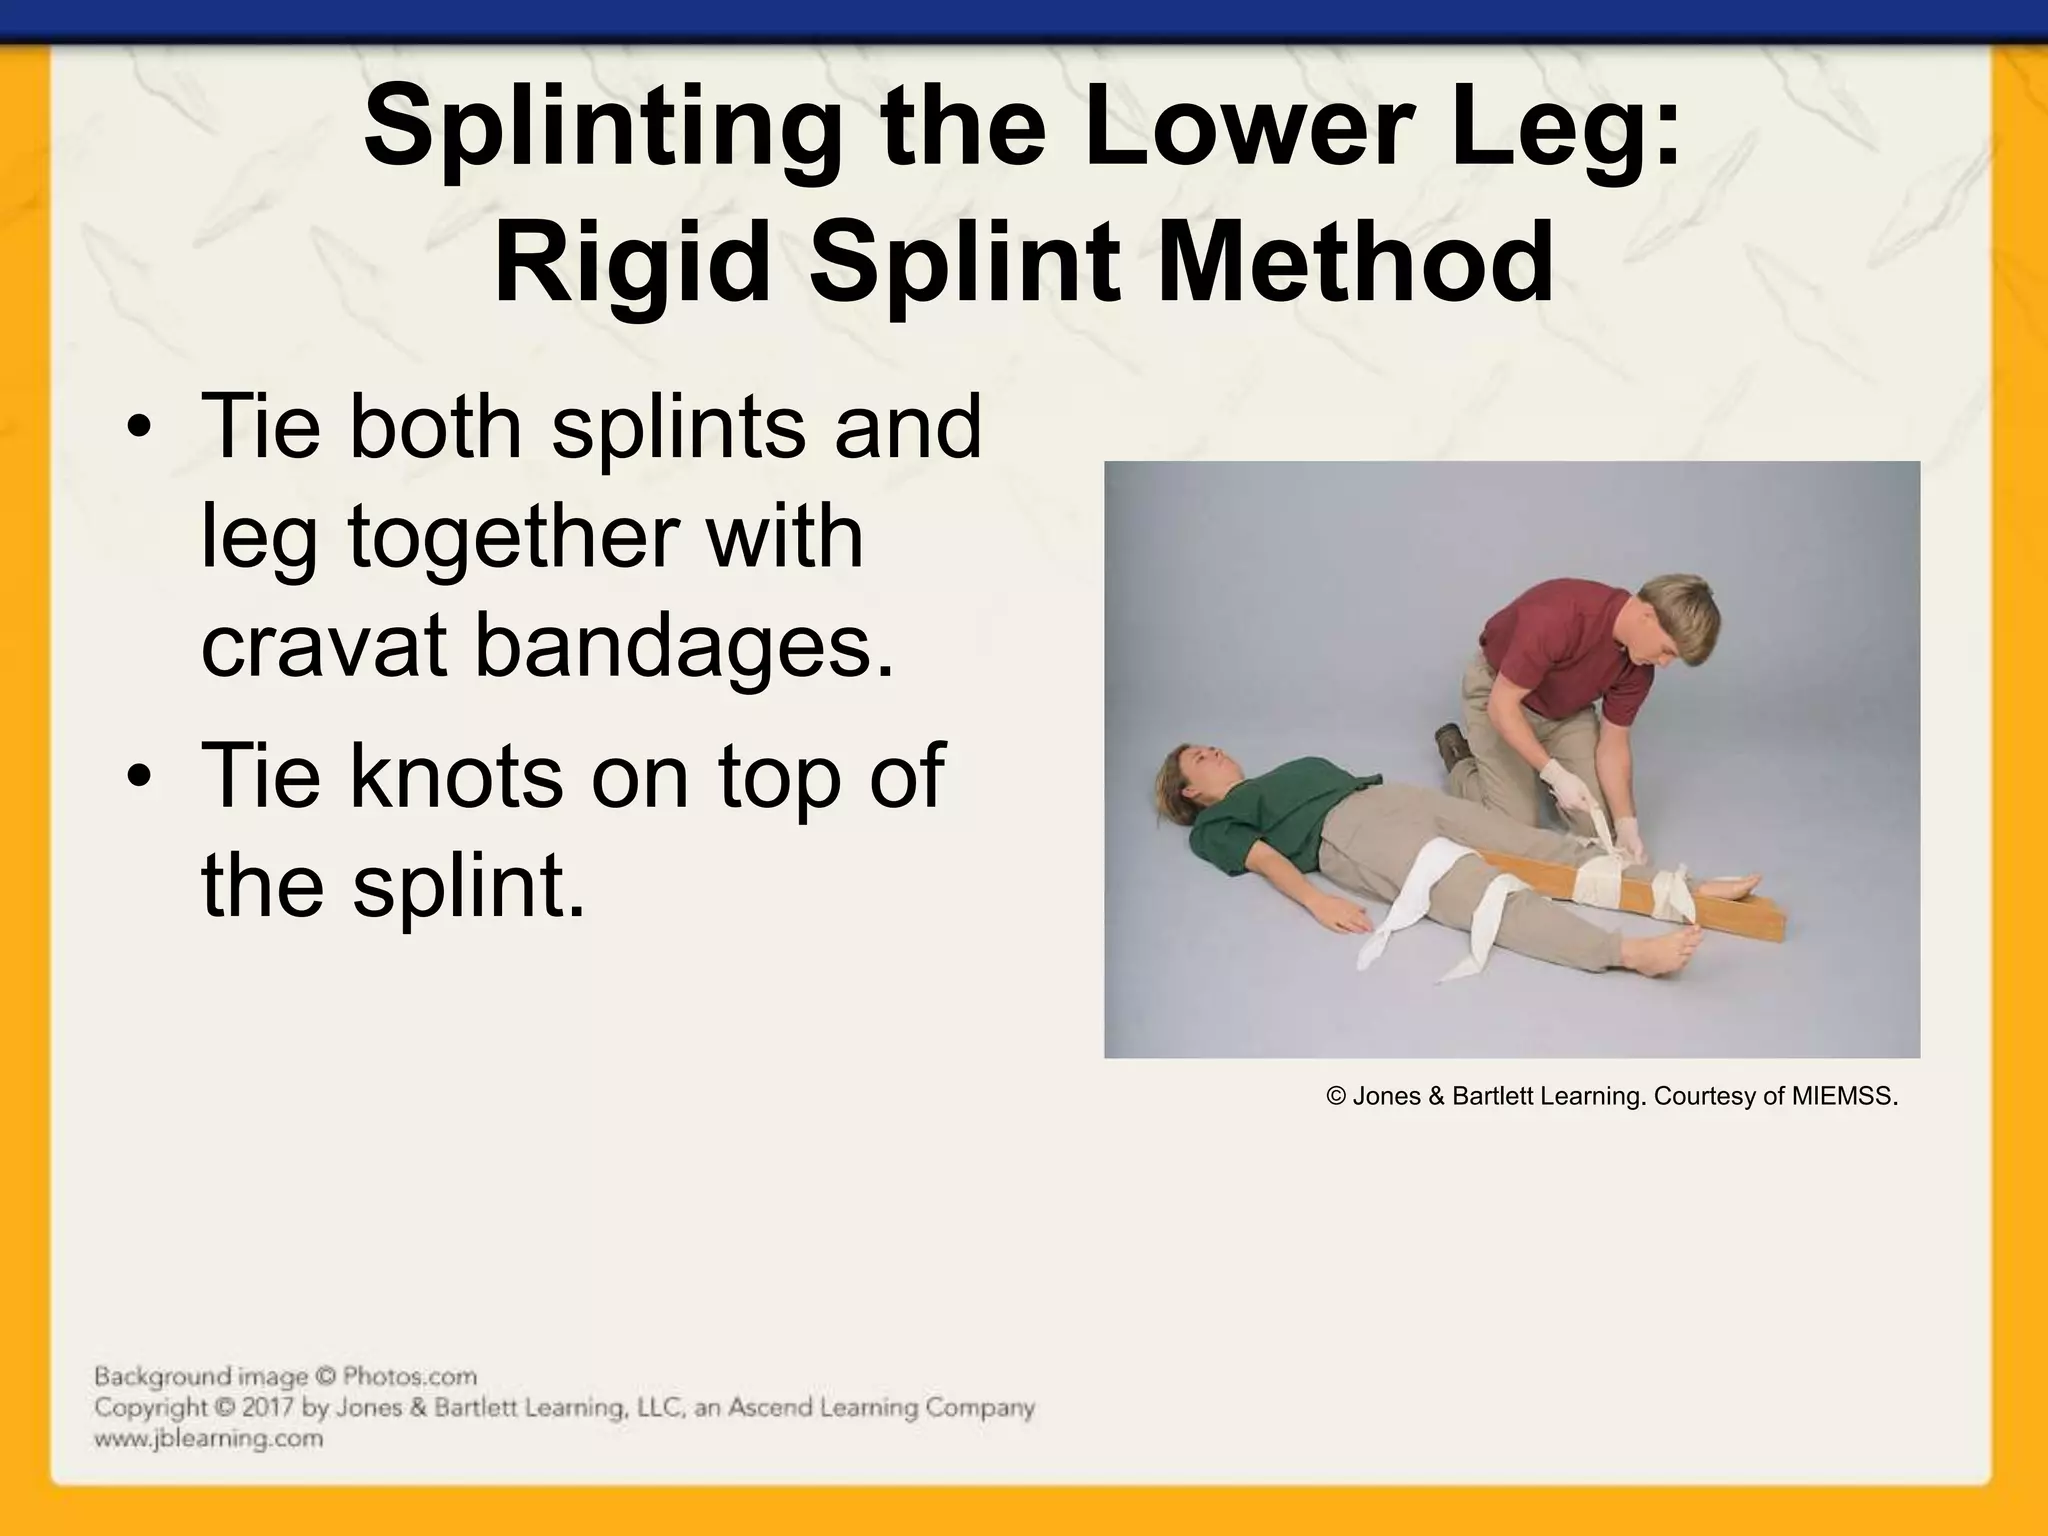
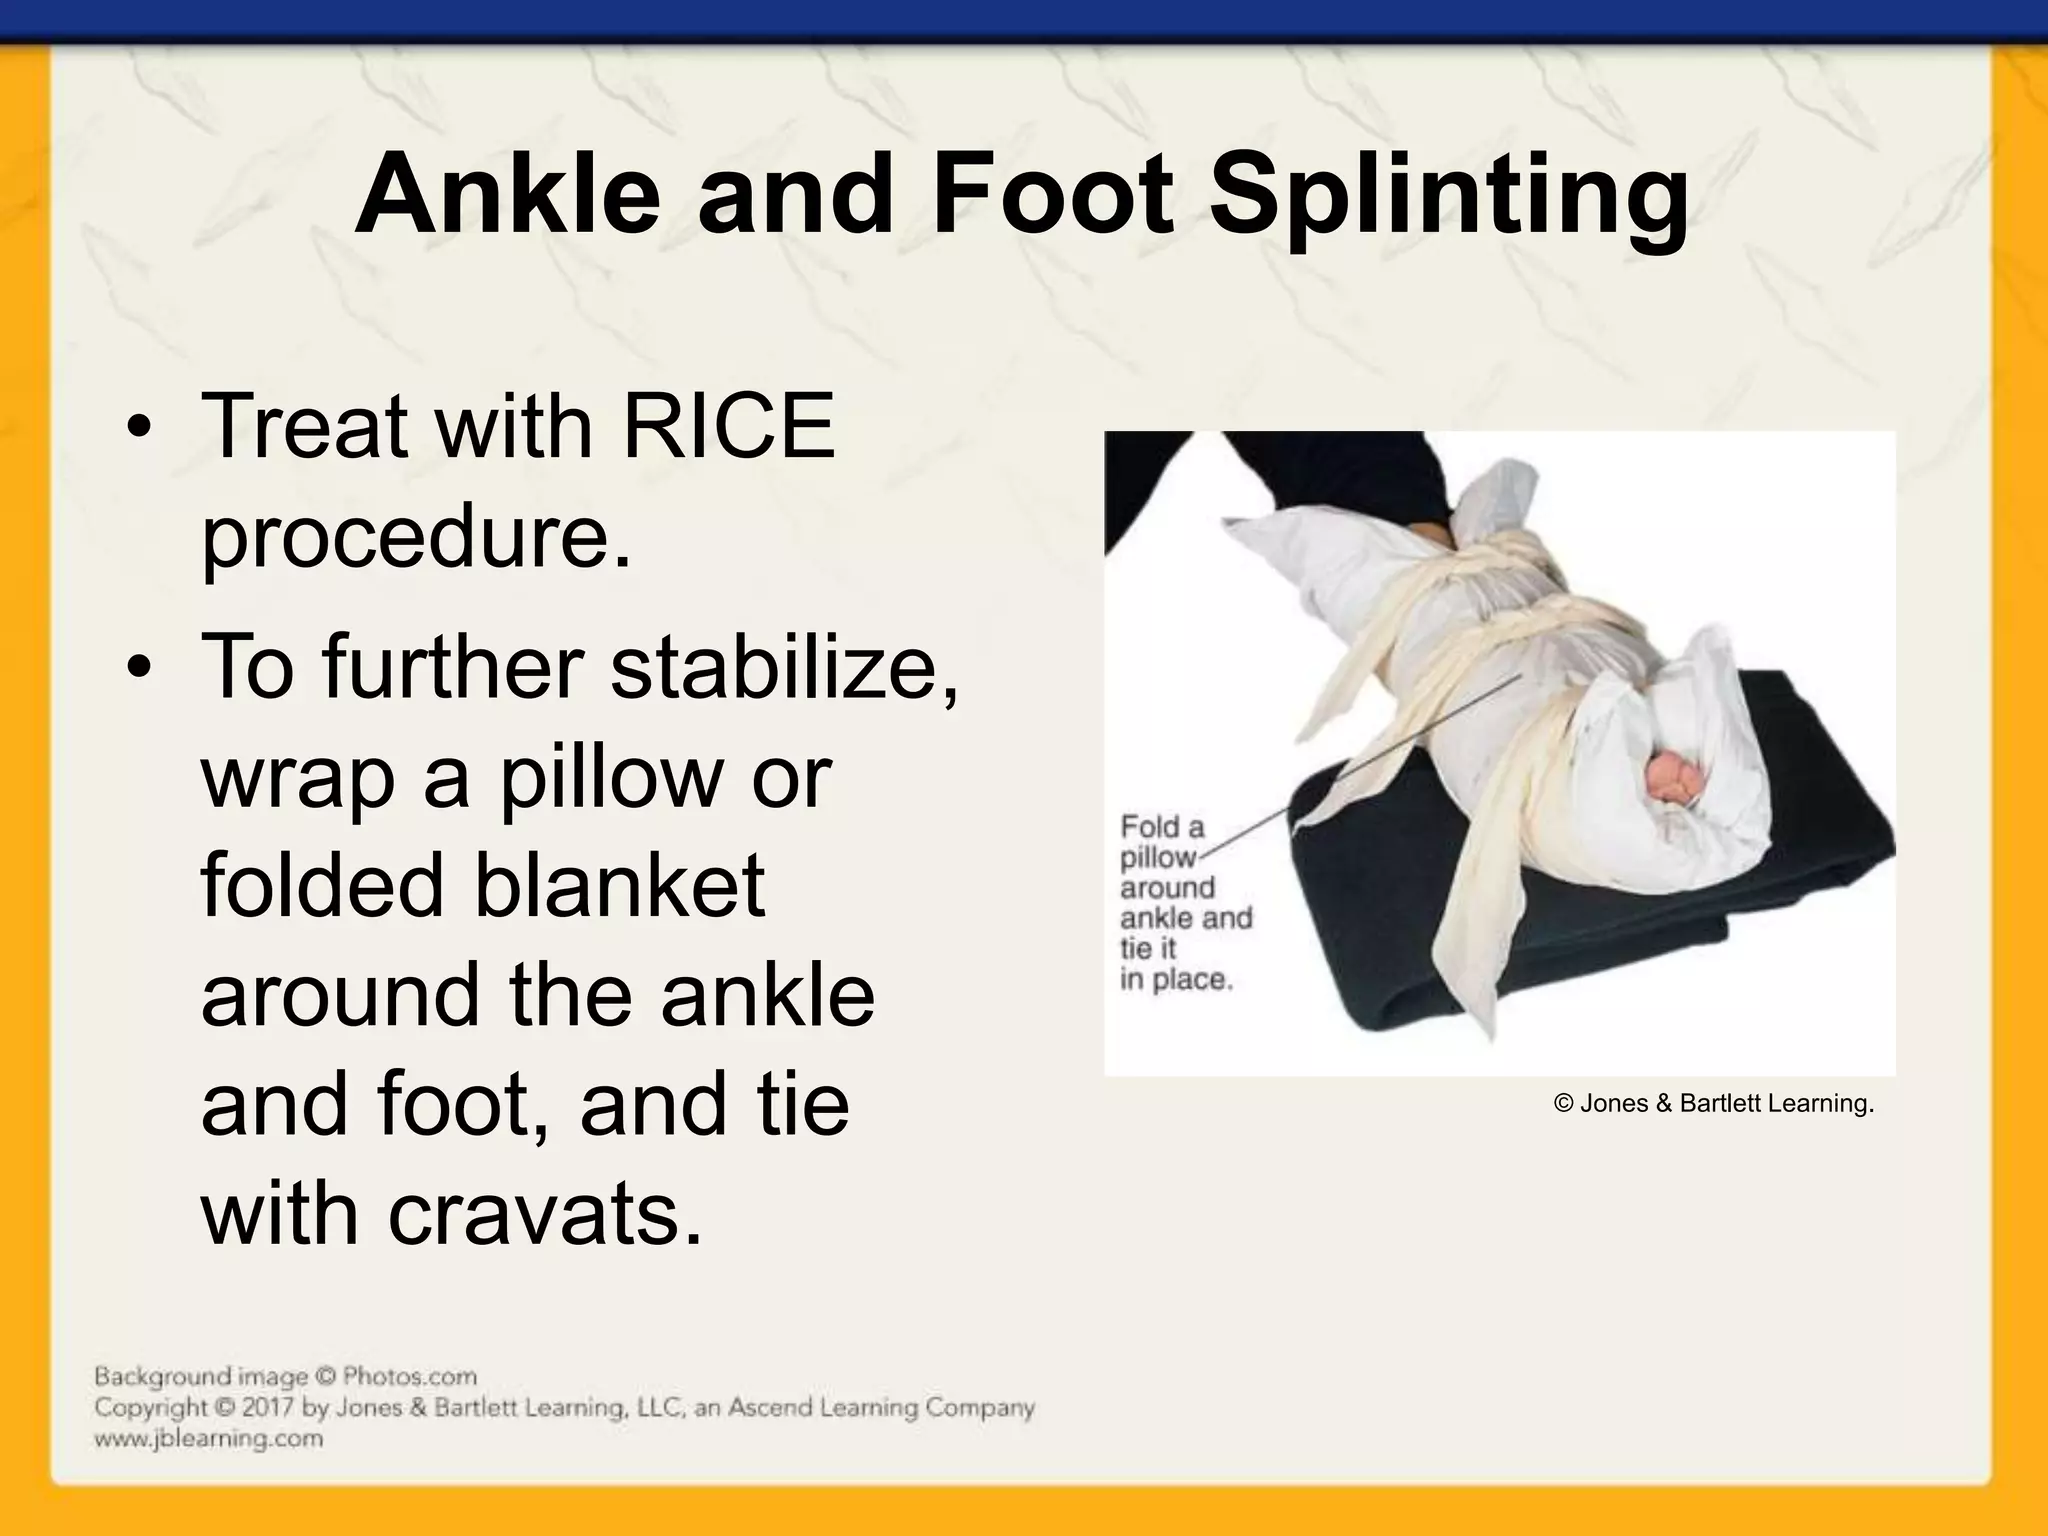
Chapter 16
Splinting Extremities
• Injured extremities should be stabilized by
splinting the extremity in the position in
which it was found.
• Stabilize: minimize further injury by holding
a body part to prevent movement.
• All fractures should be stabilized before a
person is moved.
Reasons for Splinting
• Reduce pain.
• Prevent damage to muscles, nerves, and
blood vessels.
• Prevent a closed fracture from becoming
an open fracture.
• Reduce bleeding and swelling.
• Prevent a fractured bone from moving into
soft tissues.
Types of Splints
• Rigid splint
– Inflexible device
used to maintain
stability
– Must be long
enough to be
secured above and
below fracture site
© SAM® Medical.
Types of Splints
• Soft splint
– Pillow
– Useful for lower leg
– Useful for forearm
© American Academy of Orthopaedic Surgeons.
Types of Splints
• Self-splint, or anatomic splint
– Uses the body
– Injured extremity tied to an uninjured part
© Jones & Bartlett Learning.
To Apply a Splint
• All fractures and dislocations should be
stabilized before the person is moved.
– Cover open wounds with sterile dressing.
– Check circulation, sensation, and movement.
– If pulses are absent:
• Gently line up a fracture or dislocation.
• Do not force anything into position.
• Warn the person.
To Apply a Splint
• Use the rule of thirds.
– If the injury is located in the upper or lower
third of a bone:
• Extend the splint above and below the joint.
– If the injury is located in the middle third:
• Stabilize the joints above and below the fracture.
– Place an injured arm in a sling and swathe.
To Apply a Splint
• If two first aid providers are present:
– One should support the injury site.
– Minimize movement of the extremity.
• When possible, place splint materials on
both sides of the injured part.
To Apply a Splint
• Apply splints firmly, but do not restrict
blood flow.
• Use the RICE procedure.
– Elevate.
– Do not apply ice packs if pulse is absent.
Seek Medical Care For…
• Open fracture
• Dislocation
• Joint injury with moderate or severe
swelling
• Deformity, tenderness, or swelling
• Person is unable to walk or bear weight
Seek Medical Care For…
• Snaps, crackles, or pops
• Hot, tender, swollen, or painful areas
• Uncertainty whether a bone was broken
• Lack of rapid improvement
Slings
• An open triangular bandage can be used
as a sling.
• A folded triangular bandage, known as a
cravat, can be used as a swathe in
conjunction with a sling.
Applying a Sling to Upper Arm,
Forearm, or Hand/Wrist
• Place a triangular
bandage between
forearm and chest.
– Pull upper end over
uninjured shoulder.
– Bring lower end
over the forearm.
© Jones & Bartlett Learning.
Applying a Sling to Upper Arm,
Forearm, or Hand/Wrist
• Bring end of bandage around neck to the
uninjured side.
– Tie other end above the clavicle.
© Jones & Bartlett Learning.
Applying a Sling to Upper Arm,
Forearm, or Hand/Wrist
• Secure point of bandage at the elbow.
• Place a swathe around the upper arm and
body.
© Jones & Bartlett Learning.
When Bandages or Other
Resources Are Unavailable
• Place the hand inside a buttoned jacket.
• Use a belt, necktie, etc. around the neck
and injured arm.
© American Academy of Orthopaedic
Surgeons.
© American Academy of Orthopaedic
Surgeons.
When Bandages or Other
Resources Are Unavailable
• Pin the sleeve of
the shirt or jacket
to the clothing.
• Turn up lower edge
of person’s jacket
or shirt over injured
arm.
© American Academy of
Orthopaedic Surgeons.
© American Academy of
Orthopaedic Surgeons.
Shoulder and Upper
Arm Sling
• Support injured arm away from chest.
• Place bandage between forearm and
chest.
• Pull upper end over uninjured shoulder.
• Bring lower end of bandage over forearm
and around neck to uninjured side.
Shoulder and Upper
Arm Sling
• Tie ends.
• Check pulse and nail color.
• The hand should be in a thumb-up
position.
Humerus Splinting
• Gently place the
injured arm across
the chest.
• If available, tie a rigid
splint to outside of
arm.
© Jones & Bartlett Learning.
Humerus Splinting
• Loop a cravat or strap around wrist and
neck.
• Secure the arm to the chest with a swathe.
© Jones & Bartlett Learning. © Jones & Bartlett Learning.
Splinting an Elbow in the Bent
Position
• Place a rigid splint from the upper arm to
the wrist.
• Tie the splint with cravat bandages.
© Jones & Bartlett Learning. Courtesy of MIEMSS. © Jones & Bartlett Learning. Courtesy of MIEMSS.
Splinting an Elbow in the Bent
Position
• Place the arm in a sling.
• Check CSM.
© Jones & Bartlett Learning. Courtesy of MIEMSS.
Splinting an Elbow in the
Straight Position
• Place a rigid splint along the inside of the
arm from the hand to the armpit.
© Jones & Bartlett Learning. Courtesy of MIEMSS.
Splinting an Elbow in the
Straight Position
• Secure with a roller bandage or several
cravat bandages.
• Check CSM.
© Jones & Bartlett Learning. Courtesy of MIEMSS. © Jones & Bartlett Learning. Courtesy of MIEMSS.
Forearm Splinting:
Rigid Splint
• Place a rigid splint
on the forearm.
• Secure with either a
roller bandage or
folded triangular
bandages.
• Place arm in a sling
with a binder.
© Jones & Bartlett Learning. Courtesy of MIEMSS.
Forearm Splinting:
Soft Splint
• Wrap a pillow or
folded blanket
around the forearm.
• Secure with folded
triangular bandages
or cloth bands.
• Place the arm in a
sling with a binder.
© Jones & Bartlett Learning.
Wrist, Hand, and Finger
Splinting
• Three methods:
– Place a rolled pair
of socks or a roller
bandage in palm.
• Attach a rigid splint.
© Jones & Bartlett Learning.
Wrist, Hand, and Finger
Splinting
• Three methods (cont’d):
– Mold a pillow around hand and forearm.
• Tie with cravats or roller bandage.
– Buddy tape fingers together.
Pelvis and Hip Splinting
• Treat for shock.
• Do not lift legs.
• Wait for EMS.
• Long backboard is required.
Femur Splinting
• Best splinted with a traction splint
• Call 9-1-1 immediately.
• Tell the person not to move.
• Apply an ice pack while waiting for EMS.
Splinting a Knee
• Always stabilize an injured knee in the
position in which you find it.
© Jones & Bartlett Learning. © Jones & Bartlett Learning.
Splinting a Knee in the
Straight Position
• Place a rigid splint under the leg that
extends from the buttocks to beyond the
foot.
© Jones & Bartlett Learning.
Splinting a Knee in the
Straight Position
• Place cravat bandages under the rigid
splint.
• Place soft padding under the knee and
ankle.
© Jones & Bartlett Learning.
Splinting a Knee in the
Straight Position
• Tie the cravat bandages.
• Do not tie the knots over the injured area.
© Jones & Bartlett Learning.
Splinting a Knee in the
Bent Position
• Place a rigid splint against injured leg.
• Tie a cravat bandage around the splint and
lower leg.
© Jones & Bartlett Learning. Courtesy of MIEMSS. © Jones & Bartlett Learning. Courtesy of MIEMSS.
Splinting a Knee in the
Bent Position
• Tie a cravat bandage around the splint and
thigh.
• Tie knots over the splint.
© Jones & Bartlett Learning. Courtesy of MIEMSS. © Jones & Bartlett Learning. Courtesy of MIEMSS.
Splinting the Lower Leg:
Self Splint Method
• Place padding
between the legs.
• Push the cravat
bandages under
the leg with a thin
board.
© Jones & Bartlett Learning. Courtesy of MIEMSS.
Splinting the Lower Leg:
Self Splint Method
• Tie the legs together.
• Tie knots between the legs, over the
padding.
© Jones & Bartlett Learning. Courtesy of MIEMSS. © Jones & Bartlett Learning. Courtesy of MIEMSS.
Splinting the Lower Leg:
Rigid Splint Method
• Place one rigid
splint on the
outside and
another inside.
• Push the cravat
bandages under
the leg with a thin
board.
© Jones & Bartlett Learning. Courtesy of MIEMSS.
Splinting the Lower Leg:
Rigid Splint Method
• Tie both splints and
leg together with
cravat bandages.
• Tie knots on top of
the splint.
© Jones & Bartlett Learning. Courtesy of MIEMSS.
Ankle and Foot Splinting
• Treat with RICE
procedure.
• To further stabilize,
wrap a pillow or
folded blanket
around the ankle
and foot, and tie
with cravats.
© Jones & Bartlett Learning.

Ch16 presentation splinting_extremities

  • 1.
  • 2.
    Splinting Extremities • Injuredextremities should be stabilized by splinting the extremity in the position in which it was found. • Stabilize: minimize further injury by holding a body part to prevent movement. • All fractures should be stabilized before a person is moved.
  • 3.
    Reasons for Splinting •Reduce pain. • Prevent damage to muscles, nerves, and blood vessels. • Prevent a closed fracture from becoming an open fracture. • Reduce bleeding and swelling. • Prevent a fractured bone from moving into soft tissues.
  • 4.
    Types of Splints •Rigid splint – Inflexible device used to maintain stability – Must be long enough to be secured above and below fracture site © SAM® Medical.
  • 5.
    Types of Splints •Soft splint – Pillow – Useful for lower leg – Useful for forearm © American Academy of Orthopaedic Surgeons.
  • 6.
    Types of Splints •Self-splint, or anatomic splint – Uses the body – Injured extremity tied to an uninjured part © Jones & Bartlett Learning.
  • 7.
    To Apply aSplint • All fractures and dislocations should be stabilized before the person is moved. – Cover open wounds with sterile dressing. – Check circulation, sensation, and movement. – If pulses are absent: • Gently line up a fracture or dislocation. • Do not force anything into position. • Warn the person.
  • 8.
    To Apply aSplint • Use the rule of thirds. – If the injury is located in the upper or lower third of a bone: • Extend the splint above and below the joint. – If the injury is located in the middle third: • Stabilize the joints above and below the fracture. – Place an injured arm in a sling and swathe.
  • 9.
    To Apply aSplint • If two first aid providers are present: – One should support the injury site. – Minimize movement of the extremity. • When possible, place splint materials on both sides of the injured part.
  • 10.
    To Apply aSplint • Apply splints firmly, but do not restrict blood flow. • Use the RICE procedure. – Elevate. – Do not apply ice packs if pulse is absent.
  • 11.
    Seek Medical CareFor… • Open fracture • Dislocation • Joint injury with moderate or severe swelling • Deformity, tenderness, or swelling • Person is unable to walk or bear weight
  • 12.
    Seek Medical CareFor… • Snaps, crackles, or pops • Hot, tender, swollen, or painful areas • Uncertainty whether a bone was broken • Lack of rapid improvement
  • 13.
    Slings • An opentriangular bandage can be used as a sling. • A folded triangular bandage, known as a cravat, can be used as a swathe in conjunction with a sling.
  • 14.
    Applying a Slingto Upper Arm, Forearm, or Hand/Wrist • Place a triangular bandage between forearm and chest. – Pull upper end over uninjured shoulder. – Bring lower end over the forearm. © Jones & Bartlett Learning.
  • 15.
    Applying a Slingto Upper Arm, Forearm, or Hand/Wrist • Bring end of bandage around neck to the uninjured side. – Tie other end above the clavicle. © Jones & Bartlett Learning.
  • 16.
    Applying a Slingto Upper Arm, Forearm, or Hand/Wrist • Secure point of bandage at the elbow. • Place a swathe around the upper arm and body. © Jones & Bartlett Learning.
  • 17.
    When Bandages orOther Resources Are Unavailable • Place the hand inside a buttoned jacket. • Use a belt, necktie, etc. around the neck and injured arm. © American Academy of Orthopaedic Surgeons. © American Academy of Orthopaedic Surgeons.
  • 18.
    When Bandages orOther Resources Are Unavailable • Pin the sleeve of the shirt or jacket to the clothing. • Turn up lower edge of person’s jacket or shirt over injured arm. © American Academy of Orthopaedic Surgeons. © American Academy of Orthopaedic Surgeons.
  • 19.
    Shoulder and Upper ArmSling • Support injured arm away from chest. • Place bandage between forearm and chest. • Pull upper end over uninjured shoulder. • Bring lower end of bandage over forearm and around neck to uninjured side.
  • 20.
    Shoulder and Upper ArmSling • Tie ends. • Check pulse and nail color. • The hand should be in a thumb-up position.
  • 21.
    Humerus Splinting • Gentlyplace the injured arm across the chest. • If available, tie a rigid splint to outside of arm. © Jones & Bartlett Learning.
  • 22.
    Humerus Splinting • Loopa cravat or strap around wrist and neck. • Secure the arm to the chest with a swathe. © Jones & Bartlett Learning. © Jones & Bartlett Learning.
  • 23.
    Splinting an Elbowin the Bent Position • Place a rigid splint from the upper arm to the wrist. • Tie the splint with cravat bandages. © Jones & Bartlett Learning. Courtesy of MIEMSS. © Jones & Bartlett Learning. Courtesy of MIEMSS.
  • 24.
    Splinting an Elbowin the Bent Position • Place the arm in a sling. • Check CSM. © Jones & Bartlett Learning. Courtesy of MIEMSS.
  • 25.
    Splinting an Elbowin the Straight Position • Place a rigid splint along the inside of the arm from the hand to the armpit. © Jones & Bartlett Learning. Courtesy of MIEMSS.
  • 26.
    Splinting an Elbowin the Straight Position • Secure with a roller bandage or several cravat bandages. • Check CSM. © Jones & Bartlett Learning. Courtesy of MIEMSS. © Jones & Bartlett Learning. Courtesy of MIEMSS.
  • 27.
    Forearm Splinting: Rigid Splint •Place a rigid splint on the forearm. • Secure with either a roller bandage or folded triangular bandages. • Place arm in a sling with a binder. © Jones & Bartlett Learning. Courtesy of MIEMSS. © Jones & Bartlett Learning. Courtesy of MIEMSS.
  • 28.
    Forearm Splinting: Soft Splint •Wrap a pillow or folded blanket around the forearm. • Secure with folded triangular bandages or cloth bands. • Place the arm in a sling with a binder. © Jones & Bartlett Learning. © Jones & Bartlett Learning.
  • 29.
    Wrist, Hand, andFinger Splinting • Three methods: – Place a rolled pair of socks or a roller bandage in palm. • Attach a rigid splint. © Jones & Bartlett Learning.
  • 30.
    Wrist, Hand, andFinger Splinting • Three methods (cont’d): – Mold a pillow around hand and forearm. • Tie with cravats or roller bandage. – Buddy tape fingers together.
  • 31.
    Pelvis and HipSplinting • Treat for shock. • Do not lift legs. • Wait for EMS. • Long backboard is required.
  • 32.
    Femur Splinting • Bestsplinted with a traction splint • Call 9-1-1 immediately. • Tell the person not to move. • Apply an ice pack while waiting for EMS.
  • 33.
    Splinting a Knee •Always stabilize an injured knee in the position in which you find it. © Jones & Bartlett Learning. © Jones & Bartlett Learning.
  • 34.
    Splinting a Kneein the Straight Position • Place a rigid splint under the leg that extends from the buttocks to beyond the foot. © Jones & Bartlett Learning.
  • 35.
    Splinting a Kneein the Straight Position • Place cravat bandages under the rigid splint. • Place soft padding under the knee and ankle. © Jones & Bartlett Learning.
  • 36.
    Splinting a Kneein the Straight Position • Tie the cravat bandages. • Do not tie the knots over the injured area. © Jones & Bartlett Learning.
  • 37.
    Splinting a Kneein the Bent Position • Place a rigid splint against injured leg. • Tie a cravat bandage around the splint and lower leg. © Jones & Bartlett Learning. Courtesy of MIEMSS. © Jones & Bartlett Learning. Courtesy of MIEMSS.
  • 38.
    Splinting a Kneein the Bent Position • Tie a cravat bandage around the splint and thigh. • Tie knots over the splint. © Jones & Bartlett Learning. Courtesy of MIEMSS. © Jones & Bartlett Learning. Courtesy of MIEMSS.
  • 39.
    Splinting the LowerLeg: Self Splint Method • Place padding between the legs. • Push the cravat bandages under the leg with a thin board. © Jones & Bartlett Learning. Courtesy of MIEMSS.
  • 40.
    Splinting the LowerLeg: Self Splint Method • Tie the legs together. • Tie knots between the legs, over the padding. © Jones & Bartlett Learning. Courtesy of MIEMSS. © Jones & Bartlett Learning. Courtesy of MIEMSS.
  • 41.
    Splinting the LowerLeg: Rigid Splint Method • Place one rigid splint on the outside and another inside. • Push the cravat bandages under the leg with a thin board. © Jones & Bartlett Learning. Courtesy of MIEMSS.
  • 42.
    Splinting the LowerLeg: Rigid Splint Method • Tie both splints and leg together with cravat bandages. • Tie knots on top of the splint. © Jones & Bartlett Learning. Courtesy of MIEMSS.
  • 43.
    Ankle and FootSplinting • Treat with RICE procedure. • To further stabilize, wrap a pillow or folded blanket around the ankle and foot, and tie with cravats. © Jones & Bartlett Learning.