#2 Lecture Outline
I. Introduction
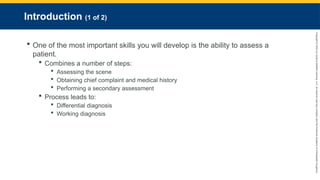
A. One of the most important skills you will develop as a paramedic is the ability to assess a patient.
1. Combines a number of steps:
a. Assessing the scene
b. Obtaining the patient’s chief complaint and medical history
c. Performing a secondary assessment
2. Process should seem seamless to patient.
3. Leads to:
a. Differential diagnosis
b. Working diagnosis
#3 Lecture Outline
4. Process should be organized and systematic, but flexible as well.
Aside from the primary survey, which focuses on identifying and addressing life threats, the sequence of the remaining components is flexible.
6. Quickly:
a. Identify your patient’s problem(s).
b. Set your care priorities.
c. Develop a patient care plan.
d. Execute the plan.
#4 Lecture Outline
B. Sick versus not sick
1. Based on:
a. Chief complaint
b. Respirations
c. Pulse
d. Mental status
e. Skin color, temperature, and condition (CTC)
2. For trauma patients, include:
a. Mechanism of injury
b. Obvious signs of signs of trauma
3. If the patient is sick, the next step is to determine how sick.
a. Minor illness versus life-threatening event
4. Every time you assess a patient you have to:
a. Qualify whether your patient is sick or not sick
b. Quantify how sick the patient is
#5 Lecture Outline
C. Establishing a field impression
1. Based on the patient history and chief complaint
2. A determination of what you think is the patient’s current problem
3. You must be able to communicate with the patient and ask the right questions.
4. Develop a patient assessment style that works for you but is based on sound medical practice.
#6 Lecture Outline
D. Is this a medical emergency or trauma?
1. Medical patients
a. Identify chief complaint and sift through medical history.
2. Trauma patients
a. The patient’s medical history may have less impact on your care plan.
b. Destination may be very important.
3. Remember that medical events can cause trauma, and traumatic events can produce medical problems.
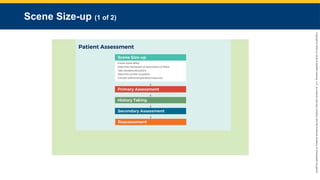
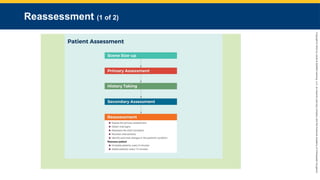
#8 This flowchart explains scene size-up, the first step in patient assessment.
#9 Lecture Outline
II. Scene Size-up
A. Scene size-up involves looking around and evaluating the overall safety and stability of the scene before initiating any patient care.
1. Make sure you have safe and secure access into the scene.
2. Make sure you have ready egress out of the scene.
3. Consider any specialty resources needed, and get them en route.
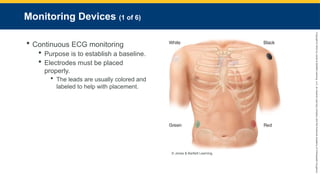
#10 Lecture Outline
B. Scene safety: a dynamic process
1. Main focus is to ensure the safety and well-being of your EMS team and any other emergency responders.
If the scene does not appear to be safe, do what is necessary to make it safe.
Secure the scene.
Call in additional resources before beginning patient care.
b. Requires constant reassessment
#11 Lecture Outline
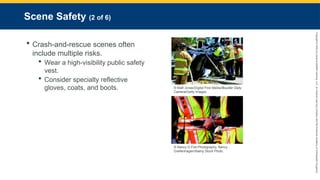
2. Crash-and-rescue scenes often include multiple risks and extrication hazards.
a. Wear an American National Standards Institute (ANSI/ISEA) 107 or 207 certified high-visibility public safety vest.
b. Also consider wearing specialty reflective gloves, coats, and boots.
#12 Lecture Outline
3. Ensure that your team can safely gain access to the scene and the patient, and then safely exit with the patient.
a. If the scene cannot be stabilized, consider a snatch and grab.
Establish a safe perimeter to keep bystanders out of harm’s way.
Formulate a basic plan with your team and visually scan the scene to promote better coordination of patient care and early identification of needs.
#13 Lecture Outline
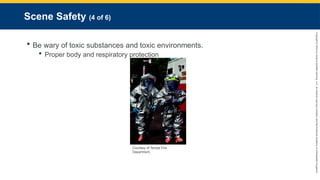
6. Toxic substances and toxic environments
a. Proper body and respiratory protection is a must.
#14 Lecture Outline
7. Potential crime scenes
a. Law enforcement should enter and secure the scene first.
i. If the EMS team unknowingly enters the scene first, request law enforcement immediately.
ii. If scene is unstable, consider retreating to your rig.
b. Formulate a plan of escape.
c. Be aware of the potential for violence from bystanders or the patient.
8. Patients who abuse methamphetamines can be a more serious threat than an average person.
#15 Lecture Outline
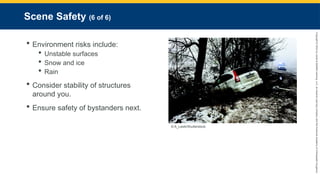
9. Risks related to the physical environment include:
a. Unstable surfaces
b. Snow and ice
c. Rain
10. Consider the stability of the structures around you.
11. Once the safety of the EMS team has been ensured, the safety of the patient is the next priority.
12. Ensure safety of bystanders next.
a. Establish a perimeter or barrier around the scene.
#16 Lecture Outline
C. Mechanism of injury or nature of illness
1. Mechanism of injury (MOI): how a traumatic injury occurred
a. The forces that act on the body to cause damage
2. Nature of illness (NOI)
a. The general type of illness a patient is experiencing
#17 Lecture Outline
3. If there is more than one patient, or if the patient is obese, you may need to request additional resources.
a. If multiple patients are present and have similar symptoms or complaints, consider:
i. Carbon monoxide poisoning
ii. Contact with some other noxious agent
iii. Food poisoning
b. The presence of multiple patients requires triage.
4. Listen for clues in the dispatch information.
a. Activate law enforcement or the incident command system (ICS) if necessary.
5. Be familiar with the various specialized resources available to you.
Only specially trained responders should participate in rescue operations.
Do not undersell overkill!
6. Assess the need for manual stabilization and spinal immobilization.
#18 Lecture Outline
D. Standard precautions
1. First priority is your own safety and the safety of other EMS team members.
#19 Lecture Outline
2. All patients should be treated as potentially infectious.
3. Wear properly sized gloves on all calls.
4. Wear eye protection if blood or fluids may potentially splash or spray.
5. Wear a HEPA or N95 mask if inhaled particles are a risk factor.
6. Wear a gown if indicated.
7. Better to err on the side of caution
#20 Lecture Outline
8. Personal protective equipment (PPE) includes:
Steel-toe boots
Leather gloves
Helmet
d. Heat-resistant outerwear
e. Self-contained breathing apparatus
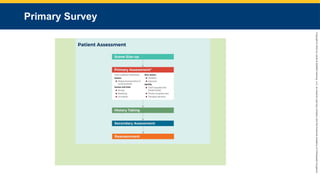
#22 This flowchart explains primary survey, the second step in patient assessment.
#23 Lecture Outline
III. Primary Survey
A. Examination techniques
1. You may use three exam techniques during the primary survey or the secondary assessment, depending on the urgency of the patient’s condition.
a. Inspection
b. Palpation
c. Auscultation
#24 Lecture Outline
B. Form a general impression.
1. The primary survey is the most time-intensive portion of the process.
a. Form a general impression within 60–90 seconds as you look at, talk to, and touch the patient.
b. General impression is your overall initial impression that determines the priority for patient care.
i. Based on surroundings, MOI, signs and symptoms, and chief complaint
ii. Enables you to identify threats to the ABCDE (Airway, Breathing, Circulation, Disability, and Exposure)
c. Avoid tunnel vision.
2. Make conscious, objective, and systematic observations.
3. Answer two questions:
a. Is the patient in stable or unstable condition?
i. If stable, might they potentially become unstable?
b. Is the patient sick or not sick?
i. If sick, how sick?
#25 Lecture Outline
4. Questions in the instance of trauma:
Is this patient hurt?
If so, how seriously?
5. Level of consciousness (LOC) may provide the first clue to an alteration in the patient’s condition.
a. Establish a baseline as soon as you encounter the patient.
6. Decide whether to implement spinal immobilization procedures.
7. Determine your priorities of care.
a. Identify the MOI or the NOI.
8. Identify age and sex of the patient.
a. May change how your patient presents
#26 Lecture Outline
9. Treat life threats as you find them and decide:
a. What additional care is needed
b. What needs to be done on scene
c. When to initiate transport
d. Which facility is most appropriate
10. Assess mental status by using the AVPU scale.
a. Determines whether the patient is alert and oriented in four areas: person, place, time, and event.
#27 Lecture Outline
C. Assess the airway
Is the airway open and patent?
a. Is it likely to remain so?
2. Responsive patients who are talking or crying provide a clue about airway adequacy.
a. Snoring respirations indicate a position problem.
b. Gurgling or bubbling sounds indicate the need for suctioning.
3. When considering airway options, move from simple to complex:
a. Position
i. Easiest to solve
b. Obstruction
i. Requires BLS procedures
#28 Lecture Outline
4. The possibility of a spine injury determines which technique to use to open the airway.
5. Mechanical means requires an airway adjunct.
a. Oropharyngeal or nasopharyngeal airway
6. If patient cannot maintain airway, use a more invasive technique.
#29 Lecture Outline
D. Assess breathing
1. Two key questions:
Is the patient breathing?
If no, then you have to breathe for the patient.
If the patient is breathing, is the breathing adequate?
2. Expose the chest and inspect for injuries.
a. Flail segment
b. Sucking chest wound
c. Tension pneumothorax
3. Consider minute volume.
a. The best measure of breathing adequacy
#30 Lecture Outline
4. Also consider:
a. Breathing rate
b. Work of breathing
c. Chest rise and fall
d. Lung sounds
#31 Lecture Outline
E. Assess circulation.
1. Perform full-body scan.
a. Look for major hemorrhage or life-threatening injury.
b. Check for pulse.
c. Evaluate the skin.
2. Assess and control external bleeding.
a. Perform a rapid exam to identify any major external bleeding.
i. Immediately control all life-threatening external bleeding.
#32 Lecture Outline
3. Palpate the pulse.
a. Radial artery in responsive adults and children
b. Carotid artery in unresponsive adults and children
c. Brachial artery in infants
4. Count the number of beats in 30 seconds and multiply by 2.
a. If pulse is regular or slow, count for a full minute.
b. Normal pulse rate for adults is 60–100 beats/min.
c. Bradycardia: Rate less than 60 beats/min
d. Tachycardia: Rate higher than 100 beats/min
#33 Lecture Outline
5. Quality
a. A normal pulse is easy to feel.
b. Weak pulse is difficult to feel, and thready pulse is weak and fast.
c. With hypertension, the pulse may feel “bounding.”
6. Rhythm
a. Regular
b. Irregular
7. Describe the rate, quality, and rhythm of the pulse.
#34 Lecture Outline
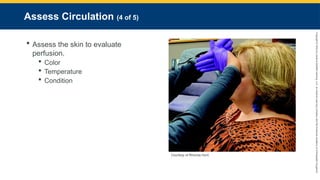
8. Assess skin for color, temperature, and condition (CTC), which collectively indicate perfusion.
a. Color
i. In people of color, mucous membranes may be used.
ii. In light-skinned people, normal skin condition is pink and warm.
iii. Cyanosis
iv. Pallor
b. Temperature
i. Rises as peripheral blood vessels dilate
ii. Falls as blood vessels constrict
#35 These tables show results for inspection and palpation of the skin.
#36 Lecture Outline
F. Restoring circulation
1. If a patient has inadequate circulation:
a. Restore or improve circulation.
Control severe bleeding.
Improve oxygen delivery to the tissues.
#37 Lecture Outline
If you cannot feel a pulse in an unresponsive adult, begin CPR until an AED or manual defibrillator is available:
Once available, immediately assess the need for defibrillation.
Follow standard precautions.
Evaluate the cardiac rhythm of any patient in cardiac arrest.
Oxygen delivery is improved through the administration of supplemental oxygen.
Medical conditions that cause sudden death include:
Airway obstruction
Respiratory arrest
Cardiac arrest
Severe bleeding
#38 Lecture Outline
G. Assess the patient for disability.
1. Perform a neurologic evaluation.
a. A mini-neurologic exam includes:
i. AVPU scale and pupils
ii. Quick assessment for neurologic deficits
iii. Glasgow Coma Scale (GCS)
#39 Lecture Outline
b. Assess for any gross neurologic deficits.
i. Have the patient move all extremities.
ii. Assess for motor strength and weakness.
iii. Assess grip strength.
iv. Assess for loss of sensation.
#40 Lecture Outline
H. Expose, then cover.
1. Visually inspect areas being examined to make an accurate and thorough assessment.
2. You cannot assess what you cannot see.
#41 Lecture Outline
I. Make a transport decision.
1. Identify priority patients.
a. Unstable or potentially unstable condition and need definitive care that cannot be accomplished in the field
b. Expedite transport by doing only what is necessary at the scene and handling everything else en route.
#42 Lecture Outline
2. Priority patients include:
a. Patients receiving CPR, in respiratory arrest, or being given life-sustaining ventilatory/circulatory support
b. Poor general impression
Unresponsiveness
Responsive but does not or cannot follow commands
e. Difficulty breathing
f. Hypoxia that fails to correct within 1 to 2 minutes
g. Hypoperfusion or shock
h. Complicated childbirth
i. Chest pain with a systolic blood pressure of less than 100 mm Hg
j. Suspected AMI with ECG showing STEMI
k. Suspected stroke
l. Uncontrolled bleeding
m. Severe pain anywhere
n. Multiple injuries (severe burns)
o. Abdominal injuries
p. Severe hypertension
q. Inability to move
r. Apparent life-threatening event (ALTE)
#44 This flowchart explains history-taking, the third step in patient assessment.
#45 Lecture Outline
IV. History Taking
A. Purpose
1. To gain information about the patient and learn about the events surrounding the incident
2. Ask open-ended questions.
a. Close-ended questions can be useful but usually garner limited information.
3. Avoid asking leading questions.
4. Ask age-appropriate and education-appropriate questions.
5. Be patient.
6. Use opportunities for patient teaching.
#46 Lecture Outline
B. Patient information
1. Name and chief complaint are most important pieces to obtain.
a. Obtain other information in whatever order is most conducive to good patient care and most convenient
#47 Lecture Outline
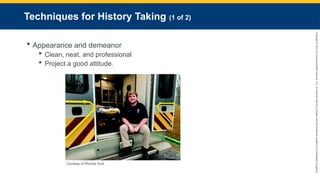
C. Techniques for history taking
1. Your appearance and demeanor
a. You should be clean, neat, and look professional.
b. Project a good attitude.
i. Facial expressions
ii. Body language
#48 Lecture Outline
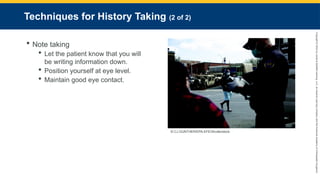
2. Note taking
a. Let the patient know that you will be writing information down.
b. Position yourself at the eye level of the patient.
c. Maintain good eye contact, and pay attention.
#49 Lecture Outline
3. Communication techniques
a. Introducing yourself and addressing the patient
i. Introduce yourself and identify your service.
ii. Introduce your partner.
Ask the patient for their name and how they would like to be addressed.
i. Avoid catch-all nicknames.
c. Be familiar with the cultural groups in your area and with any issues that could lead to misunderstanding.
d. Asking about feelings
i. You will need to ask if a patient is tired, depressed, or any number of feelings that are most easily dealt with by denial.
ii. Try to keep unpleasant sights, sounds, and smells from a patient who is feeling bad.
iii. Validate the patient’s feelings.
iv. Be empathetic but effective with your questioning.
#50 Lecture Outline
e. Communicating empathy
i. Put yourself in the patient’s shoes.
ii. Do not hesitate to communicate your feelings and address the emotional impact of what has been said.
iii. Ask for facts first, and then follow up.
f. Offering reassurance
i. Be cautious about what you tell your patients.
ii. Inappropriate reassurance harms your credibility and interferes with information collection.
#51 Lecture Outline
g. Reading nonverbal cues
i. Changes in body movements and facial expression may suggest pain, psychological distress, or fear.
ii. A big part of being a great listener is being a patient listener.
iii. Be mindful of facial expressions, heavy sighs, aggressive gestures, etc.
iv. Be poised and confident, with a positive demeanor
h. Encouraging dialogue
i. Care decisions are based on answers to your questions, combined with data from your diagnostics.
i. Avoiding medical terminology
i. Match your terminology to patient’s level of knowledge and understanding.
#52 Lecture Outline
D. Dealing with sensitive topics
1. Social history is not typically gathered in the prehospital setting.
a. Provides valuable information regarding the patient’s overall health status and helps to identify risk factors for various disease processes
#53 Lecture Outline
2. Obtaining a history of alcohol and drug misuse
a. Alcohol can mask any number of signs and symptoms, including pain.
b. Be alert for the smell of alcohol on a patient’s breath and behavior that may indicate alcohol consumption.
c. Patients may give an unreliable history.
d. If asked how much alcohol or drug has been consumed, the amount is routinely understated.
e. Intoxicated patients can be impatient, aggressive, or noncompliant.
f. The fear of punishment for illegal drug use may lead to denial of use.
g. Keep a professional attitude.
#54 Lecture Outline
3. Taking a sexual history
a. Talk to the patient in a setting that is as private as possible.
i. Patients are hesitant to share private or embarrassing information.
ii. Establish trust.
b. Keep your questions focused.
c. Do not interject any opinions or biases about sexual choices or behavior.
d. Treat with compassion and respect.
#55 Lecture Outline
E. Domestic violence and sexual assault or rape
1. You are required to report a case if you suspect physical abuse or domestic violence.
a. It is inappropriate to accuse someone of abuse at the scene.
b. Do not hesitate to call for law enforcement.
2. Look for clues to indicate abuse.
a. Multiple injuries in various states of healing
b. Unspoken messages in family behavior
3. Always call law enforcement.
4. Maintain evidence per protocol in situations involving sexual assault or rape.
a. Be supportive, caring, and nonjudgmental.
b. Have an EMS provider who is the same sex as the victim provide care.
#56 Lecture Outline
F. Handling physical attraction to patients
1. It is never appropriate for a clinician to act on feelings of attraction to a patient.
2. If a patient becomes seductive or makes sexual advances, firmly make it clear that your relationship is professional.
3. Keep someone else in the room with you at all times.
#57 Lecture Outline
G. Ensuring confidentiality
1. It is your duty to maintain confidentiality of the patient’s information.
2. Be familiar with relevant laws:
a. HIPAA
b. State laws
#58 Lecture Outline
H. Protecting the patient’s privacy
1. Interview patients in a private setting.
2. Be persistent enough to obtain information that patient may be reluctant to share.
3. Do not hesitate to ask nonessential personnel to leave the room or at least to step back.
#59 Lecture Outline
I. Gathering information from third parties
1. If patients cannot provide information, other sources on scene may need to be used.
2. The further you go from the primary source, the greater the chance the information will contain inaccuracies.
a. Family and friends often function as filters for information.
b. They may be able to describe the patient’s chief complaint, history of the present illness, past medical history, and possibly current health status.
c. You cannot reveal medical information about your patients to their family.
#60 Lecture Outline
3. Law enforcement personnel and bystanders can also provide information.
4. If emergency medical responders are already on the scene, find out what information they have already obtained and the results of any care they provided.
For routine transfers, take a few moments to review the transfer paperwork.
Evaluate your sources of information for reliability
#61 Lecture Outline
J. Cultural competence
1. You must strive to understand the differences inherent in all people.
2. Most common barriers to communication:
a. Race
b. Ethnicity
c. Age
d. Gender
e. Language
f. Education
g. Religion
h. Geography
i. Economic status
#62 Lecture Outline
3. Cultural beliefs can affect many medical decisions and treatment plans.
a. Respect ideas and beliefs even if they are not your own.
4. Dietary practices and family relationships need to be considered during patient care.
5. Some cultures have an identified leader of household.
6. Always obtain consent.
7. Provide the best possible care for all patients regardless of their socioeconomic status.
8. Research the groups that are prevalent in your area to learn the best ways to communicate.
9. Remember the importance of manners.
#63 Lecture Outline
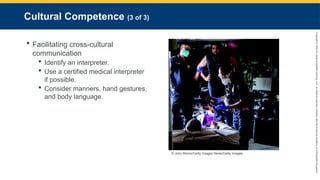
10. Facilitating cross-cultural communication
a. Identify an interpreter.
i. Consider using closed-ended questions to avoid inexact translations.
ii. Remind interpreter that information is confidential.
iii. A patient’s child may be best available interpreter, but use someone older and less attached to patient if possible.
b. Use a certified medical interpreter if possible.
c. Speaking louder will not overcome a language barrier.
d. Manners, hand gestures, and body language can have different meanings in different cultures.
#64 Lecture Outline
K. Special challenges in history taking
1. Talkative or reserved patients
a. Overly talkative patients
i. Determine whether cause of talkativeness has a clinical cause.
ii. After a few minutes, try interrupting the patient to ask for clarification of a piece of information.
b. Patients who do not offer enough information
i. Ask open-ended questions to encourage elaboration.
2. Patients with anxiety
a. Expect your patient to initially be somewhat anxious.
i. Your presence may contribute to anxiousness.
ii. The patient should begin to calm down shortly after your arrival.
b. If the patient remains anxious, consider the possibilities.
3. Patients with depression
a. Consider depression if the patient:
i. Seems sad, hopeless, restless, and irritable
ii. Has sleep or eating disruptions
iii. Says they have low energy
iv. Has pain for which you cannot find a source
b. Situational depression
c. Chronic depression
d. Ask about the patient’s feelings to assess for risk of suicide.
e. Follow local protocols.
4. Anger and hostility
a. Anger and hostility at unfairness and harsh realities are normal.
i. Do not take it personally.
ii. Do not get angry yourself.
b. Be attentive to changes in body language.
c. Establish a safe and secure scene.
d. Call law enforcement if necessary.
e. Retreat if necessary.
f. If a hostile person leaves the room, follow the person while trying to calm them down.
#65 Lecture Outline
5. Clarifying a confusing history or unusual behaviors
a. Patients may give information to a physician that they did not provide to the paramedic.
b. Consider the possible reasons for confusing behavior.
i. Lack of glucose or oxygen
ii. Toxic environment
iii. Stroke
iv. Transient ischemic attack (TIA)
v. Mental illness
vi. Drug-induced delirium
vii. Organic causes
6. Treating patients with sensory or developmental challenges
a. Limited education or intellectual challenges
i. Never presume that you will not be able to obtain a history from any patient.
ii. You may need to get some information from family members, friends, or caregivers.
b. Hearing loss, low vision, or blindness
i. Hearing loss
(a) Speaking slowly and slightly louder may be all that is necessary.
(b) Consider letting a patient wear your stethoscope and speak into the bell.
ii. Low vision
(a) Announce yourself and your reason for being there.
(b) If you move any furniture, be sure to put it back exactly where you found it.
(c) Always tell the patient what you are doing and the location of other transport.
#66 Lecture Outline
L. Managing age-related considerations
1. Pediatric patients
a. Initial approach should be similar to that of an adult.
b. Obtaining an accurate history can be difficult.
i. Include the child in the history-taking process as much as possible.
ii. Listen to the parents.
c. Be sensitive to the fears of the parents.
d. Pay attention to the relationship between the parent and child.
#67 Lecture Outline
e. Tailor your questions to the age of the child.
i. Know the characteristics of the different phases of development.
ii. In neonates and infants, maternal history and birth history is important.
(a) Focus on congenital anomalies, feeding problems, the presence of jaundice, evidence of any illness, and developmental landmarks.
iii. Around age of 3 to 5 years, ask about child’s performance in school.
(a) Determines developmental problems or learning disabilities
(b) Also focus on child’s dentition, growth, sexual development, illnesses, and immunizations.
iv. In the adolescent phase, focus more on the adolescent rather than the adult.
(a) Consider interviewing in private.
(b) Focus on risk-taking behaviors, self-esteem issues, rebelliousness, drug and alcohol use, and sexual activity.
f. Gather an accurate family history and travel history.
g. When reviewing the body system, pay special attention to any:
i. Skin lesions
ii. History of otitis media
iii. Snoring, mouth breathing, and environmental allergies
iv. Dental problems
#68 Lecture Outline
2. Geriatric patients
a. Present with a variety of medical and traumatic conditions not seen in other patients, including:
i. Loss of sensorium and diabetes-related peripheral neuropathy
ii. Balance and equilibrium problems
iii. Poor blood clotting due to medications
b. Accommodate sensory losses.
c. Patients tend to have multiple chronic medical problems that may complicate the history-taking process.
i. Multiple chief complaints
ii. Multiple medications
(a) Iatrogenic illnesses (drug interactions) may mask other conditions.
(b) Accidental overdoses and adverse reactions are also common.
iii. Gather an accurate medication history along with current dosages.
#69 Lecture Outline
d. Symptoms may be less dramatic in older patients.
i. Always have a high clinical index of suspicion when treating older adults.
e. Consider including a functional assessment during systems review.
i. Assessment of mobility
ii. Upper extremity function
iii. Activities of daily living
#70 Lecture Outline
M. Responsive medical patients
1. Chief complaint
a. The most serious thing that the patient is concerned about
b. The reason the patient or someone else called for your help
c. Should be recorded in the patient’s own words
d. Determine patient’s alertness.
e. Ask about events to begin elaborating on chief complaint.
f. Determine who called 9-1-1 and other details required by your system.
Look for clues on scene or in the home.
Vague complaints are common among older people.
#71 Lecture Outline
2. History of present illness
a. Provides a clear sequence and chronologic account of the patient’s signs and symptoms.
i. Signs: objective observations or measurements
ii. Symptoms: subjective information from the patient
b. OPQRST
c. SAMPLE
#72 Lecture Outline
d. Begin with, “What is going on today that made you call 9-1-1?”
e. If the patient’s behavior is inappropriate, consider:
i. Hypoxia
ii. Medical issue
iii. Low blood glucose or hypothermia
iv. Psychiatric emergency
v. Drug or alcohol ingestion
#73 Lecture Outline
f. Current health status
i. Made up of many unrelated pieces of information
(a) Often ties together some of the past history with the history of the current event
(b) Focuses on environmental and personal habits
#74 Lecture Outline
ii. Questions that will be most helpful include:
(a) What prescription medicines are you currently taking?
(1) How much and how often?
(b) Do you take any over-the-counter medications?
(c) Are you allergic to anything?
(d) Do you drink beer, wine, or cocktails?
(1) How much and how often?
(e) Do you smoke?
(f) Do you take any illicit drugs?
(g) What did you eat yesterday and today?
(h) Ask about screening tests that are appropriate.
(i) Are your immunizations up to date?
(j) Have you been getting a good night’s sleep?
(k) Do you exercise?
(l) What kinds of hazards (eg, cleaners) are present in the house/worksite?
(m) Use of safety belts, protective eyewear, bicycle helmets, gun locks, medication lockboxes, and outlet covers (if small children are present in the home)
(n) Do you have a history of specific diseases in your family?
(o) Where do you live?
(1) What do you like to do at home?
(2) Is there anyone in your life whom you are afraid of?
(p) How do you spend your time during the day?
(q) Have you had any important experiences lately?
(r) Do you have anything in your religion that would prevent me from administering treatment?
(s) Are you an optimistic person?
(t) Have you traveled recently to any countries with infectious diseases?
iii. Decide which items you want to explore and which you do not.
#75 Lecture Outline
g. Family history
i. Helps to establish patterns and risk factors for potential diseases
ii. Information should be related to the patient’s current medical condition.
#76 Lecture Outline
h. Social history
i. Occupation identification may provide information about possible toxic exposures.
ii. The environment provides information about lifestyle and chronic exposures.
iii. Travel history may be relevant.
iv. Long airplane rides may cause pulmonary embolism.
v. Questions regarding diet may be appropriate.
#77 Lecture Outline
3. Past medical history
a Should include:
i. Current medications and dosages
ii. Allergies
iii. Childhood illnesses and immunizations
iv. Adult illnesses
v. Past surgeries
vi. Past hospitalizations and disabilities
#78 Lecture Outline
b. The patient’s emotional affect provides insight into the overall mental health of the patient.
c. Determine whether the patient has ever experienced the current problem.
#79 Lecture Outline
N. Unresponsive patients
1. You must rely on a thorough head-to-toe physical examination plus the normal diagnostic tools to acquire the information needed for patient care.
#80 Lecture Outline
O. Trauma patients
1. Revisit information from primary survey.
2. Reconsider MOI.
a. MOIs that may be life threatening include:
i. Falls
(a) Adults: Greater than 20 feet (6 m)
(b) Children: Greater than 10 feet (3 m)
ii. High-risk motor vehicle crash (MVC)
(a) Intrusion, including roof: greater than 12 inches (30 cm) occupant site; greater than 18 inches (46 cm) any site
(b) Ejection from a vehicle
(c) Death of another patient in same vehicle
(d) Vehicle telemetry data consistent with a high risk of injury
(e) Vehicle-pedestrian/bicyclist impact collision
iii. Motorcycle/ATV crash greater than 20 mph
#81 This slide shows significant mechanisms of injury: ejection (partial or complete) from any motor vehicle (car, motorcycle, all-terrain vehicle); death of another patient in the same passenger compartment; adult fall from more than 20 feet; vehicle telemetry data consistent with high-risk injury; high-speed MVC; vehicle-pedestrian collision; motorcycle crash greater than 20 mph; penetrating injuries to the head, neck, torso, or extremities.
#82 Lecture Outline
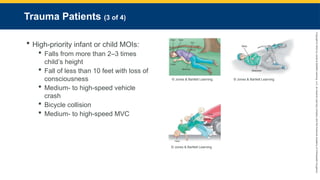
b. If patient is an infant or child, MOIs that indicate a high-priority include:
i. Falls from more than 10 feet (3 m), or two to three times the child’s height
ii. Fall of less than 10 feet with loss of consciousness
iii. Bicycle collision
iv. Medium- to high-speed vehicle crash (25 mph or greater)
#83 Lecture Outline
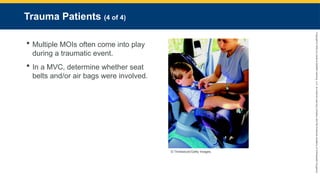
3. Multiple MOIs often come into play during a traumatic event.
4. In a MVC, determine whether seat belts and/or airbags were involved.
5. Improperly installed child safety seats can be rendered useless.
6. If a patient shows signs of systemic involvement with what appears to be a minor MOI, continue with assessment to find the more serious problem.
#84 Lecture Outline
P. Review of body systems
1. Pertinent negatives may be a way to gain information.
a. An absence or lack of certain signs and symptoms characteristic of particular illnesses
2. General symptoms
a. Vague, nonspecific signs and symptoms make it difficult to differentiate between various field diagnoses.
b. Ask questions regarding:
i. Fever
ii. Chills
iii. Malaise
iv. Fatigue
v. Night sweats
vi. Weight variations
#85 Lecture Outline
3. Skin, hair, and nails
a. Rash, itching, hives, or sweating
4. Musculoskeletal
a. Joint pain, loss of range of motion (ROM), swelling, redness, erythema, and localized heat or deformity
#86 Lecture Outline
5. Head and neck
a. Severe headache or loss of consciousness
b. Eyes and ears
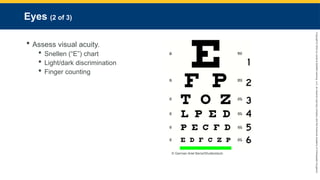
i. Eyes: visual acuity, blurred vision, diplopia, photophobia, pain, and flashes of light in the field of vision
ii. Ears: hearing, loss, pain, discharge, tinnitus, and vertigo
#87 Lecture Outline
c. Nose, throat, and mouth
i. Nose: Sense of smell, rhinorrhea, obstruction, epistaxis, postnasal discharge, and sinus pain
ii. Throat and mouth: Sore throat, bleeding, pain, dental problems, ulcers, and changes to taste sensation
#88 Lecture Outline
6. Endocrine
a. Enlargement of the thyroid gland
b. Temperature intolerance, skin changes, swelling of hands and feet, weight changes, polyuria, polydipsia, polyphagia, and any changes in body and facial hair
#89 Lecture Outline
7. Chest and lungs
a. Dyspnea and chest pain
b. Coughing, wheezing, hemoptysis, and tuberculosis status
c. Previous cardiac complaints
d. Pain or discomfort
e. Orthopnea, edema, and past cardiac evaluation and testing
#90 Lecture Outline
8. Hematology and lymph nodes
a. Anemia, bruising, and fatigue
b. Tender and enlarged lymph nodes
#91 Lecture Outline
9. Gastrointestinal
a. Appetite, general digestion, food allergies and intolerances, heartburn, nausea and vomiting, diarrhea, hematemesis, bowel irregularity, changes in stool, flatulence, jaundice, and any past GI evaluations and tests
b. Pay attention to signs and symptoms that point toward active GI bleeding.
c. Urinary habits or changes in habits, including dysuria, increased frequency of urination, urgency, nocturia, hematuria, or polyuria
#92 Lecture Outline
10. Genitourinary
a. Any current or history of sexually transmitted diseases
b. For a woman reporting acute abdominal pain, foul-smelling vaginal discharge, pain on urination, or genital lesions, ask:
i. If her menstrual cycle is regular
ii. When she last had her period
iii. If she has dysmenorrhea
iv. When she last had sexual intercourse
v. Whether she has had multiple partners
vi. What kind of contraception she uses
vii. Whether she has ever been pregnant
#93 Lecture Outline
c. Question men about erectile dysfunction, fluid discharge, and testicular pain.
d. For men who report pain on urination, discharge from the penis, or genital lesions, ask:
i. When their most recent sexual encounter was
ii. If they use condoms
iii. About the characteristics of any discharge or lesions
#94 Lecture Outline
11. Neurologic
a. History of seizures or syncope, loss of sensation, weakness in extremities, paralysis, loss of coordination or memory, and muscle twitches or tremors
b. Signs of facial asymmetry
c. If you suspect stroke or TIA, use a stroke assessment tool per local protocols.
#95 Lecture Outline
12. Psychiatric
a. Ensure the safety of yourself, the crew, and the patient.
b. History of or current depression, mood changes, difficulty concentrating, anxiety, irritability, sleep disturbances, daytime fatigue, and suicidal or homicidal tendencies.
#96 Lecture Outline
Q. Critical thinking
1. Goal of assessment is to figure out the most likely reason for your patient’s chief complaint and how best to address it.
2. There are five aspects of critical thinking:
a. Concept formation
b. Data interpretation
c. Application of principles
i. Guidelines or algorithms
d. Reflection in action
i. Being willing to change course as you interpret your patient’s condition
e. Reflection on action
i. Doing honest and thorough postrun critiques to benefit learning
3. Be able to think and perform well under pressure.
#97 Lecture Outline
R. Clinical reasoning
1. Combines knowledge of anatomy, physiology, pathophysiology, and the patient’s complaints to help direct questioning when you are obtaining a history
a. Note any abnormal symptoms of physical findings as well as their anatomic location.
b. Pay careful attention to signs or symptoms that are inconsistent with your working diagnosis.
c. Differential diagnosis—a working hypothesis of the nature of the problem
i. Start with broad possibilities.
ii. Consider patient’s chief complaint.
iii. Consider signs and symptoms along with history.
iv. Use the physical exam to tighten the possibilities.
d. Once you have determined your working diagnosis, continue to question the patient to help confirm the diagnosis.
e. Continually reevaluate the overall situation and complaint to make sure all of the patient issues have been addressed.
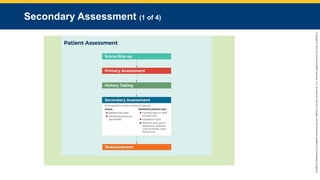
#99 This flowchart explains secondary assessment, the fourth step in patient assessment.
#100 Lecture Outline
V. Secondary Assessment
A. The process by which quantifiable, objective information is obtained from a patient about their overall state of health
1. Consists of two elements:
a. Obtaining vital signs
b. Performing a systematic physical exam
#101 Lecture Outline
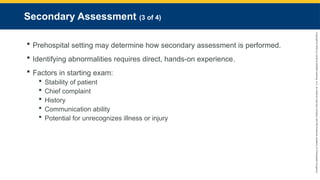
2. The conditions in the prehospital setting may determine precisely how the secondary assessment is performed.
3. To appreciate abnormalities on examination, you must understand the wide variety of normal presentations.
a. Learned only through direct, hands-on experience and patient interaction
4. The start of the exam is determined by factors such as:
a. Stability of patient
b. Chief complaint
c. History
Communication ability
Potential for unrecognized illness or injury
#102 Lecture Outline
Not every aspect of the secondary assessment will be completed in every patient.
Additional challenges associated with underlying comorbidities may arise during the examination.
7. Factors to consider when beginning an exam:
a. Location
b. Positioning of the patient
c. The patient’s point of view
d. Maintaining professionalism
#103 Lecture Outline
B. Physical exam of priority patients
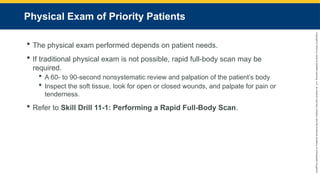
1. The physical exam performed depends on patient needs.
a. If traditional physical exam isn’t possible, a rapid full-body scan may be required.
i. A 60- to 90-second nonsystematic review and palpation of the patient’s body
ii. Inspect the soft tissue, look for open or closed wounds, and palpate for pain or tenderness.
iii. Evaluate each area of the body for the following:
(a) Open:
(1) Abrasions/amputations/avulsions
(2) Punctures/penetrations
(3) Lacerations
(b) Closed:
(1) Deformities or swelling
(2) Burns
(3) Contusions/crush injuries
iv. To perform a rapid full-body scan, see Skill Drill 11-1.
#104 Lecture Outline
C. Assessment techniques
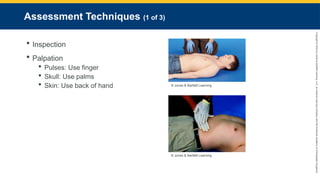
Inspection
Palpation
Use your finger to check pulse.
Use your palms to sweep across and around skull.
Use the back of your hand to touch the patient’s skin.
#105 Lecture Outline
Percussion
Gently striking the surface of the body, typically where it overlies various body cavities
i. Detects changes in the densities of the underlying structures
(a) Normal lung: medium to loud, low-pitched resonant sounds
(b) Muscle and bone: soft, high-pitched, and flat
(c) Hollow organs: loud, high-pitched, and tympanic
Requires a lot of practice to perfect.
To correctly perform percussion, see Skill Drill 11-2.
#106 Lecture Outline
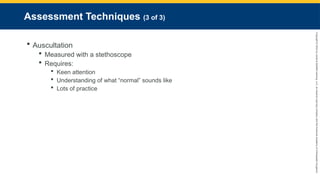
Auscultation
Listening to body sounds with a stethoscope
Requires keen attention, a thorough understanding of what “normal” sounds like, and lots of practice
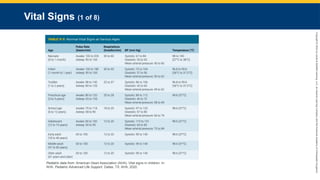
#107 This table shows normal vital signs at different ages.
#108 Lecture Outline
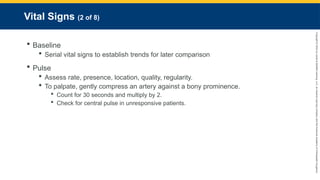
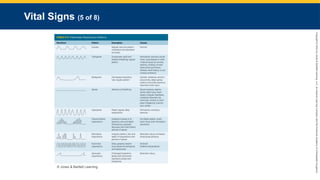
D. Vital signs
1. Baseline
Serial vital signs
Helps to establish trends showing patient improvement or deterioration
Normal limits can vary depending on factors such as age and medication use.
2. Pulse
a. Assess:
i. Rate
ii. Presence
iii. Location
iv. Quality
v. Regularity
b. To palpate the pulse, gently compress an artery against a bony prominence.
i. Can be obtained at several points:
(a) Radial
(b) Brachial
(c) Femoral
(d) Carotid
ii. Count for 30 seconds and multiply by 2.
iii. Check for the presence of a central pulse in unresponsive patients.
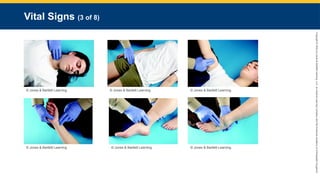
#109 These photos show the location of common pulse points on the body.
#110 Lecture Outline
3. Respiration
a. Respiratory rate
i. Typically assessed by inspecting the patient’s chest
ii. Portions of the abdominal wall, neck, face, and accessory muscle use can be observed to determine respiratory effort.
b. Evaluate the quality of the respiratory effort.
c. Recognize when patients exhibit tripod positioning, accessory muscle use, or retractions.
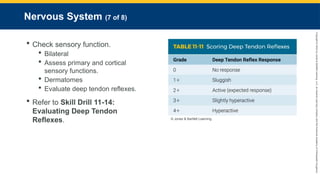
#111 This table shows pathologic respiratory patterns.
#112 Lecture Outline
4. Blood pressure
a. Commonly measured in a peripheral artery
b. Product of cardiac output and peripheral vascular resistance
i. Systolic pressure
ii. Diastolic pressure
(a) Should not go to zero
(b) Lower diastolic pressure means less myocardial perfusion.
c. Measured using a cuff that is appropriate to the patient’s size and habitus
i. Too small or tight a cuff will yield an artificially high pressure.
ii. Too large or loose a cuff will yield an inappropriately low result.
d. Ideally should be auscultated
i. Can be palpated to estimate the systolic pressure
e. Blood pressure cuff’s gauge should be inspected periodically because it can lose accuracy and require recalibration or replacement.
#113 Lecture Outline
5. Temperature
a. When using a device for measuring the tympanic membrane temperature:
i. Make sure the external auditory canal is free of cerumen.
ii. Position the probe in the canal so the infrared beam is aimed at the tympanic membrane.
iii. Wait 2–3 seconds until the digital temperature reading appears.
iv. Measures core body temperature
(a) Usually higher and more accurate than the normal oral temperature
#114 Lecture Outline
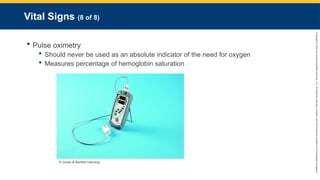
6. Pulse oximetry
a. Should never be used as an absolute indicator of the need for oxygen
b. Measures the percentage of hemoglobin saturation
c. Can provide inaccurate information for a variety of reasons:
i. Hypotension
ii. Hypothermia
iii. Carbon monoxide poisoning
iv. Sickle cell disease
v. Anemia
vi. Vascular dyes
vii. Patient motion
viii. Incorrect placement
ix. Certain types of nail polish
#115 Lecture Outline
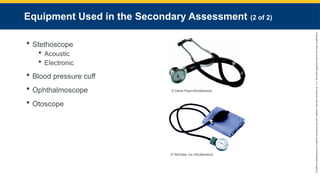
E. Equipment used in the secondary assessment
1. Includes:
a. Stethoscope
b. Blood pressure cuff (sphygmomanometer)
c. Pulse oximeter
d. Capnography and glucometry equipment
e. Reflex hammer
f. Reliable light source
g. Gloves
h. Sheet or blanket
#116 Lecture Outline
2. Stethoscope
a. Acoustic: Does not amplify sounds; blocks out ambient sounds
b. Electronic: Converts sound waves into electronic signal and amplifies them
3. Blood pressure cuff (sphygmomanometer)
a. Consists of inflatable cuff and manometer (pressure meter)
4. Ophthalmoscope
a. Used to examine a patient’s eyes and view the retina and aqueous fluid.
5. Otoscope
a. Used to evaluate a patient’s ears.
#117 Lecture Outline
F. The physical exam
1. Most important skill a health care provider can master
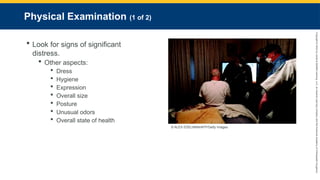
2. Begin to gain information regarding the patient’s overall presentation as you approach the scene.
a. Look for signs of significant distress.
i. Mental status changes
ii. Anxiousness
iii. Labored breathing
iv. Difficulty speaking
v. Diaphoresis
vi. Obvious pain
vii. Obvious deformity
viii. Guarding or splinting of a painful area
ix. A quiet and still affect in patients experiencing substantial/incapacitating pain
b. Other aspects that may be worth noting:
i. Dress
ii. Hygiene
iii. Expression
iv. Overall size
v. Posture
vi. Foul or unusual odors
vii. Overall state of health
#118 Lecture Outline
c. Terms to describe the degree of distress:
i. No apparent distress
ii. Mild
iii. Moderate
iv. Acute
v. Severe
d. Terms to describe the general state of a patient’s health:
i. Chronically ill
ii. Frail
iii. Feeble
iv. Robust
v. Vigorous
3. The secondary assessment is driven by the information you gathered during the primary survey and the history-taking phase.
#119 Lecture Outline
G. The full-body exam
1. A systematic head-to-toe examination
2. Goal is to identify hidden injuries or identify causes that may not have been found during the primary survey.
3. Any patient who has sustained a significant MOI, is unresponsive, or is in critical condition should receive this type of exam.
4. To correctly perform a full-body exam, see Skill Drill 11-3.
#120 Lecture Outline
5. Focused exam
a. Performed on patients who have sustained insignificant MOIs and are responsive
b. It is based on the chief complaint.
c. Most common complaints involve:
i. Head
ii. Heart
iii. Lungs
iv. Abdomen
#121 Lecture Outline
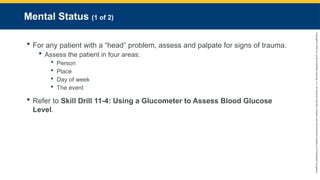
6. Mental status
a. For any patient with a head-related problem (confusion, headache, altered mentation), you should assess and palpate the head for signs of trauma.
i. Check for facial asymmetry.
ii. Dilated or constricted pupils may point to recreational drug use.
iii. Red conjunctiva may suggest drug or alcohol use.
iv. Elevated blood pressure may accompany headache.
b. Assess cognitive function (the ability to use reasoning).
i. Use AVPU scale to identify LOC.
ii. Test blood glucose using a glucometer, as described in Skill Drill 11-4.
c. Assess whether the patient is alert and oriented (A × O) in four areas:
i. Person
ii. Place
iii. Day of week
iv. The event
#122 Lecture Outline
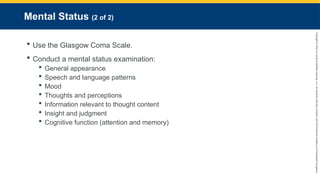
d. Use the Glasgow Coma Scale.
e. Once the basic mental status has been assessed, conduct a thorough mental status examination.
i. General appearance
ii. Speech and language patterns
iii. Mood
iv. Thoughts and perceptions
(a) Logic
(b) Relevance
(c) Organization
(d) Coherence
v. Information relevant to thought content
(a) Phobias
(b) Obsessions
(c) Anxieties
(d) Delusions
vi. Insight and judgment
(a) Awareness of illness and need for treatment
vii. Cognitive function
(a) Attention
(1) Serial 7s: Have the patient start at 100 and subtract 7 and continue subtracting 7.
(2) Spelling backward
(b) Memory
(1) Remote memory
(2) Recent memory
#123 Lecture Outline
7. Skin, hair, and nails
a. Skin
i. Perhaps the quickest and most reliable way of assessing patient’s overall distress is to look at the skin.
ii. In cold and hot environments:
(a) Transmits information from the environment to the brain
(b) Protects the body from the environment
(c) Regulates the temperature of the body
#124 Lecture Outline
iii. Examine:
(a) Color
(b) Temperature
(c) Condition (moisture and texture)
(d) Turgor
(e) Significant lesions or obvious deformities
iv. Evidence of diminished perfusion:
(a) Pallor
(b) Cyanosis
(c) Diaphoresis
(d) Vasodilation (flushing)
(e) Relatively subtle but serious changes in overall circulation are usually manifested early on in the skin’s appearance.
(f) Examine for changes in perfusion where the epidermis is thinnest:
(1) Fingernails
(2) Lips
(3) Conjunctivae
(4) Palms and soles of feet
#125 Lecture Outline
v. Pallor: present when red blood cell perfusion to the capillary beds is poor
vi. Vasoconstriction: may be indicated by pale skin
vii. Cyanosis: correlates with low arterial oxygen saturation
viii. Mottling: found in severe protracted hypoperfusion and shock
#126 Lecture Outline
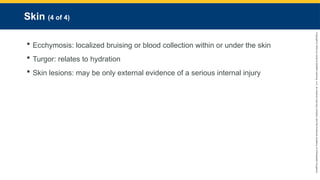
ix. Ecchymosis: localized bruising or blood collection within or under the skin
x. Turgor: relates to hydration
(a) Tenting is evident in extreme cases.
xi. Skin lesions: may be only external evidence of a serious internal injury
#127 Lecture Outline
b. Hair and nails
i. Examine hair by inspection and palpation.
ii. Note:
(a) Quantity
(b) Distribution
(c) Texture
iii. Recent changes in growth or loss of hair
#128 Lecture Outline
iv. Assess nails for:
(a) Color
(b) Shape
(c) Texture
(d) Presence or absence of lesions
v. Normal nail should be firm and smooth.
(a) Normal changes to the nails with aging include:
(1) Development of striations
(2) Change in color
vi. Overly thick nails or nails that have lines running parallel to the finger often suggest a fungal infection.
#129 This table shows abnormal findings in the nails.
#130 Lecture Outline
8. Head, eyes, ears, nose, and throat (HEENT)
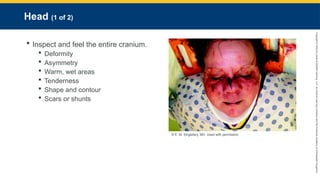
a. Head
i. Examine head by feeling and inspecting visually.
(a) Deformity
(b) Asymmetry
(c) Warm, wet areas
(d) Tenderness
(e) Shape and contour
(f) Scars or shunts
#131 Lecture Outline
ii. Evaluate the face.
(a) Color
(b) Moisture
(c) Expression
(d) Symmetry
(e) Contour
(f) Swelling or apparent areas of injury
iii. To correctly assess the head, see Skill Drill 11-5.
#132 Lecture Outline
b. Eyes
i. Assess functions of CNS.
ii. Anterior chamber and posterior chamber are assessed from front to back
#134 6Lecture Outline
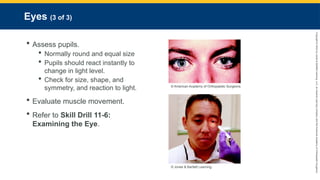
iv. Assess pupils.
(a) Normally round and of approximately equal size
(b) In low light, pupils dilate.
(c) In high light or when a bright light is suddenly introduced, pupils instantly constrict.
(1) When light is introduced to one eye, both pupils should constrict equally.
(2) Pupils should react instantly to any change in light level.
Check for size, shape, and symmetry, and reaction to light.
Anisocoria
v. Evaluate muscle movement and whether the eyes can track in all fields (up, down, left, right, across).
vi. To correctly examine the eye, see Skill Drill 11-6.
#135 Lecture Outline
c. Ears
i. Involved with hearing, sound perception, and balance control
ii. Consists of:
(a) Outer portion
(b) Middle portion
(c) Inner portion
#136 Lecture Outline
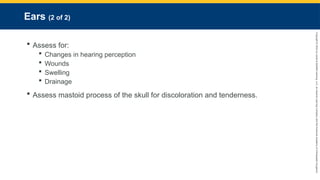
iii. Assess for:
(a) Changes in hearing perception
(b) Wounds
(c) Swelling
(d) Drainage
iv. Assess the mastoid process of the skull for discoloration and tenderness (Battle sign).
#137 Lecture Outline
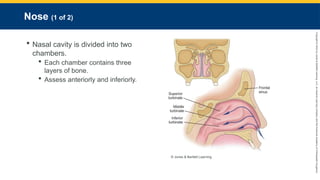
d. Nose
i. Nasal cavity is divided into two chambers by the nasal septum.
(a) Each chamber contains three layers (superior, middle, and inferior) of bone.
ii. Assess anteriorly and inferiorly.
#138 Lecture Outline
iii. Look for:
(a) Asymmetry
(b) Deformity
(c) Wounds
(d) Foreign bodies
(e) Discharge or bleeding
(f) Tenderness
iv. Note any evidence of respiratory distress.
v. Inspect the exterior for:
(a) Color changes
(b) Symmetry
(c) Structural abnormalities
vi. Inspect the septum for any deviation from midline.
vii. Note any drainage or discharge.
#139 Lecture Outline
e. Throat
i. Evaluate:
(a) Mouth
(b) Pharynx
(c) Neck
ii. As part of the overall hydration status, pay attention to the:
(a) Lips
(b) Teeth
(c) Oral mucosa
(d) Tongue
iii. Prompt assessment of the throat and upper airway structures is mandatory to rapidly determine upper airway status in patients with altered mental status.
iv. Assess for the presence of foreign body or aspiration.
#140 Lecture Outline
v. Mouth
(a) Lips
(b) Symmetry
(c) Gums
(d) Look for cyanosis around the lips.
vi. Inspect airway for obstruction.
#141 Lecture Outline
vii. Tongue
(a) Size
(b) Color
(c) Moisture
viii. Maxilla and mandible
(a) Integrity
(b) Symmetry
#142 Lecture Outline
ix. Oropharynx
(a) Discoloration
(b) Pustules
(c) Unusual odors on the patient’s breath
(d) Fluids that might need suctioned
(e) Edema and redness on the uvula
#143 Lecture Outline
x. Neck
(a) Symmetry
(b) Masses
(c) Venous distention
(1) Consider the patient’s body position.
(d) Palpate carotid pulses.
(e) Palpate the suprasternal notch.
(1) Tracheal deviation
(2) Presence of a stoma
(f) To examine the neck, see Skill Drill 11-7.
#144 Lecture Outline
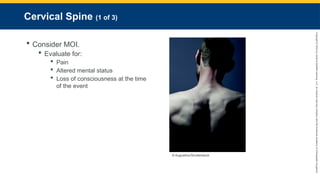
9. Cervical spine
a. Consider MOI.
b. Evaluate for:
i. Pain
ii. Altered mental status
iii. Loss of consciousness at the time of the event
#145 Lecture Outline
c. Indications for spinal immobilization:
i. Tenderness on palpation of the spinal column
ii. Complaint of pain in the spine
iii. Altered mental status
iv. Inability to communicate effectively
v. GCS of less than 15
vi. Evidence of a distracting injury
vii. Paralysis or other neurologic deficit or complaint
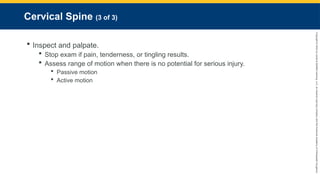
#146 Lecture Outline
d. Inspect and palpate
i. Tenderness
ii. Deformity
iii. Pain is the most reliable indicator of a spine injury or spinal cord injury.
(a) Any manipulation that results in pain, tenderness, or tingling should cause the exam to be stopped immediately and the patient placed into a properly sized collar.
e. Continued assessment of a patient’s range of motion should take place only when there is no potential for serious injury.
i. Passive motion
ii. Active motion
#147 Lecture Outline
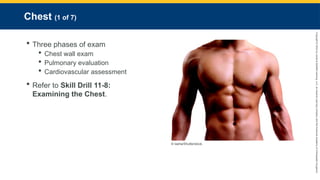
10. Chest
a. Three phases of exam
i. Chest wall exam
ii. Pulmonary evaluation
iii. Cardiovascular assessment
b. To examine the chest, see Skill Drill 11-8.
#148 Lecture Outline
c. Check for:
i. Signs of abnormal breathing movements
ii. Ventilatory fatigue
iii. Accessory muscle use (respiratory distress)
iv. Chest deformities
#149 Lecture Outline
d. Palpate abnormal areas of the chest wall.
i. Chest wall percussion
e. Listen over each of the five discrete lobes.
i. Have the patient take a deep breath through an open mouth.
#150 Lecture Outline
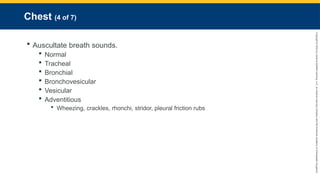
f. Auscultate breath sounds
i. Normal breath sounds: clear and quiet
ii. Bronchial sounds: hollow, tubular sounds with a lower pitch, heard over the trachea
iii. Bronchovesicular sounds: soft and lower-pitched sounds found in the midchest
iv. Vesicular sounds: finer and somewhat fainter breath sounds during expiration
v. Adventitious breath sounds include:
(a) Wheezing: High-pitched whistling
(b) Crackles (also called rales): Wet breath sounds
(c) Rhonchi: Congested breath sounds with a lower pitch and rattling quality
(d) Stridor: Brassy, crowing sound
(e) Pleural friction rubs: Squeaking or grating sounds
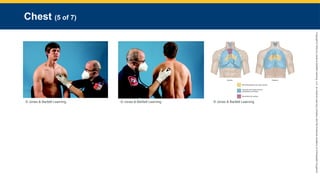
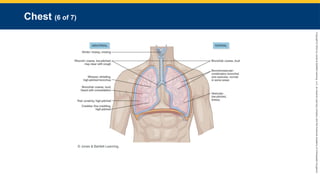
#151 This figure shows locations for auscultating breath sounds.
#152 This figure shows locations and descriptions of abnormal versus normal breath sounds.
#153 Lecture Outline
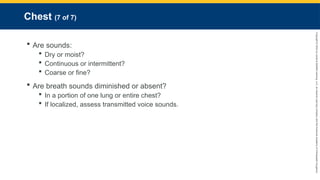
vi. It may be helpful to describe the sounds rather than attempt to immediately classify them.
vii. Are sounds:
(a) Dry or moist?
(b) Continuous or intermittent?
(c) Coarse or fine?
viii. Determine if breath sounds are diminished or absent.
(a) Diminished in a portion of one lung or entire chest?
(b) If localized, assess transmitted voice sounds.
(1) Bronchophony
(2) Whispered pectoriloquy
(3) Egophony
(4) Requires an optimal listening environment
#154 Lecture Outline
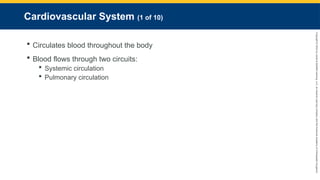
11. Cardiovascular system
a. Blood flows through two circuits:
i. Systemic circulation.
ii. Pulmonary circulation.
#155 Lecture Outline
b. Cardiac cycles involve:
i. Cardiac relaxation (diastole)
ii. Filling
iii. Contraction (systole)
#156 Lecture Outline
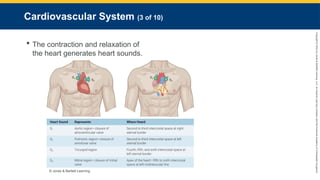
c. The contraction and relaxation of the heart, combined with the flow of blood, generates characteristic heart sounds during auscultation with a stethoscope.
i. S1
(a) First heart sound heard
(b) Closure of atrioventricular valves, marking the onset of ventricular contraction, or systole
ii. S2
(a) Second heart sound heard
(b) Usually louder than the first
(c) Closure of the semilunar valves, marking onset of ventricular relaxation, or diastole
iii. S3
(a) A soft, low-pitched rare heart sound that occurs early in diastole
(b) Most commonly associated with abnormally increased filling pressures in the atria secondary to moderate to severe heart failure
iv. S4
(a) A “gallop” rhythm
(b) A low-pitched sound that occurs immediately before the normal S1 sound
(c) Represents either decreased stretching of the left ventricle or increased pressure in the atria
#157 Lecture Outline
v. Splitting
(a) Events on the right side of the heart usually occur slightly later than those on the left side, creating two discernible sounds rather than one heart sound.
d. Heart sounds can be heard at the chest wall in the parasternal areas superiorly and inferiorly as well as in the region superior to the left nipple.
e. Korotkoff sounds
i. The sounds related to the patient’s blood pressure
ii. There are five, but only the first and fifth are clinically significant:
(a) Phase I—Clear, faint, tapping sounds that gradually increase in intensity; correlates to systolic contraction
(b) Phase II—Sounds change to a soft swishing sound.
(c) Phase III—Sounds become crisper again and increase in intensity; softer than tapping sounds in Phase I.
(d) Phase IV—Sounds become muffled.
Phase V—All sounds disappear; correlates to diastolic pressure.
iii. In patients with an auscultatory gap, sounds may disappear briefly between Phases II and III.
#158 Lecture Outline
f. Feel the chest wall to locate the point of maximum impulse (PMI) and appreciate the apical pulse.
i. Palpate for any lifts (also called heaves—the perception of the heart beating very strongly) in the chest wall, suggesting hypertrophy.
ii. Be aware of any thrills (humming vibrations).
g. Bruit
i. An abnormal “whooshing ” sound that indicates turbulent blood flow moving through a narrowed artery
h. Murmur
i. An abnormal “whooshing” sound heard over the heart that indicates turbulent blood flow around a cardiac valve
ii. Graded by range of intensity from 1 to 6
#159 Lecture Outline
i. Arterial pulses are a physical expression of systolic blood pressure.
i. Palpable wherever an artery crosses a bony prominence
j. Venous pressure tends to be low.
i. Does not assist in promoting systemic blood pressure
k. Assess the extremities for signs of venous obstruction or insufficiency.
i. Venous engorgement
ii. Palpable edema
iii. Swelling
iv. Hyperpigmentation
v. Mild erythema
vi. Painful superficial veins
vii. Heaviness in the extremities
viii. Changes in skin color
#160 Lecture Outline
l. Jugular venous distention (JVD)
i. With penetrating left chest trauma, JVD may indicate cardiac tamponade.
ii. With pedal edema, consider heart failure.
iii. There may be no evidence of JVD, even while the patient is supine, if there is hypotension.
#161 Lecture Outline
m. An older patient’s ability to compensate for a cardiovascular insult may be compromised.
i. Arterial atherosclerosis and diabetes
ii. Medications, such as for high blood pressure
#162 Lecture Outline
n. Pay attention to arterial pulses.
i. Location
ii. Rate
iii. Rhythm
iv. Quality
v. Amplitude
o. Obtain an accurate blood pressure and repeat periodically.
i. Note history of hypertension.
ii. Note the category of hypertension the patient falls in.
#163 Lecture Outline
p. Palpate and auscultate carotid arteries.
i. Assess for bruits.
q. For a suspected heart problem, assess:
i. Pulse for regularity and strength
ii. Skin for signs of hypoperfusion or oxygen desaturation
iii. Breath sounds
iv. Baseline vital signs
v. Extremities for peripheral edema
#164 Lecture Outline
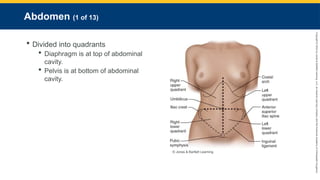
12. Abdomen
a. The abdomen is divided into imaginary quadrants.
i. The diaphragm is at the top of the abdominal cavity.
ii. The pelvis is at the bottom of the abdominal cavity.
iii. Quadrants
#165 Lecture Outline
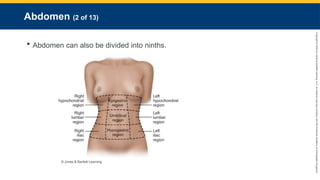
iv. Ninths
(a) Right hypochondrial
(b) Epigastric
(c) Left hypochondrial
(d) Right lumbar
(e) Umbilical
(f) Left lumbar
(g) Right iliac
(h) Hypogastric
(i) Left iliac
#166 Lecture Outline
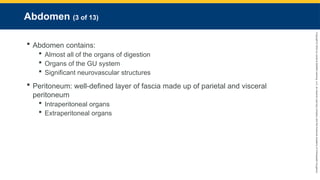
b. Contains:
i. Almost all of the organs of digestion
ii. The organs of the GU system
iii. Significant neurovascular structures
c. Peritoneum: A well-defined layer of fascia made up of the parietal and visceral peritoneum
i. Intraperitoneal organs
(a) Stomach
(b) Proximal duodenum of the small intestine
(c) Pancreas
(d) Jejunum
(e) Ileum
(f) Appendix
(g) Cecum
(h) Transverse colon
(i) Sigmoid colon
(j) Proximal rectum
(k) Liver
(l) Gallbladder
(m) Spleen
(n) Omentum
(o) Female internal genitalia
ii. Extraperitoneal organs
(a) Mid- and distal duodenum
(b) Abdominal aorta
(c) Mid- and lower rectum
(d) Kidneys
(e) Pancreatic tail
(f) Adrenal glands
(g) Ureters
(h) Renal blood vessels
(i) Gonadal blood vessels
(j) Ascending colon
(k) Descending colon
(l) Urinary bladder
#167 Lecture Outline
d. Three basic mechanisms produce abdominal pain:
i. Visceral pain
(a) Results when hollow organs are obstructed, thereby stretching the smooth muscle wall
(b) Produces cramping and more diffuse, widespread pain
ii. Inflammation
(a) Irritation of the somatic pain fibers located in the skin, the abdominal wall, and the musculature
(b) May produce sharp, localized pain
iii. Referred pain
(a) Has origins in a particular organ but is described by the patient as pain in a different location
#168 Lecture Outline
e. Obtain baseline vital signs.
i. Helps determine seriousness of patient’s condition and function of internal organs
ii. Shock presents in different stages and may be noted by decreased blood pressure.
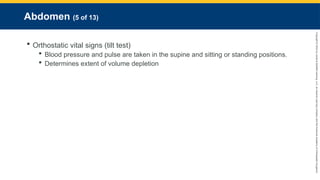
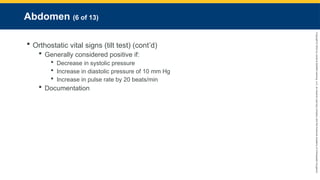
f. Orthostatic vital signs
i. Tilt test
ii. In patients who are volume-depleted, there is not enough circulating blood to push into the core circulation, especially when they move from a supine position to sitting or standing.
iii. Measurements of patient’s blood pressure and pulse are taken in the supine and sitting or standing positions.
iv. Can help determine the extent of volume depletion
v. Used for patients with complaints of:
(a) Nausea
(b) Vomiting
(c) Diarrhea
(d) Syncope
(e) GI problems
#169 Lecture Outline
vi. Generally considered positive if:
(a) BP shows a decrease in systolic pressure (up to 20 mm Hg)
(b) BP shows an increase in diastolic pressure of 10 mm Hg
(c) An increase in pulse rate by 20 beats/min
vii. Documentation should include:
(a) Whether the pulse was regular
(b) If the patient is being monitored and there is an attached ECG strip
(c) Whether the patient is experiencing other symptoms
#170 Lecture Outline
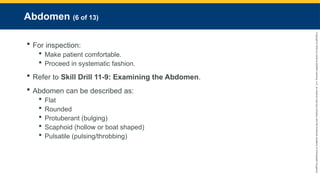
g. When examining the abdomen, make the patient as comfortable as possible.
i. May involve pain medications
ii. Assess abdomen with patient in supine position.
h. Always proceed in a systematic fashion, routinely performing inspection, auscultation, percussion, and palpation, in that order quadrant by quadrant.
i. Refer to Skill Drill 11-9.
i. Inspection
i. Abdomen can be described as:
(a) Flat
(b) Rounded
(c) Protuberant (bulging)
(d) Scaphoid ((hollow or boat shaped)
(e) Pulsatile (pulsing/throbbing)
#171 Lecture Outline
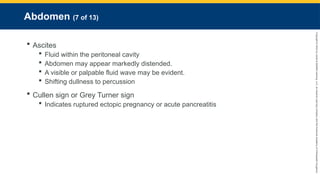
ii. Ascites
(a) Fluid within the peritoneal cavity
(b) Abdomen may appear markedly distended
(c) A visible or palpable fluid wave may be evident during examination.
(d) Shifting dullness to percussion
iii. Cullen sign or Grey Turner sign
(a) Indicative of ruptured ectopic pregnancy or acute pancreatitis
#172 Lecture Outline
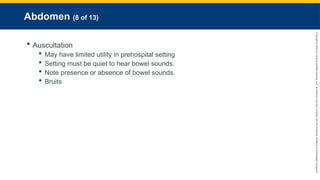
j. Auscultation
i. May have limited utility in the prehospital setting
ii. Setting must be quiet to hear bowel sounds.
iii. Bowel sounds may be described as:
(a) Hyperactive
(b) Hypoactive
(c) Absent
iv. Bruits
(a) Listen over the aorta, the right and left renal arteries, and the common iliac arteries.
#173 Lecture Outline
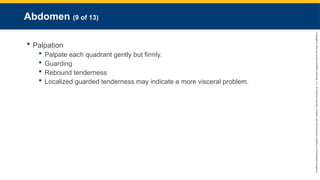
k. Palpation
i. Yields tenderness
ii. Palpate each quadrant gently but firmly.
iii. A normal abdomen should appear soft without tenderness or masses.
iv. Patient responses that indicate pain or discomfort:
(a) Moan
(b) Facial grimace
(c) Withdrawal
v. Guarding
(a) Voluntary or involuntary contraction of abdominal muscles
vi. Rebound tenderness
(a) Slowly push down and then rapidly release sections of the abdomen.
(b) Considered positive if the patient indicates pain upon release
(1) Indicates peritoneal irritation
vii. Localized guarded tenderness may have a more visceral problem.
(a) Although this may represent an early manifestation of a serious condition, it can also be associated with bowel obstruction, renal colic, biliary colic, or urinary tract infection.
(b) The pain is often deep-seated and poorly described by the patient.
#174 Lecture Outline
viii. To palpate the liver:
(a) Place your left hand behind the patient, parallel to and supporting the right 11th and 12th ribs and adjacent soft tissues below.
(b) Place your right hand on the patient’s right abdomen just below the rib cage.
(c) Ask the patient to take a deep breath.
(d) Try to feel the liver edge as it comes down to meet your fingertips.
#175 Lecture Outline
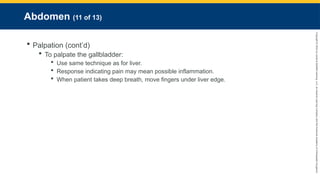
ix. To palpate the gallbladder:
(a) Use same technique to palpate as for liver.
(b) Generally cannot feel the gallbladder, but a patient response indicating pain may mean possible inflammation of the gallbladder.
(c) Difference in technique: When patient takes deep breath, move fingers under the liver edge.
#176 Lecture Outline
x. To palpate the spleen:
(a) May only be able to palpate if it is inflamed
(b) With your left hand, reach over and around the patient to support and press forward the lower left rib cage and adjacent soft tissues.
(c) With your right hand below the costal margin, press in toward the spleen.
#177 Lecture Outline
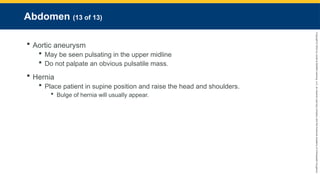
xi. Aortic aneurysm
(a) May be seen pulsating in the upper midline abdomen
(b) Do not palpate an obvious pulsatile mass.
(c) If you suspect an aortic aneurysm, minimize manipulation.
xii. Hernia
(a) A localized weakening of the abdominal wall musculature
(b) Not always visible
(c) Place the patient in a supine position and ask them to raise the head and shoulders.
(1) The bulge of a hernia will usually appear with this action.
#178 Lecture Outline
13. Female genitalia
a. Assessment should be performed in a limited and discreet fashion.
i. Keep the patient draped.
ii. Male paramedics should be assisted by a woman if possible.
b. Reasons to examine the genitalia include:
i. Concern over life-threatening hemorrhage
ii. Imminent delivery in childbirth
c. Assessment includes:
i. Palpating the bilateral inguinal regions
ii. Palpating the hypogastric region
#179 Lecture Outline
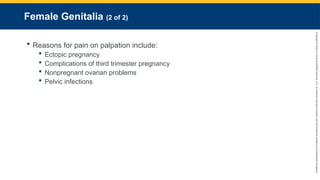
d. Clinical reasons for pain on palpation of the fallopian tube and ovary region include:
i. Ectopic pregnancy
ii. Complications of third trimester pregnancy
iii. Nonpregnant ovarian problems
iv. Pelvic infections
e. Make note of any bleeding, inflammation, discharge, swelling, or genital lesions.
#180 Lecture Outline
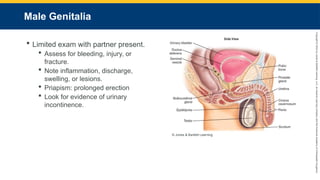
14. Male genitalia
a. Examine in a limited fashion with your partner present.
b. Assess for bleeding, injury, or underlying fracture in cases of trauma.
c. Note any inflammation, discharge, swelling, or lesions.
d. Priapism
i. A prolonged erection, usually the result of a spinal cord injury
e. Look for evidence of urinary incontinence.
#181 Lecture Outline
15. Anus
a. Often evaluated at the same time as the genitalia
b. Examined in limited circumstances
i. Keep the patient draped.
ii. Partner should be present.
c. Assess for need of bleeding control or another intervention.
d. Examine the sacrococcygeal and perineal areas.
i. Bleeding
ii. Trauma
iii. Lumps
iv. Ulcers
v. Inflammation
vi. Rash
vii. Abrasions
viii. Evidence of fecal incontinence
#182 Lecture Outline
16. Musculoskeletal system
a. Joints
i. Areas where bone ends abut each other and form a kind of hinge
ii. Filled with shock-absorbing linings and fluid
iii. Held together by ligaments
iv. Allow the body to perform mechanical work
b. Skeletal muscles
i. Used to flex and extend joints
ii. Anchored to bone via tendons
c. Joints become more vulnerable to injury, stress, and trauma as they age.
i. Crepitus is a normal variant of aging.
#183 Lecture Outline
d. Common types of musculoskeletal and soft-tissue injuries include:
i. Fractures
ii. Sprains
iii. Strains
iv. Dislocations
v. Contusions
vi. Hematomas
vii. Open wounds
e. Fractures
i. Pathologic fracture
Occurs when normal forces are applied to abnormal bone structures
Often a result of decreased bone density
ii. Traumatic fracture
Occurs when abnormal forces are applied to normal bone structures
Often a result of high-intensity blunt trauma
#184 Lecture Outline
f. When examining the skeleton and joints:
i. Pay attention to their structure and function.
ii. Consider how the joint and extremity look and how well they work.
iii. Note any limitation in range of motion, pain with range of motion, or bony crepitus.
iv. Look for evidence of inflammation or injury.
v. Evaluate for obvious deformity, diminished strength, atrophy, or asymmetry from one side to the other.
vi. Pain is considered an abnormal finding.
vii. Refer to Skill Drill 11-10.
#185 Lecture Outline
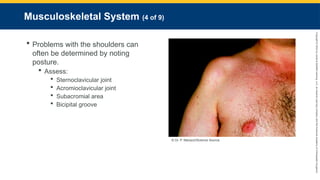
g. Problems with the shoulders and related structures can often by determined by noting the patient’s posture.
i. Palpate the proximal upper extremity and shoulder.
ii. Assess:
(a) Sternoclavicular joint
(b) Acromioclavicular joint
(c) Subacromial area
(d) Bicipital groove
(e) Note:
(1) Tenderness
(2) Swelling
(3) Crepitus
(4) Deformity
(5) Rotation
(6) Ecchymosis
#186 Lecture Outline
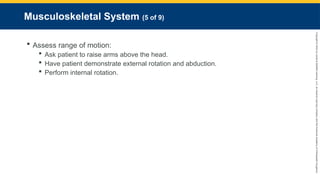
iii. Assess range of motion:
(a) Ask patient to raise the arms to the vertical position, above the head.
(b) Have the patient demonstrate external rotation and abduction by placing both hands behind the neck with the elbows out to the sides.
(c) Perform internal rotation by having the patient place both hands behind the lower back.
#187 Lecture Outline
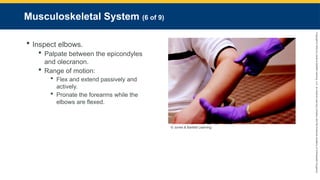
h. Inspect elbows for gross deformity or abnormal rotation.
i. Palpate the elbow between the epicondyles and olecranon.
(a) Palpate the epicondyles and olecranon themselves.
ii. Note:
(a) Tenderness
(b) Crepitus
(c) Swelling
(d) Thickening
iii. Range of motion:
(a) Flex and extend the elbows passively and actively.
(b) Have the patient supinate and pronate the forearms while the elbows are flexed at the patient’s sides.
#188 Lecture Outline
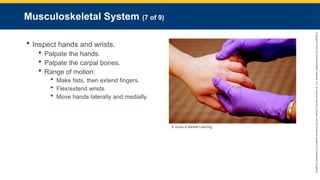
i. Inspect hands and wrists for abnormalities.
i. Palpate the hands.
(a) The medial and lateral aspects of each interphalangeal joint on each finger
ii. Squeeze the hands, compressing the metacarpophalangeal joints.
iii. Palpate the carpal bones of the wrists.
iv. Range of motion:
(a) Ask the patient to make fists with both hands, then extend and spread the fingers.
(b) Ask the patient to flex and extend the wrists.
(c) Ask the patient to move the hands laterally and medially with the palms facing down.
v. Check capillary refill.
vi. Check symmetry of radial pulses.
vii. Check overall limb temperature.
#189 Lecture Outline
j. Evaluate the patient’s ability to walk, if practical.
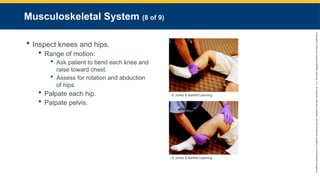
k. Inspect the knees and hips for overall alignment and symmetry.
i. Identify any deformity, shortening, and/or rotation.
ii. Look for evidence of thickening, swelling, or bruising of the thigh.
iii. Note any crepitus or palpable tenderness.
iv. Range of motion:
(a) Ask the patient to bend each knee and raise the bent knee toward the chest.
(b) Assess for rotation and abduction of the hips, both passively and actively.
v. Palpate each hip.
vi. Palpate and gently compress the pelvis downward and inward.
#190 Lecture Outline
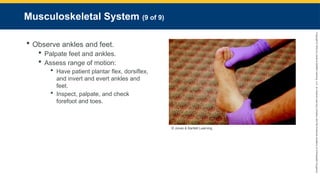
l. Observe all surfaces of the ankles and feet.
i. Note any wounds, deformities, discolorations, nodules, or swelling.
ii. Palpate all aspects of the feet and ankles.
iii. Measure distal pulses over the dorsalis pedis and tibialis posterior.
iv. Assess overall limb temperature.
v. Check capillary refill in pediatric patients.
vi. Assess range of motion:
(a) Have the patient plantar flex, dorsiflex, and invert and evert the ankles and feet.
vii. Inspect, palpate, and check range of motion in the forefoot and toes.
#191 Lecture Outline
17. Peripheral vascular system
a. Comprises all aspects of the circulatory system, except for the heart, the great vessels immediately involved with the mediastinum, and the coronary circulation
b. Lymphatic system
i. Network of nodes and ducts of various sizes that are dispersed throughout the body
c. Lymph nodes
i. Larger accumulations of lymphatic tissues
ii. Smaller amounts of lymph are distributed by tissue throughout the body.
iii. All lymphatic tissue contains large numbers of immunologically active cells.
#192 Lecture Outline
d. Perfusion occurs in the peripheral circulation via the network of capillary beds.
e. Diseases of the peripheral vascular system are often seen in patients with other underlying medical conditions.
i. Diabetes
ii. Hypertension
iii. Dyslipidemia
iv. Obesity
v. Tobacco use
#193 Lecture Outline
f. During assessment, pay attention to both the upper and lower extremities.
i. Look for signs indicative of either acute or chronic vascular problems.
ii. Refer to Skill Drill 11-11.
#194 Lecture Outline
iii. Inspect upper extremities from fingertips to shoulders.
(a) Note relative size, symmetry, and abnormalities.
(b) If indicated, palpate the epitrochlear and axillary lymph nodes.
(c) Palpate radial pulses simultaneously.
iv. The five Ps of acute arterial insufficiency:
(a) Pain
(b) Pallor
(c) Paresthesia
(d) Paresis
(e) Pulselessness
#195 Lecture Outline
v. Inspect the lower extremities from the groin and buttocks to the feet.
(a) Compare right side to left side for size and symmetry.
(b) Note any remarkable venous patterns or enlargement.
(c) Observe skin pigmentation, color, and texture.
(d) Patients with significant vascular insufficiency may display rubor, ecchymosis, or pallor.
(e) Note the presence of rashes, scars, and ulcers.
vi. Palpate pulses in the lower extremities.
(a) Dorsal pedis
(b) Posterior tibialis
(c) Femoral region
(d) Popliteal pulse
vii. Note temperature of the feet and legs.
viii. Attempt to palpate edema in the legs.
(a) Press your thumb over the dorsum of the foot and anteriorly over the tibias.
(b) Hold the thumb with firm, gentle pressure for at least 5 seconds.
ix. Palpate the superficial inguinal lymph nodes.
#196 Lecture Outline
18. Spine
a. Consists of 33 individual vertebrae
b. Inspect the back from both the posterior and lateral aspects.
i. Cervical, thoracic, and lumbar region curves
ii. Lordosis
(a) The inward curve of the lumbar spine just above the buttocks
(b) Exaggerated form of lordosis results in swayback
iii. Kyphosis
(a) The outward curve of the thoracic spine
iv. Scoliosis
(a) Sideways curvature of the spine
(b) Always abnormal
#197 These figures show abnormalities of the spine: lordosis, kyphosis, and scoliosis.
#198 Lecture Outline
c. Palpate the spine using the thumb to touch each spinous process.
i. Allows you to identify any tenderness, step-off, or crepitus
ii. An abnormality should prompt you to institute splinting and protective measures.
d. Check the rest of the back for any other significant findings on palpation.
i. Tap over costovertebral angles.
ii. Palpate scapulae, paraspinal areas, and base of neck.
iii. Check the buttocks.
#199 Lecture Outline
e. Range of motion:
i. Never evaluate passively.
ii. If any pain or tingling is elicited, stop the exam and immobilize the spine.
f. To examine the spine, see Skill Drill 11-12.
#200 Lecture Outline
19. Nervous system
a. Structure and function of the nervous system
i. Nervous system is divided into:
(a) Voluntary nervous system
(b) Involuntary (autonomic) nervous system
(1) Sympathetic
(2) Parasympathetic
#201 Lecture Outline
b. Reflexes
i. Involuntary motor response to specific sensory stimuli
ii. Primitive reflexes
(a) Normal findings in infants
(b) Abnormal findings in older people
iii. Babinski reflex test may be used to check neurologic function.
(a) Do not perform a Babinski reflex test on a patient who has lower-extremity injuries.
#202 Lecture Outline
c. The neurologic exam
i. Determine the patient’s:
(a) Mental status (AVPU)
(b) Cranial nerve function
(c) Distal motor function
(d) Distal sensory function
(e) Deep tendon reflexes
#203 Lecture Outline
ii. Mental status examination (COASTMAP)
(a) Consciousness
(b) Orientation
(c) Activity
(d) Speech
(e) Thought
(f) Memory
(g) Affect (mood)
(h) Perception
#204 Lecture Outline
iii. Cranial nerve examination
(a) Determines presence and degree of disability
(b) Can be performed in less than 3 minutes
#205 Lecture Outline
iv. Evaluation of the motor system
(a) Observe posture and body position.
(b) Watch for involuntary movements.
(1) Quality
(2) Rate
(3) Rhythm
(4) Amplitude
(c) Evaluate muscle strength.
(1) Have the patient actively move against the examiner’s resistance.
(2) Strength is graded on a scale of 0 to 5 (0 being no muscle activation).
(3) Expressed as a ratio; 5/5 is normal state
(d) Check coordination.
(1) Finger-to-nose
Heel-to-shin
Stance and gait
Pronator drift
(e) Proprioception
(1) The patient’s understanding and interpretation of the positioning of an extremity
With patient’s eyes closed, move large toe up and down and ask patient which direction it is moving.
v. To evaluate deep tendon reflexes, refer to Skill Drill 11-13.
#206 Lecture Outline
vi. Check sensory function.
(a) Tested bilaterally
(b) Assess primary sensory functions.
(1) Response to stimuli
(c) Assess cortical sensory functions.
(1) Perception of gross versus light touch
vii. Dermatomes
(a) Distinct areas of skin that are supplied by a specific sensory nerve
viii. To evaluate deep tendon reflexes, refer to Skill Drill 11-14.
#207 Lecture Outline
d. Results of the neurologic exam:
i. Delirium
(a) Consistent with an acute change in mental status, secondary to some significant underlying factor or incidence
ii. Dementia
(a) Representative of a gradual and pervasive deterioration of cognitive cortical functions
iii. Commonly encountered abnormalities:
(a) Facial and extremity strength asymmetry
(b) Aphasia
(c) Ataxia
(d) Dystonia
(e) Seizures
(f) Vertigo
(g) Visual changes
(h) Tinnitus
(i) Tremor
#208 Lecture Outline
H. Secondary assessment of unresponsive patients
1. After ruling out trauma, position unresponsive patients in the recovery position.
2. If trauma is a factor, position the patient in neutral alignment, place a properly sized and fitted rigid cervical collar, and implement spinal immobilization restriction procedures per protocol.
3. Perform a thorough assessment of the:
a. Head
b. Neck
c. Chest
d. Abdomen
e. Pelvis
f. Posterior body
Extremities
4. Look for signs of illness.
#209 Lecture Outline
5. Perform at least two sets of vital signs.
a. First set establishes baseline.
b. Second set evaluates status.
c. Map trends as time allows.
Always assess the posture of an unresponsive patient.
a. If there is no spontaneous movement, apply a painful stimulus.
#210 Lecture Outline
I. Secondary assessment of trauma patients
1. Two classifications of trauma patients:
a. Isolated injury
i. Allows you to immediately focus on the injury
b. Multisystem trauma
i. Must first find all problems
ii. Prioritize injuries according to severity.
iii. Constantly think about how each injury relates to the others.
2. High visibility factor
a. Do not become distracted by obvious, but non–life-threatening injuries.
#211 Lecture Outline
3. Any trauma patient who is unresponsive or has altered mentation is considered high risk.
4. Before examining a trauma patient, make sure that the patient’s cervical spine is manually immobilized in the neutral position.
a. Reassess patient’s mental status and revisit your transport decision.
b. Additional physical exam must be done quickly.
#212 Lecture Outline
J. Recording secondary assessment findings
1. Should be done in an orderly and concise manner
2. Use the documentation method required by your local protocols.
3. Note:
a. Objective signs
b. Pertinent negatives
c. Similar relevant information
#213 Lecture Outline
K. Limits of the secondary assessment
1. Remember:
a. Not everything can be discovered in the secondary assessment.
b. Keep total time in the field to a minimum.
c. Evaluation by a trained physician coupled with laboratory and radiographic studies may be needed for a definitive diagnosis.
#214 Lecture Outline
L. Monitoring devices
1. Continuous ECG monitoring
a. Purpose is to establish a baseline.
b. Patients who present with any cardiac-related signs and symptoms or potential signs and symptoms of illnesses with cardiac impact should be on continuous cardiac monitoring.
c. The electrodes must be placed on the patient properly.
i. The leads are usually colored and labeled to help with placement.
The lead wires are attached to electrodes.
d. There are times when the ECG looks normal, but the heart is not functioning properly.
#215 Lecture Outline
2. 12-lead ECG monitoring
a. Allows you to look at the heart from several angles to localize the site of injury to the heart muscle
b. Early recognition allows hospitals to prepare before patient arrival.
c. The only way to learn to take a 12-lead ECG is to practice with the equipment.
i. Patient should be supine.
ii. Make sure the patient does not become chilled.
(a) Shivering will produce artifact in the ECG tracing.
iii. Prepare the patient’s skin.
iv. Connect the four limb electrodes.
v. Connect and apply the precordial leads.
vi. Record the ECG.
#216 Lecture Outline
3. Carbon dioxide monitoring
a. Capnometry
i. Measures carbon dioxide output
b. Capnography
i. Includes measurement of carbon dioxide output but also provides a waveform
(a) Bronchospasm, shock, and acidosis
(b) In intubated patients, the device is placed on the proximal end of the endotracheal tube and then connected to a portable ECG monitor or a separate monitoring device.
(c) For breathing patients, a special nasal cannula adapted for collecting carbon dioxide while administering oxygen is used.
ii. Limitations:
(a) Requires a minimal airflow in order to calculate a reading
(b) Requires calibration
(c) Sometimes affected by secretions
#217 Lecture Outline
4. Basic blood chemistry
a. Blood glucometer
i. Should measure the blood glucose level of every patient who:
(a) Is diabetic
(b) Is unresponsive for unknown reasons
(c) Has generalized malaise/weakness
ii. Can obtain a rapid blood glucose reading in two ways in the field:
(a) From the hub of an IV catheter
(b) From a finger stick
iii. Most newer glucometers take only a few seconds to give a reading.
iv. Glucometers should be calibrated regularly.
v. Assure that the test strips are correct for the glucometer and that they have not expired.
#218 Lecture Outline
b. Cardiac biomarkers
i. Used to assess for the presence of damage to cardiac muscle
ii. Performed to determine whether a myocardial infarction has taken place
iii. Usually done in a lab
(a) Some field versions are now available to measure these markers quickly.
iv. Should be assessed in all cardiac patients, depending on local protocol
(a) Should also be used in patients who are presenting with signs and symptoms of a stroke
v. Be aware that it may take several hours following a myocardial infarction for the cardiac biomarkers to become elevated.
#219 Lecture Outline
c. Other blood tests
i. i-STAT handheld device
(a) Single-use, disposable i-STAT test cartridges cover most commonly performed diagnostic tests.
ii. Basic and complete metabolic profile (CHEM 7 and CHEM 12)
(a) Give insight into electrolyte status and renal and liver function
iii. Brain natriuretic peptide (BNP) test
(a) Helps differentiate cardiac versus pulmonary causes of respiratory distress
#221 This flowchart explains reassessment, the final step in patient assessment.
#222 Lecture Outline
VI. Reassessment
A. Stable patients should be reassessed every 15 minutes and unstable patients should be reassessed every 5 minutes.
#223 Lecture Outline
B. Reassessment of the primary survey
1. Compare the patient’s LOC with your baseline assessment.
2. Review the airway.
a. Be prepared to suction.
b. If the airway needs to be secured, prepare the patient for intubation.
3. Reassess breathing.
a. Stay alert for signs of ventilatory fatigue.
4. Reassess circulation.
a. Assess overall skin color.
b. Make sure all bleeding is controlled.
c. Reassess blood pressure.
5. Reassess the pulse.
#224 Lecture Outline
C. Reassessment of patient care and transport priorities
1. Have you addressed all life threats?
2. Do priorities need to be revised?
3. Is initial transport decision still appropriate?
4. Obtain another complete set of vital signs and compare with expected outcomes from your therapies.
a. Priority patients should have at a minimum three sets of vital signs.
#225 Lecture Outline
5. Look for trends.
a. Cushing reflex
b. Cardiac tamponade (Beck triad)
6. Revisit the patient’s chief complaints along with your interventions.
7. Document all of your findings with each reassessment.