#2 Lecture Outline
I. Introduction
A. It is your responsibility to administer the appropriate medications and the appropriate dosage when needed, and to determine the most effective route by which to administer them.
1. Vascular access is often needed in emergency medicine for hemodynamically unstable patients who need intravenous (IV) fluids, various medications, or both.
a. Many techniques are used in the prehospital setting.
i. Cannulation of a peripheral extremity vein
ii. External jugular (EJ) vein cannulation
iii. Intraosseous (IO) access
iv. Long-term vascular access devices (VADs)
2. Significant harm to the patient can result from:
i. Improper technique
ii. Insufficient knowledge of medication
#3 Lecture Outline
II. Medical Direction
A. Gaining approval from medical direction
1. Online (direct) medical control
2. If you are not confident with medication administration:
a. Use your protocols, a drug formulary, a flip guide, a smartphone or tablet application, or any other available resource.
b. Consider medical control.
#4 Lecture Outline
3. Online medical control is not just for approval of medications.
a. General consultation of treatment modalities with which you are not confident
4. When in doubt, contact medical control.
#5 Lecture Outline
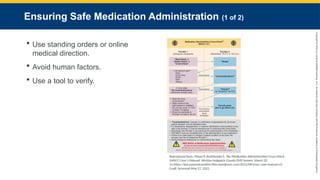
III. Ensuring Correct and Safe Medication Administration
A. Ensure medications are administered accurately and safely.
1. Use standing orders or online medical direction.
2. Avoid human factors that cause errors.
3. Use a tool to verify the drug dose, name, route, rate of administration, indication for administration, contraindications, drug concentration, and volume to be administered.
#6 Lecture Outline
B. Document the following:
1. Dose administered
a. Total quantity administered during that administration
b. Units of measure for that drug
c. Volume administered to the patient
2. Name of medication
3. Route
4. Rate
a. Bolus, infusion, or other administration method
5. Time of administration
6. Who administered the drug
7. Who helped perform the medication check
8. Patient’s response
#7 Lecture Outline
IV. Local Drug Distribution System
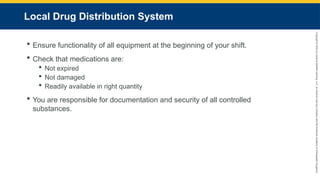
A. Ensure all equipment on the ambulance is fully functional before responding to an EMS call.
1. Verification performed during your check at the beginning of your shift
2. Check all medications to make sure they are:
a. Not expired
b. Not damaged
c. Readily available in right quantity
B. You are responsible for documentation and security of all controlled substances carried on your vehicle.
1. Follow policies and procedures of your local drug distribution, security, and accountability system.
#8 Lecture Outline
V. Medical Asepsis
A. The practice of preventing contamination from pathogens by using aseptic technique.
1. Method of cleansing that prevents contamination of a site
a. Accomplished through:
i. Sterilization of equipment
ii. Antiseptics
iii. Disinfectants
#9 Lecture Outline
B. Clean technique versus sterile technique
1. Sterile technique refers to the deconstruction of all living organisms using heat, gas, or chemicals.
2. For a sterile field to exist:
a. Wear a mask and sterile sleeves or a gown that covers you from the wrist to 2 inches (5 cm) proximal of the elbow.
b. Wear sterile gloves using numerical sizes.
c. Place sterile drapes around procedural area.
d. Only sterile items and personnel may enter the sterile field.
#10 Lecture Outline
3. It may not be feasible to maintain a sterile environment in the field.
a. Practice medical asepsis to reduce risk of contamination and infection.
i. Handwashing, wearing gloves, keeping equipment as clean as possible
ii. For example, the site on a patient’s hand that has been cleaned with iodine and alcohol before starting an IV line is said to be “medically clean.”
#11 Lecture Outline
C. Antiseptics and disinfectants
1. Antiseptics are used to cleanse an area before performing an invasive procedure.
a. Capable of destroying pathogens
b. Not toxic to living tissues
c. Most common examples:
i. Isopropyl alcohol (rubbing alcohol)
ii. Iodine
iii. 2% chlorhexidine gluconate (ChloraPrep)
2. Disinfectants are toxic to living tissue.
a. Use only on nonliving objects
#12 VI. Standard Precautions and Contaminated Equipment Disposal
#13 Lecture Outline
A. Standard precautions
1. Treat any bodily fluid as being potentially infectious.
#14 Lecture Outline
B. Disposal of contaminated equipment
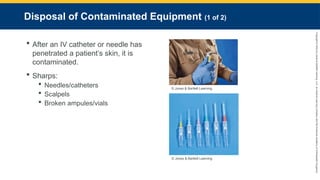
1. After an IV catheter or needle has penetrated a patient’s skin, it is contaminated.
a. Accidental needlesticks are a leading cause of disease transmission in healthcare settings.
b. Dispose immediately and properly.
c. Sharps: Any contaminated item that can cause injury
i. Include:
(a) IV/IM/subcutaneous needles and catheters
(b) Scalpels
(c) Broken ampules or vials
(d) Anything that can penetrate/lacerate skin
#15 Lecture Outline
2. Immediately dispose of all sharps in a puncture-proof sharps container with a biohazard logo.
a. Should be readily accessible
i Place at least two in the back of the ambulance.
ii. Have a small sharps container in your jump kit.
#17 Lecture Outline
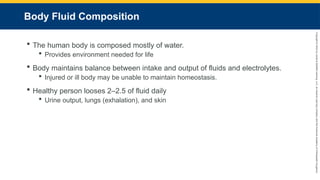
A. Body fluid composition
1. The human body is composed mostly of water.
a. Provides environment necessary for life
b. Body maintains balance between intake and output of fluids and electrolytes.
i. Injured or ill body may be unable to maintain homeostasis.
c. A healthy person loses approximately 2–2.5L of fluid daily.
i. Through urine output, lungs (exhalation), and the skin
#18 Lecture Outline
B. Dehydration
1. Inadequate total systemic fluid volume
2. Signs and symptoms:
a. Decreased level of consciousness
b. Postural hypotension
c. Tachypnea
d. Dry mucous membranes
e. Decreased urine output
f. Tachycardia
g. Poor skin turgor
h. Flushed, dry skin
#19 Lecture Outline
3. Causes:
a. Diarrhea
b. Vomiting
c. Gastrointestinal drainage
d. Infections
e. Metabolic disorders
f. Hemorrhage
g. Environmental emergencies
h. High-caffeine diet
i. Insufficient fluid intake
#20 Lecture Outline
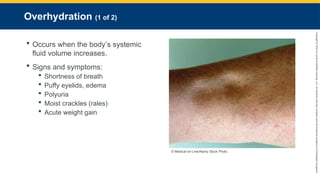
C. Overhydration
1. Occurs when the body’s total systemic fluid volume increases
2. May occur in patients:
a. With impaired kidney function
b. Who have been administered more fluid than their body can excrete
c. Younger than 1 month (kidneys are not fully developed)
3. Signs and symptoms:
a. Shortness of breath
b. Puffy eyelids
c. Edema
d. Polyuria
e. Moist crackles (rales)
f. Acute weight gain
#21 Lecture Outline
4. Causes:
a. Unmonitored IVs (pediatrics)
b. Kidney failure
c. Water intoxication in endurance sports
d. Prolonged hypoventilation
#23 Lecture Outline
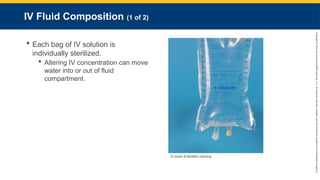
A. Each bag of IV solution is individually sterilized.
1. Compounds and ions are identical to the ones in the body.
a. Altering IV concentration can move water into or out of any fluid compartment in the body.
#24 Lecture Outline
2. Operation of electrolytes
a. A patient’s electrolytes can become altered from:
i. Excessive vomiting
ii. Diarrhea
iii. Dietary issues
iv. Medications
v. Blood loss, or a variety of other injuries
b. Understanding the role of each electrolyte aids in selecting the appropriate IV solution.
#25 Lecture Outline
B. Types of IV solutions
1. Can be categorized as crystallized or colloid, or as isotonic, hypotonic, or hypertonic
2. Crystalloid solutions
a. Dissolved crystals in water
b. Able to cross membranes and alter fluid levels
c. Best choice for prehospital care of injured patients needing body fluid replacement
d. Optimal replacement fluid is as near to whole as possible.
e. Crystallized solutions cannot carry oxygen.
f. Boluses should be given to maintain perfusion, not to raise blood pressure.
i. Increasing blood pressure may increase internal bleeding.
ii. Blood pressure should be titrated to 90 mm Hg unless otherwise noted.
#26 Lecture Outline
3. Colloid solutions
a. Contain molecules that are too large to pass out of the capillary membranes
b. Molecules remain in the vascular system.
c. High osmolarity
i. Draw fluid from the interstitial and intracellular compartments into the vascular compartments
d. Reduce edema
e. Could cause dramatic fluid shifts
f. Short duration of action
g. Low cost-to-benefit ratio
#27 Lecture Outline
4. IV solutions are also categorized by their tonicity.
a. Isotonic solution: The same concentration of sodium as the cell
i. Water does not shift.
ii. No change in the cell shape
b. Hypertonic solution: A greater concentration of sodium than the cell
i. Water is drawn out.
ii. The cell may collapse from the increased extracellular osmotic pressure.
c. Hypotonic solution: A lower concentration of sodium than the cell
i. Water flows into the cell.
ii. The cell swells and could possibly burst from increased intracellular osmotic pressure.
#28 Lecture Outline
5. Isotonic solutions
a. Example: Normal saline (0.9% sodium chloride)
b. Expand the contents of the intravascular compartment
c. Use care to avoid fluid overloading.
d. Lactated Ringer (LR) solution is generally used for patients who have significant blood loss.
i. Contains lactate
ii. Should not be given to patients with liver problems
iii. May be potentially detrimental if given during blood transfusions
iv. Contraindicated for:
(a) Mannitol, methylprednisolone, nitroglycerin, nitroprusside, norepinephrine, procainamide, and propranolol infusions
e. D5W is a unique isotonic solution.
i. Is considered isotonic in the bag
ii. Becomes hypotonic once administered
iii. Usually administered during medication infusions
#29 Lecture Outline
6. Hypotonic solutions
a. Begins to dilute serum once in the vascular compartment
b. Water pulled from vascular compartment into interstitial fluid compartment
c. Hydrate the cells while depleting the vascular compartment
i. May treat hypoglycemic conditions
d. Can cause a sudden fluid shift from intravascular space to the cells
i. May lead to cardiovascular collapse and increased intracranial pressure
ii. Dangerous for patients with stroke, head trauma, burns, malnutrition, or liver disease
iii. Third spacing: Abnormal shift into the serous linings
e. 0.45% sodium chloride, commonly referred to as half-normal saline
i. Not common in prehospital setting
ii. May be encountered during interfacility transports for patients who have normal sodium levels but need fluid replenishment
#30 Lecture Outline
7. A hypertonic solution
a. Higher osmolarity and ionic concentration than serum
b. Pulls fluid and electrolytes from the intracellular and intestinal compartments to intravascular compartment
c. Cells may collapse from increased extracellular osmotic pressure.
#31 Lecture Outline
d. Helps stabilize blood pressure, increase urine output, and reduce edema
e. Rarely used in prehospital setting but commonly encountered during interfacility transports
f. “Hypertonic” is often used to refer to solutions with high concentrations of proteins.
i. Proteins have same effect on fluid as sodium.
g. Careful monitoring to avoid fluid overloading
i. Should not be given to:
(a) Diabetic ketoacidosis patients
(b) Patients at risk of cellular dehydration
h. 3% sodium chloride may be used per your EMS protocols for interfacility transport.
i. Used as a temporizing measure to draw out fluid in an effort to reduce intracranial pressure until the patient can be taken into neurosurgery
#32 Lecture Outline
8. Oxygen-carrying solutions
a. Whole blood is the best replacement for lost blood.
i. Impractical in the prehospital setting
(a) Requires refrigeration and unique storage
b. Synthetic blood substitutes are being researched and field-tested.
#34 Lecture Outline
A. IV therapy involves cannulation of a vein with a catheter to access a patient’s vascular system.
1. Peripheral vein cannulation involves cannulating veins of the periphery.
2. The most important point to remember is to keep the IV equipment sterile.
#35 Lecture Outline
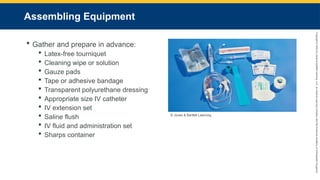
B. Assembling your equipment
1. Gather and prepare your equipment before starting an IV line.
2. The following equipment will be available:
a. Latex-free tourniquet
b. Antiseptic wipe or solution
c. Gauze pads
d. Tape or adhesive bandage
e. Transparent polyurethane dressing
f. Appropriate-size IV catheter
g. IV extension set
h. A saline flush
i. IV fluid and administration set appropriate for the patient’s condition
j. Sharps container
#36 Lecture Outline
C. Choosing an IV solution
1. Ask yourself:
a. Is the patient’s condition critical?
b. Is the patient’s condition stable?
c. Does the patient need fluid replacement?
d. Will the patient need medications?
e. Does the patient have any preexisting conditions (eg, kidney failure) that may preclude or change the standard IV therapy choice?
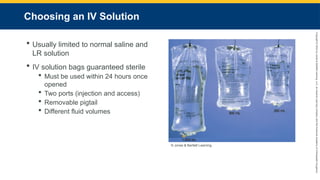
2. IV solution is usually limited to two isotonic crystalloids.
a. Normal saline
b. LR solution
3. IV solution bags are wrapped in a sterile bag and guaranteed sterile until the expiration date.
a. Solution must be used within 24 hours once opened.
b. Each bag has two ports:
i. Injection port for medication
ii. Access port for connecting the administration set
c. Removable pigtail protects sterile access port
d. IV bags come in different fluid volumes.
#37 Lecture Outline
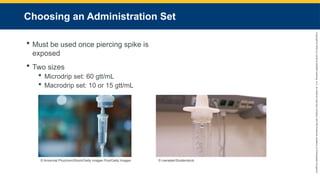
D. Choosing an administration set
1. An administration set moves fluid from the IV bag into the patient’s vascular system.
a. Contains a piercing spike protected by a plastic cover
i. The set must be used or discarded once the spike is exposed and the seal surrounding the cap is broken.
2. Two sizes:
a. Microdrip set: Allows 60 gtt (drops) per milliliter (mL)
i. Ideal for medication administration or pediatric fluid delivery
ii. Easy to control fluid flow
b. Macrodrip set: Allows 10 or 15 gtt/mL
i. Ideal for rapid fluid replacement
#38 Lecture Outline
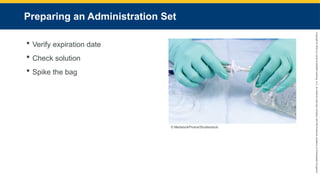
3. Preparing an administration set
a. Verify the expiration date, and check the solution for clarity.
b. Prepare to spike the bag.
#39 Lecture Outline
4. Steps for spiking the bag are as follows:
a. Ensure the proper solution is clear and not expired and the protective tail port covers are in place.
b. Ensure you have chosen the correct administration set drip rating, the tubing is not tangled, and protective covers are present on both ends, and check that the flow clamp is up almost to the drip chamber and closed.
c. Remove the protective covering at the end of the IV bag and the piercing spike.
d. Slide the spike into the IV bag port until it is seated against the bag.
e. Squeeze the drip chamber to the fill line on the chamber.
f. Run fluid into the line to flush the air out of the tubing.
#40 Lecture Outline
g. Twist the protective cover of the opposite end of the IV tubing to let the fluid flow until air bubbles are removed from the line, then either turn the roller clamp wheel to stop the flow or set the drip rate per the required dose.
h. Check the drip chamber fluid level to ensure it is half-filled.
i. If the fluid level is too low, squeeze the chamber until it fills.
ii. If the fluid level is too full, with the roller clamp in the off position, invert the bag and the chamber and squeeze the chamber to empty the fluid back into the bag.
i. Hang the bag in an appropriate location, where the ends of the IV tubing is easily accessible.
#41 Lecture Outline
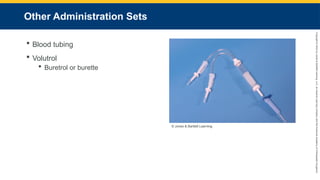
5. Other administration sets
a. Blood tubing is a macrodrip administration.
i. Designed to facilitate rapid fluid replacement by manual infusion of multiple IV bags or IV blood replacement combinations
b. Volutrol (Buretrol or burette) is a microdrip set
i. Fills 100- or 200-mL calibrated drip chamber
ii. Able to administer only the amount wanted
iii. Proximal roller clamp allows shutoff of the drip chamber from the bag.
#42 Lecture Outline
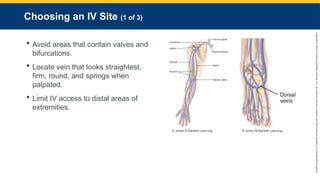
E. Choosing an IV site
1. Avoid areas of the vein that contain valves and bifurcations.
2. Follow criteria to choose a vein:
a. Locate the vein section that looks the straightest.
b. Choose a vein that looks firm, round, and springs when palpated.
c. Avoid veins that cross over joints.
d. Avoid edematous, injured, infected, or paralyzed extremities and any extremity with dialysis fistula or on the side where a mastectomy was performed.
3. Limit IV access to distal areas of extremities.
a. Start distally.
b. Work proximally.
4. Any introduced fluid immediately below an open wound can enter tissue and cause damage.
#43 Lecture Outline
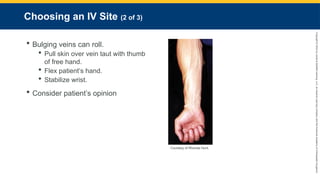
5. Bulging veins can roll from side to side.
a. Apply manual traction to lock it in place.
i. Pull skin over vein taut with thumb of free hand.
ii. Flex patient’s hand.
iii. Stabilize wrist.
iv. Applying lateral traction can stabilize veins in forearm and antecubital areas.
v. Stabilizing and cannulating the EJ vein requires a different approach.
#44 Lecture Outline
6. Consider the patient’s opinion when selecting an IV site.
a. Avoid extremity if it shows signs of:
i. Trauma
ii. Injury
iii. Infection
b. Look for track marks.
i. Signs of sclerosis
7. Hospitals prefer IV lines located in nonarticulating areas such as the top of the hand or forearm.
8. Some protocols allow IV cannulation of leg veins.
a. Can increase risk of venous thrombosis and pulmonary embolism
#45 Lecture Outline
F. Choosing an IV catheter
1. Catheter selection should reflect the purpose of the IV line, the patient’s age, and location for the line.
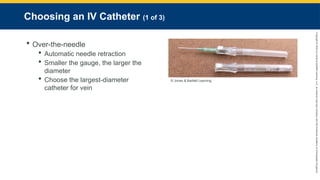
2. Over-the-needle catheters
a. Teflon catheter inserted over a hollow needle
b. Use automatic needle retraction after insertion to decrease risk of contamination.
i. Locking slide mechanism or spring-loaded slide mechanism
c. Sizes determined by their diameter (gauge)
i. The smaller the gauge, the larger the diameter.
d. Choose the largest-diameter catheter for the vein you have chosen.
i. 18- or 20-gauge catheter is usually a good size for adults.
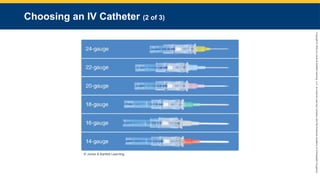
#46 This figure displays the differences in catheters sizes.
#47 Lecture Outline
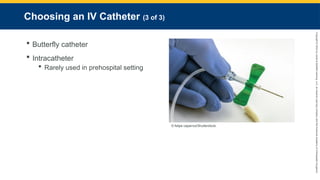
3. Butterfly catheters
a. Hollow, stainless steel needle with two plastic wings
b. Most common in phlebotomy
c. Sometimes used for IV placement in scalp veins for pediatric patients
4. Intracatheter
a. A tube that enters the bloodstream with the puncturing needle
b. Can be used in the hospital setting for medication administration, blood samples, and hemodynamic monitoring
c. Rarely used in prehospital setting
#48 Lecture Outline
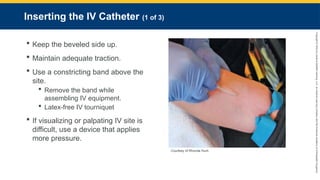
G. Inserting the IV catheter
1. Considerations for any technique:
a. Keep the beveled side of the catheter up.
b. Maintain adequate traction on the vein.
2. Use a constricting band above the site.
a. Remove the band while assembling IV equipment.
b. The most common constricting band is a latex-free IV tourniquet.
c. If visualizing or palpating IV site is difficult:
i. Replace the constricting bands with a device that applies more pressure, such as:
(a) A Penrose drain
(b) A blood pressure cuff
#49 Lecture Outline
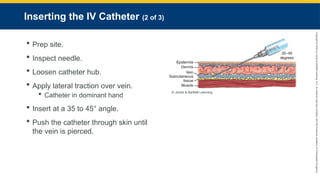
3. Prep the site according to your local or agency protocols.
4. Inspect the needle for burrs or other imperfections.
5. Loosen the catheter hub with a twisting motion to break the seal.
6. Apply gentle lateral traction on the skin over the vein, while holding the catheter bevel side up in your dominant hand.
7. Insert at a 35–45° angle.
8. Push the catheter through the skin until the vein is pierced.
#50 Lecture Outline
9. Drop angle to 15° and advance catheter a few centimeters.
10. Slide sheath off needle into vein until the hub touches the skin.
11. Apply pressure to the vein proximal to the end of the indwelling catheter.
12. Remove needle.
13. Activate the shielding device.
14. Dispose of needle in a sharps container.
#51 Lecture Outline
H. Vein Identification Assistive Devices
1. Help visualize a patient’s vasculature in the event of a challenging IV start
a. Near-infrared technology devices
b. Ultrasonographically guided devices
c. Portable vein transilluminators
i. Most economically feasible in prehospital setting
#52 Lecture Outline
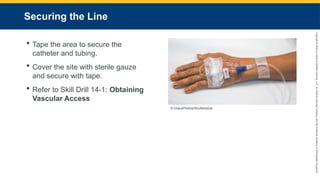
I. Securing the line
1. Tape the area to secure the catheter and tubing.
a. Double back the tubing to create a loop.
2. Cover the insertion site with sterile gauze, and secure with tape.
a. Avoid circumferential taping around any extremity.
3. Establish vascular access.
4. To correctly establish vascular access, see Skill Drill 14-1.
#53 Lecture Outline
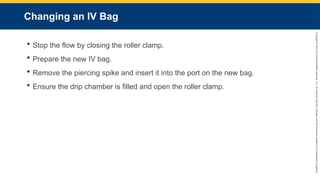
J. Changing an IV bag
1. Never allow an IV fluid bag to become completely empty.
a. Change when 25 mL of fluid is left.
2. Replace the equipment if it becomes contaminated.
3. To change an IV fluid bag:
a. Stop the flow of fluid by closing the roller clamp.
b. Prepare the new IV bag.
c. Remove the piercing spike and insert it into the port on the new bag.
d. Ensure the drip chamber is filled and open the roller clamp, adjusting the fluid rate accordingly.
#54 Lecture Outline
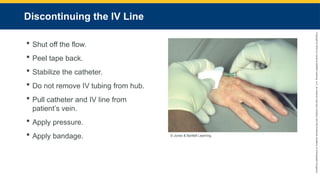
K. Discontinuing the IV line
1. Use the roller clamp to shut off the flow.
2. Peel tape back toward the IV site.
3. Stabilize the catheter.
4. Do not remove IV tubing from hub of catheter.
5. Pull catheter and IV line from patient’s vein.
6. Apply pressure to control bleeding.
7. Apply a bandage or tape the gauze in place.
#55 Lecture Outline
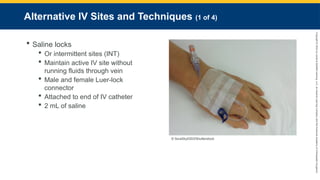
L. Alternative IV sites and techniques
1. Saline locks (buff caps)
a. Maintain active IV site without running fluids through vein
b. Composed of:
i. Male Luer-lock connecter
(a) Attaches to hub of an IV catheter
ii. Female Luer-lock connecter
(a) Can connect to syringes or an IV administration set
c. Attached to the end of an IV catheter
d. Filled with approximately 2 mL of saline
i. Keeps blood from clotting
e. Also called intermittent sites (INT)
#56 Lecture Outline
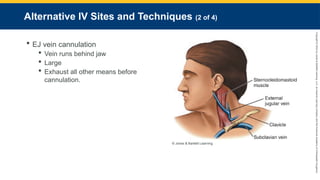
2. EJ vein cannulation
a. EJ vein runs down and obliquely backward behind the jaw
i. Pierces deep fascia of the neck
ii. Large and easy to cannulate
iii. Can roll if not anchored
b. Exhaust all other means of cannulating a peripheral vein before attempting EJ vein cannulation.
i. Risks include:
(a) Inadvertent puncture of carotid artery
(b) Rapidly expanding hematoma
(c) Air embolism
#57 Lecture Outline
c. Steps to cannulate EJ vein:
i. Place patient in supine, head-down position.
(a) Turn patient’s head to opposite side of intended venipuncture.
(b) Feel carefully for a pulse; do not pierce the carotid artery.
ii. Cleanse the site.
iii. Occlude the jugular vein with your finger.
#58 Lecture Outline
iv. Align the catheter in the direction of the vein.
v. Puncture midway between the jaw and midclavicular line.
(a) Stabilize the vein.
vi. Proceed cannulation as if for a peripheral vein.
(a) Prevent air from entering catheter.
vii. Tape line securely, avoiding circumferential dressings.
#59 Lecture Outline
M. Pediatric IV therapy considerations
1. Adult IV solutions and equipment can be used on pediatric patients with some exceptions.
2. Catheters
a. The best gauges for over-the-needle catheters used on pediatric patients are 20, 22, 24, and 26.
b. Butterfly catheters are ideal.
i. Can be used in the same location as over-the-needle catheters
ii. Can be used in visible scalp veins
#60 Lecture Outline
3. IV locations
a. Explain your actions to child and parent.
b. Youngest patients have fewer choices for an IV site.
i. Hand veins are painful but remain the location of choice for peripheral IV lines.
c. Critical to protect IV site
i. Ensure the catheter hub and tubing connection are covered with a clear dressing so they can be continually assessed.
ii. If there is a fear of the child pulling the catheter out, then consider wrapping the tubing and catheter with roller gauze.
d. Technique for starting pediatric IV line:
i. Use penlight to illuminate veins through back of hand.
ii. Once site is located, graze surface with fingernail to mark location.
iii. Proceed with IV insertion.
e. Scalp vein cannulation is aesthetically unpleasant and can be difficult.
i. Does not allow for rapid fluid resuscitation
ii. Tape a paper cup over the site to avoid direct pressure.
#61 Lecture Outline
N. Older adult IV therapy considerations
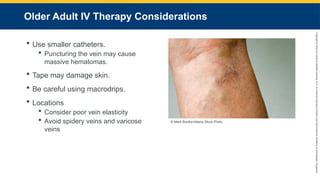
1. Smaller catheters may be preferable.
2. Puncturing the vein may cause massive hematomas.
3. Tape may cause skin damage.
4. Use smaller catheters (20, 22, 24 gauge).
5. Be careful using macrodrips.
a. Can allow rapid infusion of fluids, leading to fluid overload
6. Locations
a. Consider poor vein elasticity.
b. Avoid spidery veins because they rupture easily.
c. Do not use varicose veins.
i. They are completely closed off.
#62 Lecture Outline
X. Factors Affecting IV Flow Rates
A. Perform the following checks after completing an IV administration and whenever a problem occurs:
1. IV fluid.
a. Thick fluids infuse slowly and may be diluted to help speed.
b. Cold fluids run slower than warm fluids.
2. Administration set
a. Macrodrips deliver fluid rapidly.
b. Microdrips deliver controlled flow.
3. Height of the IV bag
a. Bag must be high enough to overcome gravity.
4. Type of catheter used
a. The larger the diameter, the faster fluid can be delivered.
5. Constricting band
a. Remove from arm after completing establishment.
6. Entire line to ensure it is not clamped at any point
a. Occasionally, the roller clamp or the clamp from an extension set is left closed.
7. Positioning of the IV line
#63 XI. Potential Complications of IV Therapy
A. Problems with IV therapy can be:
1. Local reactions (infiltration and thrombophlebitis)
2. Systemic complications (allergic reactions, circulatory overload, air embolus, vasovagal reactions, and catheter shear)
#64 Lecture Outline
B. Local complications
1. Infiltration
a. Causes localized area of edema
b. Causes include:
i. Dislodgement of catheter
ii. Puncture of the distal vein wall
iii. Solution leakage into surrounding tissue
iv. Poorly secured line
v. Poor vein or site selection
vi. Irritating solution or medication
vii. Improper cannula size
viii. High delivery rate or pressure of the solution or medication
c. Signs and symptoms include:
i. Swelling at the site
ii. Sluggish or absent flow rate
iii. Continued IV flow after occlusion of the vein above the insertion site
iv. Absence of backflow of blood into the tubing with open clam and lowered solution
v. Patient complaints of tightness, burning, pain around the IV site
#65 Lecture Outline
d. If infiltration occurs:
i. Discontinue the IV line.
ii. Reestablish IV line in another site with new equipment.
iii. Document and report condition.
#66 Lecture Outline
2. Catheter occlusion
a. Physical blockage of a vein or catheter
b. The first sign is a decreasing drip rate or blood in the IV tubing.
c. May develop due to:
i. Position of catheter within the vein
ii. Patient’s blood pressure overcoming the flow (may occur if IV bag nears empty)
#67 Lecture Outline
d. If occlusion is suspected:
i. Do not attempt to flush a catheter.
ii. Remove the catheter.
iii. Assess the integrity of the catheter.
iv. Apply a dry, sterile dressing to the site.
#68 Lecture Outline
3. Vein spasm
a. Patients report the solution is bothering them.
b. Signs and symptoms include:
i. Sluggish or stopped infusion rate
ii. Severe pain radiating up the extremity
iii. Blanching of the skin over the site
iv. Redness over and around the site
#69 Lecture Outline
c. If venous spasm occurs:
i. Slow the infusion rate until the spasm subsides.
ii. Remove the catheter if the spasm persists.
#70 Lecture Outline
4. Phlebitis and thrombophlebitis
a. Phlebitis may result from:
i. Administration of irritating IV solutions (chemical phlebitis)
ii. Injury to the vein’s lining by catheter (mechanical phlebitis)
iii. Infection (bacterial phlebitis)
b. Signs and symptoms include:
i. Pain and tenderness along affected vein
ii. Redness and swelling
iii. Warmth radiating from site
#71 Lecture Outline
If signs of phlebitis develop:
i. Discontinue the IV line and save the equipment for later analysis.
ii. Reestablish the IV line in another extremity with new equipment.
#72 Lecture Outline
d. Thrombophlebitis may occur in:
i. Association with venous cannulation
ii. Patients who misuse drugs
iii. Patients who receive long-term IV therapy
iv. Conjunction with vein-irritating solutions
e. Signs and symptoms include:
i. Slowed or stopped infusion rate
ii. Aching or burning sensation
iii. Warmth and red skin around the site
iv. Swelling of the extremity
v. Throbbing pain in the limb
#73 Lecture Outline
f. If thrombophlebitis is suspected:
i. Stop the infusion and discontinue the IV at that site.
ii. Warm compresses may provide some relief.
#74 Lecture Outline
5. Hematoma
a. An accumulation of blood in the tissues surrounding an IV site
b. Often caused by:
i. Vein perforation
ii. Improper catheter removal
c. Signs and symptoms include:
i. Bruising over and around insertion site
ii. Pain at the site
iii. Swelling and hardness at the site
iv. Inability to flush IV line
v. Inability to advance cannula completely into vein during insertion
#75 Lecture Outline
d. Common in patients with a history of:
i. Vascular diseases
ii. Taking certain medication
iii. Drinking alcohol
e. Stop and apply direct pressure if a hematoma develops while inserting a catheter.
f. Evaluate the IV flow if a hematoma develops after inserting a catheter.
i. Monitor the IV site, and leave the line in place if the hematoma is controlled and flow is not affected.
g. Apply pressure if a hematoma develops as a result of discontinuing the IV.
#76 Lecture Outline
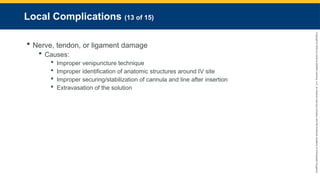
6. Nerve, tendon, or ligament damage
a. Often caused by:
i. Improper venipuncture technique
ii. Improper identification of anatomic structures around the IV site
iii. Improper securing and stabilization of the cannula and line after insertion
iv. Extravasation of the solution
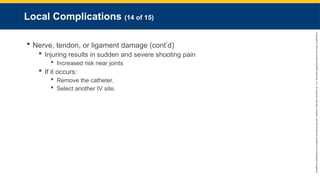
#77 Lecture Outline
b. Injury results in sudden and severe shooting pain to the patient.
i. IV site near joints increases risk
c. Remove the catheter and select another IV site.
#78 Lecture Outline
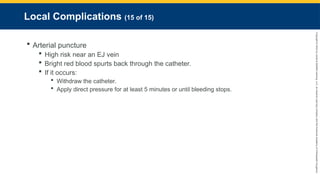
7. Arterial puncture
a. Risk is high near an EJ vein.
b. Bright red blood will spurt back through the catheter.
i. Patients with high BP levels may have rapid backflow into the bag.
c. Withdraw the catheter, and apply direct pressure for at least 5 minutes or until bleeding stops.
#79 Lecture Outline
C. Systemic complications
1. Allergic reactions
a. Can occur as response to IV solution, preservatives, or medications
b. Signs and symptoms have wide range across several systems
c. Stop the infusion, discontinue the IV, and select a new IV site.
#80 Lecture Outline
2. Pyrogenic reactions
a. Pyrogens are foreign proteins capable of producing fever.
b. Characterized by abrupt temperature elevation with:
i. Severe chills
ii. Backache
iii. Headache
iv. Weakness
v. Nausea
vi. Vomiting
c. Reaction begins within 30 minutes after IV infusion has been started.
d. Stop the infusion immediately.
i. Start a new IV line in the other arm with a fresh infusion solution.
ii. Remove the first IV.
e. Can be avoided by inspecting IV bag before use
#81 Lecture Outline
3. Circulatory overload and speed shock
a. Excessive fluid administration can lead to pulmonary edema.
i. Problems occur in patients with cardiac, pulmonary, or renal dysfunction.
b. Commonly caused by failure to readjust drip rate after flushing an IV line after insertion
c. The signs and symptoms include:
i. Anxiety
ii. Dyspnea
iii. Jugular vein distention
iv. Hypertension
v. Crackles heard when evaluating breath sounds
vi. A bounding pulse
#82 Lecture Outline
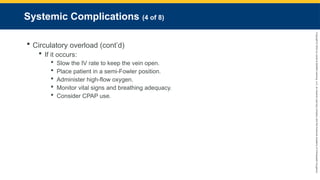
d. To treat:
i. Slow the IV rate to keep the vein open.
ii. Place patient in a semi-Fowler position.
iii. Administer high-flow oxygen.
iv. Monitor vital signs and breathing adequacy.
v. Consider CPAP use.
#83 Lecture Outline
e. Speed shock occurs when a medication or solution is rapidly introduced into the circulation.
i. Signs and symptoms include dizziness, facial flushing, anxiety, pounding headache, chills, dyspnea, tachycardia, and possible cardiac arrest.
ii. Halt infusion or medication.
iii. Ensure IV line is patent and monitor.
#84 Lecture Outline
4. Air embolus
a. Occurs when air enters the bloodstream.
b. Properly flushing an IV line will help eliminate the likelihood of an air embolism.
c. Replace empty IV bags with full ones.
d. Signs and symptoms:
i. Sudden hypotension
ii. Pallor leading to cyanosis
iii. Cool and clammy skin
iv. Weak, thready, rapid pulse
v. Chest, shoulder, and low back pain
vi. Diminished levels of consciousness
vii. Respiratory arrest
e. To treat:
i. Place patient on the left side with head down.
ii. Administer 100% oxygen.
iii. Transport to closest facility.
iv. Assist ventilations if needed.
#85 Lecture Outline
5. Vasovagal reactions
a. Anxiety concerning needles or sight of blood may cause vasculature dilation.
b. May lead to a drop in blood pressure and patient collapse
c. Patients can present with:
i. Anxiety
ii. Diaphoresis
iii. Nausea
iv. Dizziness or light-headedness
d. Treatment includes:
i. Place patient in supine position.
ii. Apply high-flow oxygen.
iii. Monitor vital signs.
iv. Establish an IV line.
#86 Lecture Outline
6. Catheter shear
a. Occurs when part of the catheter is pinched against the needle and the needle slices through the catheter, creating a free-floating fragment.
b. Signs and symptoms:
i. Sudden, severe pain at site
ii. Reduced or absent blood return
iii. Diminished breath sounds
iv. Dyspnea
v. Hypotension
vi. Tachycardia
vii. Chest pain
viii. Cyanosis
ix. Loss of consciousness
c. If you suspect a catheter shear:
i. Put patient in left lateral recumbent position (legs down and head elevated).
ii. Obtain an IV site in the other extremity and transport.
#87 Lecture Outline
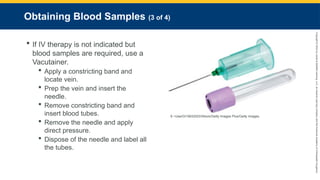
XII. Obtaining Blood Samples
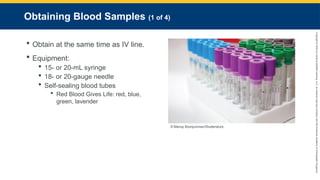
A. Obtain blood samples at the same time you start an IV line.
B. The following equipment will be needed:
1. 15- or 20-mL syringe
2. 18- or 20-gauge needle
3. Self-sealing blood tubes
a. Blood tubes should be filled in the following order (mnemonic: Red Blood Gives Life):
i. Red: Contains no additives; intended to clot if blood typing is needed
ii. Blue: Contains citrate; determines patient’s prothrombin time, partial thromboplastin time and international normalized ratio
iii. Green: Contains heparin; used for some plasma-based determinations
iv. Lavender: Contains EDTA; determines complete blood count
#88 Lecture Outline
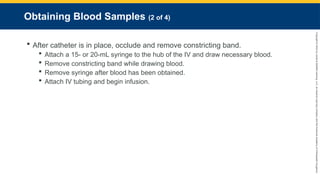
C. After the IV catheter is in place, occlude the catheter and remove constricting band.
1. Attach a 15- or 20-mL syringe to the hub of the IV and draw necessary blood.
2. Remove the constricting band while drawing blood.
3. Remove syringe after blood has been obtained.
4. Attach IV tubing and begin infusion.
#89 Lecture Outline
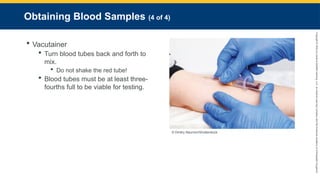
D. If IV therapy is not indicated but blood samples are required, use a Vacutainer.
1. 18- or 20-gauge sampling needle
2. Steps:
a. Apply a constricting band and locate vein.
b. Cleanse the site.
c. Insert the needle into the vein.
d. Remove the constricting band and insert blood tubes.
e. Remove the needle and apply direct pressure.
f. Dispose of the needle.
g. Label all the tubes (patient’s name, date, time, your name).
#90 Lecture Outline
3. Turn blood tubes back and forth to mix the anticoagulant and blood evenly.
a. Do not shake the red tube, which is meant to clot.
4. Blood tubes must be at least three-fourths full to be viable for testing.
#91 Lecture Outline
XIII. Blood Transfusions
A. Blood type is identified by obtaining a type and cross-match from the patient’s bloodwork.
1. Bracelet will be placed on patient to identify blood type.
2. Blood to be transfused must be checked against bracelet and verified by two ALS providers.
3. Verification includes the:
a. Patient’s complete name
b. Patient’s medical record number
c. Product being transfused
d. Unit number of the product being transfused
e. ABO and Rh type of the product
f. Expiration date of the unit
#92 Lecture Outline
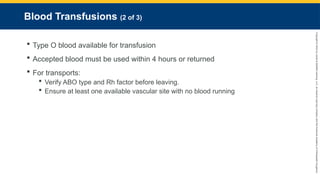
4. In emergency medical settings, the patient’s ABO blood type and Rh factor may not be known.
a. Hospital will have type O blood available for transfusion.
b. If your crew is expected to switch out units during transport, then verify the ABO type and Rh factor before leaving.
c. Accepted blood must be used within 4 hours or returned to the blood bank.
5. Any time you accept a transport involving a blood transfusion, ensure patient has at least one available vascular site that does not have blood running.
#93 Lecture Outline
a. If a transfusion reaction occurs, then any IV lines that have blood transfusing should be discontinued.
B. Blood being transfused is administered through specific blood tubing and mixed with normal saline.
1. Assess vital signs every 5 minutes.
2. Monitor the patient for signs of a transfusion reaction.
a. Headache
b. Change in mental status
c. Flushing of the skin
d. Nausea and vomiting
e. Difficulty breathing
f. Chills
g. Tachycardia
h. Hypotension
i. Fever
#95 Lecture Outline
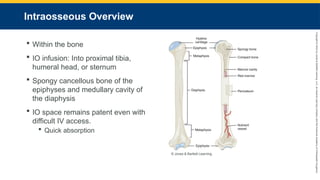
A. Intraosseous means within the bone.
1. IO infusion is a technique of administering fluids, blood and blood products, and medications into the IO space of the proximal tibia, humeral head, or sternum.
2. Long bones consist of a shaft (diaphysis), the ends (epiphyses), and the growth plate (epiphyseal plate).
3. The IO space comprises the spongy cancellous bone of the epiphyses and the medullary cavity of the diaphysis.
4. When a patient is in a hemodynamically compromised condition, peripheral veins often collapse.
a. IV access is difficult if not impossible.
b. IO space remains patent.
i. Quickly absorbs IV fluids and medications
ii. Anything that can be given via the IV route can be given via the IO route.
#96 Lecture Outline
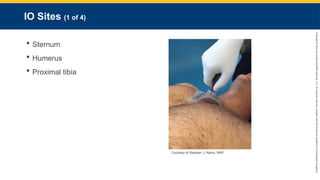
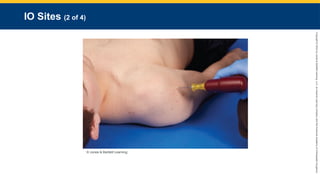
B. IO Sites
1. Three common sites you will use for IO insertion are the sternum, humerus, and proximal tibia.
#98 Lecture Outline
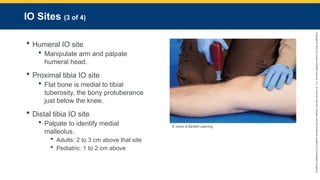
2. To locate the humeral IO site, manipulate arm and palpate humeral head:
a. Place patient’s hand over his or her abdomen.
b. Place the ulnar aspect of one of your hands vertically over the axilla near the humeral head that will be used for insertion.
c. Place the ulnar aspect of your other hand laterally along the midline of the upper portion of the patient’s humerus.
d. Place your thumbs together, palpating up the surgical neck to the humeral head.
e. Identify the sternal IO site by palpating the sternal notch and using the IO device’s adhesive target.
i. The device location is near the chest compression landmarks; however, the device does not impede chest compressions.
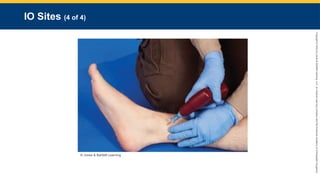
3. The flat bone of the proximal tibia is located medial to the tibial tuberosity, the bony protuberance just below the knee.
a. You must feel the leg to know the difference between the first and second landmarks.
b. To locate the proximal tibia IO site, palpate the tibial tuberosity, then:
i. For adults, palpate 0.8 inch (2 cm) medially.
ii. For pediatric patients, palpate 0.4 to 0.8 inch (1 to 2 cm) distally to avoid the epiphyseal plate.
4. For the distal tibia IO site, use palpation as well.
a. Identify the medial malleolus, then:
i. For adults, palpate 0.8 to 1.2 inch (2 to 3 cm) above that site.
ii. For pediatric patients, palpate 0.4 inch (1 to 2 cm) above the medial malleolus.
#100 Lecture Outline
C. Equipment for IO infusion
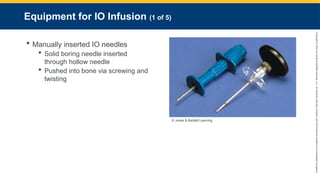
1. Manually inserted IO needles
a. Consist of solid boring needle (trocar) inserted through a sharpened hollow needle
b. Pushed into bone via screwing and twisting
i. Once needle pops through bone, solid needle is removed.
(a) Hollow steel needle remains.
c. Long needles that rest at a 90° angle to the bone
d. Easily dislodged and require careful immobilization
#101 Lecture Outline
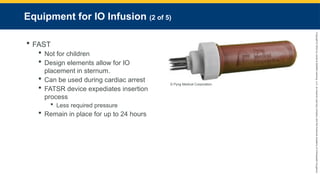
2. FAST (First Access for Shock and Trauma) devices
a. Do not use in children.
b. Design elements allow for IO placement in sternum
c. Can be used during cardiac arrest
i. While chest compressions can coincide with FAST IO use, mechanical CPR devices must be paused during the insertion phase.
ii. Mechanical CPR can continue once the FAST device is stabilized.
d. FASTR device is updated with many components already assembled to expediate insertion process
i. Safety lock removed before insertion
ii. Requires less pressure for insertion
e. Remain in place for maximum of 24 hours
i. Remove by firmly grasping the insertion tube and pulling in one continuous motion until dislodged.
#102 Lecture Outline
3. The EZ-IO
a. Features hand-held battery-powered driver with an attached IO needle
b. Inserts IO needle into proximal or distal tibia of adults and children and humeral head in adults
c. Determining factor in needle size selection is the amount of subcutaneous tissue present over the insertion site.
d. To remove the device, attach a 10-mL syringe to the IO’s Luer lock and twist clockwise.
#103 Lecture Outline
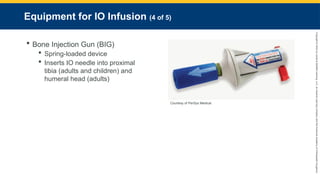
4. The Bone Injection Gun (BIG)
a. Spring-loaded device
b. Inserts IO needle into proximal tibia of adults and children and humeral head in adults
c. Uses the safety lock as the stabilization device once the device has been inserted
d. To remove the device, use the stabilization device as the removal tool.
#104 Lecture Outline
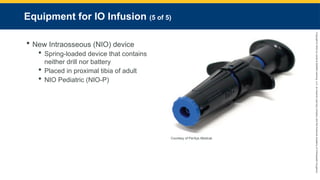
5. New Intraosseous (NIO) device
a. Placed in the proximal tibia of an adult patient
i. The humeral head is an alternative site for this device.
b. The spring-loaded device contains neither drill nor battery.
i. Inserted by unlocking a safety cap
ii. While applying downward pressure with the dominant hand, the fingers of the other hand are used to pull trigger wings up to deploy the device.
iii. The device is then pulled up in a rotating motion while the needle stabilizer is held against the skin.
iv. Once the introducing trocar is removed, any Luer-lock tubing can be attached.
c. A pediatric version, NIO Pediatric (NIO-P), is also available.
i. This device has an adjustable dial, allowing the provider to adjust by age or depth.
ii. It is only approved for placement in the proximal tibia.
#105 Lecture Outline
D. Performing IO infusion
1. To perform IO infusion using an EZ-IO device, follow the steps in Skill Drill 14-2.
#106 Lecture Outline
E. Potential complications of IO infusion
1. Same potential complications as with IV therapy, as well as others
2. Infiltration occurs when the IO needle rests outside the bone, rather than inside IO space.
a. Suspect if infusion does not run freely or site becomes edematous.
i. Discontinue infusion immediately.
ii. Reattempt in the opposite leg.
3. Osteomyelitis is inflammation of the bone and muscle caused by an infection.
4. Failure to identify the proper anatomic landmark can damage the growth plate.
#107 Lecture Outline
5. Improper technique can cause fracture.
a. Too forceful
b. Too large of an IO needle
6. Through-and-through insertion occurs when the IO needle passes through both sides of the bone.
a. Stop inserting when you feel a pop.
7. A pulmonary embolism (PE) can occur if particles of bone, fat, or marrow find their way into the systemic circulation.
a. Suspect if patient experiences acute shortness of breath, pleuritic chest pain, and cyanosis.
#108 Lecture Outline
F. Contraindications to IO infusion
1. Functional IV line is available.
2. Fracture of the bone intended for IO cannulation
3. Osteoporosis
4. Osteogenesis imperfecta (congenital disease resulting in fragile bones)
5. Bilateral knee replacements
6. Prosthetic limb
#110 Lecture Outline
A. Understand how medications affect the human body before administering them.
1. Become familiar with:
a. Mechanism of action
b. Indications
c. Contraindications
d. Adverse effects
e. Routes of administration
f. Pediatric and adult doses
g. Antidotes for adverse reactions
2. The first rule of medicine is to do no harm.
a. Ensure that a particular drug is clearly indicated to treat the patient’s condition.
b. Understand basic math to calculate appropriate doses.
#111 Lecture Outline
B. Mathematical principles used in pharmacology
1. Mathematics review
a. Fractions represent a portion of a whole number.
b. Decimals distinguish numbers that are greater than zero from numbers that are smaller than zero.
i. Whole numbers are on the left side of the decimal.
ii. Fractions of numbers are on the right side of the decimal.
iii. Convert fractions to decimals by dividing the numerator by the denominator.
c. Dividing or multiplying by 10 can easily be done by remembering a calculation method.
i. When dividing, move the decimal point to the left.
ii. When multiplying, move the decimal point to the right.
d. Percentages are part of 100 and use the % symbol.
i. Written as a fraction with the denominator being 100
ii. Convert decimals to percentages by moving the decimal over two places.
#112 Lecture Outline
2. The metric system is a decimal system based on multiples of ten.
a. Measures length, volume, weight
i. Meter (m): Length
ii. Liter (L): Volume
iii. Gram (g): Weight
b. Prefixes demonstrate the fraction of the base being used.
i. Micro- = 0.00001
ii. Milli- = 0.001
iii. Centi- = 0.01
iv. Kilo- = 1,000.0
c. Medications are supplied in a variety of weights and volumes.
i. You will be required to convert weights to volumes.
#113 Lecture Outline
d. Drugs are packaged in various units of weight and volume.
i. Usually comprise only a fraction of packaged form
ii. Conversion required to fulfill drug requests
#114 Lecture Outline
3. Volume conversion
a. The prehospital setting uses two measurements of volume: milliliters and liters.
i. 1 L equals 1,000 mL.
ii. Converting mL to L: Divide the smaller volume by 1,000 or move the decimal point three places to the left.
iii. Converting L to mL: Multiply L by 1,000 or move the decimal point three places to the right.
#115 Lecture Outline
4. Weight conversion
a. To convert a larger unit of weight to a smaller one, multiply the larger by 1,000 or move the decimal point three places to the right.
b. To convert a smaller unit of weight to a larger one, divide the larger by 1,000 or move the decimal point three places to the left.
c. 1 g equals 1,000 mg.
d. 1 mg equals 1,000 mcg.
#116 Lecture Outline
5. Converting pounds to kilograms
a. For patients who do not know their weight in pounds or who are unresponsive:
i. Estimate the patient’s weight in pounds.
ii. Convert pounds to kilograms.
b. Two formulas for converting pounds to kilograms:
i. Divide the patient’s weight in pounds by 2.2.
ii. Divide the patient’s weight in pounds by 2 and subtract 10% of that number.
#117 Lecture Outline
6. Temperature conversion
a. Normal body temperature is 98.6° Fahrenheit or 37° Celsius.
b. To convert Fahrenheit to Celsius:
i. Subtract 32 then multiply by 0.555 (5/9).
c. To convert Celsius to Fahrenheit:
i. Multiply by 1.8 (9/5) then add 32.
#118 Lecture Outline
C. Calculating medication doses
1. Based on three factors:
a. Desired dose (amount of drug ordered by the physician)
i. Expressed as standard dose or specific number of micrograms, milligrams, or grams
#119 Lecture Outline
b. Drug concentrations (total weight of the drug contained in a specific amount of volume)
i. Volume on hand: Volume of solution that the drug is contained in
(a) The weight of the drug present in 1 mL will tell you its concentration.
(1) Total weight of the drug/Total volume in milliliters = Weight per milliliter
(b) If the label lists the concentration of a drug as a percentage (number of grams present in 100 mL):
(1) Divide the numerator and denominator by 100.
#120 Lecture Outline
c. Volume to be administered
i. Desired dose (mg)/Concentration of drug on hand (mg/mL) = Volume to be administered
#121 Lecture Outline
D. Weight-based drugs
1. Some medication doses are based on the patient’s weight in kilograms.
a. Add one step to the formula: Convert the patient’s weight in pounds to kilograms
#122 Lecture Outline
XVI. Calculating Fluid Infusion Rates
A. Adjust the flow rate of the IV or IO catheter according to the patient’s condition or as dictated by medical control.
1. You must know:
a. Volume to be infused
b. Period over which it is to be infused
c. Properties of the administration
2. To calculate the flow rate:
#123 Lecture Outline
XVII. Calculating the Dose and Rate for a Medication Infusion
A. Non-weight-based medication infusions
1. Usually ordered to be administered over a specified period (typically per minute)
2. To calculate, know the following information:
a. Desired dose
b. Properties of the administration set you are using
c. If you are using an infusion pump
3. Use the same formula to calculate a drug dose as previously discussed.
a. Then calculate the desired dose to be administered continuously.
i. You must know the number of drops per milliliter (gtt/mL).
(a) Microdrip: 60 gtt/mL
(b) Macrodrip: 10 or 15 gtt/mL
#124 Lecture Outline
B. Weight-based medication infusions
1. To calculate the IV drop rate, use the previously discussed formula, but factor in the patient’s weight in kilograms.
#125 Lecture Outline
XVIII. Pediatric Drug Doses
A. There are many methods to determine the right dose of medication for pediatric patients.
1. Length-based resuscitation tape measures
2. Pediatric wheel charts
3. EMS field guide with tables or charts
4. Smartphone apps
B. Most drugs used in pediatric emergency medicine are based on the child’s weight in kilograms.
1. Calculations are the same for pediatric medicine as they are for adults.
#127 Lecture Outline
A. Given through the digestive or intestinal tract
B. Oral medication administration
1. Forms include:
a. Capsules
b. Time-released capsules
c. Lozenges
d. Pills
e. Tablets
f. Elixirs
g. Emulsions
h. Suspensions
i. Syrups
#128 Lecture Outline
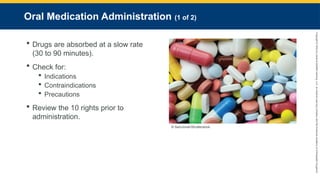
2. Drugs are absorbed at a slow rate (30 to 90 minutes).
a. PO medication may need to be started early.
3. To administer, you may use:
a. Medicine cup
b. Medicine dropper
c. Teaspoon
d. Oral syringe
e. Nipple
4. Check for indications, contraindications, and precautions, and review the rights of medication administration.
#129 Lecture Outline
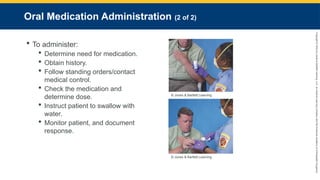
5. When administering an oral medication:
a. Take standard precautions.
b. Determine need for medication.
c. Obtain history, including allergies.
d. Follow standing orders or contact medical control.
e. Check the medication to ensure it is correct, not cloudy or discolored, and not past its expiration date.
f. Determine the appropriate dose.
g. Instruct patient to swallow a pill or tablet with water.
h. Monitor the patient’s condition and document the medication given, route, time of administration, and response of the patient.
#130 Lecture Outline
C. Orogastric and nasogastric tube medication administration
1. Gastric tubes are occasionally inserted in the prehospital setting to:
a. Decompress stomach
b. Perform gastric lavage
c. Establish a route for enteral medication administration
2. Common during interfacility transports
3. Most common solution administered is tube feeding
#131 Lecture Outline
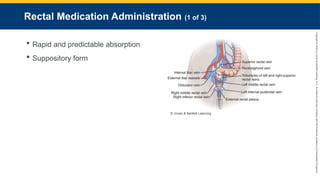
D. Rectal medication administration
1. Medication absorption is rapid and predictable.
a. Bypass the first-pass metabolism
2. Some medications available in suppository form.
a. Drug mixed in a firm base that melts at body temperature and is shaped to fit the rectum.
#132 Lecture Outline
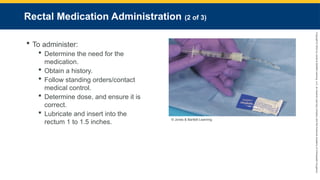
3. To administer drugs rectally:
a. Take standard precautions.
b. Determine the need for the medication.
c. Obtain a history, including drug allergies.
d. Follow standing orders or contact medical control.
e. Determine the appropriate dose and ensure:
i. It is the right medication
ii. No cloudiness or discoloration
iii. Medicine has not expired
f. Use a water-soluble gel for lubrication, and insert into the rectum 1 to 1.5 inches (3 to 4 cm).
#133 Lecture Outline
g. Modifications may be needed for liquid form.
i. You may use:
(a) Nasopharyngeal airway
(b) Small endotracheal tube
(c) Large-bore IV
(d) Commercial device
ii. Lubricate the end of the delivery device, and insert 1 to 1.5 inches (3 to 4 cm) into rectum.
iii. Tell patient not to bear down.
iv. Push medication through tube with needleless syringe.
v. Remove and dispose of the tube.
h. Monitor the patient and document medication, route, time of administration, and response of the patient.
#135 Lecture Outline
A. Any route other than the gastrointestinal tract
1. Includes:
a. Intradermal
b. Subcutaneous
c. IM
d. IV
e. IO
f. Percutaneous
2. Medications are absorbed into the central circulation faster and at a predictable rate.
#136 Lecture Outline
B. Syringes and needles
1. A variety of needles and syringes are used.
a. May be prepackaged with a needle attached
b. May be packaged separately
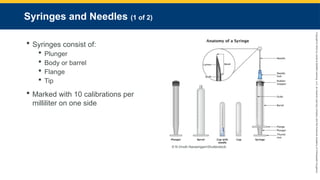
2. Syringes consist of:
a. Plunger
b. Body or barrel
c. Flange
d. Tip
3. Most syringes are marked with 10 calibrations per milliliter on one side.
a. Other side is marked minims.
b. Vary from 1 mL to 60 mL
#137 Lecture Outline
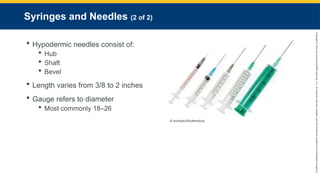
4. Hypodermic needles consist of:
a. Hub
b. Shaft
c. Bevel
5. Hypodermic needles vary from 3/8 to 2 inches in length (0.9 cm to 5 cm) for standard injections.
a. Gauge refers to diameter.
i. Smaller number = larger diameter
ii. Common needle gauge is 18 to 26
#138 Lecture Outline
C. Packaging of parenteral medications
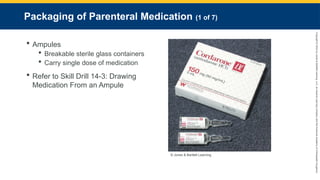
1. Ampules
a. Breakable sterile glass containers
b. Carry single dose of medication
c. To correctly draw medication from an ampule, see Skill Drill 14-3.
#139 Lecture Outline
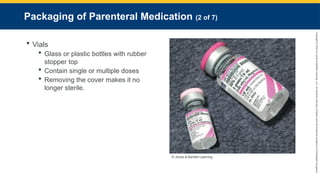
2. Vials
a. Glass or plastic bottles with a rubber stopper top
b. Contain single or multiple doses
c. Determine how much of the drug is needed and how much is in the bottle.
d. Removing the cover makes it no longer sterile.
#140 Lecture Outline
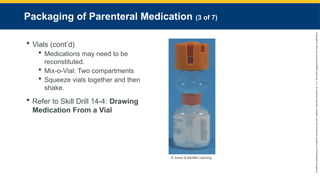
e. Some medications in vials may need to be reconstituted.
i. Shake the vial vigorously.
ii. Mix-o-Vial: Single vial divided into two compartments by a rubber stopper
f. To correctly draw medication from a vial, see Skill Drill 14-4.
#141 Lecture Outline
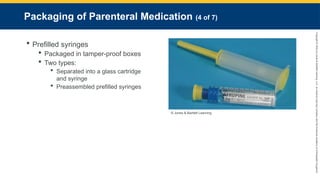
3. Prefilled syringes
a. Packaged in tamper-proof boxes
b. Two types:
i. Separated into a glass drug cartridge and syringe
ii. Preassembled prefilled syringes
#143 Lecture Outline
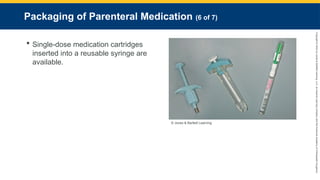
c. Single-dose medication cartridges inserted into a reusable syringe are available.
#144 Lecture Outline
4. Push-dose pressors
a. Some vasopressors are available for administration in a small bolus format.
i. Generally reserved for patients with transient hypotension or for EMS systems with short transport times
b. Epinephrine and phenylephrine (Neosynephrine) are currently available in push-dose format.
c. Using push-dose epinephrine involves mixing the appropriate concentration:
i. Use a 10-mL saline flush to waste 1 mL.
ii. Use a blunt-tip needle and draw out 0.1 mg (1 mL) of an epinephrine 1:10,000 (0.1 mg/mL) prefilled syringe.
iii. The result is a concentration of 0.1 mg or 100 mcg in 10 mL.
#145 Lecture Outline
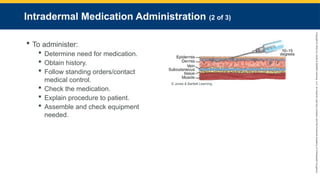
D. Intradermal medication administration
1. Intradermal injections involve administering a small amount of medication into the dermal layer.
a. Uses a 1-mL syringe and a 25- to 27-gauge, 3/8-inch to 1-inch (0.9-cm to 3-cm) needle.
2. Avoid areas containing superficial blood vessels.
a. Most common locations used are anterior forearm and upper back.
3. Medications have a slow absorption rate.
a. Minimal to no systemic distribution
b. Medication remains locally collected.
#146 Lecture Outline
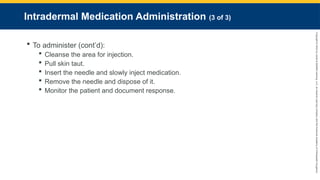
4. To administer medication intradermally:
a. Take standard precautions.
b. Determine need for medication.
c. Obtain history, including drug allergies.
d. Follow standing orders or contact medical control.
e. Check the medication.
f. Advise patient of potential discomfort and explain procedure.
g. Assemble and check equipment needed.
#147 Lecture Outline
h. Cleanse the area for injection using aseptic technique.
i. Pull skin taut with your nondominant hand.
j. Insert the needle at a 10° to 15° angle with the bevel up.
k. Slowly inject the medication.
i. Look for a wheal: A small bump indicating if the medication is pooling in the intradermal tissue
l. Remove the needle, and immediately dispose of it in a sharps container.
m. Monitor the patient’s condition and document response.
#148 Lecture Outline
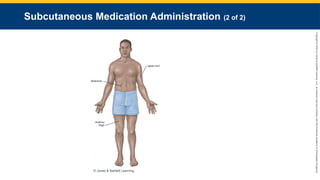
E. Subcutaneous medication administration
1. Injections are given into the loose connective tissue between the dermis and muscle layer.
a. Use a 24- to 26- gauge ½-inch to 1-inch (1-cm to 3-cm) needle.
b. Common sites include upper arms, anterior thighs, and abdomen.
2. To correctly administer a medication via the subcutaneous route, see Skill Drill 14-5.
#150 Lecture Outline
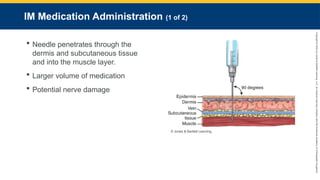
F. IM medication administration
1. Injections are given by inserting a needle through the dermis and subcutaneous tissue and into the muscle layer.
a. Allows for more rapid absorption of medication
b. Potential to damage nerves
#151 Lecture Outline
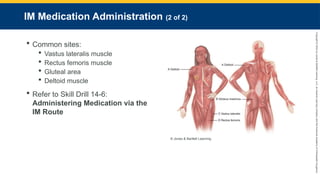
c. Common sites include:
i. Vastus lateralis muscle
ii. Rectus femoris muscle
iii. Gluteal area
iv. Deltoid muscle
2. To correctly administer a medication via the IM route, see Skill Drill 14-6.
#152 Lecture Outline
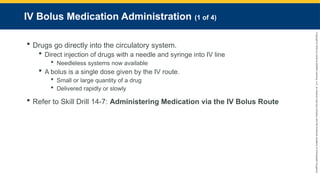
G. IV bolus medication administration
1. The IV route places drugs directly into the circulatory system.
a. Fastest route of administration
b. Bypasses most barriers to drug absorption
2. Direct injection of drugs with a needle and syringe into IV line
a. Needleless systems now available
b. Syringe screws into the injection port of the administration set.
3. A bolus is a single dose given by the IV route.
a. Small or large quantity of a drug
b. Delivered rapidly or slowly
c. Some medications require initial bolus, followed by continuous IV infusion.
d. To correctly administer a medication via the IV bolus route, see Skill Drill 14-7.
#153 Lecture Outline
4. Saline locks are used for patients who are not in need of IV fluid boluses but may need medication therapy.
a. To administer medication through a saline lock:
i. Take standard precautions.
ii. Determine the need for the medication.
iii. Obtain a history, including allergies and vital signs.
iv. Follow standing orders or contact medical control.
v. Check the medication.
vi. Explain the procedure to the patient.
#154 Lecture Outline
vii. Assemble the needed equipment and draw up the medication.
(a) 20 mL of normal saline needed to use as a flush
viii. Cleanse the injection port with alcohol or remove the protective cap.
ix. Insert the needle into the port or screw the syringe onto the port.
(a) Clamp off the IV tubing to prevent backflow.
x. Pull back slightly on the syringe plunger and observe for blood return.
(a) If blood appears, watch for infiltration.
(b) If resistance is felt or patient reports discomfort, discontinue and establish a new site.
xi. Place the needle and syringe into the sharps container.
#155 Lecture Outline
xii. Clean the port and insert the needle with the flush.
xiii. Flush and place the needle in the sharps container.
xiv. Store any unused medication properly.
xv. Monitor the patient’s condition and document the findings.
#156 Lecture Outline
H. Adding medication to an IV bag
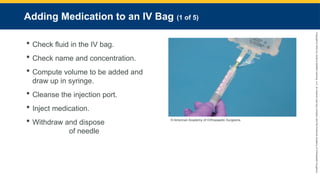
1. Certain medications are added to the IV solution itself to be administered as a maintenance infusion.
a. Check the fluid in the IV bag for discoloration and ensure it has not expired.
b. Check the medication name and concentration.
c. Compute the volume of the drug to be added to the IV bag and draw up that amount in the syringe.
d. Cleanse the medication injection port.
e. Inject medication into the IV bag via rubber stopper.
f. Withdraw the needle and dispose in the sharps container.
#157 Lecture Outline
g. Agitate the IV bag to ensure the medication is mixed in the solution.
h. Label the IV bag with the:
i. Name of the medication added
ii. Amount added
iii. Concentration in the IV bag
iv. Date and time
v. Your name
i. Attach IV administration set, and prepare the IV bag.
#158 Lecture Outline
2. IV piggyback
a. Primary line: IV administration set that is connected directly to the hub of the IV catheter
b. When performing continuous infusion, take the distal end of drip set and connect it to a port on the primary line.
c. Multiple lines can be piggybacked.
i. Label the lines to ensure there are no interactions.
d. Follow the steps in Skill Drill 14-8 to perform IV piggyback infusion.
#159 Lecture Outline
3. IV infusion pumps
a. Use an electromechanical infusion pump when:
i. Administering a medication maintenance infusion
ii. Delivering IV fluid maintenance infusions in children and older adults
b. Benefits include:
i. Deliver the rates set by the pump without deviating
ii. Calculate the amount of fluid infused and amount remaining
c. Problems include:
i. Lack of uniformity among manufacturers
ii. Air trapping in lines causes the pump to stop and an alarm to sound.
#160 Lecture Outline
d. Deliver fluids via positive pressure.
e. Safety features include:
i. An alarm that indicates change in flow pressure
ii. Alarm that alerts you to presence of occlusion or depletion of medication
f. May be designed to accommodate:
i. IV tubing to regulate the flow of fluids
ii. Needleless syringe
g. May have multiple chambers for multiple medications
i. If number of medication lines outweighs available chambers, isotonic fluid may need to be transported on gravity alone.
h. Some pumps have medication databases that calculate medication rate by desired dose and patient’s weight.
i. Volume to be infused is the amount of solution remaining to be infused.
i. IV infusion pumps come in a wide variety of configurations.
#161 Lecture Outline
I. IO medication administration
1. Fluid does not flow well into the bone.
a. Use a large syringe to infuse fluid.
i. A pressure infuser device is a sleeve placed around the IV bag and inflated to force fluid from the IV bag.
(a) Use in adults
2. Potential for compartment syndrome if fluid leaks out of bone
3. To correctly administer a medication via the IO route, see Skill Drill 14-9.
#162 Lecture Outline
J. Percutaneous medication administration
1. Medications are applied to and absorbed through the skin and mucous membranes.
2. Transdermal medication administration
a. Applied topically
b. Useful for sustained release of certain medications
c. Delivery includes: patches, creams, lotions, pastes
d. Too much medication or thin/nonintact skin may increase the speed of absorption.
e. Thick skin, scar tissue, or peripheral vascular disease may decrease the speed of absorption.
#163 Lecture Outline
f. To apply, perform the following steps:
i. Take standard precautions.
ii. Determine the need for medication.
iii. Obtain history, including drug allergies and vital signs.
iv. Follow standing orders or contact medical control.
v. Check the medication to ensure it is correct, unexpired, and is the appropriate amount.
vi. Explain the procedure to the patient.
vii. Clean and dry area for medication application.
viii. Apply the medication in accordance with the manufacturer’s specifications.
ix. Monitor patient’s condition and document the response.
#164 Lecture Outline
3. Sublingual medication administration
a. The sublingual area is highly vascular, and medication is rapidly absorbed here.
b. Drugs may also be injected under the tongue.
c. To correctly administer a sublingual medication, see Skill Drill 14-10.
#165 Lecture Outline
4. Buccal medication administration
a. The buccal region lies in between the cheek and gums.
b. Medication comes in the form of tablets or gel.
c. To administer medication via the buccal route:
i. Take standard precautions.
ii. Determine the need.
iii. Obtain history, including allergies and vital signs.
iv. Follow standing orders or contact medical control.
v. Check medication to ensure it is correct, unexpired, and the appropriate amount.
vi. Explain procedure to patient.
vii. Place medication in between the patient’s cheek and gum (or ask patient to do so).
viii. Advise patient to allow the tablet to dissolve slowly rather than chew or swallow it.
ix. Monitor the patient’s condition and document the response.
#166 Lecture Outline
5. Ocular medication administration
a. Drops or ointments are commonly administered via the ocular route.
b. Typically administered for pain relief, allergies, and infections
c. Medication administration via ocular route is rare in prehospital setting.
i. In the hospital and in some prehospital systems, providers use bottles to squeeze the prescribed amount of drops into the eye.
ii. A Morgan lens can be used for some ophthalmic medications, particularly local anesthetics.
#167 Lecture Outline
d. To assist a patient with ocular medication administration:
i. Take standard precautions.
ii. Confirm prescription.
iii. Have patient tilt head and look up.
iv. Expose conjunctiva by gently pulling down on the lower eyelid, without touching the eyeball.
v. Administer medication by using an eye dropper.
vi. Advise patient to close eye for 1 to 2 minutes.
vii. Document medication name, dose, and administration time.
#168 Lecture Outline
6. Aural medication administration
a. Administered via the ear canal
b. To assist a patient with aural medication administration:
i. Take the standard precautions.
ii. Confirm prescription.
iii. Place the patient on side with affected ear facing up.
iv. Expose the ear canal by pulling the ear up and back (adults) or down and back (infants and children).
v. Administer medication with a medicine dropper.
vi. Document medication name, dose, and administration time.
#169 Lecture Outline
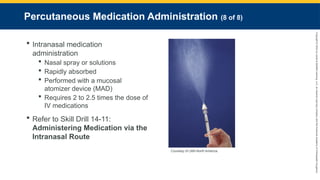
7. Intranasal medication administration
a. Intranasal medications include nasal spray for congestion or solutions to moisten the nasal mucosa.
b. Rapidly absorbed
c. Rapid onset of action
d. Performed with a mucosal atomizer device (MAD)
i. Attaches to a syringe
ii. Sprays medication into the nasal mucosa
e. Typically requires 2 to 2.5 times the dose of IV medications
f. Follow local protocol or consult with medical control.
g. To administer a medication via the intranasal route, follow the steps in Skill Drill 14-11.
#170 Lecture Outline
XXI. Medications Administered by the Inhalation Route
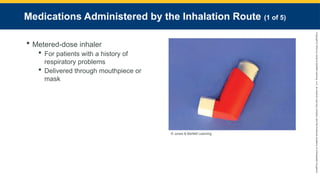
A. Nebulizer and metered-dose inhaler
1. The most common medication administered via inhalation route is oxygen.
2. Check your drug reference guide or the package prior to administration.
3. A patient with a history of respiratory problems will likely have a metered-dose inhaler (MDI).
a. Administered by the patient, but the patient may ask for assistance.
b. Can be delivered through a mouthpiece held by the patient or by a mask
#171 Lecture Outline
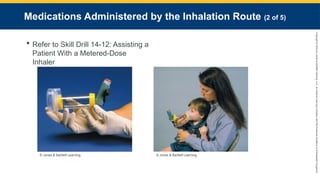
c. To correctly help a patient self-administer medication from an inhaler, see Skill Drill 14-12.
#172 Lecture Outline
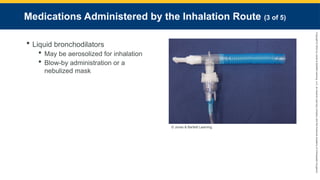
4. Liquid bronchodilators may be aerosolized in a nebulizer for inhalation.
a. Most common method of administration of inhaled medications in the prehospital setting
b. May allow blow-by administration or a nebulized mask
#173 Lecture Outline
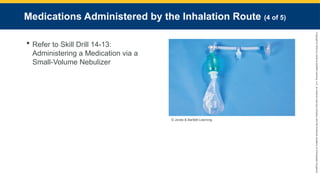
c. To administer a medication via a small-volume nebulizer, see Skill Drill 14-13.
#174 Lecture Outline
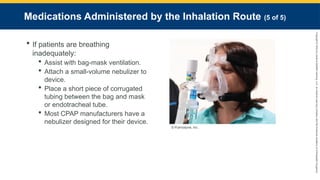
5. If patients are breathing inadequately, they may be unable to effectively inhale medications.
a. Assist with bag-mask ventilation.
b. Attach a small-volume nebulizer to the ventilation device.
c. Place a short piece of corrugated tubing between the bag and mask or endotracheal tube.
d. When using CPAP, most manufacturers have a nebulizer that is designed to work with their device.
#176 Lecture Outline
A. Long-term vascular access devices
1. Patients may be receiving:
a. Antibiotic regimen
b. Chemotherapy
c. Regular blood draws for chronic disorders
d. Hemodialysis
e. Treatment for other acute or chronic illnesses
2. Two types:
a. Non-tunneling
b. Implanted
3. Most protocols only allow access during critical events.
4. Preserved with heparin
#177 Lecture Outline
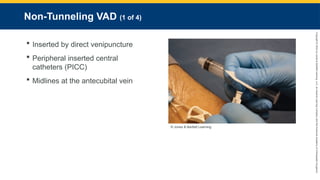
B. Non-tunneling VADs
1. Non-tunneling devices have been inserted by direct venipuncture.
a. Most commonly encountered in prehospital settings include:
i. Peripheral inserted central catheters (PICC): Used for long-term medication administration, chemotherapy, frequent venous sampling, total parenteral nutrition
ii. Midlines are inserted at the antecubital vein.
#178 Lecture Outline
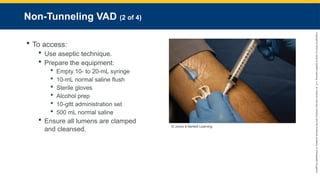
2. Accessing a non-tunneling VAD:
a. Use aseptic technique.
b. Prepare the equipment:
i. Empty 10- to 20-mL syringe
ii. 10-mL normal saline flush
iii. Sterile gloves
iv. Alcohol prep
v. 10-gtt administration set
vi. 500 mL normal saline
c. Ensure all lumens are clamped.
i. Cleanse with an antiseptic swab.
#179 Lecture Outline
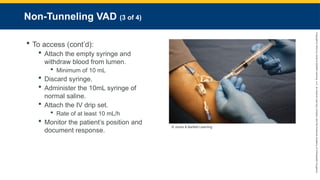
d. Attach the empty syringe and withdraw a minimum of 10 mL of blood from the lumen.
i. Withdraw gently.
ii. Turn patients head in opposite direction of central line.
e. Discard the syringe.
f. Attach the 10 mL syringe filled with normal saline and slowly administer.
g. Attach the prepared IV drip set and set it up for a rate of at least 10 mL/h.
h. Monitor the patient’s position and document response.
#181 Lecture Outline
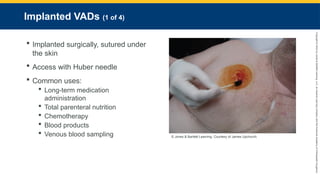
C. Implanted VADs
1. Implanted surgically, sutured under the skin
a. Palpable outside the skin
b. Not exposed to environment
c. Self-sealing core inserted in a stainless steel, titanium, or plastic shell connected to a catheter
d. Access with Huber needle.
e. Can be used for long-term medication administration, total parenteral nutrition, chemotherapy, blood products, or venous blood sampling
#182 Lecture Outline
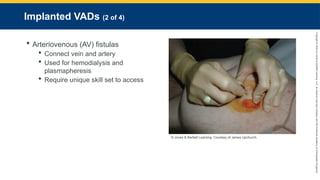
f. Arteriovenous (AV) fistulas are used for a variety of disorders.
i. Created by connecting vein and artery
ii. Used for hemodialysis and plasmapheresis
iii. Require a unique skill set to access
#183 Lecture Outline
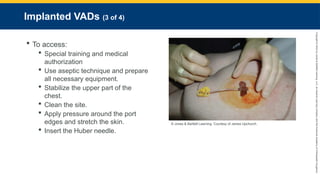
2. Accessing an implanted vascular access device requires special training and medical authorization.
a. Use aseptic technique, and prepare all necessary equipment.
b. Identify the site in the upper part of the chest. Stabilize it between the thumb and index finger of your nondominant hand.
c. Clean the site with chlorhexidine. If an allergy is present, then clean the site with betadine.
d. Apply pressure around the edges of the port to stretch the skin over the injection site.
e. While stabilizing the device, insert the Huber needle at a 90° angle.
#184 Lecture Outline
f. Withdraw at least 10 mL of blood from the needleless extension set.
g. Flush the set with the 10-mL normal saline flush. Attach the 10-gtt IV administration set.
h. Administer medications directly into the drop set medication port.
i. Monitor the patient’s condition, and document the medication given, route, administration time, and response of the patient.
#185 Lecture Outline
XXIII. Rates of Medication Absorption
A. Drugs are absorbed at a speed directly related to the route of delivery.
1. Drugs injected into the bloodstream gain access the fastest.
2. Oral medications take longer because they must be absorbed first.