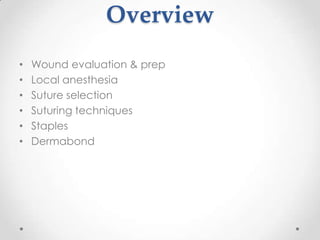
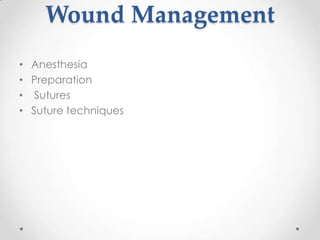
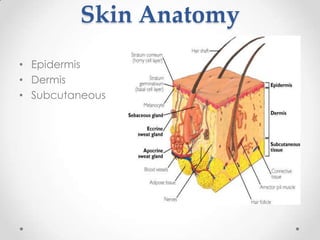
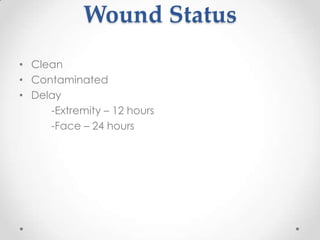
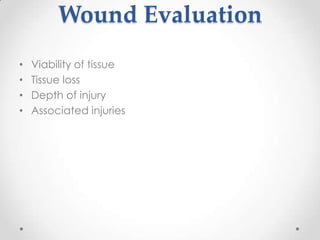
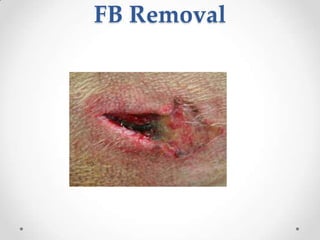
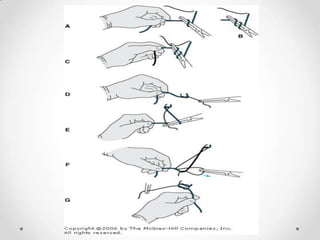
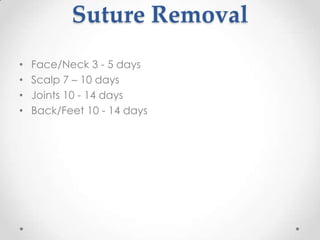
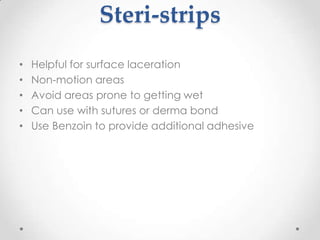
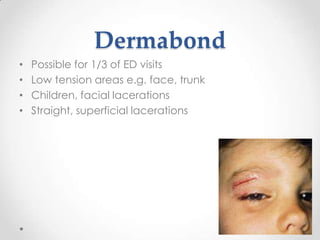
Basic Suturing Workshop
            For
Family Practitioner students
Overview
•   Wound evaluation & prep
•   Local anesthesia
•   Suture selection
•   Suturing techniques
•   Staples
•   Dermabond
Objectives
The participant will be able to :
1. Discuss the principles and management of
   wound repair.

2. Explain local anesthesia
   concepts, pharmacology and possible
   complications.

3. Perform simple interrupted suture technique.

4. discuss suture material choices and wound
   healing processes
Wound Management
• Anesthesia
• Preparation
• Sutures
• Suture techniques
Skin Anatomy
• Epidermis
• Dermis
• Subcutaneous
Types of Lacerations
Simple, Stellate, Avulsive, and Contused
Wound Status
• Clean
• Contaminated
• Delay
     -Extremity – 12 hours
     -Face – 24 hours
Wound Evaluation
•   Viability of tissue
•   Tissue loss
•   Depth of injury
•   Associated injuries
Foreign bodies on X-ray
•   Pebbles
•   Paperclip
•   Windshield glass
•   Wood
•   Needle
•   Light bulb glass
•   Dark glass
•   Transparent glass
Don’t put your finger in!
FB Removal
Wound Cleansing
             Preparation
•   Hand washing
•   Hair removal
•   Anesthesia
•   Removal of gross foreign material
•   Immersion/soaking
•   Irrigation
Practical Suture Hints
•   Comfort for you and patient
•   Adequate lighting
•   Usually sew toward yourself
•   Where to begin? Side of wound, middle,
•   landmarks
•   Flap? – enter flap first
Instruments
•   Suture with needle
•   Needle holder
•   Forceps
•   Scissors
•   Hemostats
Anesthesia
• 1% Lidocaine
Blocks pain stimuli leaves pressure & touch sensation
intact

• 2% Lidocaine
Blocks all awareness of stimuli including pressure &
touch
Guidelines

• Never allow patient to view injection

• Always aspirate before injection

• Begin with topical dripping of med

• Inject within wound
Wound Cleansing
 Method
   Mechanical cleansing
   Irrigation
   Debridement

 Solutions
     NSS
     Betadine
    Hydrogen peroxide
    Shur Cleans
Wound Irrigation
•   NSS 100-300 ml preferred
•   Most effective to remove debride
•   Use splash shield or 4X4 gauze
•   High volume
•   Low pressure
Suture Selection
•   Small needles – fine repairs, e.g. face
•   Larger needles – bigger bites
•   More zeros (6-0) – smaller, thin suture
•   Smaller suture – less tensile strength
Suture Classifications
• Absorbable
    Chromic, Vicryl, Dexon
    Digested by body enzymes or
    Hydrolyzed by tissue fluids
• Non-absorbable
    Ethilon, Monosof, Prolene, Silk
    Encapsulated or walled off
Absorbable Suture
•   Chromic, Dexon, Vicryl
•   Below the skin
•   Special areas – inside the mouth
•   Situations where later removal difficult
•   Eliminate trauma of suture removal
Non-Absorbable
• Nylon/Ethilon
• Prolene – hairy or keloid prone areas
• Silk
Suture Selection
•   Scalp 4-0 (blue)
•   Face 6-0
•   Back/Torso 3-0 or 4-0
•   Extremities 4-0 or 5-0
Wound Eversion
Wound Eversion
Best cosmetic results
• Smallest size needle
• Monofilament
• Good wound eversion
Skin Suture Placement
•   Close wound in segments
•   Sutures equidistant from skin edge on either side
•   of wound
•   Evert skin edges
•   Wound margins loosely approximated
•   Repeatedly bisect the wound
“Wound edges should be
     approximated, not
       strangulated!”
• Too tight = tissue necrosis
• Too loose = edges not aligned
Knot Security


• Chromic 2-3 knots
• Prolene 4-5 knots
• Ethilon 3-4 knots
Key Steps
•   Initiate tie with surgeon’s knot
•   Tighten the knot so it lays flat
•   Second throw in opposite direction
•   Two additional throws to secure knot
Suture Removal
•   Face/Neck 3 - 5 days
•   Scalp 7 – 10 days
•   Joints 10 - 14 days
•   Back/Feet 10 - 14 days
Steri-strips
•   Helpful for surface laceration
•   Non-motion areas
•   Avoid areas prone to getting wet
•   Can use with sutures or derma bond
•   Use Benzoin to provide additional adhesive
Tissue Glue Key Points
•   Identify appropriate wound type
•   Cleanse and dry wound area
•   Apply three or four layers of tissue glue
•   Dry between each layer to bond skin edges
Dermabond
•   Possible for 1/3 of ED visits
•   Low tension areas e.g. face, trunk
•   Children, facial lacerations
•   Straight, superficial lacerations
Dermabond safety
• Moist gauze over eye
• Trendelenburg position

Basic suturing workshop

  • 1.
    Basic Suturing Workshop For Family Practitioner students
  • 2.
    Overview • Wound evaluation & prep • Local anesthesia • Suture selection • Suturing techniques • Staples • Dermabond
  • 3.
    Objectives The participant willbe able to : 1. Discuss the principles and management of wound repair. 2. Explain local anesthesia concepts, pharmacology and possible complications. 3. Perform simple interrupted suture technique. 4. discuss suture material choices and wound healing processes
  • 4.
    Wound Management • Anesthesia •Preparation • Sutures • Suture techniques
  • 5.
    Skin Anatomy • Epidermis •Dermis • Subcutaneous
  • 6.
    Types of Lacerations Simple,Stellate, Avulsive, and Contused
  • 7.
    Wound Status • Clean •Contaminated • Delay -Extremity – 12 hours -Face – 24 hours
  • 8.
    Wound Evaluation • Viability of tissue • Tissue loss • Depth of injury • Associated injuries
  • 9.
    Foreign bodies onX-ray • Pebbles • Paperclip • Windshield glass • Wood • Needle • Light bulb glass • Dark glass • Transparent glass
  • 10.
    Don’t put yourfinger in!
  • 11.
  • 12.
    Wound Cleansing Preparation • Hand washing • Hair removal • Anesthesia • Removal of gross foreign material • Immersion/soaking • Irrigation
  • 13.
    Practical Suture Hints • Comfort for you and patient • Adequate lighting • Usually sew toward yourself • Where to begin? Side of wound, middle, • landmarks • Flap? – enter flap first
  • 14.
    Instruments • Suture with needle • Needle holder • Forceps • Scissors • Hemostats
  • 15.
    Anesthesia • 1% Lidocaine Blockspain stimuli leaves pressure & touch sensation intact • 2% Lidocaine Blocks all awareness of stimuli including pressure & touch
  • 16.
    Guidelines • Never allowpatient to view injection • Always aspirate before injection • Begin with topical dripping of med • Inject within wound
  • 17.
    Wound Cleansing  Method Mechanical cleansing Irrigation Debridement  Solutions NSS Betadine Hydrogen peroxide Shur Cleans
  • 18.
    Wound Irrigation • NSS 100-300 ml preferred • Most effective to remove debride • Use splash shield or 4X4 gauze • High volume • Low pressure
  • 19.
    Suture Selection • Small needles – fine repairs, e.g. face • Larger needles – bigger bites • More zeros (6-0) – smaller, thin suture • Smaller suture – less tensile strength
  • 20.
    Suture Classifications • Absorbable Chromic, Vicryl, Dexon Digested by body enzymes or Hydrolyzed by tissue fluids • Non-absorbable Ethilon, Monosof, Prolene, Silk Encapsulated or walled off
  • 21.
    Absorbable Suture • Chromic, Dexon, Vicryl • Below the skin • Special areas – inside the mouth • Situations where later removal difficult • Eliminate trauma of suture removal
  • 22.
    Non-Absorbable • Nylon/Ethilon • Prolene– hairy or keloid prone areas • Silk
  • 23.
    Suture Selection • Scalp 4-0 (blue) • Face 6-0 • Back/Torso 3-0 or 4-0 • Extremities 4-0 or 5-0
  • 24.
  • 25.
  • 26.
    Best cosmetic results •Smallest size needle • Monofilament • Good wound eversion
  • 27.
    Skin Suture Placement • Close wound in segments • Sutures equidistant from skin edge on either side • of wound • Evert skin edges • Wound margins loosely approximated • Repeatedly bisect the wound
  • 28.
    “Wound edges shouldbe approximated, not strangulated!” • Too tight = tissue necrosis • Too loose = edges not aligned
  • 29.
    Knot Security • Chromic2-3 knots • Prolene 4-5 knots • Ethilon 3-4 knots
  • 30.
    Key Steps • Initiate tie with surgeon’s knot • Tighten the knot so it lays flat • Second throw in opposite direction • Two additional throws to secure knot
  • 32.
    Suture Removal • Face/Neck 3 - 5 days • Scalp 7 – 10 days • Joints 10 - 14 days • Back/Feet 10 - 14 days
  • 33.
    Steri-strips • Helpful for surface laceration • Non-motion areas • Avoid areas prone to getting wet • Can use with sutures or derma bond • Use Benzoin to provide additional adhesive
  • 34.
    Tissue Glue KeyPoints • Identify appropriate wound type • Cleanse and dry wound area • Apply three or four layers of tissue glue • Dry between each layer to bond skin edges
  • 35.
    Dermabond • Possible for 1/3 of ED visits • Low tension areas e.g. face, trunk • Children, facial lacerations • Straight, superficial lacerations
  • 36.
    Dermabond safety • Moistgauze over eye • Trendelenburg position