INDEX
• Wound management
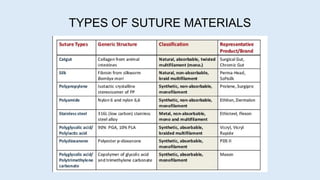
•Classification of suture material
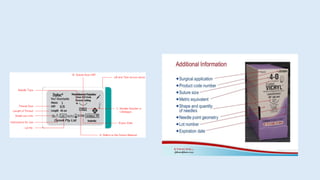
• How to read the suture pack
• Type of needles-Suturing principle
• Armamentarium used for suturing
• Types of knots -Types of suturing /techniques
• Timing of suture removal
• How to remove sutures
• Other modalities of wound closure
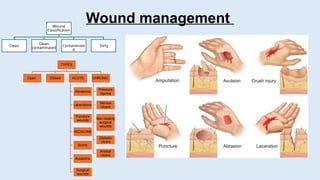
Wound Management
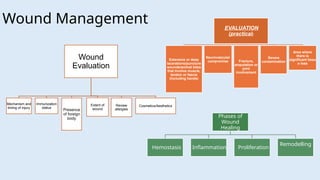
Wound
Evaluation
Mechanism and
timingof injury
Immunization
status
Presence
of foreign
body
Extent of
wound
Review
allergies
Cosmetics/Aesthetics
EVALUATION
(practical)
Extensive or deep
lacerations/puncture
wounds/animal bites
that involve muscle,
tendon or fascia
(including hands)
Neurovascular
compromise Fracture,
amputation or
joint
involvement
Severe
contamination
Area where
there is
significant tissu
e loss
Phases of
Wound
Healing
Hemostasis Inflammation Proliferation
Remodelling
5.
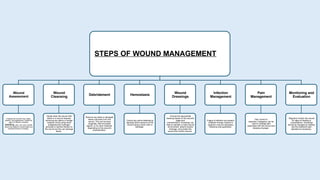
STEPS OF WOUNDMANAGEMENT
Wound
Assessment
Evaluate the wound's size, depth,
location, and appearance. Assess for
signs of infection (redness,
swelling, pain, pus) and consider
factors like patient's overall health and
potential barriers to healing.
Wound
Cleansing
Gently clean the wound with
saline or a wound cleanser,
removing any debris or foreign
material. Avoid using harsh
antiseptics like hydrogen
peroxide or alcohol directly on
the wound as they can damage
tissue.
Debridement
Remove any dead or damaged
tissue (necrosis) from the
wound. This can be done
surgically, with enzymatic
agents, or by other methods,
depending on the wound's
characteristics.
Hemostasis
Control any active bleeding by
applying direct pressure to the
wound using a clean cloth or
bandage.
Wound
Dressings
Choose the appropriate
dressing based on the wound's
stage and
characteristics. Dressings can
help to maintain a moist wound
environment, absorb excess
drainage, and protect the
wound from further trauma.
Infection
Management
If signs of infection are present,
antibiotic therapy (topical or
systemic) may be necessary,
following local guidelines.
Pain
Management
Pain control is
essential. Analgesics can be
used to manage pain
associated with the wound and
dressing changes.
Monitoring and
Evaluation
Regularly monitor the wound
for signs of healing or
complications. Dressings
should be changed as needed,
and the treatment plan
adjusted as necessary.
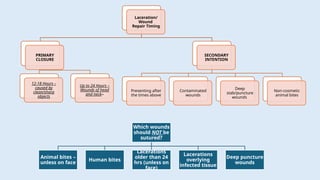
6.
Laceration/
Wound
Repair Timing
PRIMARY
CLOSURE
12-18 Hours–
caused by
clean/sharp
objects
Up to 24 Hours –
Wounds of head
and neck–
SECONDARY
INTENTION
Presenting after
the times above
Contaminated
wounds
Deep
stab/puncture
wounds
Non-cosmetic
animal bites
Which wounds
should NOT be
sutured?
Animal bites –
unless on face
Human bites
Lacerations
older than 24
hrs (unless on
face)
Lacerations
overlying
infected tissue
Deep puncture
wounds
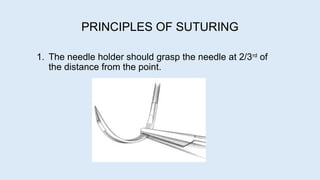
PRINCIPLES OF SUTURING
1.The needle holder should grasp the needle at 2/3rd
of
the distance from the point.
9.
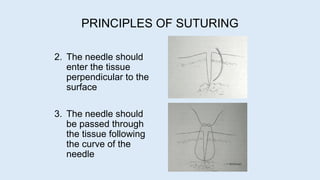
2. The needleshould
enter the tissue
perpendicular to the
surface
3. The needle should
be passed through
the tissue following
the curve of the
needle
PRINCIPLES OF SUTURING
10.
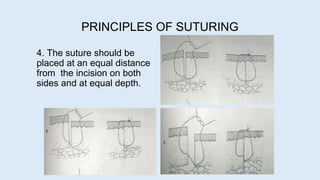
4. The sutureshould be
placed at an equal distance
from the incision on both
sides and at equal depth.
PRINCIPLES OF SUTURING
11.
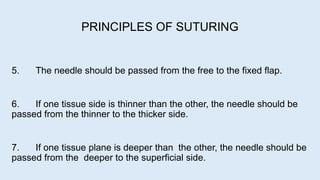
5. The needleshould be passed from the free to the fixed flap.
6. If one tissue side is thinner than the other, the needle should be
passed from the thinner to the thicker side.
7. If one tissue plane is deeper than the other, the needle should be
passed from the deeper to the superficial side.
PRINCIPLES OF SUTURING
12.
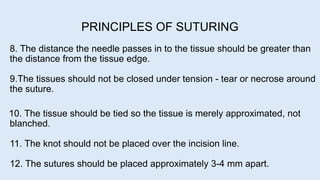
8. The distancethe needle passes in to the tissue should be greater than
the distance from the tissue edge.
9.The tissues should not be closed under tension - tear or necrose around
the suture.
10. The tissue should be tied so the tissue is merely approximated, not
blanched.
11. The knot should not be placed over the incision line.
12. The sutures should be placed approximately 3-4 mm apart.
PRINCIPLES OF SUTURING
13.
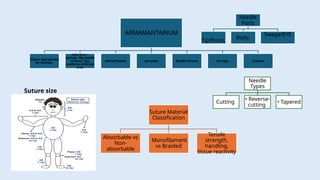
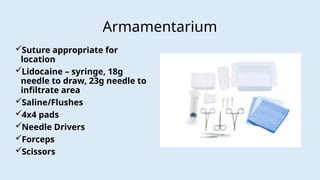
ARMAMANTARIUM
Suture appropriate
for location
Lidocaine–
syringe, 18g needle
to draw, 23g
needle to infiltrate
area
Saline/Flushes 4x4 pads Needle Drivers Forceps Scissors
Suture size
Suture Material
Classification
Absorbable vs
Non-
absorbable
Monofilament
vs Braided
Tensile
strength,
handling,
tissue reactivity
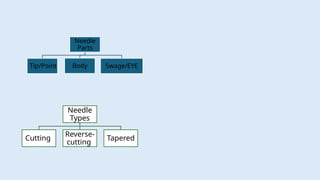
Needle
Parts
Tip/Point,
Body,
Swage/EYE
Needle
Types
Cutting
• Reverse-
cutting
• Tapered
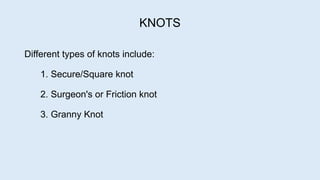
KNOTS
Different types ofknots include:
1. Secure/Square knot
2. Surgeon's or Friction knot
3. Granny Knot
19.
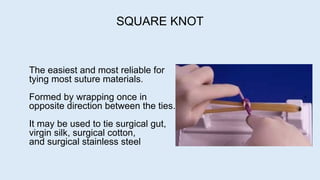
The easiest andmost reliable for
tying most suture materials.
Formed by wrapping once in
opposite direction between the ties.
It may be used to tie surgical gut,
virgin silk, surgical cotton,
and surgical stainless steel
SQUARE KNOT
20.
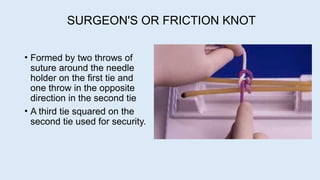
SURGEON'S OR FRICTIONKNOT
• Formed by two throws of
suture around the needle
holder on the first tie and
one throw in the opposite
direction in the second tie
• A third tie squared on the
second tie used for security.
21.
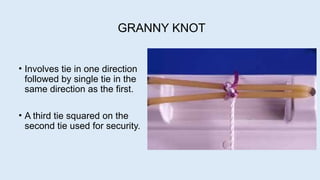
GRANNY KNOT
• Involvestie in one direction
followed by single tie in the
same direction as the first.
• A third tie squared on the
second tie used for security.
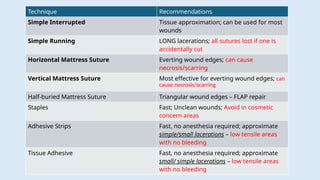
Technique Recommendations
Simple InterruptedTissue approximation; can be used for most
wounds
Simple Running LONG lacerations; all sutures lost if one is
accidentally cut
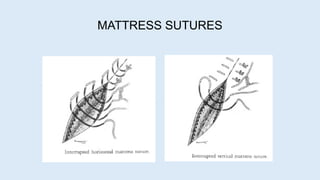
Horizontal Mattress Suture Everting wound edges; can cause
necrosis/scarring
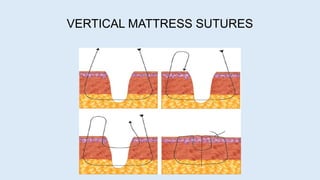
Vertical Mattress Suture Most effective for everting wound edges; can
cause necrosis/scarring
Half-buried Mattress Suture Triangular wound edges – FLAP repair
Staples Fast; Unclean wounds; Avoid in cosmetic
concern areas
Adhesive Strips Fast, no anesthesia required; approximate
simple/small lacerations – low tensile areas
with no bleeding
Tissue Adhesive Fast, no anesthesia required; approximate
small/ simple lacerations – low tensile areas
with no bleeding
#8 Grasping the suture end will result in at least bent needle if not a broken one.
#9 If the needle peirces obliquely a tear may develop
If we treat the curved needle like a straight one the flap will tear
#10 Equal thickness but one side is elevated – tie the knot on the lower side
Unequal thickness
1. farther from the incision line on thinner side
2. deeper penetration in the thinner side.
#11 8. To ensures some degree of tissue eversion in anticipation of scar contracture.
9. Undermining by either blunt or sharp dissection to relieve the tension
#12 12. The closeness of sutures depends on anticipated tension across the suture line. Closely spaced sutures are indicated in areas with heavy underlying muscle activity as in tongue
#23 How do you choose which closure technique is best?
Tissue adhesives can be applied more quickly, require no anesthesia, and eliminate the need for follow-up because they slough off spontaneously within five to 10 days. They form a protective barrier to promote wound healing and may have antimicrobial effects.18 Although tissue adhesives have a higher direct cost per unit than sutures, they are more cost-effective because of quick application and no follow-up.19 Tissue adhesives' low tensile strength makes them inappropriate for high-tension areas, such as over joints, unless the area is immobilized. They may be ideal for simple lacerations under a cast or splint.
#24 Can be used in areas of stress
Strong and the successive sutures can placed to match the individual requirements
Each suture independent of the other
The loosening of one suture will not produce loosening of other sutures
A degree of eversion of incision can be produced.
Useful in cases where the wounds become infected or hematoma formation. Removal of a few sutures offers satisfactory relief
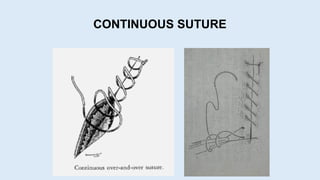
#25 1. Provides a rapid technique for closure. Initially a simple interrupted suture is placed and then the needle is inserted in a continuous fashion so that the suture passes perpendicular to the incision line.
2. Even distribution of tension over the entire suture line.
3. Provides a more watertight closure of the wound.
4. Should not be used in areas of existing tension.
5. But if a knot slips the whole suturing will come undone. Should not be done in places where hematoma or excessive swelling is anticipated
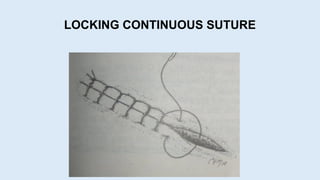
#26 Similar to continuous suture but locking is done by withdraing the suture through its own loop after every insertion.
This ensures that Suture aligns perpendicular to the incision
Locking feature prevents the continuous tightening of the sutures as it progresses
Individual locks should not be tightened excessively to prevent tissue necrosis.
Prevents adjustment of tension over the suture line as the tissue swelling occurs.
Disadvantage is same as continuous suturing
#27 Provides more tissue eversion than the interrupted sutures.
Used in areas where tension free flap closure cannot be done.
Resists muscle pull, everts wound margins and adapt the tissue flaps tightly to the underlying structures
Horizontal – atleast 8 mm from flap edges- provides broad contact of wound margins. For eg – closure of extraction sockets
The vertical mattress sutures offer the advantage of running parallel to the blood supply to the edge of the flap and is used for closing deep wounds
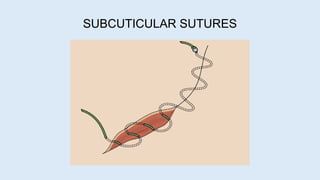
#28 Used for closure of subcuticular layer
If individual subcuticular sutures are placed they should be buried with the knot inverted.
A continuous subcuticular sutures may be used with no knots having the ends exit only a short distance from the wound.
A continuous subcuticular sutures – removed after 7-10 days by un taping both the ends and pulling in one direction.
#29 Used for closure of subcuticular layer
If individual subcuticular sutures are placed they should be buried with the knot inverted.
A continuous subcuticular sutures may be used with no knots having the ends exit only a short distance from the wound.
A continuous subcuticular sutures – removed after 7-10 days by un taping both the ends and pulling in one direction.
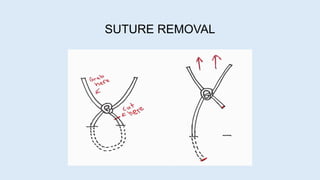
#30 External wound has healed - no longer needs the support of nonabsorbable suture material
The length of time the sutures remain in place depends upon the rate of healing and the nature of the wound
Sutures should be removed using aseptic and sterile technique - use a sterile suture removal tray prepared for the procedure
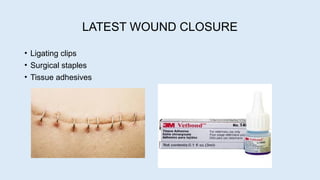
#31 Ligating clips –steel, tantalum, titanium or polydioxanone
Surgical staples- rapid closure of skin provided 5mm distance to underlying bone or vessels
Adhesives – n butyl cyanoacrylate, 2 octyl cyanoacrylate