Downloaded 697 times


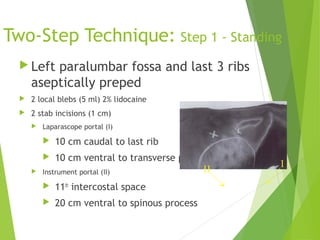
![Predisposing Factors
Abomasal atony
High grain/low roughage diets
[VFA] Gas accumulation Distention
Roughage (large particles)
Stimulates rumination via touch receptors
Increases salivary buffer action
Hypocalcemia
Milk fever
smooth muscle tone and motility
4.8 x risk of developing LDA than normocalcemic](https://image.slidesharecdn.com/abomasaldisplacmentsandvolvulus-130628101821-phpapp01/85/Abomasal-displacements-and-volvulus-8-320.jpg)


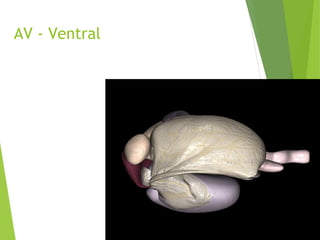


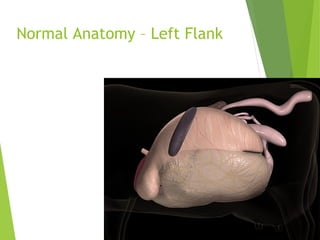
This document discusses abomasal displacements and volvulus in cattle. It begins with the normal anatomy of the abomasum and surrounding structures. It then discusses left displacement of the abomasum (LDA), including risk factors, clinical signs, diagnosis, treatment options such as medical techniques and surgical procedures like right paralumbar fossa omentopexy. Right displacement of the abomasum (RDA) and abomasal volvulus (AV) are also covered, explaining their clinical signs, diagnosis, and surgical treatment approaches. The document provides detailed descriptions of surgical techniques like proximal and distal paravertebral nerve blocks, omentopexy procedures, and abomasopexy. It concludes with advantages


