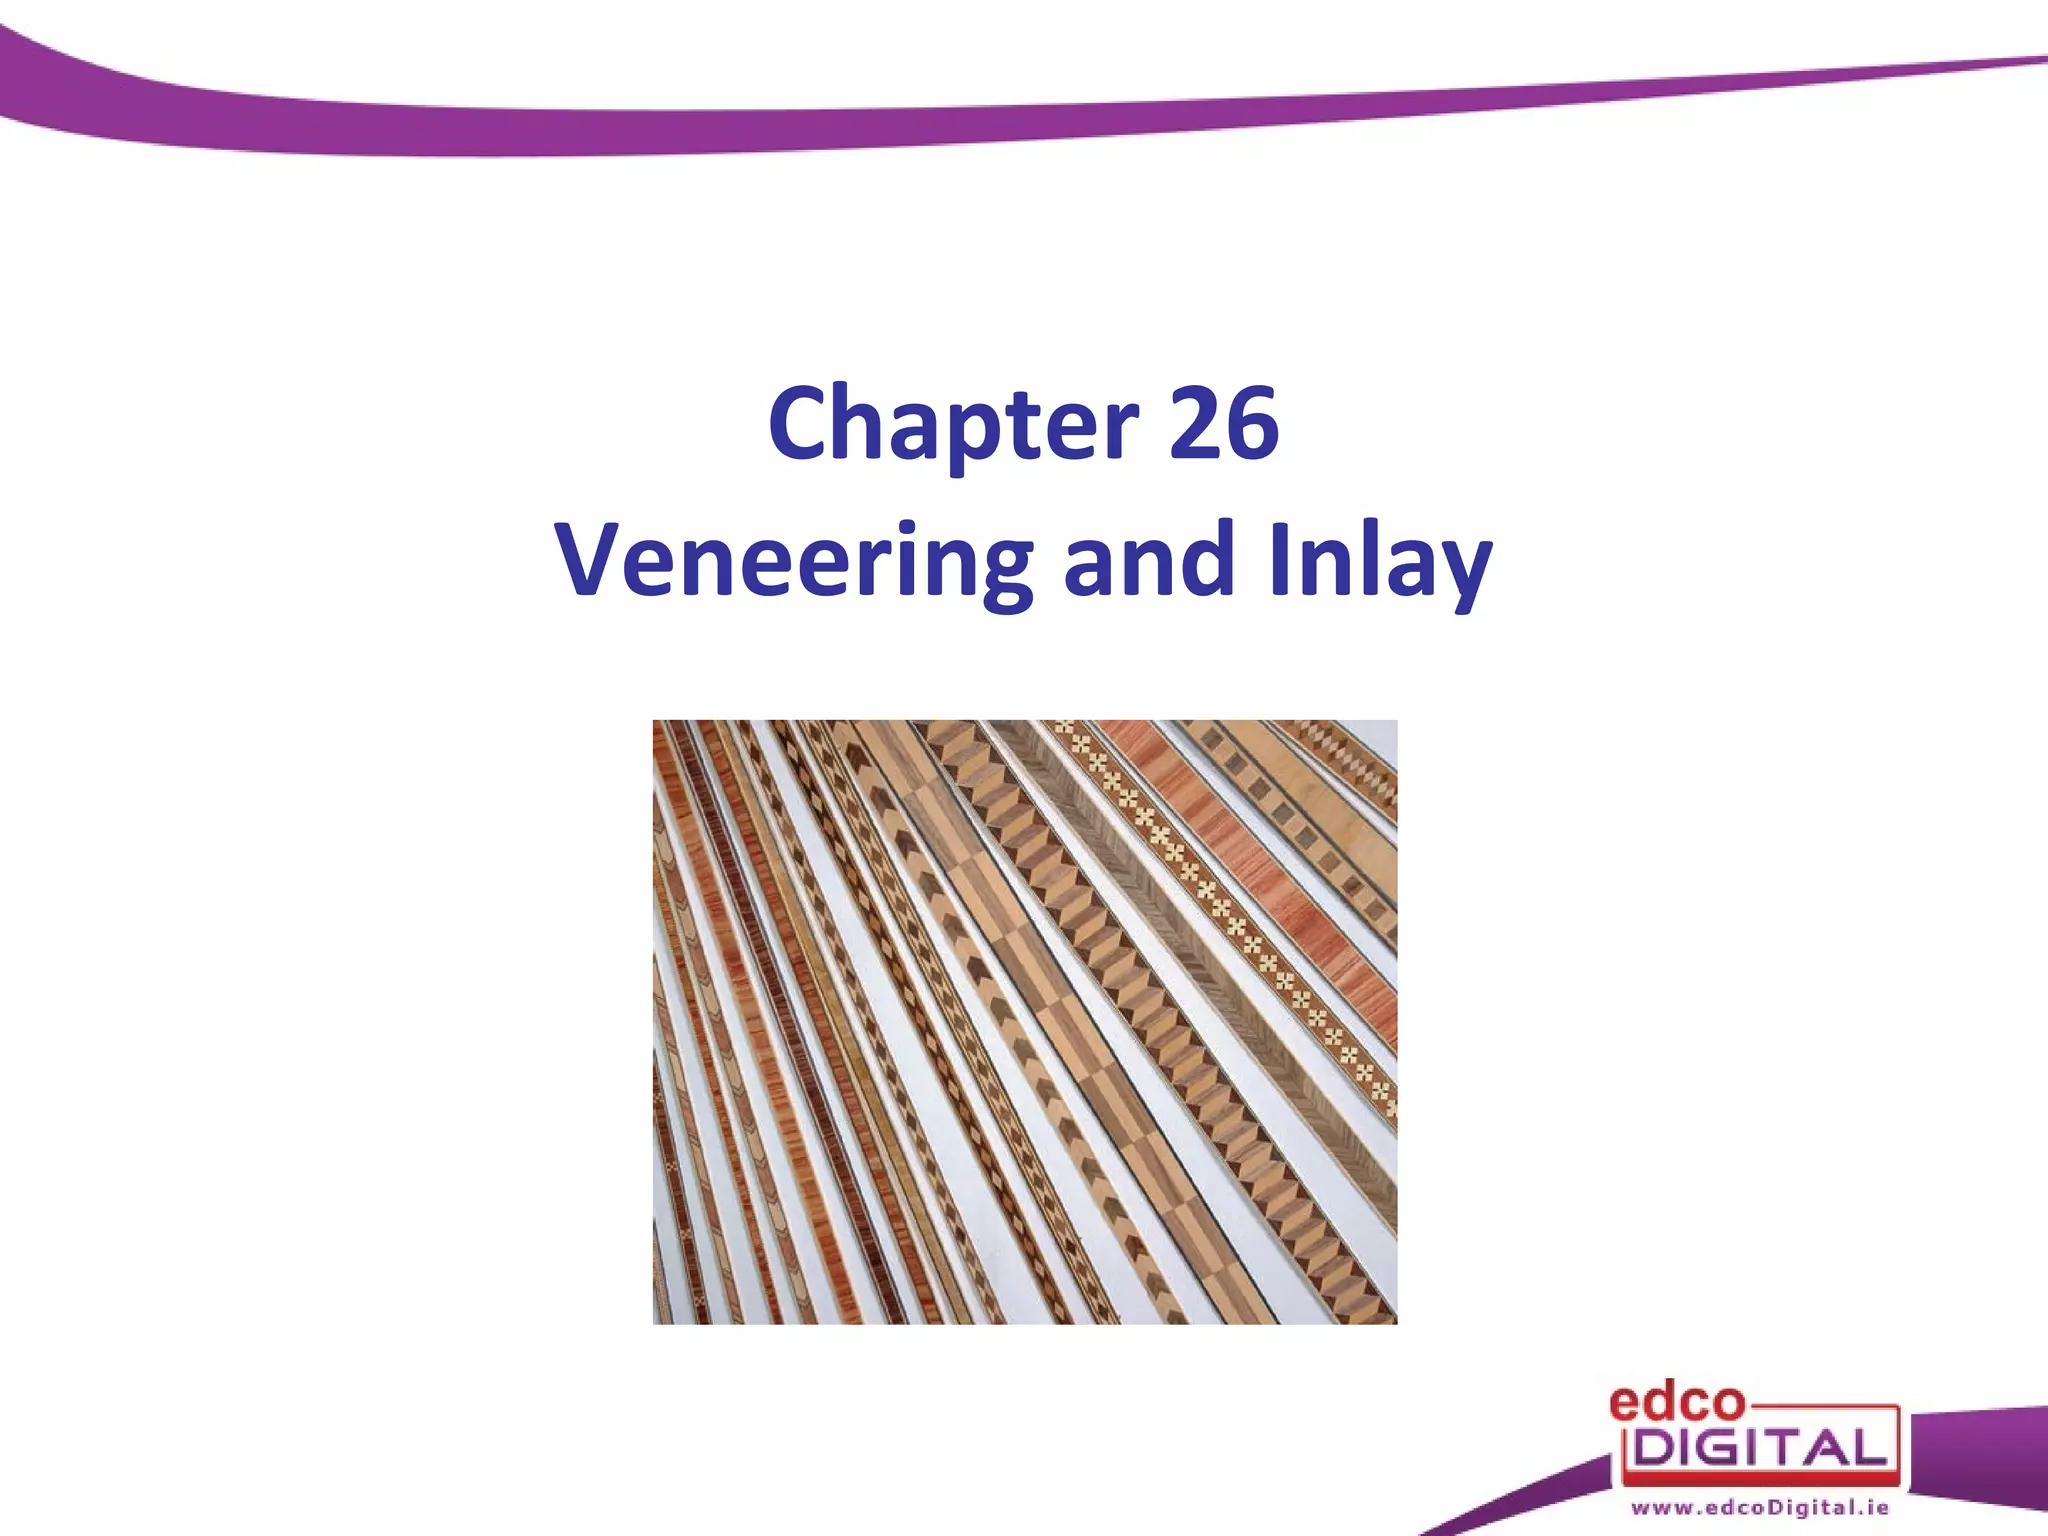
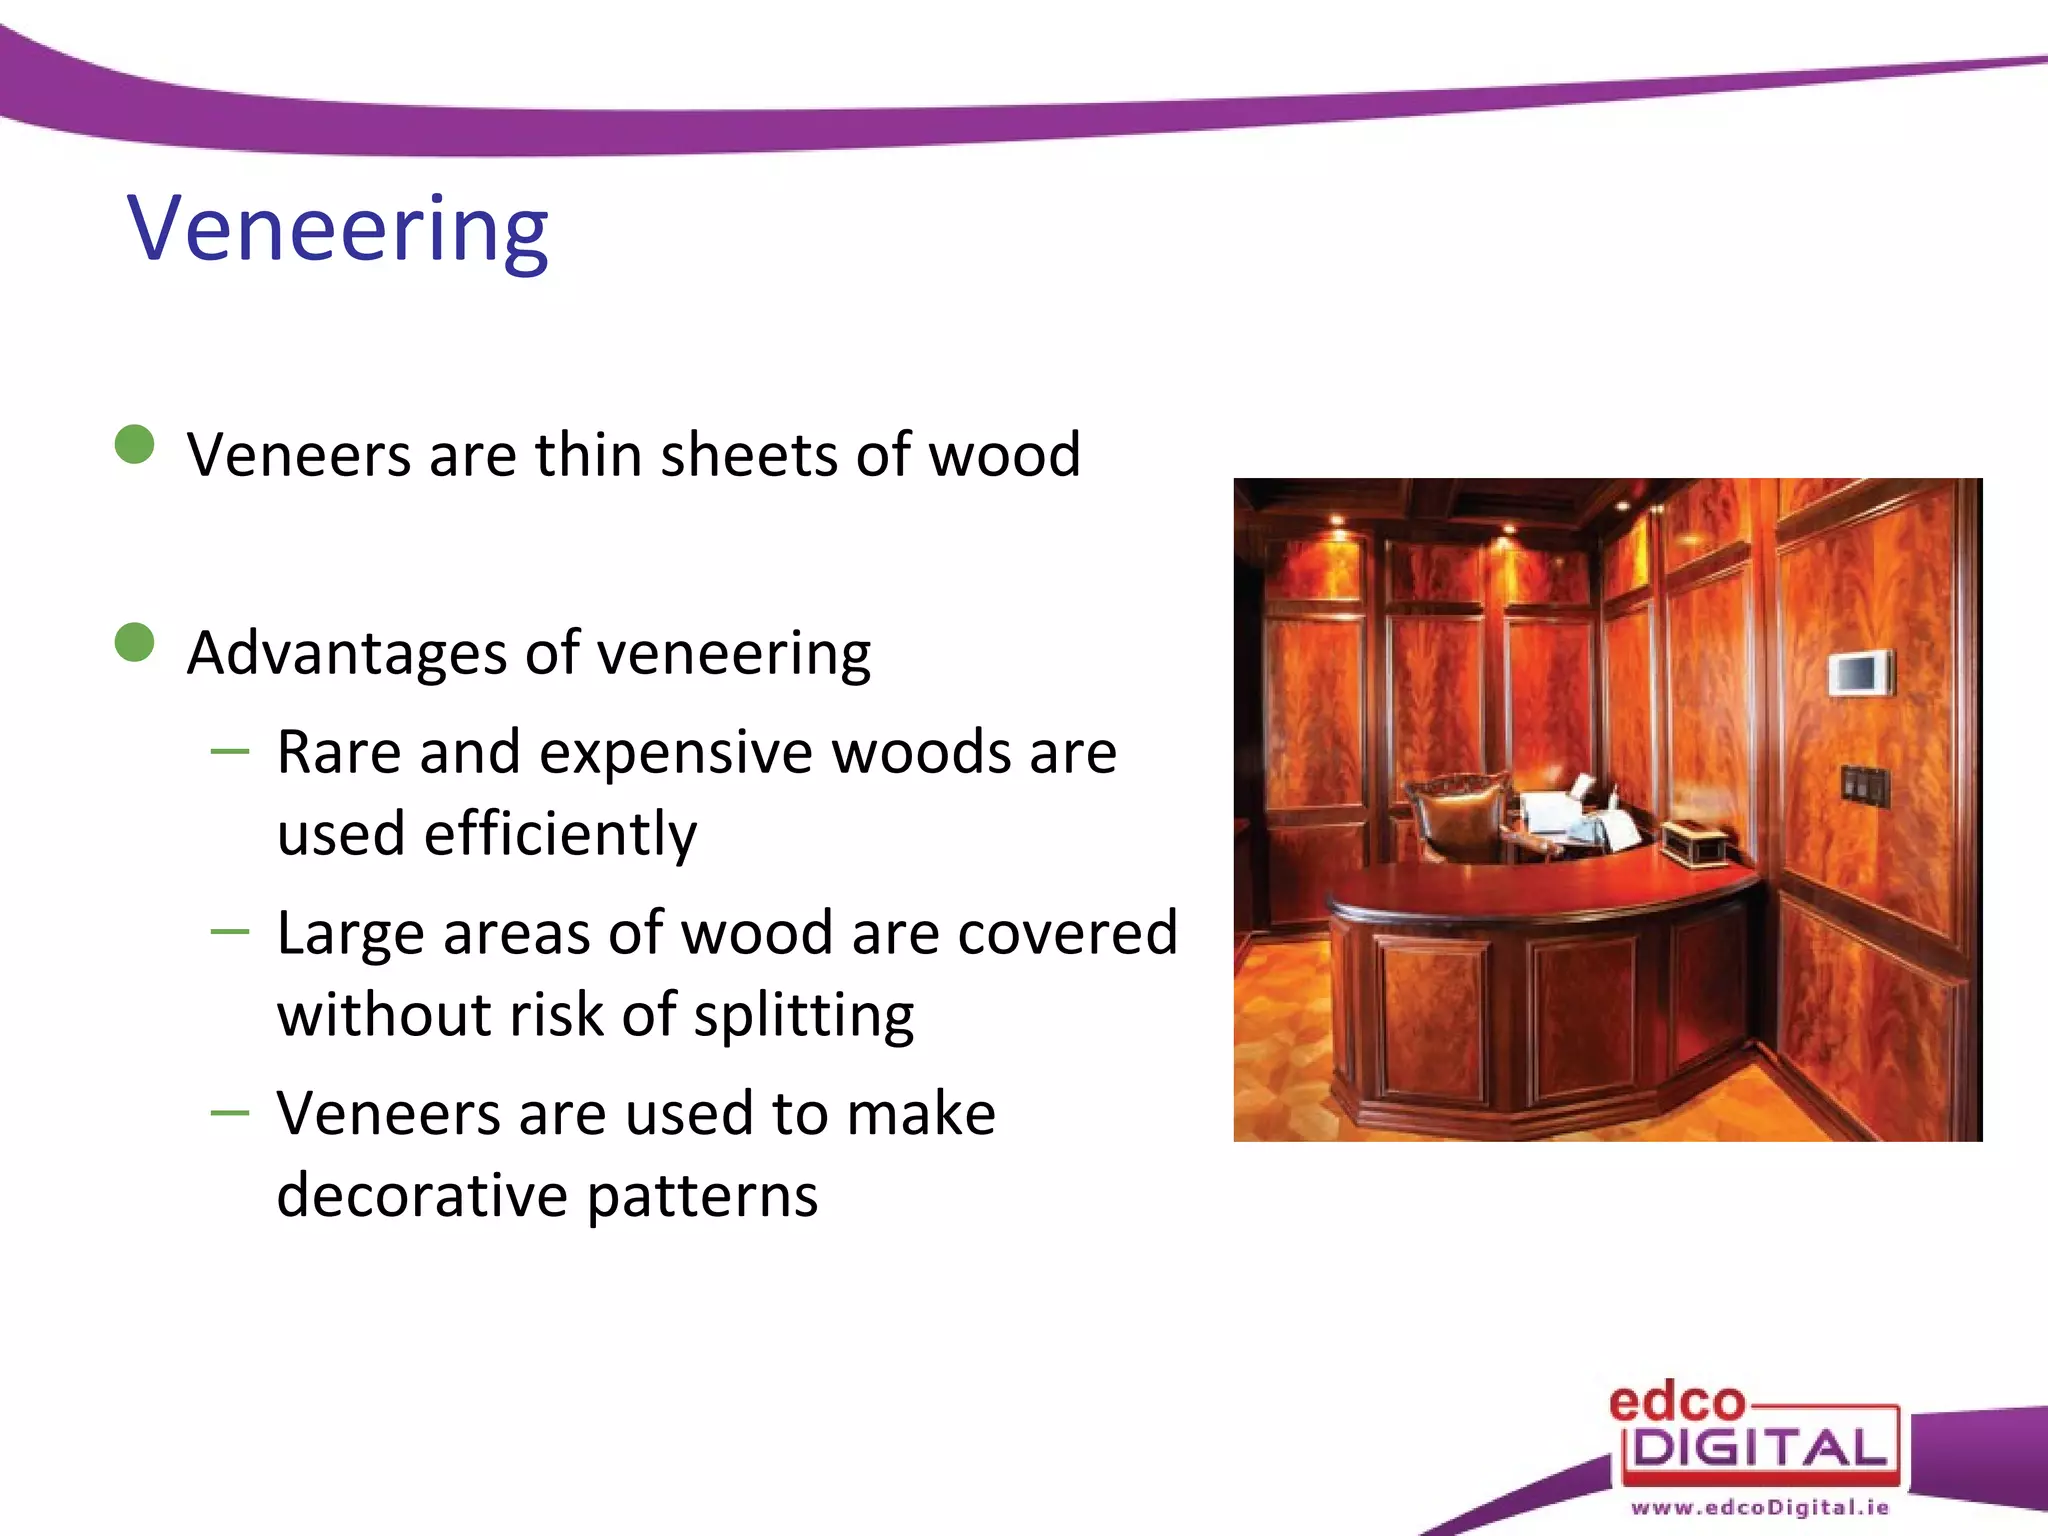
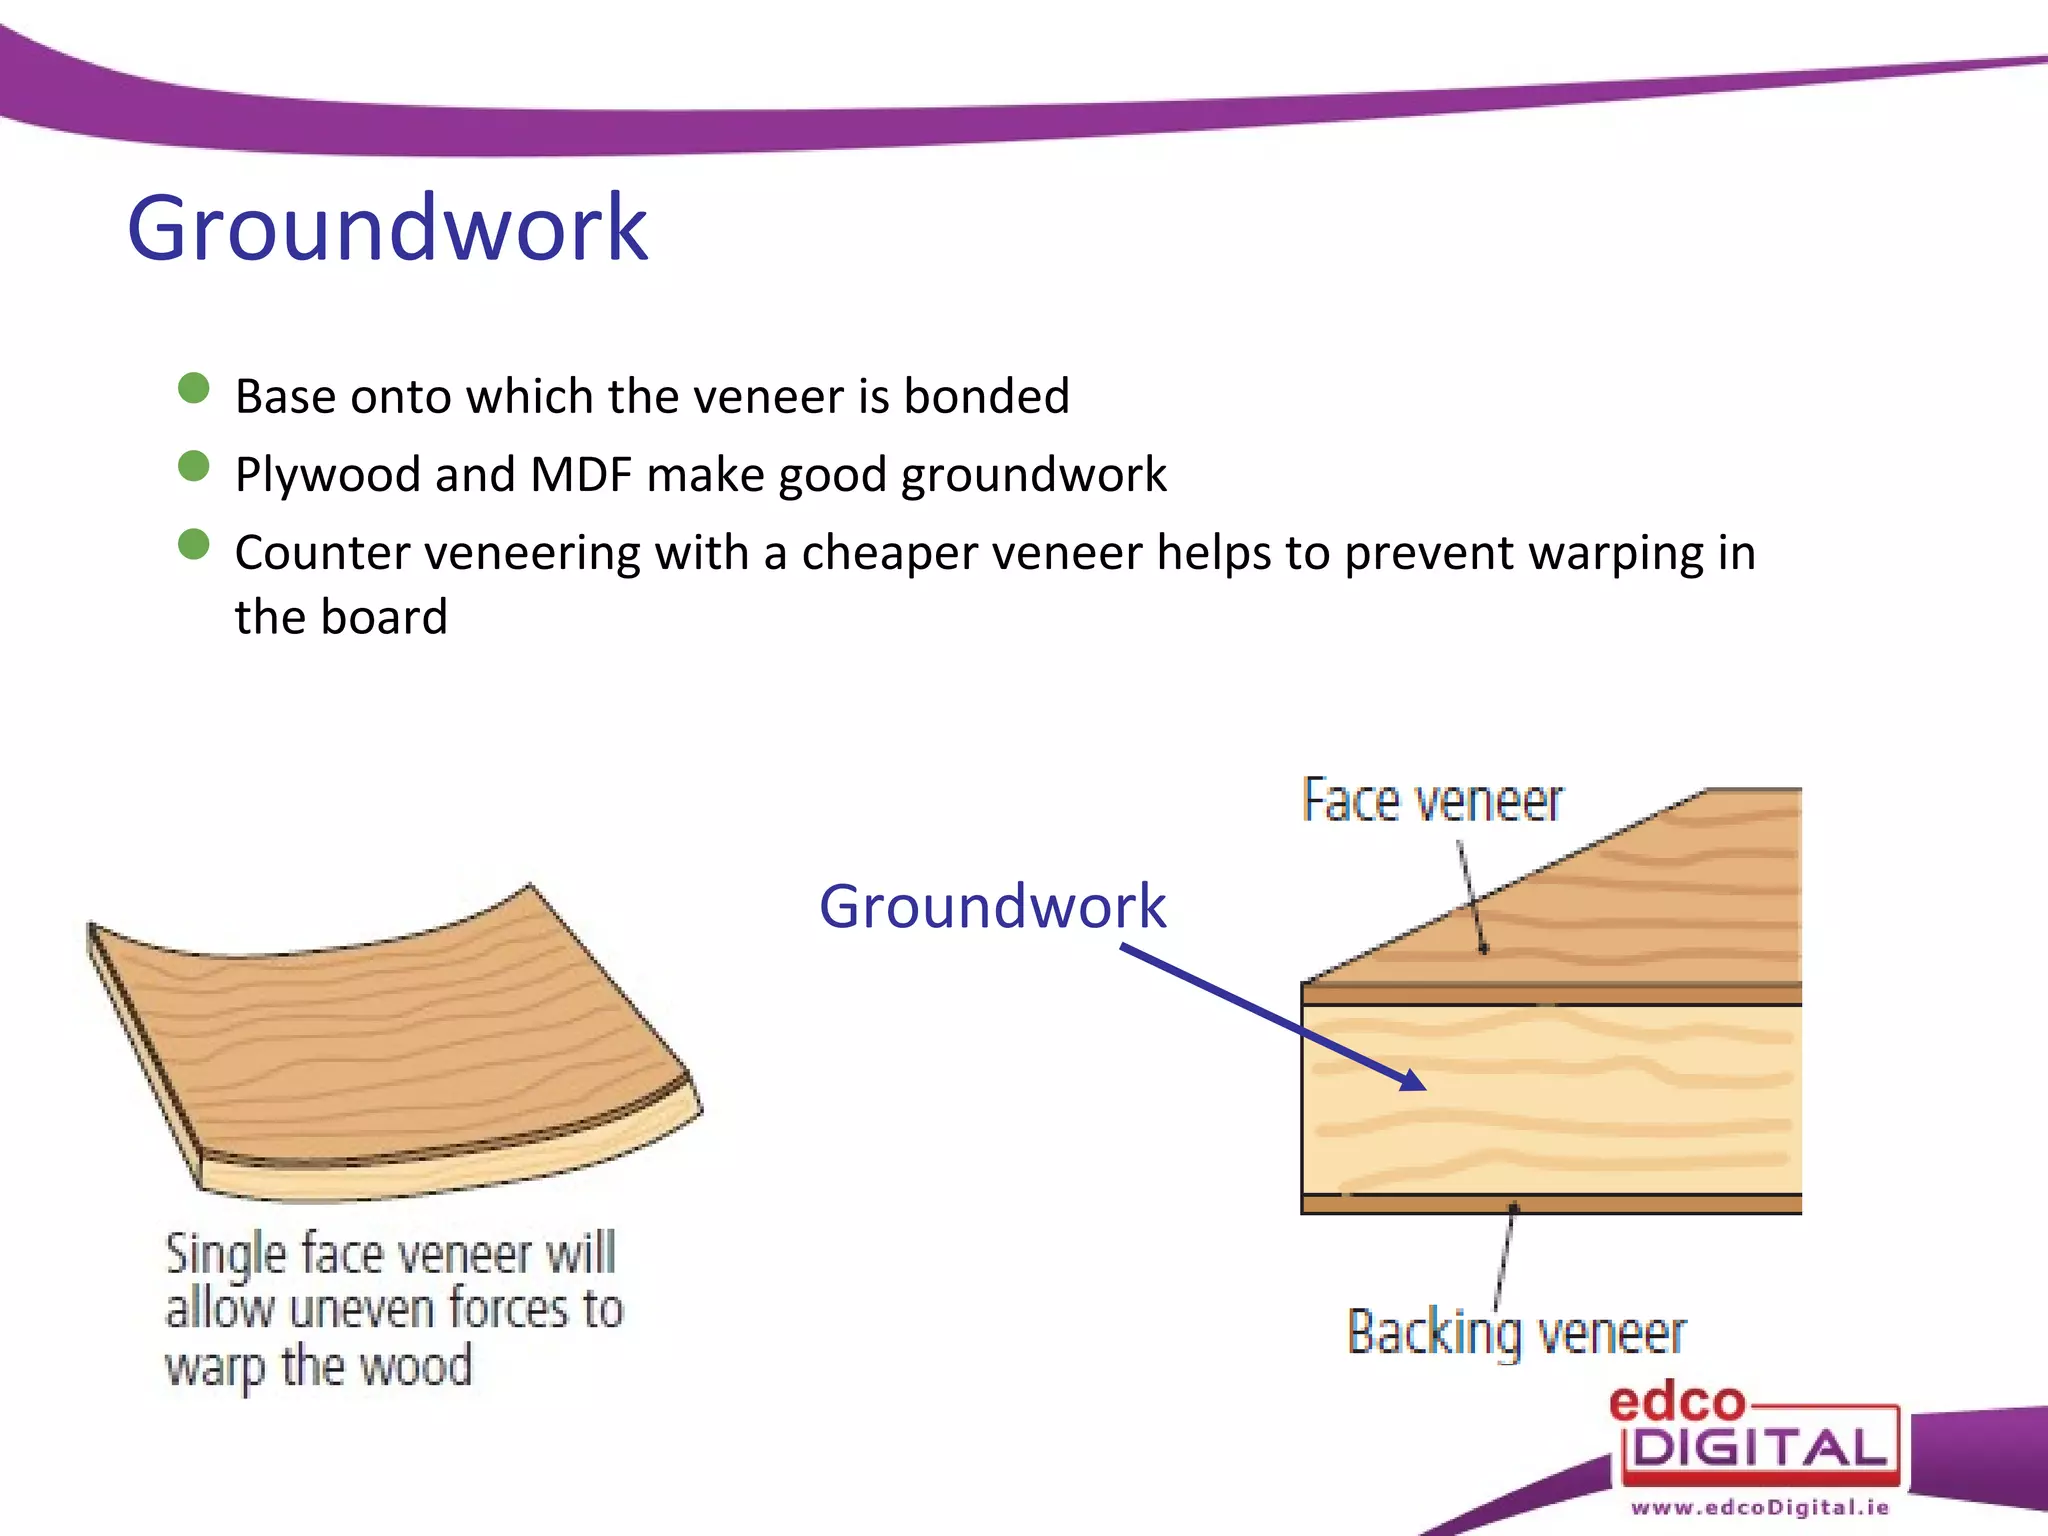
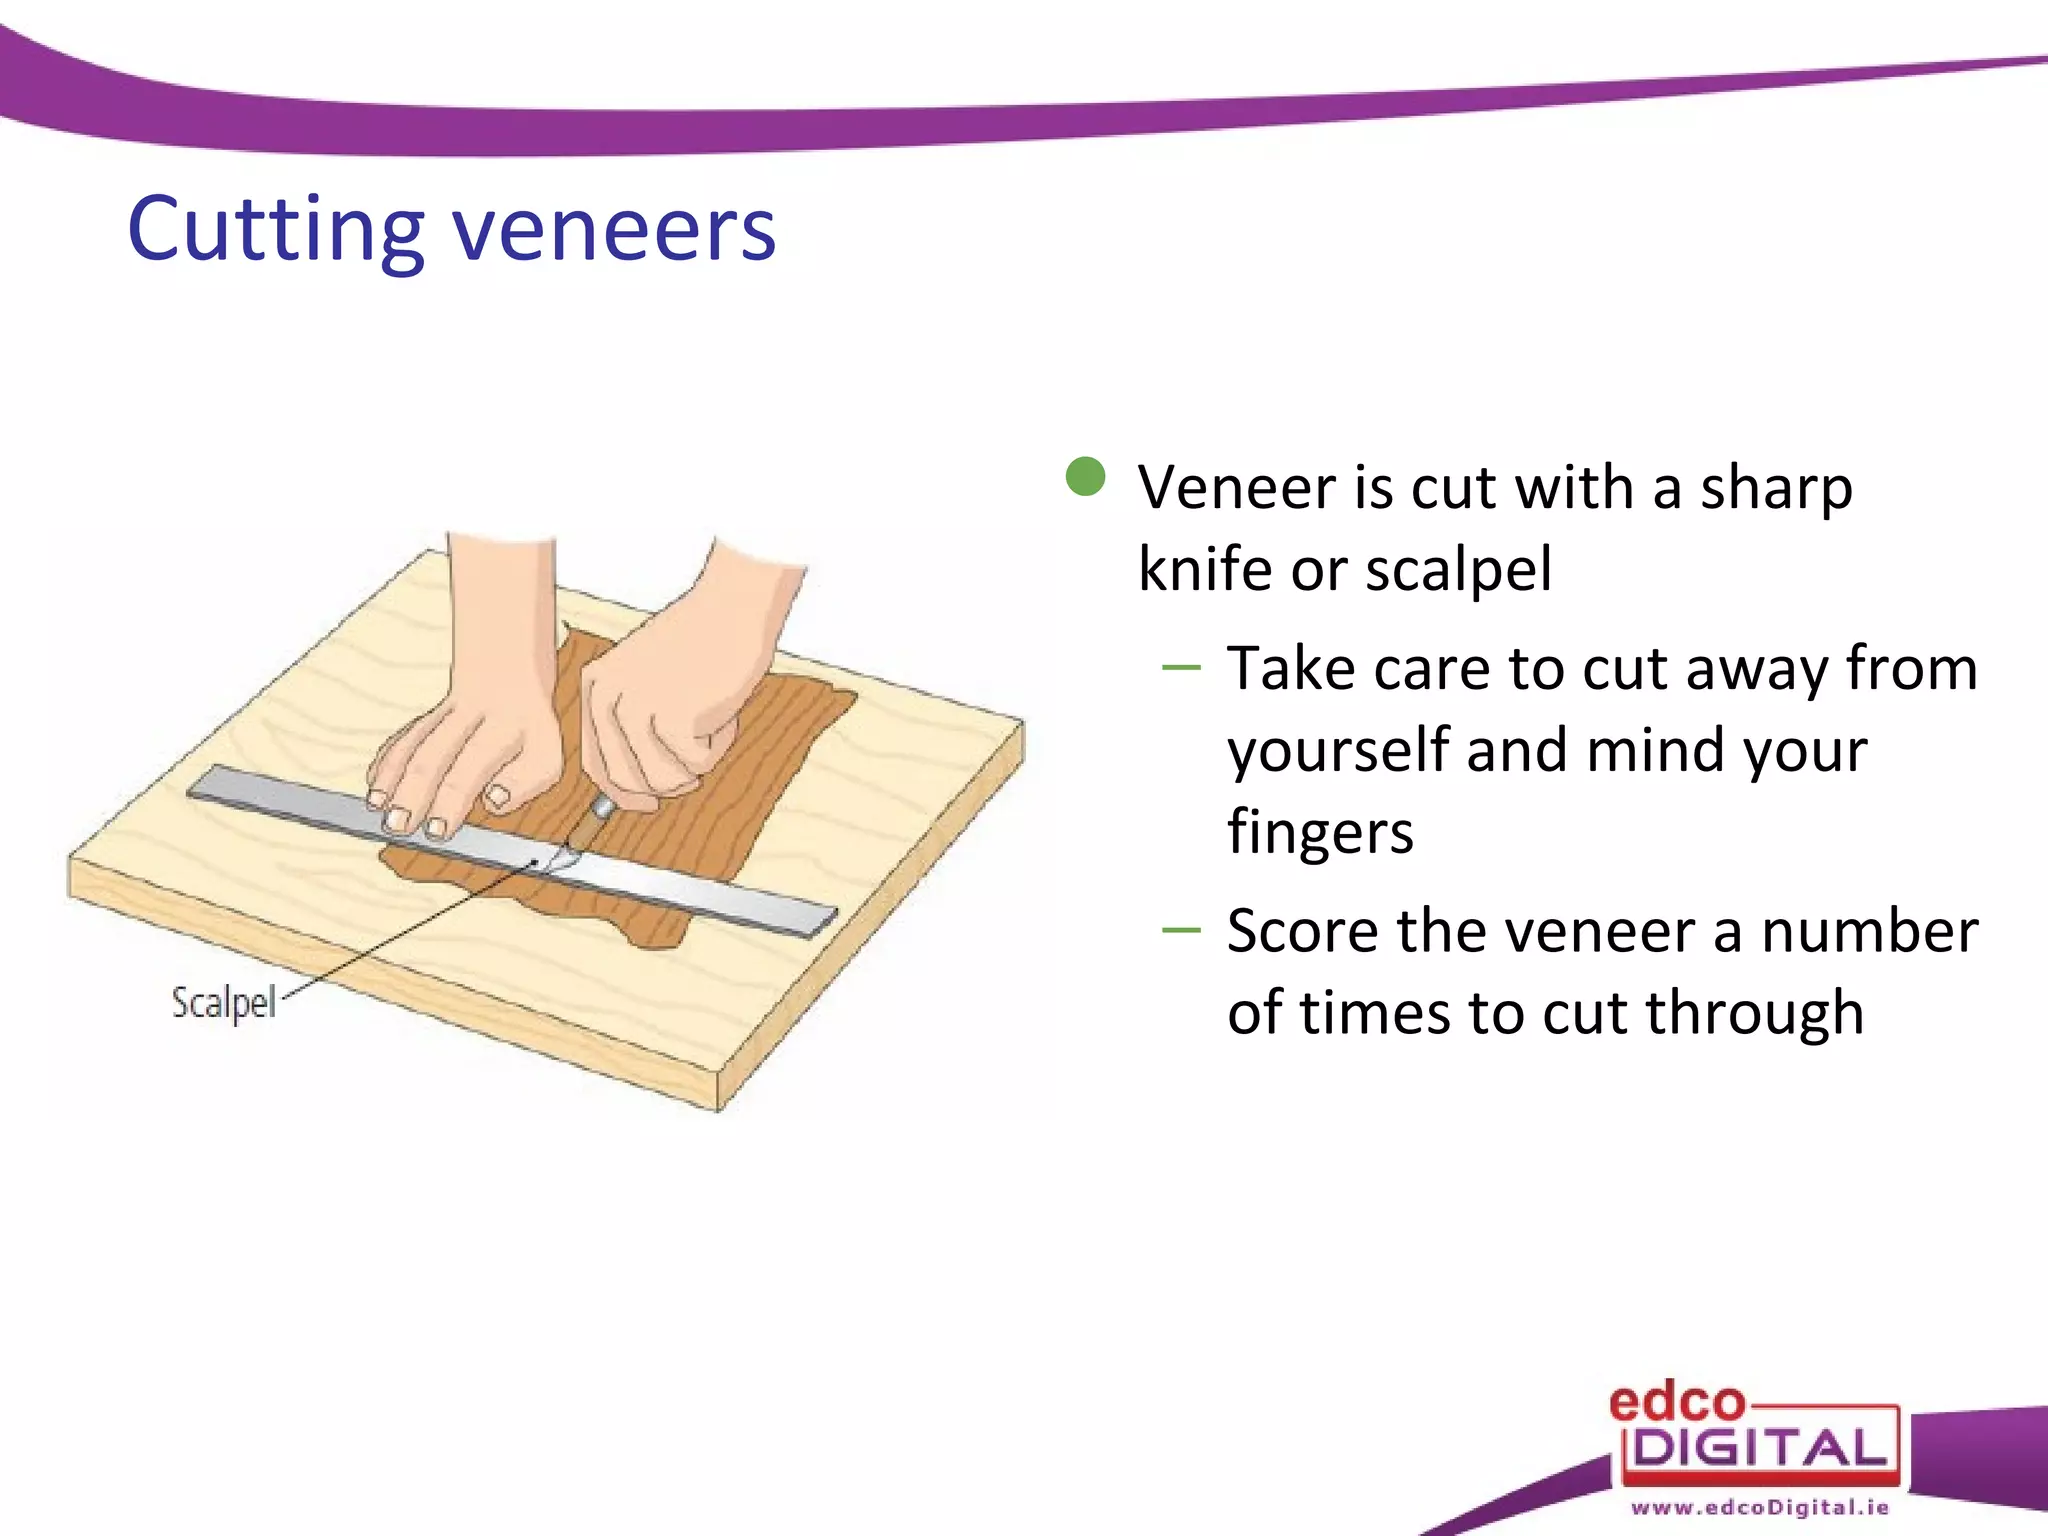
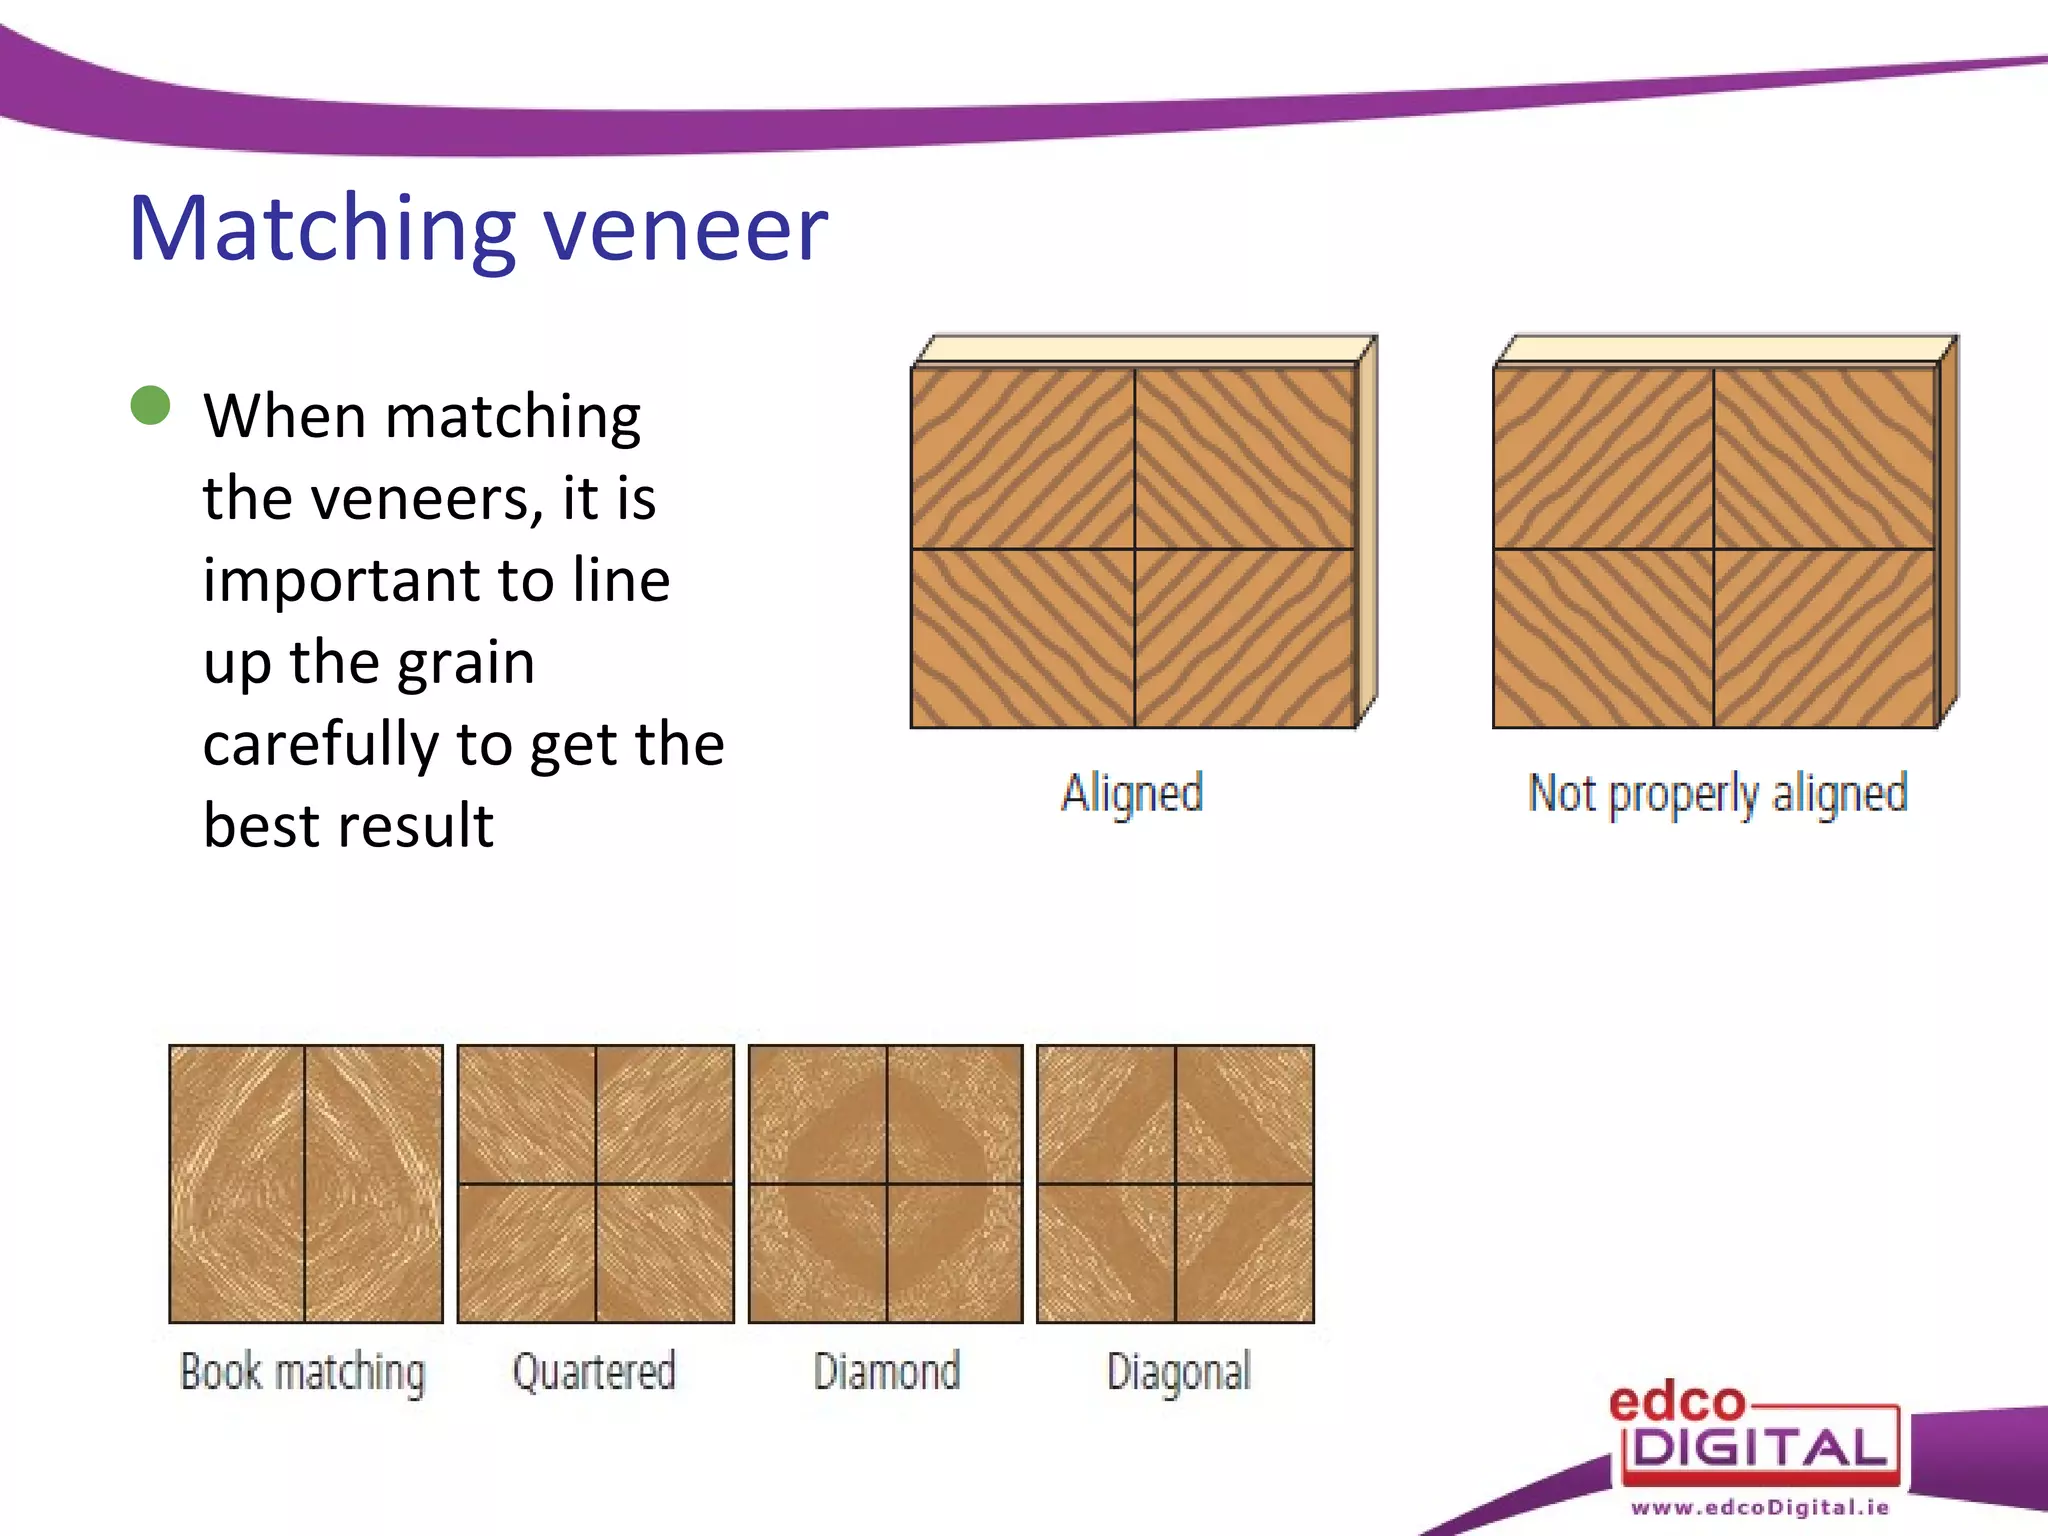
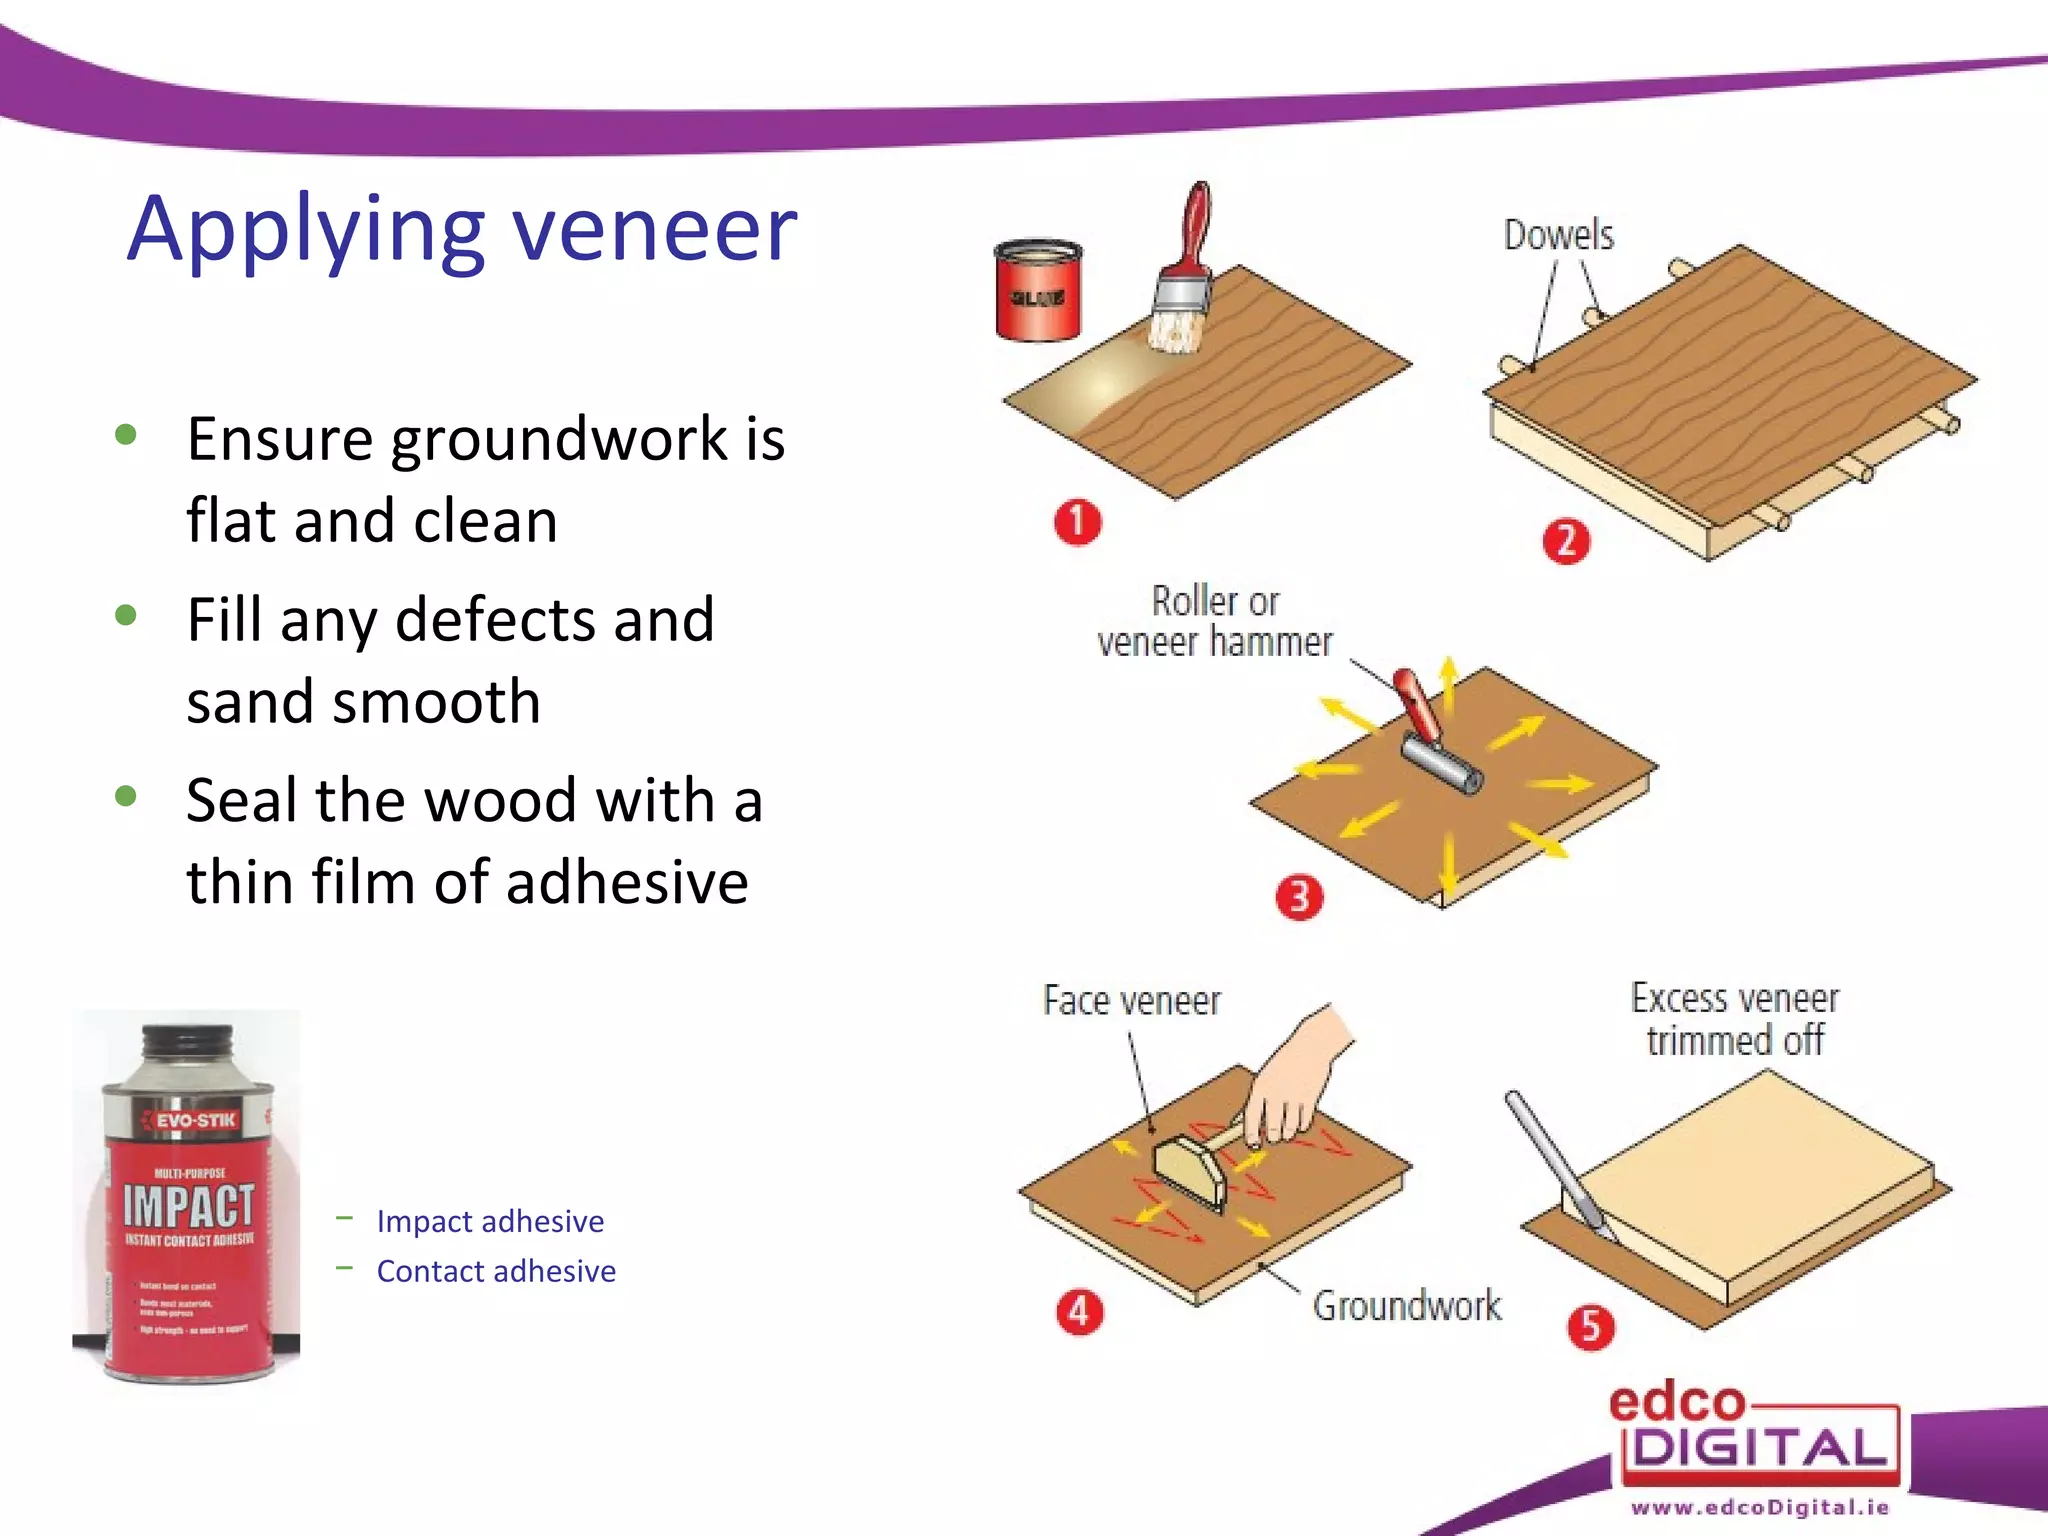
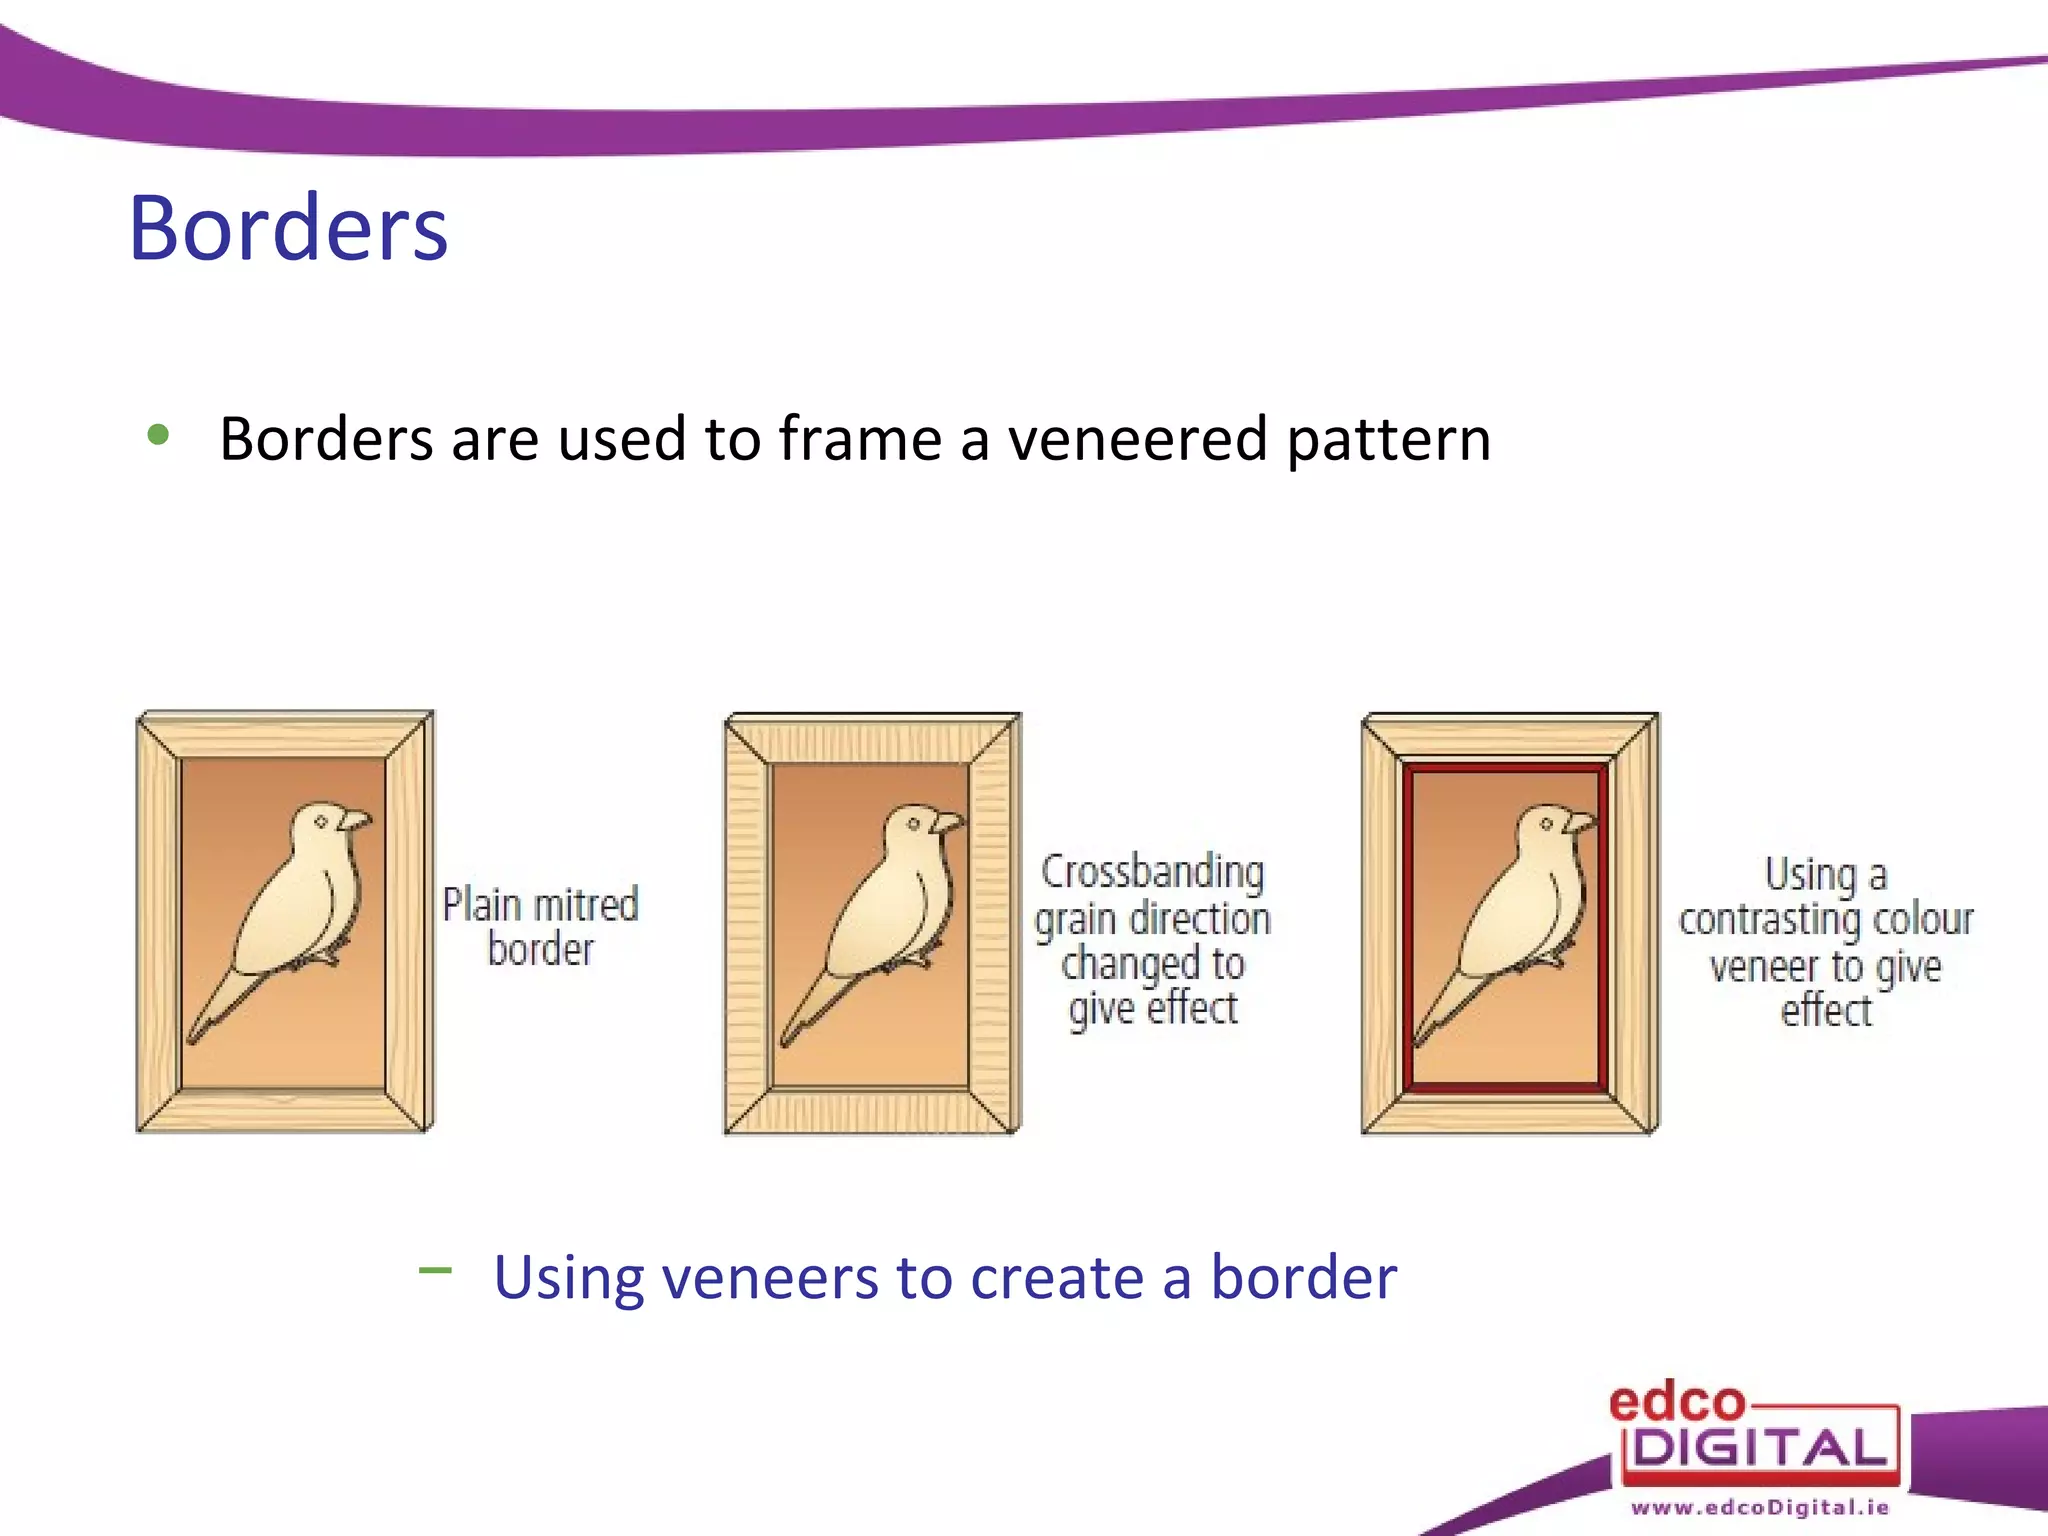
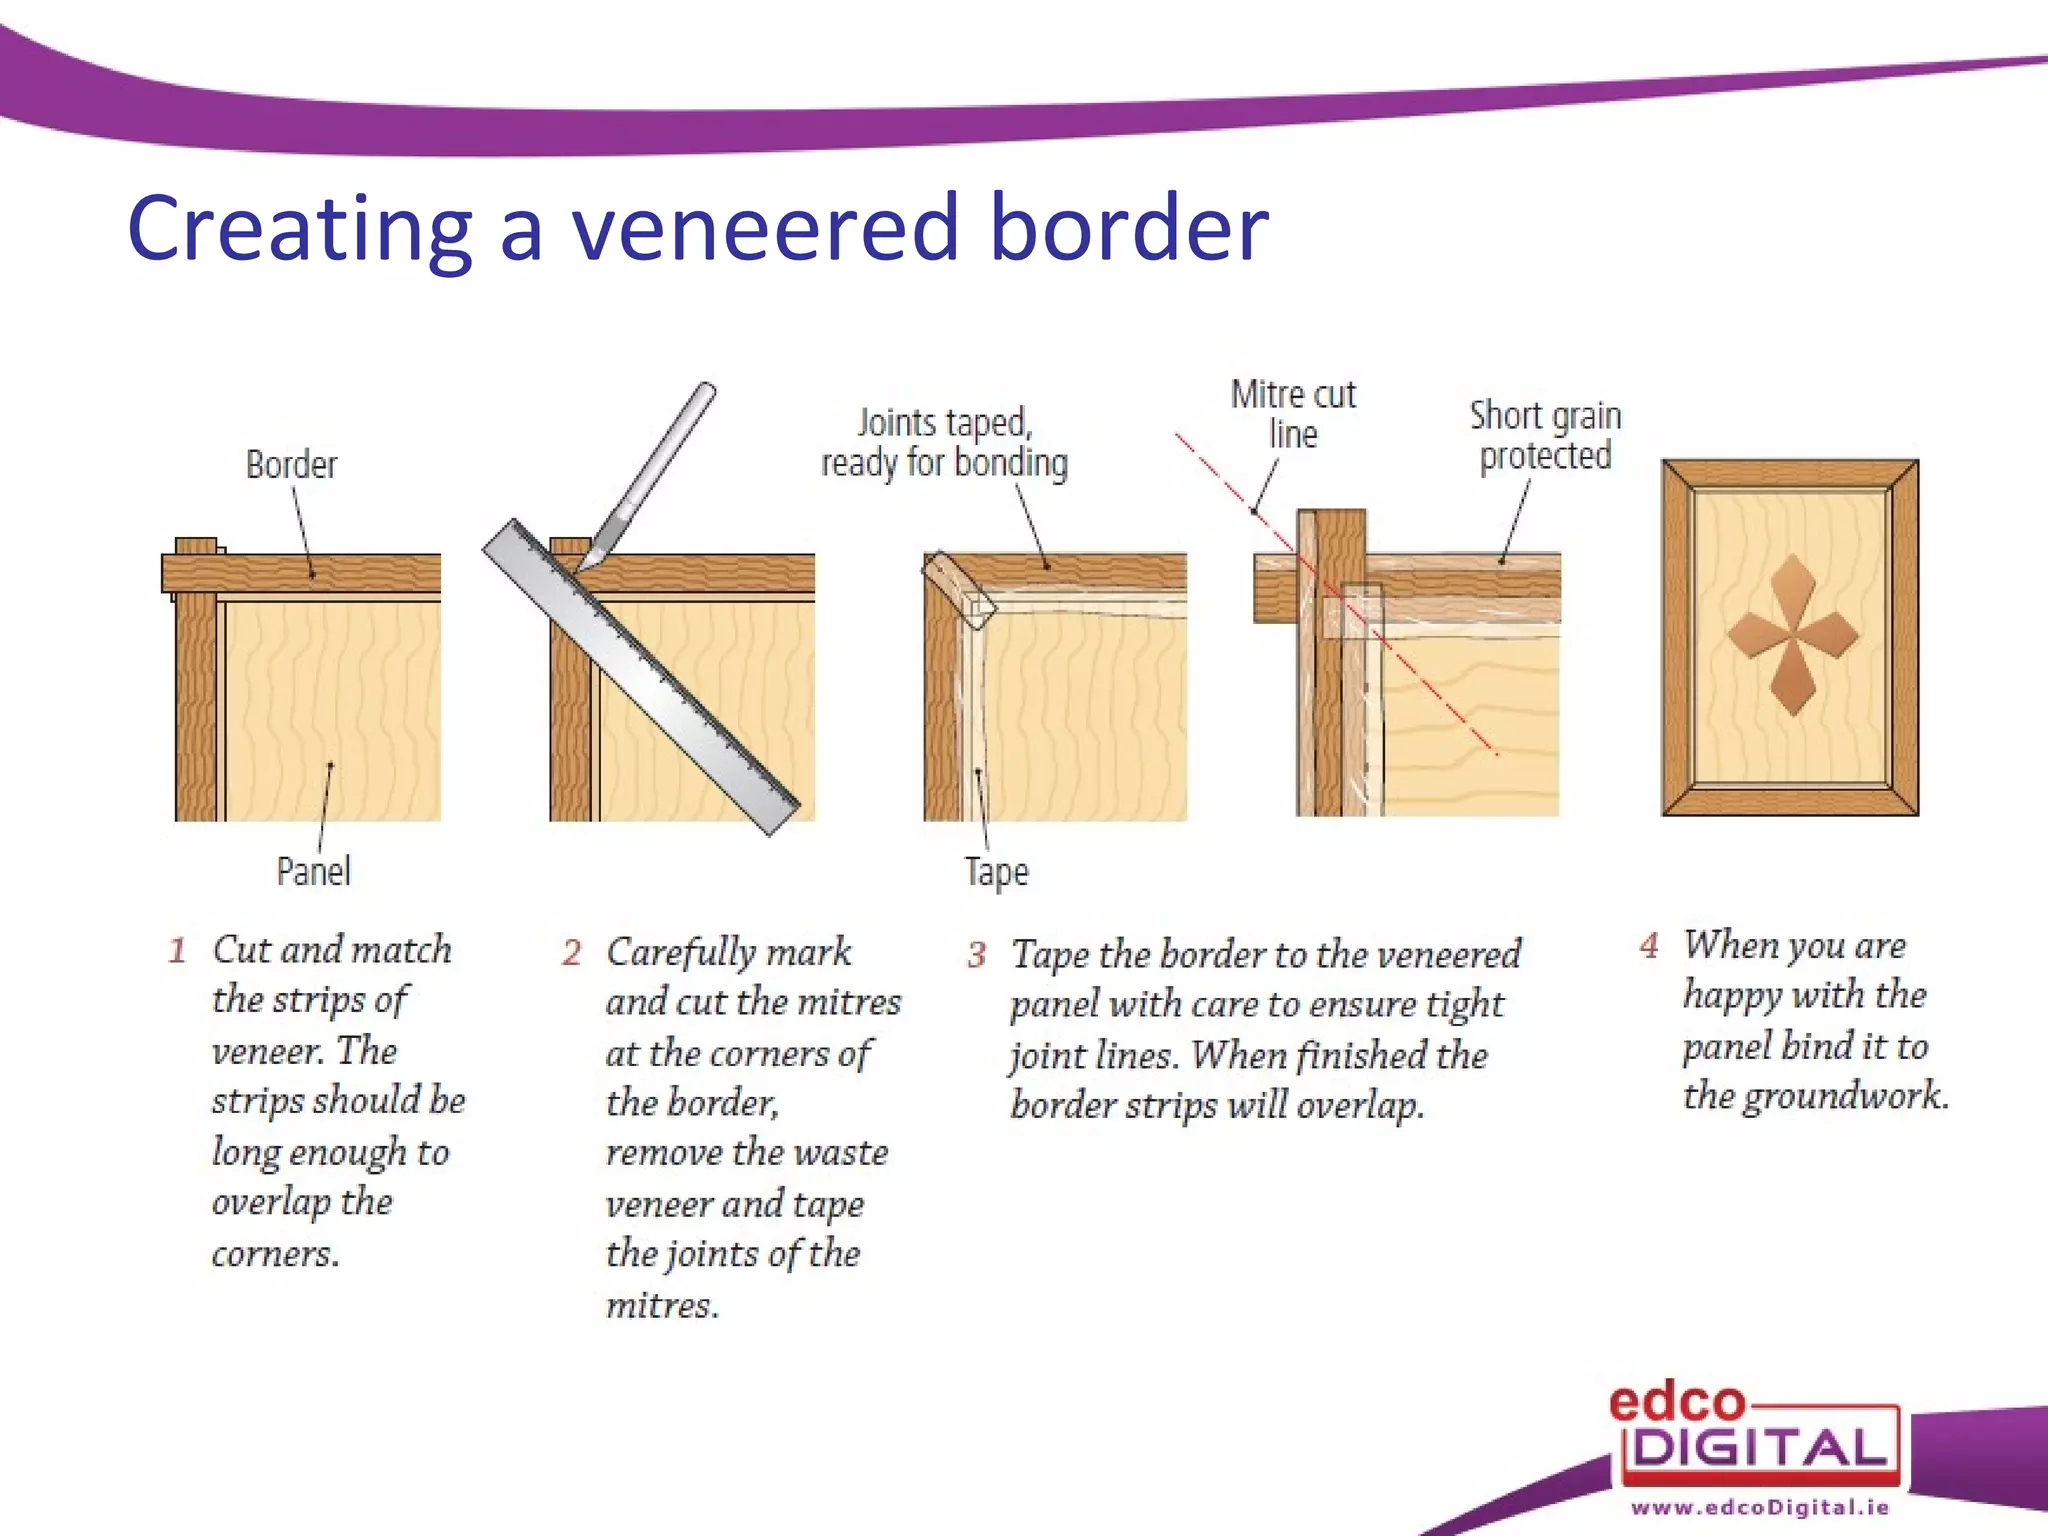
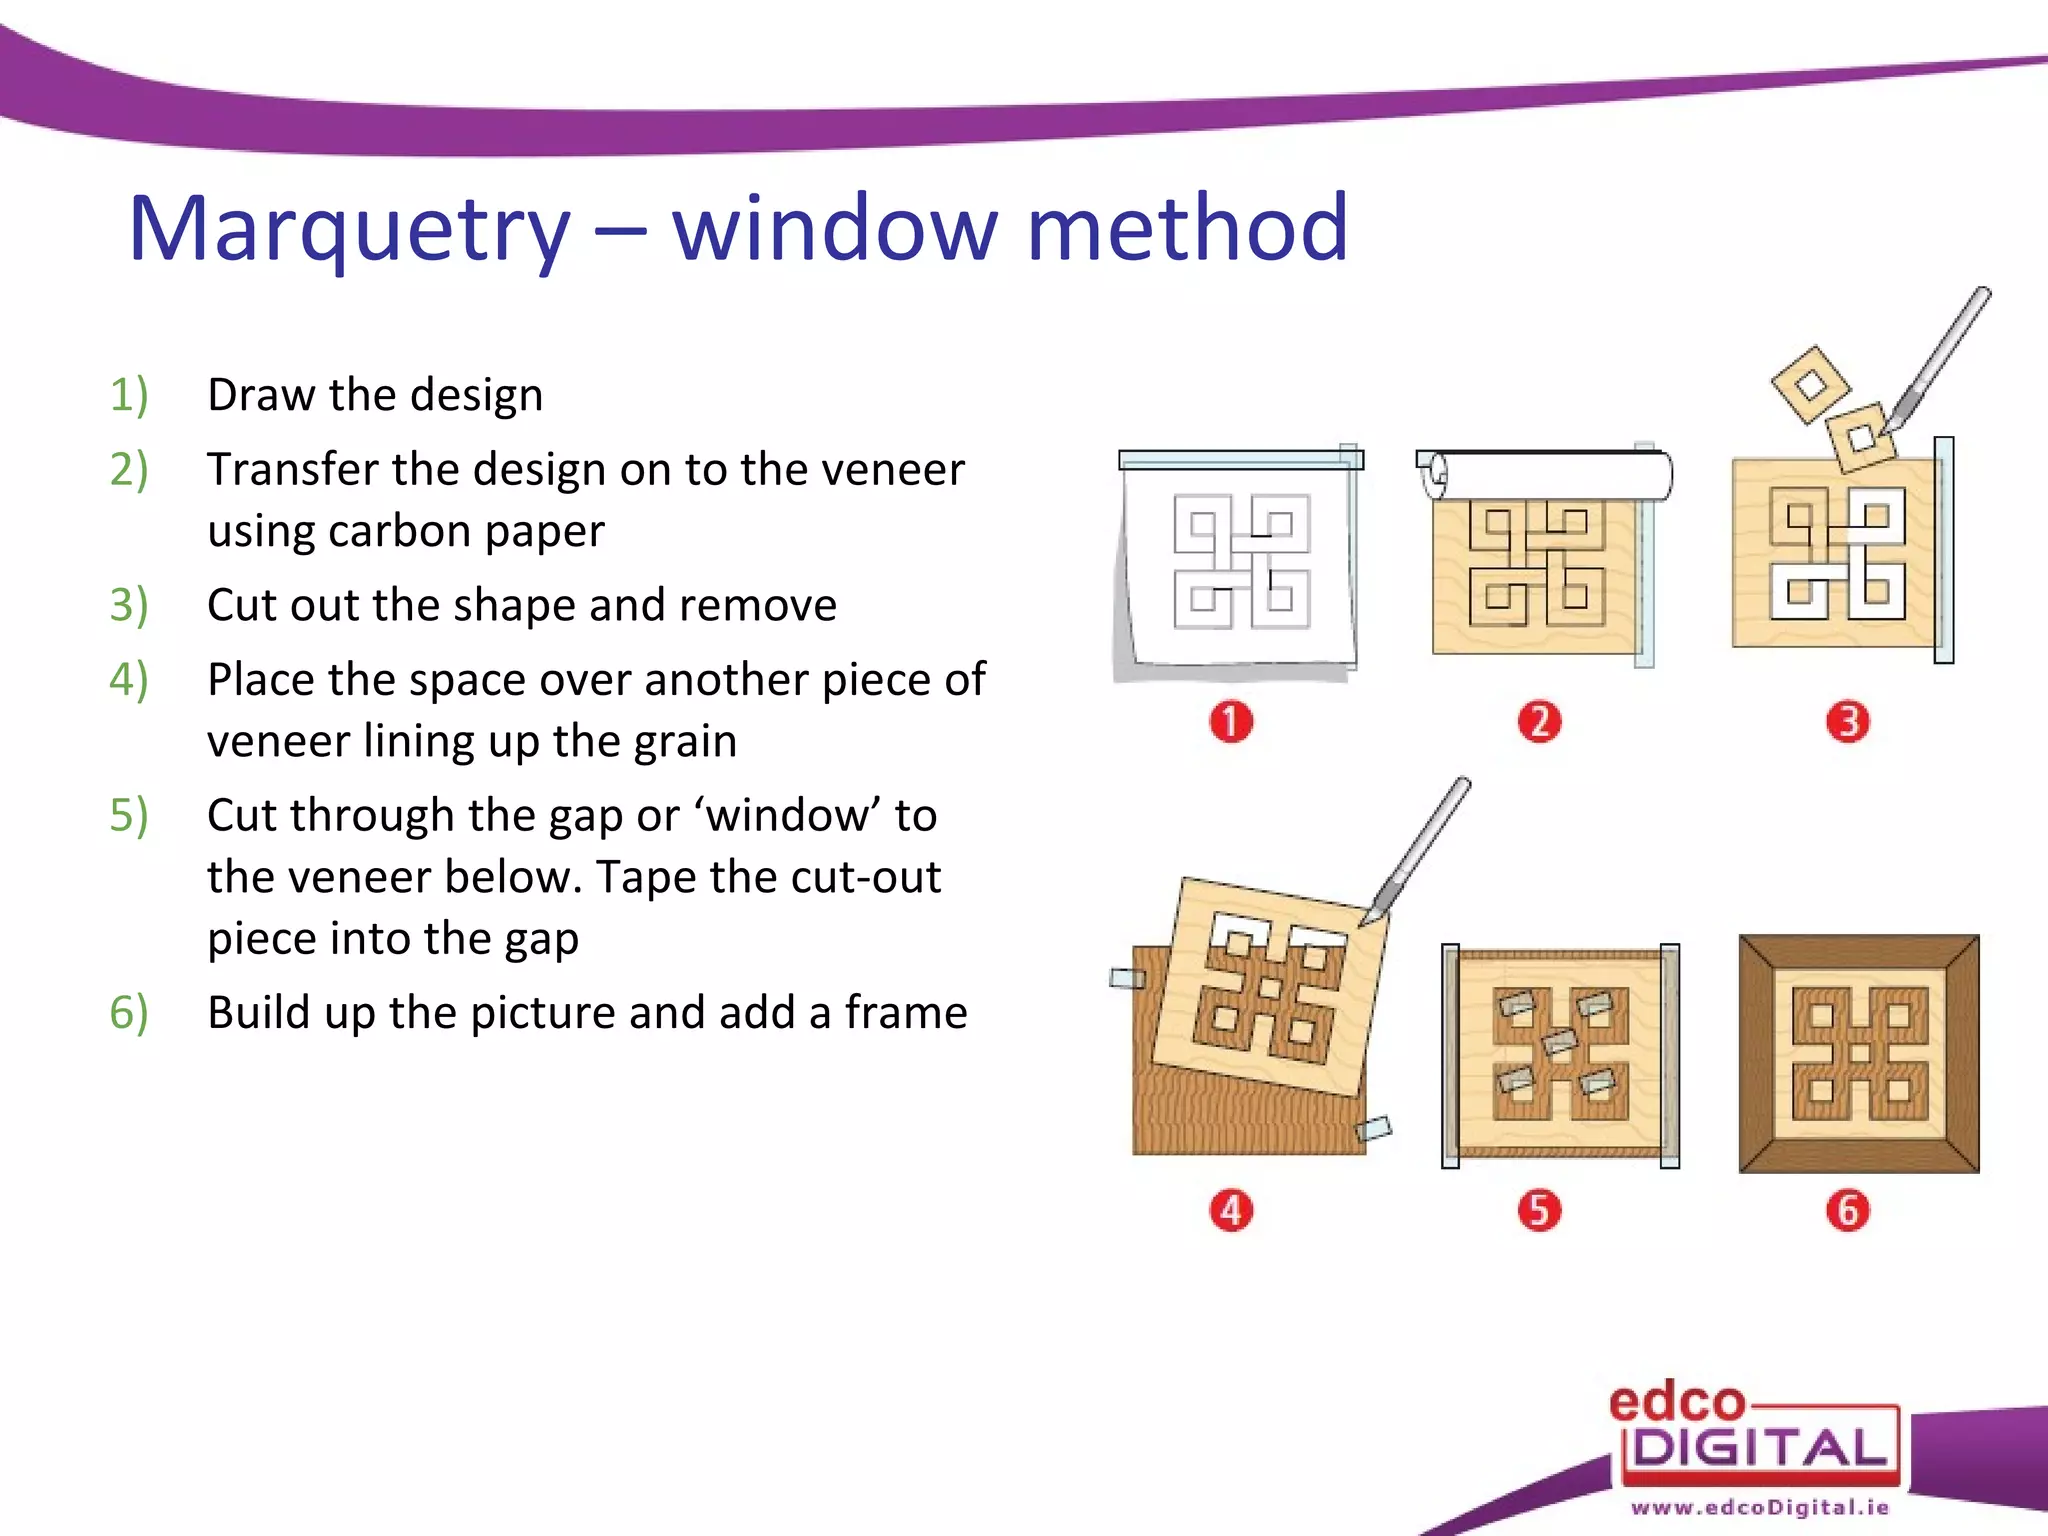
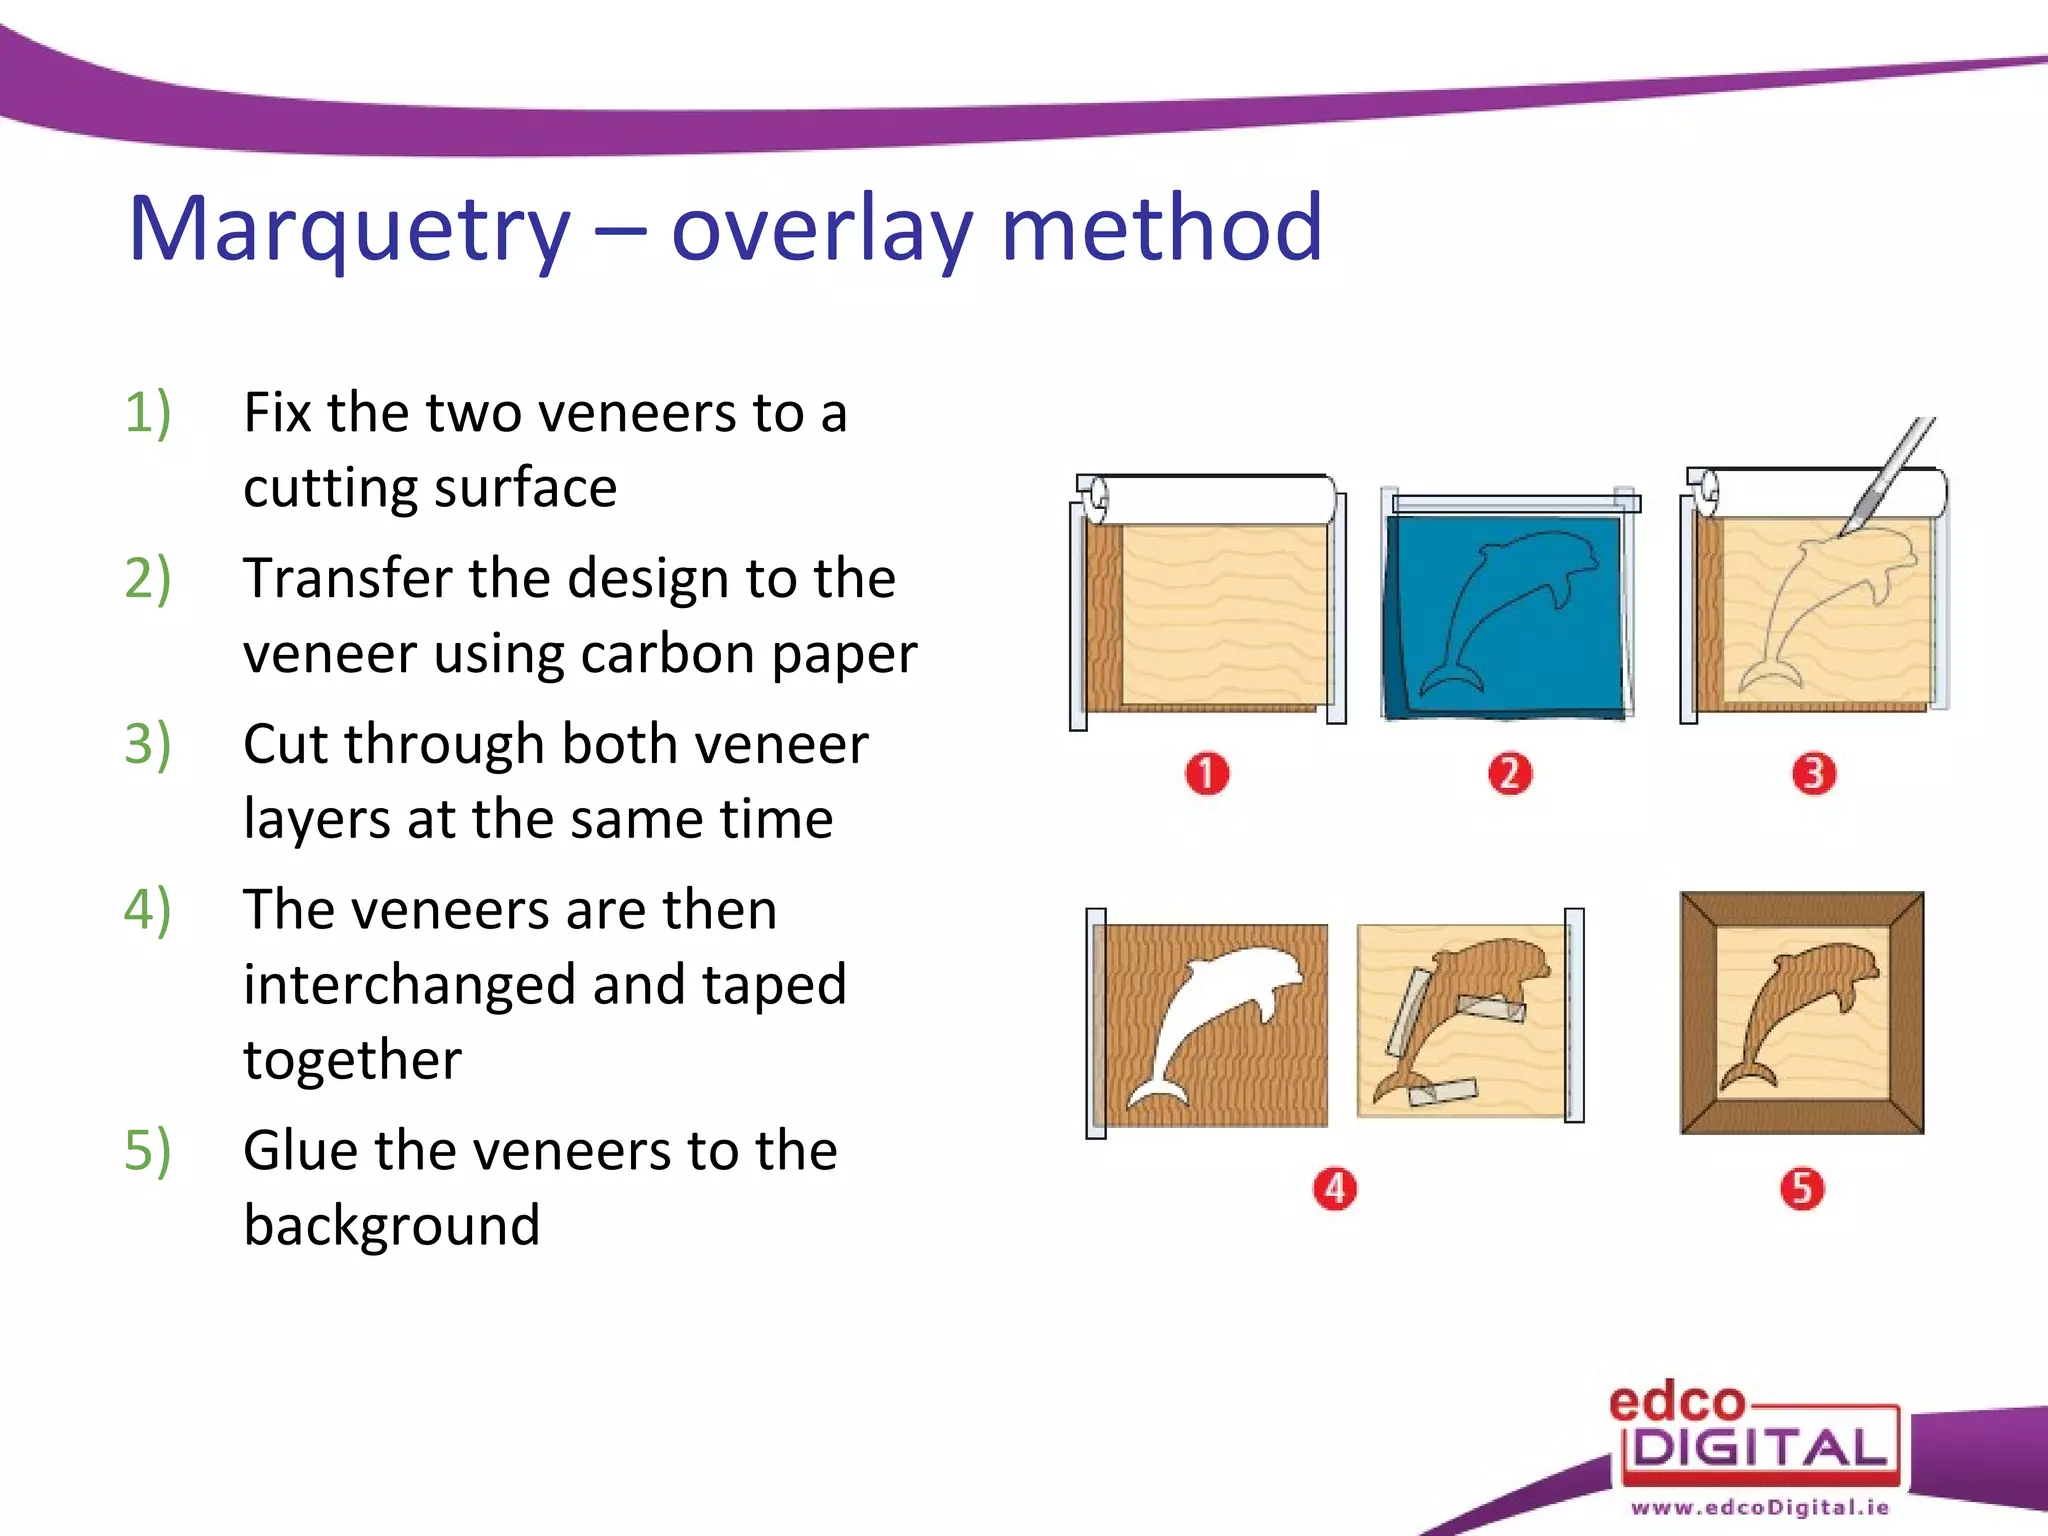
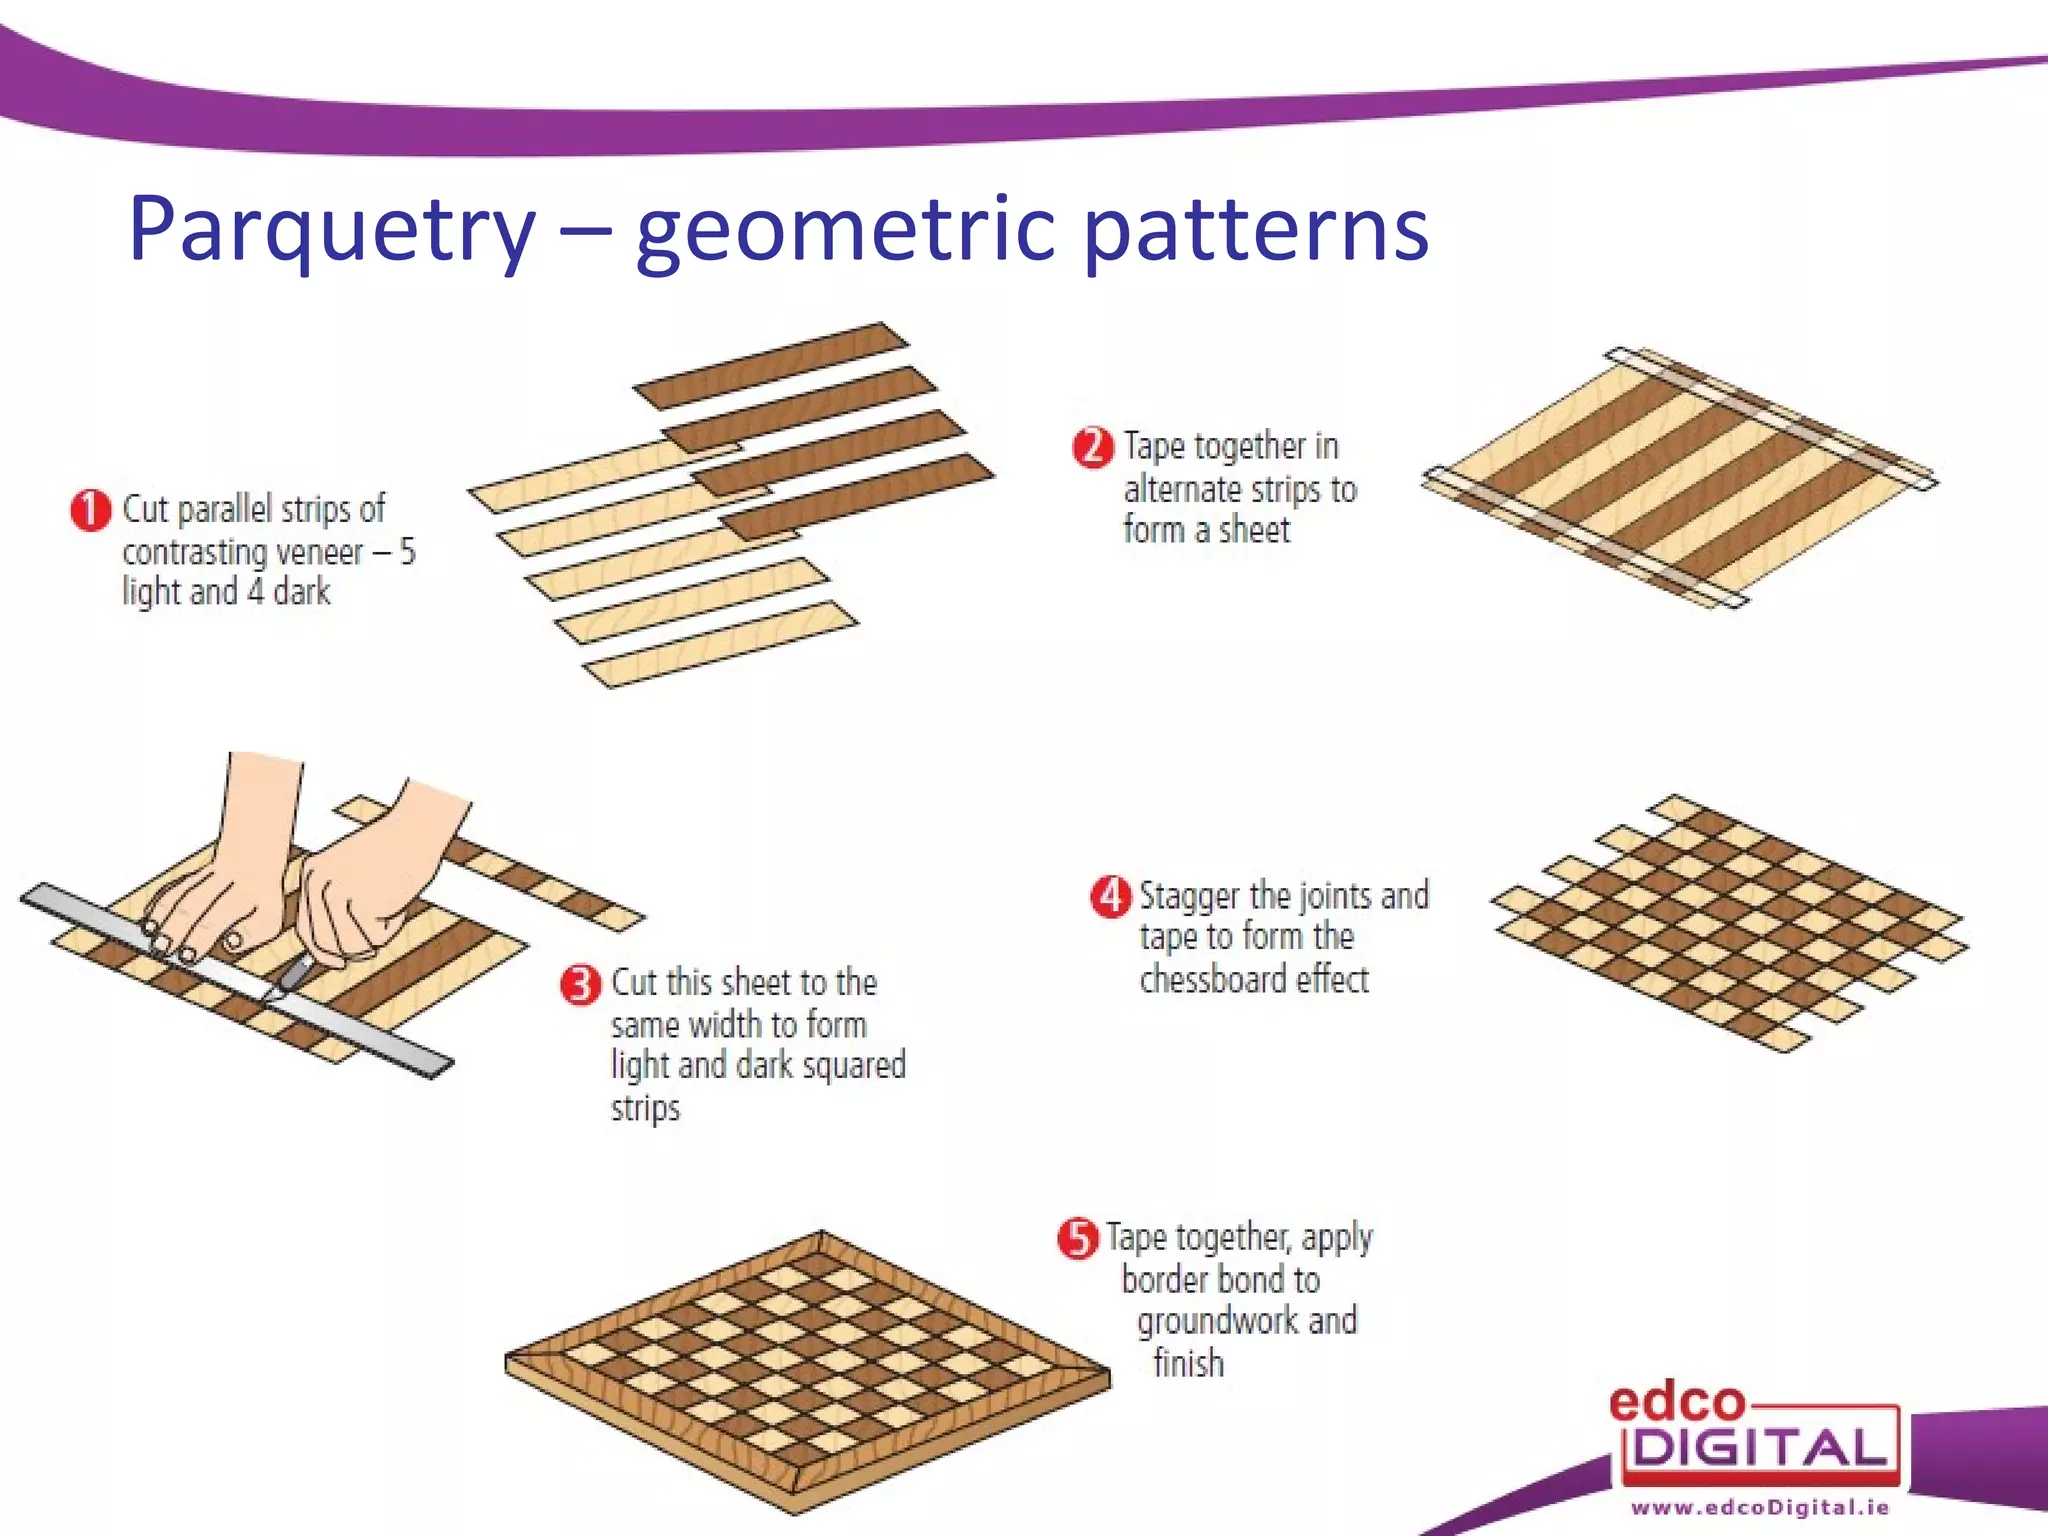
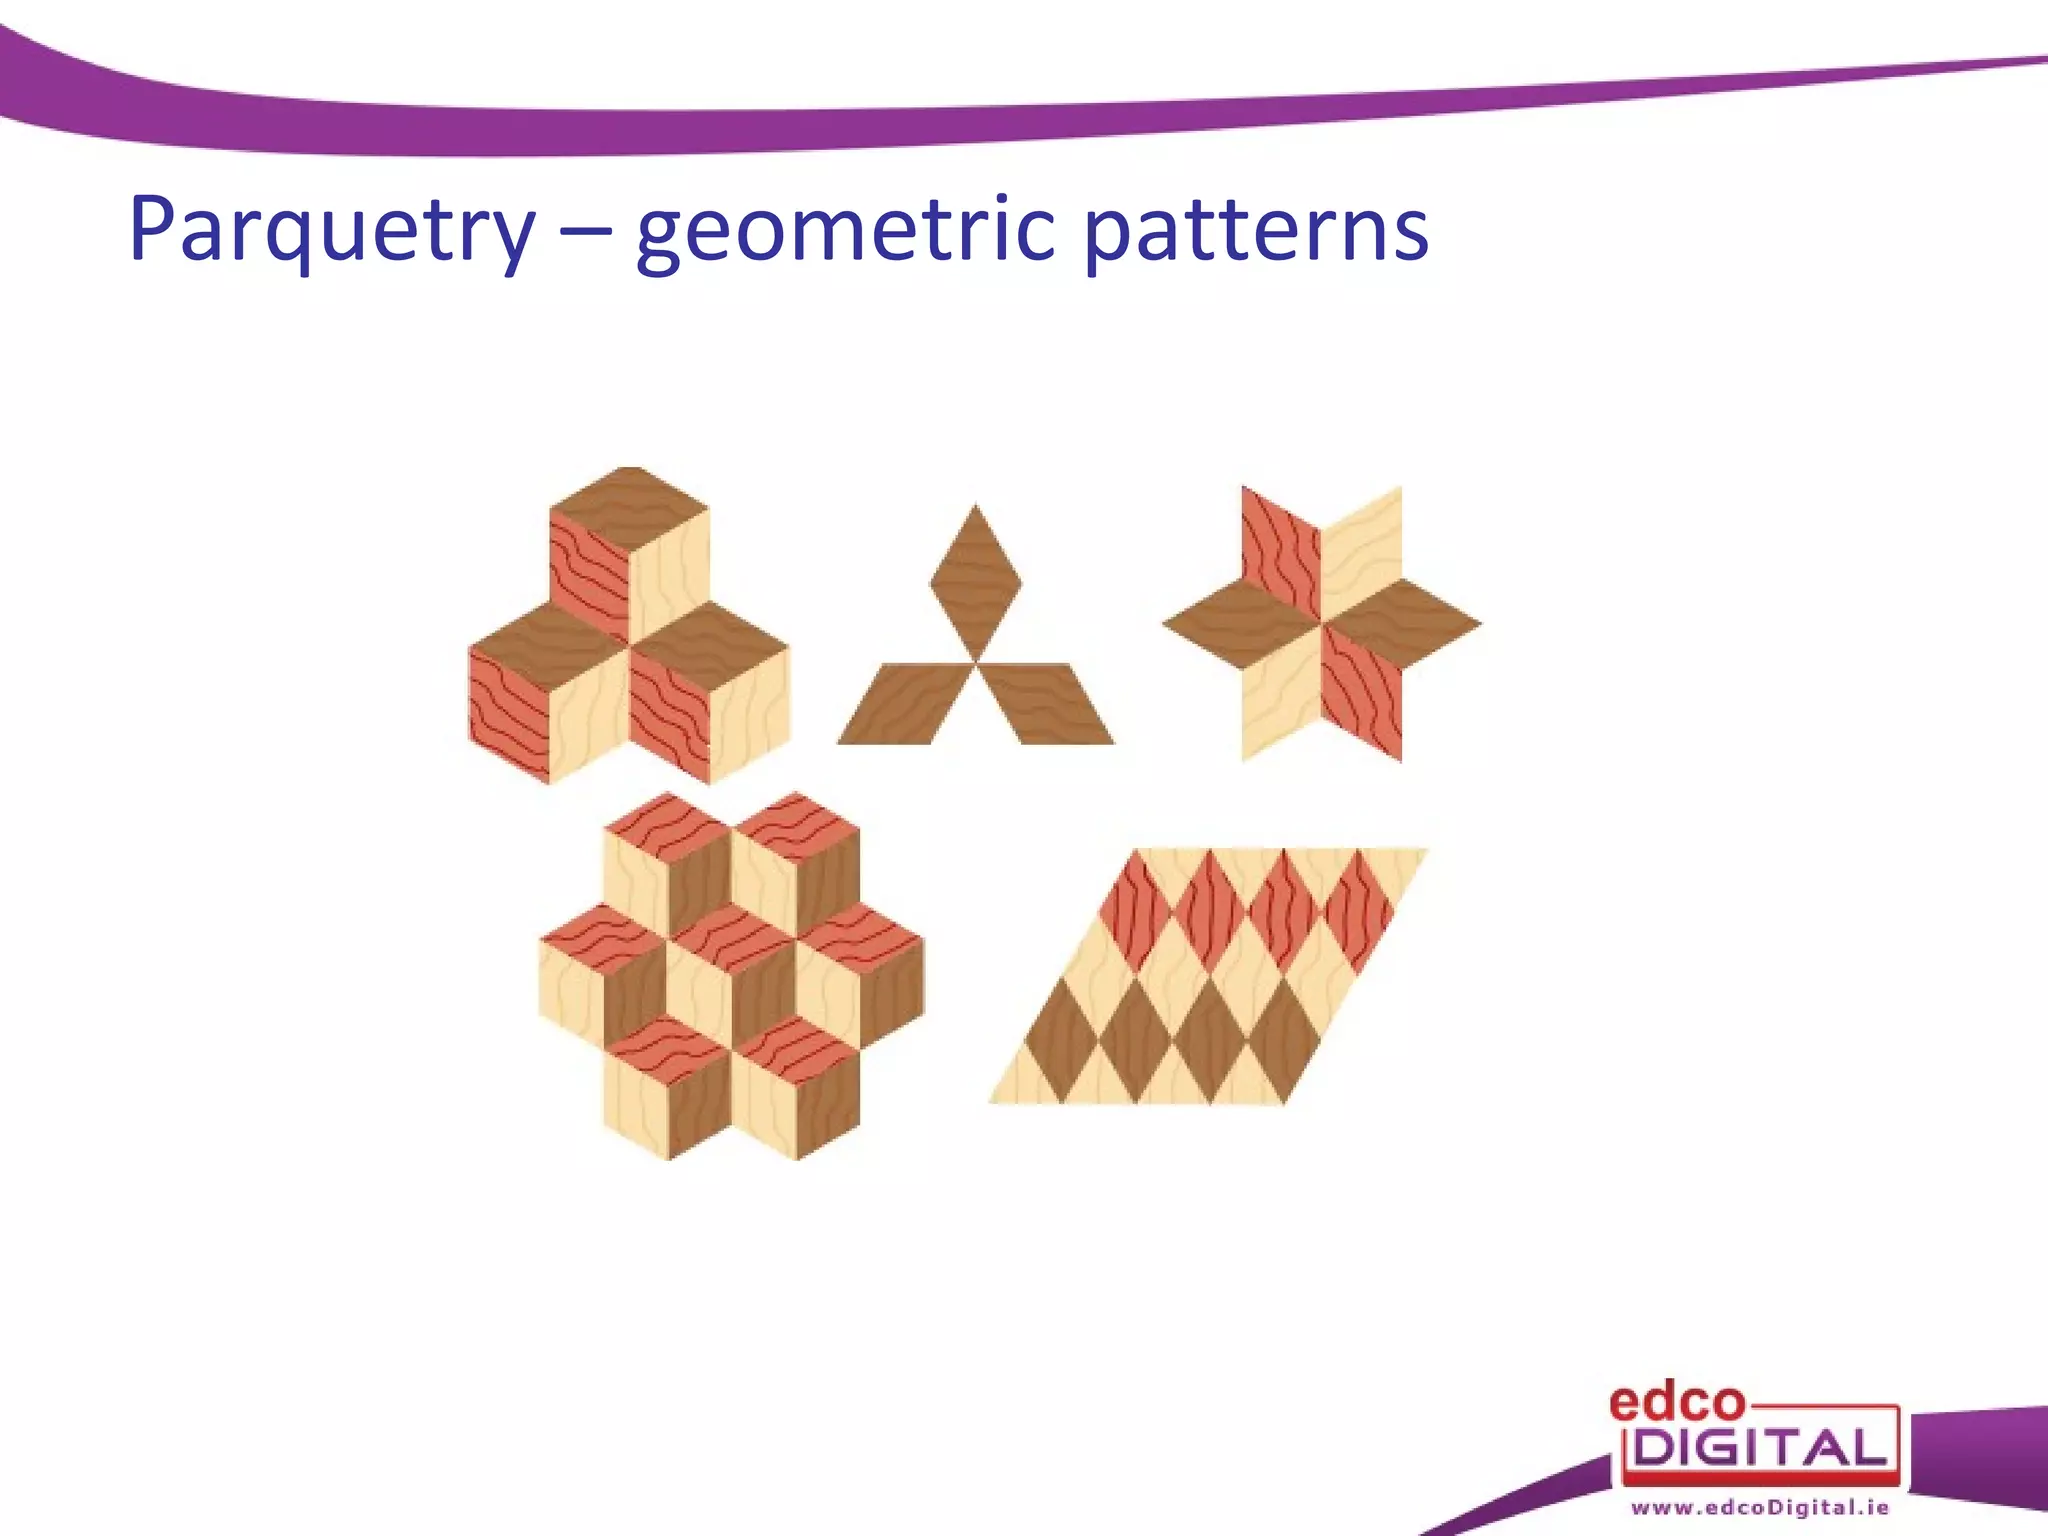
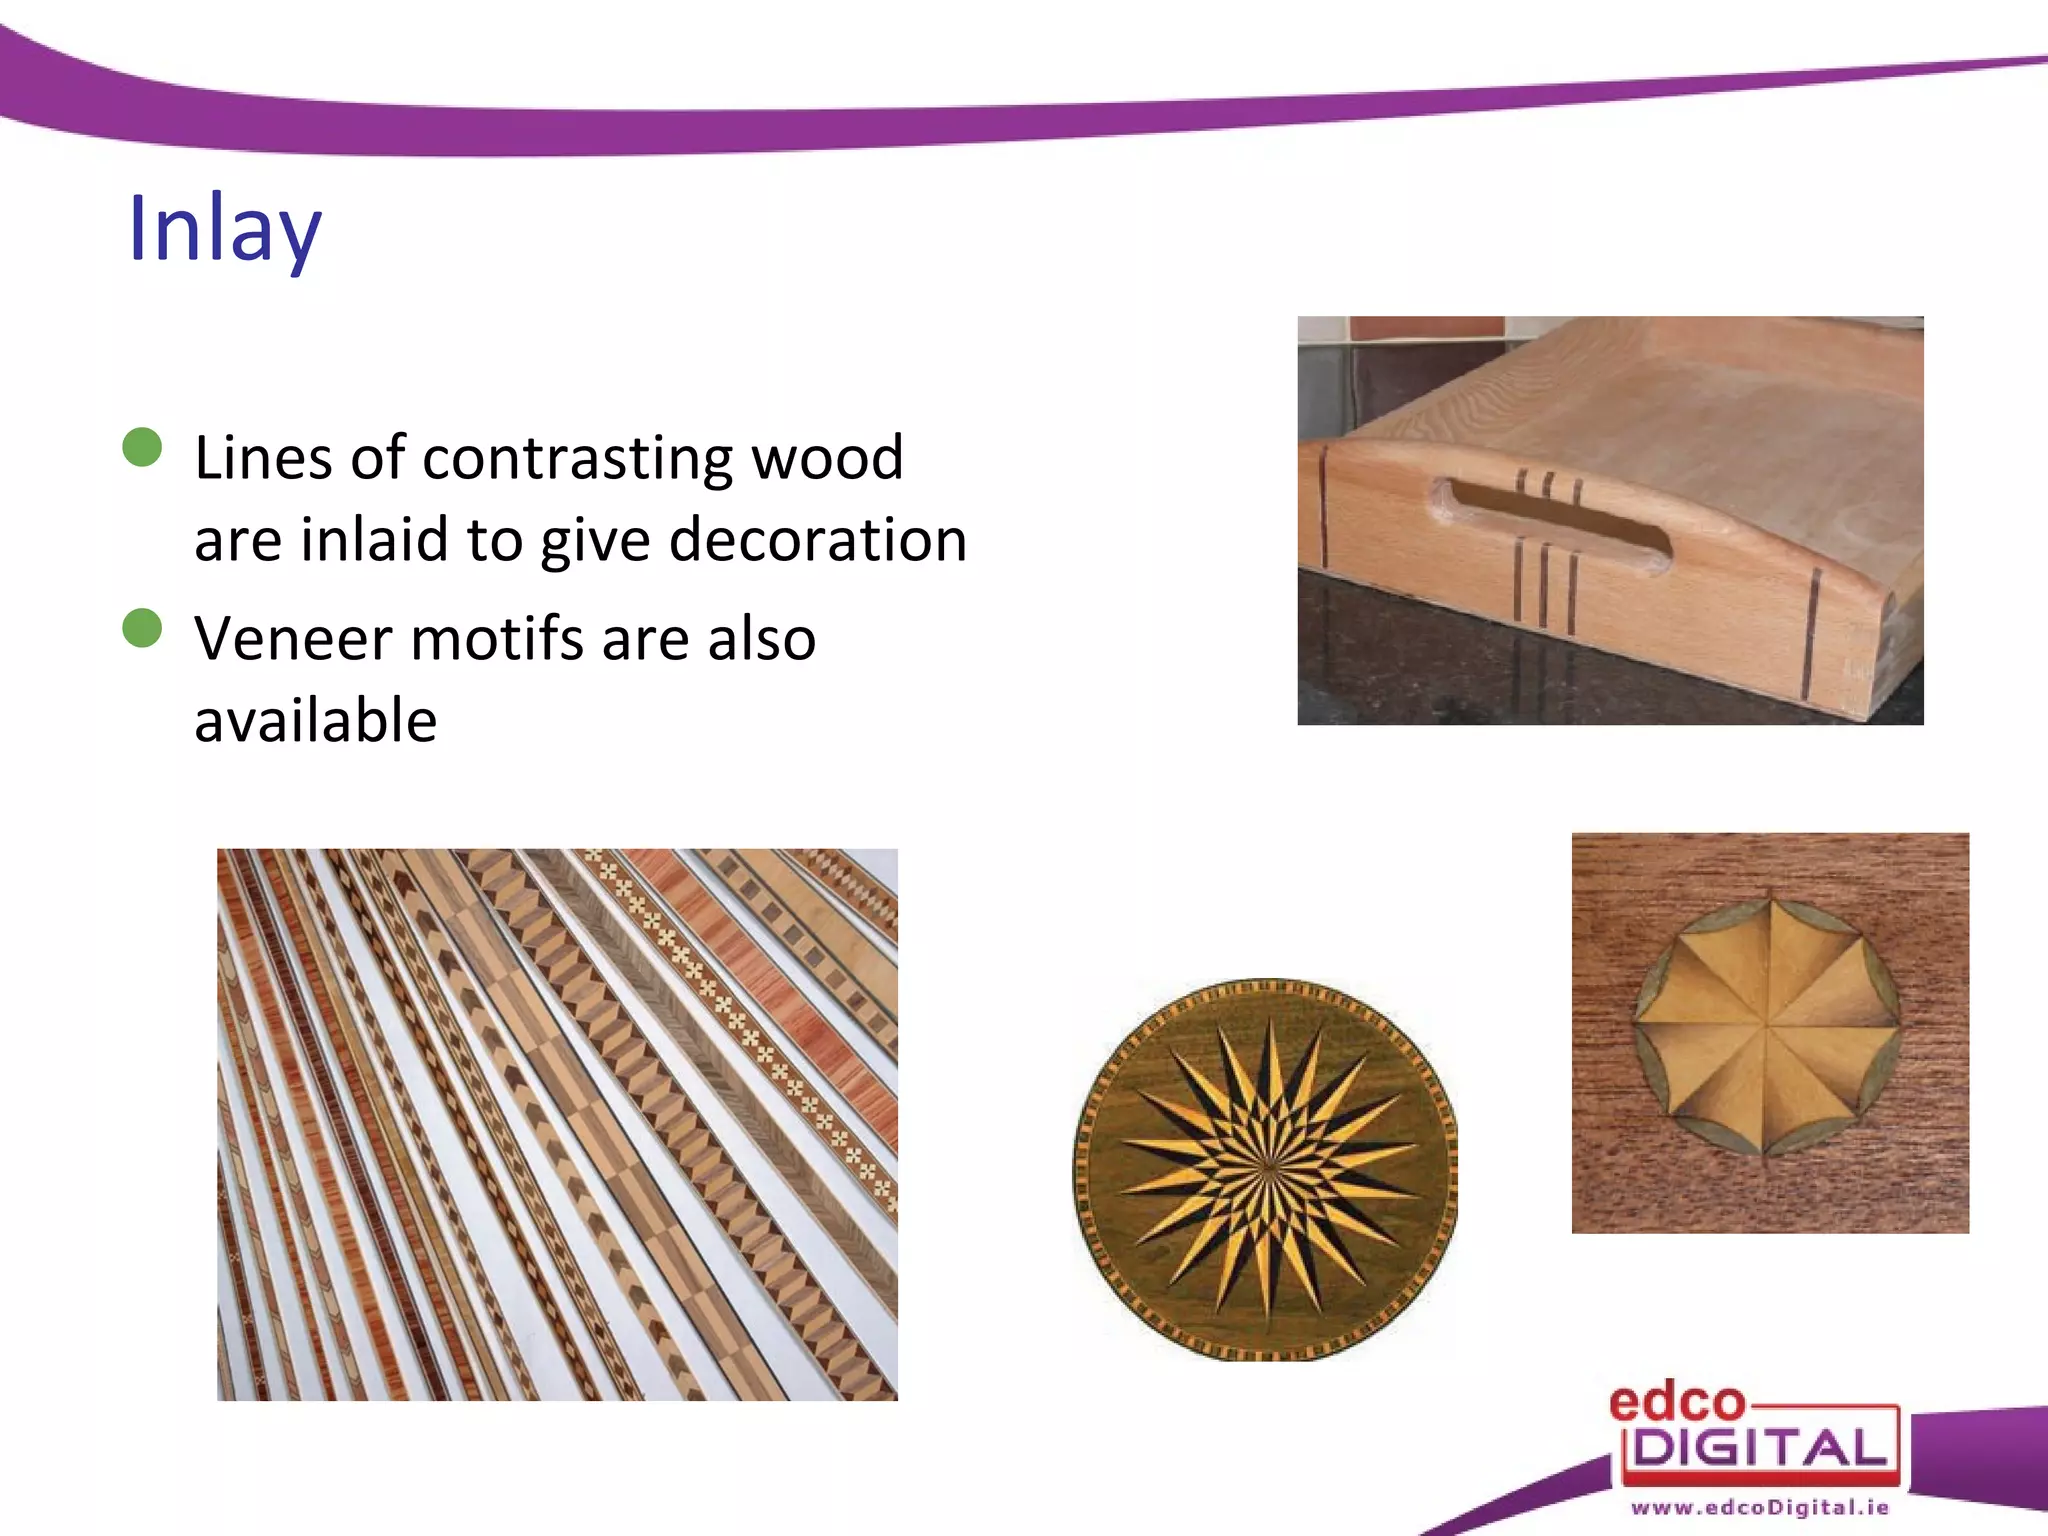
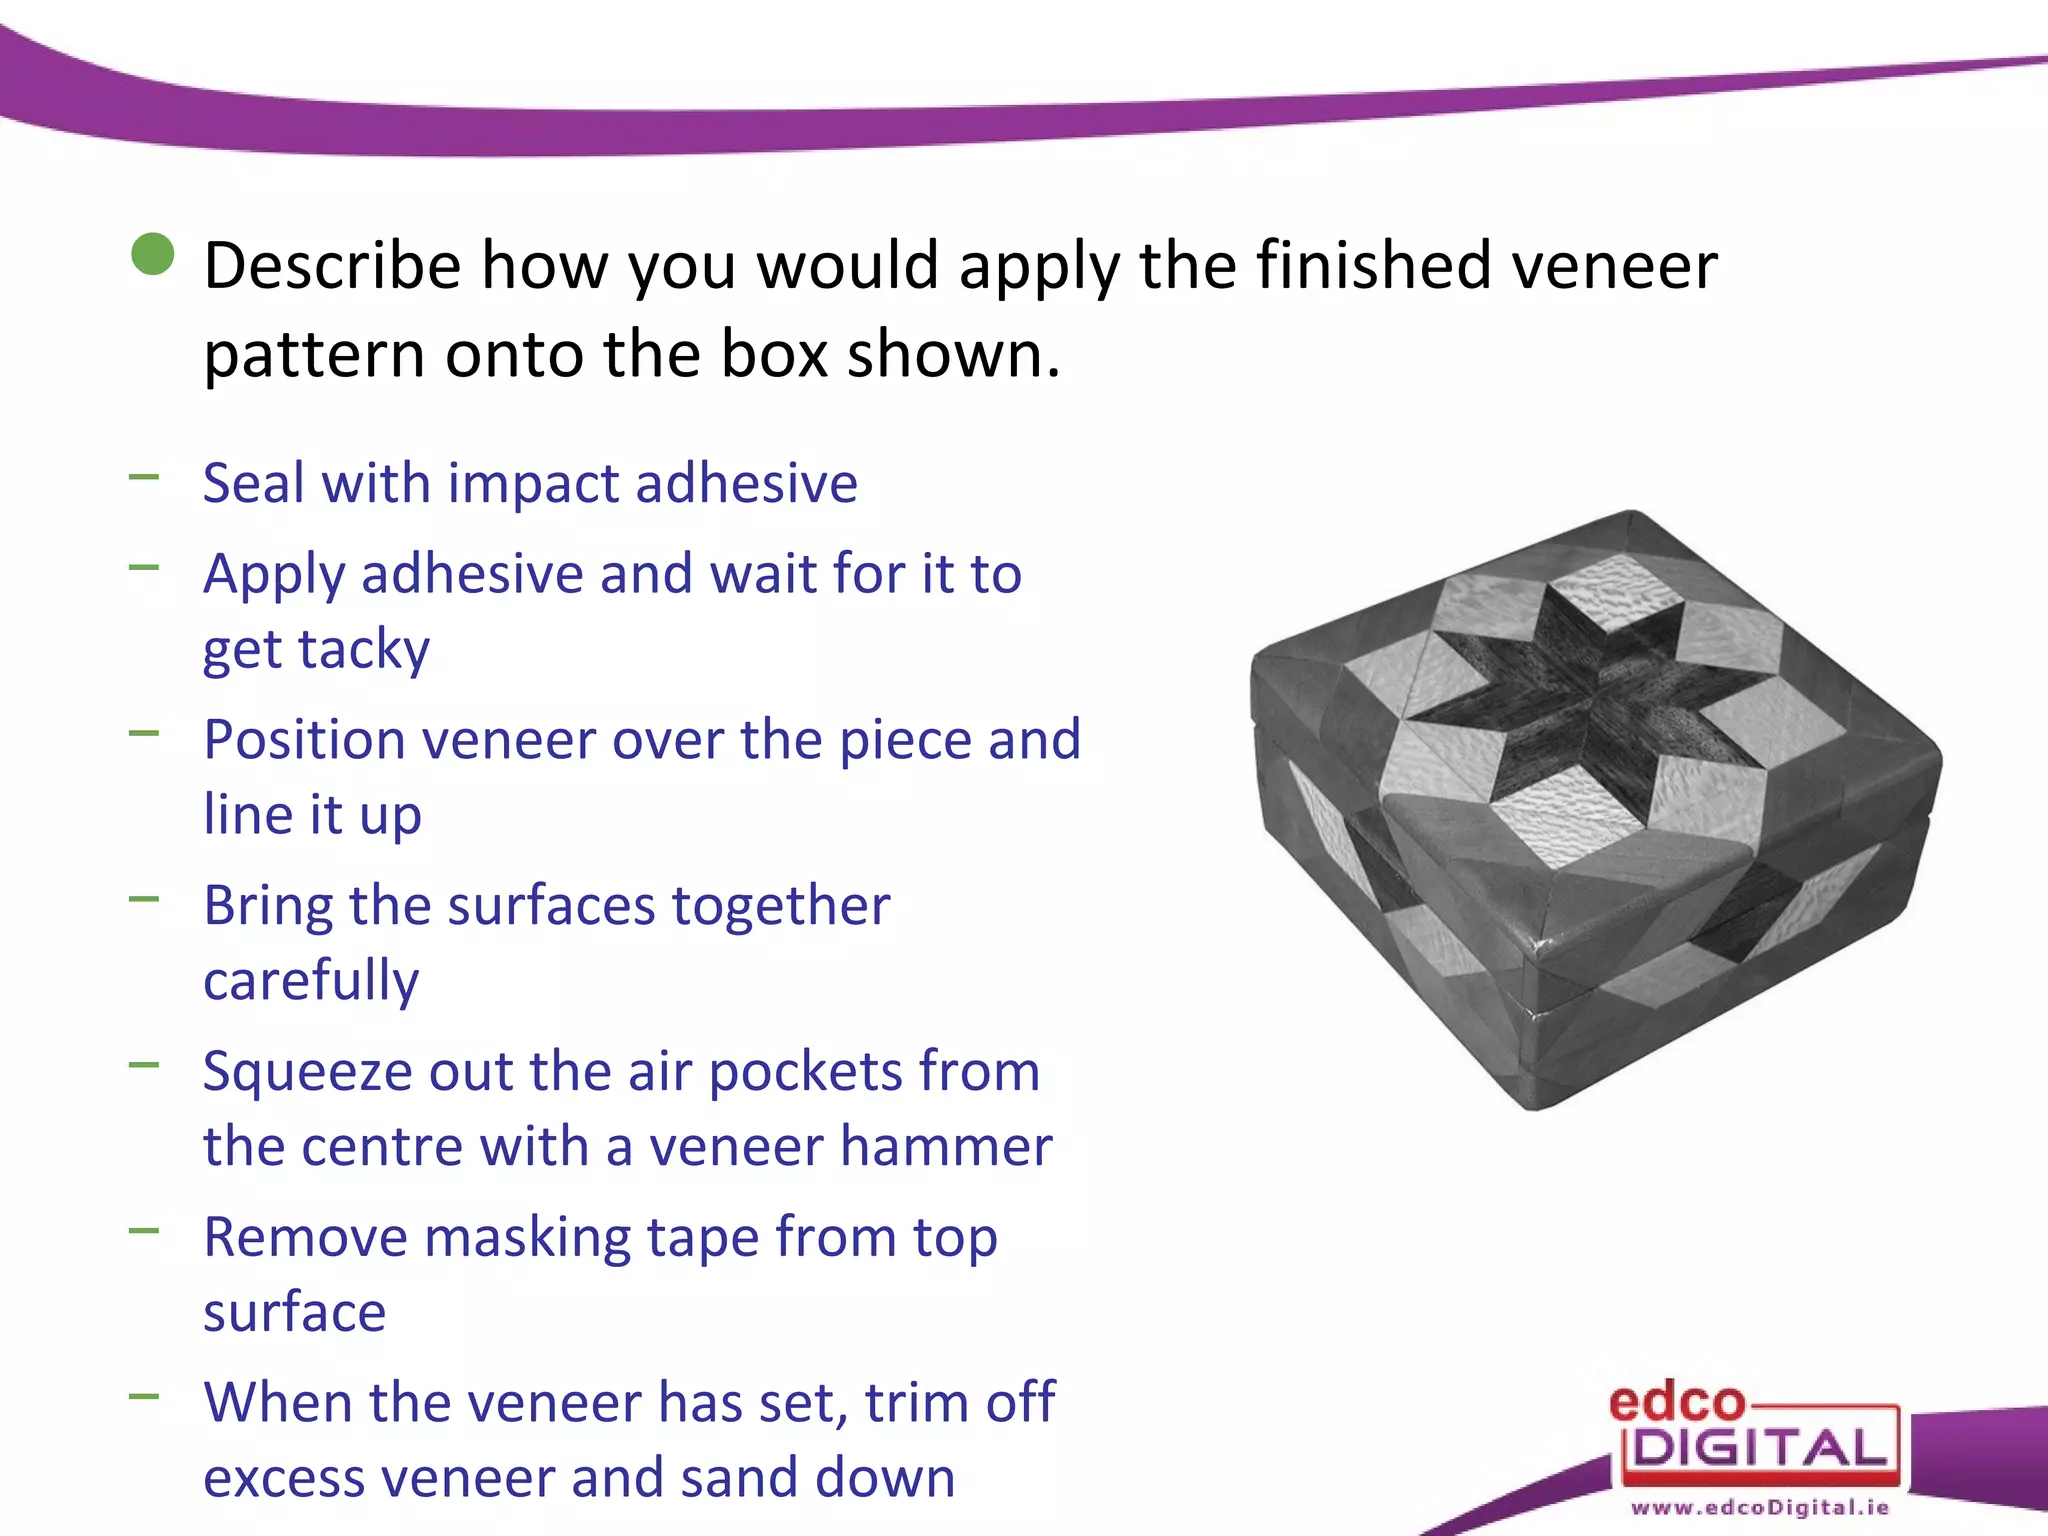
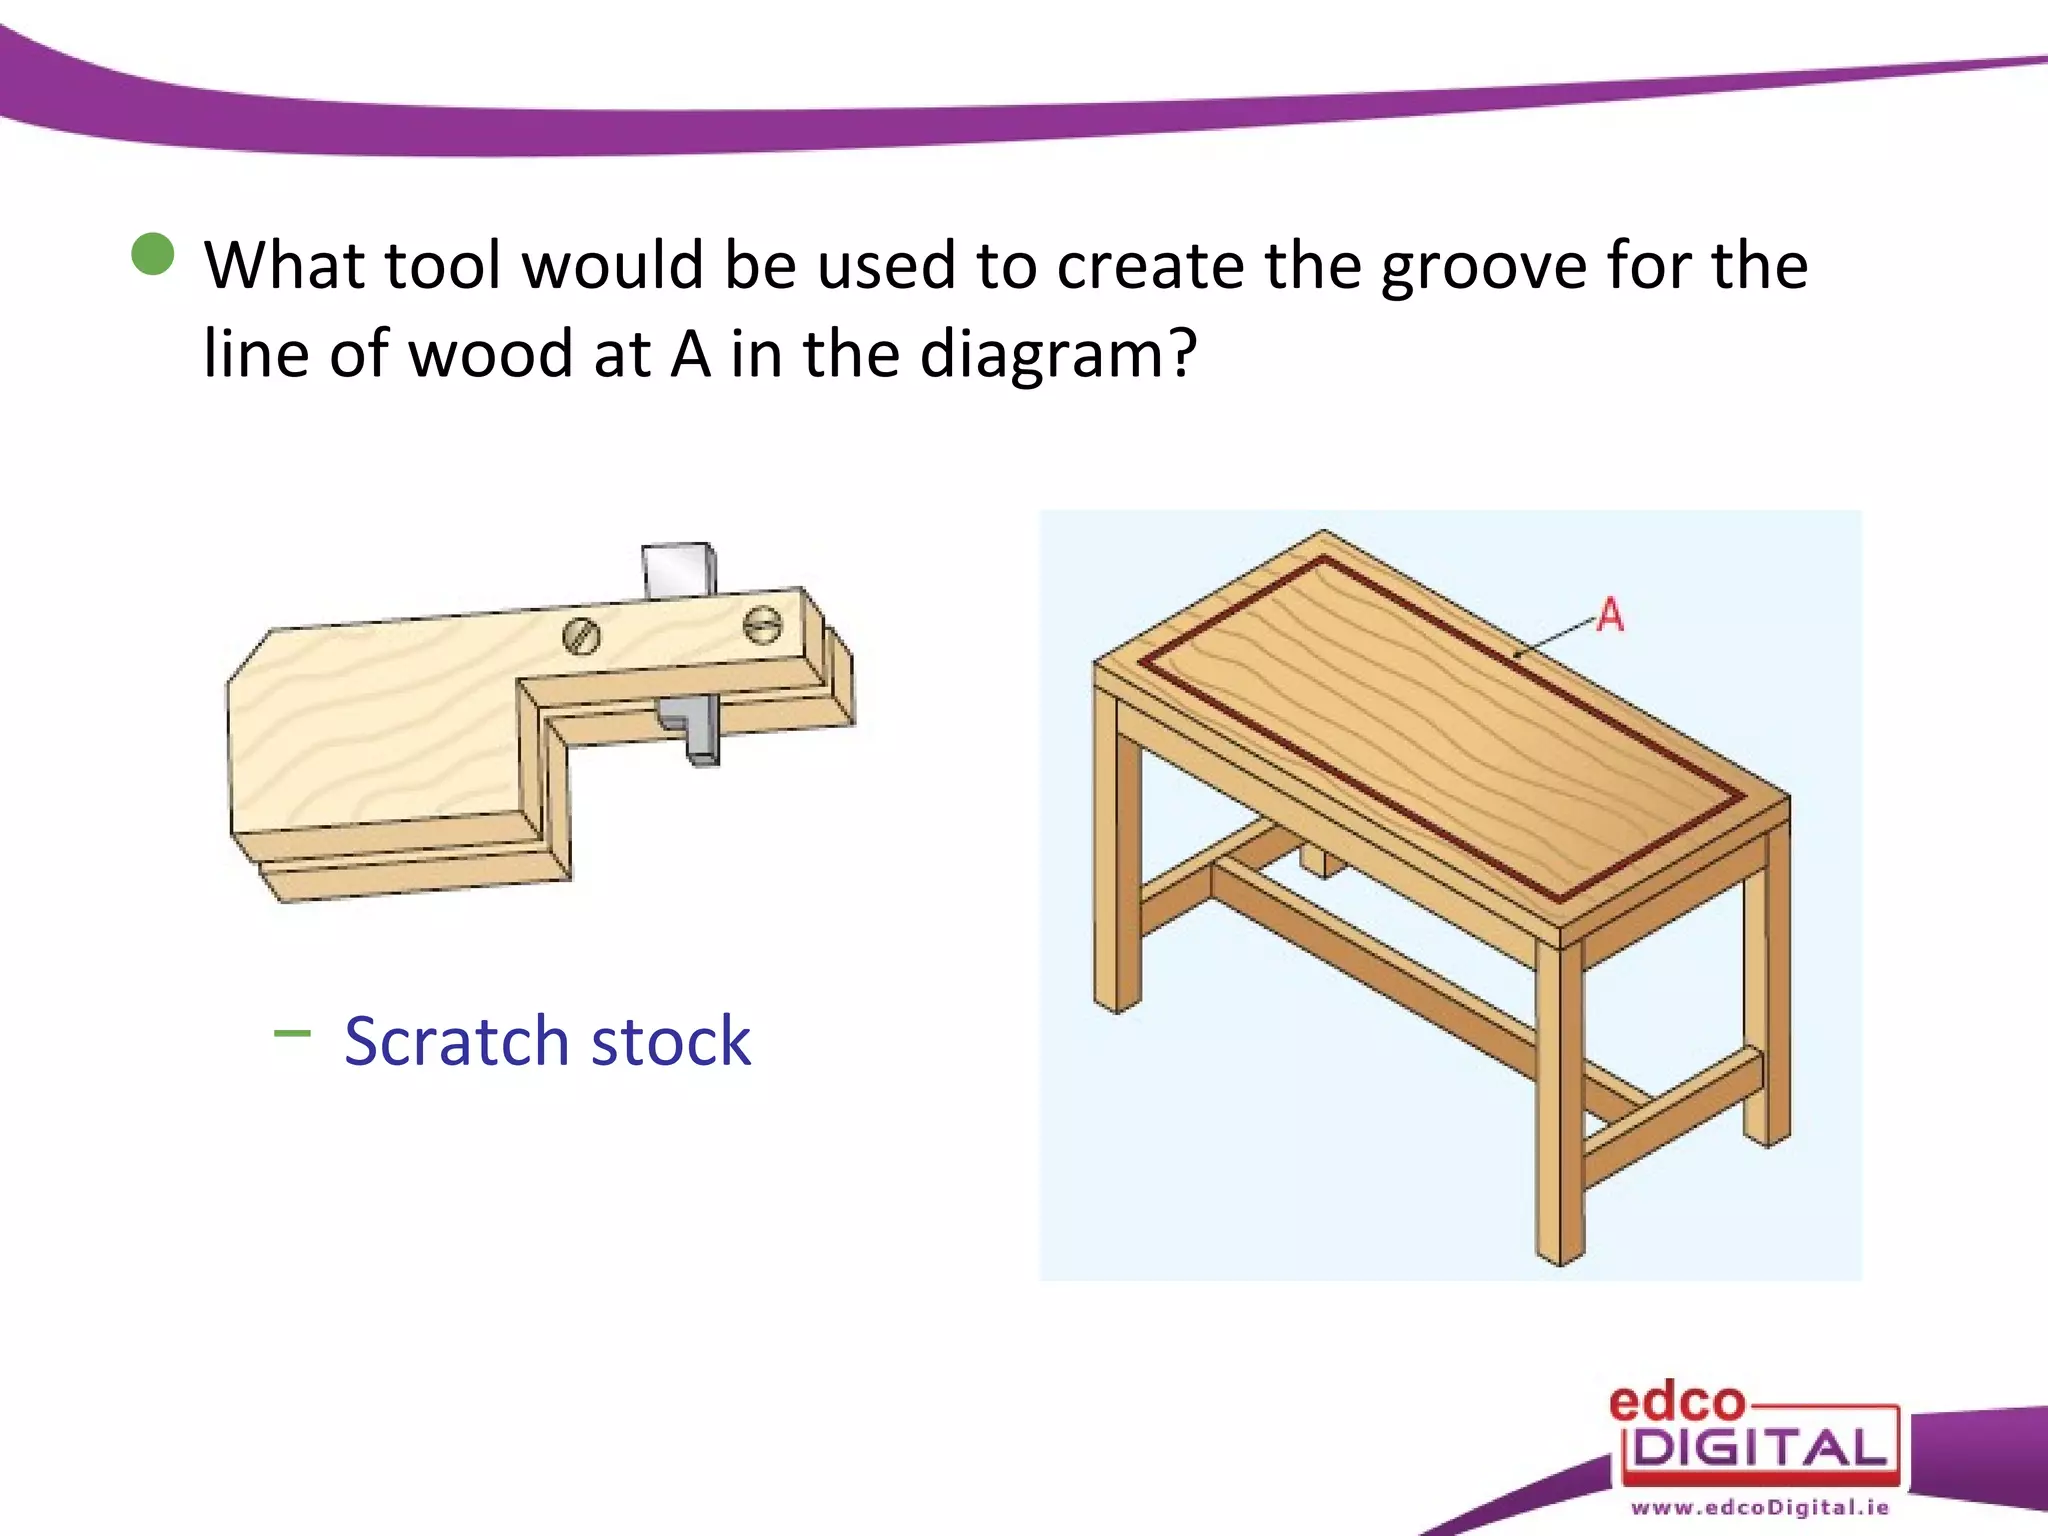
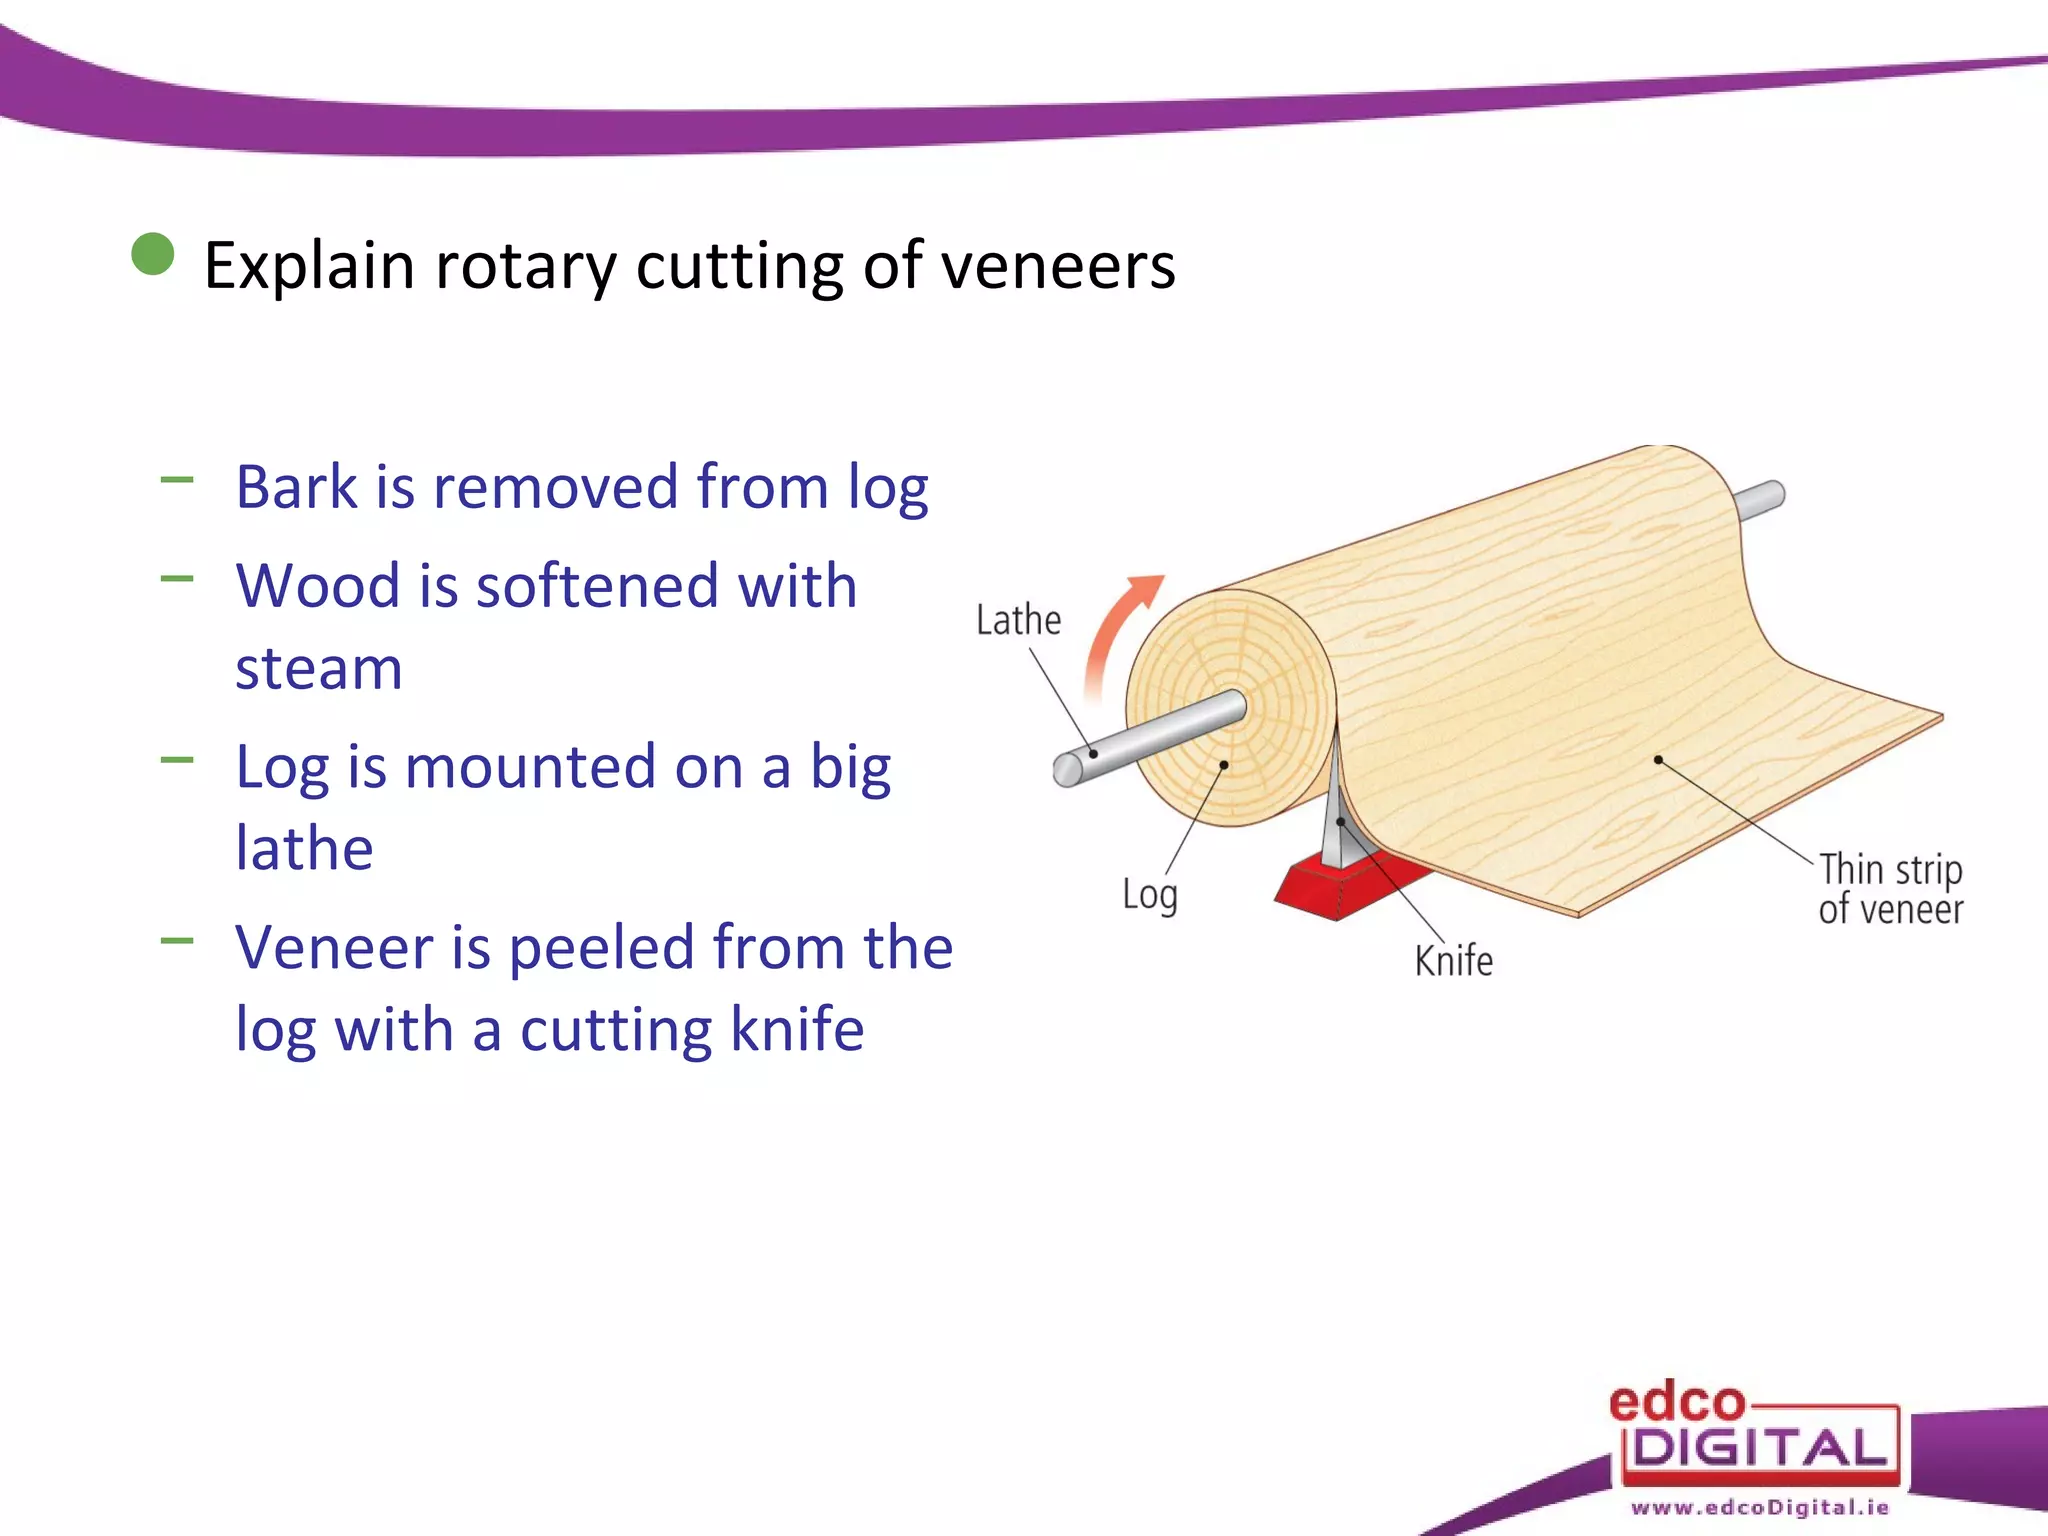
WOOD

MATERIALS TECHNOLOGY
4th Edition
Chapter 26
Veneering and Inlay
Veneering
 Veneers are thin sheets of wood
 Advantages of veneering
– Rare and expensive woods are
used efficiently
– Large areas of wood are covered
without risk of splitting
– Veneers are used to make
decorative patterns
Groundwork
 Base onto which the veneer is bonded
 Plywood and MDF make good groundwork
 Counter veneering with a cheaper veneer helps to prevent warping in
the board

Groundwork
Cutting veneers
 Veneer is cut with a sharp
knife or scalpel
– Take care to cut away from
yourself and mind your
fingers
– Score the veneer a number
of times to cut through
Matching veneer
 When matching
the veneers, it is
important to line
up the grain
carefully to get the
best result
Applying veneer
• Ensure groundwork is
flat and clean
• Fill any defects and
sand smooth
• Seal the wood with a
thin film of adhesive

− Impact adhesive
− Contact adhesive
Borders
• Borders are used to frame a veneered pattern

− Using veneers to create a border
Creating a veneered border
Marquetry – window method
1)
2)
3)
4)
5)

6)

Draw the design
Transfer the design on to the veneer
using carbon paper
Cut out the shape and remove
Place the space over another piece of
veneer lining up the grain
Cut through the gap or ‘window’ to
the veneer below. Tape the cut-out
piece into the gap
Build up the picture and add a frame
Marquetry – overlay method
1)
2)
3)
4)

5)

Fix the two veneers to a
cutting surface
Transfer the design to the
veneer using carbon paper
Cut through both veneer
layers at the same time
The veneers are then
interchanged and taped
together
Glue the veneers to the
background
Parquetry – geometric patterns
Inlay
 Lines of contrasting wood
are inlaid to give decoration
 Veneer motifs are also
available
Scratch stock
• Scratch stock

• Using the scratch stock
Quiz
 What is the name of the line of wood at A in the diagram?

− Inlay
 Describe how you would apply the finished veneer
pattern onto the box shown.
− Seal with impact adhesive
− Apply adhesive and wait for it to
get tacky
− Position veneer over the piece and
line it up
− Bring the surfaces together
carefully
− Squeeze out the air pockets from
the centre with a veneer hammer
− Remove masking tape from top
surface
− When the veneer has set, trim off
excess veneer and sand down
 What tool would be used to create the groove for the
line of wood at A in the diagram?

− Scratch stock
 Explain rotary cutting of veneers
− Bark is removed from log
− Wood is softened with
steam
− Log is mounted on a big
lathe
− Veneer is peeled from the
log with a cutting knife

26 veneering & inlay

  • 1.
  • 2.
  • 3.
    Veneering  Veneers arethin sheets of wood  Advantages of veneering – Rare and expensive woods are used efficiently – Large areas of wood are covered without risk of splitting – Veneers are used to make decorative patterns
  • 4.
    Groundwork  Base ontowhich the veneer is bonded  Plywood and MDF make good groundwork  Counter veneering with a cheaper veneer helps to prevent warping in the board Groundwork
  • 5.
    Cutting veneers  Veneeris cut with a sharp knife or scalpel – Take care to cut away from yourself and mind your fingers – Score the veneer a number of times to cut through
  • 6.
    Matching veneer  Whenmatching the veneers, it is important to line up the grain carefully to get the best result
  • 7.
    Applying veneer • Ensuregroundwork is flat and clean • Fill any defects and sand smooth • Seal the wood with a thin film of adhesive − Impact adhesive − Contact adhesive
  • 8.
    Borders • Borders areused to frame a veneered pattern − Using veneers to create a border
  • 9.
  • 10.
    Marquetry – windowmethod 1) 2) 3) 4) 5) 6) Draw the design Transfer the design on to the veneer using carbon paper Cut out the shape and remove Place the space over another piece of veneer lining up the grain Cut through the gap or ‘window’ to the veneer below. Tape the cut-out piece into the gap Build up the picture and add a frame
  • 11.
    Marquetry – overlaymethod 1) 2) 3) 4) 5) Fix the two veneers to a cutting surface Transfer the design to the veneer using carbon paper Cut through both veneer layers at the same time The veneers are then interchanged and taped together Glue the veneers to the background
  • 12.
  • 13.
  • 14.
    Inlay  Lines ofcontrasting wood are inlaid to give decoration  Veneer motifs are also available
  • 15.
    Scratch stock • Scratchstock • Using the scratch stock
  • 16.
  • 17.
     What isthe name of the line of wood at A in the diagram? − Inlay
  • 18.
     Describe howyou would apply the finished veneer pattern onto the box shown. − Seal with impact adhesive − Apply adhesive and wait for it to get tacky − Position veneer over the piece and line it up − Bring the surfaces together carefully − Squeeze out the air pockets from the centre with a veneer hammer − Remove masking tape from top surface − When the veneer has set, trim off excess veneer and sand down
  • 19.
     What toolwould be used to create the groove for the line of wood at A in the diagram? − Scratch stock
  • 20.
     Explain rotarycutting of veneers − Bark is removed from log − Wood is softened with steam − Log is mounted on a big lathe − Veneer is peeled from the log with a cutting knife