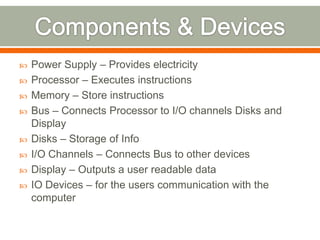
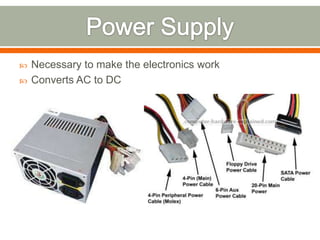
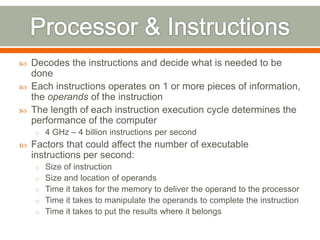
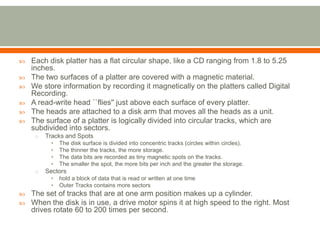
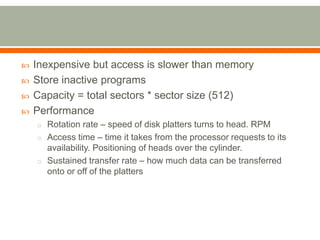
The document provides information on the key components of a personal computer including the power supply, processor, memory, bus, disks, input/output channels, and display. It describes the function of each component and how they connect and interact with each other. It also discusses common hardware issues that can occur and methods for troubleshooting and repairing PCs.
Guide to Build A High-Performance Custom Gaming PCMemory4 less
Want to build your own Gaming pc from scratch but don't know how to? This Gaming computer building guide can help you.
You will learn everything from choosing the right computer parts to build a high-performance desktop PC that can run all games, to choosing parts at lowest prices from your desired store.
Save cost on your next Gaming PC build by using techniques mentioned in this Faster Custom Gaming PC Building guide.
This is a summary version of the original post published on this blog: http://blog.memory4less.com/guide-build-custom-gaming-desktop-pc/
To buy parts for building your Custom Gaming Desktop PC visit: www.memory4less.com
Or, choose compatible computer gaming parts for your PC by using our custom PC configurator tool here:
www.memory4less.com/configurator
Disassembling Of the old working pc
In this Instruction, I will give a full documentation of how to disassemble a desktop PC, for parts. The specific computer that I will demonstrate with is an HP Media Center PC m7640n with a dead motherboard. Every computer is different, but this is a general guide.
If you don't fully grasp what I mean when I am describing something, please refer to the pictures!
Step 1.
Selection the required tools and equipment:
1. Screw Driver.
2. Multimeter.
3. Soldering iron.
4. Contract cleaner.
5. Brush.
Step 2.
To turn off the power:
If the PC being running, must shut down the pc before disassembling.
There are many ways to shut down your PC—you can turn the PC off completely.
Turn your PC off completely
To shut down:
For Windows 10 Select the Start button and then select Power > Shut down.
For Windows 8.1 / Windows RT 8.1
Move your mouse to the lower left-hand corner of the screen and right-click the Start button or press Windows logo key + X on your keyboard. Tap or click Shut down or sign out and choose Shut down.
For Windows 7 Click the Start button and then click the Shut down button. Click the Start button and then click the Shut down button.
Step 3: Unplugging
The first thing you do, is unplug every cable that's plugged in to your computer. That includes the following cables:
________________________________________
• Power
• USB
• Firewire
• Mouse
• Keyboard
• Internet
• Ethernet
• Modem
• AM\FM Antenna
• Cable TV
• etc...
So pretty much just unplug every cable from your computer.
Step 2: Outer Shell/Casing
Now that your computer is fully unplugged, move your PC to a clean work space, preferably a carpet. The carpet is better than tile, because screws and other small parts will roll around.
NOTICE:
If you are working on a carpet, about every five minutes touch something that is grounded (Sink faucet\pipe, wire coming from the ground part of a wall outlet). This is so you don't shock your motherboard or other parts.
First off, unscrew the four screws on the back of the computer. On most computer cases, there will be large knobs that you can unscrew by hand or by screw driver on the back-right side of the computer. The left side has small screws because on that side you can't access much on the inside.
Once the screws are removed, you can remove the side panels. On most computers, they just slide off. Start with the left side panel (the side that once had the knobs), slide it towards the back of the computer. Now you can remove the left panel. Just like the other one, slide it towards the back of the computer.
Please refer to the pictures if you are confused!
Step 3: Outer Shell/Casing (cont.)
In the last step I removed both side panels. In this step, I will be removing the front and top panels.
________________________________________
Wait For Next Part...
ESAT-ISP Programmer is a multipurpose development tool for Physical Computing and ISP Programming for Atmel AVR 8 bit devices.
ESAT-ISP is compatible with Arduino-UNO board.
Basic training on computer and internet for all age group. Now learn computer and internet on your own and surprise your loved ones! :)
Lets Just Go For It! Wish you an Awesome Leaning Experience.
Subscribe to our YouTube channel: https://www.youtube.com/c/TimesRide?sub_confirmation=1
Our Official Website: http://timesride.com
Follow us:
Facebook: https://www.facebook.com/rs.agrawal.9026
Instagram: https://www.instagram.com/timesridenetwork/
Twitter: https://twitter.com/TimesRide
Pinterest: https://in.pinterest.com/ride0472/
Thank You
#AwesomeLearningExperience
#SmartQuickTips&Tricks #LeaningVideos #TimesRide #Keep Learning to Keep Winning!
Youtube Video Link:
English Video: https://youtu.be/1UGYLDyYQH0
Hindi Video: https://youtu.be/WYR6B14opcY
Basic training on computer and internet for all age group. Now learn computer and internet on your own and surprise your loved ones!
Let’s Just Go For It! Wish you an Awesome Learning Experience.
Subscribe to our YouTube channel:
https://www.youtube.com/c/TimesRide?sub_confirmation=1
Visit our Official Website: https://timesride.com/
Follow us:
Facebook: https://www.facebook.com/timesride
Twitter: https://twitter.com/TimesRide
LinkedIn: https://www.linkedin.com/in/timesride
Instagram: https://www.instagram.com/timesride.connect
Pinterest: https://in.pinterest.com/timesrideconnect
Scribd: https://www.scribd.com/user/529709683/Times-Ride
Thank You
#AwesomeLearningExperience
#SmartQuickTips&Tricks #LeaningVideos #TimesRide #Keep Learning to Keep Winning!
the ppt shows the inner images of components of laptop along with their functions. which can help beginners to understand the working of laptop. and how could they modify it.
Smart TV Buyer Insights Survey 2024 by 91mobiles.pdf91mobiles
91mobiles recently conducted a Smart TV Buyer Insights Survey in which we asked over 3,000 respondents about the TV they own, aspects they look at on a new TV, and their TV buying preferences.
Transcript: Selling digital books in 2024: Insights from industry leaders - T...BookNet Canada
The publishing industry has been selling digital audiobooks and ebooks for over a decade and has found its groove. What’s changed? What has stayed the same? Where do we go from here? Join a group of leading sales peers from across the industry for a conversation about the lessons learned since the popularization of digital books, best practices, digital book supply chain management, and more.
Link to video recording: https://bnctechforum.ca/sessions/selling-digital-books-in-2024-insights-from-industry-leaders/
Presented by BookNet Canada on May 28, 2024, with support from the Department of Canadian Heritage.
Epistemic Interaction - tuning interfaces to provide information for AI supportAlan Dix
Paper presented at SYNERGY workshop at AVI 2024, Genoa, Italy. 3rd June 2024
https://alandix.com/academic/papers/synergy2024-epistemic/
As machine learning integrates deeper into human-computer interactions, the concept of epistemic interaction emerges, aiming to refine these interactions to enhance system adaptability. This approach encourages minor, intentional adjustments in user behaviour to enrich the data available for system learning. This paper introduces epistemic interaction within the context of human-system communication, illustrating how deliberate interaction design can improve system understanding and adaptation. Through concrete examples, we demonstrate the potential of epistemic interaction to significantly advance human-computer interaction by leveraging intuitive human communication strategies to inform system design and functionality, offering a novel pathway for enriching user-system engagements.
LF Energy Webinar: Electrical Grid Modelling and Simulation Through PowSyBl -...DanBrown980551
Do you want to learn how to model and simulate an electrical network from scratch in under an hour?
Then welcome to this PowSyBl workshop, hosted by Rte, the French Transmission System Operator (TSO)!
During the webinar, you will discover the PowSyBl ecosystem as well as handle and study an electrical network through an interactive Python notebook.
PowSyBl is an open source project hosted by LF Energy, which offers a comprehensive set of features for electrical grid modelling and simulation. Among other advanced features, PowSyBl provides:
- A fully editable and extendable library for grid component modelling;
- Visualization tools to display your network;
- Grid simulation tools, such as power flows, security analyses (with or without remedial actions) and sensitivity analyses;
The framework is mostly written in Java, with a Python binding so that Python developers can access PowSyBl functionalities as well.
What you will learn during the webinar:
- For beginners: discover PowSyBl's functionalities through a quick general presentation and the notebook, without needing any expert coding skills;
- For advanced developers: master the skills to efficiently apply PowSyBl functionalities to your real-world scenarios.
Essentials of Automations: Optimizing FME Workflows with ParametersSafe Software
Are you looking to streamline your workflows and boost your projects’ efficiency? Do you find yourself searching for ways to add flexibility and control over your FME workflows? If so, you’re in the right place.
Join us for an insightful dive into the world of FME parameters, a critical element in optimizing workflow efficiency. This webinar marks the beginning of our three-part “Essentials of Automation” series. This first webinar is designed to equip you with the knowledge and skills to utilize parameters effectively: enhancing the flexibility, maintainability, and user control of your FME projects.
Here’s what you’ll gain:
- Essentials of FME Parameters: Understand the pivotal role of parameters, including Reader/Writer, Transformer, User, and FME Flow categories. Discover how they are the key to unlocking automation and optimization within your workflows.
- Practical Applications in FME Form: Delve into key user parameter types including choice, connections, and file URLs. Allow users to control how a workflow runs, making your workflows more reusable. Learn to import values and deliver the best user experience for your workflows while enhancing accuracy.
- Optimization Strategies in FME Flow: Explore the creation and strategic deployment of parameters in FME Flow, including the use of deployment and geometry parameters, to maximize workflow efficiency.
- Pro Tips for Success: Gain insights on parameterizing connections and leveraging new features like Conditional Visibility for clarity and simplicity.
We’ll wrap up with a glimpse into future webinars, followed by a Q&A session to address your specific questions surrounding this topic.
Don’t miss this opportunity to elevate your FME expertise and drive your projects to new heights of efficiency.
Key Trends Shaping the Future of Infrastructure.pdfCheryl Hung
Keynote at DIGIT West Expo, Glasgow on 29 May 2024.
Cheryl Hung, ochery.com
Sr Director, Infrastructure Ecosystem, Arm.
The key trends across hardware, cloud and open-source; exploring how these areas are likely to mature and develop over the short and long-term, and then considering how organisations can position themselves to adapt and thrive.
UiPath Test Automation using UiPath Test Suite series, part 4DianaGray10
Welcome to UiPath Test Automation using UiPath Test Suite series part 4. In this session, we will cover Test Manager overview along with SAP heatmap.
The UiPath Test Manager overview with SAP heatmap webinar offers a concise yet comprehensive exploration of the role of a Test Manager within SAP environments, coupled with the utilization of heatmaps for effective testing strategies.
Participants will gain insights into the responsibilities, challenges, and best practices associated with test management in SAP projects. Additionally, the webinar delves into the significance of heatmaps as a visual aid for identifying testing priorities, areas of risk, and resource allocation within SAP landscapes. Through this session, attendees can expect to enhance their understanding of test management principles while learning practical approaches to optimize testing processes in SAP environments using heatmap visualization techniques
What will you get from this session?
1. Insights into SAP testing best practices
2. Heatmap utilization for testing
3. Optimization of testing processes
4. Demo
Topics covered:
Execution from the test manager
Orchestrator execution result
Defect reporting
SAP heatmap example with demo
Speaker:
Deepak Rai, Automation Practice Lead, Boundaryless Group and UiPath MVP
Builder.ai Founder Sachin Dev Duggal's Strategic Approach to Create an Innova...Ramesh Iyer
In today's fast-changing business world, Companies that adapt and embrace new ideas often need help to keep up with the competition. However, fostering a culture of innovation takes much work. It takes vision, leadership and willingness to take risks in the right proportion. Sachin Dev Duggal, co-founder of Builder.ai, has perfected the art of this balance, creating a company culture where creativity and growth are nurtured at each stage.
GDG Cloud Southlake #33: Boule & Rebala: Effective AppSec in SDLC using Deplo...James Anderson
Effective Application Security in Software Delivery lifecycle using Deployment Firewall and DBOM
The modern software delivery process (or the CI/CD process) includes many tools, distributed teams, open-source code, and cloud platforms. Constant focus on speed to release software to market, along with the traditional slow and manual security checks has caused gaps in continuous security as an important piece in the software supply chain. Today organizations feel more susceptible to external and internal cyber threats due to the vast attack surface in their applications supply chain and the lack of end-to-end governance and risk management.
The software team must secure its software delivery process to avoid vulnerability and security breaches. This needs to be achieved with existing tool chains and without extensive rework of the delivery processes. This talk will present strategies and techniques for providing visibility into the true risk of the existing vulnerabilities, preventing the introduction of security issues in the software, resolving vulnerabilities in production environments quickly, and capturing the deployment bill of materials (DBOM).
Speakers:
Bob Boule
Robert Boule is a technology enthusiast with PASSION for technology and making things work along with a knack for helping others understand how things work. He comes with around 20 years of solution engineering experience in application security, software continuous delivery, and SaaS platforms. He is known for his dynamic presentations in CI/CD and application security integrated in software delivery lifecycle.
Gopinath Rebala
Gopinath Rebala is the CTO of OpsMx, where he has overall responsibility for the machine learning and data processing architectures for Secure Software Delivery. Gopi also has a strong connection with our customers, leading design and architecture for strategic implementations. Gopi is a frequent speaker and well-known leader in continuous delivery and integrating security into software delivery.
Slack (or Teams) Automation for Bonterra Impact Management (fka Social Soluti...Jeffrey Haguewood
Sidekick Solutions uses Bonterra Impact Management (fka Social Solutions Apricot) and automation solutions to integrate data for business workflows.
We believe integration and automation are essential to user experience and the promise of efficient work through technology. Automation is the critical ingredient to realizing that full vision. We develop integration products and services for Bonterra Case Management software to support the deployment of automations for a variety of use cases.
This video focuses on the notifications, alerts, and approval requests using Slack for Bonterra Impact Management. The solutions covered in this webinar can also be deployed for Microsoft Teams.
Interested in deploying notification automations for Bonterra Impact Management? Contact us at sales@sidekicksolutionsllc.com to discuss next steps.
2. Power Supply – Provides electricity
Processor – Executes instructions
Memory – Store instructions
Bus – Connects Processor to I/O channels Disks and
Display
Disks – Storage of Info
I/O Channels – Connects Bus to other devices
Display – Outputs a user readable data
IO Devices – for the users communication with the
computer
3. Necessary to make the electronics work
Converts AC to DC
4. Decodes the instructions and decide what is needed to be
done
Each instructions operates on 1 or more pieces of information,
the operands of the instruction
The length of each instruction execution cycle determines the
performance of the computer
o 4 GHz – 4 billion instructions per second
Factors that could affect the number of executable
instructions per second:
o Size of instruction
o Size and location of operands
o Time it takes for the memory to deliver the operand to the processor
o Time it takes to manipulate the operands to complete the instruction
o Time it takes to put the results where it belongs
5.
6. Wires that computer chips operate according to protocol
for the behaviour of chips
Bus wires carry signals among the chips
o What the component should do
o Address on where it should be done
o Information
Bus cycle moving of information from 1 place to another
7. Distinct buses:
o Front side bus
• connects processor to chipset
• responsible for joining the different buses together
• Intel / AMD design
o Memory bus
• Connects chipset to memory modules
• Single Data Rate / Double Data Rate
o Graphics bus
• Accelerated Graphics Port
o Expansion bus
• Connects chipset to Adapter Cards and IO buses
• Peripheral Component Interconnect
8.
9. Memory location
o places to store numbers
o 1 byte , 1 value from 0 to 255
o Unique address
Memory module
o Memory chips – few bits
o Capacity – number of bytes it can hold
o Width – number of bits that can be accessed at a time
o Access time – interval from reading the number to the availability of number
for processor. Smaller access time means faster memory but not faster
computer
o Recovery delay – time from transferring of data to start of next operation
o Cycle time – access time + recovery delay
Bandwidth
o volume of information a memory can read and write per second
10.
11.
12.
13. Each disk platter has a flat circular shape, like a CD ranging from 1.8 to 5.25
inches.
The two surfaces of a platter are covered with a magnetic material.
We store information by recording it magnetically on the platters called Digital
Recording.
A read-write head ``flies'' just above each surface of every platter.
The heads are attached to a disk arm that moves all the heads as a unit.
The surface of a platter is logically divided into circular tracks, which are
subdivided into sectors.
o Tracks and Spots
• The disk surface is divided into concentric tracks (circles within circles).
• The thinner the tracks, the more storage.
• The data bits are recorded as tiny magnetic spots on the tracks.
• The smaller the spot, the more bits per inch and the greater the storage.
o Sectors
• hold a block of data that is read or written at one time
• Outer Tracks contains more sectors
The set of tracks that are at one arm position makes up a cylinder.
When the disk is in use, a drive motor spins it at high speed to the right. Most
drives rotate 60 to 200 times per second.
14. Inexpensive but access is slower than memory
Store inactive programs
Capacity = total sectors * sector size (512)
Performance
o Rotation rate – speed of disk platters turns to head. RPM
o Access time – time it takes from the processor requests to its
availability. Positioning of heads over the cylinder.
o Sustained transfer rate – how much data can be transferred
onto or off of the platters
15. Connects disks to bus
Connects other attached devices
Receives requests from the processor over the bus
Rearrange the requests if needed
Handed to the disk
16. Video Card is a memory with surrounding electronics
o Digital to analog converters – changes numbers to signals
o Display memory – contains the pixel number
o Graphics acceleration processor
o Timing and Control
o AGP or PCI bus
Monitor
o Requires three signals (red, green and blue)
17.
18. Input Devices – the instruction is coming from the user to
be received by the computer
Output Devices – the receiver of the result is the user
19. Screwdrivers – slotted and Philips from small to medium
Socket drivers – screw heads that fits hex drivers
Pliers – Nose Pliers
Flashlight
Mirror
Multimeter – failure diagnosis
Soldering Iron – Repairing / Removing components from
circuit cards
Thin Gloves – reduces static discharge
20.
21. Do’s Don’ts
assemble your PC on a clean, uncluttered FLAT assemble your PC on a couch, or a carpeted floor,
surface. Tiles if possible. or a chair, cushion, etc..
use properly insulated tools to reduce the possibility Use of improper tools
of static discharge from your body. Plastic or rubber drag your feet across the carpet and touch the case
handles. just because you get a kick out of static shocks.
use an anti-static wrist band if you have one This WILL screw up the components.
available to reduce the possibility of static discharge Liquids, foods and magnetic tools are not allowed to
from your body. be near the PC.
use cable ties or zip ties to secure wires in the PC use masking tape to secure ANY wires or
when doing cable management. components in the case. Fire hazard
close up the case and cover the build in progress handle open circuit boards or touch capacitors or
when you're not working on it. resistors more than you absolutely need to.
take notes while building and write down questions plug in your power supply while you're working
you come up with. inside the box.
take your time and make sure components are drill holes in your components because you think
secured properly, and connected correctly. Refer to you can secure them better that way with more
manuals, or installation materials if you have them screws.
on hand. modify connections to make them fit, or splice wires
together to create your own connections (unless
you are a trained and experienced computer or
electronics engineer).
22. makes sure all the other chips, hard drives, ports and CPU
function together
Role of BIOS:
o Check the Complementary Metal Oxide Semiconductor (CMOS)
Setup for custom settings
• CMOS Setup provides detailed information particular to your system
and can be altered as your system changes
o Load the interrupt handlers and device drivers
• Interrupt handlers act as translators between the hardware components
and the operating system
o Initialize registers and power management
o Perform the power-on self-test (POST) to make sure everything is
working properly
o Display system settings
o Determine which devices are bootable
o Initiate the bootstrap sequence
23. To enter the CMOS Setup, you must press a certain key or
combination of keys during the initial start up sequence
o "Esc," "Del," "F1," "F2," "Ctrl-Esc" or "Ctrl-Alt-Esc“
Incorrect settings may keep your computer from booting
Configuration Option:
o System Time/Date - Set the system time and date
o Boot Sequence - The order that BIOS will try to load the operating system
o Plug and Play - A standard for auto-detecting connected devices; should be
set to "Yes" if your computer and operating system both support it
o Mouse/Keyboard - "Enable Num Lock," "Enable the Keyboard," "Auto-
Detect Mouse“
o Drive Configuration - Configure hard drives, CD-ROM and floppy drives
o Memory - Direct the BIOS to shadow to a specific memory address
o Security - Set a password for accessing the computer
o Power Management - Select whether to use power management, as well as
set the amount of time for standby and suspend
o Exit - Save your changes, discard your changes or restore default settings
24.
25. Back up all user files if you're planning to perform a system recovery.
Gather together all the installation CDs which came with your computer and with
the devices you have added to your computer.
Ensure that your computer is set up to boot from the CD-ROM drive.
Place the first CD for the operating system in the CD drive.
Turn the computer off. Wait a full 30 seconds before turning it back on again.
Turn the computer back on, and follow the instructions on the screen to partition
and format your hard drive.
Follow the instructions which appear on the screen
Reconnect to the internet. Troubleshoot any problems with your installation by
visiting the software provider's support website.
Install or reinstall your antivirus software and promptly download and install all
the definition updates.
Navigate immediately to the update site of the operating system's manufacturer
and download all critical updates.
Install the software for any additional devices which did not come with your
computer. Update the drivers for all of your devices. Check device manager to
see which version of each driver you are using and check the date.