Downloaded 1,393 times


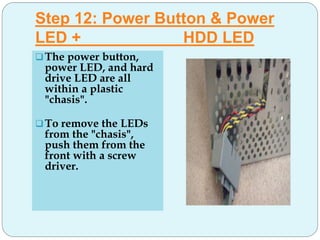
![Step 5: Power Supply
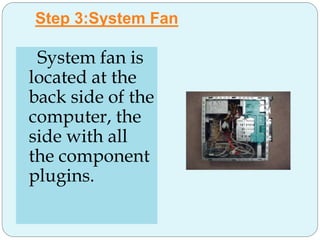
The power supply
supplies power to every
component in a
computer. The list
below is every thing
that to disconnect:
Motherboard (very
large connector/plug)
CD/DVD drive[s]
power
Internal hard drive
power
Portable hard drive slot
power](https://image.slidesharecdn.com/presentation1-140829124653-phpapp02/85/Disassembling-a-PC-10-320.jpg)
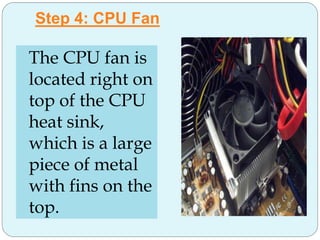
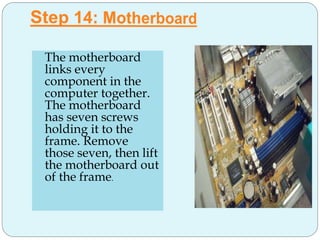
![Step 6: CD/DVD Drive[s]
The CD/DVD
drive is one of the
easiest
components to
remove. First,
unplug the ribbon
from the back of
the drive. Once
that is completed
then push it out
from the inside.](https://image.slidesharecdn.com/presentation1-140829124653-phpapp02/85/Disassembling-a-PC-11-320.jpg)


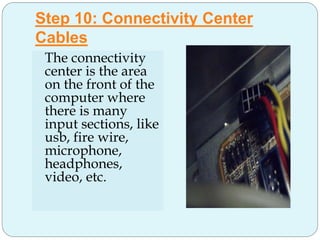
![Step 13: Connectivity
Center
First thing, unscrew
the single screw
holding it in place.
Once the screw[s]
are removed, the
whole component
should slide into the
inside of the
computer, which
can then be
removed.](https://image.slidesharecdn.com/presentation1-140829124653-phpapp02/85/Disassembling-a-PC-19-320.jpg)

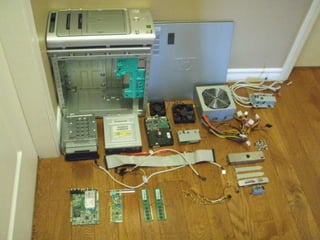


This document provides step-by-step instructions for disassembling a PC. It begins by explaining what disassembling entails - removing the different components from the system unit by unplugging, unscrewing, and lifting them out. It then lists 13 steps to fully disassemble a PC, including unplugging all cables, removing the outer shell and side panels, taking out the system fan, CPU fan, power supply, CD/DVD drives, expansion cards, RAM, and motherboard. The goal of disassembling is to separate all the individual parts that make up a computer system.


