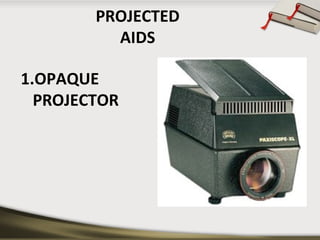
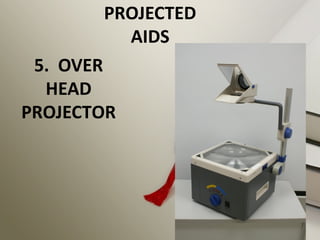
Projected teaching aids

S
SEMINAR ON 
PROJECTED 
AIDS 
Saraspreet kaur 
MBA (FINANCE) LPU 2010
DEFINITION OF AV AIDS 
• Audio visual aids are anything by means of which 
learning process may be encouraged or carried on 
through the sense of hearing or sense of sight. 
- Goods ,Dictionary of education. 
• Audio-Visual Aids are those devices by the use of 
which communications of ideas between persons 
and groups in various teaching and training 
situations is helped. These are also termed as multi 
sensory materials. 
-Edgar Dale
DEFINITION 
• “Audio visual aids are any device which can be 
used to make the learning experience more 
concrete , more realistic and more dynamic” 
-KINDAR S JAMES 
• Audio-Visual Aids are those sensory objects or 
images which initiate or stimulate and 
reinforce learning. - BURTON
PRINCIPLE’S IN THE USE OF 
AV AIDS 
PPrriinncciippllee ooff sseelleeccttiioonn 
PPrriinncciippllee ooff pprreeppaarraattiioonn 
PPrriinncciippllee ooff pphhyyssiiccaall 
ccoonnttrrooll 
PPrriinncciippllee ooff pprrooppeerr 
pprreesseennttaattiioonn 
PPrriinncciippllee ooff rreessppoonnssee 
PPrriinncciippllee ooff eevvaalluuaattiioonn
Values of AV-Aids 
• Best motivators 
• Antidote to the disease of verbal instruction 
• Clear images 
• Variety 
• Opportunities to handle and manipulate 
• Retentivity 
• Helpful in attracting attention 
• Helpful in fixing up new learning 
• Saving of energy and time 
• Vividness 
• Meeting individual difference
Values 
• Encouragement to healthy class room interaction 
• Spread on education on a mass scale 
• Promotion of scientific temper 
• Development of higher faculties 
• Reinforcement to learners 
• Positive transfer of learning and training 
• Positive environment for creative discipline
Characteristics 
• They should be meaningful and purposeful 
• They should be accurate in every aspect 
• They should be simple 
• They should be cheap 
• They should be up to date 
• They should be easily portable 
• They should be according to the mental level of 
students 
• They should be motivate the learners 
• They should be large enough to be properly seen by 
the students for whom they are meant 
• They should be improvised.
ADVANTAGES OF PROJECTED 
AIDS 
• Provides greater enjoyment in learning 
• Stimulates more rapid learning 
• Increases retention: larger percentages and longer 
retention 
• Compels attention 
• Enlarges or reduces actual size of objects 
• Brings distant past and the present into the 
classroom
ADVANTAGES 
• The mental reaction of the pupils to audio-visual 
experience is both intellectual and emotional. 
• 86 % of our sense knowledge is attained through 
seeing and hearing and hence is the use of audio-visual 
aids 
• A-V Aids provide first hand experience to the 
children and hence the learning becomes 
interesting real and durable. 
• A-V Aids help the learner to grasp quickly and 
retain the experience so received longer. 
• They make a lasting impression on the minds of 
the learners.
“one picture is worth a thousand words” 
• They make learning 
– realistic, 
– permanent, 
– natural and 
– easy.
FUNCTIONS OF projected AIDS 
• They supply a concrete basis for conceptual thinking and 
hence, reduce meaningless word response of students. 
• They have high degree of interest for students. 
• They make learning more permanent. 
• They offer a reality of experience which stimulate self 
activity on the part of pupil. 5. Develop continuity of 
thought; this is especially true of motion pictures. 
• They provide experience not easily obtained through other 
materials and contribute to the efficiency, depth, and 
variety of learning.
NEED AND IMPORTANCE 
• Motivate students mental and physical activity 
• Save time 
• first hand experience by looking at concrete things, living specimen, 
handling apparatus and actual demonstration etc. Pupils to have clear 
conception of ideas, information, facts and principles. 
• Help to bring a change in the atmosphere of the class. 
• Provide a congenial atmosphere in the class. 
• Help to develop scientific attitude and get a training in scientific 
method. 
• Large number of students can taught at a time. 
• Most convenient, easy and natural way of learning. 
• make learning effective and durable
CLASSIFICATION OF 
AV AIDS 
1. PROJECTED AIDS 
2. NON-PROJECTED AIDS
PROJECTED AV AIDS 
• Opaque projectors 
• Slides 
• Film strips 
• Overhead projectors 
• LCD panels 
• Slide projector(magic lantern) 
• Epidiascope 
• Slide cum film strip projector 
• Films ( video materials)
NON PROJECTED AIDS 
• Cartoons 
• Charts 
• Comics 
• Diagrams 
• Flash cards 
• Graphs 
• Maps 
• Photographs 
• Pictures 
• Posters 
• Printed material 
• Black board 
• Bulletin board 
• Flannel board 
• Magnetic board 
• Diagrams 
• Models 
• Puppets 
• Specimens
PROJECTED 
AIDS 
1.OPAQUE 
PROJECTOR
OPAQUE PROJECTOR 
• a device which displays opaque materials by shining 
a bright lamp onto the object 
• A system of mirrors, prisms and/or imaging lenses is 
used to focus an image of the material onto a 
viewing screen
Opaque projector -cont 
• projectors require 
brighter bulbs 
• larger lenses 
• Care to be taken to 
prevent material 
damage 
• Not very common
Opaque projector -CONT 
WORKING 
 Opaque projector, built of large black 
 Consists two mirrors at top & bottom;1000w bulb 
 Light rays passes through the first mirror, then to the 
object, light rays from the illuminated picture then 
focuses to the second mirror , then it is projected to 
screen by using a convex lens 
• then the picture want to project is placed on the 
plate and handle is fixed again , then switch on light
OPAQUE PROJECTOR -CONT 
• PAXISCOPE 
• Project images or printed matter or small opaque 
objects on a screen 
• Works as epidiascope and diascope 
• Principle 
– Horizontal straight line projection
PRECAUTIONS THAT SHOULD BE 
TAKEN FOR OPAQUE PROJECTOR 
• handled carefully 
• Protected from breakage 
• away from moisture 
• kept clean 
• preferably kept in a cool room 
• switched off when not in use.
ADVANTAGES 
• graphic aids are projected with magnification 
• tracing enlarged images 
• no need of clipping picture from book resources 
• Flat specimen like coins, cloth pieces, leaves etc. can 
also be projected 
• seen conveniently by a large number of students 
• Teaching material of various sizes can be used 
• language reading lessons 
• stamp size to that of 20cmx250cm size pictures. 
• helps in preparation of graphic aids
DISADVANTAGES 
• Demands total darkness 
• Bulky machine 
• Electricity required 
• Difficult maintenance
PROJECTED 
AIDS 
2. SLIDES
SLIDE 
A slide is a still transparency of 70mm, 35mm or 6mm 
size which is optically enlarged and projected on a 
screen as a real image
4 KINDS OF SLIDES CAN BE MADE BY TEACHER 
• Marker slides 
• Cellophane slides 
• Silhouette slides 
• Etched glass slides
Marker slide 
• a clean glass piece of right size 
• Draw picture or a diagram is with a fine tip marker 
pen 
• Hold glass piece in cardboard or wooden frame
Silhouette slides 
• small cut outs from colour 
cellophanes are plated on 
the glass piece 
• another glass piece is 
plated over it 
• two are taped together 
• Or by drawing on 
cellophane piece and 
sticking it onto the glass 
piece
ETCHED GLASS SLIDE 
• clean a glass piece thoroughly 
• rinse it with kerosene 
• Draw the diagram with crayon glass marking pencil
ADVANTAGES OF SLIDES 
• They attract attention 
•They arouse interest 
•They assist lesson and development 
•They test student understanding 
•They review instruction 
•They facilitate teacher student participation
DISADVANTAGES OF SLIDES 
• More time consumes for preparations of slides 
• They can only be seen with the help of slide 
projectors 
• Students can’t see the slides with the naked eyes 
• Expensive material is used for making the slides 
• Many errors occurs during preparation
Projected aids 
3. Film strips
FILM STRIP 
•A filmstrip is one of the projective audio visual 
that a fixed sequence related still on a roll of 35 
mm film. 
•The filmstrip can be projected backside of the 
map as convenience of the teaching situation 
demand. 
• A large number of subjects come with in the 
range of filmstrips. 
•The teacher only needs to tap the right type of 
strip for his teaching purpose.
Preparations of Film strips 
Filmstrips can be prepared either by employing 
photographic methods or by drawing picture by 
hand on the film itself. 
The steps in preparation are 
Select a suitable topic from the syllabus after 
considering the possibilities of depicting the subject 
matter by drawing photographs. 
 Prepare a detail script describing the contents of 
each frame indicating the method of preparing it. 
i.e. whether by at work or by 
photograph.
-cont 
• Make rough sketches of the figure on the paper so as 
to serve as guide when final sketches are drawn 
• Draw the sketches in suitable size 
• Arrange the drawings $ enlarged photographs 
• the material in correct sequence thus arranged using 
36mm film camera & prepare negative. 
• Prepare the guidebook, which is to follow the 
filmstrips explaining the details of each frame.
PRECAUTION WHILE USING FILM – STRIP 
The Film strip, because of its fixed 
sequence, is not as flexible for individual 
stills as the slides, which can be in any 
order. 
The film strip is a “skill” medium .It 
cannot portray effectively and is not 
intended to do so. 
The film strip is easily damaged and is 
not easy to repair. 
For presenting film strips in the class 
room teacher need to analyses the 
significance of the use of strip for 
educational purpose.
-cont 
•Determine the lessons that could be 
effectively illustrated with a strip. 
•Preview film strip before using them. 
•Show again any part of the film strips 
needing move specific study. 
•Use film strip to stimulate emotions built 
attitude and to point out us problem. 
•Use a pointer to direct attention to 
specific details on screen.
Advantages 
It is an economical visual materials 
It is easy to make and convenient to handle and carry. 
Takes up little space and can be easily stored. 
Provides a logical sequence to the teaching procedure and the individual 
picture on the strip can be kept before the student for a length of time. 
Film –strip can be projected on the screen or wall or paper screen as the 
convenience and the teaching situation demands. 
It is available both in color & blank & white. 
Good to use – afterward, have a discussion to see whether people have 
understood the subject. 
DISADVANTAGES 
• Its frame connect be remove or substitute . 
• It this becomes necessary them the strip can be cut into slides & 
mounted
Projected 
aids 
4. Slide cum 
film strip 
projector
SLIDE CUM FILM STRIP PROJECTOR 
The slides and film strips are projected on a screen 
using an optical instrument called slide cum film 
strip projector 
Technology same as opaque projectors 
Cannot project 3 dimensional image 
makes use of small photographs mounted on a 
slide
STRUCTURE 
• consists of a metal case having a concave reflector 
• 500 watt or 1000 watt straight filament bulb 
• set of concave lens called condenser to illuminate 
the slide 
• slid able set of convex lenses have objective which 
focuses the image of the slide on the screen. 
• The metal core is fitted with as small exhaust fan to 
blow out the excess heat. 
• a slide frame or a film strip carrier
Using common slide cum film projector 
• Place the slide projector on a rigid and stable table. 
• Place the screen at an appropriate place 
• Insert the slide projector or film strip carrier in its 
place after opening the tube. 
• Mount a slide or film strip on its carrier 
• Insert the projector cord plug into the wall socket. 
• Darken the room
- cont 
• Switch on the cooling fan first and then the 
projection bulb. 
• Focus the image 
• Show the slide and explain 
• Insert the next slide 
• Present the slides or frames sequentially 
• switch off the bulb first then the cooling fan 
• unplug the slide projector and store it back in its box.
PREPARATION OF A SLIDE SHOW 
• Collect all the available slides 
• check them thoroughly 
• Choose the slides 
• Arrange the chosen slides in a proper sequence 
• Darken the room 
• Make proper seating arrangements for students 
• start teaching 
• interruption during the slide show will result in the 
loss of interest
CARE OF SLIDES AND FILMSTRIPS 
• they require care in handling and storage 
• store vertically in cardboard trays of right size 
• trays should be covered 
• they should be catalogued subject wise 
• film strips can be placed in rolled up positions in 
cylindrical container 
• container should be properly labelled
ADVANTAGES OF SLIDE PROJECTIONS. 
• Requires simple skills 
• convenient aid for making classroom teaching 
interesting. 
• small in size 
• can be stored and also carried around easily 
• quite cheaper 
• a logical and sequential order of presentation 
• image in the screen can be held for any time interval
-cont 
• save time in teaching 
• Capture attention and interest of students 
• Interaction with students and group participation is 
possible
ADVANTAGES OF FILM STRIPS 
• economical 
• easy to make 
• convenient to handle 
• Takes up little 
• can be easily stored 
• Provides logical sequence 
• Can use AC/DC power, batteries, or rechargeable 
batteries with solar panels.
DISADVANTAGES OF SLIDES AND 
FILM STRIP 
• Need a darkened room. 
• Require equipment and power that will need to be 
maintained. 
• Sequence cannot be changed. 
• Visual media only; it requires audio or printed text. 
• Require professional assistance for final production.
CARE OF THE FILMSTRIP 
• Keep free of dust and dirt which can scratch the 
filmstrip 
• Keep dry because moisture can cause the emulsion 
to become sticky. 
• Then the film will stick together and be destroyed. 
• Keep oily hands off the film as they can leave 
residue on the film. 
• Keep away from excessive heat which can cause the 
film to warp.
STORAGE OF THE FILMSTRIP 
• Store in containers away from heat, dust, moisture 
• When winding up the filmstrip, hold onto the edges 
• Do not pull to make it tighter as this can leave 
scratches on the film
CARE OF THE EQUIPMENT 
• Don’t handle projector while the bulb is still hot as 
the bulb filament is fragile. 
• Pack equipment carefully for safe transporting. 
• Protect from the environment, dust, dirt, moisture
PROJECTED 
AIDS 
5. OVER 
HEAD 
PROJECTOR
OHP 
• An OHP is an important electronic teaching aid. 
• This machine projects an image from a transparency 
• It will be advisable to switch off the bulbs of OHP for 
5 minutes after every 10 minutes of use.
PREPARING TRANSPERENCIES
PREPARING A TRANSPARENCY 
• prepared by writing on cellophane sheets with the 
help of an OHP pen 
• Coloured pens 
• Xeroxing from any printed material 
• besides single transparency can be used on a roll
RULE OF SIX FOR PREPAIRING 
TRANSPARENCIES 
• Six lines per transparency 
• Six words per line 
• Six mm smallest letter size 
• Six cm (3+3 on each side) margin
SCREENS FOR PROJECTIONS 
Effective utilization of projection material necessitates 
careful selection of the screen. Types of screen are 
aluminium coated 
 glass board 
flat white screen 
Screens should be mounted properly and at a proper 
angle
USING AN OHP 
• Place the OHP on a stable 
table with the objective lens 
facing the screen behind the 
teacher. 
• Put the cord plug into power 
wall socket. 
• Switch on the blower first 
and then the bulb. 
• Place transparency on the 
glass top.
-CONT 
• Move the objective lens and mirror assembly up and 
down to get the image in focus on the screen. 
• Explain about the material on the transparency from 
behind OHP with a strong pointer. 
• The handle of the teacher should not come on the 
slide. 
• Make your points short and simple 
• Remove what is not needed.
ADVANTAGES OF OHP 
• teacher can face the class without any difficulty. 
• The teacher can maintain eye contact and observe 
the reactions of students. 
• Small objects can be shown on the machine simply 
by placing them on projection slide. 
• The graphics and writings can be shown very clearly 
and colourfully. 
• It does not need as darkened room as compared to 
other projectors
SOME DO’S AND 
DON’T’S WHILE USING 
THE OHP
DO’S 
• Focus and position image before presentation 
• Stand to the side of the screen 
• Turn off projector when not in u 
• Letters the larger the better 
• Use colour to attract attention 
• Put captions on top. 
• Have images in to two-thirds of visual position image 
at the top of the screen 
• Use pen or ruler to point 
• Use upper and lower case letters
DON’T’S 
• Walk or stand in front of the screen. 
• Leave the projector on when you’ve talking about 
something 
• Write closely on the whole of the transparency sheet 
• Have images type-written or too small 
• Use black and white visuals only 
• Use finger to point 
• Use only capital letter
PROJECTED 
AIDS 
6. 
SLIDE 
PROJECTOR
SLIDE PROJECTOR OR DIASCOPE 
OR MAGIC LANTERN 
• It is used to project slides. 
• Used for projecting pictures from a transparent slide 
on a wall or screen. 
• It helps in showing the magnified image of the slide. 
• If the slide is coloured it would be more attractive.
Construction of slide projector 
• Source of light ( projection lamp) 
• Reflector ( concave mirror) 
• Condensing lens 
• Slide carrier 
• Objective lens
Working of a slide projector 
• When a figure or illustration is very small and it is 
required that whole class should see it clearly , a 
transparent slide of small figure is prepared. 
• slide is placed inverted into the slide carrier part of 
the projector. 
• The light rays emitted by the source of light and 
reflected by the concave mirror lying behind the 
lamp, are directed forward to fall on the condensed 
lens.
-cont 
• This lens shatters and bends these rays into strong 
beam of lights , which passes through the slide CD 
and comes to the point at the centre of objective 
lens. 
• The objective lens spread the light rays and directs 
them on screen surface. 
• than the image produced on the screen is enlarged, 
sharp and clear.
advantages 
• Arouse attention and interest of the students 
• Variety of educational information can be given 
• Easy to transport 
• Easy to use 
• Economical in time 
• Not costly 
• Non – fragile 
• Non- inflammable
disadvantages 
• Not suitable for all types of educational material. 
• Transparent slides can’t be put to excessive use. 
• Not to use for longer duration.
Projected aids 
7. 
epidiascope
introduction 
• It is the combination of episcope and diascope. 
• It projects transparent as well as opaque materials. 
• It can be used conventially in the class room. 
• When it is used to project slides it works as diascope 
• When it is used to project an opaque object it serves 
as episcope
construction 
• Projection lens 
• Episcope lens 
• Body containning lamp and mirror 
• Diascope attachments 
• Base 
• Removable top covers and ventilation vanes
working 
• Source of light falls on opaque body 
• Plane mirror reflects the light so that it passes 
through projection lens 
• Forming a magnifying image on the screen , it works 
as episcope 
• By the movement of lever,projector can be used to 
project slides, thus it acts as diascope. 
• In this way, there is a change from episcopy to 
diascopy.
ADVANTAGES 
• Projection of any material.( films, film strips, slides) 
• Can be used for magnification purposes. 
• Can be used to deal with big classes 
• Convinent use 
• Motivation 
• Clearification and better retention
DIS-ADVANTAGES 
Its very heavy and can’t be moved easily 
Very costly 
It requires dark room
precautions 
• Material to be projected should be wisely selected 
• Do not use too many pictures or things, it may 
confuse the students 
• Items should be presented in the systematic way.
Projected 
aids 
8. Video 
materials
introduction 
• The video casette recorder helps to enhance the 
educational and entertainment values of the 
television. 
• The video lessons are more effective than the 
conventional lessons and serve as a better models as 
they are given by more efficient teachers.
Precautions while Using Videotapes 
• Preview the videotape 
• Check to be sure that the videotape is compatible 
with the videotape player 
• Cue the videotape to the beginning of the program 
• Arrange the room so that all participants can see
-cont 
• State the session objective 
• Provide an overview of the videotape 
• Ask participants to look for a number of specific 
points during the videotape 
• Discuss the videotape after it has been shown 
• Prepare test items based on the videotape content if 
appropriate
Advantages of Using Videotapes 
• Source of entertainment 
• Source of information 
• Stimuli for discussion 
• Animation can be used to show an abstract concept 
• TV monitors tolerate fluctuations in voltage much 
better than projectors 
• Video players are less expensive and easier to 
maintain than slide projectors
Disadvantages of Videotapes 
• Commercially prepared videotapes are often 
outdated 
• Videotapes may have been edited and omit or 
rearrange key training steps in the procedure 
• Participants may be distracted by cultural differences
CONCLUSION 
• Audio Visual Aids are very useful for the teaching 
process 
• audio-visual are great tools to catch the audience 
attention 
• It is important to use variety of teaching methods for 
students with varying preferences 
• An AV aid should also not distract a student from 
learning experiences
Projected teaching aids
1 of 86

More Related Content

What's hot(20)

Audio visual aidsAudio visual aids
Audio visual aids
Priya Dharshini709.7K views
Unit planningUnit planning
Unit planning
Meenakshi Thakur23.4K views
Non Projected AV AidsNon Projected AV Aids
Non Projected AV Aids
Jang Group of Companies62.3K views
Instructional aids Instructional aids
Instructional aids
sakshi rana7.2K views
ChartsCharts
Charts
Dr. Hina Kaynat11.5K views
Film strip okFilm strip ok
Film strip ok
surendra sharma25.1K views
Maxims of teaching pptMaxims of teaching ppt
Maxims of teaching ppt
VindyaVindya11.3K views
 Project Method of Teaching Project Method of Teaching
Project Method of Teaching
Mandeep Gill400.9K views
Unit planUnit plan
Unit plan
BeulahJayarani12.8K views
Laboratory methodLaboratory method
Laboratory method
Mandeep Gill65.9K views
SimulationSimulation
Simulation
MAHESWARI JAIKUMAR 20.3K views
Film stripsFilm strips
Film strips
Priyanka Kumari13.3K views
Teacher preparations Teacher preparations
Teacher preparations
DR .PALLAVI PATHANIA7.3K views
Core curriculumCore curriculum
Core curriculum
The Gandhigram Rural Institute (Deemed to be University)11.8K views
Computer  assisted  learningComputer  assisted  learning
Computer assisted learning
Ramya Ramya12.8K views
Overhead projector getesOverhead projector getes
Overhead projector getes
SFYC33.2K views

Viewers also liked

Teaching AidsTeaching Aids
Teaching AidsDeepty Gupta
347.2K views49 slides
Projectd av aidsProjectd av aids
Projectd av aidsnishima sagar
53.2K views62 slides
Field TripField Trip
Field TripBSEPhySci14
30.9K views18 slides
Hevner design-scienceHevner design-science
Hevner design-scienceshmushmu
5K views32 slides
Technological artifactsTechnological artifacts
Technological artifactsscrow3
9.7K views8 slides

Viewers also liked(17)

Teaching AidsTeaching Aids
Teaching Aids
Deepty Gupta347.2K views
Projectd av aidsProjectd av aids
Projectd av aids
nishima sagar53.2K views
Field TripField Trip
Field Trip
BSEPhySci1430.9K views
Hevner design-scienceHevner design-science
Hevner design-science
shmushmu5K views
Technological artifactsTechnological artifacts
Technological artifacts
scrow39.7K views
Effective use of visual aidsEffective use of visual aids
Effective use of visual aids
Rashmi Joshi18.2K views
Teaching aidsTeaching aids
Teaching aids
Parkavi Elangovan6.7K views
Radio for LearningRadio for Learning
Radio for Learning
CEMCA4.5K views
models of teachingmodels of teaching
models of teaching
School of eduction, PU57.1K views
Uses of computers in educationUses of computers in education
Uses of computers in education
Melanie Garay79.9K views
educational television educational television
educational television
Mac Mondano9.8K views
Lesson plan av_aids NURSING EDUCATIONLesson plan av_aids NURSING EDUCATION
Lesson plan av_aids NURSING EDUCATION
Princess Pearl72.2K views

Similar to Projected teaching aids

AV AIDS PPT.pptxAV AIDS PPT.pptx
AV AIDS PPT.pptxSuhel Khan
179 views74 slides
Projected aidsProjected aids
Projected aidsilaiyarani
1.6K views115 slides
Unit 7Unit 7
Unit 7Sabeeta Lohana
40 views5 slides

Similar to Projected teaching aids(20)

AV AIDS PPT.pptxAV AIDS PPT.pptx
AV AIDS PPT.pptx
Suhel Khan179 views
Instructional technology(gcet)Instructional technology(gcet)
Instructional technology(gcet)
Ayaz Mahmood11.7K views
Projected aidsProjected aids
Projected aids
ilaiyarani1.6K views
Unit 7Unit 7
Unit 7
Sabeeta Lohana40 views
instructional aids.pptxinstructional aids.pptx
instructional aids.pptx
shanmuga institute of medica sciences41 views
5250541.ppt5250541.ppt
5250541.ppt
CHANDAN PADHAN8 views
Health educationHealth education
Health education
ghavya815 views
Av aidsAv aids
Av aids
Eko Priyanto21.8K views
CLASSIFICATION OF TEACHING AIDSCLASSIFICATION OF TEACHING AIDS
CLASSIFICATION OF TEACHING AIDS
Thiagarajar College of Preceptors (Aided)2.8K views
Educational media( a.v aids)Educational media( a.v aids)
Educational media( a.v aids)
PRANATI PATRA8.2K views
Lesson 10: Projected MediaLesson 10: Projected Media
Lesson 10: Projected Media
JennyDomingo53.5K views
Instructional aidsInstructional aids
Instructional aids
Kanìka Guleria22.9K views
 instructional aids instructional aids
instructional aids
JulainaMehraj161 views
Keerah graciaKeerah gracia
Keerah gracia
Keerah Gracia323 views
Non projected picturesNon projected pictures
Non projected pictures
SFYC23.3K views

Recently uploaded(20)

AI Tools for Business and StartupsAI Tools for Business and Startups
AI Tools for Business and Startups
Svetlin Nakov57 views
Psychology KS5Psychology KS5
Psychology KS5
WestHatch53 views
2022 CAPE Merit List 2023 2022 CAPE Merit List 2023
2022 CAPE Merit List 2023
Caribbean Examinations Council3K views
Nico Baumbach IMR Media ComponentNico Baumbach IMR Media Component
Nico Baumbach IMR Media Component
InMediaRes1186 views
Scope of Biochemistry.pptxScope of Biochemistry.pptx
Scope of Biochemistry.pptx
shoba shoba110 views
Narration  ppt.pptxNarration  ppt.pptx
Narration ppt.pptx
Tariq KHAN62 views
BYSC infopack.pdfBYSC infopack.pdf
BYSC infopack.pdf
Fundacja Rozwoju Społeczeństwa Przedsiębiorczego144 views
Gopal Chakraborty Memorial Quiz 2.0 Prelims.pptxGopal Chakraborty Memorial Quiz 2.0 Prelims.pptx
Gopal Chakraborty Memorial Quiz 2.0 Prelims.pptx
Debapriya Chakraborty221 views
NS3 Unit 2 Life processes of animals.pptxNS3 Unit 2 Life processes of animals.pptx
NS3 Unit 2 Life processes of animals.pptx
manuelaromero201389 views
Narration lesson plan.docxNarration lesson plan.docx
Narration lesson plan.docx
Tariq KHAN90 views
CWP_23995_2013_17_11_2023_FINAL_ORDER.pdfCWP_23995_2013_17_11_2023_FINAL_ORDER.pdf
CWP_23995_2013_17_11_2023_FINAL_ORDER.pdf
SukhwinderSingh895865467 views
Lecture: Open InnovationLecture: Open Innovation
Lecture: Open Innovation
Michal Hron82 views
ACTIVITY BOOK key water sports.pptxACTIVITY BOOK key water sports.pptx
ACTIVITY BOOK key water sports.pptx
Mar Caston Palacio132 views
Plastic waste.pdfPlastic waste.pdf
Plastic waste.pdf
alqaseedae81 views
ICANNICANN
ICANN
RajaulKarim2057 views

Projected teaching aids

  • 1. SEMINAR ON PROJECTED AIDS Saraspreet kaur MBA (FINANCE) LPU 2010
  • 2. DEFINITION OF AV AIDS • Audio visual aids are anything by means of which learning process may be encouraged or carried on through the sense of hearing or sense of sight. - Goods ,Dictionary of education. • Audio-Visual Aids are those devices by the use of which communications of ideas between persons and groups in various teaching and training situations is helped. These are also termed as multi sensory materials. -Edgar Dale
  • 3. DEFINITION • “Audio visual aids are any device which can be used to make the learning experience more concrete , more realistic and more dynamic” -KINDAR S JAMES • Audio-Visual Aids are those sensory objects or images which initiate or stimulate and reinforce learning. - BURTON
  • 4. PRINCIPLE’S IN THE USE OF AV AIDS PPrriinncciippllee ooff sseelleeccttiioonn PPrriinncciippllee ooff pprreeppaarraattiioonn PPrriinncciippllee ooff pphhyyssiiccaall ccoonnttrrooll PPrriinncciippllee ooff pprrooppeerr pprreesseennttaattiioonn PPrriinncciippllee ooff rreessppoonnssee PPrriinncciippllee ooff eevvaalluuaattiioonn
  • 5. Values of AV-Aids • Best motivators • Antidote to the disease of verbal instruction • Clear images • Variety • Opportunities to handle and manipulate • Retentivity • Helpful in attracting attention • Helpful in fixing up new learning • Saving of energy and time • Vividness • Meeting individual difference
  • 6. Values • Encouragement to healthy class room interaction • Spread on education on a mass scale • Promotion of scientific temper • Development of higher faculties • Reinforcement to learners • Positive transfer of learning and training • Positive environment for creative discipline
  • 7. Characteristics • They should be meaningful and purposeful • They should be accurate in every aspect • They should be simple • They should be cheap • They should be up to date • They should be easily portable • They should be according to the mental level of students • They should be motivate the learners • They should be large enough to be properly seen by the students for whom they are meant • They should be improvised.
  • 8. ADVANTAGES OF PROJECTED AIDS • Provides greater enjoyment in learning • Stimulates more rapid learning • Increases retention: larger percentages and longer retention • Compels attention • Enlarges or reduces actual size of objects • Brings distant past and the present into the classroom
  • 9. ADVANTAGES • The mental reaction of the pupils to audio-visual experience is both intellectual and emotional. • 86 % of our sense knowledge is attained through seeing and hearing and hence is the use of audio-visual aids • A-V Aids provide first hand experience to the children and hence the learning becomes interesting real and durable. • A-V Aids help the learner to grasp quickly and retain the experience so received longer. • They make a lasting impression on the minds of the learners.
  • 10. “one picture is worth a thousand words” • They make learning – realistic, – permanent, – natural and – easy.
  • 11. FUNCTIONS OF projected AIDS • They supply a concrete basis for conceptual thinking and hence, reduce meaningless word response of students. • They have high degree of interest for students. • They make learning more permanent. • They offer a reality of experience which stimulate self activity on the part of pupil. 5. Develop continuity of thought; this is especially true of motion pictures. • They provide experience not easily obtained through other materials and contribute to the efficiency, depth, and variety of learning.
  • 12. NEED AND IMPORTANCE • Motivate students mental and physical activity • Save time • first hand experience by looking at concrete things, living specimen, handling apparatus and actual demonstration etc. Pupils to have clear conception of ideas, information, facts and principles. • Help to bring a change in the atmosphere of the class. • Provide a congenial atmosphere in the class. • Help to develop scientific attitude and get a training in scientific method. • Large number of students can taught at a time. • Most convenient, easy and natural way of learning. • make learning effective and durable
  • 13. CLASSIFICATION OF AV AIDS 1. PROJECTED AIDS 2. NON-PROJECTED AIDS
  • 14. PROJECTED AV AIDS • Opaque projectors • Slides • Film strips • Overhead projectors • LCD panels • Slide projector(magic lantern) • Epidiascope • Slide cum film strip projector • Films ( video materials)
  • 15. NON PROJECTED AIDS • Cartoons • Charts • Comics • Diagrams • Flash cards • Graphs • Maps • Photographs • Pictures • Posters • Printed material • Black board • Bulletin board • Flannel board • Magnetic board • Diagrams • Models • Puppets • Specimens
  • 17. OPAQUE PROJECTOR • a device which displays opaque materials by shining a bright lamp onto the object • A system of mirrors, prisms and/or imaging lenses is used to focus an image of the material onto a viewing screen
  • 18. Opaque projector -cont • projectors require brighter bulbs • larger lenses • Care to be taken to prevent material damage • Not very common
  • 19. Opaque projector -CONT WORKING  Opaque projector, built of large black  Consists two mirrors at top & bottom;1000w bulb  Light rays passes through the first mirror, then to the object, light rays from the illuminated picture then focuses to the second mirror , then it is projected to screen by using a convex lens • then the picture want to project is placed on the plate and handle is fixed again , then switch on light
  • 20. OPAQUE PROJECTOR -CONT • PAXISCOPE • Project images or printed matter or small opaque objects on a screen • Works as epidiascope and diascope • Principle – Horizontal straight line projection
  • 21. PRECAUTIONS THAT SHOULD BE TAKEN FOR OPAQUE PROJECTOR • handled carefully • Protected from breakage • away from moisture • kept clean • preferably kept in a cool room • switched off when not in use.
  • 22. ADVANTAGES • graphic aids are projected with magnification • tracing enlarged images • no need of clipping picture from book resources • Flat specimen like coins, cloth pieces, leaves etc. can also be projected • seen conveniently by a large number of students • Teaching material of various sizes can be used • language reading lessons • stamp size to that of 20cmx250cm size pictures. • helps in preparation of graphic aids
  • 23. DISADVANTAGES • Demands total darkness • Bulky machine • Electricity required • Difficult maintenance
  • 25. SLIDE A slide is a still transparency of 70mm, 35mm or 6mm size which is optically enlarged and projected on a screen as a real image
  • 26. 4 KINDS OF SLIDES CAN BE MADE BY TEACHER • Marker slides • Cellophane slides • Silhouette slides • Etched glass slides
  • 27. Marker slide • a clean glass piece of right size • Draw picture or a diagram is with a fine tip marker pen • Hold glass piece in cardboard or wooden frame
  • 28. Silhouette slides • small cut outs from colour cellophanes are plated on the glass piece • another glass piece is plated over it • two are taped together • Or by drawing on cellophane piece and sticking it onto the glass piece
  • 29. ETCHED GLASS SLIDE • clean a glass piece thoroughly • rinse it with kerosene • Draw the diagram with crayon glass marking pencil
  • 30. ADVANTAGES OF SLIDES • They attract attention •They arouse interest •They assist lesson and development •They test student understanding •They review instruction •They facilitate teacher student participation
  • 31. DISADVANTAGES OF SLIDES • More time consumes for preparations of slides • They can only be seen with the help of slide projectors • Students can’t see the slides with the naked eyes • Expensive material is used for making the slides • Many errors occurs during preparation
  • 32. Projected aids 3. Film strips
  • 33. FILM STRIP •A filmstrip is one of the projective audio visual that a fixed sequence related still on a roll of 35 mm film. •The filmstrip can be projected backside of the map as convenience of the teaching situation demand. • A large number of subjects come with in the range of filmstrips. •The teacher only needs to tap the right type of strip for his teaching purpose.
  • 34. Preparations of Film strips Filmstrips can be prepared either by employing photographic methods or by drawing picture by hand on the film itself. The steps in preparation are Select a suitable topic from the syllabus after considering the possibilities of depicting the subject matter by drawing photographs.  Prepare a detail script describing the contents of each frame indicating the method of preparing it. i.e. whether by at work or by photograph.
  • 35. -cont • Make rough sketches of the figure on the paper so as to serve as guide when final sketches are drawn • Draw the sketches in suitable size • Arrange the drawings $ enlarged photographs • the material in correct sequence thus arranged using 36mm film camera & prepare negative. • Prepare the guidebook, which is to follow the filmstrips explaining the details of each frame.
  • 36. PRECAUTION WHILE USING FILM – STRIP The Film strip, because of its fixed sequence, is not as flexible for individual stills as the slides, which can be in any order. The film strip is a “skill” medium .It cannot portray effectively and is not intended to do so. The film strip is easily damaged and is not easy to repair. For presenting film strips in the class room teacher need to analyses the significance of the use of strip for educational purpose.
  • 37. -cont •Determine the lessons that could be effectively illustrated with a strip. •Preview film strip before using them. •Show again any part of the film strips needing move specific study. •Use film strip to stimulate emotions built attitude and to point out us problem. •Use a pointer to direct attention to specific details on screen.
  • 38. Advantages It is an economical visual materials It is easy to make and convenient to handle and carry. Takes up little space and can be easily stored. Provides a logical sequence to the teaching procedure and the individual picture on the strip can be kept before the student for a length of time. Film –strip can be projected on the screen or wall or paper screen as the convenience and the teaching situation demands. It is available both in color & blank & white. Good to use – afterward, have a discussion to see whether people have understood the subject. DISADVANTAGES • Its frame connect be remove or substitute . • It this becomes necessary them the strip can be cut into slides & mounted
  • 39. Projected aids 4. Slide cum film strip projector
  • 40. SLIDE CUM FILM STRIP PROJECTOR The slides and film strips are projected on a screen using an optical instrument called slide cum film strip projector Technology same as opaque projectors Cannot project 3 dimensional image makes use of small photographs mounted on a slide
  • 41. STRUCTURE • consists of a metal case having a concave reflector • 500 watt or 1000 watt straight filament bulb • set of concave lens called condenser to illuminate the slide • slid able set of convex lenses have objective which focuses the image of the slide on the screen. • The metal core is fitted with as small exhaust fan to blow out the excess heat. • a slide frame or a film strip carrier
  • 42. Using common slide cum film projector • Place the slide projector on a rigid and stable table. • Place the screen at an appropriate place • Insert the slide projector or film strip carrier in its place after opening the tube. • Mount a slide or film strip on its carrier • Insert the projector cord plug into the wall socket. • Darken the room
  • 43. - cont • Switch on the cooling fan first and then the projection bulb. • Focus the image • Show the slide and explain • Insert the next slide • Present the slides or frames sequentially • switch off the bulb first then the cooling fan • unplug the slide projector and store it back in its box.
  • 44. PREPARATION OF A SLIDE SHOW • Collect all the available slides • check them thoroughly • Choose the slides • Arrange the chosen slides in a proper sequence • Darken the room • Make proper seating arrangements for students • start teaching • interruption during the slide show will result in the loss of interest
  • 45. CARE OF SLIDES AND FILMSTRIPS • they require care in handling and storage • store vertically in cardboard trays of right size • trays should be covered • they should be catalogued subject wise • film strips can be placed in rolled up positions in cylindrical container • container should be properly labelled
  • 46. ADVANTAGES OF SLIDE PROJECTIONS. • Requires simple skills • convenient aid for making classroom teaching interesting. • small in size • can be stored and also carried around easily • quite cheaper • a logical and sequential order of presentation • image in the screen can be held for any time interval
  • 47. -cont • save time in teaching • Capture attention and interest of students • Interaction with students and group participation is possible
  • 48. ADVANTAGES OF FILM STRIPS • economical • easy to make • convenient to handle • Takes up little • can be easily stored • Provides logical sequence • Can use AC/DC power, batteries, or rechargeable batteries with solar panels.
  • 49. DISADVANTAGES OF SLIDES AND FILM STRIP • Need a darkened room. • Require equipment and power that will need to be maintained. • Sequence cannot be changed. • Visual media only; it requires audio or printed text. • Require professional assistance for final production.
  • 50. CARE OF THE FILMSTRIP • Keep free of dust and dirt which can scratch the filmstrip • Keep dry because moisture can cause the emulsion to become sticky. • Then the film will stick together and be destroyed. • Keep oily hands off the film as they can leave residue on the film. • Keep away from excessive heat which can cause the film to warp.
  • 51. STORAGE OF THE FILMSTRIP • Store in containers away from heat, dust, moisture • When winding up the filmstrip, hold onto the edges • Do not pull to make it tighter as this can leave scratches on the film
  • 52. CARE OF THE EQUIPMENT • Don’t handle projector while the bulb is still hot as the bulb filament is fragile. • Pack equipment carefully for safe transporting. • Protect from the environment, dust, dirt, moisture
  • 53. PROJECTED AIDS 5. OVER HEAD PROJECTOR
  • 54. OHP • An OHP is an important electronic teaching aid. • This machine projects an image from a transparency • It will be advisable to switch off the bulbs of OHP for 5 minutes after every 10 minutes of use.
  • 56. PREPARING A TRANSPARENCY • prepared by writing on cellophane sheets with the help of an OHP pen • Coloured pens • Xeroxing from any printed material • besides single transparency can be used on a roll
  • 57. RULE OF SIX FOR PREPAIRING TRANSPARENCIES • Six lines per transparency • Six words per line • Six mm smallest letter size • Six cm (3+3 on each side) margin
  • 58. SCREENS FOR PROJECTIONS Effective utilization of projection material necessitates careful selection of the screen. Types of screen are aluminium coated  glass board flat white screen Screens should be mounted properly and at a proper angle
  • 59. USING AN OHP • Place the OHP on a stable table with the objective lens facing the screen behind the teacher. • Put the cord plug into power wall socket. • Switch on the blower first and then the bulb. • Place transparency on the glass top.
  • 60. -CONT • Move the objective lens and mirror assembly up and down to get the image in focus on the screen. • Explain about the material on the transparency from behind OHP with a strong pointer. • The handle of the teacher should not come on the slide. • Make your points short and simple • Remove what is not needed.
  • 61. ADVANTAGES OF OHP • teacher can face the class without any difficulty. • The teacher can maintain eye contact and observe the reactions of students. • Small objects can be shown on the machine simply by placing them on projection slide. • The graphics and writings can be shown very clearly and colourfully. • It does not need as darkened room as compared to other projectors
  • 62. SOME DO’S AND DON’T’S WHILE USING THE OHP
  • 63. DO’S • Focus and position image before presentation • Stand to the side of the screen • Turn off projector when not in u • Letters the larger the better • Use colour to attract attention • Put captions on top. • Have images in to two-thirds of visual position image at the top of the screen • Use pen or ruler to point • Use upper and lower case letters
  • 64. DON’T’S • Walk or stand in front of the screen. • Leave the projector on when you’ve talking about something • Write closely on the whole of the transparency sheet • Have images type-written or too small • Use black and white visuals only • Use finger to point • Use only capital letter
  • 65. PROJECTED AIDS 6. SLIDE PROJECTOR
  • 66. SLIDE PROJECTOR OR DIASCOPE OR MAGIC LANTERN • It is used to project slides. • Used for projecting pictures from a transparent slide on a wall or screen. • It helps in showing the magnified image of the slide. • If the slide is coloured it would be more attractive.
  • 67. Construction of slide projector • Source of light ( projection lamp) • Reflector ( concave mirror) • Condensing lens • Slide carrier • Objective lens
  • 68. Working of a slide projector • When a figure or illustration is very small and it is required that whole class should see it clearly , a transparent slide of small figure is prepared. • slide is placed inverted into the slide carrier part of the projector. • The light rays emitted by the source of light and reflected by the concave mirror lying behind the lamp, are directed forward to fall on the condensed lens.
  • 69. -cont • This lens shatters and bends these rays into strong beam of lights , which passes through the slide CD and comes to the point at the centre of objective lens. • The objective lens spread the light rays and directs them on screen surface. • than the image produced on the screen is enlarged, sharp and clear.
  • 70. advantages • Arouse attention and interest of the students • Variety of educational information can be given • Easy to transport • Easy to use • Economical in time • Not costly • Non – fragile • Non- inflammable
  • 71. disadvantages • Not suitable for all types of educational material. • Transparent slides can’t be put to excessive use. • Not to use for longer duration.
  • 72. Projected aids 7. epidiascope
  • 73. introduction • It is the combination of episcope and diascope. • It projects transparent as well as opaque materials. • It can be used conventially in the class room. • When it is used to project slides it works as diascope • When it is used to project an opaque object it serves as episcope
  • 74. construction • Projection lens • Episcope lens • Body containning lamp and mirror • Diascope attachments • Base • Removable top covers and ventilation vanes
  • 75. working • Source of light falls on opaque body • Plane mirror reflects the light so that it passes through projection lens • Forming a magnifying image on the screen , it works as episcope • By the movement of lever,projector can be used to project slides, thus it acts as diascope. • In this way, there is a change from episcopy to diascopy.
  • 76. ADVANTAGES • Projection of any material.( films, film strips, slides) • Can be used for magnification purposes. • Can be used to deal with big classes • Convinent use • Motivation • Clearification and better retention
  • 77. DIS-ADVANTAGES Its very heavy and can’t be moved easily Very costly It requires dark room
  • 78. precautions • Material to be projected should be wisely selected • Do not use too many pictures or things, it may confuse the students • Items should be presented in the systematic way.
  • 79. Projected aids 8. Video materials
  • 80. introduction • The video casette recorder helps to enhance the educational and entertainment values of the television. • The video lessons are more effective than the conventional lessons and serve as a better models as they are given by more efficient teachers.
  • 81. Precautions while Using Videotapes • Preview the videotape • Check to be sure that the videotape is compatible with the videotape player • Cue the videotape to the beginning of the program • Arrange the room so that all participants can see
  • 82. -cont • State the session objective • Provide an overview of the videotape • Ask participants to look for a number of specific points during the videotape • Discuss the videotape after it has been shown • Prepare test items based on the videotape content if appropriate
  • 83. Advantages of Using Videotapes • Source of entertainment • Source of information • Stimuli for discussion • Animation can be used to show an abstract concept • TV monitors tolerate fluctuations in voltage much better than projectors • Video players are less expensive and easier to maintain than slide projectors
  • 84. Disadvantages of Videotapes • Commercially prepared videotapes are often outdated • Videotapes may have been edited and omit or rearrange key training steps in the procedure • Participants may be distracted by cultural differences
  • 85. CONCLUSION • Audio Visual Aids are very useful for the teaching process • audio-visual are great tools to catch the audience attention • It is important to use variety of teaching methods for students with varying preferences • An AV aid should also not distract a student from learning experiences