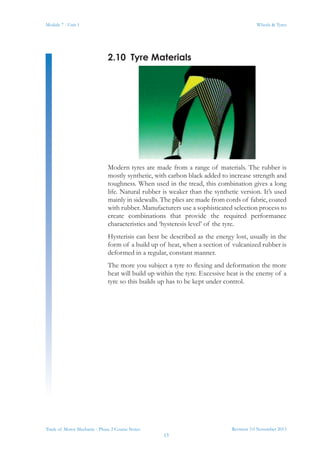
Trade of Motor Mechanic
Module 7
Unit 1
Wheels & Tyres
Phase
2
Produced by
In cooperation with:
Subject Matter Experts
Martin McMahon
&
CDX Global
Curriculum Revision 2.2 16-01-07
© SOLAS 2013
Revision 3.0 November 2013
Module 7 - Unit 1 Wheels & Tyres
Trade of Motor Mechanic - Phase 2 Course Notes
Table of Contents
Introduction......................................................................................................... 1
Unit Objective...................................................................................................... 2
1.0	 Health, Safety and Precautionary Procedures......................................... 3
1.1	 Health and Safety........................................................................... 3
2.0	 Construction and Features of Wheels and Tyres..................................... 4
2.1	Wheels............................................................................................ 4
2.2	 Types of Wheels............................................................................ 5
2.3	 Rim Sizes & Designations............................................................. 6
2.4	 Tyre Types..................................................................................... 7
2.5	 Tyre Construction.......................................................................... 8
2.6	 Tyre Tread Designs....................................................................... 9
2.7	 Cross-Ply Tyres.............................................................................10
2.8	 Radial Ply Tyres............................................................................11
2.9	 Radial Ply Tyre Sidewalls/Thread...............................................12
2.10	 Tyre Materials...............................................................................13
3.0	 Primary Data on Automobile Tyres........................................................14
3.1	 Tyre Information..........................................................................14
3.3	 Tyre Ratings for Temperature & Traction...................................18
4.0	 Removing, Refitting and Repairing Tyres...............................................19
5.0	 ‘Space-Saver’ Tyres..................................................................................19
5.1	 Space-Saver tyres...........................................................................19
6.0	 ‘Run Flat’ Tyres...................................................................................... 20
6.1	 Run Flat Tyres (RFT).................................................................. 20
6.2	 Tyre Pressure Monitoring System (TPMS)................................. 22
7.0	 Dynamical Wheel/Tyre Balancing......................................................... 24
7.1	 Wheel Balancing.......................................................................... 24
8.0	 Balancing Automobile Road Wheel/Tyre Assembly............................. 26
9.0	 NCT/DoT VTM Requirements for Automotive Wheels and Tyres...... 26
10.0	 Reporting on Tyre Condition and Patterns of Wear.............................. 27
10.1	 Tyre Wear Diagnosis.................................................................... 27
11.0	 Wheel Bearing Types and their Tightening/Adjustment Procedure.... 29
12.0	 Wheel Bearing Maintenance.................................................................. 29
12.1	 Maintenance of a Wheel Bearing................................................ 29
13.0	 Changing Tyres Procedure..................................................................... 36
13.1	 Procedure for Changing Tyres.................................................... 36
14.0	 ‘End of Useful Life’ Procedures with Tyres/Tubes.............................. 36
14.1	 Tyre Disposal............................................................................... 36
Self Assessment................................................................................................. 37
Suggested Exercises.......................................................................................... 39
Training Resources............................................................................................ 39
Suggested Further Reading............................................................................... 40
Revision 3.0 November 2013
1
Module 7 - Unit 1 Wheels & Tyres
Trade of Motor Mechanic - Phase 2 Course Notes
Introduction
There are 3 Units in Module 7. This Unit 1 focuses on Wheels and
Tyres.
Wheels must be strong enough to support the vehicle and withstand
the forces caused by normal operation. At the same time, they
must be as light as possible, to help keep un-sprung weight to a
minimum.
The tyre provides a cushion between the vehicle and the road to
reduce the transmission of road shocks. It also provides friction
to allow the vehicle perform its normal operations. Modern tyres
are manufactured from a range of materials. The rubber is mainly
synthetic. This unit will cover the key components associated with
the Wheels and Tyres and the relevant environment, health and
safety.
Module 7
Suspension &
Steering
Unit 1 Unit 2 Unit 3
Wheels &
Tyres
Suspension &
Dampers
Steering
Alignment
& Geometry
Module 7 - Unit 1
Revision 3.0 November 2013
2
Wheels & Tyres
Trade of Motor Mechanic - Phase 2 Course Notes
Unit Objective
By the end of this unit each apprentice will be able to:
•	 List the construction and primary design features of motor
vehicle wheels/rims and tyres
•	 Describe the primary manufacturer classification data on
automobile tyres.
•	 Remove, refit tyres, repair punctures on tubeless tyres
•	 Describe the function and limitation of use of 'space-saver'
passenger car spare wheel/tyre assembly
•	 Describe the basic construction, use and operation of ‘run
flat’ tyres
•	 State the reasons why automotive road wheel/tyre assemblies
need to be dynamically balanced
•	 Balance automobile road wheel/tyre assembly
•	 Describe the NCT/DoT VTM requirements for automotive
wheels and tyres
•	 Examine the wheels and tyres of an automobile and write a
reportontyrecondition,patternsof wearandrecommendations
for compliance with NCT/DoT VTM requirements
•	 Identify non-driven wheel bearing types and describe their
tightening/adjustment procedure (where applicable)
•	 Remove/refit/renew wheel bearings on a non-driven wheel,
tighten and torque or adjust running clearance
•	 Describe the procedure used when changing tyres - wheel
positions on vehicles fitted with electronic tyre pressure
monitoring system
•	 Describe the 'end of useful life' procedures to be used with
tyres/tubes etc.
Revision 3.0 November 2013
3
Module 7 - Unit 1 Wheels & Tyres
Trade of Motor Mechanic - Phase 2 Course Notes
1.0	 Health, Safety and
Precautionary Procedures
1.1	 Health and Safety
If the proper safety procedures are not adhered when working on
Wheels and Tyres this could lead to serious injury health problems
to personnel.
Instruction is given in the proper safety precautions applicable to
working on Wheels and Tyres which include the following:
•	 Compressed air
•	 Correct tyre pressure
•	 Danger as tyre bead locates itself on the wheel rim
•	 Damage to the tyre bead during refitting & removal
•	 Steel wire ends protruding from the crown
•	 Balance weights insecurely attached
•	 Vehicle insecurely supported
•	 Wheel bearings incorrectly tightened  torque
•	 Road wheels not torque
•	 Use of Personal Protective Equipment (PPE) e.g. Eye
protection, foot wear etc.
Refer to motor risk assessments, Environmental policy and Material Safety
Data Sheets (MSDS)
Key Learning Points
•	 Personal safety precautions applicable to working with
compressed air, wearing of safety glasses/goggles. Correct
tyre pressure, danger as tyre bead locates itself on the wheel
rim. Damage to the tyre bead during removal or refitting.
Steel wire ends protruding from the crown. Balance weights
insecurely attached. Vehicle insecurely supported. Wheel
bearings incorrectly tightened/torqued. Road wheels not
torqued correctly
Module 7 - Unit 1
Revision 3.0 November 2013
4
Wheels & Tyres
Trade of Motor Mechanic - Phase 2 Course Notes
2.0	 Construction and Features of
Wheels and Tyres
2.1	Wheels
Wheels must be strong enough to support the vehicle and withstand
the forces caused by normal operation. At the same time, they must
be as light as possible, to help keep un-sprung weight to a minimum.
Wheels can be made from cast aluminium alloy or magnesium
alloy. Alloy wheels are popular because of their appearance and
because they are lighter than similar steel wheels. Aluminium is a
better conductor of heat, so alloy wheels can dissipate heat from
brakes and tyres more effectively than steel ones. Most wheels have
ventilation holes in the flange, so air can circulate to the brakes. Most
passenger car wheels are of well, or drop-centre design. This design
allows for tyre removal and fitting. The removal and fitting of tyres
should be carried out according to manufactures instructions.
Key Learning Points
•	 Wheel rim design features, rim offset, well, diameter, tapered
bead seat, outside or inside tyre fitting (alloys)
•	 Tyre construction; beads, plies, symmetrical/asymmetrical
thread/ pattern etc., radial v crossply, tubed/tubeless, sealing
system, wear indicator/bars
•	 Tyre design; water dispersal, aquaplaning, static v sliding
friction
•	 S.I. unit of pressure-bar
Revision 3.0 November 2013
5
Module 7 - Unit 1 Wheels & Tyres
Trade of Motor Mechanic - Phase 2 Course Notes
2.2	 Types of Wheels
Passenger cars normally use rims which are of well based, or drop-
centre design. The drop enter is used for mounting and demounting
the tyre onto the rim. Wheels must be strong enough to carry the
mass of the vehicle and withstand the forces that are generated
during use. The wheel centre must accurately locate the wheel rim
centrally on the axle. It must also provide the required distance from
the centreline of the wheel, to the face of the mounting flange.
This is called offset. Offset is important because it brings the tyre
centreline into close alignment with the larger inner hub bearing and
reduces load on the stub axle. This allows the inside of the wheel
centre to be shaped to provide space for the brake assembly, usually
located inside the wheel. Ventilation slots allow air to circulate around
the brakes. The rim must be accurately shaped and dimensioned and
strong enough to support the tyre under the load of the vehicle and
the forces generated by the motion of the vehicle.
When inflated, the tyre is locked to the rim by tapering the bead seat
towards the flange, or by safety ridges or humps, close to the flange.
In the event of sudden deflation, or blow-out, safety ridges prevent
the tyre moving down into the well. This helps maintain control of
the vehicle while the brakes are applied. Well-based rims can also
be used on heavy commercial vehicles for tubeless tyres.
Module 7 - Unit 1
Revision 3.0 November 2013
6
Wheels & Tyres
Trade of Motor Mechanic - Phase 2 Course Notes
2.3	 Rim Sizes & Designations
To ensure correct fit between a tyre and rim, all manufacturers of
wheels and tyres comply with standard dimensions, as recommended
by automotive manufactures. The width of the rim is the distance
across the rim flanges, at the bead seat. Its diameter is the distance
across the centre of the rim from bead seat to bead seat.
The shape of well-based rims is provided by a letter code, such as
J, K, JJ and KK. The width of the rim and the diameter is traditionally
stated in inches. A rim designated 7 JJ by 14 would refer to a rim
measuring 7 inches across the rim flanges and 14 inches in diameter
from bead seat to bead seat, with the profile conforming to a JJ
code.
The rim width and diameter can also be stated in millimetres. Metric rims are
not interchangeable with Imperial rims.
The tyre must be an exact fit on the rim, to fulfil a number of
functions.
•	 It ensures that the narrow contact area between the beads of
the tyre and the rim will seal the air in a tubeless tyre.
•	 It transfers all the forces between the tyre and the wheel,
without slipping or chafing.
•	 It ensures the friction between the tyre and the rim prevents
the tyre turning on the rim.
Revision 3.0 November 2013
7
Module 7 - Unit 1 Wheels & Tyres
Trade of Motor Mechanic - Phase 2 Course Notes
2.4	 Tyre Types
The tyre provides a cushion between the vehicle and the road to
reduce the transmission of road shocks. It also provides friction
to allow the vehicle perform its normal operations. Modern tyres
are manufactured from a range of materials. The rubber is mainly
synthetic. Two types of tyre construction are common – cross-ply
and radial. Most passenger cars now use radial tyres, as do most 4-
wheel-drives and heavy vehicles. Tube tyres require an inner tube
to seal the air inside the tyre.
Tubeless tyres eliminate the inner tube by making the complete
wheel and tyre assembly air-tight. A special, air-tight valve assembly
is needed. This can be a tight fit into the rim, or it can be held with
a nut and sealing washers.
Tyres can be identified by markings on the sidewalls. This typically
includes the maker’s name, the rim size, the type of tyre construction,
aspect ratio, maximum load and speed and, in some cases, intended
use. Regulations cover the allowable dimensions for wheels and tyres
on a particular vehicle. Covered in section 3.1. These dimensions are
usually set out on the tyre spec attached to the vehicle. Incorrectly
selected wheels and tyres can overload wheel bearings and change
steering characteristics.
The tyre chart lists the wheel and tyre sizes approved by the
manufacturer for the vehicle.
Using other wheels and tyres may be illegal. The repairing of
punctures on tyres must be carried out in accordance with current
legalisation.
Module 7 - Unit 1
Revision 3.0 November 2013
8
Wheels & Tyres
Trade of Motor Mechanic - Phase 2 Course Notes
2.5	 Tyre Construction
A tyre provides a cushion between the vehicle and the road, to
reduce the transmission of road shocks. The air in the tyre supports
the vehicle’s mass and the tread provides frictional contact with the
road surface, so the vehicle can manoeuvre for normal use. Radial
ply tyres are usually manufactured in stages. The casing is initially
formed by laying the rubber inner and the first layer of textile ply
cords, around a flat drum mould. The rubber-covered bead wire
and sidewalls are then locked into position.
The rubber sidewalls protect a finished tyre from kerb damage and
weathering. At the second stage-building machine, the tyre is shaped.
Belts of steel wire are guided into place. The tread is then positioned
and the uncured tyre is consolidated by rollers, before it is placed
in the mould. During the moulding and curing stage, the tyre is
subjected to high temperature and pressure and it takes on its final
fixed identity, with its own distinctive tread pattern. It is then
trimmed and checked for balance and quality before it is inflated
and run under load against a rotating drum. This is a final check for
ride uniformity.
Revision 3.0 November 2013
9
Module 7 - Unit 1 Wheels & Tyres
Trade of Motor Mechanic - Phase 2 Course Notes
2.6	 Tyre Tread Designs
Tyres generally fall into one of the following categories:
•	 Directional
•	 Non-directional
•	 Symmetric and Asymmetric.
Directional tread patterns are designed to provide a range of
functions during particular driving conditions. The tyre can only
be mounted to the wheel so that it revolves in a particular direction
to correspond with the tread pattern. An arrow on the tyre sidewall
indicates the designed direction of forward travel. On-directional
tread patterns are designed in such a way that the tyre can be mounted
on the road wheel for any direction of rotation. Tyre treads can be
directional, non-directional, symmetric and asymmetric.
In wet conditions, the coefficient of friction between a smooth tyre
and the road surface falls to an extremely low value. Aquaplaning
is prevented by Grooves in the tread pattern clearing water away
from the contact patch area. This allows a relatively “dry area” to
be formed and for road adhesion to be maintained.
Static friction occurs when two objects are not moving relative to
each other e.g. the tyre against the road surface while the car is
stopped. To overcome this, a force must be applied (car starting to
move) which results in rolling friction. If rolling friction increases
until it is greater than static sliding friction will result.
The SI unit of tyre pressure is the “bar”.
Module 7 - Unit 1
Revision 3.0 November 2013
10
Wheels & Tyres
Trade of Motor Mechanic - Phase 2 Course Notes
2.7	 Cross-Ply Tyres
Two types of tyre construction are common cross-ply and radial
ply. The cross-ply tyre is the older form. It is also called a bias-ply
or conventional tyre. It is constructed of 2 or more plies or layers
of textile casing cords, positioned diagonally from bead to bead.
The rubber-encased cords run at an angle of between 30 and 38
degrees to the centreline, with each cord wrapped around the beads.
A latticed criss-crossed structure is formed, with alternate layers
crossing over each other and laid with the cord angles in opposite
directions.
Bias/Crossply Construction
This provides a strong, stable casing, with relatively stiff sidewalls.
However during cornering, stiff sidewalls can distort the tread and
partially lifting it off the road surface. This reduces the friction
between the road and the tyre. Stiff sidewalls can also make tyres
run at a high temperature. This is because, as the tyre rotates, the
cords in the plies flex over each other, causing friction and heat. A
tyre that overheats can wear prematurely.
Revision 3.0 November 2013
11
Module 7 - Unit 1 Wheels & Tyres
Trade of Motor Mechanic - Phase 2 Course Notes
2.8	 Radial Ply Tyres
Radial ply tyres have much more flexible sidewalls due to their
construction. They use 2 or more layers of casing plies, with the
cord loops running radially from bead to bead.
Radial Construction
The sidewalls are more flexible because the casing cords do not
cross over each other. However, a belt of 2 or more bracing layers
must be placed under the tread. The cords of the bracing layers may
be of fabric, or of steel and are placed at 12, to 15 degrees to the
circumference line. This forms triangles where the belt cords cross
over the radial cords. The stiff bracing layer links the cord loops
together to give fore and aft stability, when accelerating, or braking
and it prevents any movement of the cords during cornering. The
cord plies flex and deform only in the area above the road contact
patch.
There are no heavy plies to distort and flexing of the thin casing
generates little heat, which is easily dispersed. A radial ply tyre runs
cooler than a comparable cross-ply tyre and this increase tread life.
A radial tyre has less rolling resistance as it moves over the road
surface.
Module 7 - Unit 1
Revision 3.0 November 2013
12
Wheels & Tyres
Trade of Motor Mechanic - Phase 2 Course Notes
2.9	 Radial Ply Tyre Sidewalls/Thread
The sidewalls of radial ply tyres bulge where the tyre meets the road,
making it difficult to estimate inflation pressure visually. It needs to
be checked with an accurate tyre gauge. Using correct inflation
pressures extends tyre life and is vital for safety.
A tubeless tyre is lined with a soft rubber layer to form an air-tight
seal. This inner liner also seals against small penetrations, letting air
escape only relatively slowly. When a tubeless tyre is fitted, an air-
tight valve assembly is used. It can be a tight fit into the rim, or be
held with a nut and sealing washers.
A tyre and wheel assembly must be balanced. As the wheel rotates,
centrifugal force acts outwards. Any part heavier than the rest will
vibrate vertically, with the heavy area slapping the road surface with
each turn of the wheel. This is called static unbalance.
Dynamic unbalance causes the wheel assembly to turn inwards and
then outwards, with each half revolution. As speed rises, rapid side
movement of the front wheels causes a sideways-vibration, or wheel
wobble effect, at the front of the vehicle.
Tread life can also be reduced by incorrect wheel alignment. The
feathered edge of this tyre indicates an incorrect toe-setting. Wear
on the one shoulder of this tyre could be due to incorrect camber
setting. Most passenger car tyres have tread-wear indicators moulded
into the tread pattern. They generally provide an indication when
the depth of a tyre groove falls to 1.6 millimetres (legal limit).
Control of a vehicle in any weather conditions depends finally on
frictional forces generated between the tyres and road surface.
Revision 3.0 November 2013
13
Module 7 - Unit 1 Wheels & Tyres
Trade of Motor Mechanic - Phase 2 Course Notes
2.10	 Tyre Materials
Modern tyres are made from a range of materials. The rubber is
mostly synthetic, with carbon black added to increase strength and
toughness. When used in the tread, this combination gives a long
life. Natural rubber is weaker than the synthetic version. It’s used
mainly in sidewalls. The plies are made from cords of fabric, coated
with rubber. Manufacturers use a sophisticated selection process to
create combinations that provide the required performance
characteristics and ‘hysteresis level’ of the tyre.
Hysterisis can best be described as the energy lost, usually in the
form of a build up of heat, when a section of vulcanized rubber is
deformed in a regular, constant manner.
The more you subject a tyre to flexing and deformation the more
heat will build up within the tyre. Excessive heat is the enemy of a
tyre so this builds up has to be kept under control.
Module 7 - Unit 1
Revision 3.0 November 2013
14
Wheels & Tyres
Trade of Motor Mechanic - Phase 2 Course Notes
3.0	 Primary Data on Automobile
Tyres
3.1	 Tyre Information
Information on tyre aspect ratio is now included in the sidewall
marking, together with the type of construction, speed rating and
maximum permitted pressure.
The speed rating of the tyre is given by the letter code, which
indicates maximum recommended speed for that tyre. Common
symbols for passenger car tyres include;
•	 S, for up to 180 kilometres per hour.
•	 H, up to 210 kilometres per hour.
•	 V, up to 240 kilometres per hour.
•	 And Z for over 240 kilometres per hour.
Radial ply tyres have always been marked with the section width in
millimetres, but with the rim diameter in inches. For example:
•	 185 is section width in millimetres.
•	 70 indicate a 70% aspect ratio.
•	 H is the speed rating, for up to 210 kilometres per hour.
•	 R indicates radial ply construction.•	 13 indicate the tyre is
suitable for fitting to a 13-inch diameter rim.
Totally metric types are also manufactured. For example:
•	 190 is the section width in millimetres.
•	 The aspect ratio is 65%.
•	 The speed rating is H, for up to 210 kilometres per hour.
•	 R indicates radial ply construction.
•	 390 indicate the tyre is suitable for fitting to a 390 mm diameter
rim.
Key Learning Points
•	 Classification data; type, diameter, width, aspect ratio, speed
ratio, ply rating, load index, maximum permitted pressure
•	 Tyre information
Revision 3.0 November 2013
15
Module 7 - Unit 1 Wheels & Tyres
Trade of Motor Mechanic - Phase 2 Course Notes
Metric-diameter rims cannot be fitted with inch-diameter tyres, or
vice-versa.
Although tyre markings may remain traditional, e.g. 255 45 Z-R 17,
there is a worldwide move towards an I-S-O metric standard which
uses letters:
•	 P for passenger,
•	 LT for light truck,
•	 C for commercial,
•	 And T means temporary use as a spare wheel.
The tyre may have a load index number, indicating the maximum
load a tyre can carry at the speed indicated by its speed symbol,
which follows the number.
e.g. a P-series metric size code may read in full – P205/65 R15
92H.
•	 P for passenger car tyre,
•	 205 is the section width in millimetres,
•	 With 65% aspect ratio,
•	 R – Radial ply construction,
•	 15 inch diameter rim,
•	 92 load index, for a maximum load of 630 kilograms,
•	 And H for a speed rating up to 210 kilometres per hour.
Further development of high-speed tyres has expanded the speed
categories to include W and Y.
Module 7 - Unit 1
Revision 3.0 November 2013
16
Wheels & Tyres
Trade of Motor Mechanic - Phase 2 Course Notes
In another example:
•	 Z indicates a speed over 240 kilometres per hour, but the load
and speed rating is taken as the maximum load and speed,
that is,
•	 89 for a maximum load of 580 kilograms,
•	 And W for 270 kilometres per hour.
Understanding Load Index
The Load capacity of a tyre determines what payload each tyre can
carry. It is vital that you check with your manufacturer what capacity
should be put on your car. The following table shows what Index
specification can carry.
Load
index
Load in
kg
Load
index
Load in
kg
Load
index
Load in
kg
62 265 84 500 106 950
63 272 85 515 107 975
64 280 86 530 108 1000
65 290 87 545 109 1030
66 300 88 560 110 1060
67 307 89 580 111 1090
68 315 90 600 112 1120
69 325 91 615 113 1150
70 335 92 630 114 1180
71 345 93 650 115 1215
72 355 94 670 116 1250
73 365 95 690 117 1285
74 375 96 710 118 1320
75 387 97 730 119 1360
76 400 98 750 120 1400
77 412 99 775 121 1450
78 425 100 800 122 1500
79 437 101 825 123 1550
80 450 102 850 124 1600
81 462 103 875 125 1650
82 475 104 900 126 1700
83 487 105 925
Revision 3.0 November 2013
17
Module 7 - Unit 1 Wheels & Tyres
Trade of Motor Mechanic - Phase 2 Course Notes
3.2	 Tyre Sizes & Designations
The size of a tyre must satisfy some basic conditions. The bead
diameter must suit the wheel rim diameter. Section width must be
suitable for use on the wheel rim and large enough to have a suitable
load-carrying capacity for the vehicle. The overall tyre size must
allow sufficient clearance between the tyre and the vehicle frame.
All manufacturers mould information about the tyre into its sidewall.
In cross-ply tyres, the bead diameter and the section width are stated
in inches. For example, six hundred by sixteen indicates a tyre with
a section width of 6 inches and a bead diameter suitable for fitting
to a rim which is 16 inches in diameter, across the bead seats.
The load capacity is indicated by the ply rating, for example, 6PR.
The aspect ratio of a tyre is the ratio of its height to its width. It
is usually given as a percentage. The lower a tyre’s aspect ratio, the
wider the tyre is in relation to its height.
An aspect ratio of 98% means the section height of the tyre is slightly
less than the section width. This is called a cushion or balloon tyre.
An aspect ratio of 88% means the height is 12% less than the width,
giving a lower profile. It is called a medium low profile tyre. The
profile of cross-ply tyres was reduced further to between 78% and
82%, called a super low section. However the stiffness of cross-ply
tyres makes them unsuitable for further reduction in profile.
Radial ply tyres have been manufactured in 78% profile, but are also
made with further reductions in profile, from 75%, to 45%.
Module 7 - Unit 1
Revision 3.0 November 2013
18
Wheels & Tyres
Trade of Motor Mechanic - Phase 2 Course Notes
3.3	 Tyre Ratings for Temperature &
Traction
One of the markings on the sidewall of a tyre is a Uniform Tyre
Quality Grading or UTQG grade.
The tyre’s UTQG rating provides information on three aspects of
the tyres durability and operational characteristics. They are:
Tread wear, traction and temperature.
The tread wear number comes from testing the tyre in controlled
conditions. The higher the number the longer the life expectancy
of the tread. Since no one vehicle will be subjected to exactly the
same surfaces and at the same speeds as the controlled conditions,
the number can only be an indicator of expected tread life in
“normal conditions”.
Summary
A Uniform Tyre Quality Grading or UTQG grade provides
information on tread wear, traction and temperature.
Revision 3.0 November 2013
19
Module 7 - Unit 1 Wheels & Tyres
Trade of Motor Mechanic - Phase 2 Course Notes
4.0	 Removing, Refitting and
Repairing Tyres
This is a practical task. Please refer to your instructor for additional information,
which is available from the automotive technical manuals.
5.0	 ‘Space-Saver’ Tyres
5.1	 Space-Saver tyres
Space-saver spares are designed for emergency use only. They’re
designed to get you to a service centre where you can have the
regular tyre fixed or buy a new one. When provided with the vehicle
aspartof theoriginalmanufacturer’sequipment,mostmanufacturers
warn not to exceed 50 miles or 80 kilometres per hour and 50 miles
or 80 kilometres of driving on the space saver tyre.
Some cars are provided with miniature or collapsible space-saver
spare tyres as spare wheels. These normally require a specially
charged canister for inflation when being installed. Others have
small, temporary spare tyres that are inflated normally with a
compressed air supply but to a much higher pressure than normal
road tyres.
Note: Space-saver tyres are designed for emergency use only.
Key Learning Points
•	 Tyre removal and refitting, lubricant used, bead undamaged
and secure to rim, correct pressure
Practical Task
Key Learning Points
•	 Manufacturer’s recommendations on speed and distance,
limitations of use of 'space saver' wheels
Module 7 - Unit 1
Revision 3.0 November 2013
20
Wheels & Tyres
Trade of Motor Mechanic - Phase 2 Course Notes
6.0	 ‘Run Flat’ Tyres
6.1	 Run Flat Tyres (RFT)
The major safety benefit of Run Flat technology or RFT is that it
enables a driver to maintain control if a vehicle in motion suffers a
rapid loss of tyre pressure. In addition, RFT tyres enable the driver
to continue the journey within specified speed and distance limits,
avoiding the need to replace the wheel on the side of the road.
Tyre manufactures also maintain that, as an added benefit of RFT
they usually save weight by eliminating the need to carry a spare tyre.
However, because of their construction they are generally between
two to three times heavier than their conventional counterpart,
which adds additional un-sprung weight to the vehicle affects the
suspension and can increase fuel consumption. Because of the extra
materials used in construction of the tyre, they are also normally
more expensive to purchase. In addition, run flat tyres are usually
“harder riding” and noisier in operation which can be a disadvantage
in some applications. From a manufacturing perspective however,
the free space created by eliminating a standard spare wheel gives
the car manufacturer a range of additional design opportunities.
Key Learning Points
•	 ‘Run flat’ tyre technology; increased sidewall strength,
rubber textile sandwich, 80 km of use, speed 80 km/h,
possible required use of pressure monitoring system
Revision 3.0 November 2013
21
Module 7 - Unit 1 Wheels & Tyres
Trade of Motor Mechanic - Phase 2 Course Notes
An “onboard” vehicle tyre pressure monitoring system (TPMS) is
normally mandatory for all RFT applications. Run Flat Technology
design features generally focus on two aspects of operational use
- rigidity and heat resistance. This is to enable the tyre to support
vehicle weight when it is rotating with a total air loss.
Some run flat tyres are known as “Extended Mobility Technology”
or “EMT” tyres. EMT sidewalls can be six times thicker than
traditional tyres. As a result the manufactures say that EMT “Run
flat” tyres can be driven at speeds of 55-miles or 80-kilometers per
hour for up to 200 miles or 300 kilometres in a deflated condition
before being damaged.
They normally have a directional tyre pattern which must be fitted
in such a way that the tread rotates only in one direction. Specialized
equipment is needed to fit Run flat tyres as the sidewalls are stiffer
and thus not as pliable when fitting. Whilst the tyres are described
as “Run flat”, they are not indestructible. Major damage that slices
the tyre casing can still result in complete tyre failure.
Summary Run Flat technology or RFT tyres enable a driver to
maintain control if a vehicle in motion suffers a rapid loss of tyre
pressure.
Module 7 - Unit 1
Revision 3.0 November 2013
22
Wheels & Tyres
Trade of Motor Mechanic - Phase 2 Course Notes
6.2	 Tyre Pressure Monitoring System
(TPMS)
Maintaining proper tyre pressure is essential for the safety and
performance of a vehicle. It also plays a significant role in decreasing
fuel consumption and extending tyre life. All tyres lose inflation over
time and, as many modern vehicles have extended service intervals,
tyres can become dangerously under-inflated without regular
checking by the vehicle driver.
In addition to increased fuel consumption and tyre wear, long periods
of driving with low tyre pressures can cause additional stress on
the tyre sidewalls. This results in increased operating temperatures
that can lead to premature tyre failure. Tyres operating with low
pressures can also affect the vehicle’s handling and performance.
In a worst-case scenario, under-inflation can lead to a tyre blow-out
or tread separation.
Automated Tyre Pressure Monitoring Systems or TPMS provide
a means of reliable and continuous monitoring of the vehicle
tyre pressure and are designed to increase safety, decrease fuel
consumption and improve vehicle performance.
There are two types of tyre pressure monitoring; direct and
indirect.
The direct monitoring system uses a pressure sensor mounted
inside each wheel and uses a wireless transmitter to give direct tyre
pressure readings.
The indirect system uses the vehicles wheel speed sensors to
determine if a tyre is under inflated when compared to each of the
other tyres.
Revision 3.0 November 2013
23
Module 7 - Unit 1 Wheels & Tyres
Trade of Motor Mechanic - Phase 2 Course Notes
TPMS can be fitted to all vehicle types using conventional and run-
flat tyres.
With a Tyre Pressure Monitoring System installed on a vehicle,
drivers can monitor the tyre pressures and temperatures from the
driver’s seat to ensure that their tyres are properly inflated under all
operating conditions. The systems are also designed to ignore normal
pressure variations caused by changes in ambient temperature.
The sensor installed inside each wheel is able to respond to as little
as a 3PSI or 20Kpa drop in pressure. Real-time information is sent
via wireless signal to a display in the vehicle. If a fluctuation occurs,
an audible and visual warning instantly alerts the driver allowing
time for the vehicle to be stopped or driven to a service station for
tyre repair or re-inflation. The tyre is used to enclose the unit as
protection from the outside environment. An on-board computer
receives the radio messages from the sensors, which are coded for
individual wheel identification.
The interactive display inside the vehicle shows:
•	 The required tyre pressure
•	 The actual tyre pressure
•	 The tyre pressure status
•	 The temperature of the tyre
•	 The driver can use the display control buttons to check the
status of each tyre.
In OEM installations, each time the ignition is switched on, an
indicator on the instrument panel and on a system display provides
information about all four tyre pressures and gives a "Pressure
OK" message if all is well. An indicator on the display will “flash”
whenever pressure loss is detected. In the case of minor deflation, an
orange "Service" light is shown and indicates the faulty tyre. If the
pressure is dangerously low, a red "Stop" light flashes, accompanied
by a punctured tyre icon, indicating that an immediate wheel change
is needed.
The sensors are activated by a centrifugal switch and transmit only
when the vehicle is in motion. When the vehicle stops the sensors
return to sleep mode to extend battery life, however the driver is
still able to review the latest signals received from the wheels before
the vehicle was stopped.
Module 7 - Unit 1
Revision 3.0 November 2013
24
Wheels & Tyres
Trade of Motor Mechanic - Phase 2 Course Notes
7.0	 Dynamical Wheel/Tyre
Balancing
7.1	 Wheel Balancing
Imbalance is an uneven distribution of mass about the tyre/wheel
centre-line. Balancing is an essential process when fitting new tyres
to wheels or after the tyre has been removed and then refitted to
the rim. Most standard production tyres and wheels will, when
built, have slight imbalances in their construction due to the nature
of the manufacturing process. Balancing allows the technician to
determine where these “heavy” spots are located and counteract the
effect with balance weights.
An imbalance in a tyre/wheel assembly can usually be noticed as one
of two things. Firstly an imbalanced front wheel will give a vibration
that can be felt through the vehicle steering wheel. Secondly, an
imbalance in the rear wheels will result in a vibration that can be
“felt” through the vehicle body. As well as being uncomfortable this
imbalance can have a detrimental effect on the vehicles handling and
the wear of tyre thread, suspension linkage and shock absorbers.
Key Learning Points
•	 Wheel balance; static, uneven weight distribution, dynamic,
centrifugal force wheel hop, wheel shimmy, wear of thread/
suspension linkage/shock absorbers etc.
Revision 3.0 November 2013
25
Module 7 - Unit 1 Wheels & Tyres
Trade of Motor Mechanic - Phase 2 Course Notes
Wheel balancers will check two kinds of balance, “static” (A) and
“dynamic” (B). Static imbalance causes a wheel to shake up and
down (wheel hop) as it spins, so static balance is achieved when
both halves of the tyre wheel assembly weigh exactly the same.
Dynamic imbalance causes a tyre and wheel to shake back and forth
or sideways as it spins (wheel shimming). Dynamic balance is
achieved when the inner and outer sides of the wheel and tyre weigh
the same.
Module 7 - Unit 1
Revision 3.0 November 2013
26
Wheels & Tyres
Trade of Motor Mechanic - Phase 2 Course Notes
8.0	 Balancing Automobile Road
Wheel/Tyre Assembly
This is a practical task. Please refer to your instructor for additional information,
which is available from the automotive technical manuals.
9.0	 NCT/DoT VTM
Requirements for Automotive
Wheels and Tyres
NCT Requirements
Item 36 to 40 of NCT manual 2004
Key Learning Points
•	 Balance steel and alloy wheels, clip and adhesive weights in
most suitable locations
Practical Task
Key Learning Points
•	 Current NCT/DoT VTM regulations on automotive wheels
and tyres
Revision 3.0 November 2013
27
Module 7 - Unit 1 Wheels & Tyres
Trade of Motor Mechanic - Phase 2 Course Notes
10.0	Reporting on Tyre Condition
and Patterns of Wear
This is a practical task. Please refer to your instructor for additional information,
which is available from the automotive technical manuals.
10.1	 Tyre Wear Diagnosis
Checking for tyre wear patterns
Preparation and Safety
Check tyre for correct wear pattern and ensure there are no
embedded foreign objects in the tread.
Make sure that you understand and observe all legislative and
personal safety procedures when carrying out the following tasks.
If you are unsure of what these are, ask your instructor.
Some manufacturers supply an emergency rim assembly instead of
a full-size spare. It is not intended for long-term use or high speed,
but it must have adequate tread.
Key Learning Points
•	 Wheel and tyre examination and report, locate NCT/
DoT VTM data, Tyre Condition, Specification, Thread,
Wheels, Spare Wheel and Carrier examined and correct
recommendations made for NCT/DoT VTM standard
compliance
•	 Tyre wear diagnosis (cause/effect)
Practical Task
Objective
Safety Check
Points to Note
Module 7 - Unit 1
Revision 3.0 November 2013
28
Wheels & Tyres
Trade of Motor Mechanic - Phase 2 Course Notes
Step-by-Step Instruction
1.	 Check for foreign objects and pressure: Inspect the tyres for
embedded objects in treads and remove them and look for
signs of wear on all wheels, including the spare. Check the
pressure in the tyres.
2.	 Check tread wear depth: Most tyres have wear indicator bars
incorporated into the tread pattern. Inspect the wear indicator
bars. Tyres should have at least one sixteenth of an inch, or
two millimetres of tread remaining. The wear indicator bars
are normally set at this depth. If the tread is worn down to that
level or below, they are unserviceable and must be replaced.
3.	 Check tread wear pattern: Check the wear patterns with the
vehicle’s shop manual to indicate the types of wear that have
occurred. Causes of uneven wear can include faulty shock
absorbers, incorrect front alignment angles and wheels out
of balance. Uneven tread and bald spots can indicate over- or
under-inflated tyres and poor alignment.
4.	 Check tyre for damage: Inspect the sidewalls of the tyres for
signs of cracking from impacts with blunt objects. Carefully
examine the tread area for separation. This is usually identified
as bubbles under the tread area. Spin the wheel and see if it
is running true. If it is wobbling as it rotates, report it to your
supervisor.
Revision 3.0 November 2013
29
Module 7 - Unit 1 Wheels & Tyres
Trade of Motor Mechanic - Phase 2 Course Notes
11.0	 Wheel Bearing Types and
their Tightening/Adjustment
Procedure
This is a practical task. Please refer to your instructor for additional information,
which is available from the automotive technical manuals.
12.0	Wheel Bearing Maintenance
This is a practical task. Please refer to your instructor for additional information,
which is available from the automotive technical manuals.
12.1	 Maintenance of a Wheel Bearing
Shown here is one example
1	 Prepare the vehicle
Prepare the vehicle by having
it in a raised condition and at a
comfortable working height.
The road wheel removed and
the brake unit stripped to enable
the hub to be dismantled.
Key Learning Points
•	 Remove, determine condition/replace/refit wheel bearings
on non-driven wheel, tightening/torqueing/adjustment
procedure of free play to manufacturer's specification
Practical Task
Practical Task
Module 7 - Unit 1
Revision 3.0 November 2013
30
Wheels & Tyres
Trade of Motor Mechanic - Phase 2 Course Notes
2	 Remove the bearing hub assembly
Pry off the dust cap and
remove the locking device. This
is usually a cotter pin through
the nut and spindle.
Remove the retaining nut and
washer.
Clean them and place them
in a safe place ready for
reassembly.
When removing the hub, be
careful not to get any of the
grease on the brake shoes if
they are still in position.
3	 Remove the hub seal
Using a long dowel or drift and
using a hammer, gently drive
on the front of the inner hub
bearing from inside the hub
unit.
This will push the bearing out
and also remove the oil seal. It
is good practice to renew the
oil seal when you service the
bearings.
Revision 3.0 November 2013
31
Module 7 - Unit 1 Wheels & Tyres
Trade of Motor Mechanic - Phase 2 Course Notes
4	 Clean and check the old bearings
Use a paper towel to wipe all of
the old bearing grease from the
spindle and the hub dust cap.
Clean the bearing with solvent
and air dry on a paper towel or
blow it dry with compressed
air.
Clean out any grease in the
hub and dispose of the grease
in an environmentally friendly
manner. It is not recommended
to use shop rags for this,
especially if they are laundered
for re-use.
If you use an air blower as part
of the cleaning process, be
careful not to blow the old, dirty
grease into the bearing or let the
bearing spin.
5	 Inspect the bearing
Inspect the bearing and it’s
housing, which is called the
“bearing race,” for damage.
If you see any pitting or obvious
damage, replace the bearing and
the bearing race. These must be
replaced as a set.
Module 7 - Unit 1
Revision 3.0 November 2013
32
Wheels & Tyres
Trade of Motor Mechanic - Phase 2 Course Notes
6	 Re-pack grease into bearing
Check your shop manual to see
which grease is recommended
for the vehicle and its
application. The most common
method is to pack the bearings
by hand.
Put a small amount of grease in
the palm of your hand.
Work the grease into the large
open end of the bearing until
it oozes out the opposite side
then spread a fresh layer of
grease all around the bearing
and on the bearing races.
You can also grease the bearing
with a pressure-bearing packer
unit, if the correct grease is used
for the application.
Place the freshly greased bearing on a paper towel.
Revision 3.0 November 2013
33
Module 7 - Unit 1 Wheels & Tyres
Trade of Motor Mechanic - Phase 2 Course Notes
7	 Grease inside of the hub and dust cap
Put a small amount of grease
in the cavity of the hub.
Also, pack some grease into the
dust cap. Fill it about one-third,
not all the way up.
8	 Re-install the bearings and seal
Re-install the bearing in the
same bearing race. Leave a ring
of grease below the bearing
race to help keep the fresh
grease inside the bearing area
after it heats up.
Before installing the new seal,
ensure it is the right size to go
over the spindle, by checking
its diameter with the old oil
seal that was removed from the
hub.
Install the new seal with its
sealing lip facing towards the
bearing, with a recommended
seal-installing tool.
Carefully tap on the installer
tool ensuring that the seal goes
in straight.
Module 7 - Unit 1
Revision 3.0 November 2013
34
Wheels & Tyres
Trade of Motor Mechanic - Phase 2 Course Notes
Lightly lubricate the seal lip.
9	 Inspect the sealing area of the spindle
Inspect the sealing area for any
signs of wear or damage. If the
seal area is worn or grooved,
If the seal area is worn or
grooved, it will affect the sealing
function and could damage the
renewed seal.
10	 Re-install bearing hub assembly
Slide the hub assembly onto the
spindle and ensure it sits on the
sealing area.
Put the outer bearing in place.
Revision 3.0 November 2013
35
Module 7 - Unit 1 Wheels & Tyres
Trade of Motor Mechanic - Phase 2 Course Notes
Add the washer and retaining
nut and screw it up by hand
until it just touches the back
of the outer bearing.
Now tighten, or pre-load the
bearing, in accordance with the
specifications in the vehicle’s
shop manual.
Re-install the brake assembly and get your instructor to check
that the job is secure and within specifications prior to replacing
the road wheel.
Module 7 - Unit 1
Revision 3.0 November 2013
36
Wheels & Tyres
Trade of Motor Mechanic - Phase 2 Course Notes
13.0	Changing Tyres Procedure
13.1	 Procedure for Changing Tyres
When removing and fitting tyres refer to vehicle manufactures
instructions.
Vehicles fitted with tyre pressure monitoring systems (TPMS)
require special attention when changing tyres. Please refer to the
vehicle manufacture for the appropriate instructions.
14.0	‘End of Useful Life’
Procedures with Tyres/Tubes
14.1	 Tyre Disposal
Usedtyresandtubeshavelikeallotherwastematerialtobestoredand
disposed of according to the relevant environment procedures.
Key Learning Points
•	 Tyre pressure monitoring system; only renew the valve
insert, 'save pressures' function is invoked on control system
menu
Key Learning Points
•	 Worn/used tyres/tubes etc. appropriately stored for use by
industry approved recycling company
Revision 3.0 November 2013
37
Module 7 - Unit 1 Wheels & Tyres
Trade of Motor Mechanic - Phase 2 Course Notes
Self Assessment
Q1: Tyre information is moulded into: (Tick one box only)
 1. The rim
 2. The bead diameter
 3. The tread
 4. The sidewall
Q2 Wheel rims are sized according to: (Tick one box only)
 1. Diameter
 2. Flange height
 3. Width
 4. All of these
Q3 An “onboard” vehicle tyre pressure monitoring system
(TPMS) is normally mandatory for all RFT applications.
(Tick one box only)
 1. True
 2. False
Q4: Excessive wear in the middle of a tyre tread could
indicate: (Tick one box only)
 1. Under-inflation
 2. Over-inflation
 3. Wheels not running parallel
 4. Excess negative camber
Q5: The main function of grooves in the tread pattern is to:
(Tick one box only)
 1. Reduce road noise intrusion
 2. Indicate when the tyre is worn out
 3. Increase traction on dry surfaces
 4. Clear water from the contact patch
Module 7 - Unit 1
Revision 3.0 November 2013
38
Wheels & Tyres
Trade of Motor Mechanic - Phase 2 Course Notes
Q6: An aspect ratio of 75% indicates that:
(Tick one box only)
 1. The width of the tyre is 75% of its height
 2. The height of the tyre is 25% less than its width
 3. The height of the tyre is 25% greater than its width
Q7: Tubeless tyres have no inner tubes because they have:
(Tick one box only)
 1. A soft-rubber inner-casing liner
 2. High-tensile steel beads
 3. An increased number of casing plies
 4. A special outer-casing compound
Q8: When checking tyre pressures you must make sure that
the gauge is accurate. If the gauge is reading high it could
lead to the tyre being: (Tick one box only)
 1. Under-inflated
 2. Over-inflated
Q9: Radial ply tyres have: (Tick one box only)
 1. Larger sidewalls than bias ply tyres
 2. Softer sidewalls than bias ply tyres
 3. Smaller sidewalls than bias ply tyres
 4. Stiffer sidewalls than bias ply tyres
Q10: A tyre with an aspect ratio of 45% is:
(Tick one box only)
 1. A low profile tyre
 2. A high profile tyre
 3. A small bead tyre
 4. A cross-ply tyre
Q11: When a tyre is marked as ‘Temporary Use Only’, this
means: (Tick only one box)
 1. It can only be used for a short term
 2. It is only suitable to use as a spare tyre to move the vehicle
to a safe place while the original tyre is repaired
 3. It is not recommended for high speed driving
 4. It does not have an inner tube
Revision 3.0 November 2013
39
Module 7 - Unit 1 Wheels & Tyres
Trade of Motor Mechanic - Phase 2 Course Notes
Suggested Exercises
•	 Use an electronic data facility to procure manufacturer’s
appropriate data for use with practical exercises
•	 Remove/refit tyres
•	 Repair punctures
•	 Examine and report on wheels and tyres of training vehicles
for NCT/DoT VTM compliance
•	 Remove/refit wheels to training vehicle, use torque spanner
always for tightening
•	 Remove, examine for wear, replace/refit wheel bearings on
training vehicle to manufacturer's recommendations
Training Resources
•	 Technical information in book/electronic form on wheel
and tyre design, classifications, performance and wear
characteristics, wheel bearing construction and running
clearances
•	 Manufacturer’s information on tyre sizes, pressures. NCT/
DoT VTM wheel, tyre, regulations
•	 Tyre removal and refitting equipment including. alloy rim
facility
•	 Compressor etc.
•	 Dynamic wheel balancer
•	 Selection of balance weights, used tyres storage/disposal/
recycling facilities
Module 7 - Unit 1
Revision 3.0 November 2013
40
Wheels & Tyres
Trade of Motor Mechanic - Phase 2 Course Notes
Suggested Further Reading
•	 Advanced Automotive Diagnosis. Tom Denton. ISBN
0340741236
•	 Automobile Electrical and Electronic Systems (3rd Edition).
Tom Denton. ISBN 0750662190
•	 Automotive Mechanics (10th Edition). William H. Crouse and
Donald L. Anglin. ISBN 0028009436
•	 BoschAutomotiveElectricsAutomotiveElectronics:Systemsand
Components (4th Edition). Robert Bosch. ISBN 0837610508
•	 Bosch Automotive Handbook (6th Edition). Robert Bosch.
ISBN 1860584748
•	 Bosch Automotive Technology Technical Instruction booklet
series (numerous titles)
•	 Hillier’s Fundamentals of Motor Vehicle Technology: Book
One (5th Edition). V.A.W. Hillier and Peter Coombes. ISBN
0748780823
•	 Hillier’s Fundamentals of Motor Vehicle Technology: Book
Two (5th Edition). V.A.W. Hillier and Peter Coombes. ISBN
0748780998
•	 Modern Automotive Technology. James E. Duffy. ISBN
1566376106
•	 Motor Vehicle Craft Studies - Principles. F.K. Sully. ISBN
040800133X
•	 National Car Test (NCT) Manual (Department of Transport,
Vehicle Testers Manual - DoT VTM). Department of
Transport
•	 Transmission, Chassis and Related Systems (Vehicle Maintenance
and Repair Series: Level 3) (3rd Edition) John Whipp and Roy
Brooks. ISBN 186152806X
•	 Vehicle and Engine Technology (2nd Edition). Heinz Heisler.
ISBN 0340691867
•	 http://www.cdxglobal.com/
•	 http://auto.howstuffworks.com/
•	 http://www.autoshop101.com/
•	 http://www.cdxetextbook.com/
•	 Automotive Encyclopedia and Text Book Resource (CD version
of e-textbook), Available from your instructor.
Notes
27-33 Upper Baggot Street
Dublin 4

Tyres and wheel

  • 1.
    Trade of MotorMechanic Module 7 Unit 1 Wheels & Tyres Phase 2
  • 2.
    Produced by In cooperationwith: Subject Matter Experts Martin McMahon & CDX Global Curriculum Revision 2.2 16-01-07 © SOLAS 2013
  • 3.
    Revision 3.0 November2013 Module 7 - Unit 1 Wheels & Tyres Trade of Motor Mechanic - Phase 2 Course Notes Table of Contents Introduction......................................................................................................... 1 Unit Objective...................................................................................................... 2 1.0 Health, Safety and Precautionary Procedures......................................... 3 1.1 Health and Safety........................................................................... 3 2.0 Construction and Features of Wheels and Tyres..................................... 4 2.1 Wheels............................................................................................ 4 2.2 Types of Wheels............................................................................ 5 2.3 Rim Sizes & Designations............................................................. 6 2.4 Tyre Types..................................................................................... 7 2.5 Tyre Construction.......................................................................... 8 2.6 Tyre Tread Designs....................................................................... 9 2.7 Cross-Ply Tyres.............................................................................10 2.8 Radial Ply Tyres............................................................................11 2.9 Radial Ply Tyre Sidewalls/Thread...............................................12 2.10 Tyre Materials...............................................................................13 3.0 Primary Data on Automobile Tyres........................................................14 3.1 Tyre Information..........................................................................14 3.3 Tyre Ratings for Temperature & Traction...................................18 4.0 Removing, Refitting and Repairing Tyres...............................................19 5.0 ‘Space-Saver’ Tyres..................................................................................19 5.1 Space-Saver tyres...........................................................................19 6.0 ‘Run Flat’ Tyres...................................................................................... 20 6.1 Run Flat Tyres (RFT).................................................................. 20 6.2 Tyre Pressure Monitoring System (TPMS)................................. 22 7.0 Dynamical Wheel/Tyre Balancing......................................................... 24 7.1 Wheel Balancing.......................................................................... 24 8.0 Balancing Automobile Road Wheel/Tyre Assembly............................. 26 9.0 NCT/DoT VTM Requirements for Automotive Wheels and Tyres...... 26 10.0 Reporting on Tyre Condition and Patterns of Wear.............................. 27 10.1 Tyre Wear Diagnosis.................................................................... 27 11.0 Wheel Bearing Types and their Tightening/Adjustment Procedure.... 29 12.0 Wheel Bearing Maintenance.................................................................. 29 12.1 Maintenance of a Wheel Bearing................................................ 29 13.0 Changing Tyres Procedure..................................................................... 36 13.1 Procedure for Changing Tyres.................................................... 36 14.0 ‘End of Useful Life’ Procedures with Tyres/Tubes.............................. 36 14.1 Tyre Disposal............................................................................... 36 Self Assessment................................................................................................. 37 Suggested Exercises.......................................................................................... 39 Training Resources............................................................................................ 39 Suggested Further Reading............................................................................... 40
  • 5.
    Revision 3.0 November2013 1 Module 7 - Unit 1 Wheels & Tyres Trade of Motor Mechanic - Phase 2 Course Notes Introduction There are 3 Units in Module 7. This Unit 1 focuses on Wheels and Tyres. Wheels must be strong enough to support the vehicle and withstand the forces caused by normal operation. At the same time, they must be as light as possible, to help keep un-sprung weight to a minimum. The tyre provides a cushion between the vehicle and the road to reduce the transmission of road shocks. It also provides friction to allow the vehicle perform its normal operations. Modern tyres are manufactured from a range of materials. The rubber is mainly synthetic. This unit will cover the key components associated with the Wheels and Tyres and the relevant environment, health and safety. Module 7 Suspension & Steering Unit 1 Unit 2 Unit 3 Wheels & Tyres Suspension & Dampers Steering Alignment & Geometry
  • 6.
    Module 7 -Unit 1 Revision 3.0 November 2013 2 Wheels & Tyres Trade of Motor Mechanic - Phase 2 Course Notes Unit Objective By the end of this unit each apprentice will be able to: • List the construction and primary design features of motor vehicle wheels/rims and tyres • Describe the primary manufacturer classification data on automobile tyres. • Remove, refit tyres, repair punctures on tubeless tyres • Describe the function and limitation of use of 'space-saver' passenger car spare wheel/tyre assembly • Describe the basic construction, use and operation of ‘run flat’ tyres • State the reasons why automotive road wheel/tyre assemblies need to be dynamically balanced • Balance automobile road wheel/tyre assembly • Describe the NCT/DoT VTM requirements for automotive wheels and tyres • Examine the wheels and tyres of an automobile and write a reportontyrecondition,patternsof wearandrecommendations for compliance with NCT/DoT VTM requirements • Identify non-driven wheel bearing types and describe their tightening/adjustment procedure (where applicable) • Remove/refit/renew wheel bearings on a non-driven wheel, tighten and torque or adjust running clearance • Describe the procedure used when changing tyres - wheel positions on vehicles fitted with electronic tyre pressure monitoring system • Describe the 'end of useful life' procedures to be used with tyres/tubes etc.
  • 7.
    Revision 3.0 November2013 3 Module 7 - Unit 1 Wheels & Tyres Trade of Motor Mechanic - Phase 2 Course Notes 1.0 Health, Safety and Precautionary Procedures 1.1 Health and Safety If the proper safety procedures are not adhered when working on Wheels and Tyres this could lead to serious injury health problems to personnel. Instruction is given in the proper safety precautions applicable to working on Wheels and Tyres which include the following: • Compressed air • Correct tyre pressure • Danger as tyre bead locates itself on the wheel rim • Damage to the tyre bead during refitting & removal • Steel wire ends protruding from the crown • Balance weights insecurely attached • Vehicle insecurely supported • Wheel bearings incorrectly tightened torque • Road wheels not torque • Use of Personal Protective Equipment (PPE) e.g. Eye protection, foot wear etc. Refer to motor risk assessments, Environmental policy and Material Safety Data Sheets (MSDS) Key Learning Points • Personal safety precautions applicable to working with compressed air, wearing of safety glasses/goggles. Correct tyre pressure, danger as tyre bead locates itself on the wheel rim. Damage to the tyre bead during removal or refitting. Steel wire ends protruding from the crown. Balance weights insecurely attached. Vehicle insecurely supported. Wheel bearings incorrectly tightened/torqued. Road wheels not torqued correctly
  • 8.
    Module 7 -Unit 1 Revision 3.0 November 2013 4 Wheels & Tyres Trade of Motor Mechanic - Phase 2 Course Notes 2.0 Construction and Features of Wheels and Tyres 2.1 Wheels Wheels must be strong enough to support the vehicle and withstand the forces caused by normal operation. At the same time, they must be as light as possible, to help keep un-sprung weight to a minimum. Wheels can be made from cast aluminium alloy or magnesium alloy. Alloy wheels are popular because of their appearance and because they are lighter than similar steel wheels. Aluminium is a better conductor of heat, so alloy wheels can dissipate heat from brakes and tyres more effectively than steel ones. Most wheels have ventilation holes in the flange, so air can circulate to the brakes. Most passenger car wheels are of well, or drop-centre design. This design allows for tyre removal and fitting. The removal and fitting of tyres should be carried out according to manufactures instructions. Key Learning Points • Wheel rim design features, rim offset, well, diameter, tapered bead seat, outside or inside tyre fitting (alloys) • Tyre construction; beads, plies, symmetrical/asymmetrical thread/ pattern etc., radial v crossply, tubed/tubeless, sealing system, wear indicator/bars • Tyre design; water dispersal, aquaplaning, static v sliding friction • S.I. unit of pressure-bar
  • 9.
    Revision 3.0 November2013 5 Module 7 - Unit 1 Wheels & Tyres Trade of Motor Mechanic - Phase 2 Course Notes 2.2 Types of Wheels Passenger cars normally use rims which are of well based, or drop- centre design. The drop enter is used for mounting and demounting the tyre onto the rim. Wheels must be strong enough to carry the mass of the vehicle and withstand the forces that are generated during use. The wheel centre must accurately locate the wheel rim centrally on the axle. It must also provide the required distance from the centreline of the wheel, to the face of the mounting flange. This is called offset. Offset is important because it brings the tyre centreline into close alignment with the larger inner hub bearing and reduces load on the stub axle. This allows the inside of the wheel centre to be shaped to provide space for the brake assembly, usually located inside the wheel. Ventilation slots allow air to circulate around the brakes. The rim must be accurately shaped and dimensioned and strong enough to support the tyre under the load of the vehicle and the forces generated by the motion of the vehicle. When inflated, the tyre is locked to the rim by tapering the bead seat towards the flange, or by safety ridges or humps, close to the flange. In the event of sudden deflation, or blow-out, safety ridges prevent the tyre moving down into the well. This helps maintain control of the vehicle while the brakes are applied. Well-based rims can also be used on heavy commercial vehicles for tubeless tyres.
  • 10.
    Module 7 -Unit 1 Revision 3.0 November 2013 6 Wheels & Tyres Trade of Motor Mechanic - Phase 2 Course Notes 2.3 Rim Sizes & Designations To ensure correct fit between a tyre and rim, all manufacturers of wheels and tyres comply with standard dimensions, as recommended by automotive manufactures. The width of the rim is the distance across the rim flanges, at the bead seat. Its diameter is the distance across the centre of the rim from bead seat to bead seat. The shape of well-based rims is provided by a letter code, such as J, K, JJ and KK. The width of the rim and the diameter is traditionally stated in inches. A rim designated 7 JJ by 14 would refer to a rim measuring 7 inches across the rim flanges and 14 inches in diameter from bead seat to bead seat, with the profile conforming to a JJ code. The rim width and diameter can also be stated in millimetres. Metric rims are not interchangeable with Imperial rims. The tyre must be an exact fit on the rim, to fulfil a number of functions. • It ensures that the narrow contact area between the beads of the tyre and the rim will seal the air in a tubeless tyre. • It transfers all the forces between the tyre and the wheel, without slipping or chafing. • It ensures the friction between the tyre and the rim prevents the tyre turning on the rim.
  • 11.
    Revision 3.0 November2013 7 Module 7 - Unit 1 Wheels & Tyres Trade of Motor Mechanic - Phase 2 Course Notes 2.4 Tyre Types The tyre provides a cushion between the vehicle and the road to reduce the transmission of road shocks. It also provides friction to allow the vehicle perform its normal operations. Modern tyres are manufactured from a range of materials. The rubber is mainly synthetic. Two types of tyre construction are common – cross-ply and radial. Most passenger cars now use radial tyres, as do most 4- wheel-drives and heavy vehicles. Tube tyres require an inner tube to seal the air inside the tyre. Tubeless tyres eliminate the inner tube by making the complete wheel and tyre assembly air-tight. A special, air-tight valve assembly is needed. This can be a tight fit into the rim, or it can be held with a nut and sealing washers. Tyres can be identified by markings on the sidewalls. This typically includes the maker’s name, the rim size, the type of tyre construction, aspect ratio, maximum load and speed and, in some cases, intended use. Regulations cover the allowable dimensions for wheels and tyres on a particular vehicle. Covered in section 3.1. These dimensions are usually set out on the tyre spec attached to the vehicle. Incorrectly selected wheels and tyres can overload wheel bearings and change steering characteristics. The tyre chart lists the wheel and tyre sizes approved by the manufacturer for the vehicle. Using other wheels and tyres may be illegal. The repairing of punctures on tyres must be carried out in accordance with current legalisation.
  • 12.
    Module 7 -Unit 1 Revision 3.0 November 2013 8 Wheels & Tyres Trade of Motor Mechanic - Phase 2 Course Notes 2.5 Tyre Construction A tyre provides a cushion between the vehicle and the road, to reduce the transmission of road shocks. The air in the tyre supports the vehicle’s mass and the tread provides frictional contact with the road surface, so the vehicle can manoeuvre for normal use. Radial ply tyres are usually manufactured in stages. The casing is initially formed by laying the rubber inner and the first layer of textile ply cords, around a flat drum mould. The rubber-covered bead wire and sidewalls are then locked into position. The rubber sidewalls protect a finished tyre from kerb damage and weathering. At the second stage-building machine, the tyre is shaped. Belts of steel wire are guided into place. The tread is then positioned and the uncured tyre is consolidated by rollers, before it is placed in the mould. During the moulding and curing stage, the tyre is subjected to high temperature and pressure and it takes on its final fixed identity, with its own distinctive tread pattern. It is then trimmed and checked for balance and quality before it is inflated and run under load against a rotating drum. This is a final check for ride uniformity.
  • 13.
    Revision 3.0 November2013 9 Module 7 - Unit 1 Wheels & Tyres Trade of Motor Mechanic - Phase 2 Course Notes 2.6 Tyre Tread Designs Tyres generally fall into one of the following categories: • Directional • Non-directional • Symmetric and Asymmetric. Directional tread patterns are designed to provide a range of functions during particular driving conditions. The tyre can only be mounted to the wheel so that it revolves in a particular direction to correspond with the tread pattern. An arrow on the tyre sidewall indicates the designed direction of forward travel. On-directional tread patterns are designed in such a way that the tyre can be mounted on the road wheel for any direction of rotation. Tyre treads can be directional, non-directional, symmetric and asymmetric. In wet conditions, the coefficient of friction between a smooth tyre and the road surface falls to an extremely low value. Aquaplaning is prevented by Grooves in the tread pattern clearing water away from the contact patch area. This allows a relatively “dry area” to be formed and for road adhesion to be maintained. Static friction occurs when two objects are not moving relative to each other e.g. the tyre against the road surface while the car is stopped. To overcome this, a force must be applied (car starting to move) which results in rolling friction. If rolling friction increases until it is greater than static sliding friction will result. The SI unit of tyre pressure is the “bar”.
  • 14.
    Module 7 -Unit 1 Revision 3.0 November 2013 10 Wheels & Tyres Trade of Motor Mechanic - Phase 2 Course Notes 2.7 Cross-Ply Tyres Two types of tyre construction are common cross-ply and radial ply. The cross-ply tyre is the older form. It is also called a bias-ply or conventional tyre. It is constructed of 2 or more plies or layers of textile casing cords, positioned diagonally from bead to bead. The rubber-encased cords run at an angle of between 30 and 38 degrees to the centreline, with each cord wrapped around the beads. A latticed criss-crossed structure is formed, with alternate layers crossing over each other and laid with the cord angles in opposite directions. Bias/Crossply Construction This provides a strong, stable casing, with relatively stiff sidewalls. However during cornering, stiff sidewalls can distort the tread and partially lifting it off the road surface. This reduces the friction between the road and the tyre. Stiff sidewalls can also make tyres run at a high temperature. This is because, as the tyre rotates, the cords in the plies flex over each other, causing friction and heat. A tyre that overheats can wear prematurely.
  • 15.
    Revision 3.0 November2013 11 Module 7 - Unit 1 Wheels & Tyres Trade of Motor Mechanic - Phase 2 Course Notes 2.8 Radial Ply Tyres Radial ply tyres have much more flexible sidewalls due to their construction. They use 2 or more layers of casing plies, with the cord loops running radially from bead to bead. Radial Construction The sidewalls are more flexible because the casing cords do not cross over each other. However, a belt of 2 or more bracing layers must be placed under the tread. The cords of the bracing layers may be of fabric, or of steel and are placed at 12, to 15 degrees to the circumference line. This forms triangles where the belt cords cross over the radial cords. The stiff bracing layer links the cord loops together to give fore and aft stability, when accelerating, or braking and it prevents any movement of the cords during cornering. The cord plies flex and deform only in the area above the road contact patch. There are no heavy plies to distort and flexing of the thin casing generates little heat, which is easily dispersed. A radial ply tyre runs cooler than a comparable cross-ply tyre and this increase tread life. A radial tyre has less rolling resistance as it moves over the road surface.
  • 16.
    Module 7 -Unit 1 Revision 3.0 November 2013 12 Wheels & Tyres Trade of Motor Mechanic - Phase 2 Course Notes 2.9 Radial Ply Tyre Sidewalls/Thread The sidewalls of radial ply tyres bulge where the tyre meets the road, making it difficult to estimate inflation pressure visually. It needs to be checked with an accurate tyre gauge. Using correct inflation pressures extends tyre life and is vital for safety. A tubeless tyre is lined with a soft rubber layer to form an air-tight seal. This inner liner also seals against small penetrations, letting air escape only relatively slowly. When a tubeless tyre is fitted, an air- tight valve assembly is used. It can be a tight fit into the rim, or be held with a nut and sealing washers. A tyre and wheel assembly must be balanced. As the wheel rotates, centrifugal force acts outwards. Any part heavier than the rest will vibrate vertically, with the heavy area slapping the road surface with each turn of the wheel. This is called static unbalance. Dynamic unbalance causes the wheel assembly to turn inwards and then outwards, with each half revolution. As speed rises, rapid side movement of the front wheels causes a sideways-vibration, or wheel wobble effect, at the front of the vehicle. Tread life can also be reduced by incorrect wheel alignment. The feathered edge of this tyre indicates an incorrect toe-setting. Wear on the one shoulder of this tyre could be due to incorrect camber setting. Most passenger car tyres have tread-wear indicators moulded into the tread pattern. They generally provide an indication when the depth of a tyre groove falls to 1.6 millimetres (legal limit). Control of a vehicle in any weather conditions depends finally on frictional forces generated between the tyres and road surface.
  • 17.
    Revision 3.0 November2013 13 Module 7 - Unit 1 Wheels & Tyres Trade of Motor Mechanic - Phase 2 Course Notes 2.10 Tyre Materials Modern tyres are made from a range of materials. The rubber is mostly synthetic, with carbon black added to increase strength and toughness. When used in the tread, this combination gives a long life. Natural rubber is weaker than the synthetic version. It’s used mainly in sidewalls. The plies are made from cords of fabric, coated with rubber. Manufacturers use a sophisticated selection process to create combinations that provide the required performance characteristics and ‘hysteresis level’ of the tyre. Hysterisis can best be described as the energy lost, usually in the form of a build up of heat, when a section of vulcanized rubber is deformed in a regular, constant manner. The more you subject a tyre to flexing and deformation the more heat will build up within the tyre. Excessive heat is the enemy of a tyre so this builds up has to be kept under control.
  • 18.
    Module 7 -Unit 1 Revision 3.0 November 2013 14 Wheels & Tyres Trade of Motor Mechanic - Phase 2 Course Notes 3.0 Primary Data on Automobile Tyres 3.1 Tyre Information Information on tyre aspect ratio is now included in the sidewall marking, together with the type of construction, speed rating and maximum permitted pressure. The speed rating of the tyre is given by the letter code, which indicates maximum recommended speed for that tyre. Common symbols for passenger car tyres include; • S, for up to 180 kilometres per hour. • H, up to 210 kilometres per hour. • V, up to 240 kilometres per hour. • And Z for over 240 kilometres per hour. Radial ply tyres have always been marked with the section width in millimetres, but with the rim diameter in inches. For example: • 185 is section width in millimetres. • 70 indicate a 70% aspect ratio. • H is the speed rating, for up to 210 kilometres per hour. • R indicates radial ply construction.• 13 indicate the tyre is suitable for fitting to a 13-inch diameter rim. Totally metric types are also manufactured. For example: • 190 is the section width in millimetres. • The aspect ratio is 65%. • The speed rating is H, for up to 210 kilometres per hour. • R indicates radial ply construction. • 390 indicate the tyre is suitable for fitting to a 390 mm diameter rim. Key Learning Points • Classification data; type, diameter, width, aspect ratio, speed ratio, ply rating, load index, maximum permitted pressure • Tyre information
  • 19.
    Revision 3.0 November2013 15 Module 7 - Unit 1 Wheels & Tyres Trade of Motor Mechanic - Phase 2 Course Notes Metric-diameter rims cannot be fitted with inch-diameter tyres, or vice-versa. Although tyre markings may remain traditional, e.g. 255 45 Z-R 17, there is a worldwide move towards an I-S-O metric standard which uses letters: • P for passenger, • LT for light truck, • C for commercial, • And T means temporary use as a spare wheel. The tyre may have a load index number, indicating the maximum load a tyre can carry at the speed indicated by its speed symbol, which follows the number. e.g. a P-series metric size code may read in full – P205/65 R15 92H. • P for passenger car tyre, • 205 is the section width in millimetres, • With 65% aspect ratio, • R – Radial ply construction, • 15 inch diameter rim, • 92 load index, for a maximum load of 630 kilograms, • And H for a speed rating up to 210 kilometres per hour. Further development of high-speed tyres has expanded the speed categories to include W and Y.
  • 20.
    Module 7 -Unit 1 Revision 3.0 November 2013 16 Wheels & Tyres Trade of Motor Mechanic - Phase 2 Course Notes In another example: • Z indicates a speed over 240 kilometres per hour, but the load and speed rating is taken as the maximum load and speed, that is, • 89 for a maximum load of 580 kilograms, • And W for 270 kilometres per hour. Understanding Load Index The Load capacity of a tyre determines what payload each tyre can carry. It is vital that you check with your manufacturer what capacity should be put on your car. The following table shows what Index specification can carry. Load index Load in kg Load index Load in kg Load index Load in kg 62 265 84 500 106 950 63 272 85 515 107 975 64 280 86 530 108 1000 65 290 87 545 109 1030 66 300 88 560 110 1060 67 307 89 580 111 1090 68 315 90 600 112 1120 69 325 91 615 113 1150 70 335 92 630 114 1180 71 345 93 650 115 1215 72 355 94 670 116 1250 73 365 95 690 117 1285 74 375 96 710 118 1320 75 387 97 730 119 1360 76 400 98 750 120 1400 77 412 99 775 121 1450 78 425 100 800 122 1500 79 437 101 825 123 1550 80 450 102 850 124 1600 81 462 103 875 125 1650 82 475 104 900 126 1700 83 487 105 925
  • 21.
    Revision 3.0 November2013 17 Module 7 - Unit 1 Wheels & Tyres Trade of Motor Mechanic - Phase 2 Course Notes 3.2 Tyre Sizes & Designations The size of a tyre must satisfy some basic conditions. The bead diameter must suit the wheel rim diameter. Section width must be suitable for use on the wheel rim and large enough to have a suitable load-carrying capacity for the vehicle. The overall tyre size must allow sufficient clearance between the tyre and the vehicle frame. All manufacturers mould information about the tyre into its sidewall. In cross-ply tyres, the bead diameter and the section width are stated in inches. For example, six hundred by sixteen indicates a tyre with a section width of 6 inches and a bead diameter suitable for fitting to a rim which is 16 inches in diameter, across the bead seats. The load capacity is indicated by the ply rating, for example, 6PR. The aspect ratio of a tyre is the ratio of its height to its width. It is usually given as a percentage. The lower a tyre’s aspect ratio, the wider the tyre is in relation to its height. An aspect ratio of 98% means the section height of the tyre is slightly less than the section width. This is called a cushion or balloon tyre. An aspect ratio of 88% means the height is 12% less than the width, giving a lower profile. It is called a medium low profile tyre. The profile of cross-ply tyres was reduced further to between 78% and 82%, called a super low section. However the stiffness of cross-ply tyres makes them unsuitable for further reduction in profile. Radial ply tyres have been manufactured in 78% profile, but are also made with further reductions in profile, from 75%, to 45%.
  • 22.
    Module 7 -Unit 1 Revision 3.0 November 2013 18 Wheels & Tyres Trade of Motor Mechanic - Phase 2 Course Notes 3.3 Tyre Ratings for Temperature & Traction One of the markings on the sidewall of a tyre is a Uniform Tyre Quality Grading or UTQG grade. The tyre’s UTQG rating provides information on three aspects of the tyres durability and operational characteristics. They are: Tread wear, traction and temperature. The tread wear number comes from testing the tyre in controlled conditions. The higher the number the longer the life expectancy of the tread. Since no one vehicle will be subjected to exactly the same surfaces and at the same speeds as the controlled conditions, the number can only be an indicator of expected tread life in “normal conditions”. Summary A Uniform Tyre Quality Grading or UTQG grade provides information on tread wear, traction and temperature.
  • 23.
    Revision 3.0 November2013 19 Module 7 - Unit 1 Wheels & Tyres Trade of Motor Mechanic - Phase 2 Course Notes 4.0 Removing, Refitting and Repairing Tyres This is a practical task. Please refer to your instructor for additional information, which is available from the automotive technical manuals. 5.0 ‘Space-Saver’ Tyres 5.1 Space-Saver tyres Space-saver spares are designed for emergency use only. They’re designed to get you to a service centre where you can have the regular tyre fixed or buy a new one. When provided with the vehicle aspartof theoriginalmanufacturer’sequipment,mostmanufacturers warn not to exceed 50 miles or 80 kilometres per hour and 50 miles or 80 kilometres of driving on the space saver tyre. Some cars are provided with miniature or collapsible space-saver spare tyres as spare wheels. These normally require a specially charged canister for inflation when being installed. Others have small, temporary spare tyres that are inflated normally with a compressed air supply but to a much higher pressure than normal road tyres. Note: Space-saver tyres are designed for emergency use only. Key Learning Points • Tyre removal and refitting, lubricant used, bead undamaged and secure to rim, correct pressure Practical Task Key Learning Points • Manufacturer’s recommendations on speed and distance, limitations of use of 'space saver' wheels
  • 24.
    Module 7 -Unit 1 Revision 3.0 November 2013 20 Wheels & Tyres Trade of Motor Mechanic - Phase 2 Course Notes 6.0 ‘Run Flat’ Tyres 6.1 Run Flat Tyres (RFT) The major safety benefit of Run Flat technology or RFT is that it enables a driver to maintain control if a vehicle in motion suffers a rapid loss of tyre pressure. In addition, RFT tyres enable the driver to continue the journey within specified speed and distance limits, avoiding the need to replace the wheel on the side of the road. Tyre manufactures also maintain that, as an added benefit of RFT they usually save weight by eliminating the need to carry a spare tyre. However, because of their construction they are generally between two to three times heavier than their conventional counterpart, which adds additional un-sprung weight to the vehicle affects the suspension and can increase fuel consumption. Because of the extra materials used in construction of the tyre, they are also normally more expensive to purchase. In addition, run flat tyres are usually “harder riding” and noisier in operation which can be a disadvantage in some applications. From a manufacturing perspective however, the free space created by eliminating a standard spare wheel gives the car manufacturer a range of additional design opportunities. Key Learning Points • ‘Run flat’ tyre technology; increased sidewall strength, rubber textile sandwich, 80 km of use, speed 80 km/h, possible required use of pressure monitoring system
  • 25.
    Revision 3.0 November2013 21 Module 7 - Unit 1 Wheels & Tyres Trade of Motor Mechanic - Phase 2 Course Notes An “onboard” vehicle tyre pressure monitoring system (TPMS) is normally mandatory for all RFT applications. Run Flat Technology design features generally focus on two aspects of operational use - rigidity and heat resistance. This is to enable the tyre to support vehicle weight when it is rotating with a total air loss. Some run flat tyres are known as “Extended Mobility Technology” or “EMT” tyres. EMT sidewalls can be six times thicker than traditional tyres. As a result the manufactures say that EMT “Run flat” tyres can be driven at speeds of 55-miles or 80-kilometers per hour for up to 200 miles or 300 kilometres in a deflated condition before being damaged. They normally have a directional tyre pattern which must be fitted in such a way that the tread rotates only in one direction. Specialized equipment is needed to fit Run flat tyres as the sidewalls are stiffer and thus not as pliable when fitting. Whilst the tyres are described as “Run flat”, they are not indestructible. Major damage that slices the tyre casing can still result in complete tyre failure. Summary Run Flat technology or RFT tyres enable a driver to maintain control if a vehicle in motion suffers a rapid loss of tyre pressure.
  • 26.
    Module 7 -Unit 1 Revision 3.0 November 2013 22 Wheels & Tyres Trade of Motor Mechanic - Phase 2 Course Notes 6.2 Tyre Pressure Monitoring System (TPMS) Maintaining proper tyre pressure is essential for the safety and performance of a vehicle. It also plays a significant role in decreasing fuel consumption and extending tyre life. All tyres lose inflation over time and, as many modern vehicles have extended service intervals, tyres can become dangerously under-inflated without regular checking by the vehicle driver. In addition to increased fuel consumption and tyre wear, long periods of driving with low tyre pressures can cause additional stress on the tyre sidewalls. This results in increased operating temperatures that can lead to premature tyre failure. Tyres operating with low pressures can also affect the vehicle’s handling and performance. In a worst-case scenario, under-inflation can lead to a tyre blow-out or tread separation. Automated Tyre Pressure Monitoring Systems or TPMS provide a means of reliable and continuous monitoring of the vehicle tyre pressure and are designed to increase safety, decrease fuel consumption and improve vehicle performance. There are two types of tyre pressure monitoring; direct and indirect. The direct monitoring system uses a pressure sensor mounted inside each wheel and uses a wireless transmitter to give direct tyre pressure readings. The indirect system uses the vehicles wheel speed sensors to determine if a tyre is under inflated when compared to each of the other tyres.
  • 27.
    Revision 3.0 November2013 23 Module 7 - Unit 1 Wheels & Tyres Trade of Motor Mechanic - Phase 2 Course Notes TPMS can be fitted to all vehicle types using conventional and run- flat tyres. With a Tyre Pressure Monitoring System installed on a vehicle, drivers can monitor the tyre pressures and temperatures from the driver’s seat to ensure that their tyres are properly inflated under all operating conditions. The systems are also designed to ignore normal pressure variations caused by changes in ambient temperature. The sensor installed inside each wheel is able to respond to as little as a 3PSI or 20Kpa drop in pressure. Real-time information is sent via wireless signal to a display in the vehicle. If a fluctuation occurs, an audible and visual warning instantly alerts the driver allowing time for the vehicle to be stopped or driven to a service station for tyre repair or re-inflation. The tyre is used to enclose the unit as protection from the outside environment. An on-board computer receives the radio messages from the sensors, which are coded for individual wheel identification. The interactive display inside the vehicle shows: • The required tyre pressure • The actual tyre pressure • The tyre pressure status • The temperature of the tyre • The driver can use the display control buttons to check the status of each tyre. In OEM installations, each time the ignition is switched on, an indicator on the instrument panel and on a system display provides information about all four tyre pressures and gives a "Pressure OK" message if all is well. An indicator on the display will “flash” whenever pressure loss is detected. In the case of minor deflation, an orange "Service" light is shown and indicates the faulty tyre. If the pressure is dangerously low, a red "Stop" light flashes, accompanied by a punctured tyre icon, indicating that an immediate wheel change is needed. The sensors are activated by a centrifugal switch and transmit only when the vehicle is in motion. When the vehicle stops the sensors return to sleep mode to extend battery life, however the driver is still able to review the latest signals received from the wheels before the vehicle was stopped.
  • 28.
    Module 7 -Unit 1 Revision 3.0 November 2013 24 Wheels & Tyres Trade of Motor Mechanic - Phase 2 Course Notes 7.0 Dynamical Wheel/Tyre Balancing 7.1 Wheel Balancing Imbalance is an uneven distribution of mass about the tyre/wheel centre-line. Balancing is an essential process when fitting new tyres to wheels or after the tyre has been removed and then refitted to the rim. Most standard production tyres and wheels will, when built, have slight imbalances in their construction due to the nature of the manufacturing process. Balancing allows the technician to determine where these “heavy” spots are located and counteract the effect with balance weights. An imbalance in a tyre/wheel assembly can usually be noticed as one of two things. Firstly an imbalanced front wheel will give a vibration that can be felt through the vehicle steering wheel. Secondly, an imbalance in the rear wheels will result in a vibration that can be “felt” through the vehicle body. As well as being uncomfortable this imbalance can have a detrimental effect on the vehicles handling and the wear of tyre thread, suspension linkage and shock absorbers. Key Learning Points • Wheel balance; static, uneven weight distribution, dynamic, centrifugal force wheel hop, wheel shimmy, wear of thread/ suspension linkage/shock absorbers etc.
  • 29.
    Revision 3.0 November2013 25 Module 7 - Unit 1 Wheels & Tyres Trade of Motor Mechanic - Phase 2 Course Notes Wheel balancers will check two kinds of balance, “static” (A) and “dynamic” (B). Static imbalance causes a wheel to shake up and down (wheel hop) as it spins, so static balance is achieved when both halves of the tyre wheel assembly weigh exactly the same. Dynamic imbalance causes a tyre and wheel to shake back and forth or sideways as it spins (wheel shimming). Dynamic balance is achieved when the inner and outer sides of the wheel and tyre weigh the same.
  • 30.
    Module 7 -Unit 1 Revision 3.0 November 2013 26 Wheels & Tyres Trade of Motor Mechanic - Phase 2 Course Notes 8.0 Balancing Automobile Road Wheel/Tyre Assembly This is a practical task. Please refer to your instructor for additional information, which is available from the automotive technical manuals. 9.0 NCT/DoT VTM Requirements for Automotive Wheels and Tyres NCT Requirements Item 36 to 40 of NCT manual 2004 Key Learning Points • Balance steel and alloy wheels, clip and adhesive weights in most suitable locations Practical Task Key Learning Points • Current NCT/DoT VTM regulations on automotive wheels and tyres
  • 31.
    Revision 3.0 November2013 27 Module 7 - Unit 1 Wheels & Tyres Trade of Motor Mechanic - Phase 2 Course Notes 10.0 Reporting on Tyre Condition and Patterns of Wear This is a practical task. Please refer to your instructor for additional information, which is available from the automotive technical manuals. 10.1 Tyre Wear Diagnosis Checking for tyre wear patterns Preparation and Safety Check tyre for correct wear pattern and ensure there are no embedded foreign objects in the tread. Make sure that you understand and observe all legislative and personal safety procedures when carrying out the following tasks. If you are unsure of what these are, ask your instructor. Some manufacturers supply an emergency rim assembly instead of a full-size spare. It is not intended for long-term use or high speed, but it must have adequate tread. Key Learning Points • Wheel and tyre examination and report, locate NCT/ DoT VTM data, Tyre Condition, Specification, Thread, Wheels, Spare Wheel and Carrier examined and correct recommendations made for NCT/DoT VTM standard compliance • Tyre wear diagnosis (cause/effect) Practical Task Objective Safety Check Points to Note
  • 32.
    Module 7 -Unit 1 Revision 3.0 November 2013 28 Wheels & Tyres Trade of Motor Mechanic - Phase 2 Course Notes Step-by-Step Instruction 1. Check for foreign objects and pressure: Inspect the tyres for embedded objects in treads and remove them and look for signs of wear on all wheels, including the spare. Check the pressure in the tyres. 2. Check tread wear depth: Most tyres have wear indicator bars incorporated into the tread pattern. Inspect the wear indicator bars. Tyres should have at least one sixteenth of an inch, or two millimetres of tread remaining. The wear indicator bars are normally set at this depth. If the tread is worn down to that level or below, they are unserviceable and must be replaced. 3. Check tread wear pattern: Check the wear patterns with the vehicle’s shop manual to indicate the types of wear that have occurred. Causes of uneven wear can include faulty shock absorbers, incorrect front alignment angles and wheels out of balance. Uneven tread and bald spots can indicate over- or under-inflated tyres and poor alignment. 4. Check tyre for damage: Inspect the sidewalls of the tyres for signs of cracking from impacts with blunt objects. Carefully examine the tread area for separation. This is usually identified as bubbles under the tread area. Spin the wheel and see if it is running true. If it is wobbling as it rotates, report it to your supervisor.
  • 33.
    Revision 3.0 November2013 29 Module 7 - Unit 1 Wheels & Tyres Trade of Motor Mechanic - Phase 2 Course Notes 11.0 Wheel Bearing Types and their Tightening/Adjustment Procedure This is a practical task. Please refer to your instructor for additional information, which is available from the automotive technical manuals. 12.0 Wheel Bearing Maintenance This is a practical task. Please refer to your instructor for additional information, which is available from the automotive technical manuals. 12.1 Maintenance of a Wheel Bearing Shown here is one example 1 Prepare the vehicle Prepare the vehicle by having it in a raised condition and at a comfortable working height. The road wheel removed and the brake unit stripped to enable the hub to be dismantled. Key Learning Points • Remove, determine condition/replace/refit wheel bearings on non-driven wheel, tightening/torqueing/adjustment procedure of free play to manufacturer's specification Practical Task Practical Task
  • 34.
    Module 7 -Unit 1 Revision 3.0 November 2013 30 Wheels & Tyres Trade of Motor Mechanic - Phase 2 Course Notes 2 Remove the bearing hub assembly Pry off the dust cap and remove the locking device. This is usually a cotter pin through the nut and spindle. Remove the retaining nut and washer. Clean them and place them in a safe place ready for reassembly. When removing the hub, be careful not to get any of the grease on the brake shoes if they are still in position. 3 Remove the hub seal Using a long dowel or drift and using a hammer, gently drive on the front of the inner hub bearing from inside the hub unit. This will push the bearing out and also remove the oil seal. It is good practice to renew the oil seal when you service the bearings.
  • 35.
    Revision 3.0 November2013 31 Module 7 - Unit 1 Wheels & Tyres Trade of Motor Mechanic - Phase 2 Course Notes 4 Clean and check the old bearings Use a paper towel to wipe all of the old bearing grease from the spindle and the hub dust cap. Clean the bearing with solvent and air dry on a paper towel or blow it dry with compressed air. Clean out any grease in the hub and dispose of the grease in an environmentally friendly manner. It is not recommended to use shop rags for this, especially if they are laundered for re-use. If you use an air blower as part of the cleaning process, be careful not to blow the old, dirty grease into the bearing or let the bearing spin. 5 Inspect the bearing Inspect the bearing and it’s housing, which is called the “bearing race,” for damage. If you see any pitting or obvious damage, replace the bearing and the bearing race. These must be replaced as a set.
  • 36.
    Module 7 -Unit 1 Revision 3.0 November 2013 32 Wheels & Tyres Trade of Motor Mechanic - Phase 2 Course Notes 6 Re-pack grease into bearing Check your shop manual to see which grease is recommended for the vehicle and its application. The most common method is to pack the bearings by hand. Put a small amount of grease in the palm of your hand. Work the grease into the large open end of the bearing until it oozes out the opposite side then spread a fresh layer of grease all around the bearing and on the bearing races. You can also grease the bearing with a pressure-bearing packer unit, if the correct grease is used for the application. Place the freshly greased bearing on a paper towel.
  • 37.
    Revision 3.0 November2013 33 Module 7 - Unit 1 Wheels & Tyres Trade of Motor Mechanic - Phase 2 Course Notes 7 Grease inside of the hub and dust cap Put a small amount of grease in the cavity of the hub. Also, pack some grease into the dust cap. Fill it about one-third, not all the way up. 8 Re-install the bearings and seal Re-install the bearing in the same bearing race. Leave a ring of grease below the bearing race to help keep the fresh grease inside the bearing area after it heats up. Before installing the new seal, ensure it is the right size to go over the spindle, by checking its diameter with the old oil seal that was removed from the hub. Install the new seal with its sealing lip facing towards the bearing, with a recommended seal-installing tool. Carefully tap on the installer tool ensuring that the seal goes in straight.
  • 38.
    Module 7 -Unit 1 Revision 3.0 November 2013 34 Wheels & Tyres Trade of Motor Mechanic - Phase 2 Course Notes Lightly lubricate the seal lip. 9 Inspect the sealing area of the spindle Inspect the sealing area for any signs of wear or damage. If the seal area is worn or grooved, If the seal area is worn or grooved, it will affect the sealing function and could damage the renewed seal. 10 Re-install bearing hub assembly Slide the hub assembly onto the spindle and ensure it sits on the sealing area. Put the outer bearing in place.
  • 39.
    Revision 3.0 November2013 35 Module 7 - Unit 1 Wheels & Tyres Trade of Motor Mechanic - Phase 2 Course Notes Add the washer and retaining nut and screw it up by hand until it just touches the back of the outer bearing. Now tighten, or pre-load the bearing, in accordance with the specifications in the vehicle’s shop manual. Re-install the brake assembly and get your instructor to check that the job is secure and within specifications prior to replacing the road wheel.
  • 40.
    Module 7 -Unit 1 Revision 3.0 November 2013 36 Wheels & Tyres Trade of Motor Mechanic - Phase 2 Course Notes 13.0 Changing Tyres Procedure 13.1 Procedure for Changing Tyres When removing and fitting tyres refer to vehicle manufactures instructions. Vehicles fitted with tyre pressure monitoring systems (TPMS) require special attention when changing tyres. Please refer to the vehicle manufacture for the appropriate instructions. 14.0 ‘End of Useful Life’ Procedures with Tyres/Tubes 14.1 Tyre Disposal Usedtyresandtubeshavelikeallotherwastematerialtobestoredand disposed of according to the relevant environment procedures. Key Learning Points • Tyre pressure monitoring system; only renew the valve insert, 'save pressures' function is invoked on control system menu Key Learning Points • Worn/used tyres/tubes etc. appropriately stored for use by industry approved recycling company
  • 41.
    Revision 3.0 November2013 37 Module 7 - Unit 1 Wheels & Tyres Trade of Motor Mechanic - Phase 2 Course Notes Self Assessment Q1: Tyre information is moulded into: (Tick one box only)  1. The rim  2. The bead diameter  3. The tread  4. The sidewall Q2 Wheel rims are sized according to: (Tick one box only)  1. Diameter  2. Flange height  3. Width  4. All of these Q3 An “onboard” vehicle tyre pressure monitoring system (TPMS) is normally mandatory for all RFT applications. (Tick one box only)  1. True  2. False Q4: Excessive wear in the middle of a tyre tread could indicate: (Tick one box only)  1. Under-inflation  2. Over-inflation  3. Wheels not running parallel  4. Excess negative camber Q5: The main function of grooves in the tread pattern is to: (Tick one box only)  1. Reduce road noise intrusion  2. Indicate when the tyre is worn out  3. Increase traction on dry surfaces  4. Clear water from the contact patch
  • 42.
    Module 7 -Unit 1 Revision 3.0 November 2013 38 Wheels & Tyres Trade of Motor Mechanic - Phase 2 Course Notes Q6: An aspect ratio of 75% indicates that: (Tick one box only)  1. The width of the tyre is 75% of its height  2. The height of the tyre is 25% less than its width  3. The height of the tyre is 25% greater than its width Q7: Tubeless tyres have no inner tubes because they have: (Tick one box only)  1. A soft-rubber inner-casing liner  2. High-tensile steel beads  3. An increased number of casing plies  4. A special outer-casing compound Q8: When checking tyre pressures you must make sure that the gauge is accurate. If the gauge is reading high it could lead to the tyre being: (Tick one box only)  1. Under-inflated  2. Over-inflated Q9: Radial ply tyres have: (Tick one box only)  1. Larger sidewalls than bias ply tyres  2. Softer sidewalls than bias ply tyres  3. Smaller sidewalls than bias ply tyres  4. Stiffer sidewalls than bias ply tyres Q10: A tyre with an aspect ratio of 45% is: (Tick one box only)  1. A low profile tyre  2. A high profile tyre  3. A small bead tyre  4. A cross-ply tyre Q11: When a tyre is marked as ‘Temporary Use Only’, this means: (Tick only one box)  1. It can only be used for a short term  2. It is only suitable to use as a spare tyre to move the vehicle to a safe place while the original tyre is repaired  3. It is not recommended for high speed driving  4. It does not have an inner tube
  • 43.
    Revision 3.0 November2013 39 Module 7 - Unit 1 Wheels & Tyres Trade of Motor Mechanic - Phase 2 Course Notes Suggested Exercises • Use an electronic data facility to procure manufacturer’s appropriate data for use with practical exercises • Remove/refit tyres • Repair punctures • Examine and report on wheels and tyres of training vehicles for NCT/DoT VTM compliance • Remove/refit wheels to training vehicle, use torque spanner always for tightening • Remove, examine for wear, replace/refit wheel bearings on training vehicle to manufacturer's recommendations Training Resources • Technical information in book/electronic form on wheel and tyre design, classifications, performance and wear characteristics, wheel bearing construction and running clearances • Manufacturer’s information on tyre sizes, pressures. NCT/ DoT VTM wheel, tyre, regulations • Tyre removal and refitting equipment including. alloy rim facility • Compressor etc. • Dynamic wheel balancer • Selection of balance weights, used tyres storage/disposal/ recycling facilities
  • 44.
    Module 7 -Unit 1 Revision 3.0 November 2013 40 Wheels & Tyres Trade of Motor Mechanic - Phase 2 Course Notes Suggested Further Reading • Advanced Automotive Diagnosis. Tom Denton. ISBN 0340741236 • Automobile Electrical and Electronic Systems (3rd Edition). Tom Denton. ISBN 0750662190 • Automotive Mechanics (10th Edition). William H. Crouse and Donald L. Anglin. ISBN 0028009436 • BoschAutomotiveElectricsAutomotiveElectronics:Systemsand Components (4th Edition). Robert Bosch. ISBN 0837610508 • Bosch Automotive Handbook (6th Edition). Robert Bosch. ISBN 1860584748 • Bosch Automotive Technology Technical Instruction booklet series (numerous titles) • Hillier’s Fundamentals of Motor Vehicle Technology: Book One (5th Edition). V.A.W. Hillier and Peter Coombes. ISBN 0748780823 • Hillier’s Fundamentals of Motor Vehicle Technology: Book Two (5th Edition). V.A.W. Hillier and Peter Coombes. ISBN 0748780998 • Modern Automotive Technology. James E. Duffy. ISBN 1566376106 • Motor Vehicle Craft Studies - Principles. F.K. Sully. ISBN 040800133X • National Car Test (NCT) Manual (Department of Transport, Vehicle Testers Manual - DoT VTM). Department of Transport • Transmission, Chassis and Related Systems (Vehicle Maintenance and Repair Series: Level 3) (3rd Edition) John Whipp and Roy Brooks. ISBN 186152806X • Vehicle and Engine Technology (2nd Edition). Heinz Heisler. ISBN 0340691867 • http://www.cdxglobal.com/ • http://auto.howstuffworks.com/ • http://www.autoshop101.com/ • http://www.cdxetextbook.com/ • Automotive Encyclopedia and Text Book Resource (CD version of e-textbook), Available from your instructor.
  • 45.
  • 48.
    27-33 Upper BaggotStreet Dublin 4