This document provides information on tracheostomy care including:
- The risks of tracheostomy include infection, internal bleeding, and loss of speech.
- Pre-op care involves sedation, NPO after 2200 hours, blood tests, consent forms and ensuring communication methods.
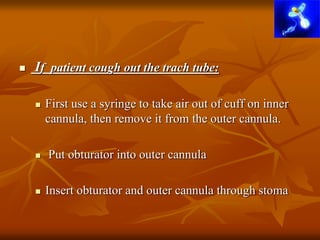
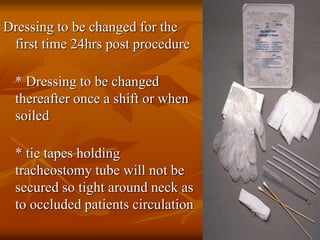
- Post-op care consists of tracheostomy tube cleaning daily, suctioning secretions, monitoring oxygen levels, and giving medications like antibiotics and analgesics.
- Proper tracheostomy care is needed to prevent complications and keep the site infection-free.
2. making an incision through the front of neck
and the wall of the trachea to permit the tube's
insertion.
The opening to the trachea is known medically
as a stoma or a trach . The tube, referred to as a
cannula, is held in place with stitches
5. PRE-OP CARE
Sedative
NPO since 2200hrs
taking insulin, diabetes pills, blood pressure
medicine, heart pills, or any other medication
on the day of surgery??
6. PAC
Vital signs
Blood tests
ECG
Chest x ray
Pulse oximeter
7. Written informed consent
IV access
Communication:
Once tube is in place - won't be able to talk
Before surgery, patient and nursing officer will need to
work out a way of telling what patient need.
8. You can use hand
signals, pencil and
paper, lip reading, a
letter board, or a magic
slate
Also, ask for a bell or
rattle to get attention
quickly
Later may be able to
learn to talk by using a
"speaking trach tube
9. Pre-Op Preparations
Make patient lie on his/her back with a rolled
towel under his/her shoulders.
Anesthesia
GA/LA
10. POST-OP CARE
Trach Care:
>Once the trach tube is in place, nursing
assistant will clean the stoma and the
surrounding skin at least once a day.
>They may need to suction the tube frequently to
clean out any saliva or secretions that
accumulate and threaten to block the tube.
13. Cleaning the Trach
clean inner cannula once in a day
Unlock inner cannula & remove it by pulling it
gently out and down
Put a clean wet inner cannula inside outer cannula
14. Lock inner cannula in place
Clean dirty cannula by soaking it in liquid soap
and water
Rinse inner cannula under running water
Make sure that all the soap and hydrogen peroxide
have been rinsed off well
15. Using a Trach Bib
is used to catch any secretions that come from your
stoma and could make your skin sore
Suctioning the Trach Tube
Aseptic technique
Suction catheters should be less than half size of
trachea tube insitu
During suctioning procedure catheter should only
occluded for 5 second intervals
16. catheter should be inserted into
trachea tube with gentle pressure and
withdrawn from the trachea tube
using a rotating technique
patient should be monitored by
oximetry for O2 saturation during the
procedure
Advance the catheter 5 to 8 inches
Do not cover the catheter's control
valve while inserting the catheter.
The control valve is the small hole
near the end that is in your hand.
Covering it starts the suction.
17. The need for suctioning
should be assessed at
least every two hours or
more frequently as need
arises
If repeated suctioning is
to be performed allow
patient rest for several
minutes to regain
adequate oxygen levels
18. Over suctioning should be
avoided to decrease potential
damage to patients airway
Pre-oxygenate patient with 100%
O2 for 2 minutes prior to
suctioning
Apply suctioning withdraw
suction catheter with a rotating
motion and apply suctioning only
at 5 second intervals
19. If patient cough out the trach tube:
First use a syringe to take air out of cuff on inner
cannula, then remove it from the outer cannula.
Put obturator into outer cannula
Insert obturator and outer cannula through stoma
20.
21. Pull out obturator while pressing trach plate firmly
Put inner cannula down outer cannula and turn it
clockwise until it locks in place
Inserting inner cannula can make patient cough or gag,
so hold the trach plate firmly
Now inflate the cuff so the trach won't fall out again.
Tie the trach ties and put a trach bib under the trach plate.
23. Dressing to be changed for the
first time 24hrs post procedure
* Dressing to be changed
thereafter once a shift or when
soiled
* tie tapes holding
tracheostomy tube will not be
secured so tight around neck as
to occluded patients circulation
24. OUTCOMES:
* Complication of tracheal stenosis and
erosion are minimised by securing tracheal
tube in midline position
* The patient tracheostomy site will remain
infection free
26. * Remove old dressing and ties
* Swab around tracheal stoma with normal saline
* Fold sterile gauze squares in half and place on
under each flange of the tracheostomy tube.
* Attach cotton tape to tracheostomy tube flange by
passing doubled cotton tape up through opening in
flange then threading loose ends up through loop.
End result should have two tails extending out from
flange
27. The long cotton tape are then to be tied leaving at least a
two finger space between patient and tie tapes.
* Ensure patients comfort with new dressing
* Test cuff press with cuffed tracheostomy tubes