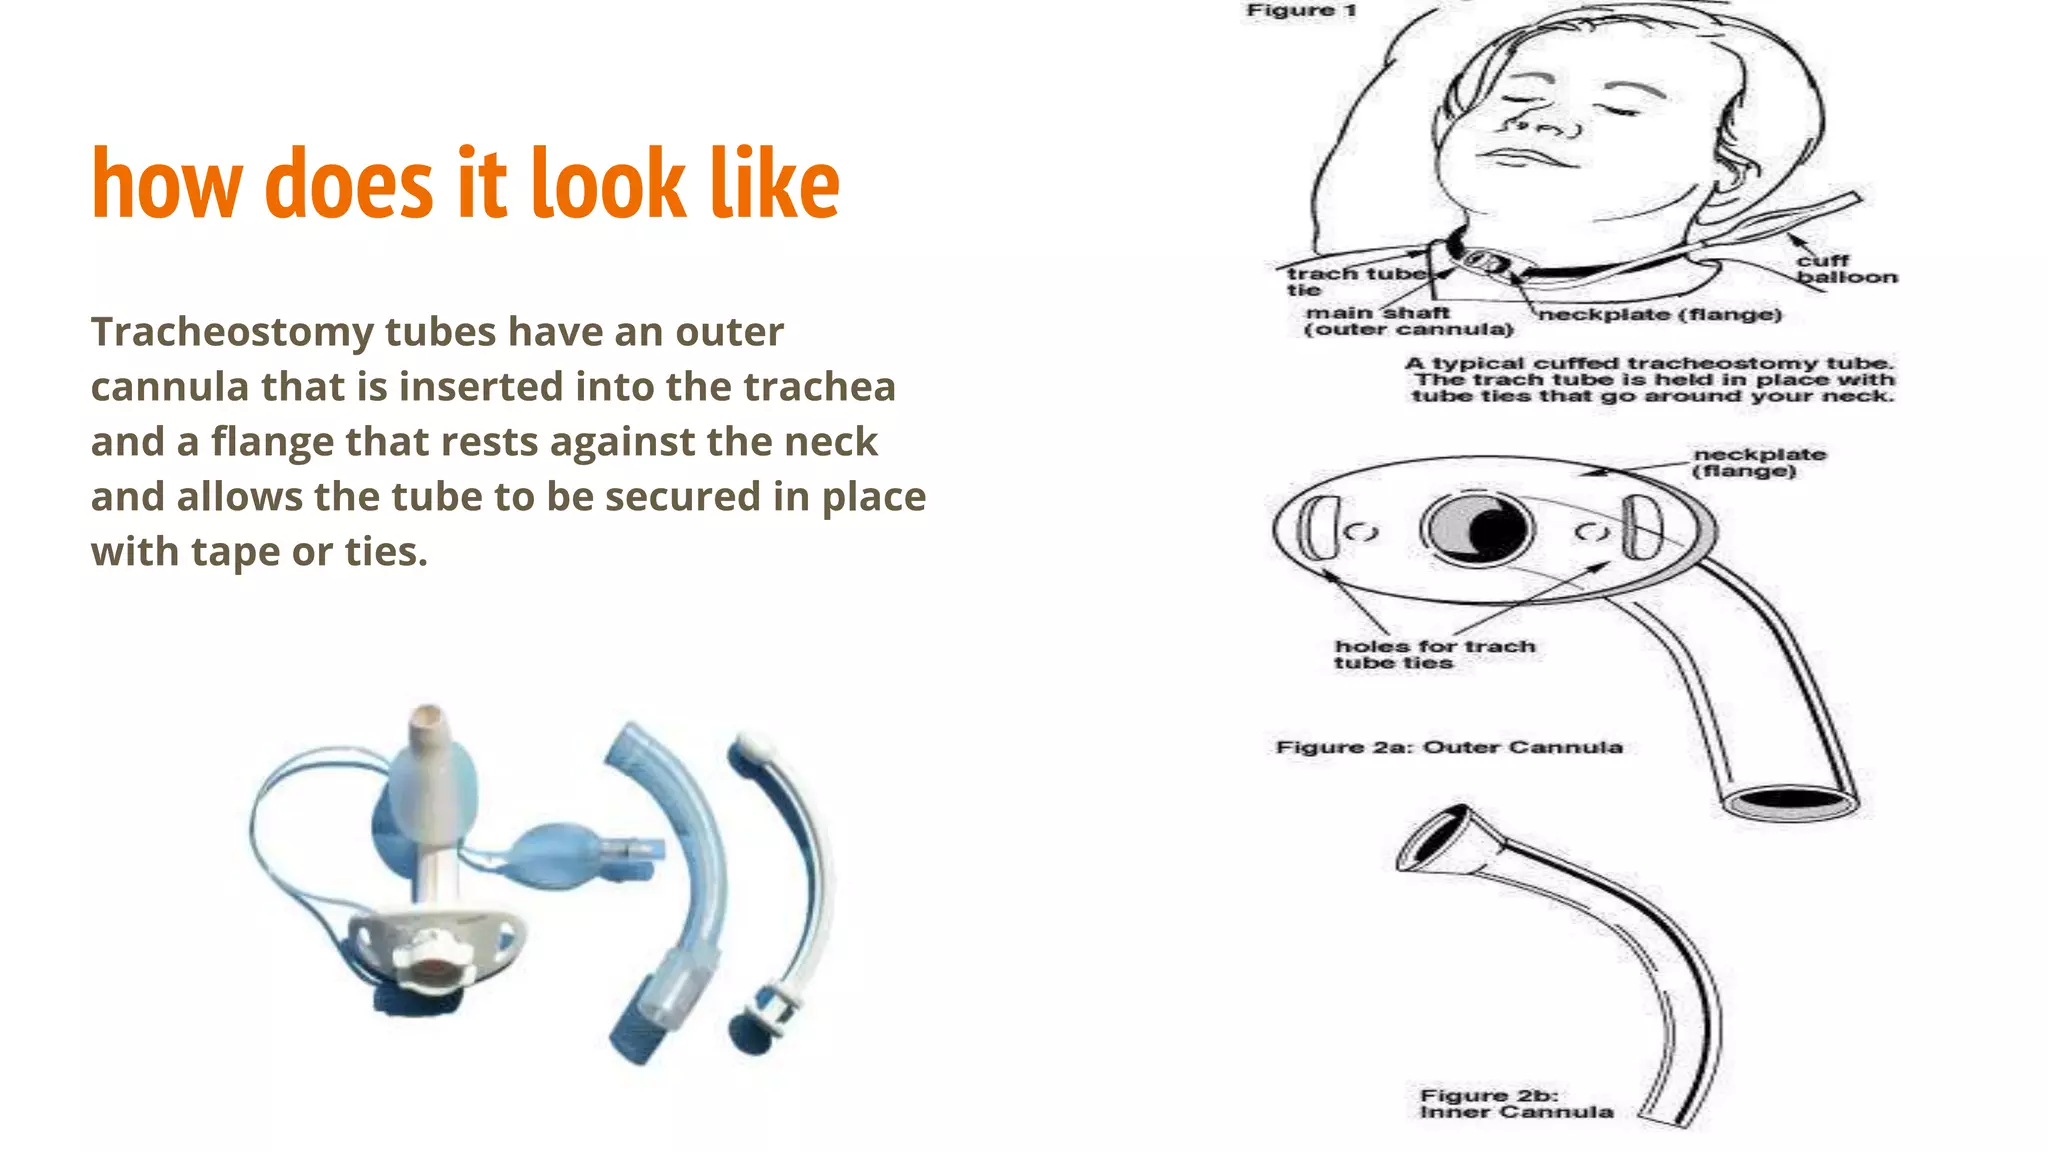
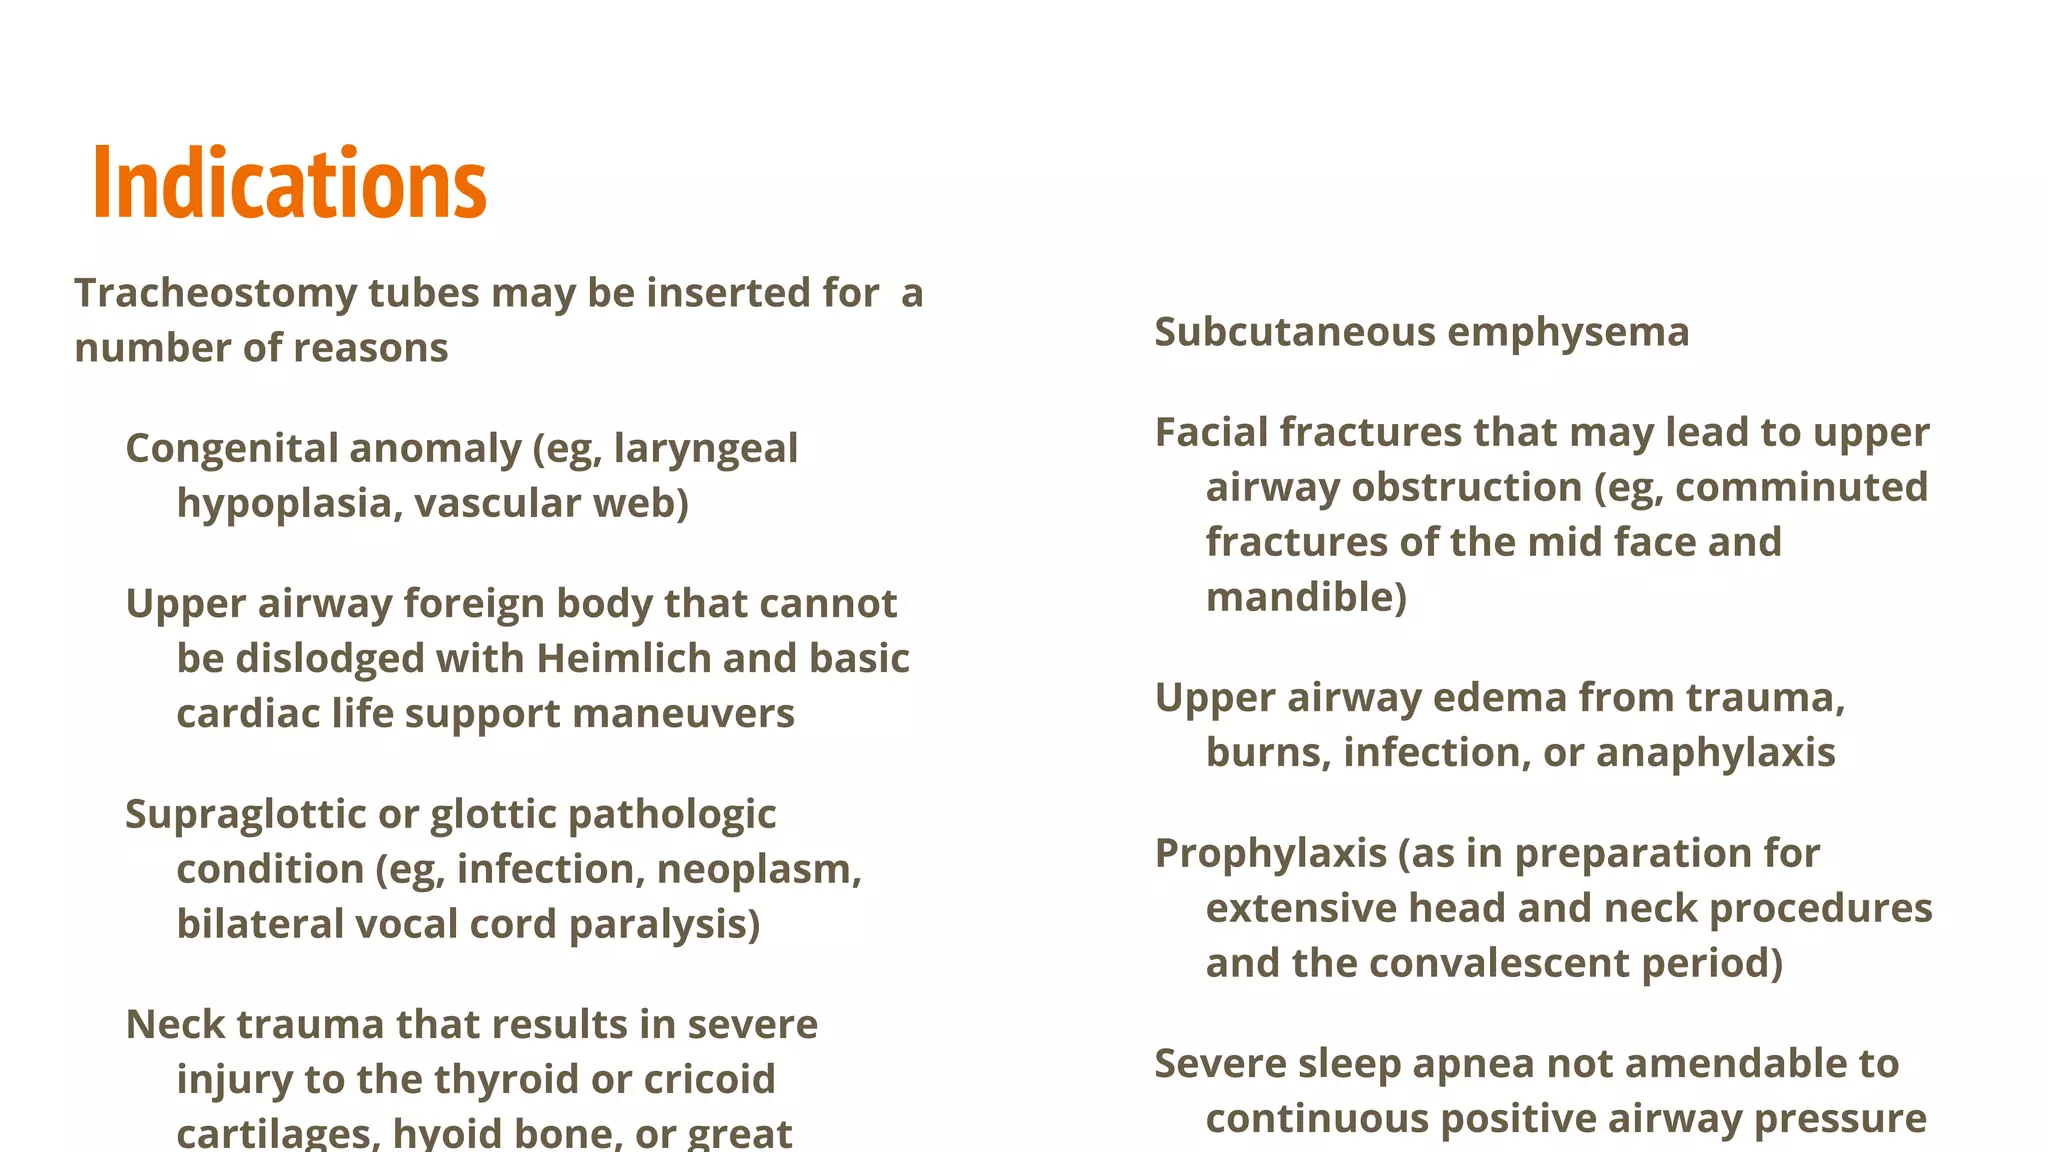
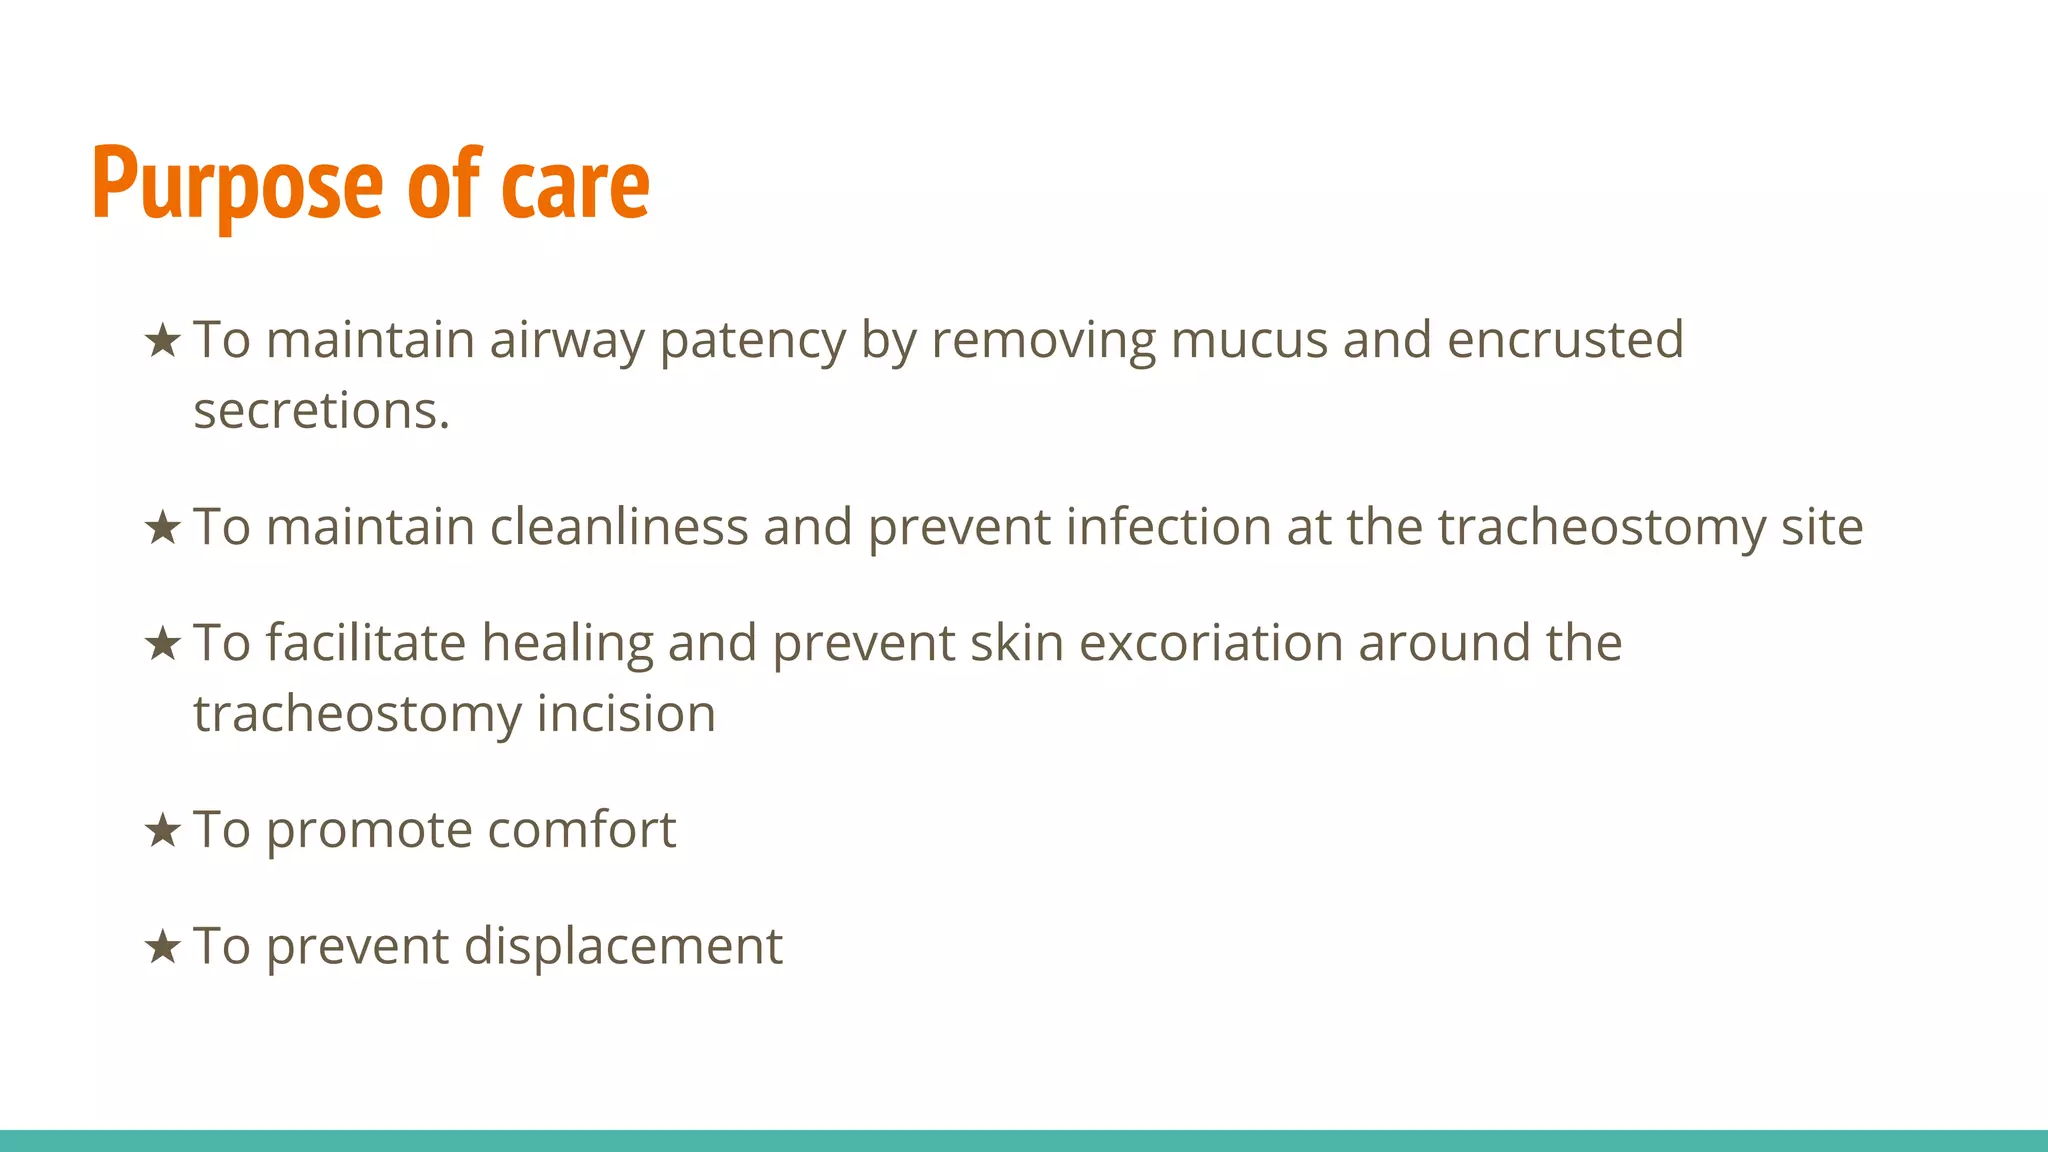
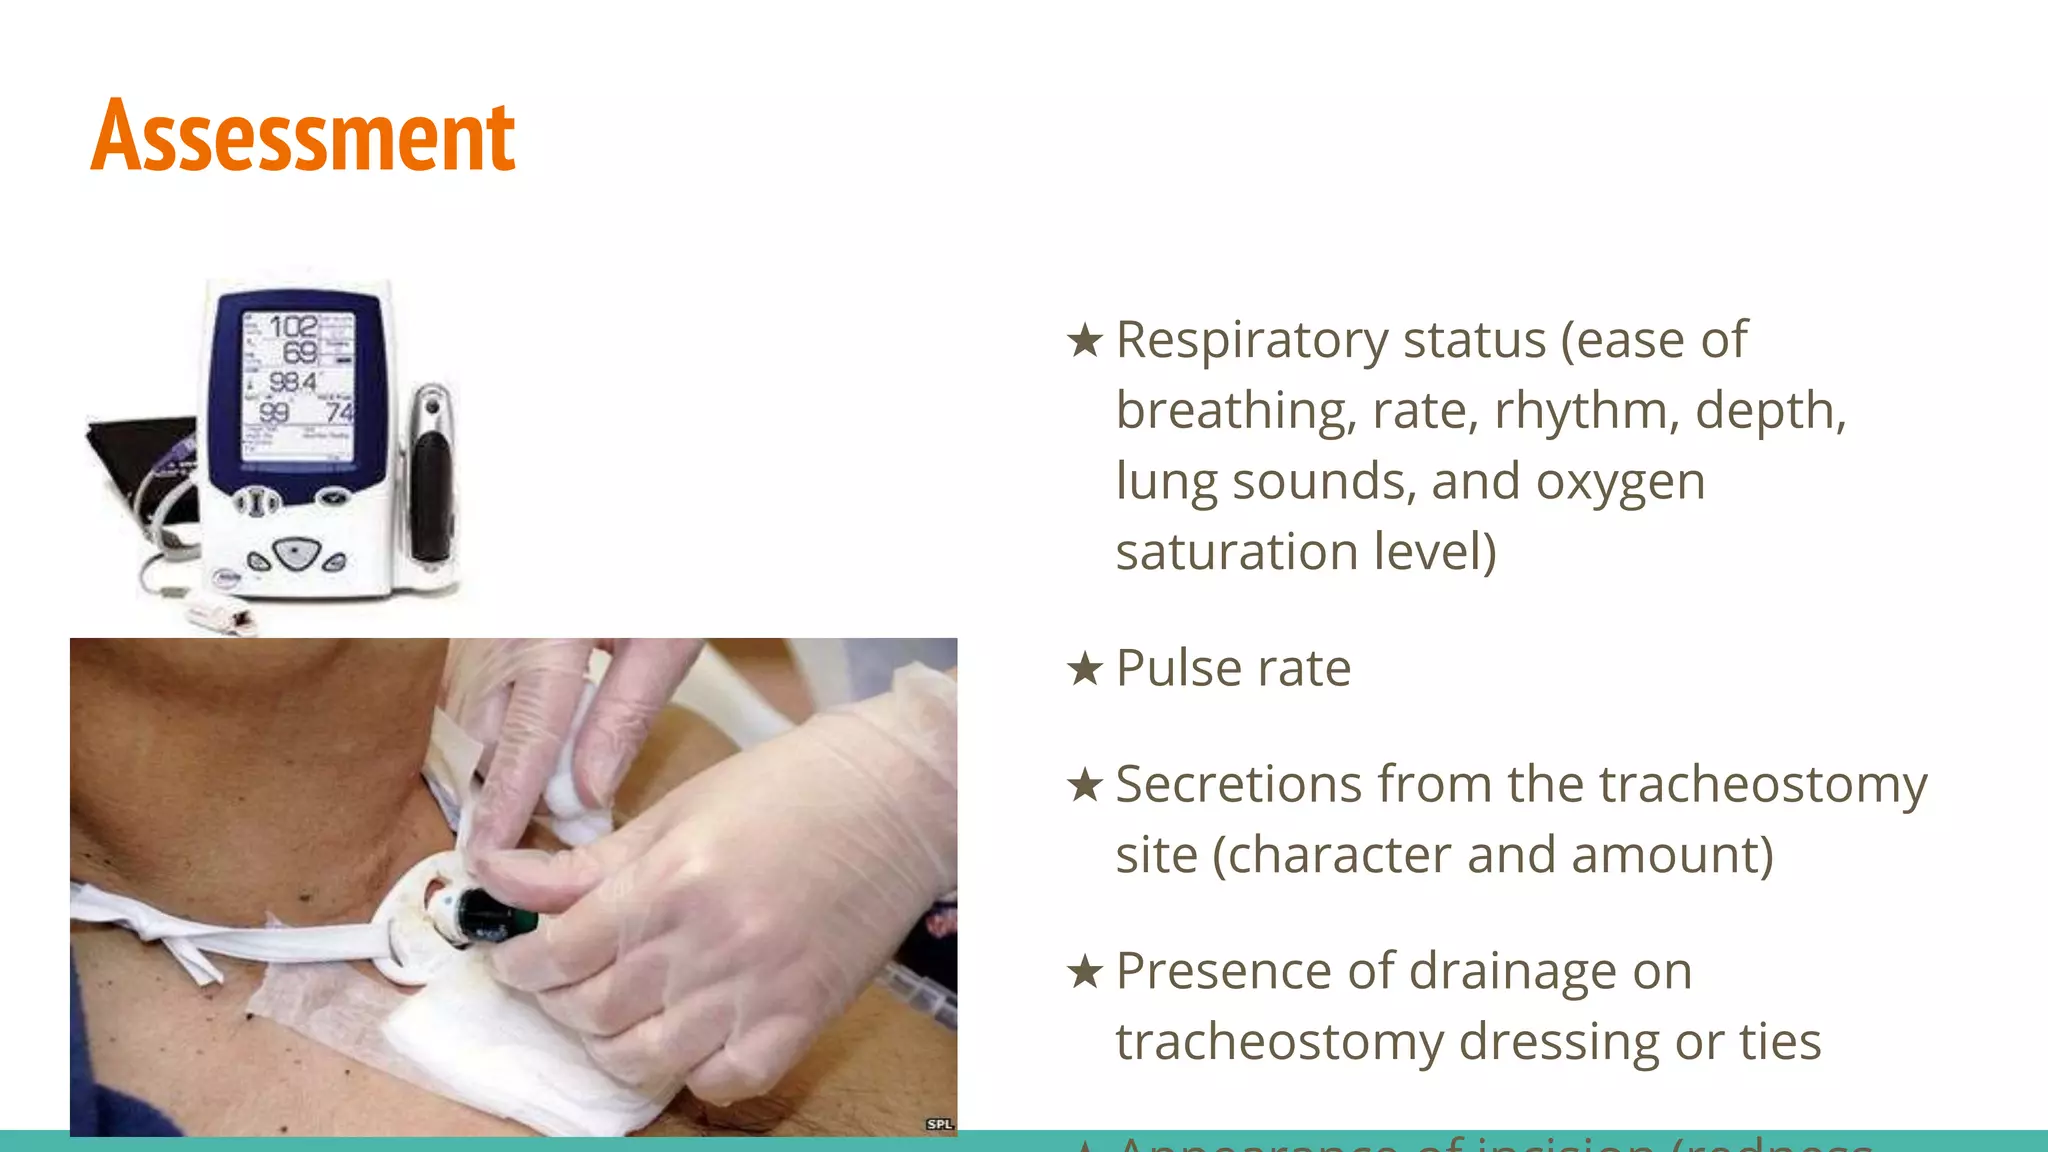
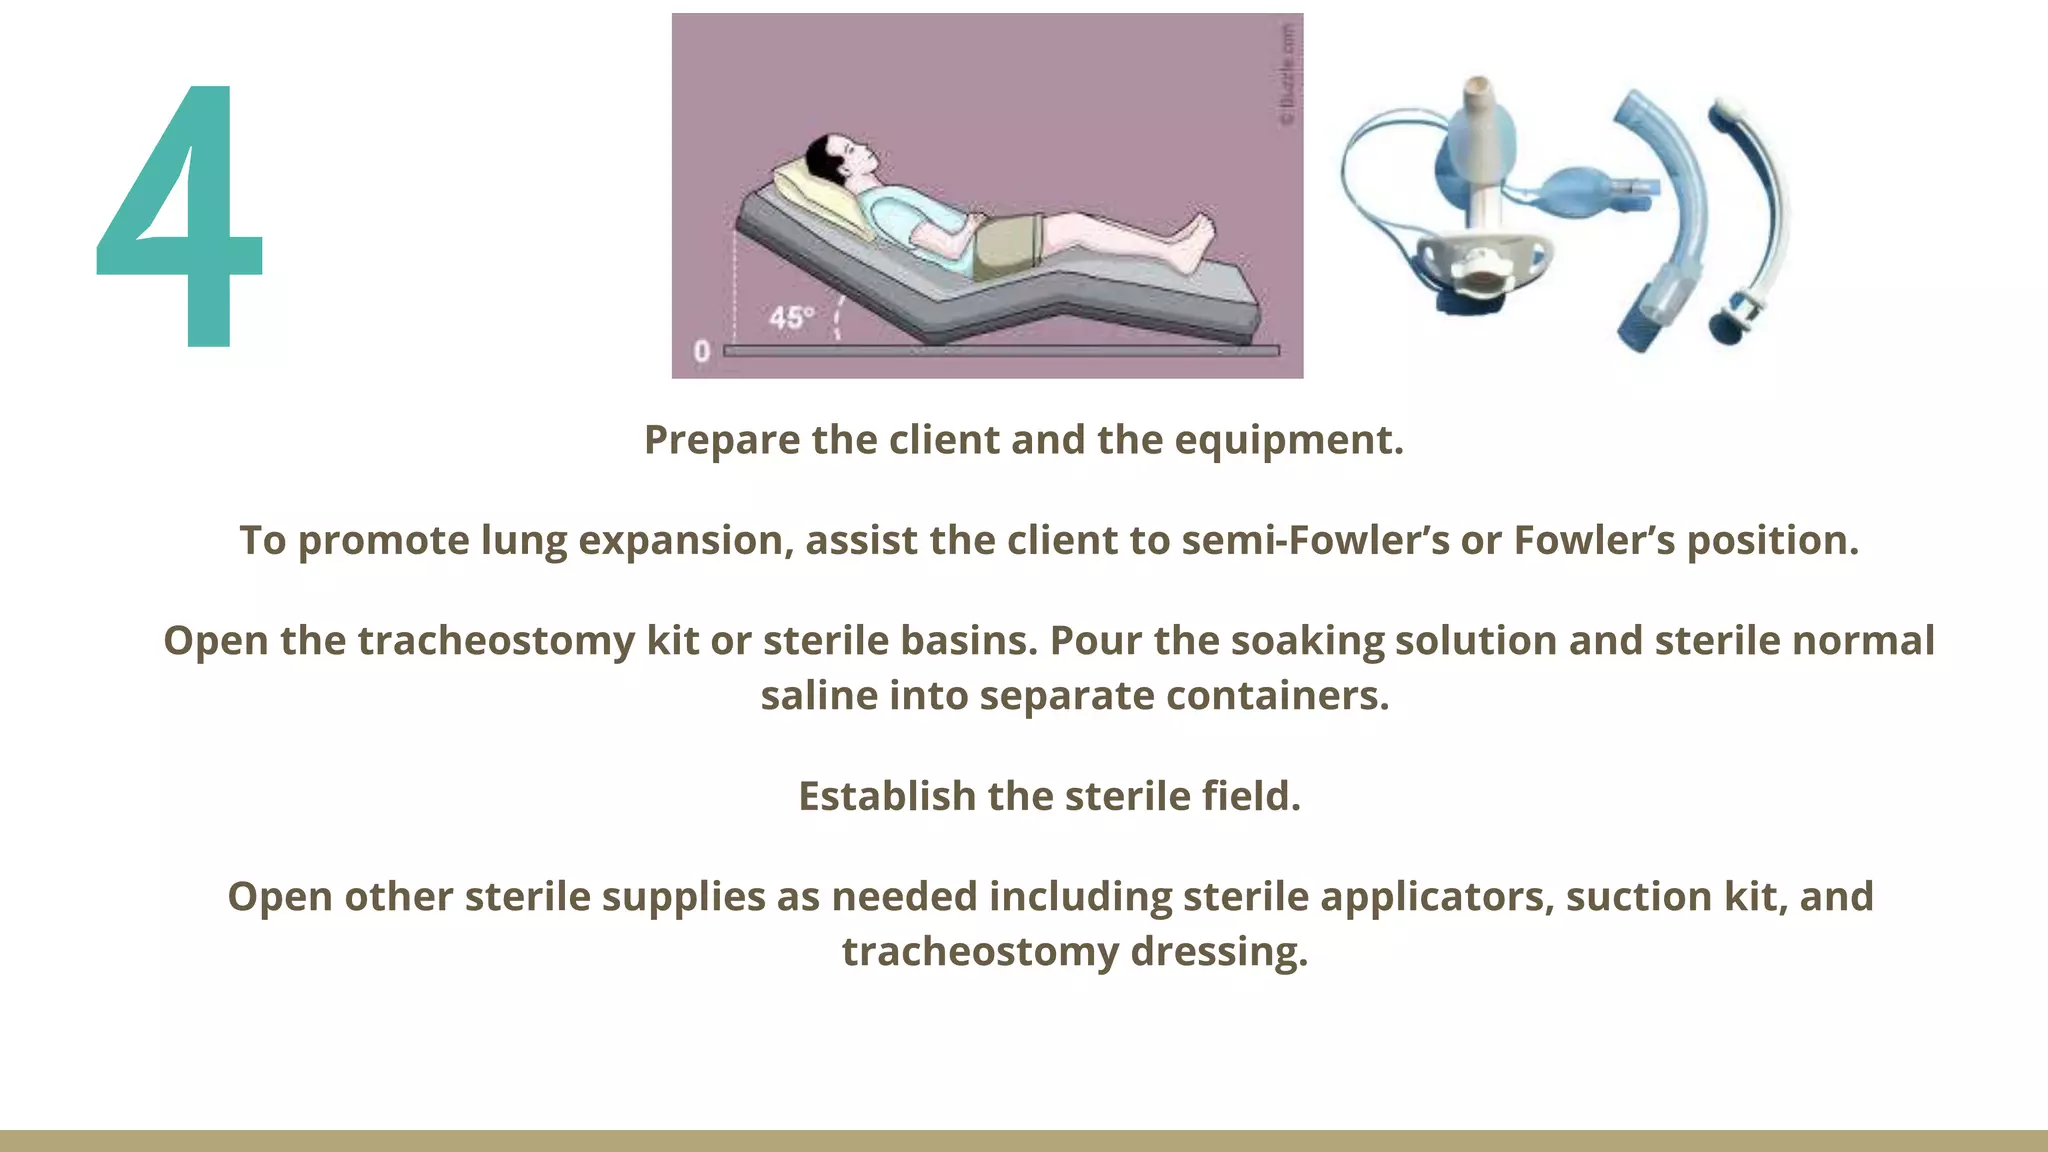
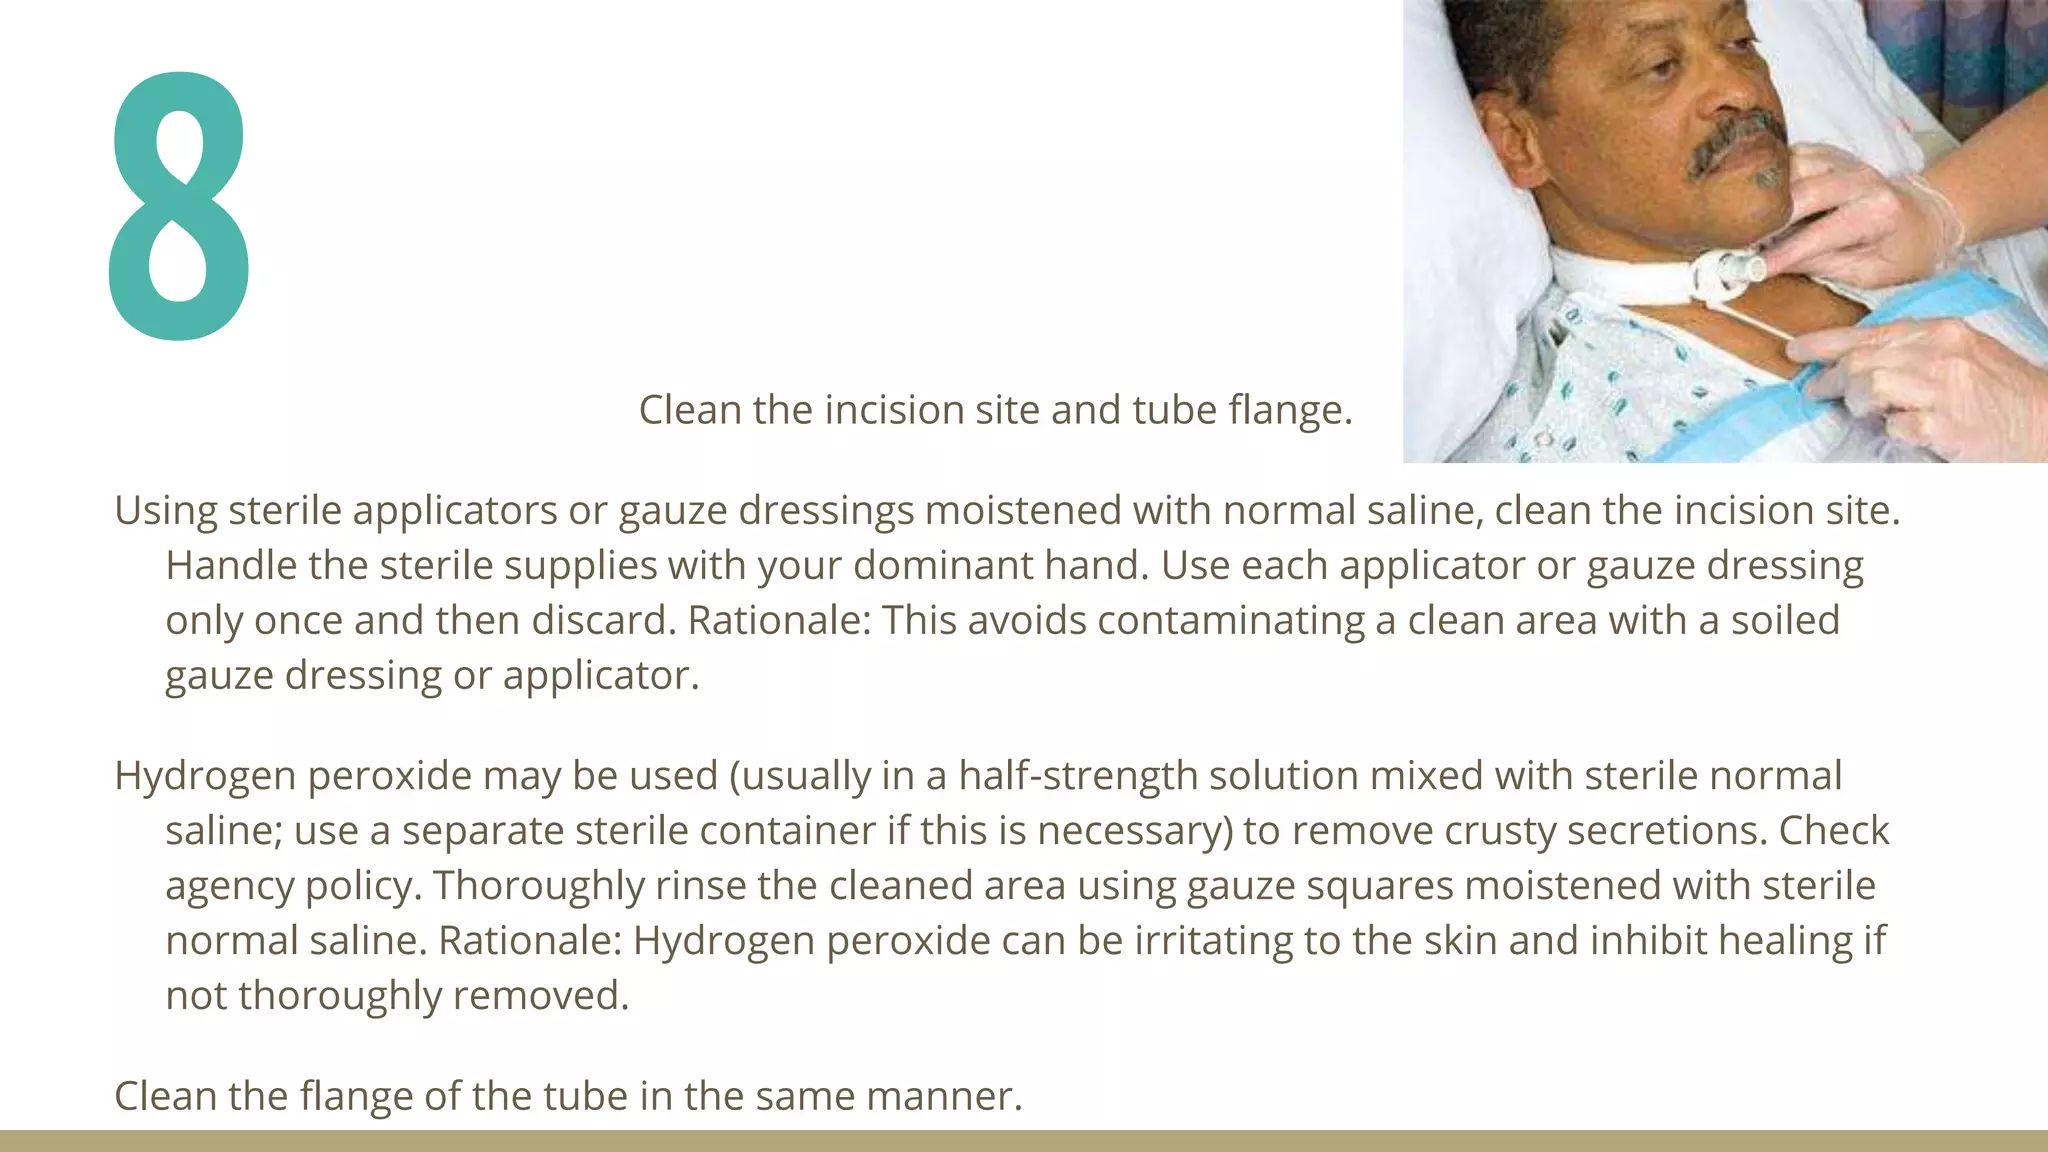
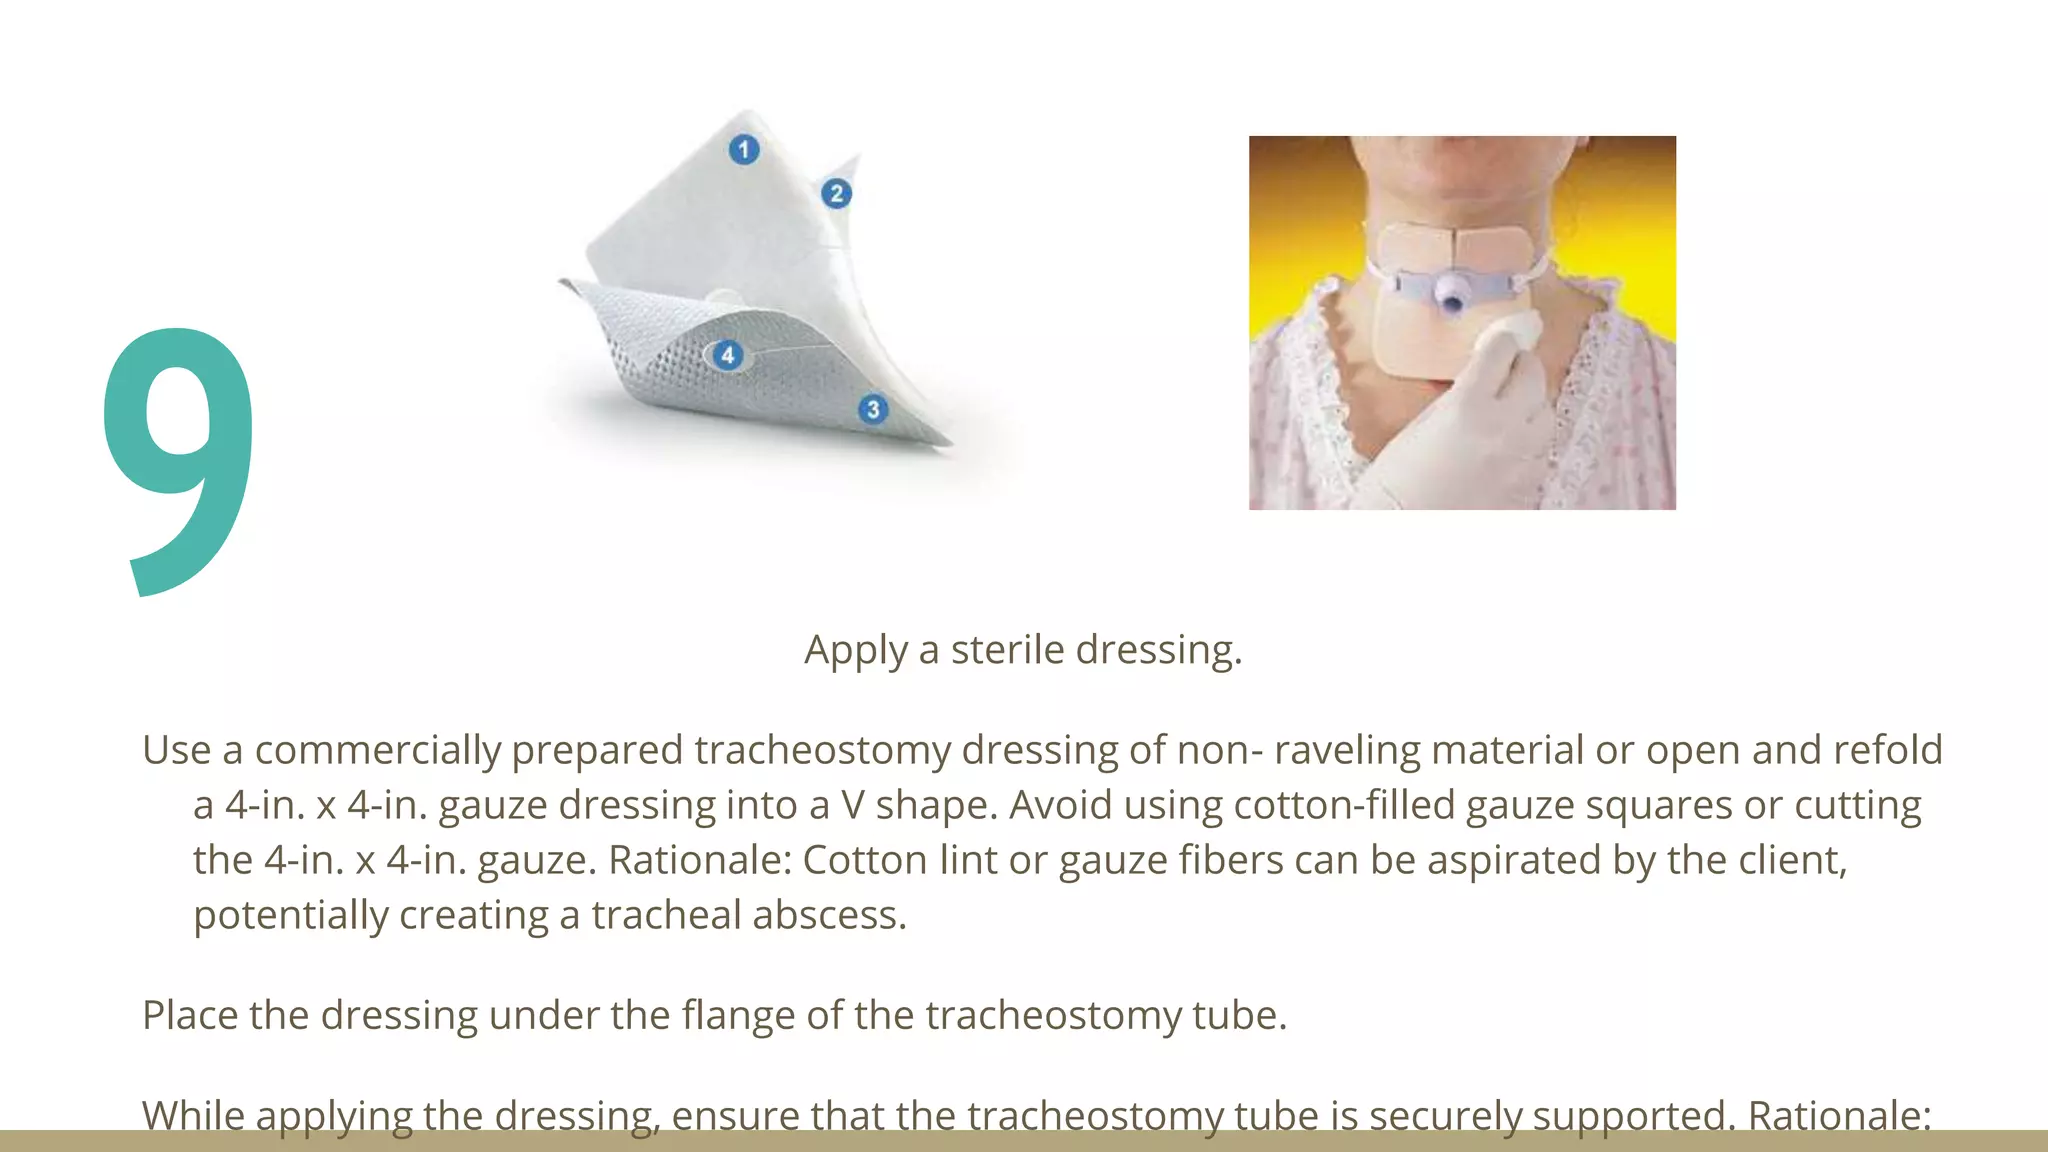
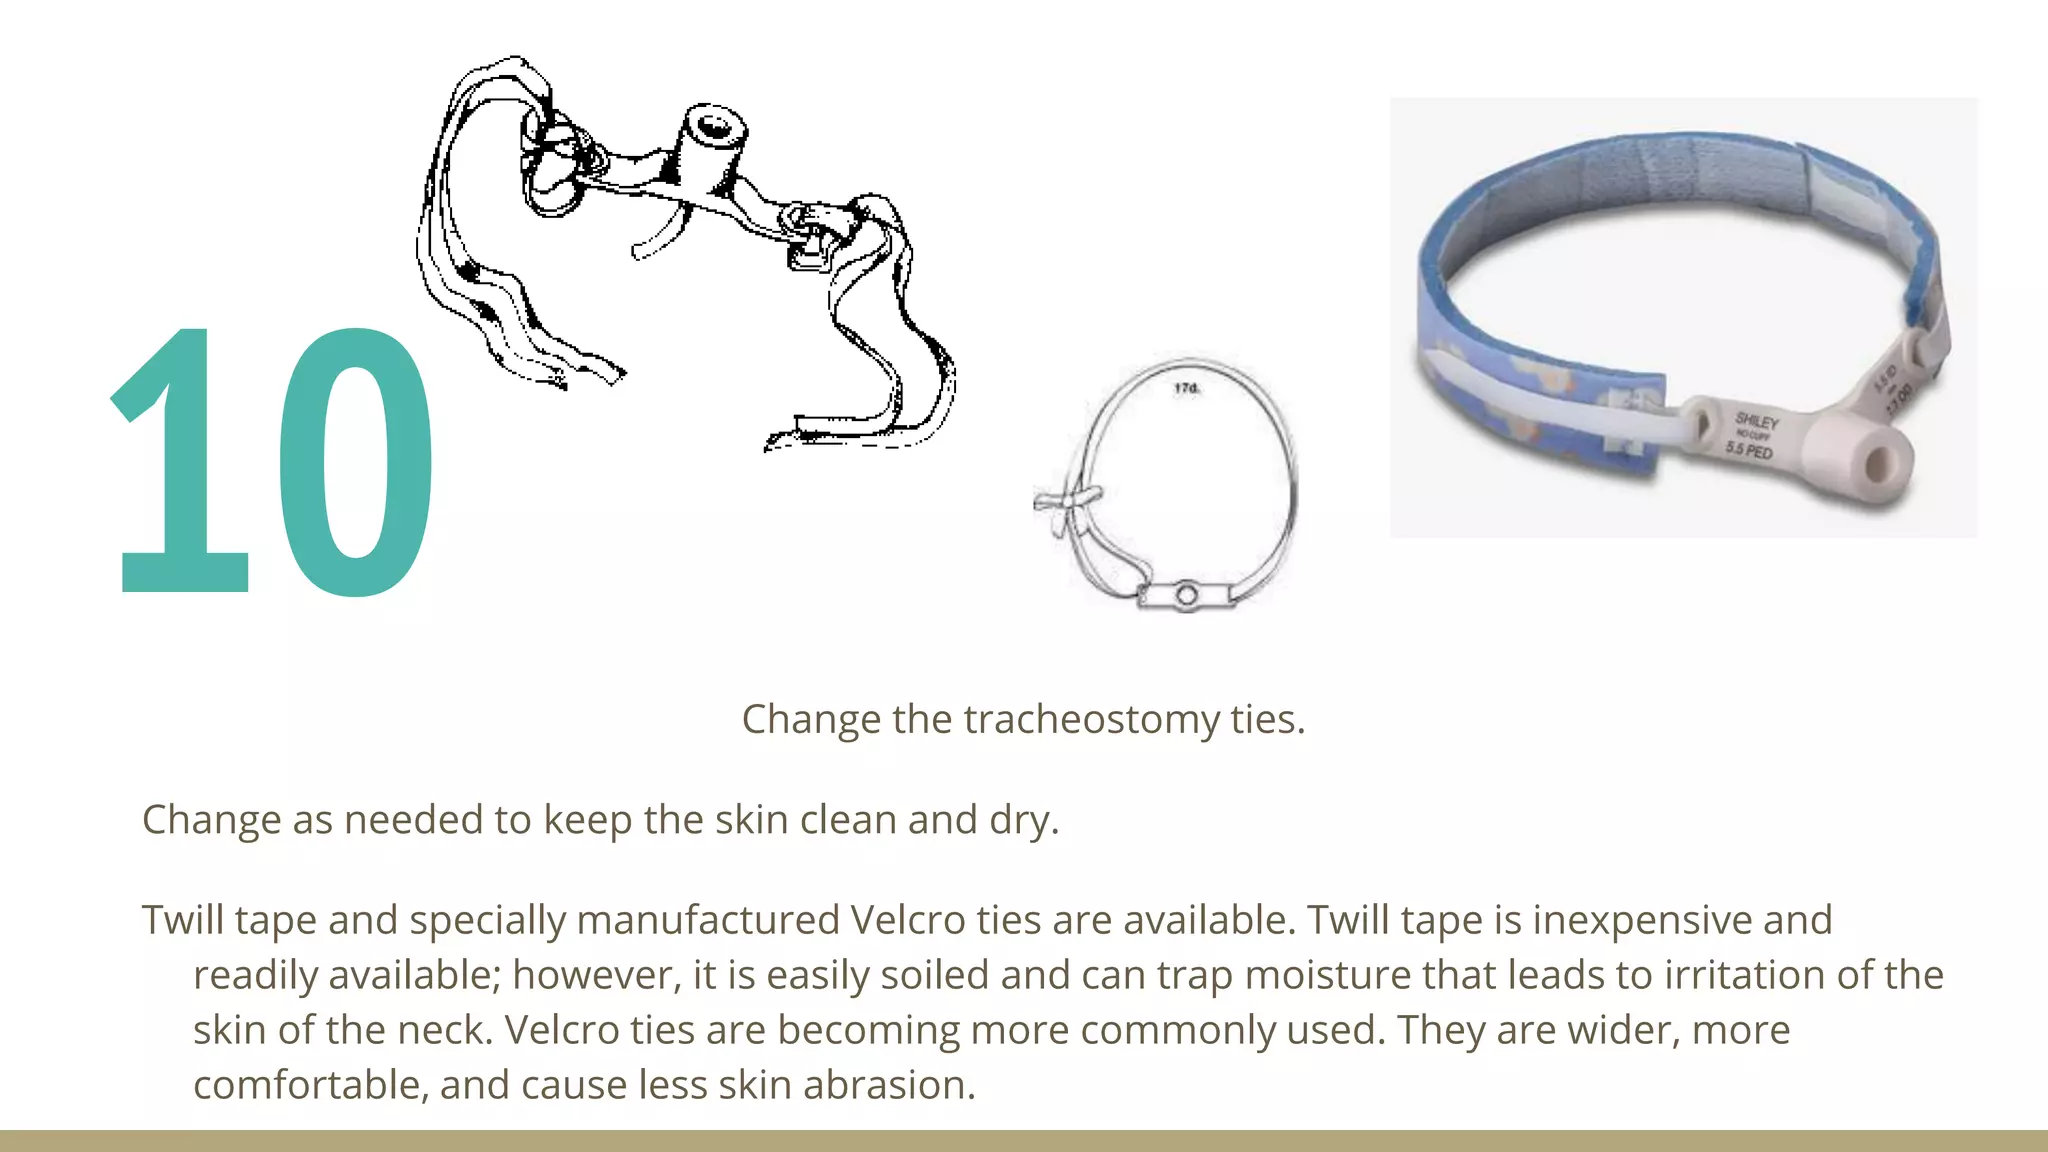
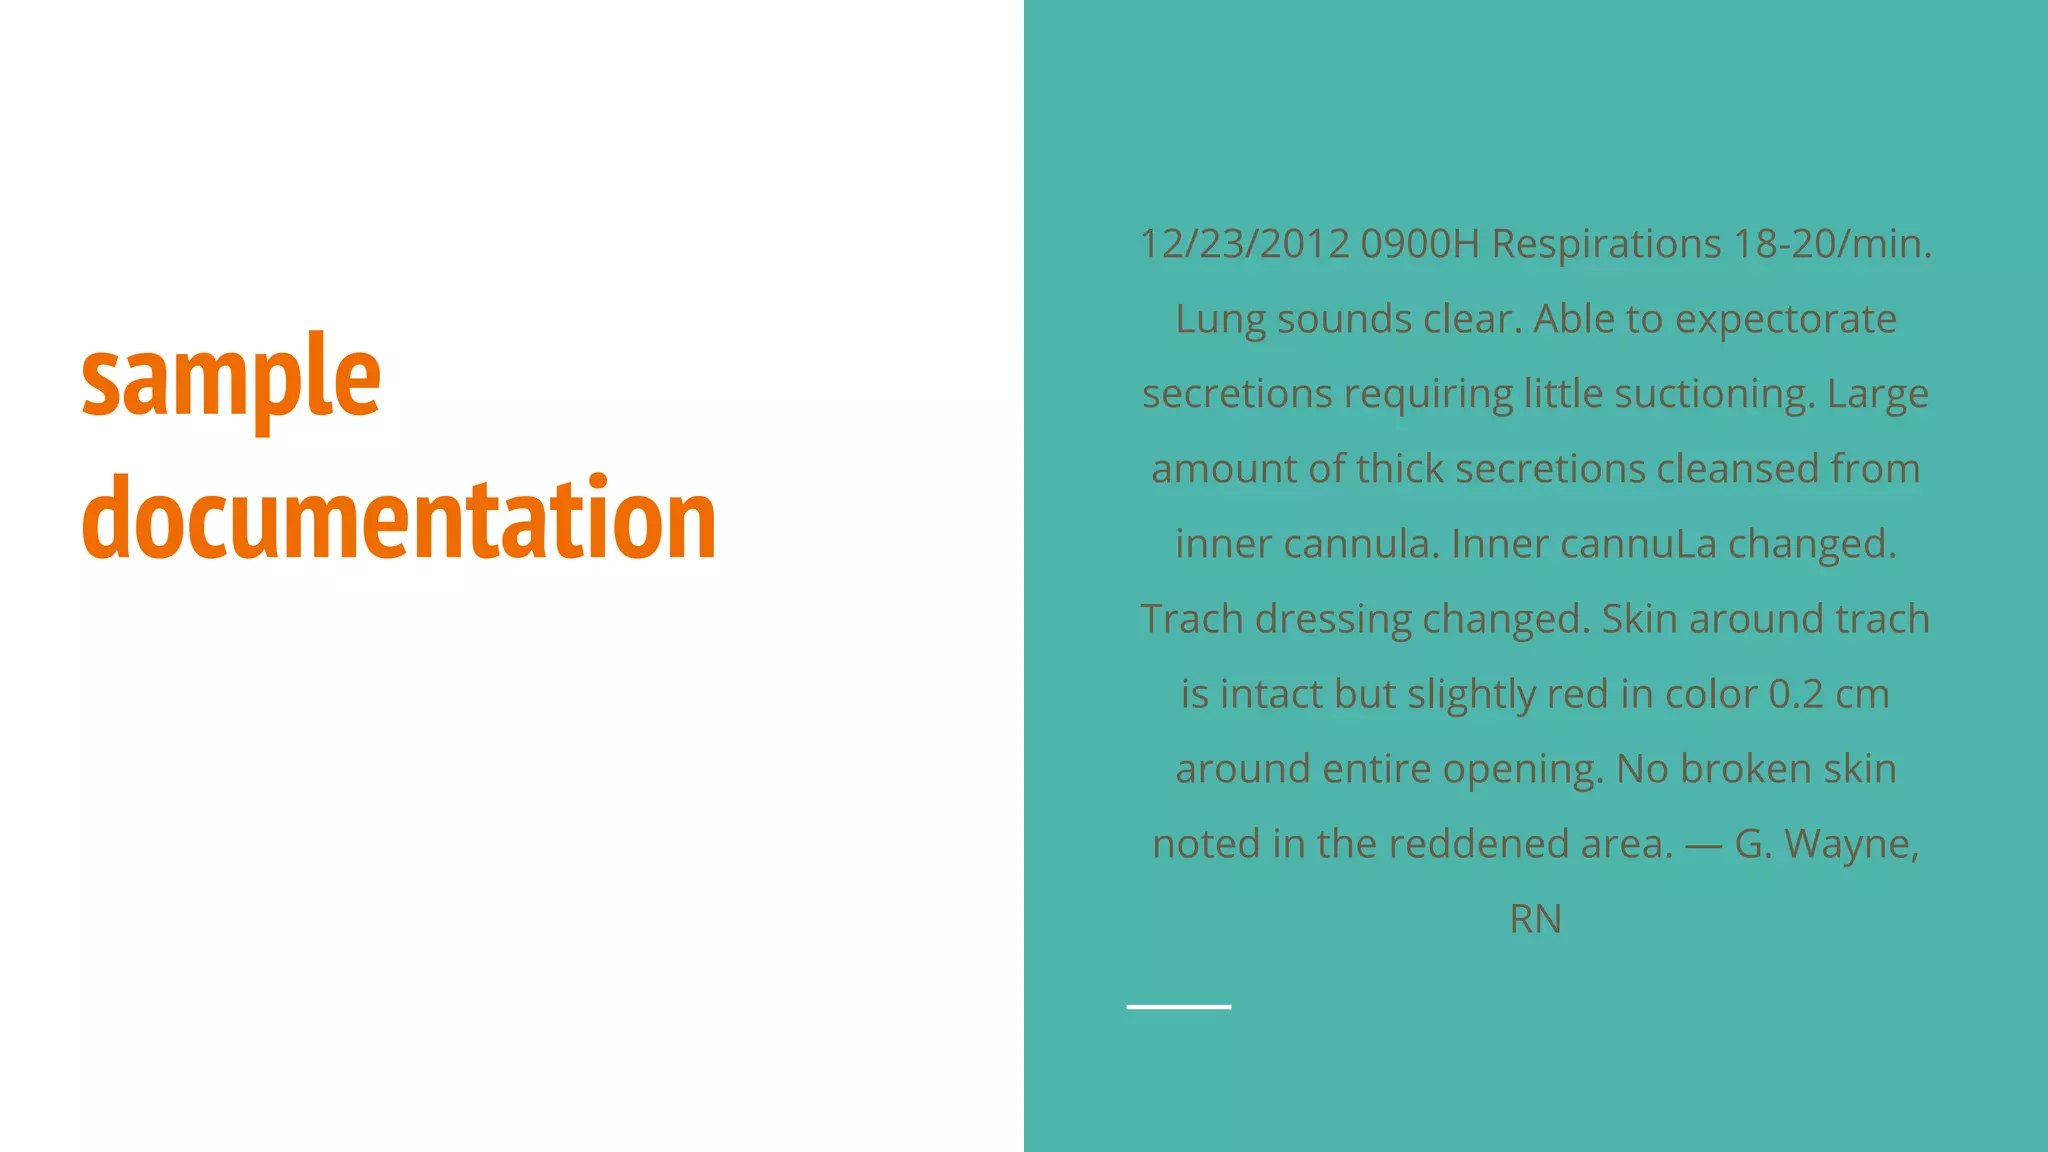
Tracheostomy Care and
Management
Compiled and Presented by:
Walaa Nasser
OUTLINE
Definition of terms
Indications
Contraindications
Proper placement according to anatomy
Management and Care
References
Definition of Terms
Decannulation: The process whereby a tracheostomy tube is removed once patient no longer needs
it.
Humidification: The mechanical process of increasing the water vapour content of an inspired gas.
Stoma: An opening, either natural or surgically created, which connects a portion of the body cavity
to the outside environment (in this case, between the trachea and the anterior surface of the neck).
Tracheostomy: A surgical procedure to create an opening between 2-3 (3-4) tracheal rings into the
trachea below the larynx.
Tracheal Suctioning: A means of clearing thick mucus and secretions from the trachea and lower
airway through the application of negative pressure via a suction catheter.
Tracheostomy tube: A curved hollow tube of rubber or plastic inserted into the tracheostomy stoma
(the hole made in the neck and windpipe (Trachea) to relieve airway obstruction, facilitate
mechanical ventilation or the removal of tracheal secretions.
Tracheostomy is
A tracheostomy is an opening into the
trachea through the neck just below the
larynx through which an indwelling tube is
placed and thus an artificial airway is
created. It is used for clients needing long-
term airway support.
how does it look like
Tracheostomy tubes have an outer
cannula that is inserted into the trachea
and a flange that rests against the neck
and allows the tube to be secured in place
with tape or ties.
Indications
Tracheostomy tubes may be inserted for a
number of reasons
Congenital anomaly (eg, laryngeal
hypoplasia, vascular web)
Upper airway foreign body that cannot
be dislodged with Heimlich and basic
cardiac life support maneuvers
Supraglottic or glottic pathologic
condition (eg, infection, neoplasm,
bilateral vocal cord paralysis)
Neck trauma that results in severe
injury to the thyroid or cricoid
cartilages, hyoid bone, or great
Subcutaneous emphysema
Facial fractures that may lead to upper
airway obstruction (eg, comminuted
fractures of the mid face and
mandible)
Upper airway edema from trauma,
burns, infection, or anaphylaxis
Prophylaxis (as in preparation for
extensive head and neck procedures
and the convalescent period)
Severe sleep apnea not amendable to
continuous positive airway pressure
Complications to Tracheostomy placement
Early Complications:
Bleeding
Air trapped around the lungs (pneumothorax)
Air trapped in the deeper layers of the
chest(pneumomediastinum)
Air trapped underneath the skin around the
tracheostomy (subcutaneous emphysema)
Damage to the swallowing tube (esophagus)
Injury to the nerve that moves the vocal cords
(recurrent laryngeal nerve)
Tracheostomy tube can be blocked by blood clots,
Later Complications that may occur while the
tracheostomy tube is in place include:
Accidental removal of the tracheostomy tube
(accidental decannulation)
Infection in the trachea and around the
tracheostomy tube
Windpipe itself may become damaged for a
number of reasons, including pressure from
the tube; bacteria that cause infections and
form scar tissue; or friction from a tube that
moves too much
Proper Placement
Purpose of care
★ To maintain airway patency by removing mucus and encrusted
secretions.
★ To maintain cleanliness and prevent infection at the tracheostomy site
★ To facilitate healing and prevent skin excoriation around the
tracheostomy incision
★ To promote comfort
★ To prevent displacement
Assessment
★ Respiratory status (ease of
breathing, rate, rhythm, depth,
lung sounds, and oxygen
saturation level)
★ Pulse rate
★ Secretions from the tracheostomy
site (character and amount)
★ Presence of drainage on
tracheostomy dressing or ties
equipments used
Sterile disposable tracheostomy cleaning kit
or supplies (sterile containers, sterile nylon
brush or pipe cleaners, sterile applicators,
gauze squares)
Sterile suction catheter kit (suction catheter
and sterile container for solution)
Sterile normal saline (Check agency protocol
for soaking solution)
Sterile gloves (2 pairs)
Clean gloves
Towel or drape to protect bed linens
Moisture-proof bag
Commercially available tracheostomy
dressing or sterile 4-in. x -in. gauze dressing
Cotton twill ties
Clean scissors
PROCEDURE
step by step
Introduce self and verify the client’s identity using agency protocol. Explain to
the client everything that you need to do, why it is necessary, and how can he
cooperate. Eye blinking, raising a finger can be a means of communication to
indicate pain or distress.
1
2Observe appropriate infection control procedures such as hand hygiene.
3 Provide for client privacy.
4 Prepare the client and the equipment.
To promote lung expansion, assist the client to semi-Fowler’s or Fowler’s position.
Open the tracheostomy kit or sterile basins. Pour the soaking solution and sterile normal
saline into separate containers.
Establish the sterile field.
Open other sterile supplies as needed including sterile applicators, suction kit, and
tracheostomy dressing.
5 Suction the tracheostomy tube, if necessary.
Put a clean glove on your nondominant hand and a sterile glove on your dominant hand (or put
on a pair of sterile gloves).
Suction the full length of the tracheostomy tube to remove secretions and ensure a patent
airway.
Rinse the suction catheter and wrap the catheter around your hand, and peel the glove off so that
it turns inside out over the catheter.
Unlock the inner cannula with the gloved hand. Remove it by gently pulling it out toward you in
line with its curvature. Place it in the soaking solution. Rationale: This moistens and loosens
secretions.
Remove the soiled tracheostomy dressing. Place the soiled dressing in your gloved hand and peel
6 Clean the inner cannula
Remove the inner cannula from the soaking solution.
Clean the lumen and entire inner cannula thoroughly using the brush or pipe cleaners moistened
with sterile normal saline. Inspect the cannula for cleanliness by holding it at eye level and
looking through it into the light.
Rinse the inner cannula thoroughly in the sterile normal saline.
After rinsing, gently tap the cannula against the inside edge of the sterile saline container. Use a
pipe cleaner folded in half to dry only the inside of the cannula; do not dry the outside.
Rationale: This removes excess liquid from the cannula and prevents possible aspiration by the
client, while leaving a film of moisture on the outer surface to lubricate the cannula for
reinsertion.
7 Replace the inner cannula, securing it in place.
Insert the inner cannula by grasping the outer flange and inserting the cannula in the direction of
its curvature.
Lock the cannula in place by turning the lock (if present) into position to secure the flange of the
inner cannula to the outer cannula.
8 Clean the incision site and tube flange.
Using sterile applicators or gauze dressings moistened with normal saline, clean the incision site.
Handle the sterile supplies with your dominant hand. Use each applicator or gauze dressing
only once and then discard. Rationale: This avoids contaminating a clean area with a soiled
gauze dressing or applicator.
Hydrogen peroxide may be used (usually in a half-strength solution mixed with sterile normal
saline; use a separate sterile container if this is necessary) to remove crusty secretions. Check
agency policy. Thoroughly rinse the cleaned area using gauze squares moistened with sterile
normal saline. Rationale: Hydrogen peroxide can be irritating to the skin and inhibit healing if
not thoroughly removed.
Clean the flange of the tube in the same manner.
9 Apply a sterile dressing.
Use a commercially prepared tracheostomy dressing of non- raveling material or open and refold
a 4-in. x 4-in. gauze dressing into a V shape. Avoid using cotton-filled gauze squares or cutting
the 4-in. x 4-in. gauze. Rationale: Cotton lint or gauze fibers can be aspirated by the client,
potentially creating a tracheal abscess.
Place the dressing under the flange of the tracheostomy tube.
While applying the dressing, ensure that the tracheostomy tube is securely supported. Rationale:
10 Change the tracheostomy ties.
Change as needed to keep the skin clean and dry.
Twill tape and specially manufactured Velcro ties are available. Twill tape is inexpensive and
readily available; however, it is easily soiled and can trap moisture that leads to irritation of the
skin of the neck. Velcro ties are becoming more commonly used. They are wider, more
comfortable, and cause less skin abrasion.
sample
documentation
12/23/2012 0900H Respirations 18-20/min.
Lung sounds clear. Able to expectorate
secretions requiring little suctioning. Large
amount of thick secretions cleansed from
inner cannula. Inner cannuLa changed.
Trach dressing changed. Skin around trach
is intact but slightly red in color 0.2 cm
around entire opening. No broken skin
noted in the reddened area. — G. Wayne,
RN
References
http://nurseslabs.com/tracheostomy-nursing-management/
http://www.nhsggc.org.uk/about-us/professional-support-sites/shock-
team/guidelines-for-care-of-patients-with-a-tracheostomy-tube/indication-for-
a-tracheostomy/
http://www.nursebuff.com/2014/06/tracheostomy-care/
http://emedicine.medscape.com/article/865068-overview
http://www.hopkinsmedicine.org/tracheostomy/about/complications.html

Tracheostomy care and management

  • 1.
    Tracheostomy Care and Management Compiledand Presented by: Walaa Nasser
  • 2.
    OUTLINE Definition of terms Indications Contraindications Properplacement according to anatomy Management and Care References
  • 3.
    Definition of Terms Decannulation:The process whereby a tracheostomy tube is removed once patient no longer needs it. Humidification: The mechanical process of increasing the water vapour content of an inspired gas. Stoma: An opening, either natural or surgically created, which connects a portion of the body cavity to the outside environment (in this case, between the trachea and the anterior surface of the neck). Tracheostomy: A surgical procedure to create an opening between 2-3 (3-4) tracheal rings into the trachea below the larynx. Tracheal Suctioning: A means of clearing thick mucus and secretions from the trachea and lower airway through the application of negative pressure via a suction catheter. Tracheostomy tube: A curved hollow tube of rubber or plastic inserted into the tracheostomy stoma (the hole made in the neck and windpipe (Trachea) to relieve airway obstruction, facilitate mechanical ventilation or the removal of tracheal secretions.
  • 4.
    Tracheostomy is A tracheostomyis an opening into the trachea through the neck just below the larynx through which an indwelling tube is placed and thus an artificial airway is created. It is used for clients needing long- term airway support.
  • 5.
    how does itlook like Tracheostomy tubes have an outer cannula that is inserted into the trachea and a flange that rests against the neck and allows the tube to be secured in place with tape or ties.
  • 6.
    Indications Tracheostomy tubes maybe inserted for a number of reasons Congenital anomaly (eg, laryngeal hypoplasia, vascular web) Upper airway foreign body that cannot be dislodged with Heimlich and basic cardiac life support maneuvers Supraglottic or glottic pathologic condition (eg, infection, neoplasm, bilateral vocal cord paralysis) Neck trauma that results in severe injury to the thyroid or cricoid cartilages, hyoid bone, or great Subcutaneous emphysema Facial fractures that may lead to upper airway obstruction (eg, comminuted fractures of the mid face and mandible) Upper airway edema from trauma, burns, infection, or anaphylaxis Prophylaxis (as in preparation for extensive head and neck procedures and the convalescent period) Severe sleep apnea not amendable to continuous positive airway pressure
  • 7.
    Complications to Tracheostomyplacement Early Complications: Bleeding Air trapped around the lungs (pneumothorax) Air trapped in the deeper layers of the chest(pneumomediastinum) Air trapped underneath the skin around the tracheostomy (subcutaneous emphysema) Damage to the swallowing tube (esophagus) Injury to the nerve that moves the vocal cords (recurrent laryngeal nerve) Tracheostomy tube can be blocked by blood clots, Later Complications that may occur while the tracheostomy tube is in place include: Accidental removal of the tracheostomy tube (accidental decannulation) Infection in the trachea and around the tracheostomy tube Windpipe itself may become damaged for a number of reasons, including pressure from the tube; bacteria that cause infections and form scar tissue; or friction from a tube that moves too much
  • 8.
  • 10.
    Purpose of care ★To maintain airway patency by removing mucus and encrusted secretions. ★ To maintain cleanliness and prevent infection at the tracheostomy site ★ To facilitate healing and prevent skin excoriation around the tracheostomy incision ★ To promote comfort ★ To prevent displacement
  • 11.
    Assessment ★ Respiratory status(ease of breathing, rate, rhythm, depth, lung sounds, and oxygen saturation level) ★ Pulse rate ★ Secretions from the tracheostomy site (character and amount) ★ Presence of drainage on tracheostomy dressing or ties
  • 12.
    equipments used Sterile disposabletracheostomy cleaning kit or supplies (sterile containers, sterile nylon brush or pipe cleaners, sterile applicators, gauze squares) Sterile suction catheter kit (suction catheter and sterile container for solution) Sterile normal saline (Check agency protocol for soaking solution) Sterile gloves (2 pairs) Clean gloves Towel or drape to protect bed linens Moisture-proof bag Commercially available tracheostomy dressing or sterile 4-in. x -in. gauze dressing Cotton twill ties Clean scissors
  • 13.
  • 14.
    Introduce self andverify the client’s identity using agency protocol. Explain to the client everything that you need to do, why it is necessary, and how can he cooperate. Eye blinking, raising a finger can be a means of communication to indicate pain or distress. 1
  • 15.
    2Observe appropriate infectioncontrol procedures such as hand hygiene.
  • 16.
    3 Provide forclient privacy.
  • 17.
    4 Prepare theclient and the equipment. To promote lung expansion, assist the client to semi-Fowler’s or Fowler’s position. Open the tracheostomy kit or sterile basins. Pour the soaking solution and sterile normal saline into separate containers. Establish the sterile field. Open other sterile supplies as needed including sterile applicators, suction kit, and tracheostomy dressing.
  • 18.
    5 Suction thetracheostomy tube, if necessary. Put a clean glove on your nondominant hand and a sterile glove on your dominant hand (or put on a pair of sterile gloves). Suction the full length of the tracheostomy tube to remove secretions and ensure a patent airway. Rinse the suction catheter and wrap the catheter around your hand, and peel the glove off so that it turns inside out over the catheter. Unlock the inner cannula with the gloved hand. Remove it by gently pulling it out toward you in line with its curvature. Place it in the soaking solution. Rationale: This moistens and loosens secretions. Remove the soiled tracheostomy dressing. Place the soiled dressing in your gloved hand and peel
  • 20.
    6 Clean theinner cannula Remove the inner cannula from the soaking solution. Clean the lumen and entire inner cannula thoroughly using the brush or pipe cleaners moistened with sterile normal saline. Inspect the cannula for cleanliness by holding it at eye level and looking through it into the light. Rinse the inner cannula thoroughly in the sterile normal saline. After rinsing, gently tap the cannula against the inside edge of the sterile saline container. Use a pipe cleaner folded in half to dry only the inside of the cannula; do not dry the outside. Rationale: This removes excess liquid from the cannula and prevents possible aspiration by the client, while leaving a film of moisture on the outer surface to lubricate the cannula for reinsertion.
  • 21.
    7 Replace theinner cannula, securing it in place. Insert the inner cannula by grasping the outer flange and inserting the cannula in the direction of its curvature. Lock the cannula in place by turning the lock (if present) into position to secure the flange of the inner cannula to the outer cannula.
  • 22.
    8 Clean theincision site and tube flange. Using sterile applicators or gauze dressings moistened with normal saline, clean the incision site. Handle the sterile supplies with your dominant hand. Use each applicator or gauze dressing only once and then discard. Rationale: This avoids contaminating a clean area with a soiled gauze dressing or applicator. Hydrogen peroxide may be used (usually in a half-strength solution mixed with sterile normal saline; use a separate sterile container if this is necessary) to remove crusty secretions. Check agency policy. Thoroughly rinse the cleaned area using gauze squares moistened with sterile normal saline. Rationale: Hydrogen peroxide can be irritating to the skin and inhibit healing if not thoroughly removed. Clean the flange of the tube in the same manner.
  • 23.
    9 Apply asterile dressing. Use a commercially prepared tracheostomy dressing of non- raveling material or open and refold a 4-in. x 4-in. gauze dressing into a V shape. Avoid using cotton-filled gauze squares or cutting the 4-in. x 4-in. gauze. Rationale: Cotton lint or gauze fibers can be aspirated by the client, potentially creating a tracheal abscess. Place the dressing under the flange of the tracheostomy tube. While applying the dressing, ensure that the tracheostomy tube is securely supported. Rationale:
  • 24.
    10 Change thetracheostomy ties. Change as needed to keep the skin clean and dry. Twill tape and specially manufactured Velcro ties are available. Twill tape is inexpensive and readily available; however, it is easily soiled and can trap moisture that leads to irritation of the skin of the neck. Velcro ties are becoming more commonly used. They are wider, more comfortable, and cause less skin abrasion.
  • 25.
    sample documentation 12/23/2012 0900H Respirations18-20/min. Lung sounds clear. Able to expectorate secretions requiring little suctioning. Large amount of thick secretions cleansed from inner cannula. Inner cannuLa changed. Trach dressing changed. Skin around trach is intact but slightly red in color 0.2 cm around entire opening. No broken skin noted in the reddened area. — G. Wayne, RN
  • 26.