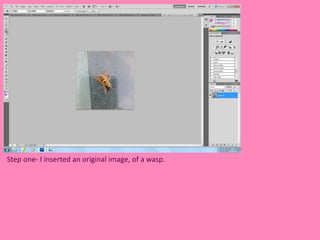
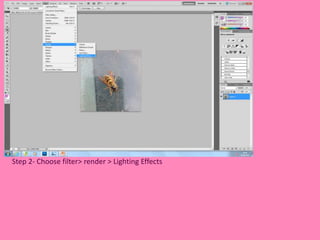
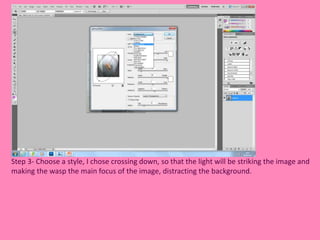
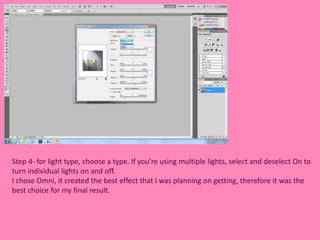
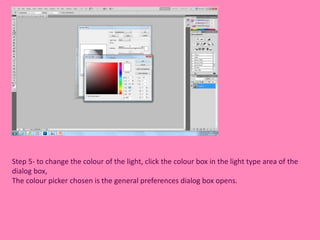
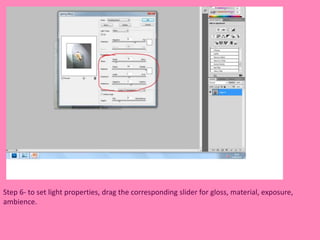
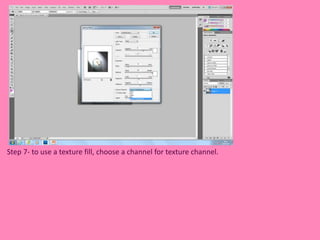
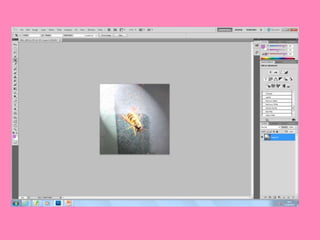
TECHNIQUE ONE
Step one- I inserted an original image, of a wasp.
Step 2- Choose filter> render > Lighting Effects
Step 3- Choose a style, I chose crossing down, so that the light will be striking the image and 
making the wasp the main focus of the image, distracting the background.
Step 4- for light type, choose a type. If you're using multiple lights, select and deselect On to 
turn individual lights on and off. 
I chose Omni, it created the best effect that I was planning on getting, therefore it was the 
best choice for my final result.
Omni- shines light in all directions from directly 
above the image- like a light bulb over a piece of 
paper. 
Directional- shines light from far away so that 
the light angle doesn’t change- like the sun 
Spotlight- casts an elliptical beam of light. The 
line in the preview window defines the light 
direction and angle, and the handles define the 
edges of the ellipse.
Step 5- to change the colour of the light, click the colour box in the light type area of the 
dialog box, 
The colour picker chosen is the general preferences dialog box opens.
Step 6- to set light properties, drag the corresponding slider for gloss, material, exposure, 
ambience.
Gloss- determines how much the surface reflects light, (as on 
the surface of a piece of photographic paper) from Matte (low 
reflectance) to shiny (high reflectance) 
Material- Determines which is more reflective: the light or the 
object on which the light is cast. Plastic reflects the light’s 
colour, metallic reflects the objects colour 
Exposer- Increases (positive values) or decreases (negative 
values) light. A value of 0 has no effect. 
Ambience- diffuses the light as if it were combined with other 
light in a room, such as sunlight or fluorescent light.
Step 7- to use a texture fill, choose a channel for texture channel.
PhotoShop TechniqueOne

PhotoShop TechniqueOne

  • 1.
  • 2.
    Step one- Iinserted an original image, of a wasp.
  • 3.
    Step 2- Choosefilter> render > Lighting Effects
  • 4.
    Step 3- Choosea style, I chose crossing down, so that the light will be striking the image and making the wasp the main focus of the image, distracting the background.
  • 5.
    Step 4- forlight type, choose a type. If you're using multiple lights, select and deselect On to turn individual lights on and off. I chose Omni, it created the best effect that I was planning on getting, therefore it was the best choice for my final result.
  • 6.
    Omni- shines lightin all directions from directly above the image- like a light bulb over a piece of paper. Directional- shines light from far away so that the light angle doesn’t change- like the sun Spotlight- casts an elliptical beam of light. The line in the preview window defines the light direction and angle, and the handles define the edges of the ellipse.
  • 7.
    Step 5- tochange the colour of the light, click the colour box in the light type area of the dialog box, The colour picker chosen is the general preferences dialog box opens.
  • 8.
    Step 6- toset light properties, drag the corresponding slider for gloss, material, exposure, ambience.
  • 9.
    Gloss- determines howmuch the surface reflects light, (as on the surface of a piece of photographic paper) from Matte (low reflectance) to shiny (high reflectance) Material- Determines which is more reflective: the light or the object on which the light is cast. Plastic reflects the light’s colour, metallic reflects the objects colour Exposer- Increases (positive values) or decreases (negative values) light. A value of 0 has no effect. Ambience- diffuses the light as if it were combined with other light in a room, such as sunlight or fluorescent light.
  • 10.
    Step 7- touse a texture fill, choose a channel for texture channel.