How to Create Simple Manipulation Using Lighting Effects
•
0 likes•382 views

The lighting effects can be used for enhancing any image. The following easier tips and tricks can help the learners to know the way of manipulating any image using lighting effects.

More Related Content
What's hot
What's hot (20)
Viewers also liked
Viewers also liked (16)
Similar to How to Create Simple Manipulation Using Lighting Effects
Similar to How to Create Simple Manipulation Using Lighting Effects (20)
Recently uploaded
Recently uploaded (20)
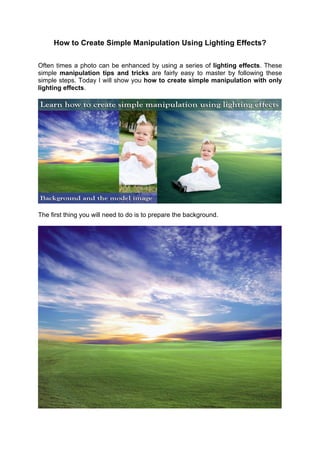
How to Create Simple Manipulation Using Lighting Effects
- 1. How to Create Simple Manipulation Using Lighting Effects? Often times a photo can be enhanced by using a series of lighting effects. These simple manipulation tips and tricks are fairly easy to master by following these simple steps. Today I will show you how to create simple manipulation with only lighting effects. The first thing you will need to do is to prepare the background.
- 2. Perhaps you wish to have a more rounded area where the grass and ground are, rather than the original curly across version. So you would select the pen tool, then outline the area you wish to keep. Then right click and choose “make selection.”
- 3. Then in the box next to further radius put 20 pixels, and click OK. Next you would click on selection tool and then right click and the in the drop down box click on, “layer the copy.”
- 4. Then go to the right hand area of the screen and see the new layer should be above the background on the right side. Then maybe you want to round it off, so you would again click on selection tool and then right click to get free transform.
- 5. Now the bottom half of the screen will be enclosed. Next you will right click again and click “Warp”.
- 6. Now you should see 3 boxes across and 3 boxes down for a total of 9. Now go to the top line and the 2nd vertical line, and move the line up just a bit and the next vertical line to the right, lift it as well until you see that there is a slight curve. Then continue lifting the other horizontal lines until they are all curved slightly.
- 7. Finally, click apply and the background image is ready for next edit. Then you will merge the layers by clicking on the upper right corner of the layer.
- 8. Then duplicate what you have just done, so we can begin the light effects.
- 9. First, you would resize the photo, then click on filter, then render, then lighting effects.
- 10. Now you should see one elliptical ring, tilting to the screen, with 4 points on the ring.
- 11. Then using the mouse, extend the circles to make then longer and wider to the upper right hand corner of the image.
- 12. Now go to properties, and set it as you wish. I select myself at Intensity 27, Narrow 45, Gloss 32, Material -22, Exposure 36 and Ambience 10. The effect is pretty good, unless you want to make it a bit lighter.
- 13. Next you want to go to hue saturation, click on this a box with open with the hue, saturation, and lightness levels to choose. Start by setting the saturation at -30.
- 14. Then go to the photo filter, and go to the box at the bottom and put a color you wish. I select myself 00ff72(green). Then hit ok.
- 15. Then you can change the green hue of the picture, (making it darker or lighter). Now go to the Gradient map.
- 16. And put in the first color is 00a7ec (blue), and click ok. The next color is ff9c00 (orange) click ok again. You should see a blue sky with bright orange near the upper part.
- 17. Now change blank mode to soft light. Set the opacity at 60%. Now the background is ready for the next step.
- 18. Now it is time to add the model to the picture. Go to desktop to get photo. I am using a baby girl picture for it. Next, use the pen tool to draw outline around the model.
- 19. Then right click to make the selection, go to further radius and put in 3 pixels, and hit ok.
- 20. Then copy the selection by Comand+C, and then drag this image to the new project. Then using the eraser tool, trace around the entire model’s outline, removing the extra bits of grass by photo retouching technique, so that it blends in more naturally with your background.
- 21. Next, you want to change the size of the model you just put into the background, by using the free transform. You put a box around the image, and then reduce it down to the size you desire, and then click ok.
- 22. The next thing is to use the burn tool (located right underneath the dodge tool). You can run it over the image to deepen the hue and tone of her clothing.
- 23. Next you want to create a realistic drop shadow; so use the brush tool for it and give some black shadow underneath the model image to give a realistic look. There you have it, now you know how to use Photoshop simply manipulation, to create a lighting effect. The published tutorial can be found at http://www.clippingpathindia.com/blog/2015/01/04/how-to-create-simple- manipulation-using-lighting-effects/ . Hope you enjoyed the tutorial! About the author: Rokaiya Yeasmin Munni Graphic Designer, SEO Specialist and Deputy Manager (Marketing Division) At Outsource Experts Ltd, which is the mother company of http://www.clippingpathindia.com