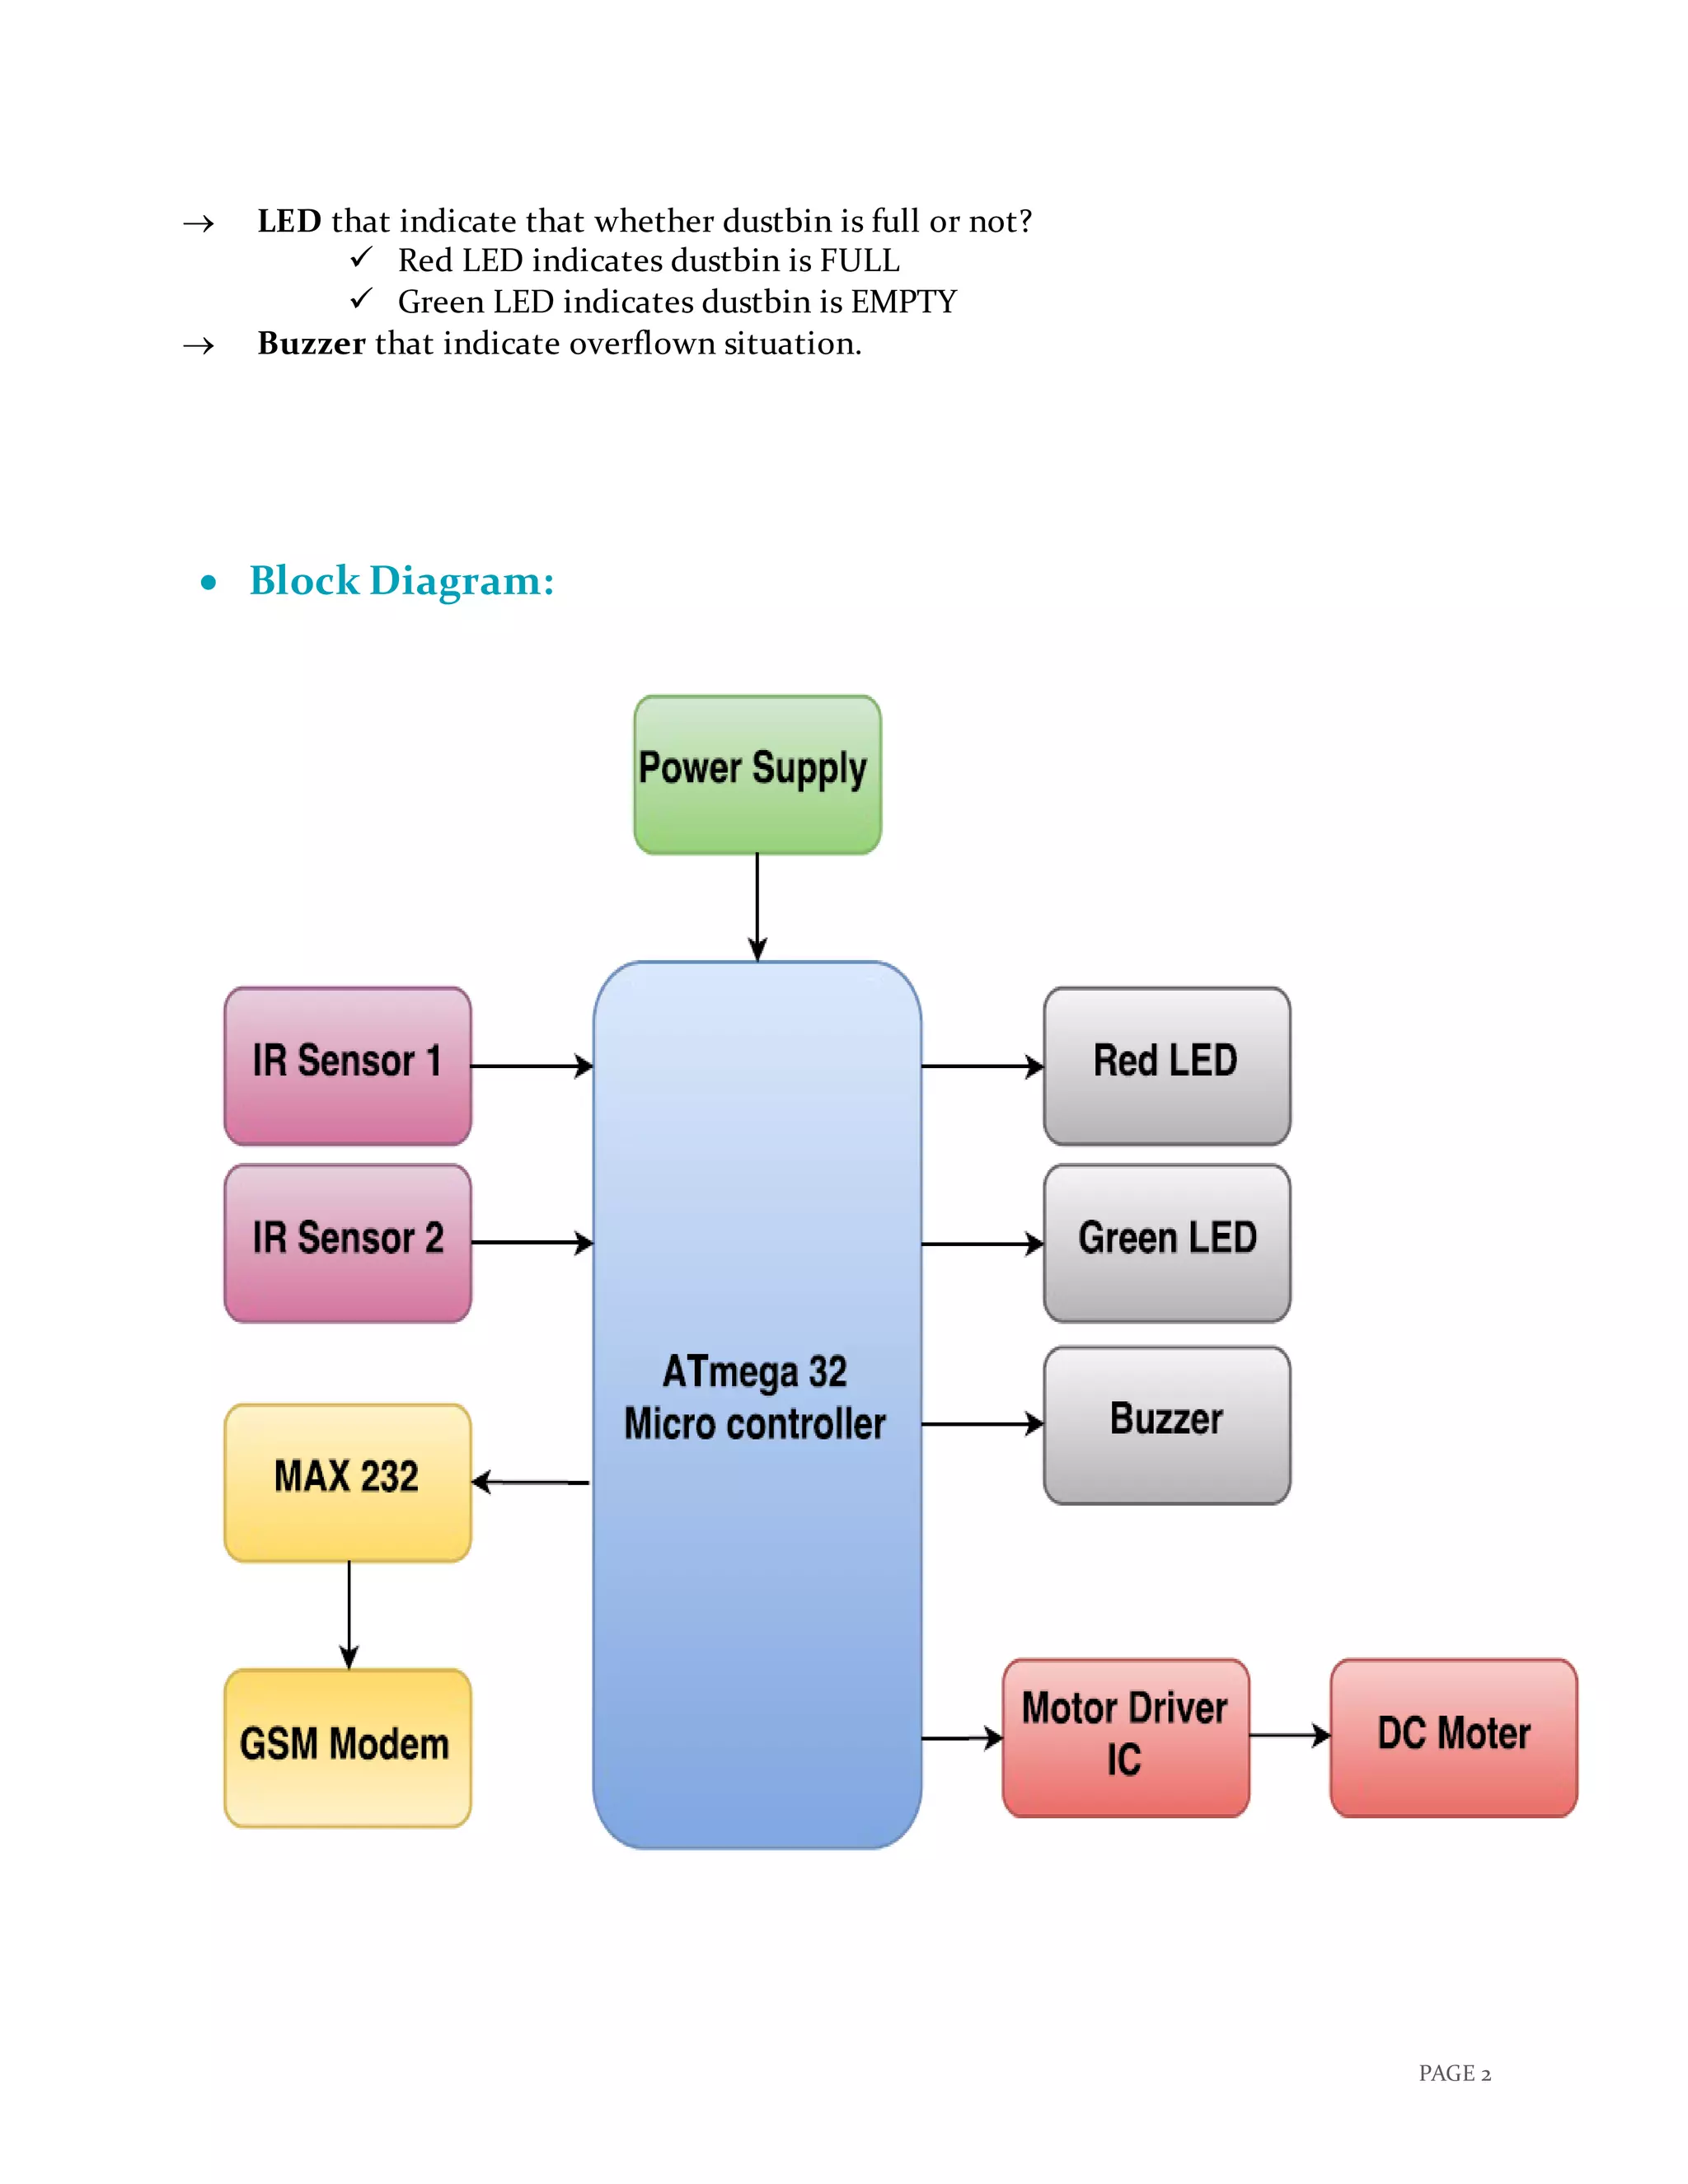
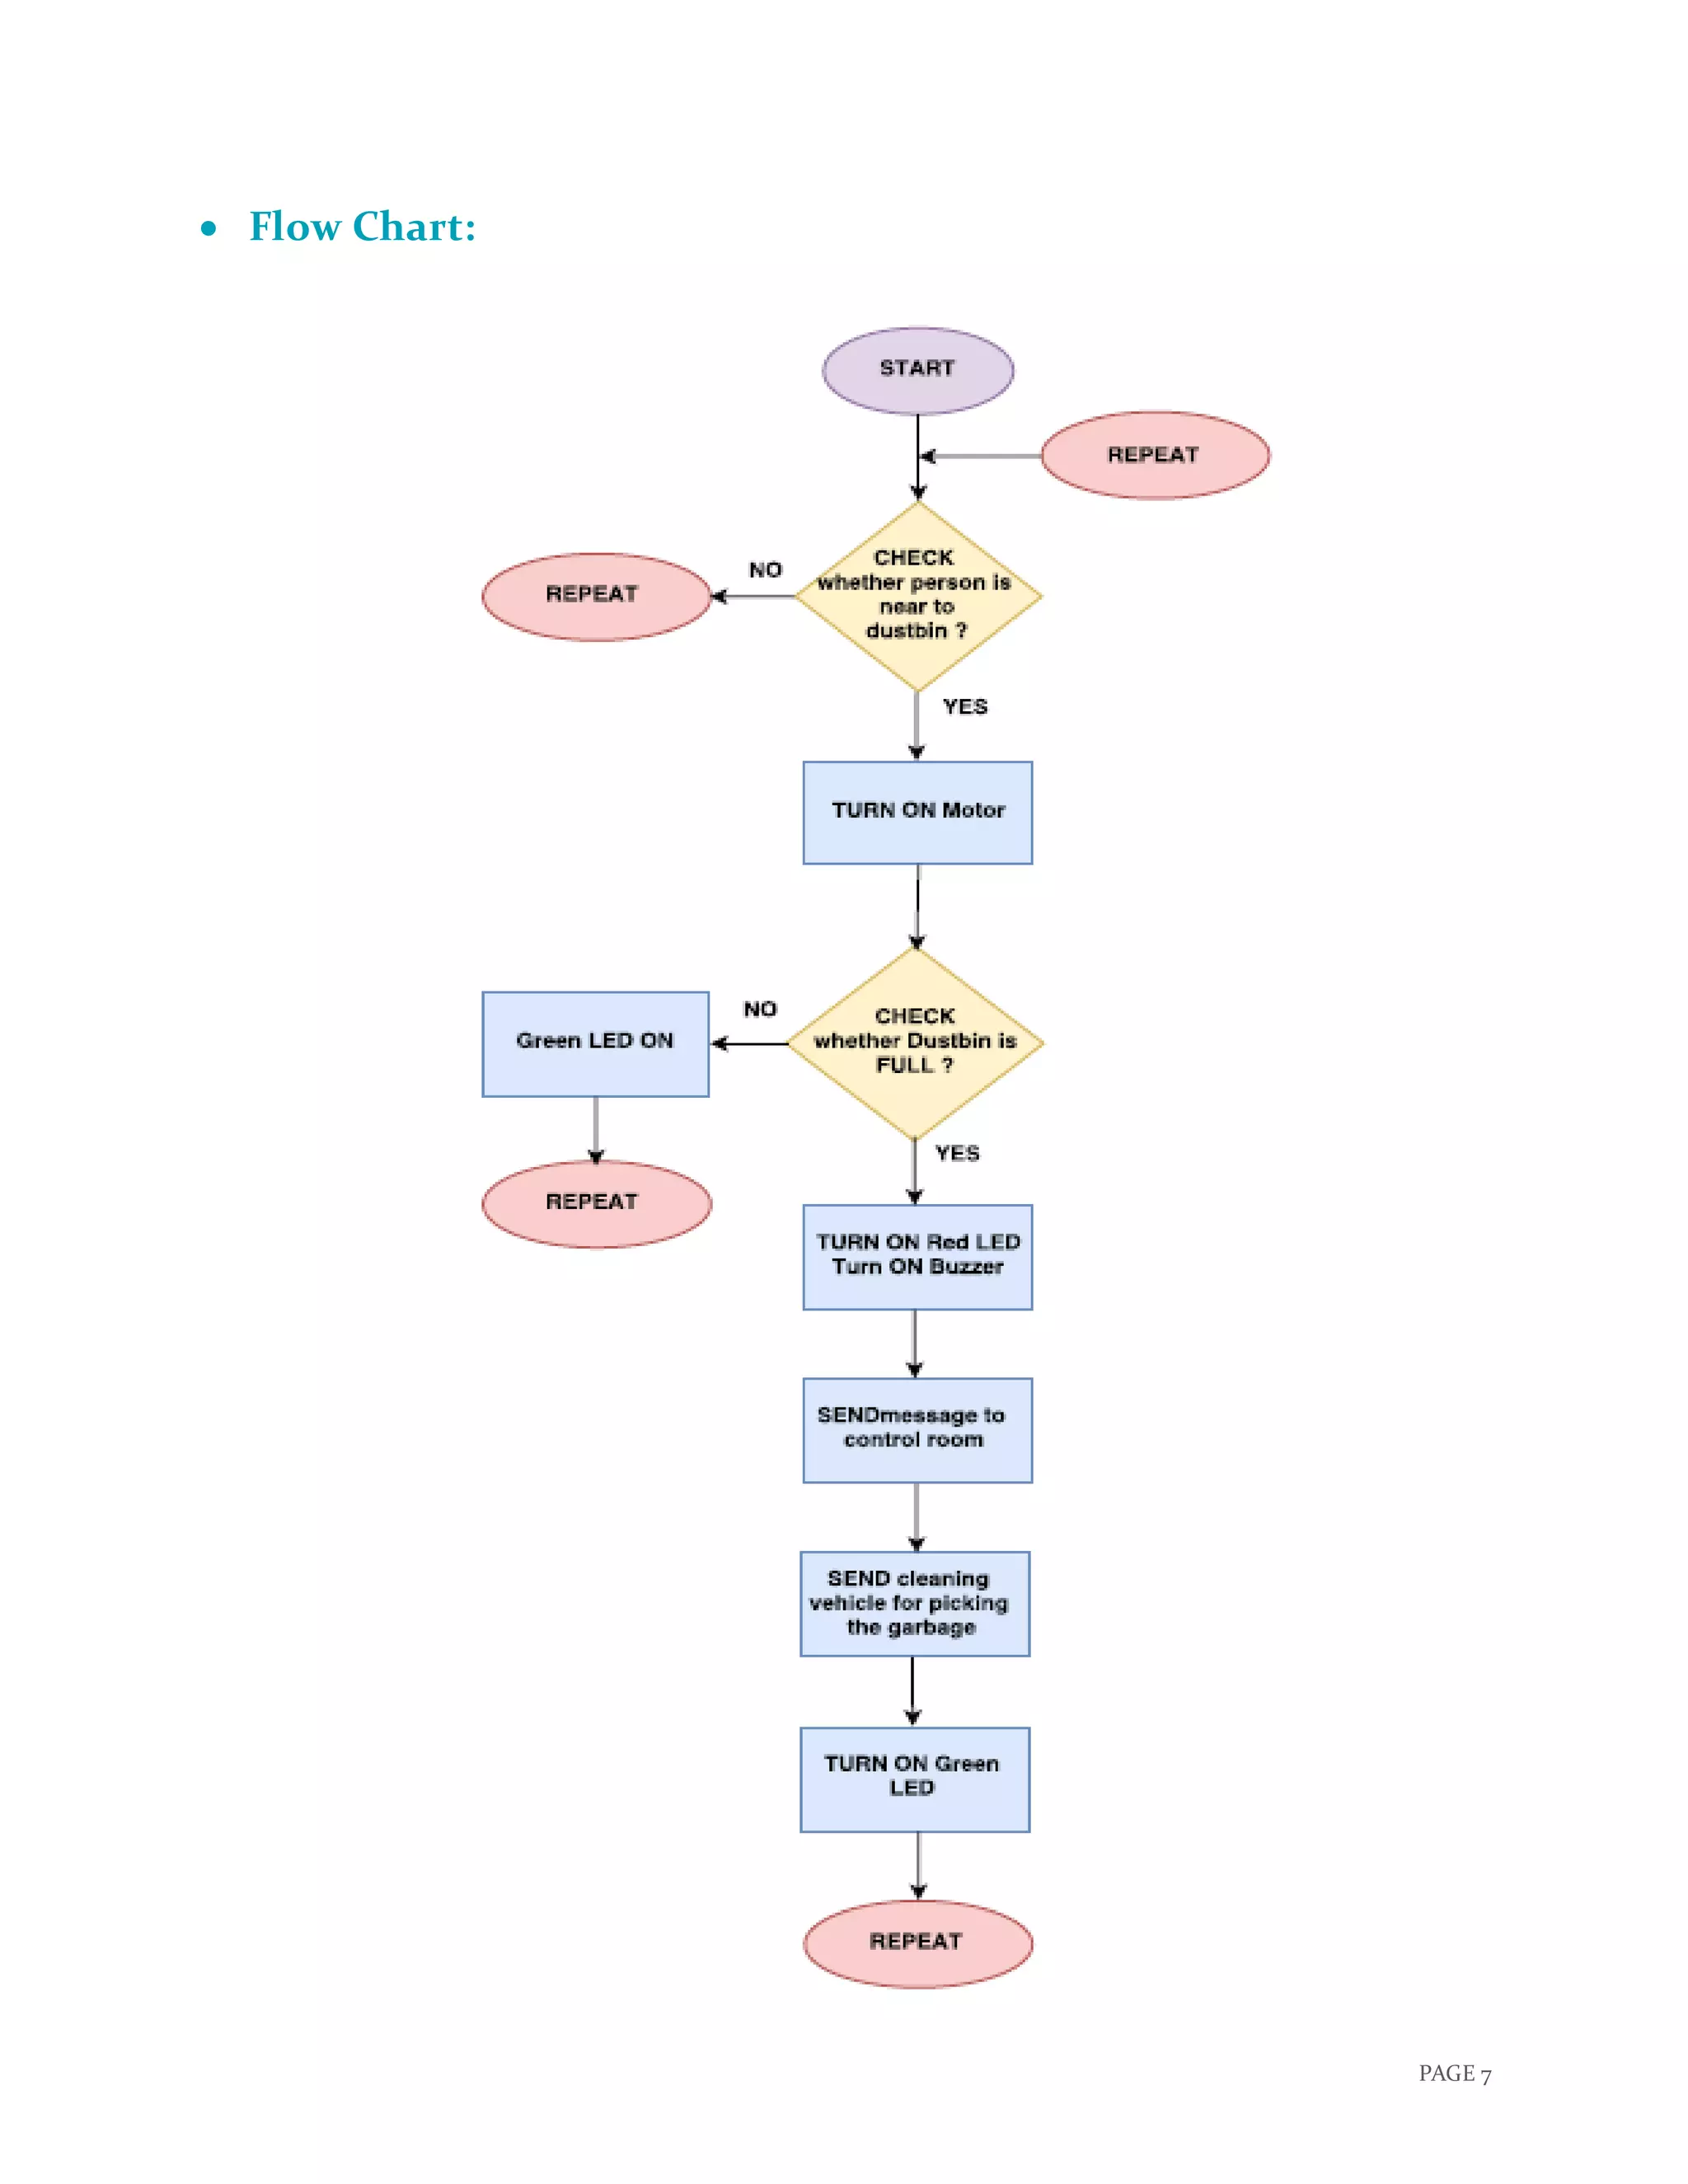
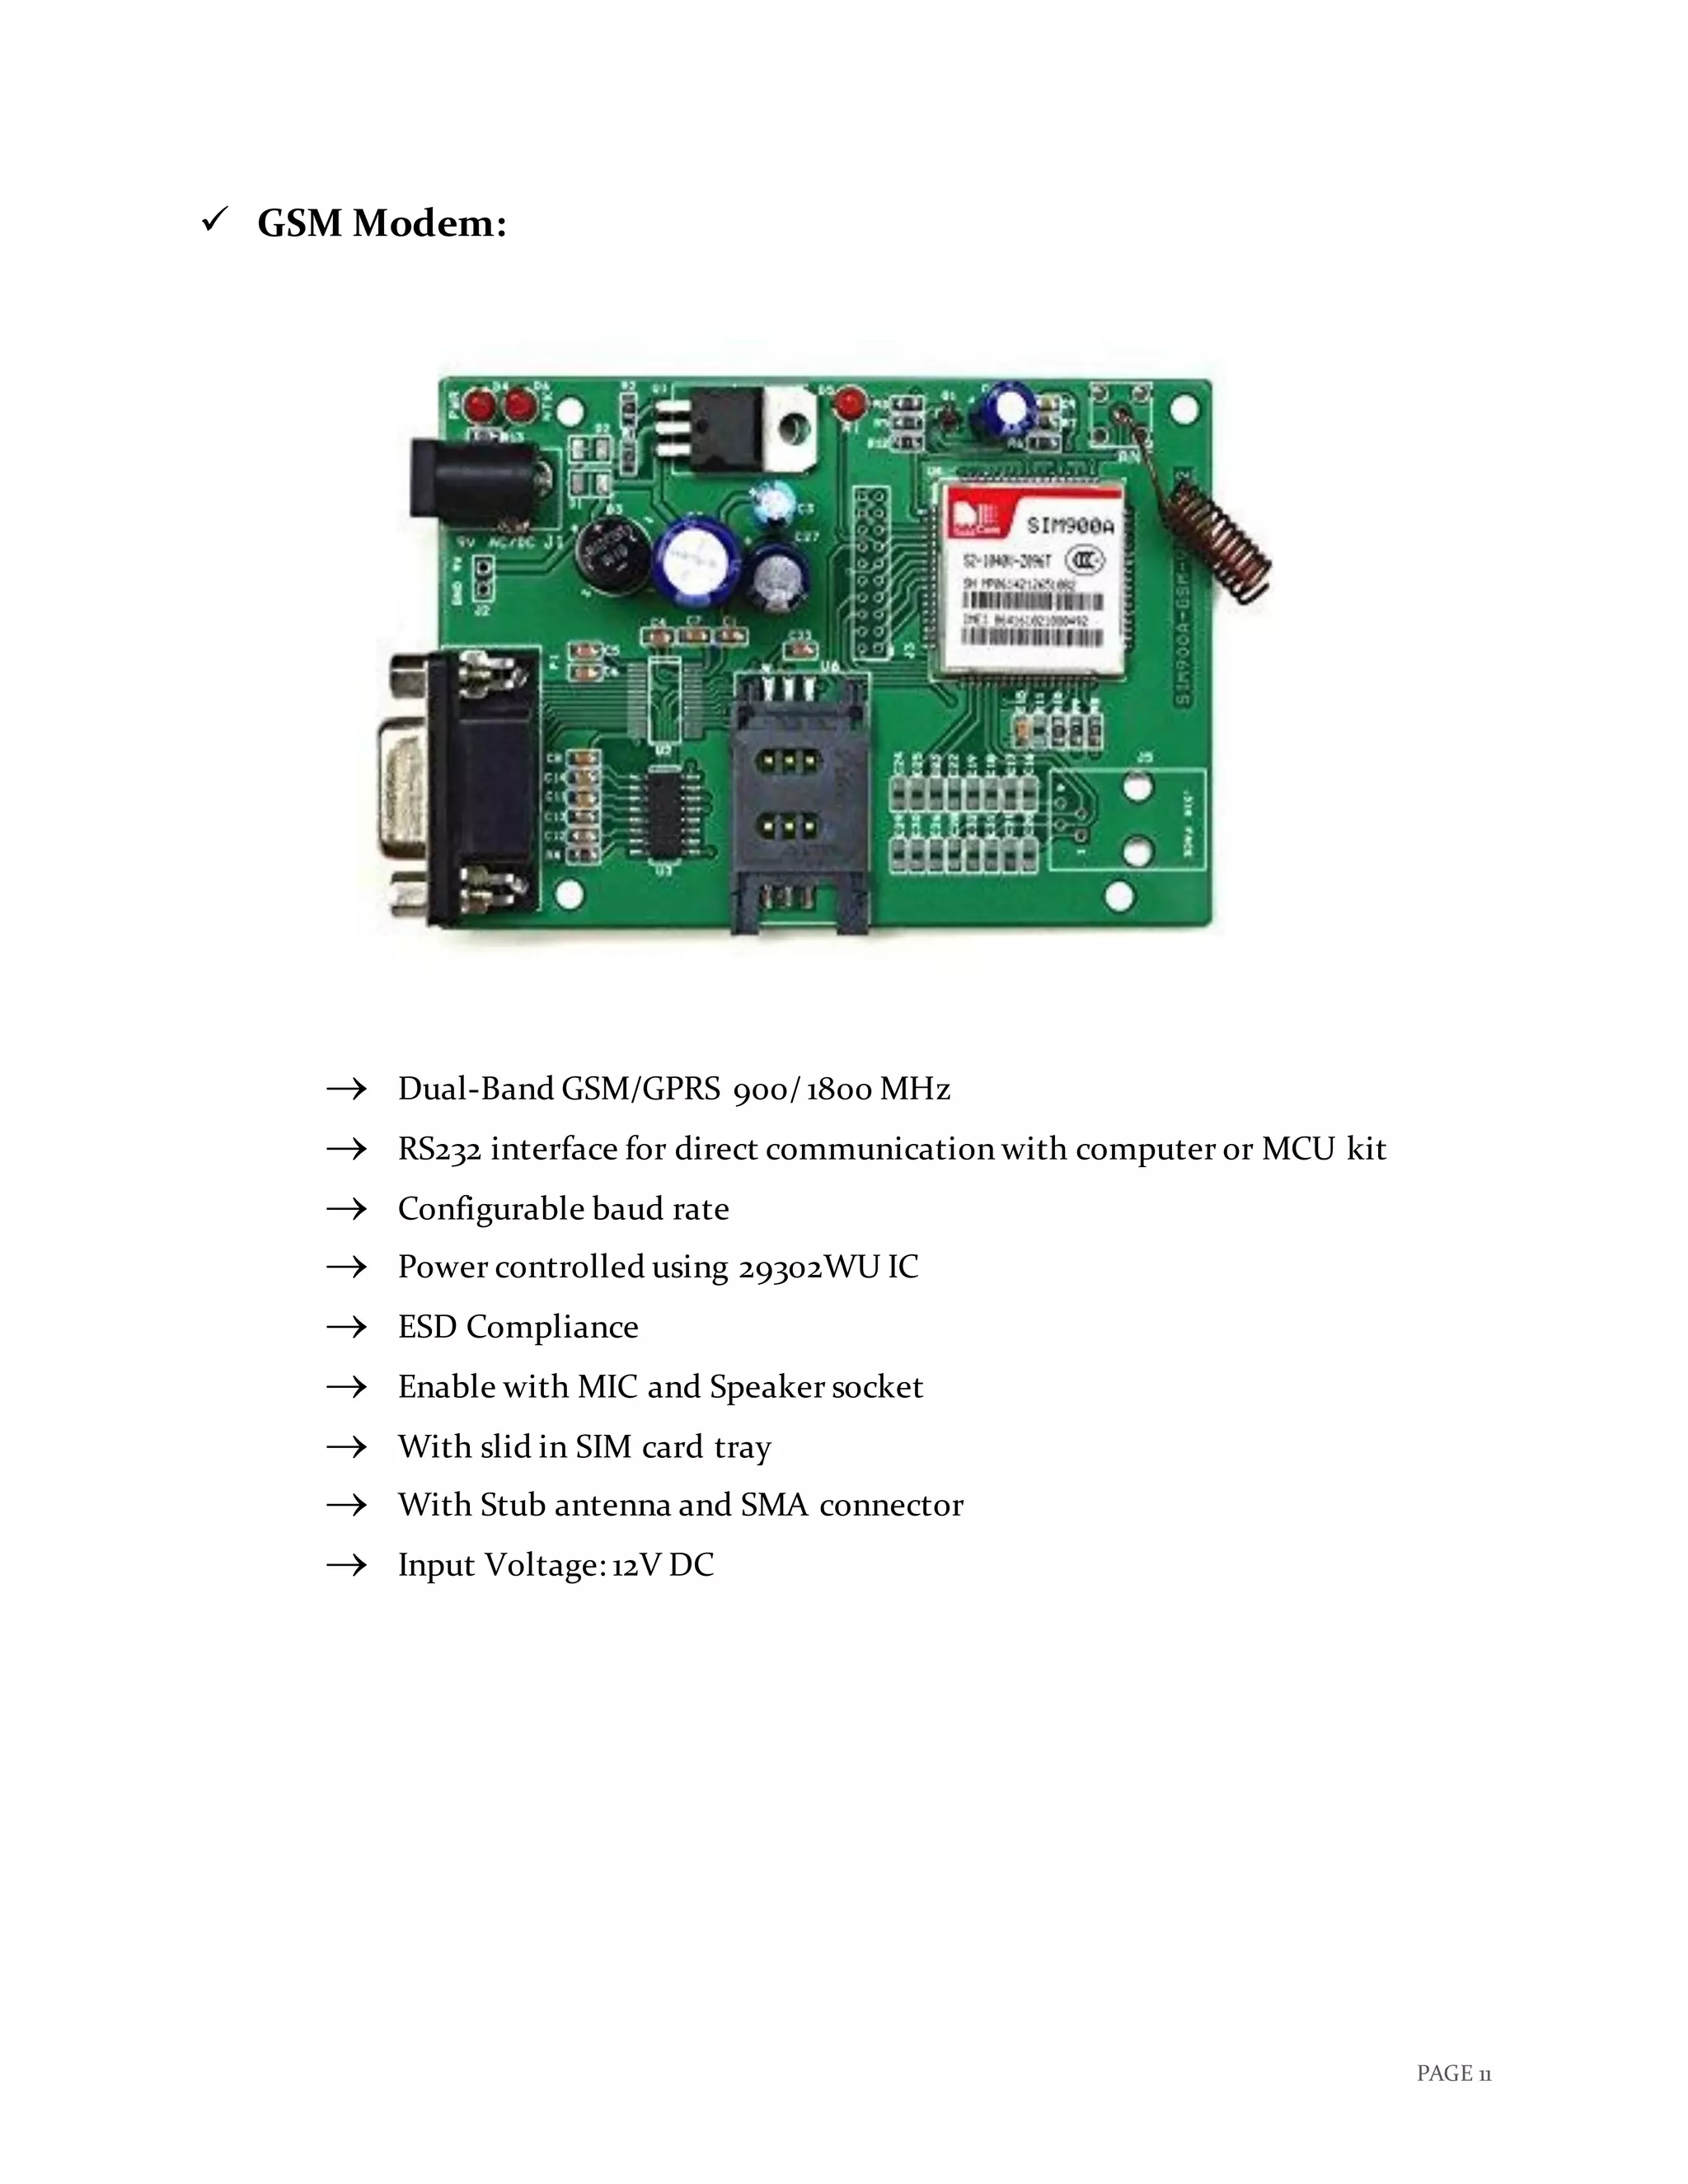
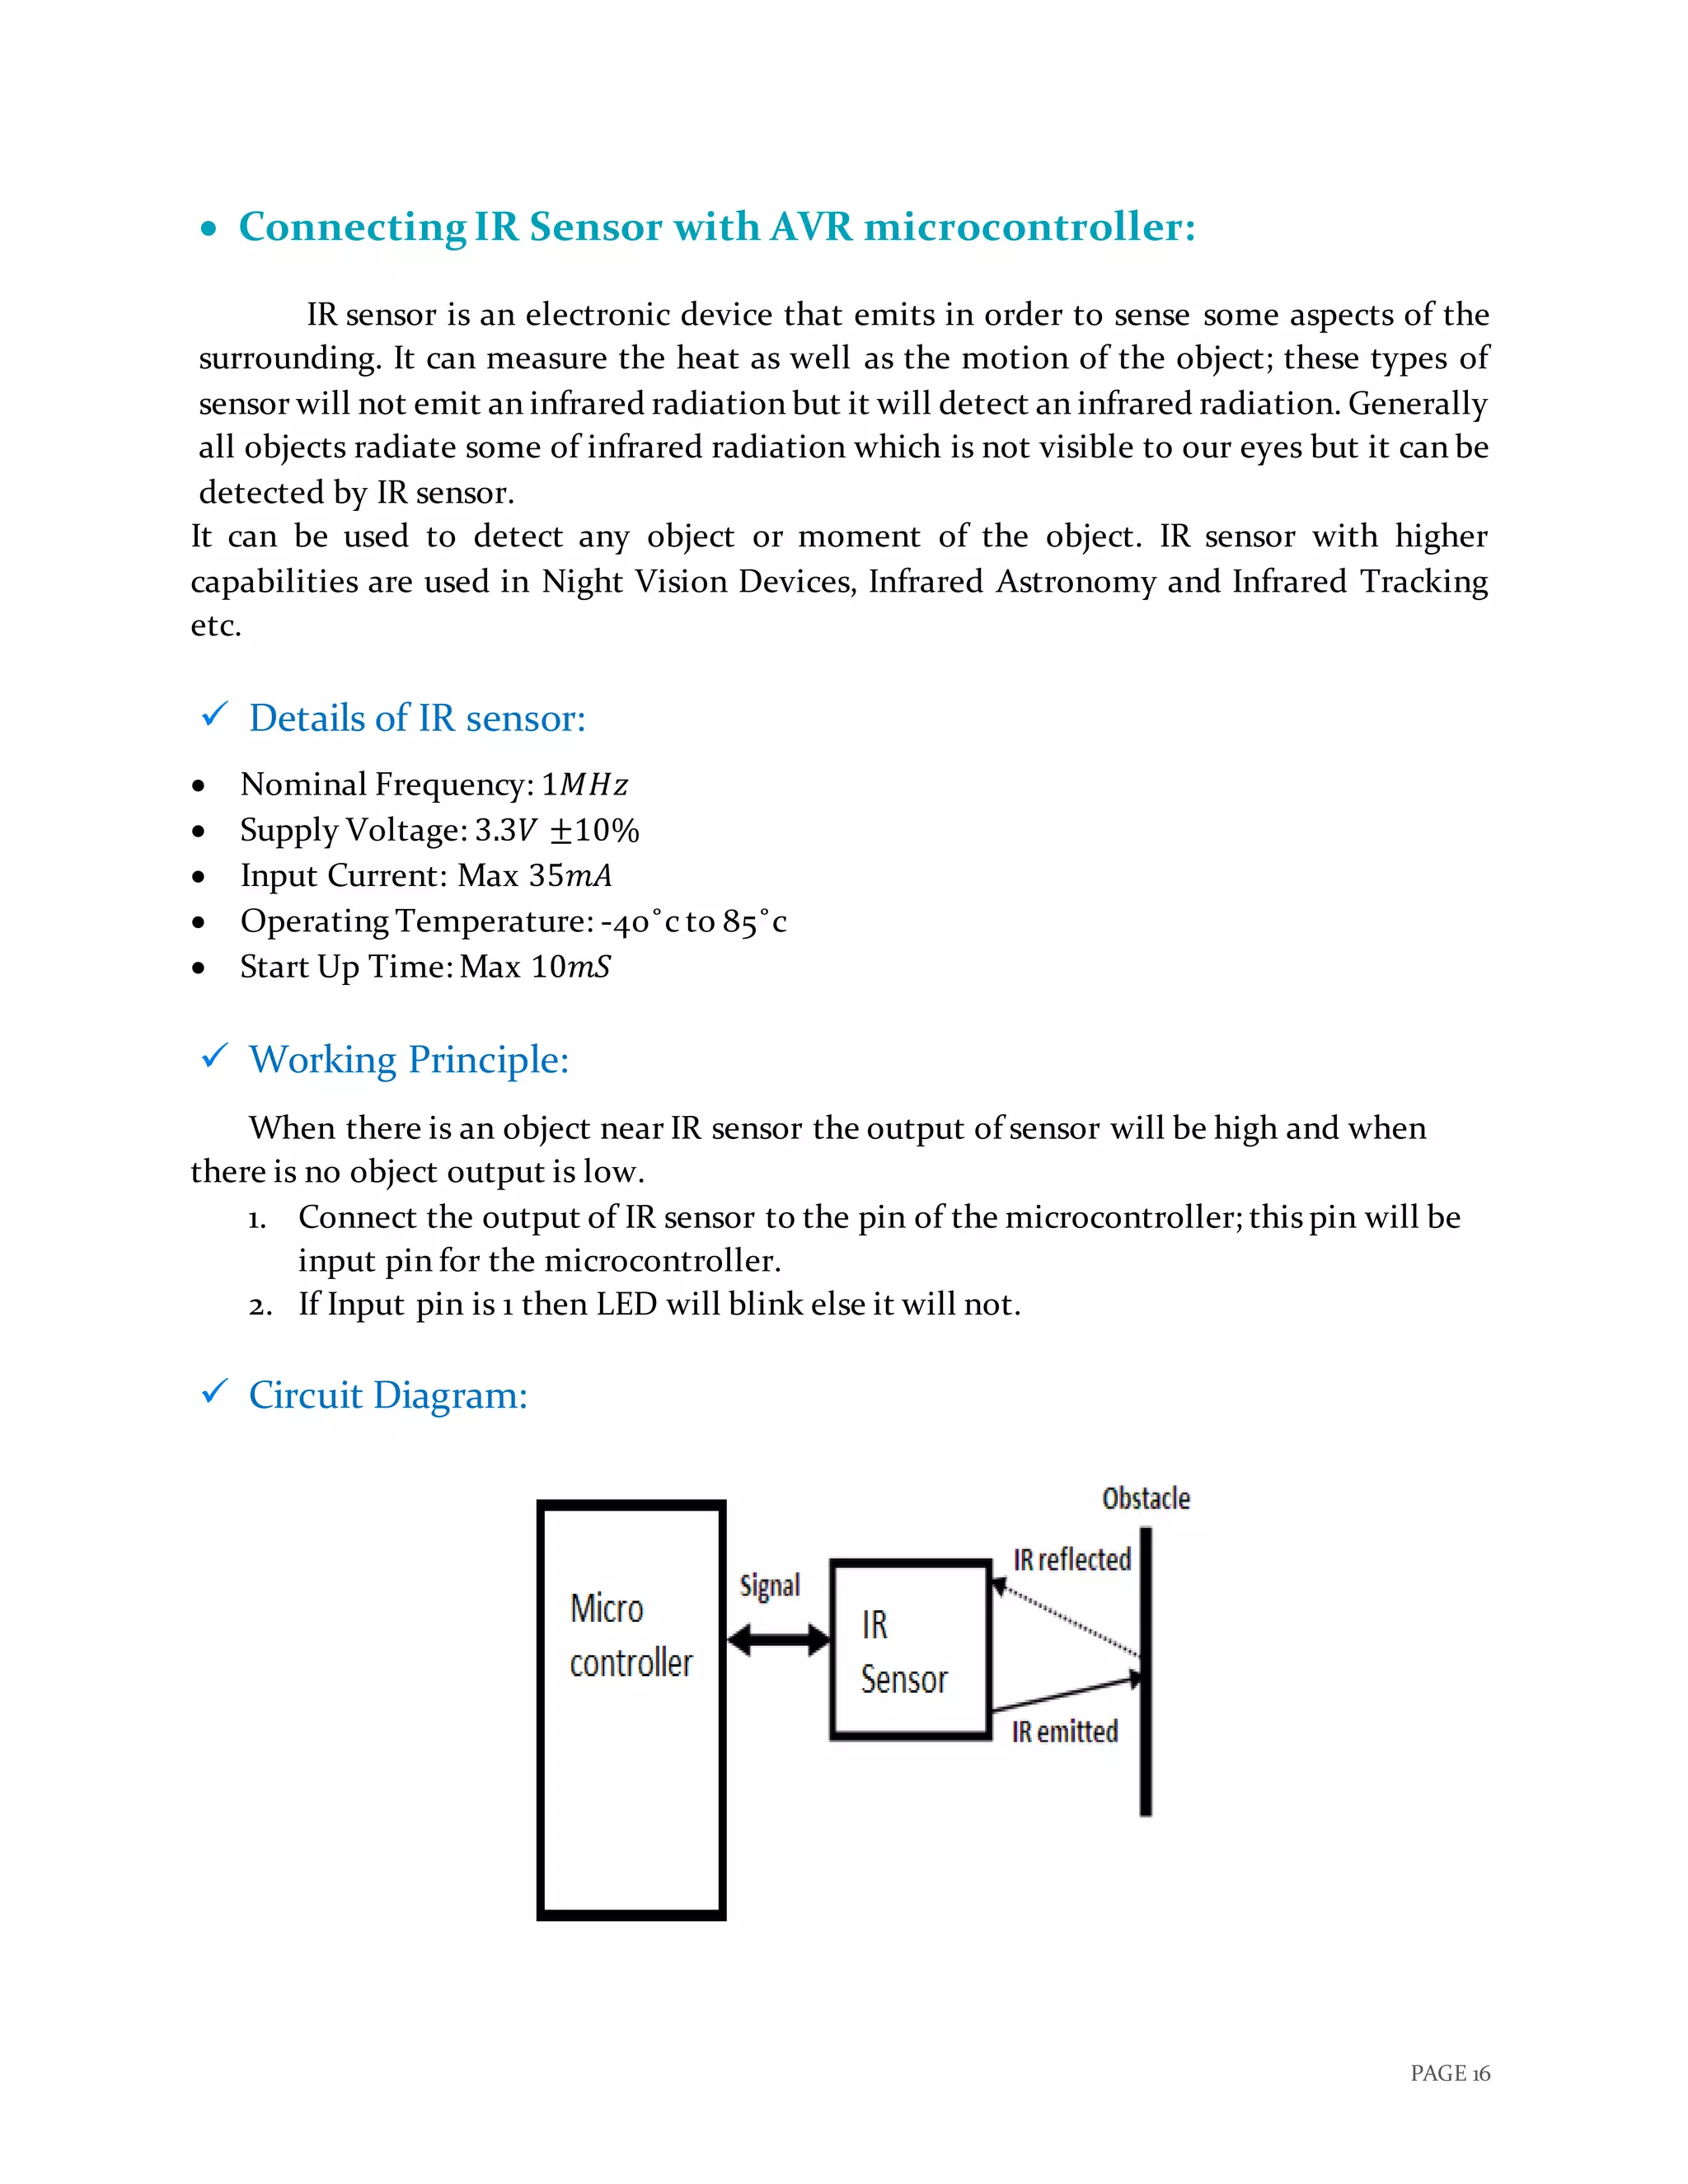
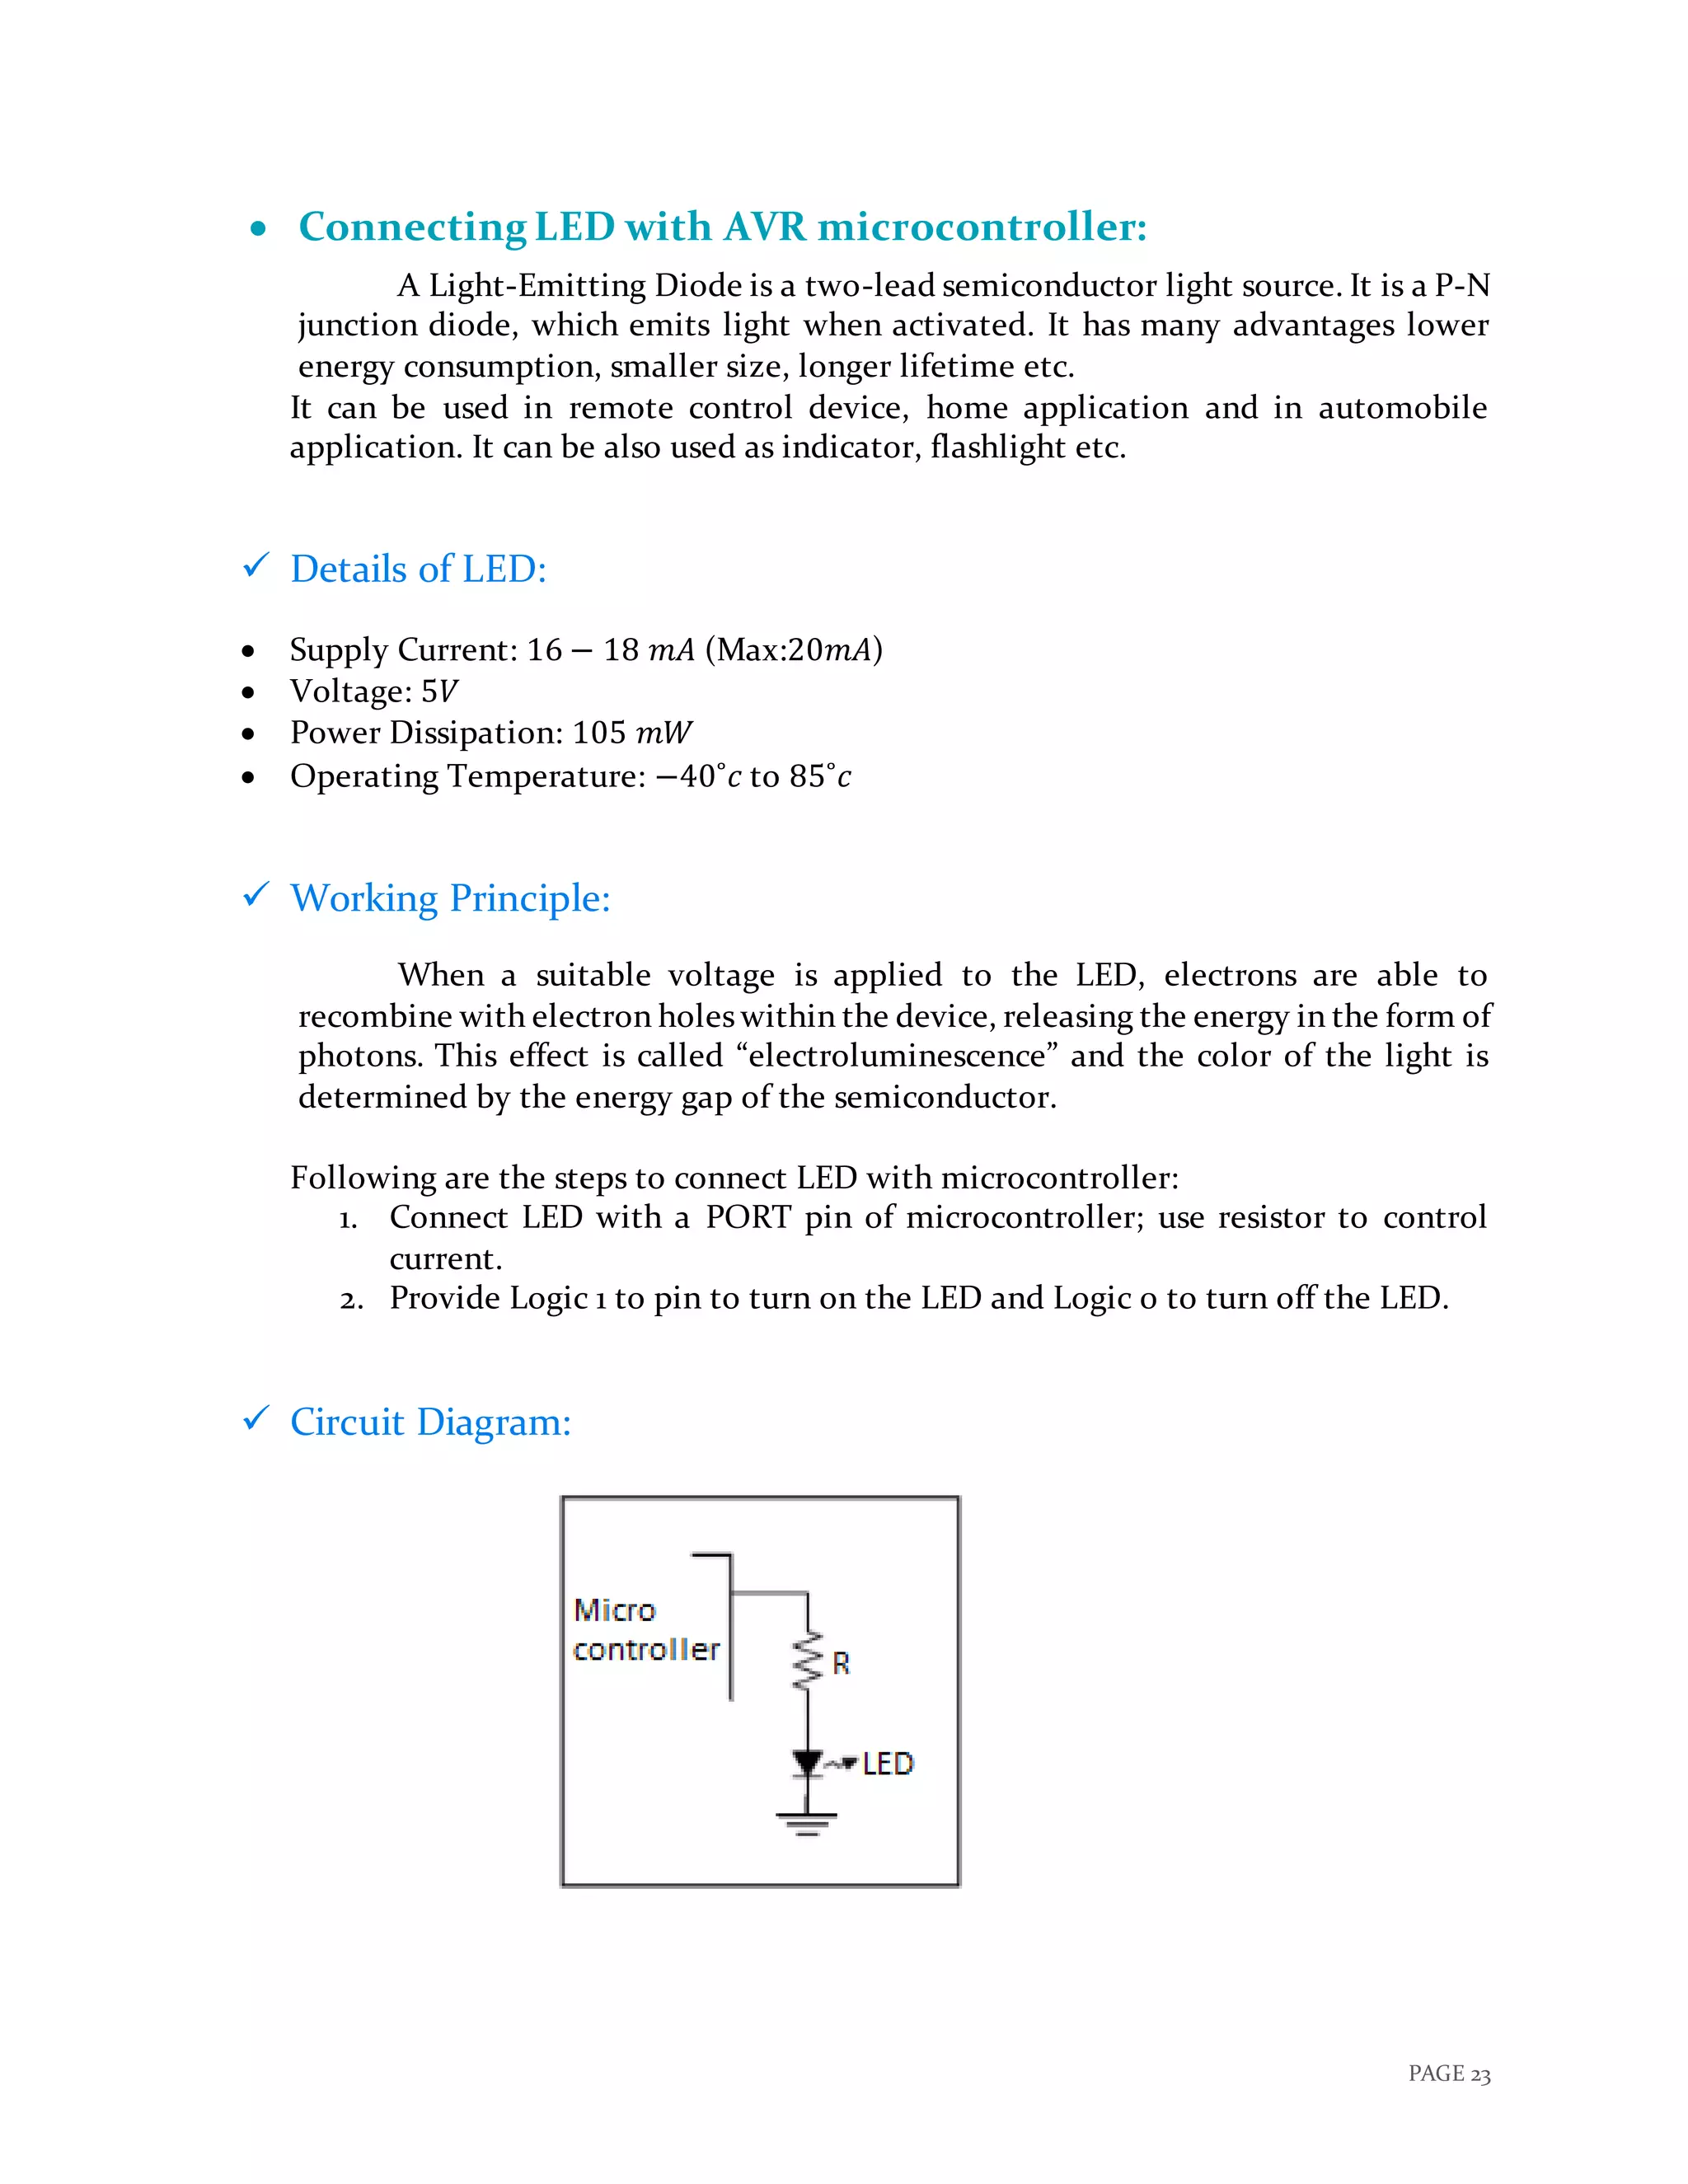
This document describes a project to create a "Smart Dustbin" that uses sensors and communication technologies to monitor garbage levels and notify authorities when bins are full. The system uses infrared sensors to detect garbage levels in bins and sends SMS alerts to municipal authorities. When a bin reaches 90% capacity, a buzzer sounds and LED lights indicate the full status. The lid also prevents additional garbage from being added. The goal is to improve waste management and support cleanliness initiatives through automated monitoring of public garbage bins.


![PAGE 15
unsigned char str[] =
"ATrnAT+CSMINS?rnAT+CREG?rnATE1rnAT+CMGF=1rnAT+CSCS="GSM"
rnAT+CSMP=17,167,0,16rnAT+CMGS="+91**********"rHi I am sim300n";
int str_len=strlen(str);
int i=0;
usart_initialize();
while(1)
{
usart_send(str[i++]); //Send data
if (i>=str_len) // Till string Length
{
i=0;
usart_send(26);
delay_ms(2000);
break;
}
delay_ms(300);
}
}](https://image.slidesharecdn.com/reportsmartdustbin-171205174639/75/Report-smart-dustbin-16-2048.jpg)


![PAGE 27
Final Code:
#include<string.h>
void usart_initialize()
{
UCSRB=0x08; //Tx Enable
UCSRC=0x86; // Data Size : 8-bit, Stop Bit:1,No parity
UBRRL=0x33; // X= (Fosc/(16(Desired Baud Rate)))-1
// =(8*10^6/(16 *9600))-1
// =52.08-1
// =51 (Dec)
//Here, URSEl=0, so Fosc is divided by 16 if it was 1 //Fosc would
Have been divided by 8
}
//USART Send
void usart_send(unsigned char ch)
{
while(UCSRA.B5==0); // Wait till UDR is empty
UDR=ch; //Write the value to be Tx
}
void send_SMS(unsigned char str[], int str_len)
{
int i=0;
int cnt = 1;
while(cnt != 5)
{
usart_send(str[i++]); //Send data
if (i>=str_len) // Till string Length
{
i=0;
usart_send(26);
delay_ms(2000);
cnt = 5;
//break;
}
delay_ms(300);
}
}
void main() {](https://image.slidesharecdn.com/reportsmartdustbin-171205174639/75/Report-smart-dustbin-28-2048.jpg)
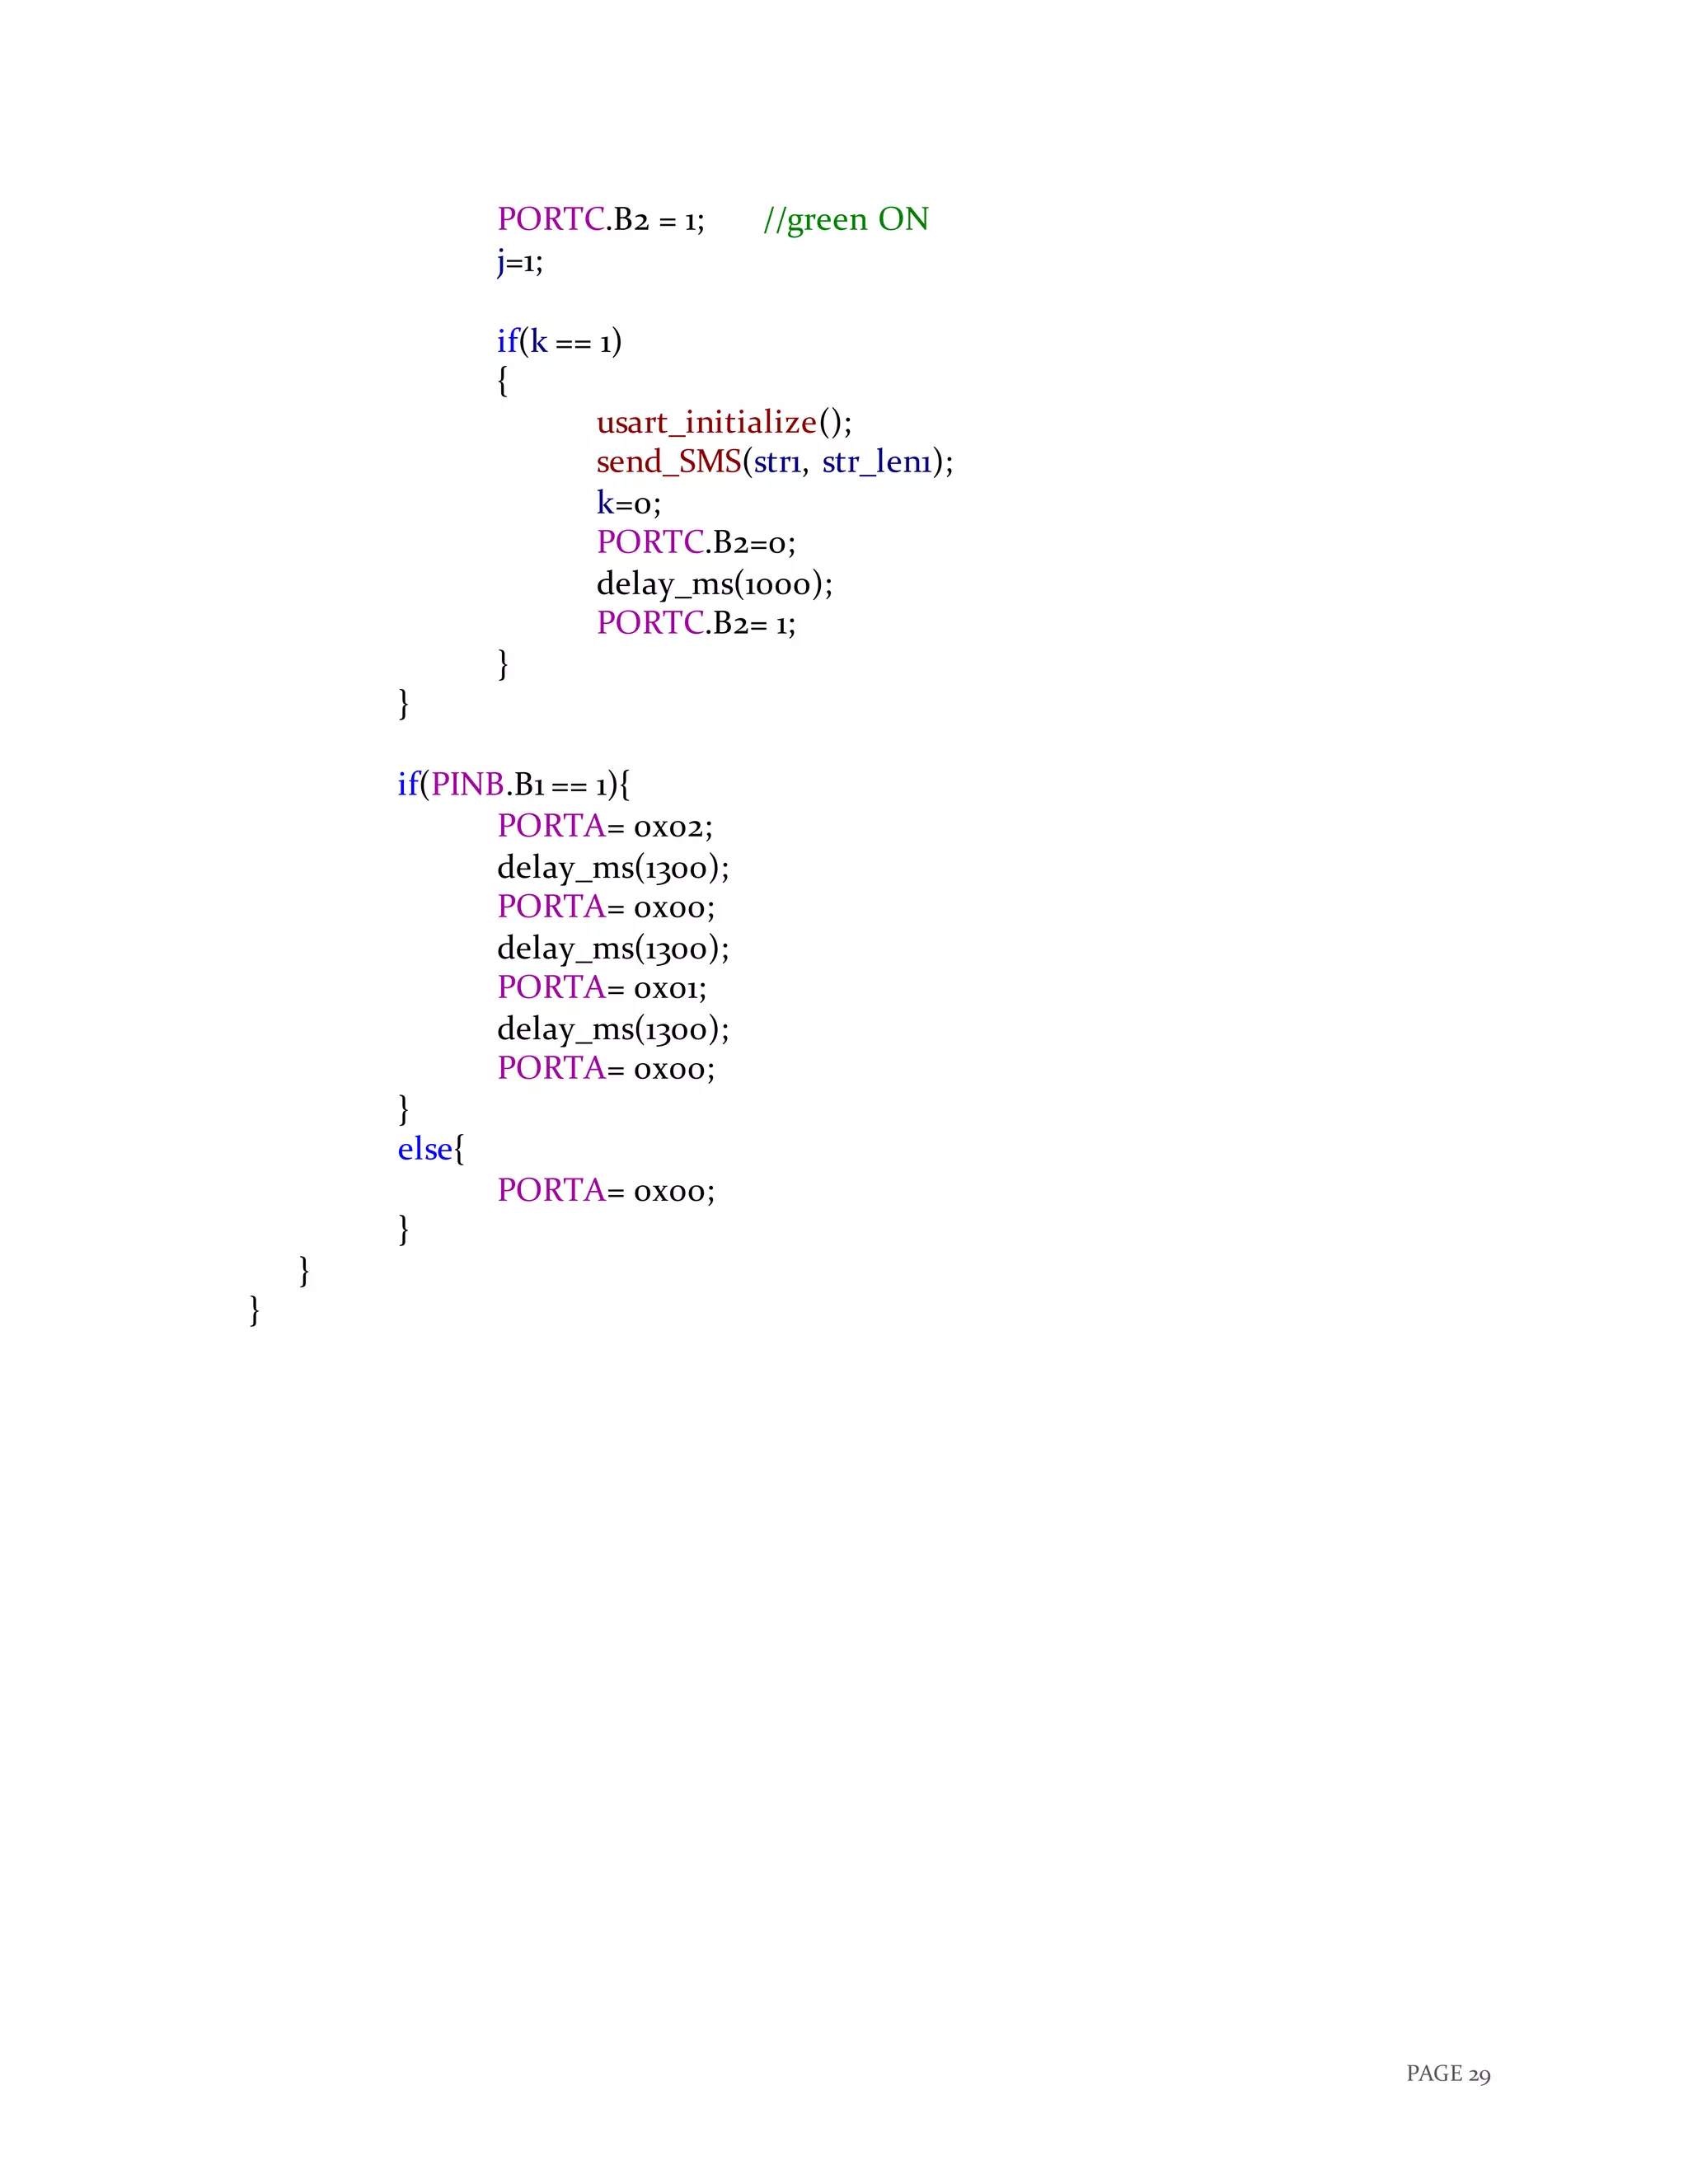
![PAGE 28
int j=1;
int k=0;
unsigned char
str[]="ATrnAT+CSMINS?rnAT+CREG?rnATE1rnAT+CMGF=1rnAT+CSCS="
GSM"rnAT+CSMP=17,167,0,16rnAT+CMGS="+91**********"rALERT!nDustbin:
001 is filled...n";
int str_len=strlen(str);
unsigned char
str1[]="ATrnAT+CSMINS?rnAT+CREG?rnATE1rnAT+CMGF=1rnAT+CSCS="
GSM"rnAT+CSMP=17,167,0,16rnAT+CMGS="+91**********"rGarbage collected
from Dustbin 001.n";
int str_len1=strlen(str1);
DDRB = 0x00;
DDRC = 0x03;
DDRA= 0x03;
DDRD= 0x00;
while(1)
{
if(PINB.B0 == 1)
{
PORTC.B1 = 1; //red led ON
PORTC.B2 = 0; //green led off
if(j == 1)
{
PORTC.B0 = 1; //buzzer ON
Delay_ms(4000);
PORTC.B0 = 0x00; ///buzzer off
usart_initialize();
send_SMS(str, str_len);
j=0;
k=1;
}
PORTC.B0 = 0x00; ///buzzer off
}
else if(PINB.B0 == 0)
{
PORTC.B0 = 0; //buzzer off
PORTC.B1 = 0; //red led off](https://image.slidesharecdn.com/reportsmartdustbin-171205174639/75/Report-smart-dustbin-29-2048.jpg)


![[Year 2015-16 ] IOT Based Waste Management](https://cdn.slidesharecdn.com/ss_thumbnails/presentation-180701111407-thumbnail.jpg?width=640&height=640&fit=bounds)