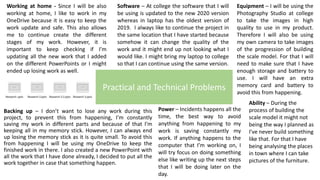
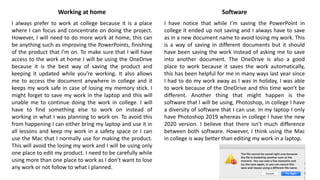
SlideShare a Scribd company logo
1 of 14
Problem Solving
Leticia Lopes
Backing up – I don’t want to lose any work during this
project, to prevent this from happening, I’m constantly
saving my work in different parts and because of that I’m
keeping all in my memory stick. However, I can always end
up losing the memory stick as it is quite small. To avoid this
from happening I will be using my OneDrive to keep the
finished work in there. I also created a new PowerPoint with
all the work that I have done already, I decided to put all the
work together in case that something happen.
Practical and Technical Problems
Working at home - Since I will be also
working at home, I like to work in my
OneDrive because it is easy to keep the
work update and safe. This also allows
me to continue create the different
stages of my work. However, it is
important to keep checking if I’m
updating all the new work that I added
on the different PowerPoints or I might
ended up losing work as well.
Software – At college the software that I will
be using is updated to the new 2020 version
whereas in laptop has the oldest version of
2019. I always like to continue the project in
the same location that I have started because
somehow it can change the quality of the
work and it might end up not looking what I
would like. I might bring my laptop to college
so that I can continue using the same version.
Equipment – I will be using the
Photography Studio at college
to take the images in high
quality to use in my product.
Therefore I will also be using
my own camera to take images
of the progression of building
the scale model. For that I will
need to make sure that I have
enough storage and battery to
use. I will have an extra
memory card and battery to
avoid this from happening.
Power – Incidents happens all the
time, the best way to avoid
anything from happening to my
work is saving constantly my
work. If anything happens to the
computer that I’m working on, I
will try focus on doing something
else like writing up the next steps
that I will be doing later on the
day.
Ability – During the
process of building the
scale model it might not
being the way I planned as
I’ve never build something
like that. For that I have
being analysing the places
in town where I can take
pictures of the furniture.
Working at home
I always prefer to work at college because it is a place
where I can focus and concentrate on doing the project.
However, I will need to do more work at home, this can
be anything such as improving the PowerPoints, finishing
of the product that I’m on. To make sure that I will have
access to the work at home I will be using the OneDrive
because it is the best way of saving the product and
keeping it updated while you’re working. It also allows
me to access the document anywhere in college and it
keeps my work safe in case of losing my memory stick. I
might forget to save my work in the laptop and this will
unable me to continue doing the work in college. I will
have to find something else to work on instead of
working in what I was planning to work on. To avoid this
from happening I can either bring my laptop and use it in
all lessons and keep my work in a safety space or I can
use the Mac that I normally use for making the product.
This will avoid the losing my work and I will be using only
one place to edit my product. I need to be carefully while
using more than one place to work as I don’t want to lose
any work or not follow to what I planned.
Software
I have notice that while I’m saving the PowerPoint in
college it ended up not saving and I always have to save
as in a new document name to avoid losing my work. This
is a way of saving in different documents but it should
have been saving the work instead of asking me to save
into another document. The OneDrive is also a good
place to work because it saves the work automatically,
this has been helpful for me in many ways last year since
I had to do my work away as I was in holiday, I was able
to work because of the OneDrive and this time won’t be
different. Another thing that might happen is the
software that I will be using, Photoshop, in college I have
a diversity of software that I can use. In my laptop I only
have Photoshop 2019 whereas in college I have the new
2020 version. I believe that there isn’t much difference
between both software. However, I think using the Mac
in college is way better than editing my work in a laptop.
Backing up
Last year, I saved my work in a Mac and some of the
lessons weren’t in a Mac room, so I had to run back to
the room to get my work. If it was in a computer and I
left my work in the download, it wouldn’t be there
anymore. To prevent this from happening I will be
saving my work in different places and versions so that
if something like that happen I won’t be losing
everything. A good place to save the work is the
OneDrive, I like using it because it allows me to use
from any place and it saves automatically. It is good to
have a backup I ended up losing my memory stick or
forgetting it at home. I don’t want to lose my work
during this project because it is the final major project,
I would be annoyed if something happen to the work
that I’m working on. Another way to avoid this is
updating the document that I’m using to put all my
work. So far I have the initial theory and the research,
each part that I also updated in my website. I can also
save my work in 4 different places, the desktop, in my
memory stick, my H drive using the file way and also
the OneDrive.
Equipment
I will be using the studio to take some high quality
images of the scale model and all the parts that will
be included in the pages. In this case once I finished
producing the scale model, I need to book the room
so that I don’t lose too much time as the studio might
get full booked. Another aspect that might happen is
the SD card not work, specially in my camera, I have
an extra SD card and one of them always says that
the SD is protected, I wasn’t sure why the SD card
was saying this but if wasn’t for the second card I
wasn’t going to be able to take the images on that
day. To avoid this happening again I will be using the
same SD card as in last year and try sort it out the
reason why the protected SD isn’t working. I also
need to make sure that I have an extra battery in case
of using the camera outside, I don’t want to get
frustrated while taking the images that will be
extremely important in this project.
Theoretical Problems
Location – In case that the idea of
creating a scale doesn’t work out. I
will have to have a second plan of
where to take pictures to use in
this project. I have found some
places where caught my attention
while I was researching in town. I
might end up exploring different
shops in town to take pictures of
the furniture options.
Finance – Since I will be building a scale model,
I will have to buy some things to help me to
make a really nice and interesting model. I did
some research on places of where I would find
all the materials needed for this project and
the best place to do that was Hobby & Craft.
Health and Safety – There is a
lot to consider in this project for
my own safety, I will be cutting
and building up the scale model
using a foam board. I believe
that I will be using materials to
cut the board and also make the
rest of the small things that I will
be using in there. To avoid any
problem I will use the help of a
professional that have done a
scale model before. I will be also
carefully while using any sharpen
materials so that I don’t end up
insuring myself.
Professional Printing – This will be my last project in
college, so I decided to print it out so that I can also use it
in my presentation. I feel like it will bring my work to life
instead of having it only digitally. For this I will be
researching different places where I can print my work
inside my budget plan. Before printing it, I will make sure
that everything is the way that it is suppose to be using the
college printer. This will help me make a few improvements
before handing it for the professionals printers.
Production Time – For me is very important to stick
with the deadlines as I don’t like feeling like I’m
behind to what I planned. I also need to plan
everything to finish before my production since I
don’t want to have more work to do instead of
focusing on making the product.
Health and Safety Finance
In this project I want to give a lot of myself to make a
good product, better than the my last projects. For that I
will have to use my own money to make what I’m
planning, the scale model for example is something that
came up while I was putting my ideas in a piece of
paper. I will be using foam board which I found in sale
when visiting the store, I was able to buy four foam
board for a good price. While I was buying the supplies
needed I always projected how it would look and how it
will give a best result. Another thing that I’m considering
for the content of the book is interviewing a specific
interior designer to talk about their own work, I might
separate a whole page for this as it will be interesting to
know a bit more about the interior designers of the
area. For this I will need to think about the transport to
meet the interviewee, also I need to see if they are
available to meet me. Meeting them will help me to
collect more information about their products.
I feel like it is extremely important to mention what
might happen during the production of this product.
This can be building the scale model and taking
pictures in the studio. The best way to avoid injuring
myself while producing the scale model is taking care
of my actions and avoid leaving the tools in a
dangerous place. I will be also using glue gun to build
the scale model which will help me in some parts of
the model. I might burn my self, for this I will make
sure to wait the glue cool down before touching the
area that I just finished.
I might also feel uncomfortable and feel pain in certain
areas such as headaches and backpains. To avoid the
headaches is always good for me wear my glasses as I
will be working in front of a computer the whole time.
The backpains can be avoided taking breaks, sitting
straight and take a walk sometime are helpful. I’m
mentioning these specifically pains because I often get
those while working on a project. It is always good to
keep this tips in mind.
Professional Printing
This is something that I’ve considered for a long time
now. Printing my work is also a way of evaluating my
product in a different way. I always liked having the
book instead of having it online, it is so much nicer
having physically the book in hands. For this I will
have to analyse and think carefully about sending my
work to the professional as I can get in a unsafe
website which can easily be a fraud. I know a place in
York that print images, I will try get in contact with
them to know if they do print books otherwise I will
have to search online to find a truthful website that
prints in good quality. I found this website that
seems to give a good result for printing, but I need to
make sure of that as I don’t want to end up losing
money. They have different types of book printing
which is quite interesting as I found some cheaper. I
also need to include this into my budget list as I only
want to spend exactly what will be needed and
useful for this project.
https://www.pixartprinting.co.uk/printing-magazines-books-catalogues/paperback-binding-corrugated-milled-and-glued/
PixArt Printing
Experiments
2D Landscapes
So I found this tutorial quite interesting as I never did something similar to
it. It was quite amusing creating this 2D landscape using quite simples tools
in Photoshop. I found this method quite similar to the rotoscoping that I
used on my last project, however, in this case I’m using it to create a
scenario whereas in the project I used to make an illustration of the
character. Firstly, I created a new layer and for that I decided to use the A4
paper. I think it gives enough space and also it was the closest size from the
tutorial. A thing that I found really important from this tutorial is that they
gave me a lot of information of how to create certain things and some of
them I didn’t even know about. Then using the lasso tool, I started to
create the landscape using different shades of the colour that I started
using which was a dark brown, to fill the space I used the Paint Bucket Tool.
After creating all the landscape and the mountain, I used the Elliptical
Marquee Tool instead of using the Ellipse Tool and also filled using the Paint
Bucket. I also added some lights coming from the sun and hitting the
mountain. To create the tree paint brush I created a new document using
the size of 2500x2500 pixels, firstly I made a mistake in this part as I wasn’t
sure if it was affect the process, I used the millimetres instead of pixels and
the Photoshop wasn’t letting me define the image as brush. So I started the
process of creating the tree brush again. Using the right document, I went
to filter, render and then tree, there’s different types of tree in there that I
wasn’t sure that we could do that in Photoshop. After that I changed the
colour using hue/saturation and adjusted the lightness to dark to make it
into a tree silhouette. Another thing that I learned from this tutorial was
that I was able to edit the brush using F5 it gives me plenty of options to
make the brush easy to use. So after changing the spacing and dynamic of
the brush I added some trees in the illustration which gave it a better
appearance in my opinion.
After adding the trees around the landscape, I used a sample from
a wolf silhouette exactly the same as showing in the tutorial. The
only thing that he didn’t show was how to make it perfectly
transparent so I did my best to take all the white bits from the
image. Then I watched the same channel tutorial but how to make
the clouds and since I never made anything like that I found it quite
interesting and easy to create. I used the sample that he left in the
video’s description then opened in photoshop and using again the
lasso tool I selected only a part of the clouds that I would be making
the brush later. I opened the channels and duplicated only the red
channel to make it black and white as showing in the tutorial. To
make it darker I opened the levels pressing CMD + L and then I
transformed the background of the cloud even darker leaving only
the cloud in white. I filled up the whole layer with black before
making anything else. I found this next step quite tricking while
watching the tutorial, so basically I selected back the RGB channel
and pressing only CMD to select all the cloud. I went back to Layers
and sing CMD + J and then CMD + I to invert the colours of the
image. To create the brush I just did the same progress as before,
‘Edit’ and ‘Define Brush Preset’. Then I just added some of the
clouds behind the mountain and between the landscape. I really
liked how he explained how to make this illustration, I might watch
some of his other videos to explore more the options that I have to
use in my project. I also experimented changing the colours of it
and it looked quite nice. I might use this method to make the page
a bit more interesting for my target audience as they might be also
appreciate illustrations.
Nemanja Sekulic: https://www.youtube.com/watch?v=LBczOO5hOKc&t=1174s
2D to 3D
The same channel from the last experiment also showed me how to
transform my 2D sketch into a realistic 3D image called Matte Painting.
Firstly, I thought that it would be easy and not too complicated but
following the instructions it helped me gain more skills. To create the
landscape I used the same images that he provided in his tutorial.
Following the steps I started building up the landscape using the images
and selecting only the parts that I would look better in that specific
area. Then I cut it to make it in the shape of the area that I wanted. To
make it looks more realistic I duplicated the layer that I was using and
erased the parts that wasn’t matching with the part that I was working
on. Using the images I was able to make this art, this for me was the
most hardest part. In the tutorial he used CMD + clicking on the layer of
the sketch to and then using that same layer he was able to erase the
bits that he didn’t want. However, in mine I wasn’t able to do that so I
just added the layers in the place that I wanted them to be and just
deleted the parts to make it more 3D. It was worth the try making this
experiment as I’ve never done anything like that and through this I was
able to acknowledge new different skills while doing it.
After this I added the trees using again the filter, render to create the
redwood tree but instead of making a new tree every time, I used for
the first time the Mixer Brush Tool, I didn’t know that it was possible to
create a brush using this tool. A really important thing that I learned
during this process was that the lighting matters a lot in this type of
work, in this experiment I learned that to render the tree I can also
change the lighting to make it more appealing to what I intend to
create and it makes a huge difference in the image.
Nemanja Sekulic: https://www.youtube.com/watch?v=Y9CnrPUEfK4&t=3005s
For the mountain I had to find another image similar
as the shape of mine was completely different from
mine and also the file was smaller than mine work
so it wouldn’t be in a good quality if I resized the
image to make it bigger enough to cover my
mountain. I added different parts of the image that I
chose for this and with the parts I started to build up
the mountain and make it bigger and more realistic
using the same method that I used before. Then I
added the wolf and I added some shadows to make
it darker in some parts of his body. To finish off this
part I added the background and hidden the moon
using the Clone Stamp tool. Now, to add the moon
was quite impressive as I would have make it in a
totally different way. Using the Elliptical Marquee
Tool I selected the moon and pasted in the art. Then
I flipped it in horizontally and change it to screen
blending mode. Then I changed the levels to make
the circle disappear in the background. To finish off
and give it a bit of shadow and light also known as
dodge and burn I added two different shades of
curves, a lighter and a darker one, inverted it to add
only in some specific areas then using the brush tool
I selected different places to add the lights and the
shadows. In my opinion this made the whole
difference in the image and I might use this in my
final product.
Problem Solving

More Related Content

What's hot

What have you learnt about technologies whilst creating your magazine
What have you learnt about technologies whilst creating your magazineWhat have you learnt about technologies whilst creating your magazine
What have you learnt about technologies whilst creating your magazine
rebeccamilesmedia
 
6. What have you learnt about technologies from the process of constructing t...
6. What have you learnt about technologies from the process of constructing t...6. What have you learnt about technologies from the process of constructing t...
6. What have you learnt about technologies from the process of constructing t...
Kiraan123
 

What's hot (20)

Q6 eval
Q6 evalQ6 eval
Q6 eval
 
Question 7
Question  7Question  7
Question 7
 
6
66
6
 
Evaluation 6
Evaluation 6Evaluation 6
Evaluation 6
 
FMP Problem Solving v6
FMP Problem Solving v6FMP Problem Solving v6
FMP Problem Solving v6
 
Evaluation guidance
Evaluation guidanceEvaluation guidance
Evaluation guidance
 
Task 3 problem solving intro
Task 3 problem solving introTask 3 problem solving intro
Task 3 problem solving intro
 
7
77
7
 
Question 6
Question 6Question 6
Question 6
 
What have you learnt about technologies whilst creating your magazine
What have you learnt about technologies whilst creating your magazineWhat have you learnt about technologies whilst creating your magazine
What have you learnt about technologies whilst creating your magazine
 
Question 6
Question 6Question 6
Question 6
 
How did you use media technologies in the
How did you use media technologies in theHow did you use media technologies in the
How did you use media technologies in the
 
Question 6
Question 6Question 6
Question 6
 
Digital Graphic Narrative beth geldard
 Digital Graphic Narrative beth geldard Digital Graphic Narrative beth geldard
Digital Graphic Narrative beth geldard
 
Question 6
Question 6Question 6
Question 6
 
6. What have you learnt about technologies from the process of constructing t...
6. What have you learnt about technologies from the process of constructing t...6. What have you learnt about technologies from the process of constructing t...
6. What have you learnt about technologies from the process of constructing t...
 
Question six
Question sixQuestion six
Question six
 
Task 6 evaluation fmp
Task 6 evaluation fmpTask 6 evaluation fmp
Task 6 evaluation fmp
 
7. Production Reflection
7. Production Reflection7. Production Reflection
7. Production Reflection
 
Q6: What have you learnt about technologies from the process of constructing ...
Q6: What have you learnt about technologies from the process of constructing ...Q6: What have you learnt about technologies from the process of constructing ...
Q6: What have you learnt about technologies from the process of constructing ...
 

Similar to Problem Solving (20)

Problem solving FMP
Problem solving FMPProblem solving FMP
Problem solving FMP
 
Problem solving
Problem solvingProblem solving
Problem solving
 
Problem solving
Problem solvingProblem solving
Problem solving
 
Problem solving 2
 Problem solving 2 Problem solving 2
Problem solving 2
 
Problem solving
Problem solvingProblem solving
Problem solving
 
Problem solving
Problem solvingProblem solving
Problem solving
 
Fmp problem solving
Fmp problem solvingFmp problem solving
Fmp problem solving
 
Fmp problem solving v10
Fmp problem solving v10Fmp problem solving v10
Fmp problem solving v10
 
Problem solving (Updated)
Problem solving (Updated)Problem solving (Updated)
Problem solving (Updated)
 
Problem solving (final)
Problem solving (final)Problem solving (final)
Problem solving (final)
 
Question 7
Question 7Question 7
Question 7
 
Problem solving 1 2
Problem solving 1 2Problem solving 1 2
Problem solving 1 2
 
Problems
ProblemsProblems
Problems
 
Research & planning: Digital technology and ICT used
Research & planning: Digital technology and ICT usedResearch & planning: Digital technology and ICT used
Research & planning: Digital technology and ICT used
 
Problems
ProblemsProblems
Problems
 
5. pre production
5. pre production5. pre production
5. pre production
 
3. Problem Solvingand Experiments.pptx
3. Problem Solvingand Experiments.pptx3. Problem Solvingand Experiments.pptx
3. Problem Solvingand Experiments.pptx
 
Problem solving fmp
Problem solving fmpProblem solving fmp
Problem solving fmp
 
5. problem solving
5. problem solving5. problem solving
5. problem solving
 
Evaluation 6
Evaluation 6Evaluation 6
Evaluation 6
 

More from Leticia Pozze (20)

Diary Week
Diary WeekDiary Week
Diary Week
 
Daily Reflections
Daily ReflectionsDaily Reflections
Daily Reflections
 
Pre Production
Pre ProductionPre Production
Pre Production
 
Diary Week
Diary Week Diary Week
Diary Week
 
Lopes, Leticia
Lopes, Leticia Lopes, Leticia
Lopes, Leticia
 
Research (3.2)
Research (3.2)Research (3.2)
Research (3.2)
 
CV
CV CV
CV
 
FMP Proposal
FMP ProposalFMP Proposal
FMP Proposal
 
1a. FMP Theory
1a. FMP Theory1a. FMP Theory
1a. FMP Theory
 
FMP Pre Proposal
FMP Pre ProposalFMP Pre Proposal
FMP Pre Proposal
 
Theory
TheoryTheory
Theory
 
Print Pro Forma
Print Pro FormaPrint Pro Forma
Print Pro Forma
 
Theory
TheoryTheory
Theory
 
Proposal (Client's)
Proposal (Client's)Proposal (Client's)
Proposal (Client's)
 
Evaluation (1)
Evaluation (1)Evaluation (1)
Evaluation (1)
 
Client's Project
Client's ProjectClient's Project
Client's Project
 
Client + Proposal
Client + ProposalClient + Proposal
Client + Proposal
 
Ual UCAS
Ual UCAS Ual UCAS
Ual UCAS
 
DSLR Workshop Camera Audit
DSLR Workshop Camera AuditDSLR Workshop Camera Audit
DSLR Workshop Camera Audit
 
2. Proposal
2. Proposal2. Proposal
2. Proposal
 

Recently uploaded

Ecosystem Interactions Class Discussion Presentation in Blue Green Lined Styl...
Ecosystem Interactions Class Discussion Presentation in Blue Green Lined Styl...Ecosystem Interactions Class Discussion Presentation in Blue Green Lined Styl...
Ecosystem Interactions Class Discussion Presentation in Blue Green Lined Styl...
fonyou31
 

Recently uploaded (20)

Mattingly "AI & Prompt Design: Structured Data, Assistants, & RAG"
Mattingly "AI & Prompt Design: Structured Data, Assistants, & RAG"Mattingly "AI & Prompt Design: Structured Data, Assistants, & RAG"
Mattingly "AI & Prompt Design: Structured Data, Assistants, & RAG"
 
General AI for Medical Educators April 2024
General AI for Medical Educators April 2024General AI for Medical Educators April 2024
General AI for Medical Educators April 2024
 
Advanced Views - Calendar View in Odoo 17
Advanced Views - Calendar View in Odoo 17Advanced Views - Calendar View in Odoo 17
Advanced Views - Calendar View in Odoo 17
 
Call Girls in Dwarka Mor Delhi Contact Us 9654467111
Call Girls in Dwarka Mor Delhi Contact Us 9654467111Call Girls in Dwarka Mor Delhi Contact Us 9654467111
Call Girls in Dwarka Mor Delhi Contact Us 9654467111
 
Class 11th Physics NEET formula sheet pdf
Class 11th Physics NEET formula sheet pdfClass 11th Physics NEET formula sheet pdf
Class 11th Physics NEET formula sheet pdf
 
Sports & Fitness Value Added Course FY..
Sports & Fitness Value Added Course FY..Sports & Fitness Value Added Course FY..
Sports & Fitness Value Added Course FY..
 
Nutritional Needs Presentation - HLTH 104
Nutritional Needs Presentation - HLTH 104Nutritional Needs Presentation - HLTH 104
Nutritional Needs Presentation - HLTH 104
 
Z Score,T Score, Percential Rank and Box Plot Graph
Z Score,T Score, Percential Rank and Box Plot GraphZ Score,T Score, Percential Rank and Box Plot Graph
Z Score,T Score, Percential Rank and Box Plot Graph
 
INDIA QUIZ 2024 RLAC DELHI UNIVERSITY.pptx
INDIA QUIZ 2024 RLAC DELHI UNIVERSITY.pptxINDIA QUIZ 2024 RLAC DELHI UNIVERSITY.pptx
INDIA QUIZ 2024 RLAC DELHI UNIVERSITY.pptx
 
Unit-IV- Pharma. Marketing Channels.pptx
Unit-IV- Pharma. Marketing Channels.pptxUnit-IV- Pharma. Marketing Channels.pptx
Unit-IV- Pharma. Marketing Channels.pptx
 
Ecosystem Interactions Class Discussion Presentation in Blue Green Lined Styl...
Ecosystem Interactions Class Discussion Presentation in Blue Green Lined Styl...Ecosystem Interactions Class Discussion Presentation in Blue Green Lined Styl...
Ecosystem Interactions Class Discussion Presentation in Blue Green Lined Styl...
 
IGNOU MSCCFT and PGDCFT Exam Question Pattern: MCFT003 Counselling and Family...
IGNOU MSCCFT and PGDCFT Exam Question Pattern: MCFT003 Counselling and Family...IGNOU MSCCFT and PGDCFT Exam Question Pattern: MCFT003 Counselling and Family...
IGNOU MSCCFT and PGDCFT Exam Question Pattern: MCFT003 Counselling and Family...
 
Web & Social Media Analytics Previous Year Question Paper.pdf
Web & Social Media Analytics Previous Year Question Paper.pdfWeb & Social Media Analytics Previous Year Question Paper.pdf
Web & Social Media Analytics Previous Year Question Paper.pdf
 
APM Welcome, APM North West Network Conference, Synergies Across Sectors
APM Welcome, APM North West Network Conference, Synergies Across SectorsAPM Welcome, APM North West Network Conference, Synergies Across Sectors
APM Welcome, APM North West Network Conference, Synergies Across Sectors
 
Grant Readiness 101 TechSoup and Remy Consulting
Grant Readiness 101 TechSoup and Remy ConsultingGrant Readiness 101 TechSoup and Remy Consulting
Grant Readiness 101 TechSoup and Remy Consulting
 
Código Creativo y Arte de Software | Unidad 1
Código Creativo y Arte de Software | Unidad 1Código Creativo y Arte de Software | Unidad 1
Código Creativo y Arte de Software | Unidad 1
 
Presentation by Andreas Schleicher Tackling the School Absenteeism Crisis 30 ...
Presentation by Andreas Schleicher Tackling the School Absenteeism Crisis 30 ...Presentation by Andreas Schleicher Tackling the School Absenteeism Crisis 30 ...
Presentation by Andreas Schleicher Tackling the School Absenteeism Crisis 30 ...
 
SOCIAL AND HISTORICAL CONTEXT - LFTVD.pptx
SOCIAL AND HISTORICAL CONTEXT - LFTVD.pptxSOCIAL AND HISTORICAL CONTEXT - LFTVD.pptx
SOCIAL AND HISTORICAL CONTEXT - LFTVD.pptx
 
social pharmacy d-pharm 1st year by Pragati K. Mahajan
social pharmacy d-pharm 1st year by Pragati K. Mahajansocial pharmacy d-pharm 1st year by Pragati K. Mahajan
social pharmacy d-pharm 1st year by Pragati K. Mahajan
 
Advance Mobile Application Development class 07
Advance Mobile Application Development class 07Advance Mobile Application Development class 07
Advance Mobile Application Development class 07
 

Problem Solving

  • 2. Backing up – I don’t want to lose any work during this project, to prevent this from happening, I’m constantly saving my work in different parts and because of that I’m keeping all in my memory stick. However, I can always end up losing the memory stick as it is quite small. To avoid this from happening I will be using my OneDrive to keep the finished work in there. I also created a new PowerPoint with all the work that I have done already, I decided to put all the work together in case that something happen. Practical and Technical Problems Working at home - Since I will be also working at home, I like to work in my OneDrive because it is easy to keep the work update and safe. This also allows me to continue create the different stages of my work. However, it is important to keep checking if I’m updating all the new work that I added on the different PowerPoints or I might ended up losing work as well. Software – At college the software that I will be using is updated to the new 2020 version whereas in laptop has the oldest version of 2019. I always like to continue the project in the same location that I have started because somehow it can change the quality of the work and it might end up not looking what I would like. I might bring my laptop to college so that I can continue using the same version. Equipment – I will be using the Photography Studio at college to take the images in high quality to use in my product. Therefore I will also be using my own camera to take images of the progression of building the scale model. For that I will need to make sure that I have enough storage and battery to use. I will have an extra memory card and battery to avoid this from happening. Power – Incidents happens all the time, the best way to avoid anything from happening to my work is saving constantly my work. If anything happens to the computer that I’m working on, I will try focus on doing something else like writing up the next steps that I will be doing later on the day. Ability – During the process of building the scale model it might not being the way I planned as I’ve never build something like that. For that I have being analysing the places in town where I can take pictures of the furniture.
  • 3. Working at home I always prefer to work at college because it is a place where I can focus and concentrate on doing the project. However, I will need to do more work at home, this can be anything such as improving the PowerPoints, finishing of the product that I’m on. To make sure that I will have access to the work at home I will be using the OneDrive because it is the best way of saving the product and keeping it updated while you’re working. It also allows me to access the document anywhere in college and it keeps my work safe in case of losing my memory stick. I might forget to save my work in the laptop and this will unable me to continue doing the work in college. I will have to find something else to work on instead of working in what I was planning to work on. To avoid this from happening I can either bring my laptop and use it in all lessons and keep my work in a safety space or I can use the Mac that I normally use for making the product. This will avoid the losing my work and I will be using only one place to edit my product. I need to be carefully while using more than one place to work as I don’t want to lose any work or not follow to what I planned. Software I have notice that while I’m saving the PowerPoint in college it ended up not saving and I always have to save as in a new document name to avoid losing my work. This is a way of saving in different documents but it should have been saving the work instead of asking me to save into another document. The OneDrive is also a good place to work because it saves the work automatically, this has been helpful for me in many ways last year since I had to do my work away as I was in holiday, I was able to work because of the OneDrive and this time won’t be different. Another thing that might happen is the software that I will be using, Photoshop, in college I have a diversity of software that I can use. In my laptop I only have Photoshop 2019 whereas in college I have the new 2020 version. I believe that there isn’t much difference between both software. However, I think using the Mac in college is way better than editing my work in a laptop.
  • 4. Backing up Last year, I saved my work in a Mac and some of the lessons weren’t in a Mac room, so I had to run back to the room to get my work. If it was in a computer and I left my work in the download, it wouldn’t be there anymore. To prevent this from happening I will be saving my work in different places and versions so that if something like that happen I won’t be losing everything. A good place to save the work is the OneDrive, I like using it because it allows me to use from any place and it saves automatically. It is good to have a backup I ended up losing my memory stick or forgetting it at home. I don’t want to lose my work during this project because it is the final major project, I would be annoyed if something happen to the work that I’m working on. Another way to avoid this is updating the document that I’m using to put all my work. So far I have the initial theory and the research, each part that I also updated in my website. I can also save my work in 4 different places, the desktop, in my memory stick, my H drive using the file way and also the OneDrive. Equipment I will be using the studio to take some high quality images of the scale model and all the parts that will be included in the pages. In this case once I finished producing the scale model, I need to book the room so that I don’t lose too much time as the studio might get full booked. Another aspect that might happen is the SD card not work, specially in my camera, I have an extra SD card and one of them always says that the SD is protected, I wasn’t sure why the SD card was saying this but if wasn’t for the second card I wasn’t going to be able to take the images on that day. To avoid this happening again I will be using the same SD card as in last year and try sort it out the reason why the protected SD isn’t working. I also need to make sure that I have an extra battery in case of using the camera outside, I don’t want to get frustrated while taking the images that will be extremely important in this project.
  • 5. Theoretical Problems Location – In case that the idea of creating a scale doesn’t work out. I will have to have a second plan of where to take pictures to use in this project. I have found some places where caught my attention while I was researching in town. I might end up exploring different shops in town to take pictures of the furniture options. Finance – Since I will be building a scale model, I will have to buy some things to help me to make a really nice and interesting model. I did some research on places of where I would find all the materials needed for this project and the best place to do that was Hobby & Craft. Health and Safety – There is a lot to consider in this project for my own safety, I will be cutting and building up the scale model using a foam board. I believe that I will be using materials to cut the board and also make the rest of the small things that I will be using in there. To avoid any problem I will use the help of a professional that have done a scale model before. I will be also carefully while using any sharpen materials so that I don’t end up insuring myself. Professional Printing – This will be my last project in college, so I decided to print it out so that I can also use it in my presentation. I feel like it will bring my work to life instead of having it only digitally. For this I will be researching different places where I can print my work inside my budget plan. Before printing it, I will make sure that everything is the way that it is suppose to be using the college printer. This will help me make a few improvements before handing it for the professionals printers. Production Time – For me is very important to stick with the deadlines as I don’t like feeling like I’m behind to what I planned. I also need to plan everything to finish before my production since I don’t want to have more work to do instead of focusing on making the product.
  • 6. Health and Safety Finance In this project I want to give a lot of myself to make a good product, better than the my last projects. For that I will have to use my own money to make what I’m planning, the scale model for example is something that came up while I was putting my ideas in a piece of paper. I will be using foam board which I found in sale when visiting the store, I was able to buy four foam board for a good price. While I was buying the supplies needed I always projected how it would look and how it will give a best result. Another thing that I’m considering for the content of the book is interviewing a specific interior designer to talk about their own work, I might separate a whole page for this as it will be interesting to know a bit more about the interior designers of the area. For this I will need to think about the transport to meet the interviewee, also I need to see if they are available to meet me. Meeting them will help me to collect more information about their products. I feel like it is extremely important to mention what might happen during the production of this product. This can be building the scale model and taking pictures in the studio. The best way to avoid injuring myself while producing the scale model is taking care of my actions and avoid leaving the tools in a dangerous place. I will be also using glue gun to build the scale model which will help me in some parts of the model. I might burn my self, for this I will make sure to wait the glue cool down before touching the area that I just finished. I might also feel uncomfortable and feel pain in certain areas such as headaches and backpains. To avoid the headaches is always good for me wear my glasses as I will be working in front of a computer the whole time. The backpains can be avoided taking breaks, sitting straight and take a walk sometime are helpful. I’m mentioning these specifically pains because I often get those while working on a project. It is always good to keep this tips in mind.
  • 7. Professional Printing This is something that I’ve considered for a long time now. Printing my work is also a way of evaluating my product in a different way. I always liked having the book instead of having it online, it is so much nicer having physically the book in hands. For this I will have to analyse and think carefully about sending my work to the professional as I can get in a unsafe website which can easily be a fraud. I know a place in York that print images, I will try get in contact with them to know if they do print books otherwise I will have to search online to find a truthful website that prints in good quality. I found this website that seems to give a good result for printing, but I need to make sure of that as I don’t want to end up losing money. They have different types of book printing which is quite interesting as I found some cheaper. I also need to include this into my budget list as I only want to spend exactly what will be needed and useful for this project. https://www.pixartprinting.co.uk/printing-magazines-books-catalogues/paperback-binding-corrugated-milled-and-glued/ PixArt Printing
  • 9. 2D Landscapes So I found this tutorial quite interesting as I never did something similar to it. It was quite amusing creating this 2D landscape using quite simples tools in Photoshop. I found this method quite similar to the rotoscoping that I used on my last project, however, in this case I’m using it to create a scenario whereas in the project I used to make an illustration of the character. Firstly, I created a new layer and for that I decided to use the A4 paper. I think it gives enough space and also it was the closest size from the tutorial. A thing that I found really important from this tutorial is that they gave me a lot of information of how to create certain things and some of them I didn’t even know about. Then using the lasso tool, I started to create the landscape using different shades of the colour that I started using which was a dark brown, to fill the space I used the Paint Bucket Tool. After creating all the landscape and the mountain, I used the Elliptical Marquee Tool instead of using the Ellipse Tool and also filled using the Paint Bucket. I also added some lights coming from the sun and hitting the mountain. To create the tree paint brush I created a new document using the size of 2500x2500 pixels, firstly I made a mistake in this part as I wasn’t sure if it was affect the process, I used the millimetres instead of pixels and the Photoshop wasn’t letting me define the image as brush. So I started the process of creating the tree brush again. Using the right document, I went to filter, render and then tree, there’s different types of tree in there that I wasn’t sure that we could do that in Photoshop. After that I changed the colour using hue/saturation and adjusted the lightness to dark to make it into a tree silhouette. Another thing that I learned from this tutorial was that I was able to edit the brush using F5 it gives me plenty of options to make the brush easy to use. So after changing the spacing and dynamic of the brush I added some trees in the illustration which gave it a better appearance in my opinion.
  • 10. After adding the trees around the landscape, I used a sample from a wolf silhouette exactly the same as showing in the tutorial. The only thing that he didn’t show was how to make it perfectly transparent so I did my best to take all the white bits from the image. Then I watched the same channel tutorial but how to make the clouds and since I never made anything like that I found it quite interesting and easy to create. I used the sample that he left in the video’s description then opened in photoshop and using again the lasso tool I selected only a part of the clouds that I would be making the brush later. I opened the channels and duplicated only the red channel to make it black and white as showing in the tutorial. To make it darker I opened the levels pressing CMD + L and then I transformed the background of the cloud even darker leaving only the cloud in white. I filled up the whole layer with black before making anything else. I found this next step quite tricking while watching the tutorial, so basically I selected back the RGB channel and pressing only CMD to select all the cloud. I went back to Layers and sing CMD + J and then CMD + I to invert the colours of the image. To create the brush I just did the same progress as before, ‘Edit’ and ‘Define Brush Preset’. Then I just added some of the clouds behind the mountain and between the landscape. I really liked how he explained how to make this illustration, I might watch some of his other videos to explore more the options that I have to use in my project. I also experimented changing the colours of it and it looked quite nice. I might use this method to make the page a bit more interesting for my target audience as they might be also appreciate illustrations. Nemanja Sekulic: https://www.youtube.com/watch?v=LBczOO5hOKc&t=1174s
  • 11.
  • 12. 2D to 3D The same channel from the last experiment also showed me how to transform my 2D sketch into a realistic 3D image called Matte Painting. Firstly, I thought that it would be easy and not too complicated but following the instructions it helped me gain more skills. To create the landscape I used the same images that he provided in his tutorial. Following the steps I started building up the landscape using the images and selecting only the parts that I would look better in that specific area. Then I cut it to make it in the shape of the area that I wanted. To make it looks more realistic I duplicated the layer that I was using and erased the parts that wasn’t matching with the part that I was working on. Using the images I was able to make this art, this for me was the most hardest part. In the tutorial he used CMD + clicking on the layer of the sketch to and then using that same layer he was able to erase the bits that he didn’t want. However, in mine I wasn’t able to do that so I just added the layers in the place that I wanted them to be and just deleted the parts to make it more 3D. It was worth the try making this experiment as I’ve never done anything like that and through this I was able to acknowledge new different skills while doing it. After this I added the trees using again the filter, render to create the redwood tree but instead of making a new tree every time, I used for the first time the Mixer Brush Tool, I didn’t know that it was possible to create a brush using this tool. A really important thing that I learned during this process was that the lighting matters a lot in this type of work, in this experiment I learned that to render the tree I can also change the lighting to make it more appealing to what I intend to create and it makes a huge difference in the image. Nemanja Sekulic: https://www.youtube.com/watch?v=Y9CnrPUEfK4&t=3005s
  • 13. For the mountain I had to find another image similar as the shape of mine was completely different from mine and also the file was smaller than mine work so it wouldn’t be in a good quality if I resized the image to make it bigger enough to cover my mountain. I added different parts of the image that I chose for this and with the parts I started to build up the mountain and make it bigger and more realistic using the same method that I used before. Then I added the wolf and I added some shadows to make it darker in some parts of his body. To finish off this part I added the background and hidden the moon using the Clone Stamp tool. Now, to add the moon was quite impressive as I would have make it in a totally different way. Using the Elliptical Marquee Tool I selected the moon and pasted in the art. Then I flipped it in horizontally and change it to screen blending mode. Then I changed the levels to make the circle disappear in the background. To finish off and give it a bit of shadow and light also known as dodge and burn I added two different shades of curves, a lighter and a darker one, inverted it to add only in some specific areas then using the brush tool I selected different places to add the lights and the shadows. In my opinion this made the whole difference in the image and I might use this in my final product.

Editor's Notes

  1. https://www.youtube.com/watch?v=LBczOO5hOKc https://www.youtube.com/watch?v=FIBXXglbYtQ