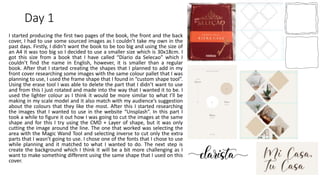
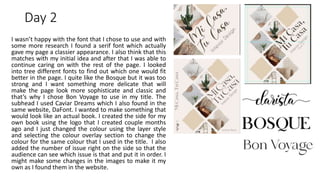
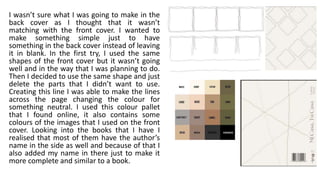
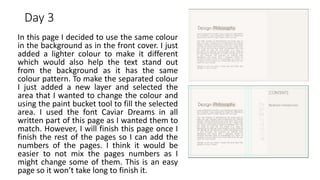
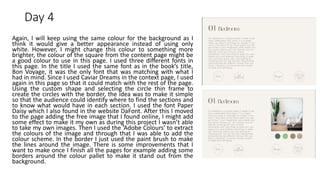
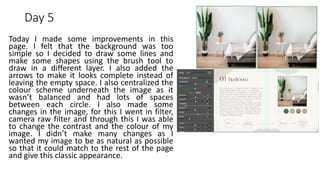
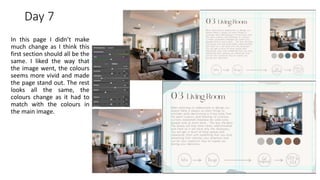
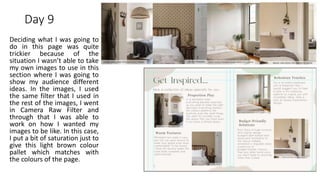
Daily Reflections
Leticia Lopes
Day 1
I started producing the first two pages of the book, the front and the back
cover, I had to use some sourced images as I couldn’t take my own in the
past days. Firstly, I didn’t want the book to be too big and using the size of
an A4 it was too big so I decided to use a smaller size which is 30x18cm. I
got this size from a book that I have called “Diario da Selecao” which I
couldn’t find the name in English, however, it is smaller than a regular
book. After that I started creating the shapes that I planned to add in my
front cover researching some images with the same colour pallet that I was
planning to use, I used the frame shape that I found in “custom shape tool”.
Using the erase tool I was able to delete the part that I didn’t want to use
and from this I just rotated and made into the way that I wanted it to be. I
used the lighter colour as I think it would be more similar to what I’ll be
making in my scale model and it also match with my audience’s suggestion
about the colours that they like the most. After this I started researching
the images that I wanted to use in the website “Unsplash”. In this part I
took a while to figure it out how I was going to cut the images at the same
shape and for this I try using the CMD + Layer of shape, but it was only
cutting the image around the line. The one that worked was selecting the
area with the Magic Wand Tool and selecting inverse to cut only the extra
parts that I wasn’t going to use. I chose one of the fonts that I chose to use
while planning and it matched to what I wanted to do. The next step is
create the background which I think it will be a bit more challenging as I
want to make something different using the same shape that I used on this
cover.
Day 2
I wasn’t happy with the font that I chose to use and with
some more research I found a serif font which actually
gave my page a classier appearance. I also think that this
matches with my initial idea and after that I was able to
continue caring on with the rest of the page. I looked
into tree different fonts to find out which one would fit
better in the page. I quite like the Bosque but it was too
strong and I want something more delicate that will
make the page look more sophisticate and classic and
that’s why I chose Bon Voyage to use in my title. The
subhead I used Caviar Dreams which I also found in the
same website, DaFont. I wanted to make something that
would look like an actual book. I created the side for my
own book using the logo that I created couple months
ago and I just changed the colour using the layer style
and selecting the colour overlay section to change the
colour for the same colour that I used in the title. I also
added the number of issue right on the side so that the
audience can see which issue is that and put it in order. I
might make some changes in the images to make it my
own as I found them in the website.
I wasn’t sure what I was going to make in the
back cover as I thought that it wasn’t
matching with the front cover. I wanted to
make something simple just to have
something in the back cover instead of leaving
it in blank. In the first try, I used the same
shapes of the front cover but it wasn’t going
well and in the way that I was planning to do.
Then I decided to use the same shape and just
delete the parts that I didn’t want to use.
Creating this line I was able to make the lines
across the page changing the colour for
something neutral. I used this colour pallet
that I found online, it also contains some
colours of the images that I used on the front
cover. Looking into the books that I have I
realised that most of them have the author’s
name in the side as well and because of that I
also added my name in there just to make it
more complete and similar to a book.
Day 3
In this page I decided to use the same colour
in the background as in the front cover. I just
added a lighter colour to make it different
which would also help the text stand out
from the background as it has the same
colour pattern. To make the separated colour
I just added a new layer and selected the
area that I wanted to change the colour and
using the paint bucket tool to fill the selected
area. I used the font Caviar Dreams in all
written part of this page as I wanted them to
match. However, I will finish this page once I
finish the rest of the pages so I can add the
numbers of the pages. I think it would be
easier to not mix the pages numbers as I
might change some of them. This is an easy
page so it won’t take long to finish it.
Day 4
Again, I will keep using the same colour for the background as I
think it would give a better appearance instead of using only
white. However, I might change this colour to something more
brighter, the colour of the square from the content page might be
a good colour to use in this page. I used three different fonts in
this page. In the title I used the same font as in the book’s title,
Bon Voyage, it was the only font that was matching with what I
had in mind. Since I used Caviar Dreams in the context page, I used
again in this page so that it could match with the rest of the page.
Using the custom shape and selecting the circle thin frame to
create the circles with the border, the idea was to make it simple
so that the audience could identify where to find the sections and
to know what would have in each section. I used the font Paper
Daisy which I also found in the website DaFont. After this I moved
to the page adding the free image that I found online, I might add
some effect to make it my own as during this project I wasn’t able
to take my own images. Then I used the ‘Adobe Colours’ to extract
the colours of the image and through that I was able to add the
colour scheme. In the border I just used the paint brush to make
the lines around the image. There is some improvements that I
want to make once I finish all the pages for example adding some
borders around the colour pallet to make it stand out from the
background.
Day 5
Today I made some improvements in this
page. I felt that the background was too
simple so I decided to draw some lines and
make some shapes using the brush tool to
draw in a different layer. I also added the
arrows to make it looks complete instead of
leaving the empty space. I also centralized the
colour scheme underneath the image as it
wasn’t balanced and had lots of spaces
between each circle. I also made some
changes in the image, for this I went in filter,
camera raw filter and through this I was able
to change the contrast and the colour of my
image. I didn’t make many changes as I
wanted my image to be as natural as possible
so that it could match to the rest of the page
and give this classic appearance.
Day 6
I basically did the same steps that I did
on the first page. I wanted this section
pages to be equal to each other so that
the audience could recognize the section
that they are in. The only important
thing that I changed in this page was the
colour scheme, I used the same colour of
the main image to draw the shapes
around the page which makes the page
looks complete. I really liked the way that
this page turned out, the colour makes
the page stand out and instead of using
the same colour pattern it looks
different.
Day 7
In this page I didn’t make
much change as I think this
first section should all be the
same. I liked the way that
the image went, the colours
seems more vivid and made
the page stand out. The rest
looks all the same, the
colours change as it had to
match with the colours in
the main image.
Day 8
I think that this is one of my
favourite pages. I really liked the
way that the colours are
together in this page. I kept the
same layout as the previous
pages because I wanted to make
this section all in a same
pattern.
Day 9
Deciding what I was going to
do in this page was quite
trickier because of the
situation I wasn’t able to take
my own images to use in this
section where I was going to
show my audience different
ideas. In the images, I used
the same filter that I used in
the rest of the images, I went
in Camera Raw Filter and
through that I was able to
work on how I wanted my
images to be like. In this case,
I put a bit of saturation just to
give this light brown colour
pallet which matches with
the colours of the page.
Day 10
In this page I wanted to make something
for the audience to express their
thoughts. To create this lines outside I
used the same shape that I used in the
front cover that I found in custom shape
tool and selected the frame 7. I did the
same method that I used in the front
cover to delete the second line of the
frame. Then I looked for a cactus
silhouette to add in the space so that it
could be different and catch the
audience’s attention. In this sections the
audience will be able to write on it and
play some interactive games such as word
hunt.
Day 11
In this page I used the same colours that
I used in the first pages of the bedroom
section. I wanted to add some
information about this specific items and
where the audience could find. I took
this idea from one of my audience that
left this suggestion on my survey
questionnaire. To drawn around the
page, I used again the brush tool which I
think is the easiest way to create those, I
also change the opacity making it more
light comparing to the original colour. I
also tried to change the colour of the
images to make it my own but I think
that it would change too much and it
wasn’t going to show the exactly colour
of the items. All images that I used in this
page are from The Range, the same
place where I got all the information.
Bibliography – Sourced Images
Front Cover:
• Alyssa Strohmann. Cacto and Interior Love. Available on Unsplash https://unsplash.com/@anotherlovely
• Element5 Digital. Stairs. Available: https://unsplash.com/photos/2cwqJgtQ3D0
• Samantha Gades. My Bedroom-Simplicity. Available: https://unsplash.com/photos/BlIhVfXbi9s
• Hutomo Abrianto. Corner. Available: https://unsplash.com/photos/l2jk-uxb1BY
• Katsia Jazwinska. Interior with sofa and wicker décor. Available: https://unsplash.com/photos/ejshExfNUbA
Pages:
• Minh Pham. Bedroom. Available: https://unsplash.com/photos/YAPZt8wxMO4

Daily Reflections

  • 1.
  • 2.
    Day 1 I startedproducing the first two pages of the book, the front and the back cover, I had to use some sourced images as I couldn’t take my own in the past days. Firstly, I didn’t want the book to be too big and using the size of an A4 it was too big so I decided to use a smaller size which is 30x18cm. I got this size from a book that I have called “Diario da Selecao” which I couldn’t find the name in English, however, it is smaller than a regular book. After that I started creating the shapes that I planned to add in my front cover researching some images with the same colour pallet that I was planning to use, I used the frame shape that I found in “custom shape tool”. Using the erase tool I was able to delete the part that I didn’t want to use and from this I just rotated and made into the way that I wanted it to be. I used the lighter colour as I think it would be more similar to what I’ll be making in my scale model and it also match with my audience’s suggestion about the colours that they like the most. After this I started researching the images that I wanted to use in the website “Unsplash”. In this part I took a while to figure it out how I was going to cut the images at the same shape and for this I try using the CMD + Layer of shape, but it was only cutting the image around the line. The one that worked was selecting the area with the Magic Wand Tool and selecting inverse to cut only the extra parts that I wasn’t going to use. I chose one of the fonts that I chose to use while planning and it matched to what I wanted to do. The next step is create the background which I think it will be a bit more challenging as I want to make something different using the same shape that I used on this cover.
  • 3.
    Day 2 I wasn’thappy with the font that I chose to use and with some more research I found a serif font which actually gave my page a classier appearance. I also think that this matches with my initial idea and after that I was able to continue caring on with the rest of the page. I looked into tree different fonts to find out which one would fit better in the page. I quite like the Bosque but it was too strong and I want something more delicate that will make the page look more sophisticate and classic and that’s why I chose Bon Voyage to use in my title. The subhead I used Caviar Dreams which I also found in the same website, DaFont. I wanted to make something that would look like an actual book. I created the side for my own book using the logo that I created couple months ago and I just changed the colour using the layer style and selecting the colour overlay section to change the colour for the same colour that I used in the title. I also added the number of issue right on the side so that the audience can see which issue is that and put it in order. I might make some changes in the images to make it my own as I found them in the website.
  • 4.
    I wasn’t surewhat I was going to make in the back cover as I thought that it wasn’t matching with the front cover. I wanted to make something simple just to have something in the back cover instead of leaving it in blank. In the first try, I used the same shapes of the front cover but it wasn’t going well and in the way that I was planning to do. Then I decided to use the same shape and just delete the parts that I didn’t want to use. Creating this line I was able to make the lines across the page changing the colour for something neutral. I used this colour pallet that I found online, it also contains some colours of the images that I used on the front cover. Looking into the books that I have I realised that most of them have the author’s name in the side as well and because of that I also added my name in there just to make it more complete and similar to a book.
  • 5.
    Day 3 In thispage I decided to use the same colour in the background as in the front cover. I just added a lighter colour to make it different which would also help the text stand out from the background as it has the same colour pattern. To make the separated colour I just added a new layer and selected the area that I wanted to change the colour and using the paint bucket tool to fill the selected area. I used the font Caviar Dreams in all written part of this page as I wanted them to match. However, I will finish this page once I finish the rest of the pages so I can add the numbers of the pages. I think it would be easier to not mix the pages numbers as I might change some of them. This is an easy page so it won’t take long to finish it.
  • 6.
    Day 4 Again, Iwill keep using the same colour for the background as I think it would give a better appearance instead of using only white. However, I might change this colour to something more brighter, the colour of the square from the content page might be a good colour to use in this page. I used three different fonts in this page. In the title I used the same font as in the book’s title, Bon Voyage, it was the only font that was matching with what I had in mind. Since I used Caviar Dreams in the context page, I used again in this page so that it could match with the rest of the page. Using the custom shape and selecting the circle thin frame to create the circles with the border, the idea was to make it simple so that the audience could identify where to find the sections and to know what would have in each section. I used the font Paper Daisy which I also found in the website DaFont. After this I moved to the page adding the free image that I found online, I might add some effect to make it my own as during this project I wasn’t able to take my own images. Then I used the ‘Adobe Colours’ to extract the colours of the image and through that I was able to add the colour scheme. In the border I just used the paint brush to make the lines around the image. There is some improvements that I want to make once I finish all the pages for example adding some borders around the colour pallet to make it stand out from the background.
  • 7.
    Day 5 Today Imade some improvements in this page. I felt that the background was too simple so I decided to draw some lines and make some shapes using the brush tool to draw in a different layer. I also added the arrows to make it looks complete instead of leaving the empty space. I also centralized the colour scheme underneath the image as it wasn’t balanced and had lots of spaces between each circle. I also made some changes in the image, for this I went in filter, camera raw filter and through this I was able to change the contrast and the colour of my image. I didn’t make many changes as I wanted my image to be as natural as possible so that it could match to the rest of the page and give this classic appearance.
  • 8.
    Day 6 I basicallydid the same steps that I did on the first page. I wanted this section pages to be equal to each other so that the audience could recognize the section that they are in. The only important thing that I changed in this page was the colour scheme, I used the same colour of the main image to draw the shapes around the page which makes the page looks complete. I really liked the way that this page turned out, the colour makes the page stand out and instead of using the same colour pattern it looks different.
  • 9.
    Day 7 In thispage I didn’t make much change as I think this first section should all be the same. I liked the way that the image went, the colours seems more vivid and made the page stand out. The rest looks all the same, the colours change as it had to match with the colours in the main image.
  • 10.
    Day 8 I thinkthat this is one of my favourite pages. I really liked the way that the colours are together in this page. I kept the same layout as the previous pages because I wanted to make this section all in a same pattern.
  • 11.
    Day 9 Deciding whatI was going to do in this page was quite trickier because of the situation I wasn’t able to take my own images to use in this section where I was going to show my audience different ideas. In the images, I used the same filter that I used in the rest of the images, I went in Camera Raw Filter and through that I was able to work on how I wanted my images to be like. In this case, I put a bit of saturation just to give this light brown colour pallet which matches with the colours of the page.
  • 12.
    Day 10 In thispage I wanted to make something for the audience to express their thoughts. To create this lines outside I used the same shape that I used in the front cover that I found in custom shape tool and selected the frame 7. I did the same method that I used in the front cover to delete the second line of the frame. Then I looked for a cactus silhouette to add in the space so that it could be different and catch the audience’s attention. In this sections the audience will be able to write on it and play some interactive games such as word hunt.
  • 13.
    Day 11 In thispage I used the same colours that I used in the first pages of the bedroom section. I wanted to add some information about this specific items and where the audience could find. I took this idea from one of my audience that left this suggestion on my survey questionnaire. To drawn around the page, I used again the brush tool which I think is the easiest way to create those, I also change the opacity making it more light comparing to the original colour. I also tried to change the colour of the images to make it my own but I think that it would change too much and it wasn’t going to show the exactly colour of the items. All images that I used in this page are from The Range, the same place where I got all the information.
  • 14.
    Bibliography – SourcedImages Front Cover: • Alyssa Strohmann. Cacto and Interior Love. Available on Unsplash https://unsplash.com/@anotherlovely • Element5 Digital. Stairs. Available: https://unsplash.com/photos/2cwqJgtQ3D0 • Samantha Gades. My Bedroom-Simplicity. Available: https://unsplash.com/photos/BlIhVfXbi9s • Hutomo Abrianto. Corner. Available: https://unsplash.com/photos/l2jk-uxb1BY • Katsia Jazwinska. Interior with sofa and wicker décor. Available: https://unsplash.com/photos/ejshExfNUbA Pages: • Minh Pham. Bedroom. Available: https://unsplash.com/photos/YAPZt8wxMO4