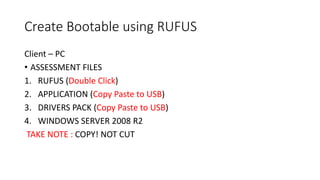
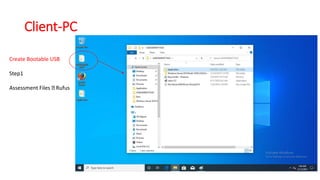
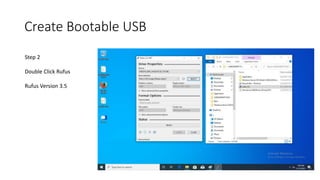
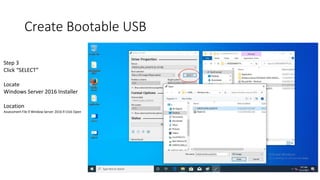
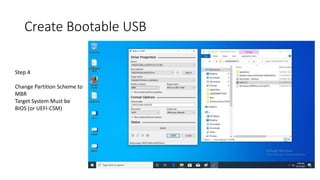
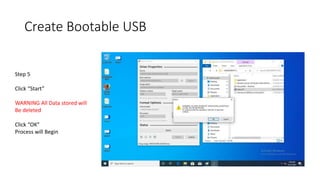
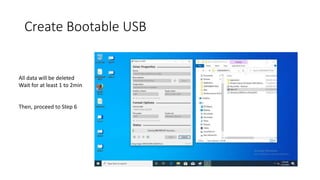
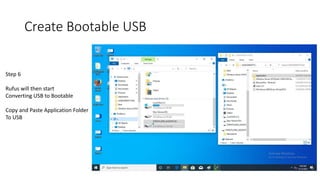
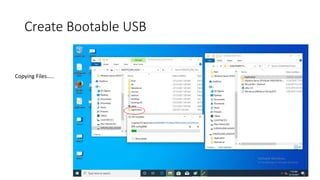
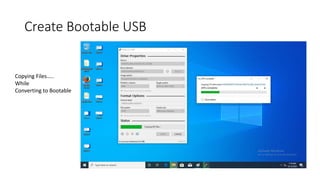
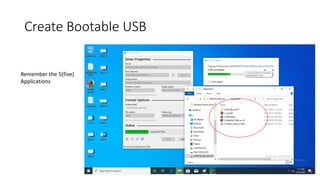
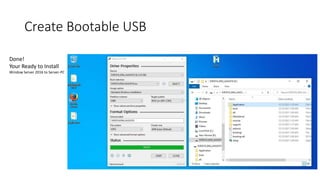
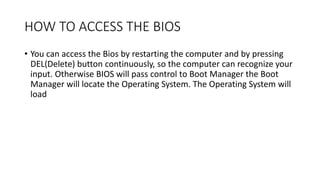
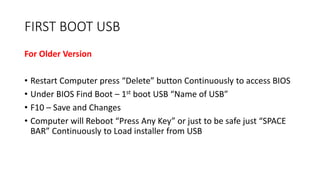
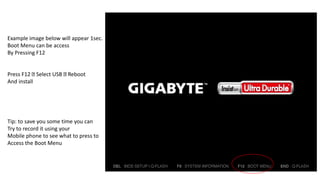
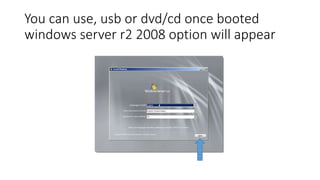
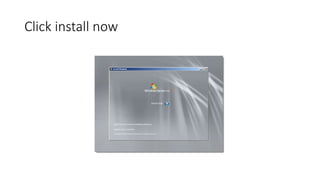
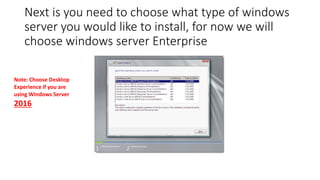
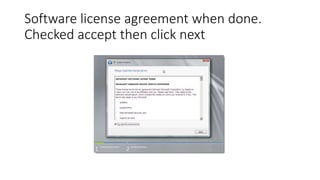
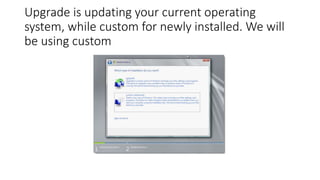
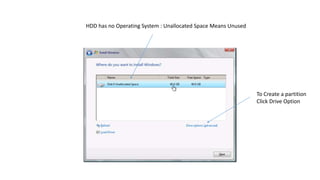
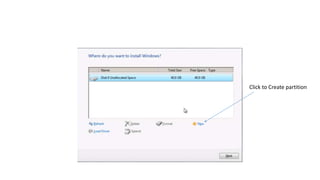
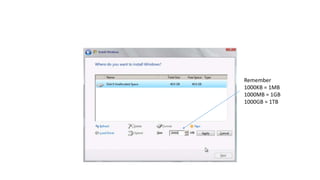
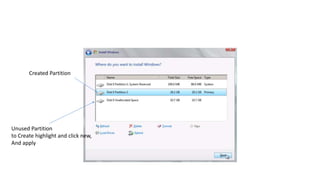
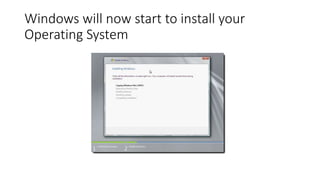
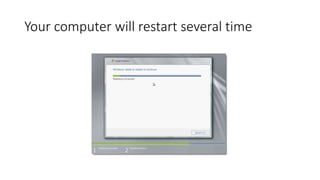
Bootable USB
Create Bootable using RUFUS
Client – PC
• ASSESSMENT FILES
1. RUFUS (Double Click)
2. APPLICATION (Copy Paste to USB)
3. DRIVERS PACK (Copy Paste to USB)
4. WINDOWS SERVER 2008 R2
TAKE NOTE : COPY! NOT CUT
Client-PC
Create Bootable USB
Step1
Assessment Files Rufus
Create Bootable USB
Step 2
Double Click Rufus
Rufus Version 3.5
Create Bootable USB
Step 3
Click “SELECT”
Locate
Windows Server 2016 Installer
Location
Assessment File Window Server 2016 Click Open
Create Bootable USB
Step 4
Change Partition Scheme to
MBR
Target System Must be
BIOS (or UEFI-CSM)
Create Bootable USB
Step 5
Click “Start”
WARNING All Data stored will
Be deleted
Click “OK”
Process will Begin
Create Bootable USB
All data will be deleted
Wait for at least 1 to 2min
Then, proceed to Step 6
Create Bootable USB
Step 6
Rufus will then start
Converting USB to Bootable
Copy and Paste Application Folder
To USB
Create Bootable USB
Copying Files…..
Create Bootable USB
Copying Files…..
While
Converting to Bootable
Create Bootable USB
Remember the 5(five)
Applications
Create Bootable USB
Done!
Your Ready to Install
Window Server 2016 to Server-PC
HOW TO ACCESS THE BIOS
• You can access the Bios by restarting the computer and by pressing
DEL(Delete) button continuously, so the computer can recognize your
input. Otherwise BIOS will pass control to Boot Manager the Boot
Manager will locate the Operating System. The Operating System will
load
FIRST BOOT USB
For Older Version
• Restart Computer press “Delete” button Continuously to access BIOS
• Under BIOS Find Boot – 1st boot USB “Name of USB”
• F10 – Save and Changes
• Computer will Reboot “Press Any Key” or just to be safe just “SPACE
BAR” Continuously to Load installer from USB
Example image below will appear 1sec.
Boot Menu can be access
By Pressing F12
Press F12 Select USB Reboot
And install
Tip: to save you some time you can
Try to record it using your
Mobile phone to see what to press to
Access the Boot Menu
Window Server R2 2008
Installation Guide
You can use, usb or dvd/cd once booted
windows server r2 2008 option will appear
Click install now
Just wait a little for setup to start
Next is you need to choose what type of windows
server you would like to install, for now we will
choose windows server Enterprise
Note: Choose Desktop
Experience if you are
using Windows Server
2016
Software license agreement when done.
Checked accept then click next
Upgrade is updating your current operating
system, while custom for newly installed. We will
be using custom
Here is an example of our HDD total size and the available disk space. To create a
partition click on Drive option the following will appear : Delete, Extend , Format
and new. Click new to create a new partition and decide how large is that
partition, Click next when done!
HDD has no Operating System : Unallocated Space Means Unused
To Create a partition
Click Drive Option
Click to Create partition
Remember
1000KB = 1MB
1000MB = 1GB
1000GB = 1TB
Created Partition
Unused Partition
to Create highlight and click new,
And apply
Windows will now start to install your
Operating System
Wait until the installation process is done.
While waiting prepare your cat5 cable for network
connections.
Your computer will restart several time
Once finish, windows will restart..
Finally windows operating system is booting
Windows server will require an
authentication every time you log in, click OK.
Type your Password use a combination of upper
case and lowercase and some special character.
CSS PASSWORD IS :
p@$$w0rd
Congratulation you have installed your first
windows server 2008 R2
Coc1 Done!

Bootable-USB.pptx