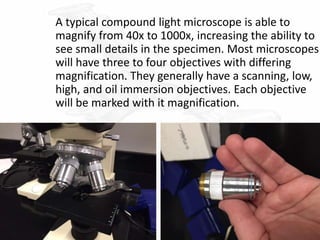
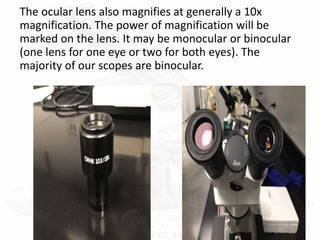
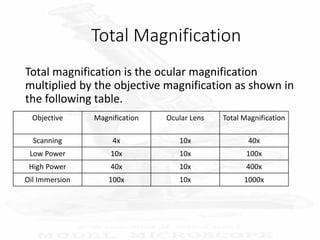
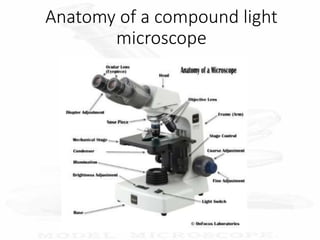
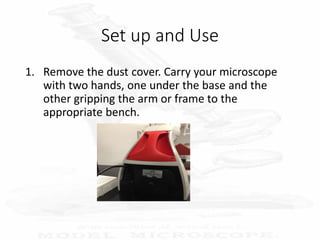
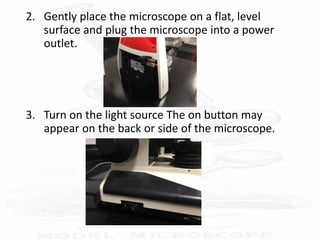
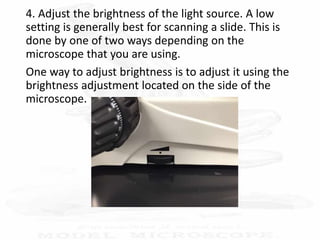
Use and Care of a
Compound Light
Microscope
Animal and Food Science Department
Brigham Young University Idaho
Introduction:
A microscope is a tool that allows us to view things
that are to small to see with the naked eye. The most
common microscope is the compound light
microscope.
It uses a system of two or more lens to collect and
focus the transmitted visible light through the
specimen to the eye. Often this is referred to as
bright field microscopy. Animal cells, plant cells,
bacteria and protozoa can be easily seen using this
type of microscope.
A typical compound light microscope is able to
magnify from 40x to 1000x, increasing the ability to
see small details in the specimen. Most microscopes
will have three to four objectives with differing
magnification. They generally have a scanning, low,
high, and oil immersion objectives. Each objective
will be marked with it magnification.
The ocular lens also magnifies at generally a 10x
magnification. The power of magnification will be
marked on the lens. It may be monocular or binocular
(one lens for one eye or two for both eyes). The
majority of our scopes are binocular.
Total Magnification
Total magnification is the ocular magnification
multiplied by the objective magnification as shown in
the following table.
Objective Magnification Ocular Lens Total Magnification
Scanning 4x 10x 40x
Low Power 10x 10x 100x
High Power 40x 10x 400x
Oil Immersion 100x 10x 1000x
Anatomy of a compound light
microscope
Set up and Use
1. Remove the dust cover. Carry your microscope
with two hands, one under the base and the
other gripping the arm or frame to the
appropriate bench.
2. Gently place the microscope on a flat, level
surface and plug the microscope into a power
outlet.
3. Turn on the light source The on button may
appear on the back or side of the microscope.
4. Adjust the brightness of the light source. A low
setting is generally best for scanning a slide. This is
done by one of two ways depending on the
microscope that you are using.
One way to adjust brightness is to adjust it using the
brightness adjustment located on the side of the
microscope.
This model generally also has an adjustable
condenser. It is generally marked for the individual
objectives. Set the condenser accordingly.
On older microscopes the brightness is adjusted by
turning the Illumination Ring on top of the light source.
By turning the ring you can decrease the amount of
light or increase the amount of light being shown
through the sample
5. Adjust the stage as low as possible with
the coarse focus knob. It is the outer or
larger knob.
6. Rotate the nose of the microscope so that
the lowest objective is in line with the light
source.
7. Place a slide on the stage holding it with the slide
clip. If a slide has a coverslip –it should always face
up.
8. Once your slide is correctly seated, look through
the ocular lens, adjust your brightness and using the
coarse adjustment knob (outer knob) bring the stage
up towards the objective, stopping when the slide
image comes into view. The slide should never be
pushed all the way up to the objective.
9. Once the image if seen use the fine focus
adjustment knob (inner knob) to sharpen in on the
details of the structure. After this point you will only
use the fine focus on the slide. All coarse adjustments
have been made.
With the scanning or lowest objective in use- you
may scan across the slide by moving the stage from
right to left and left to right. This is done using the
stage knobs found just below the stage of the
microscope.
As you scan across the slide you may need to use the
fine focus (inner knob) to sharpen the image. Once
you decide on an area of the slide you may want to
look at a higher magnification of the area.
This is done by rotating the nose of the microscope to
the next objective. On our microscopes that is a 10X
objective. Once the object has been rotated and
locked into place and you have made your light
adjustments (generally brighter); look through the
eyepiece and using only the fine adjustment knob
sharpen the image.
If the magnification still does not give the detail that
you need the nose of the microscope may be rotated
again to lock in the third objective which in our case
is a 40X. Again brightness may need adjusted and the
fine focus is used to focus and sharpen the image.
To view significantly small structures the oil
immersion objective (100x) may need to be used.
This is used by rotating the nose of the microscope to
between the third objective and the oil immersion
objective. At this point a small drop of oil is placed on
the slide and then the oil immersion objective is
rotated in passing through the oil on the slide.
Immersion oil should only be used with the oil
immersion objective. Once oil is used the slide must
be properly cleaned prior to viewing it with any of
the other objectives on the microscope. An increase
in light will be needed and only the fine focus
adjustment should be used to focus the image.
DO NOT under any circumstance use the coarse
adjustment as you will crush the slide into the
objective and potentially damage the objective and
the slide.
If you get oil on the other objectives notify the laboratory
manager as soon as possible so that the objectives can be
removed and properly cleaned. If the oil is allowed to dry
on the objective it will not come off and all images
viewed thereafter will have a haze and not focus
correctly.
10. When finished viewing your image- use the coarse
adjustment knob to lower (go away from) the objectives
of the microscope. Rotate the nose of the microscope to
the scanning or 4x objective. If oil has been used, use lens
tissue and cleaner to remove the oil from the slide,
objective, and stage.
11. Turn off the light and unplug the microscope. Cover
the microscope with a dust cover.
12. Return the microscope to the shelf.
13. If you encounter any issues tell or ask your lab
assistant, instructor or laboratory manager.

microscope introduction.pptx

  • 1.
    Use and Careof a Compound Light Microscope Animal and Food Science Department Brigham Young University Idaho
  • 2.
    Introduction: A microscope isa tool that allows us to view things that are to small to see with the naked eye. The most common microscope is the compound light microscope. It uses a system of two or more lens to collect and focus the transmitted visible light through the specimen to the eye. Often this is referred to as bright field microscopy. Animal cells, plant cells, bacteria and protozoa can be easily seen using this type of microscope.
  • 3.
    A typical compoundlight microscope is able to magnify from 40x to 1000x, increasing the ability to see small details in the specimen. Most microscopes will have three to four objectives with differing magnification. They generally have a scanning, low, high, and oil immersion objectives. Each objective will be marked with it magnification.
  • 4.
    The ocular lensalso magnifies at generally a 10x magnification. The power of magnification will be marked on the lens. It may be monocular or binocular (one lens for one eye or two for both eyes). The majority of our scopes are binocular.
  • 5.
    Total Magnification Total magnificationis the ocular magnification multiplied by the objective magnification as shown in the following table. Objective Magnification Ocular Lens Total Magnification Scanning 4x 10x 40x Low Power 10x 10x 100x High Power 40x 10x 400x Oil Immersion 100x 10x 1000x
  • 6.
    Anatomy of acompound light microscope
  • 7.
    Set up andUse 1. Remove the dust cover. Carry your microscope with two hands, one under the base and the other gripping the arm or frame to the appropriate bench.
  • 8.
    2. Gently placethe microscope on a flat, level surface and plug the microscope into a power outlet. 3. Turn on the light source The on button may appear on the back or side of the microscope.
  • 9.
    4. Adjust thebrightness of the light source. A low setting is generally best for scanning a slide. This is done by one of two ways depending on the microscope that you are using. One way to adjust brightness is to adjust it using the brightness adjustment located on the side of the microscope.
  • 10.
    This model generallyalso has an adjustable condenser. It is generally marked for the individual objectives. Set the condenser accordingly.
  • 11.
    On older microscopesthe brightness is adjusted by turning the Illumination Ring on top of the light source. By turning the ring you can decrease the amount of light or increase the amount of light being shown through the sample
  • 12.
    5. Adjust thestage as low as possible with the coarse focus knob. It is the outer or larger knob. 6. Rotate the nose of the microscope so that the lowest objective is in line with the light source.
  • 13.
    7. Place aslide on the stage holding it with the slide clip. If a slide has a coverslip –it should always face up.
  • 14.
    8. Once yourslide is correctly seated, look through the ocular lens, adjust your brightness and using the coarse adjustment knob (outer knob) bring the stage up towards the objective, stopping when the slide image comes into view. The slide should never be pushed all the way up to the objective.
  • 15.
    9. Once theimage if seen use the fine focus adjustment knob (inner knob) to sharpen in on the details of the structure. After this point you will only use the fine focus on the slide. All coarse adjustments have been made.
  • 16.
    With the scanningor lowest objective in use- you may scan across the slide by moving the stage from right to left and left to right. This is done using the stage knobs found just below the stage of the microscope.
  • 17.
    As you scanacross the slide you may need to use the fine focus (inner knob) to sharpen the image. Once you decide on an area of the slide you may want to look at a higher magnification of the area. This is done by rotating the nose of the microscope to the next objective. On our microscopes that is a 10X objective. Once the object has been rotated and locked into place and you have made your light adjustments (generally brighter); look through the eyepiece and using only the fine adjustment knob sharpen the image.
  • 18.
    If the magnificationstill does not give the detail that you need the nose of the microscope may be rotated again to lock in the third objective which in our case is a 40X. Again brightness may need adjusted and the fine focus is used to focus and sharpen the image.
  • 19.
    To view significantlysmall structures the oil immersion objective (100x) may need to be used. This is used by rotating the nose of the microscope to between the third objective and the oil immersion objective. At this point a small drop of oil is placed on the slide and then the oil immersion objective is rotated in passing through the oil on the slide.
  • 20.
    Immersion oil shouldonly be used with the oil immersion objective. Once oil is used the slide must be properly cleaned prior to viewing it with any of the other objectives on the microscope. An increase in light will be needed and only the fine focus adjustment should be used to focus the image. DO NOT under any circumstance use the coarse adjustment as you will crush the slide into the objective and potentially damage the objective and the slide.
  • 21.
    If you getoil on the other objectives notify the laboratory manager as soon as possible so that the objectives can be removed and properly cleaned. If the oil is allowed to dry on the objective it will not come off and all images viewed thereafter will have a haze and not focus correctly. 10. When finished viewing your image- use the coarse adjustment knob to lower (go away from) the objectives of the microscope. Rotate the nose of the microscope to the scanning or 4x objective. If oil has been used, use lens tissue and cleaner to remove the oil from the slide, objective, and stage. 11. Turn off the light and unplug the microscope. Cover the microscope with a dust cover. 12. Return the microscope to the shelf. 13. If you encounter any issues tell or ask your lab assistant, instructor or laboratory manager.