Download to read offline


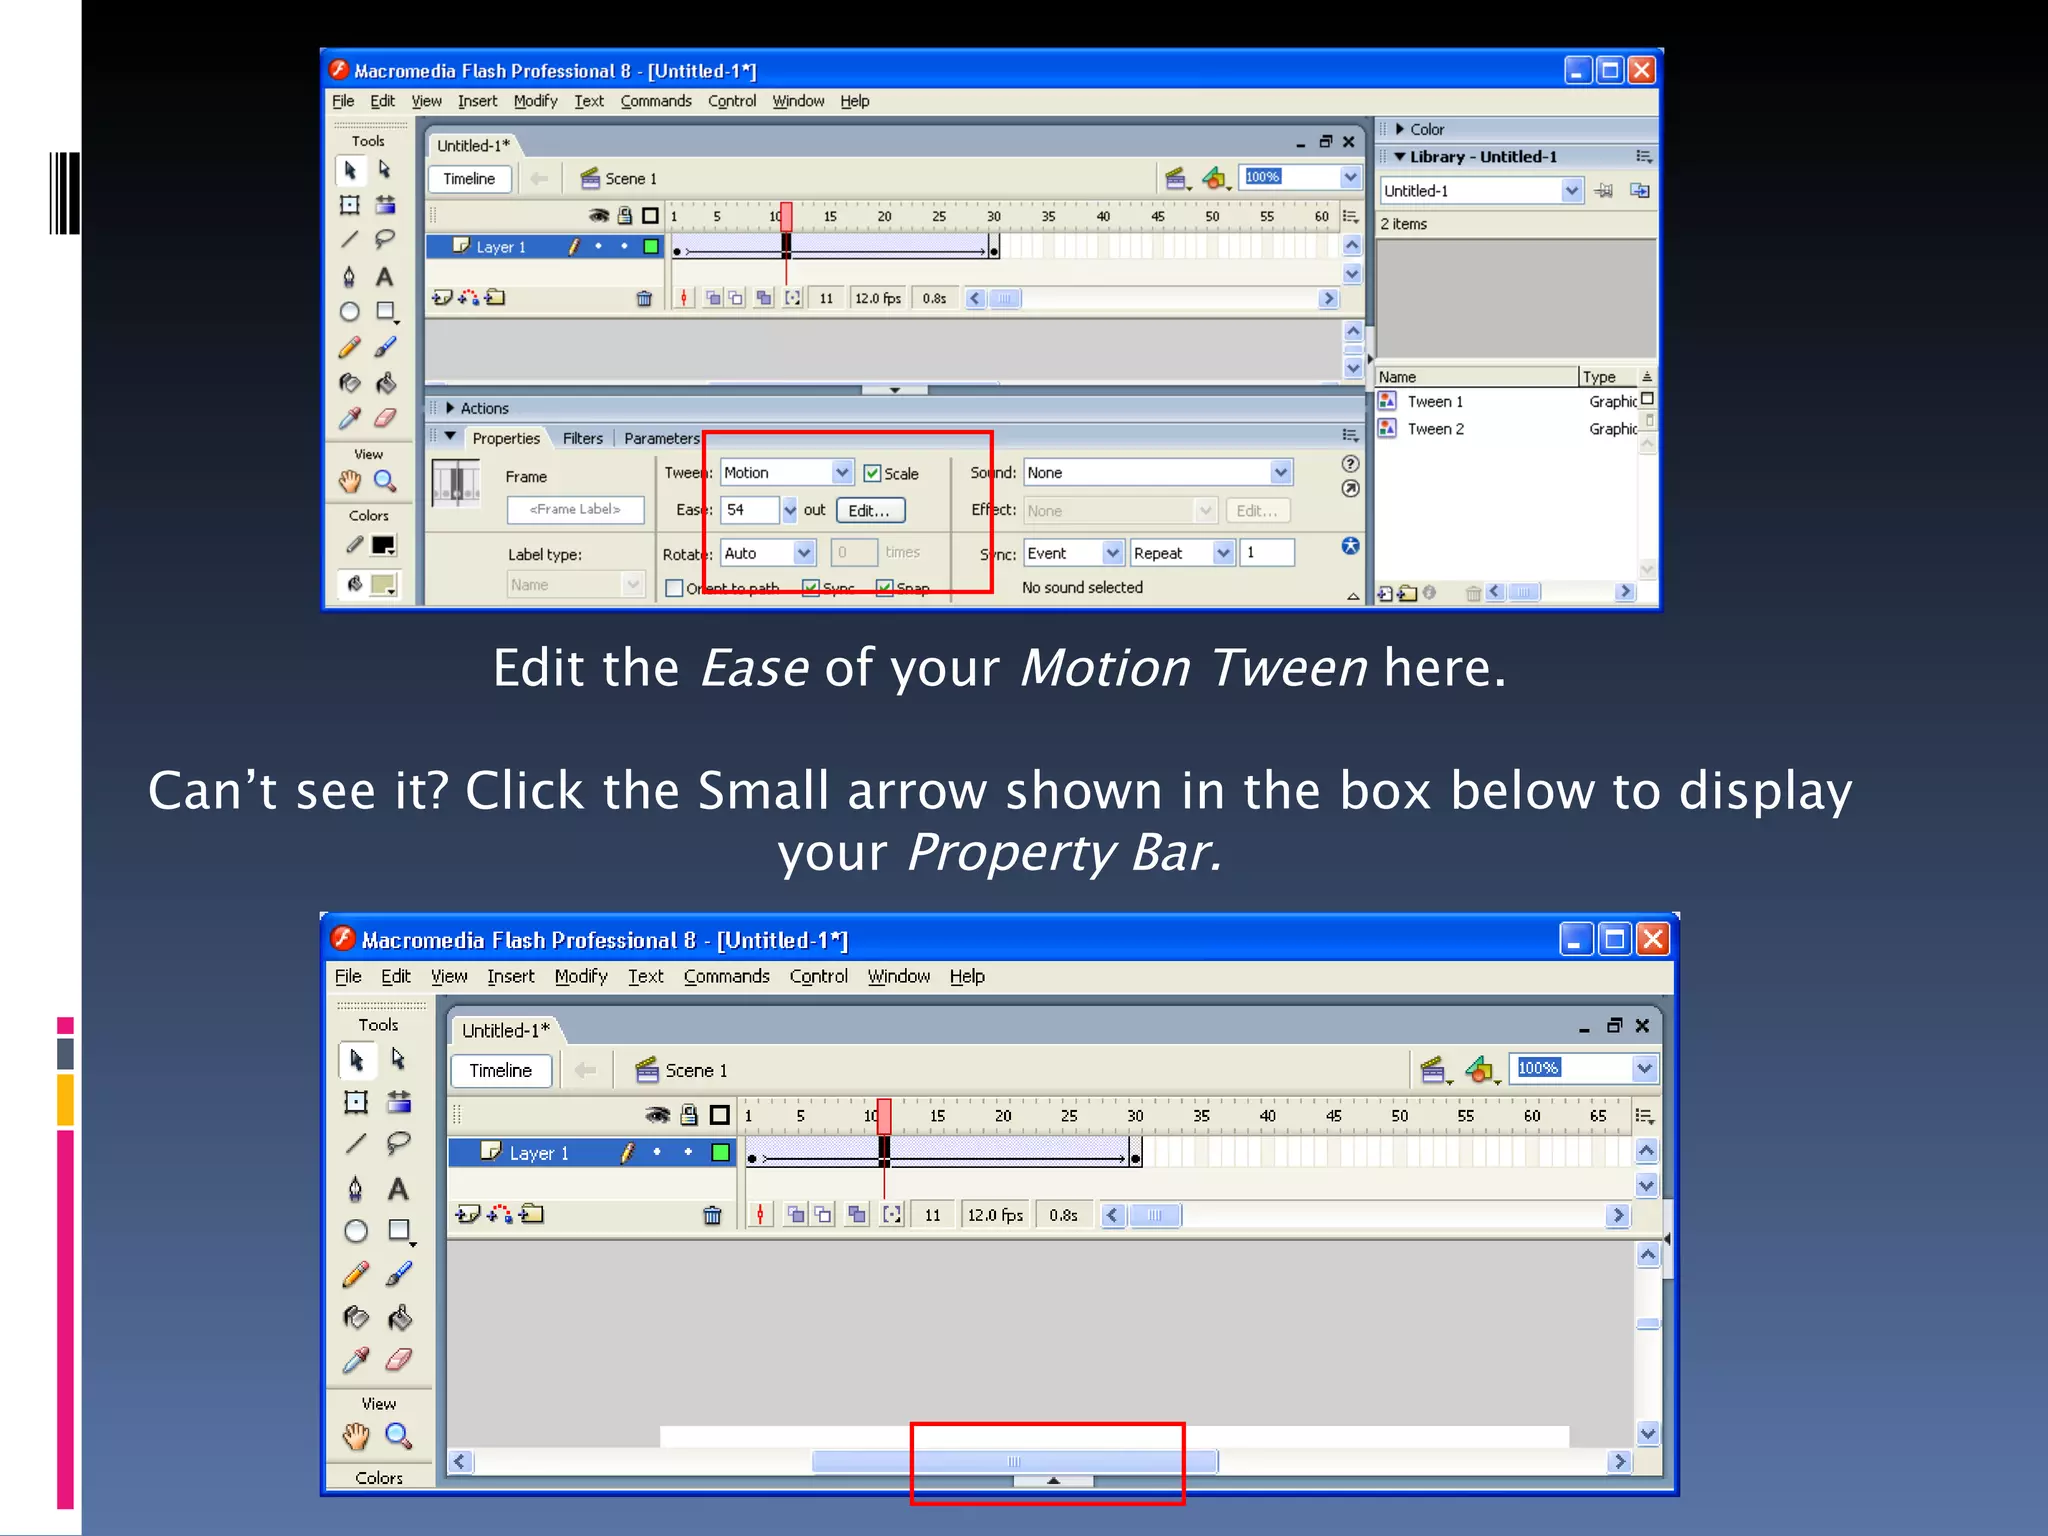
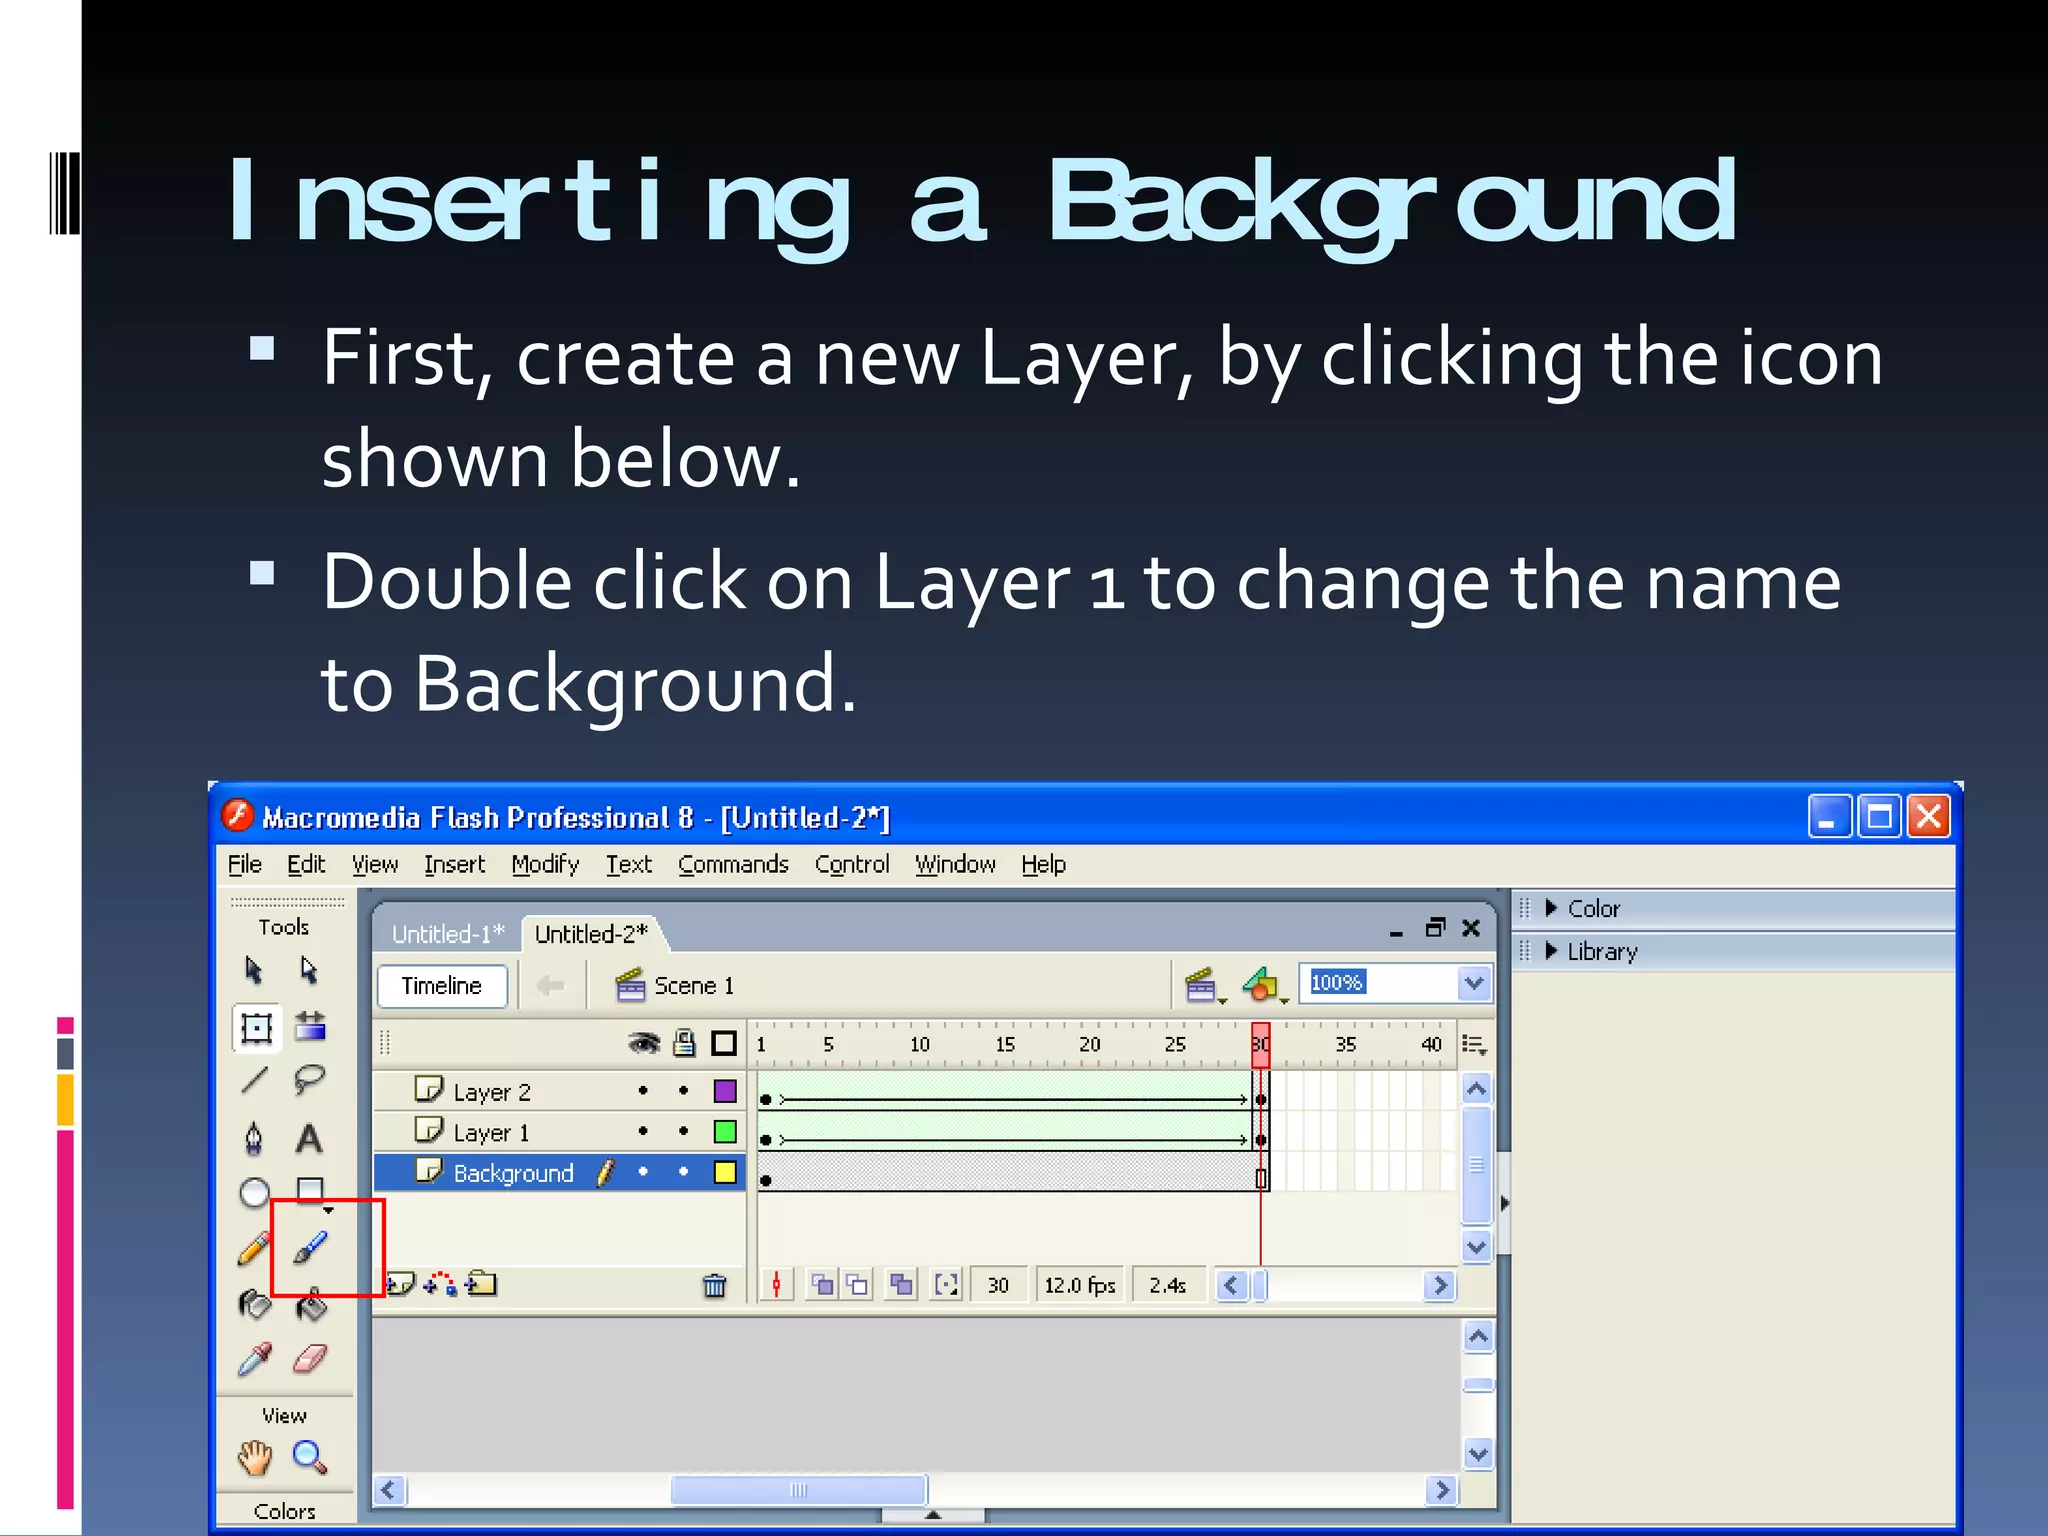
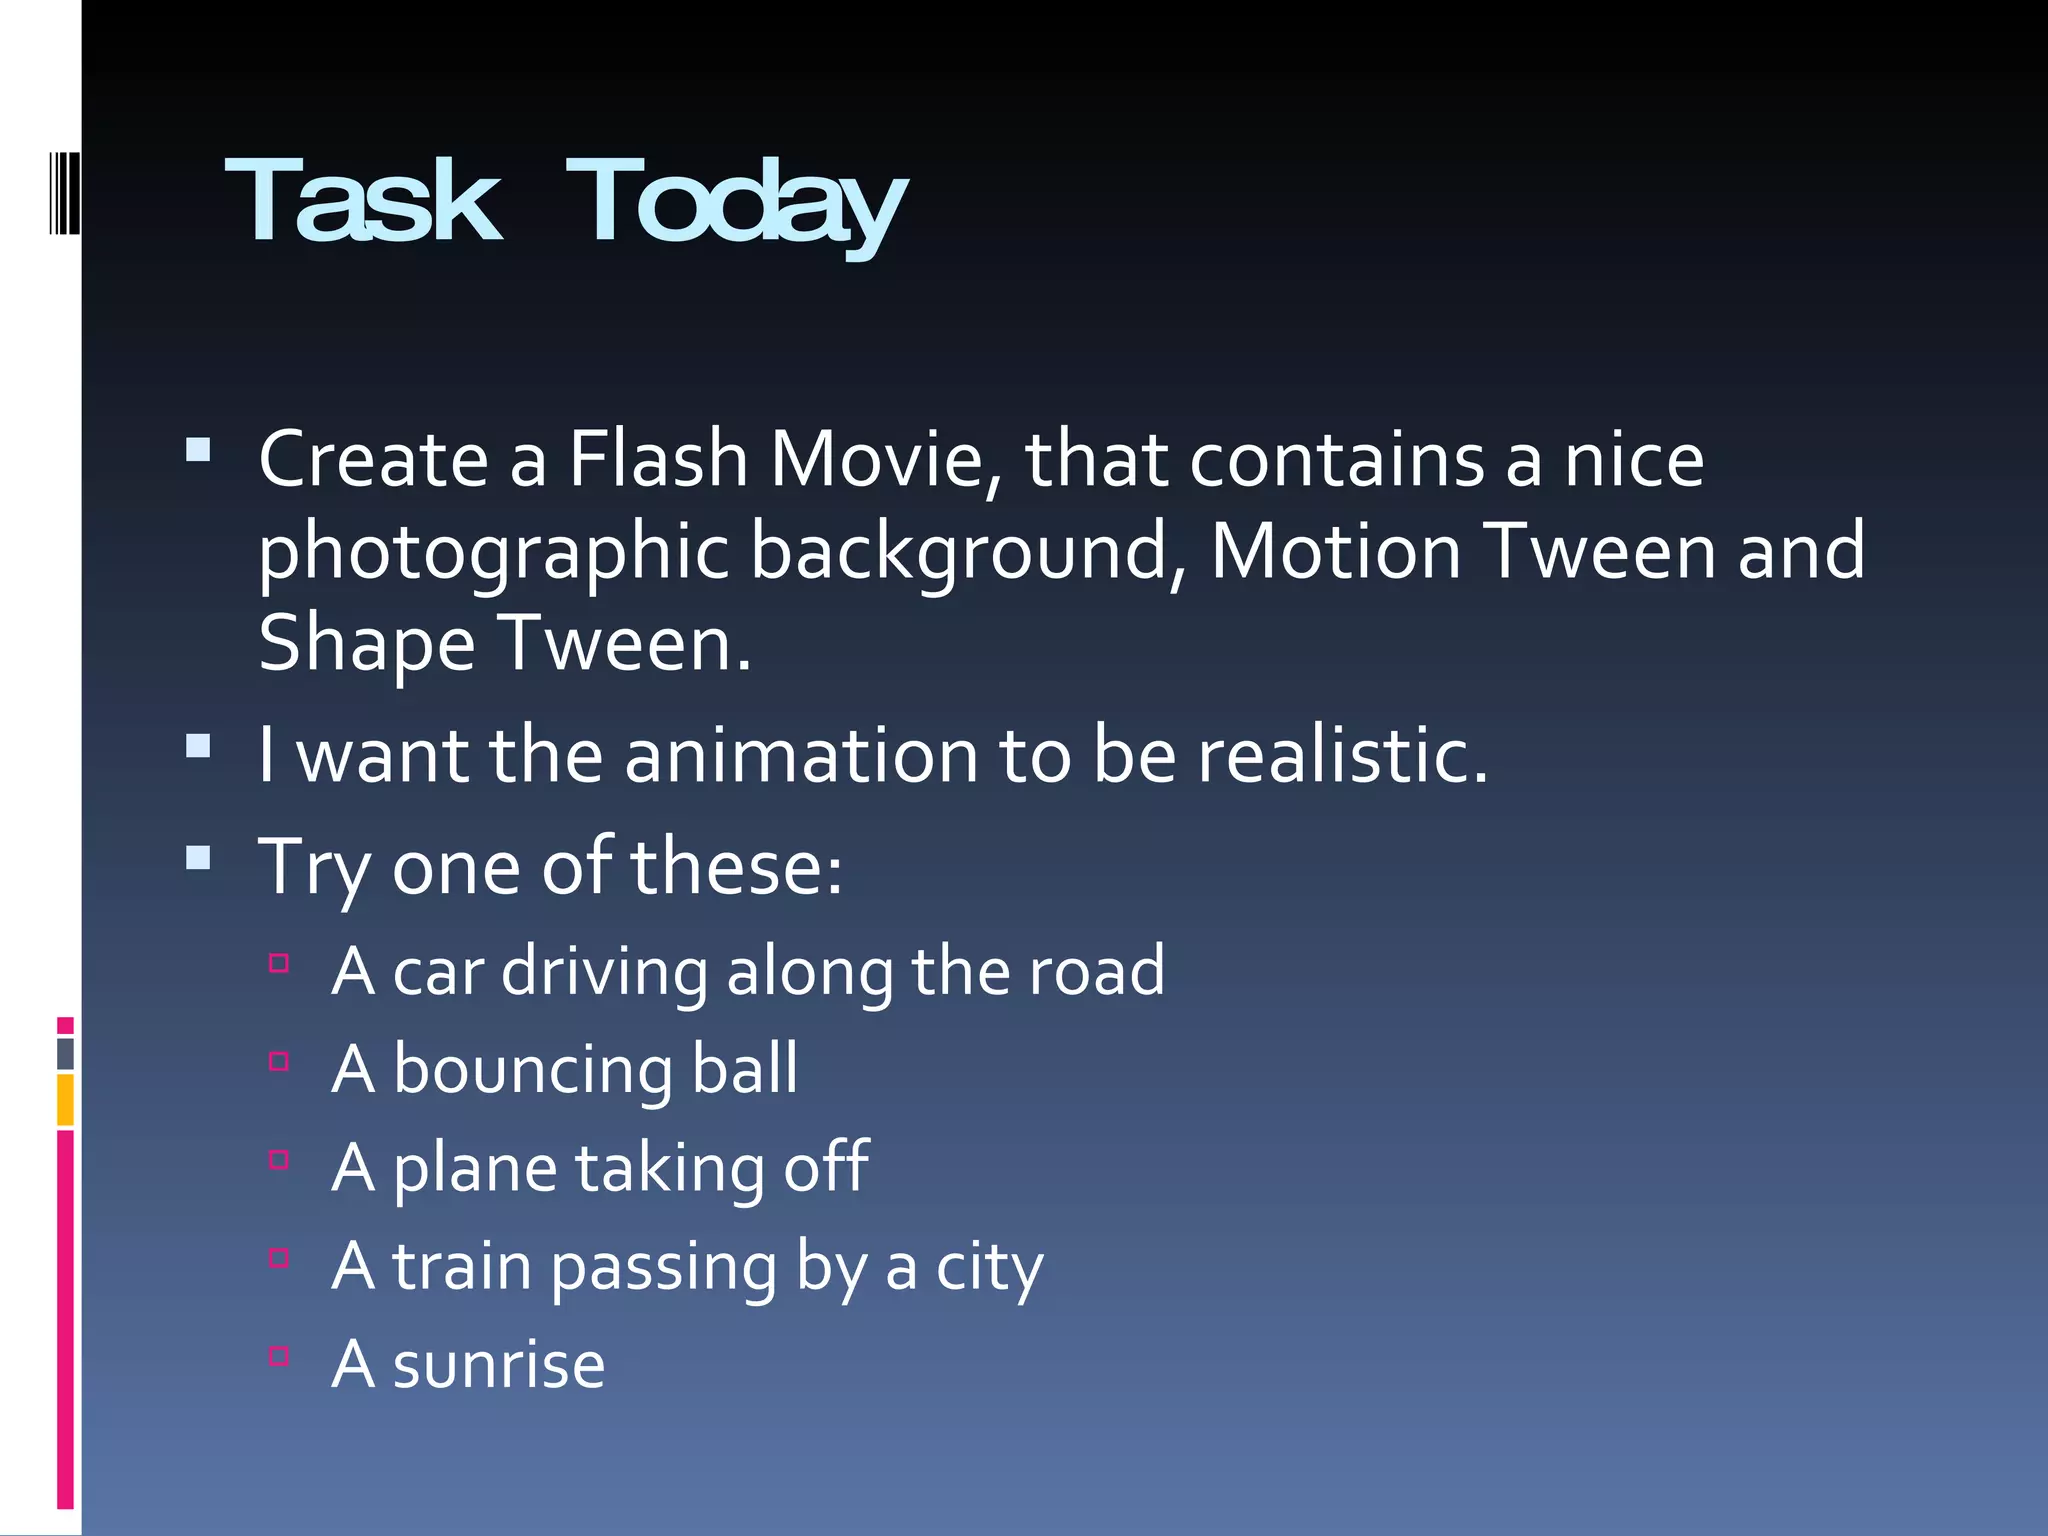
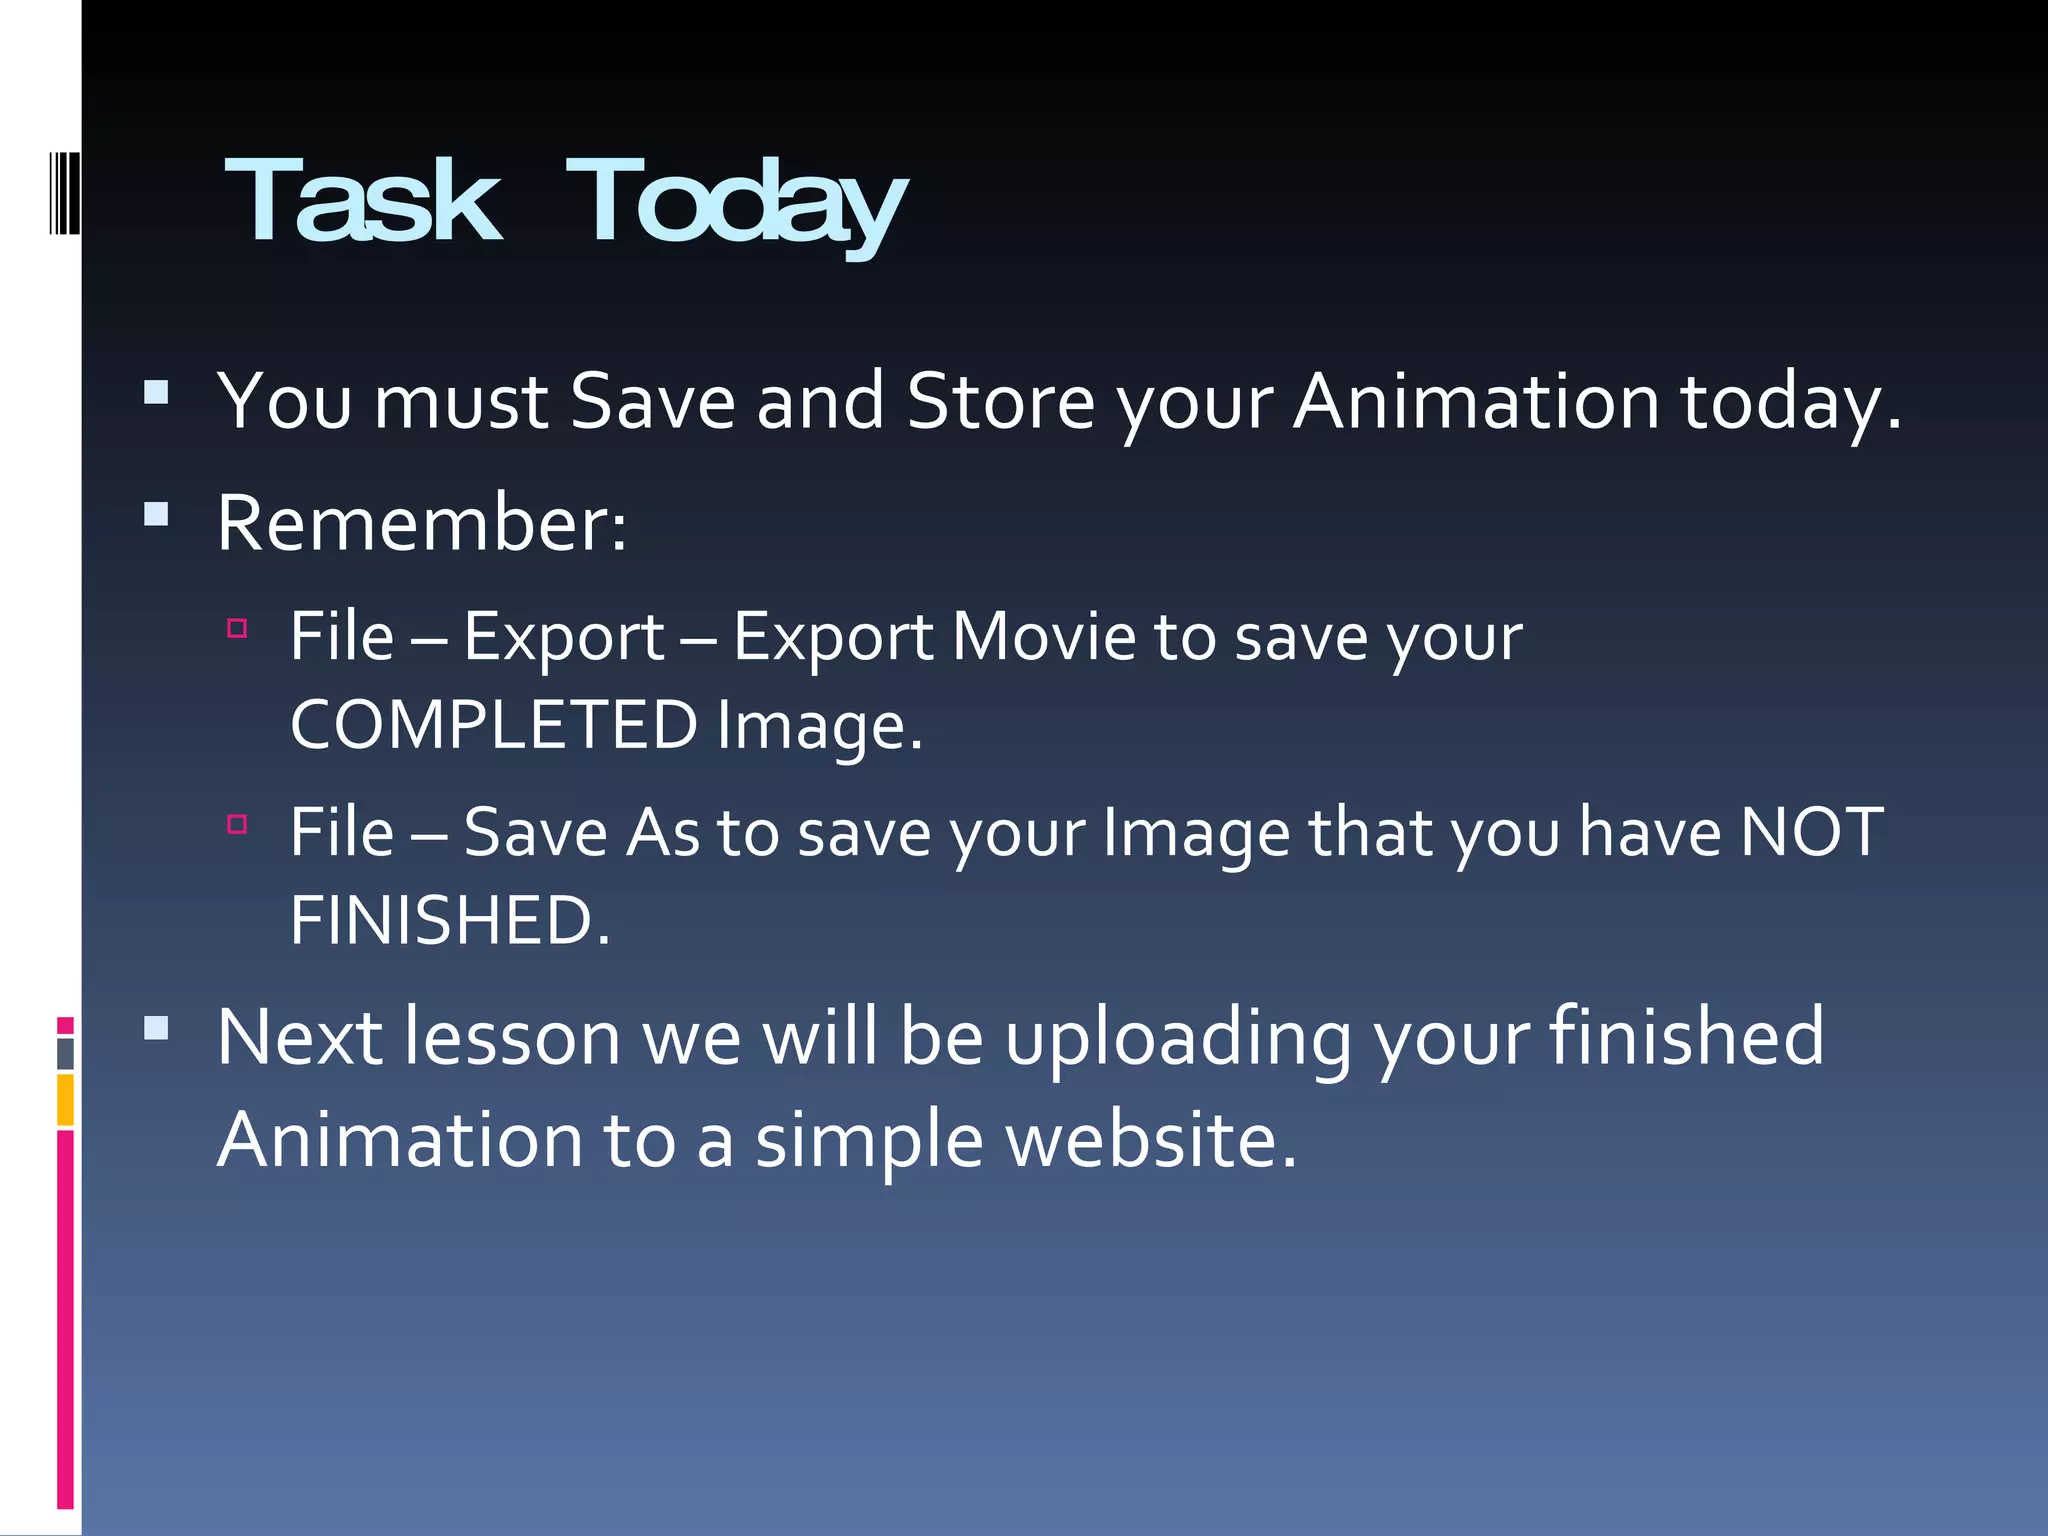

The document discusses different types of tweens that can be used to create animations in Flash, including motion tweens and shape tweens. It provides instructions for creating basic motion tweens by moving an object between keyframes, and shape tweens by transforming one object into another between keyframes. Tips are also included, such as using easing to accelerate or decelerate motion, and breaking apart text/images before applying shape tweens. The document concludes by assigning a task to create an animation using these tweens and techniques.


