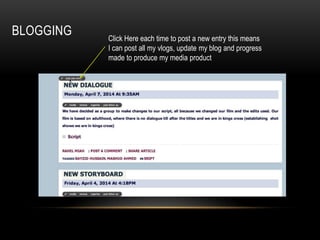
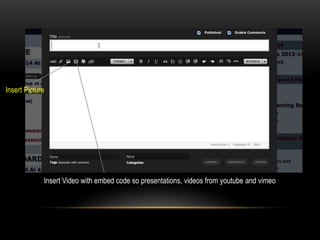
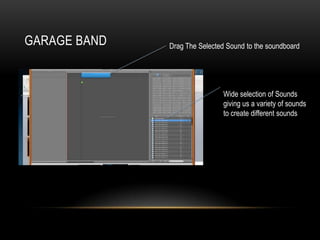
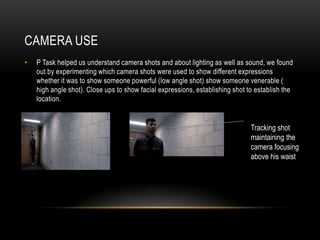
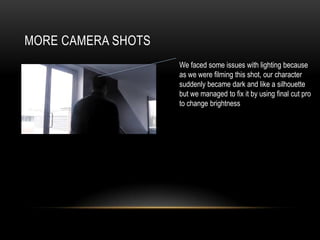
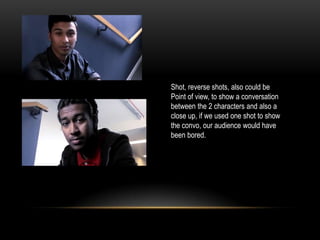
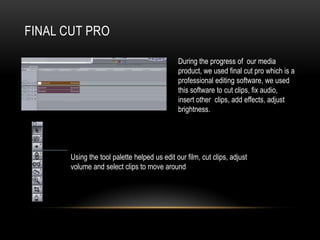
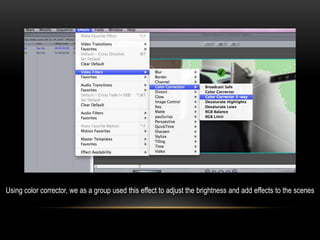
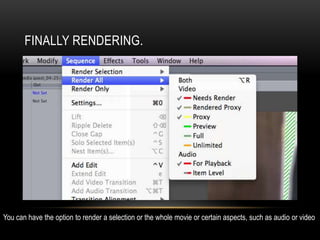
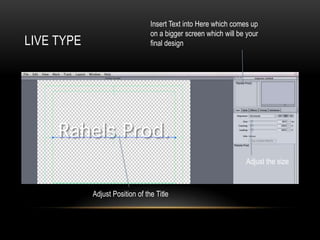
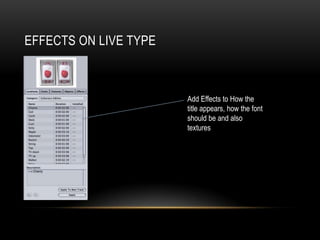
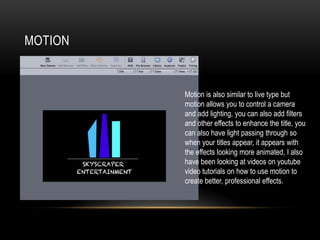
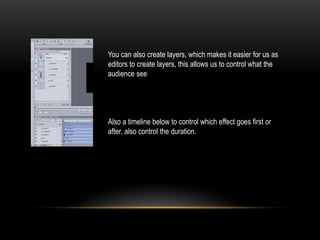
TECHNOLOGY USED
BLOGGING Click Here each time to post a new entry this means
I can post all my vlogs, update my blog and progress
made to produce my media product
Insert Picture
Insert Video with embed code so presentations, videos from youtube and vimeo
After copying the code into
the box, save and close to
clarify that the video is up.
After Click SAVE AND CLOSE and your
video will be published onto your blog
GARAGE BAND Drag The Selected Sound to the soundboard
Wide selection of Sounds
giving us a variety of sounds
to create different sounds
Drag More Underneath to create layers
which make it fine for you to create fades
CAMERA USE
• P Task helped us understand camera shots and about lighting as well as sound, we found
out by experimenting which camera shots were used to show different expressions
whether it was to show someone powerful (low angle shot) show someone venerable (
high angle shot). Close ups to show facial expressions, establishing shot to establish the
location.
Tracking shot
maintaining the
camera focusing
above his waist
MORE CAMERA SHOTS
We faced some issues with lighting because
as we were filming this shot, our character
suddenly became dark and like a silhouette
but we managed to fix it by using final cut pro
to change brightness
Shot, reverse shots, also could be
Point of view, to show a conversation
between the 2 characters and also a
close up, if we used one shot to show
the convo, our audience would have
been bored.
FINAL CUT PRO
During the progress of our media
product, we used final cut pro which is a
professional editing software, we used
this software to cut clips, fix audio,
insert other clips, add effects, adjust
brightness.
Using the tool palette helped us edit our film, cut clips, adjust
volume and select clips to move around
Using color corrector, we as a group used this effect to adjust the brightness and add effects to the scenes
FINALLY RENDERING.
You can have the option to render a selection or the whole movie or certain aspects, such as audio or video
LIVE TYPE
Insert Text into Here which comes up
on a bigger screen which will be your
final design
Adjust the size
Adjust Position of the Title
EFFECTS ON LIVE TYPE
Add Effects to How the
title appears, how the font
should be and also
textures
MOTION
Motion is also similar to live type but
motion allows you to control a camera
and add lighting, you can also add filters
and other effects to enhance the title, you
can also have light passing through so
when your titles appear, it appears with
the effects looking more animated, I also
have been looking at videos on youtube
video tutorials on how to use motion to
create better, professional effects.
You can also create layers, which makes it easier for us as
editors to create layers, this allows us to control what the
audience see
Also a timeline below to control which effect goes first or
after, also control the duration.

technology used during progress

  • 1.
  • 2.
    BLOGGING Click Hereeach time to post a new entry this means I can post all my vlogs, update my blog and progress made to produce my media product
  • 3.
    Insert Picture Insert Videowith embed code so presentations, videos from youtube and vimeo
  • 4.
    After copying thecode into the box, save and close to clarify that the video is up.
  • 5.
    After Click SAVEAND CLOSE and your video will be published onto your blog
  • 6.
    GARAGE BAND DragThe Selected Sound to the soundboard Wide selection of Sounds giving us a variety of sounds to create different sounds
  • 7.
    Drag More Underneathto create layers which make it fine for you to create fades
  • 8.
    CAMERA USE • PTask helped us understand camera shots and about lighting as well as sound, we found out by experimenting which camera shots were used to show different expressions whether it was to show someone powerful (low angle shot) show someone venerable ( high angle shot). Close ups to show facial expressions, establishing shot to establish the location. Tracking shot maintaining the camera focusing above his waist
  • 9.
    MORE CAMERA SHOTS Wefaced some issues with lighting because as we were filming this shot, our character suddenly became dark and like a silhouette but we managed to fix it by using final cut pro to change brightness
  • 10.
    Shot, reverse shots,also could be Point of view, to show a conversation between the 2 characters and also a close up, if we used one shot to show the convo, our audience would have been bored.
  • 11.
    FINAL CUT PRO Duringthe progress of our media product, we used final cut pro which is a professional editing software, we used this software to cut clips, fix audio, insert other clips, add effects, adjust brightness. Using the tool palette helped us edit our film, cut clips, adjust volume and select clips to move around
  • 12.
    Using color corrector,we as a group used this effect to adjust the brightness and add effects to the scenes
  • 13.
    FINALLY RENDERING. You canhave the option to render a selection or the whole movie or certain aspects, such as audio or video
  • 14.
    LIVE TYPE Insert Textinto Here which comes up on a bigger screen which will be your final design Adjust the size Adjust Position of the Title
  • 15.
    EFFECTS ON LIVETYPE Add Effects to How the title appears, how the font should be and also textures
  • 16.
    MOTION Motion is alsosimilar to live type but motion allows you to control a camera and add lighting, you can also add filters and other effects to enhance the title, you can also have light passing through so when your titles appear, it appears with the effects looking more animated, I also have been looking at videos on youtube video tutorials on how to use motion to create better, professional effects.
  • 17.
    You can alsocreate layers, which makes it easier for us as editors to create layers, this allows us to control what the audience see Also a timeline below to control which effect goes first or after, also control the duration.