Downloaded 133 times
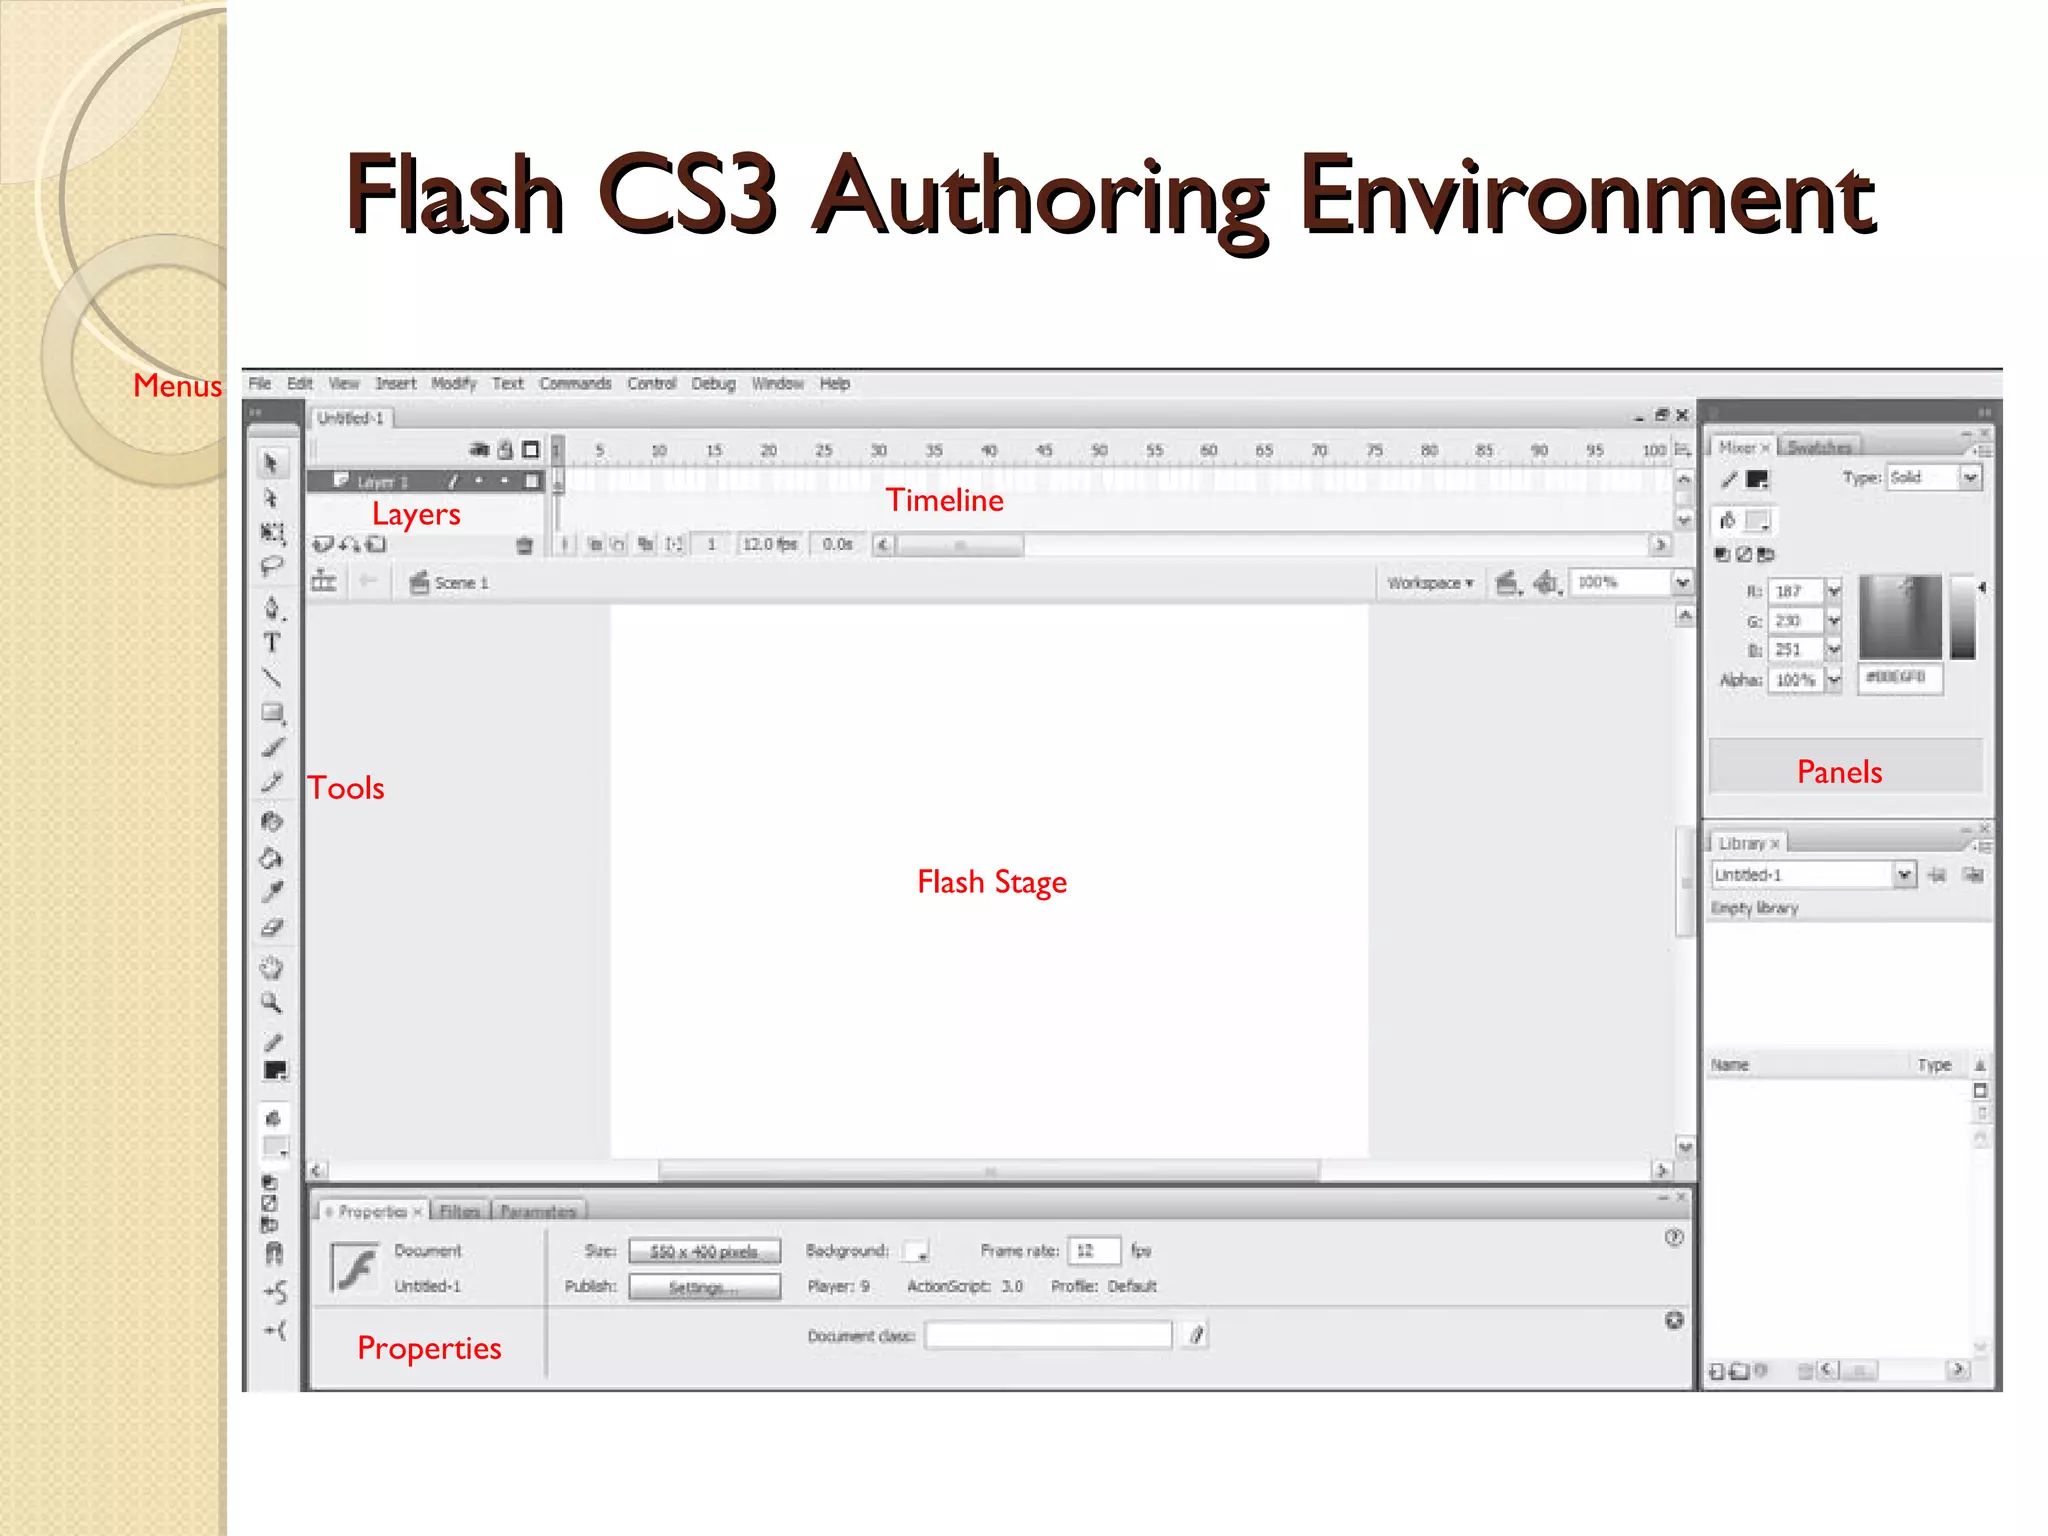
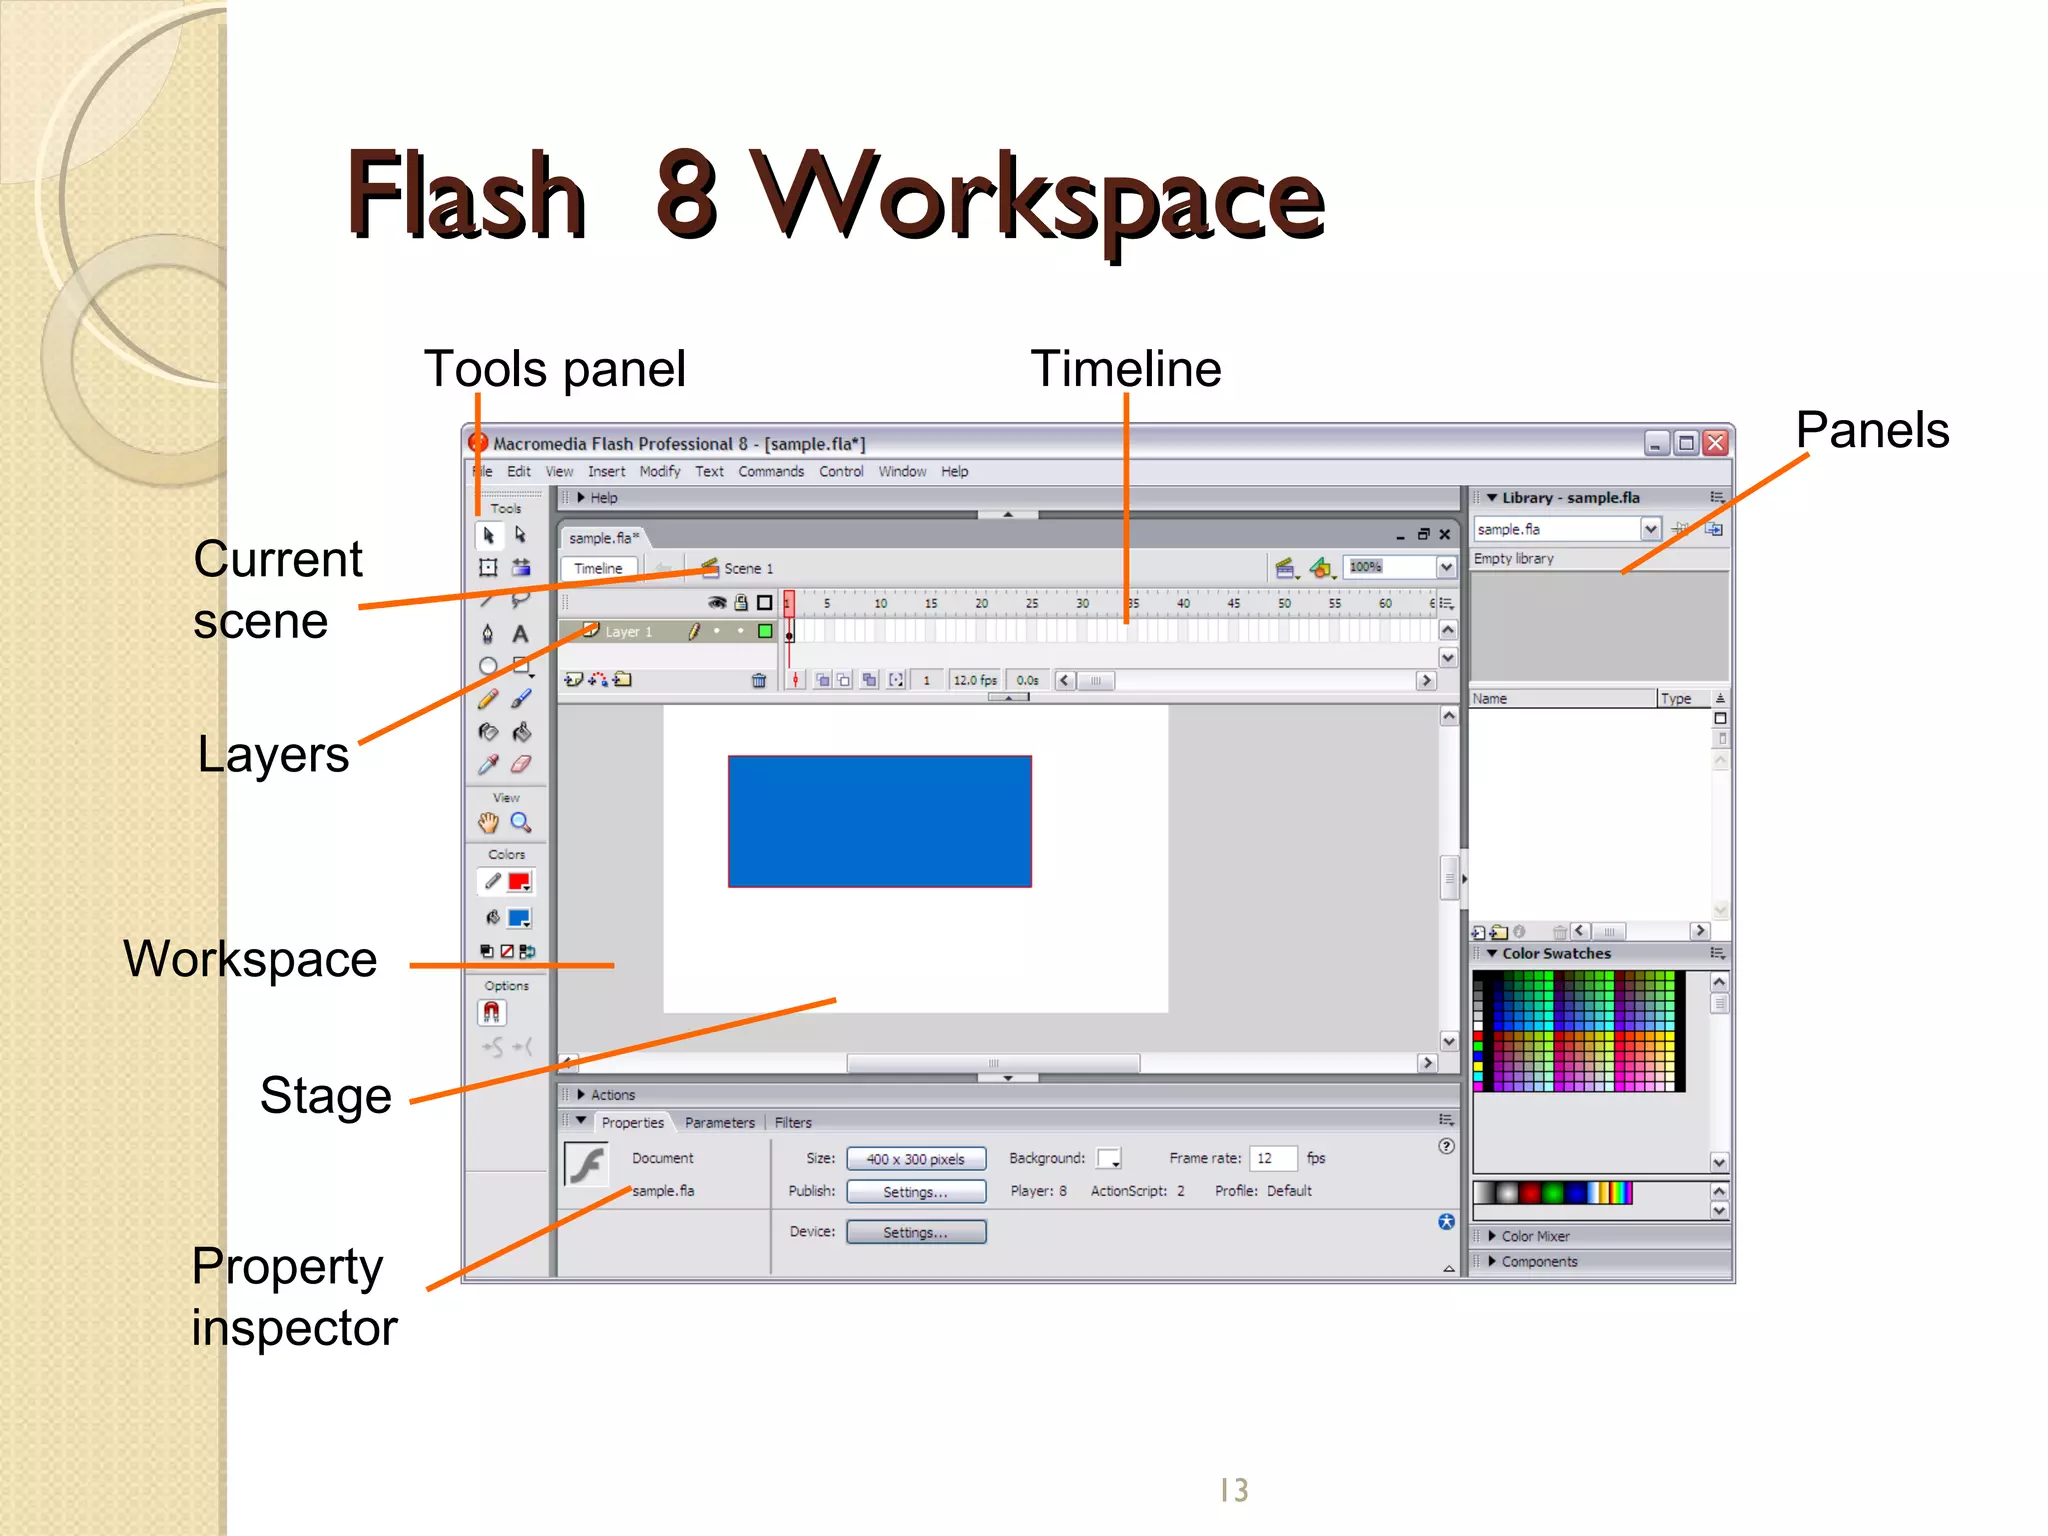
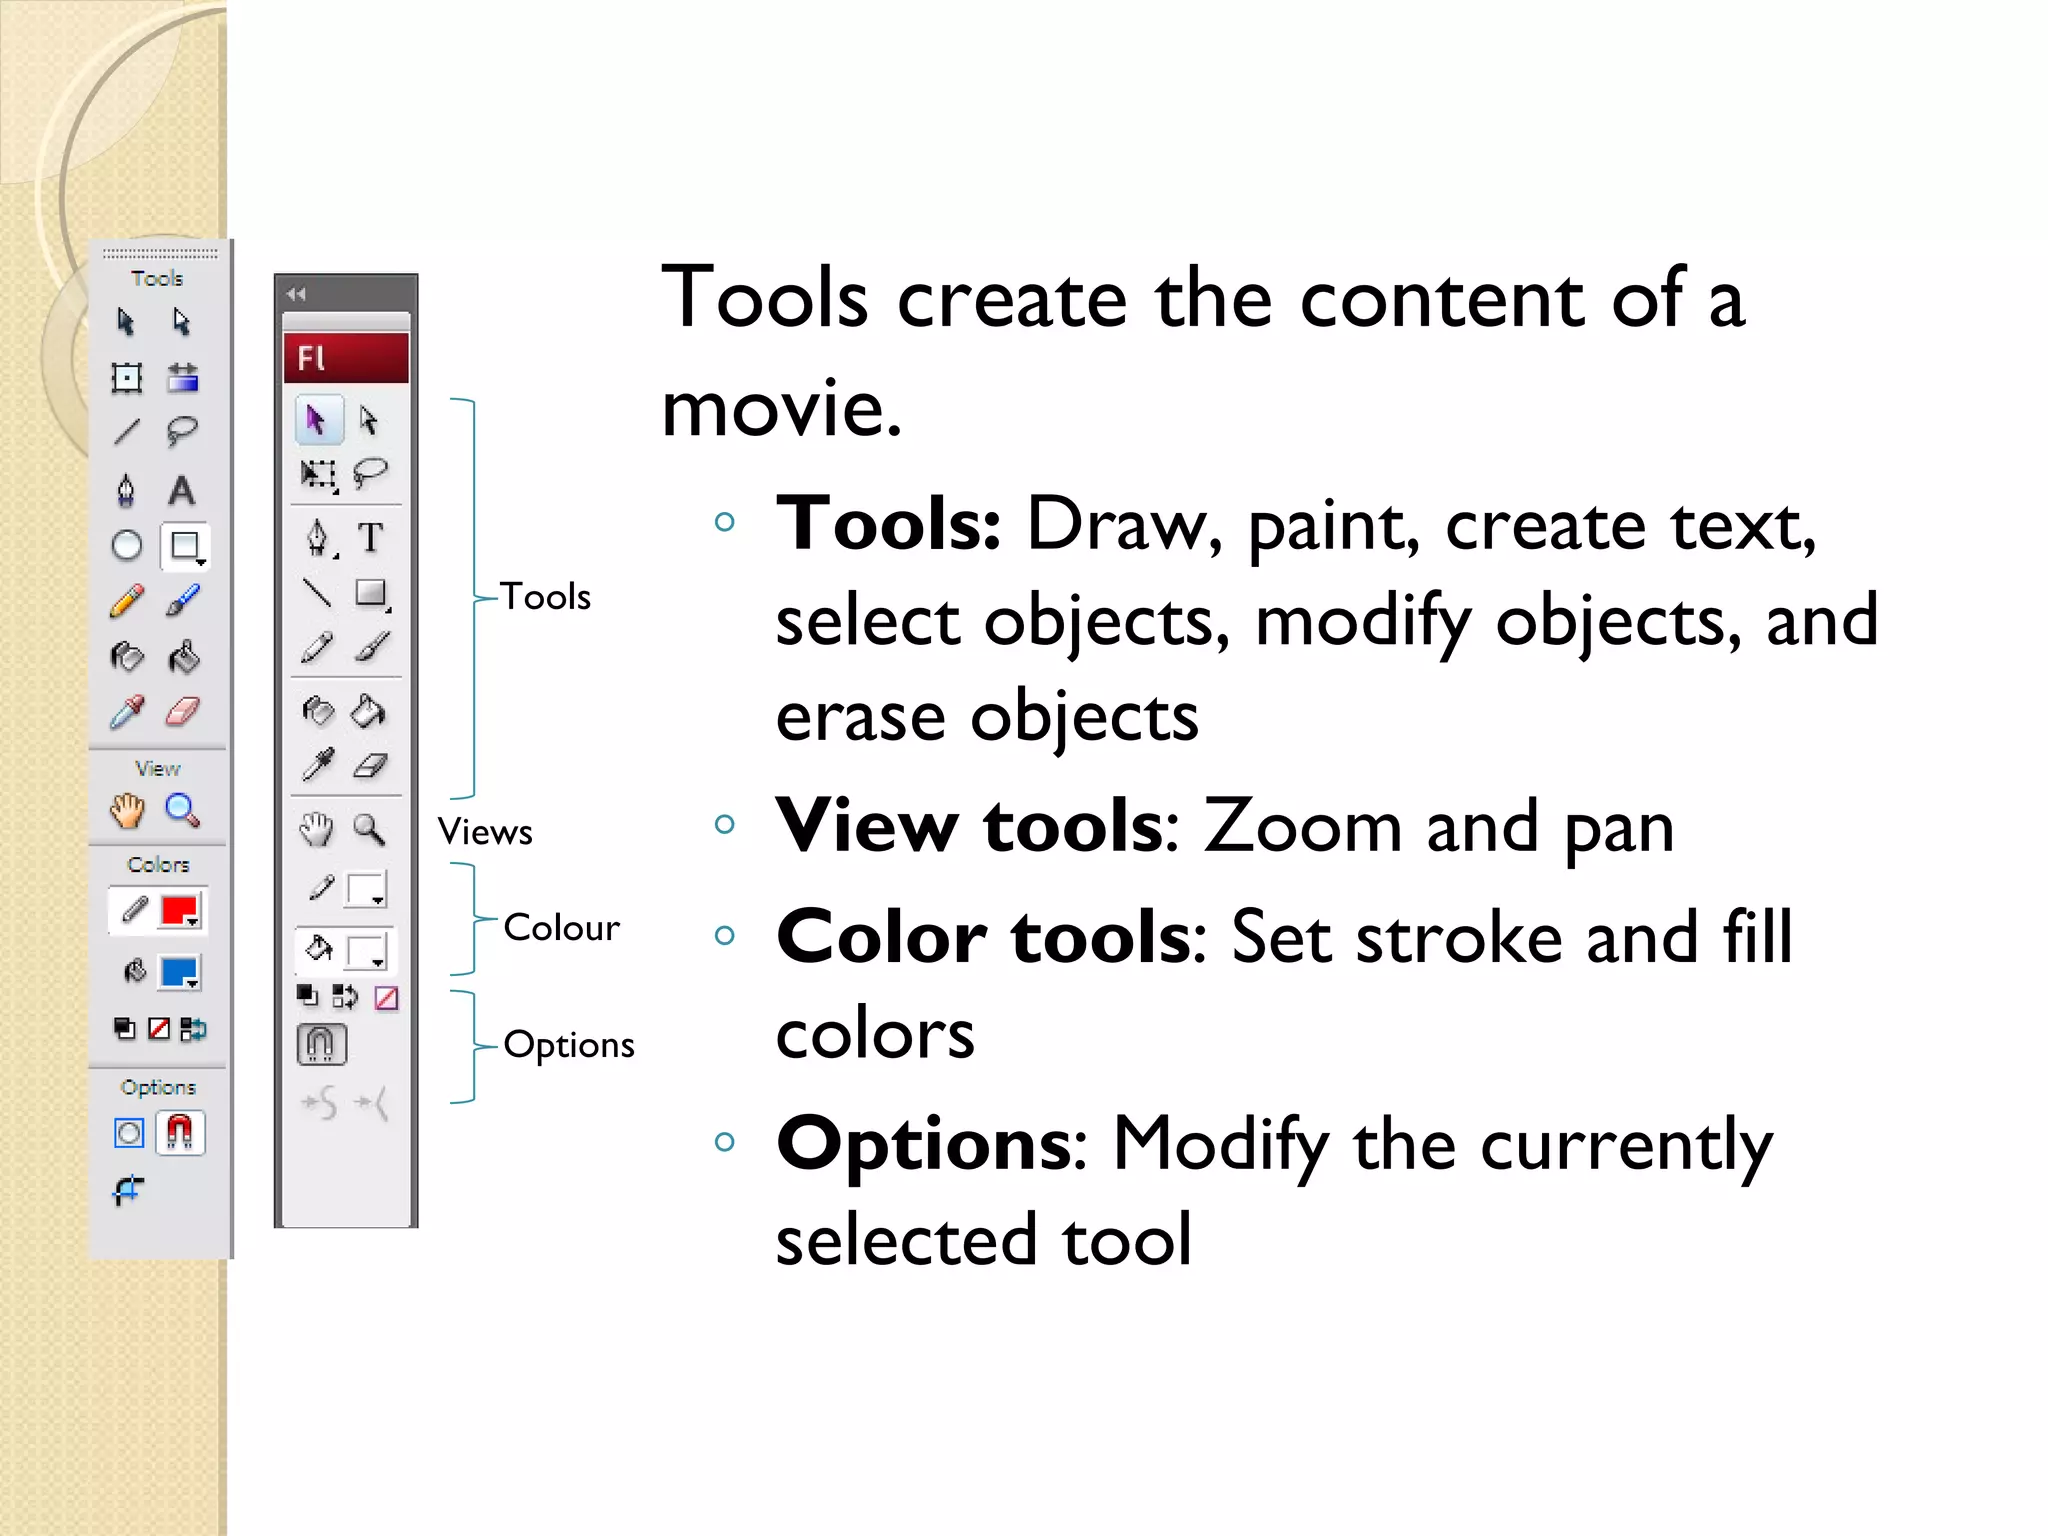
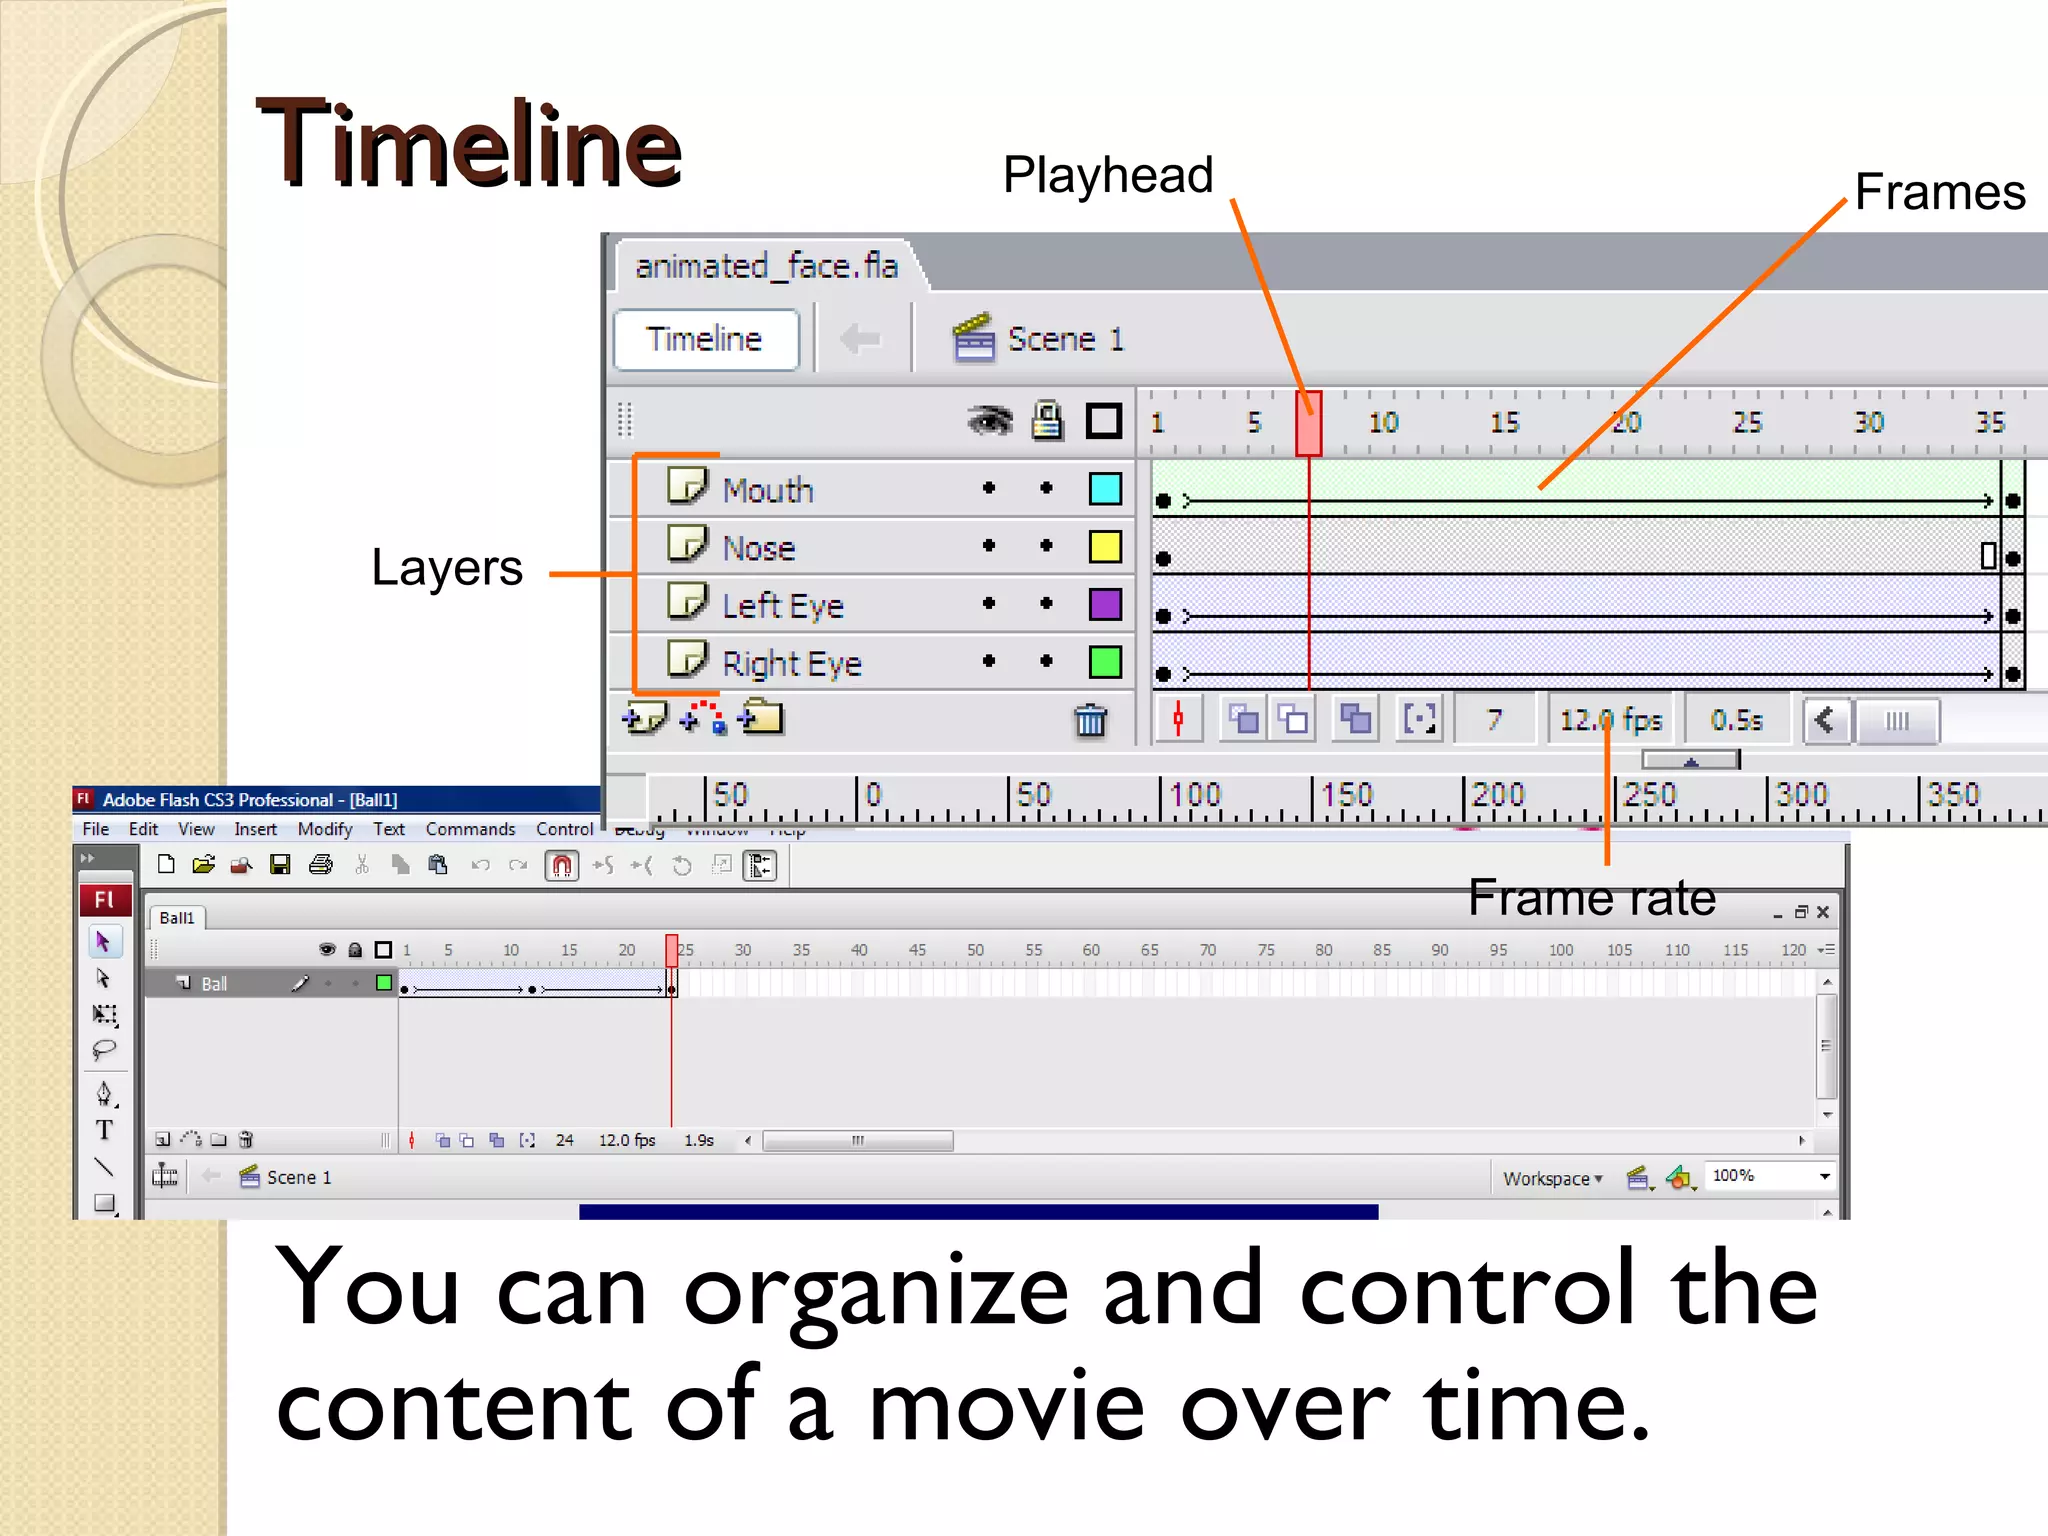

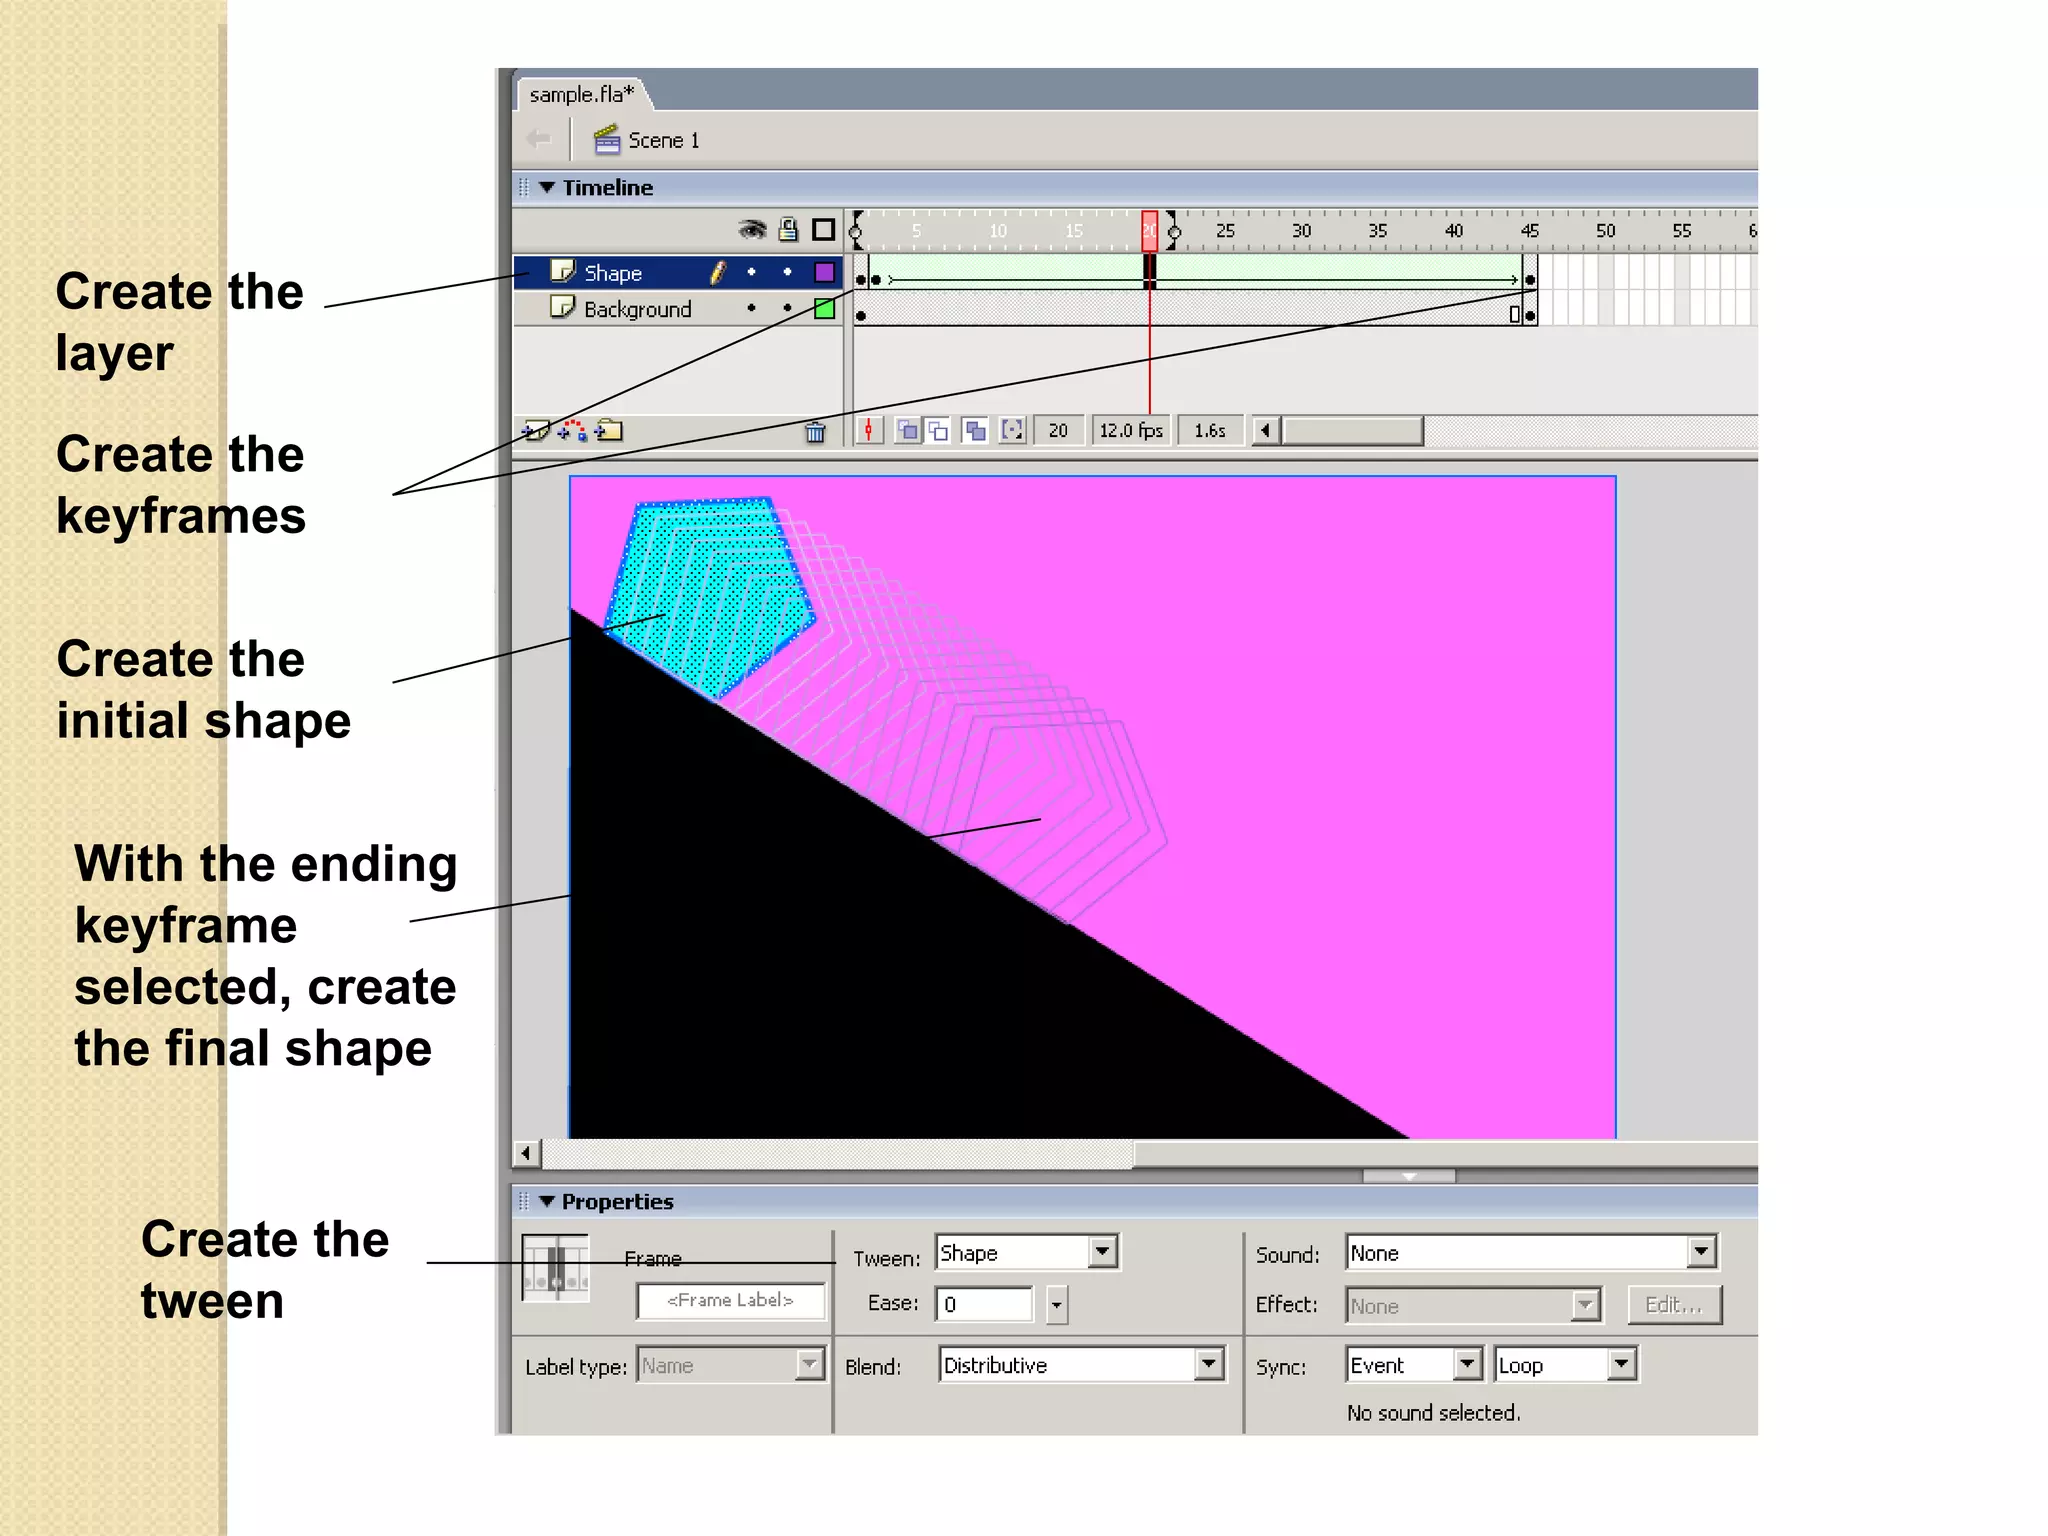
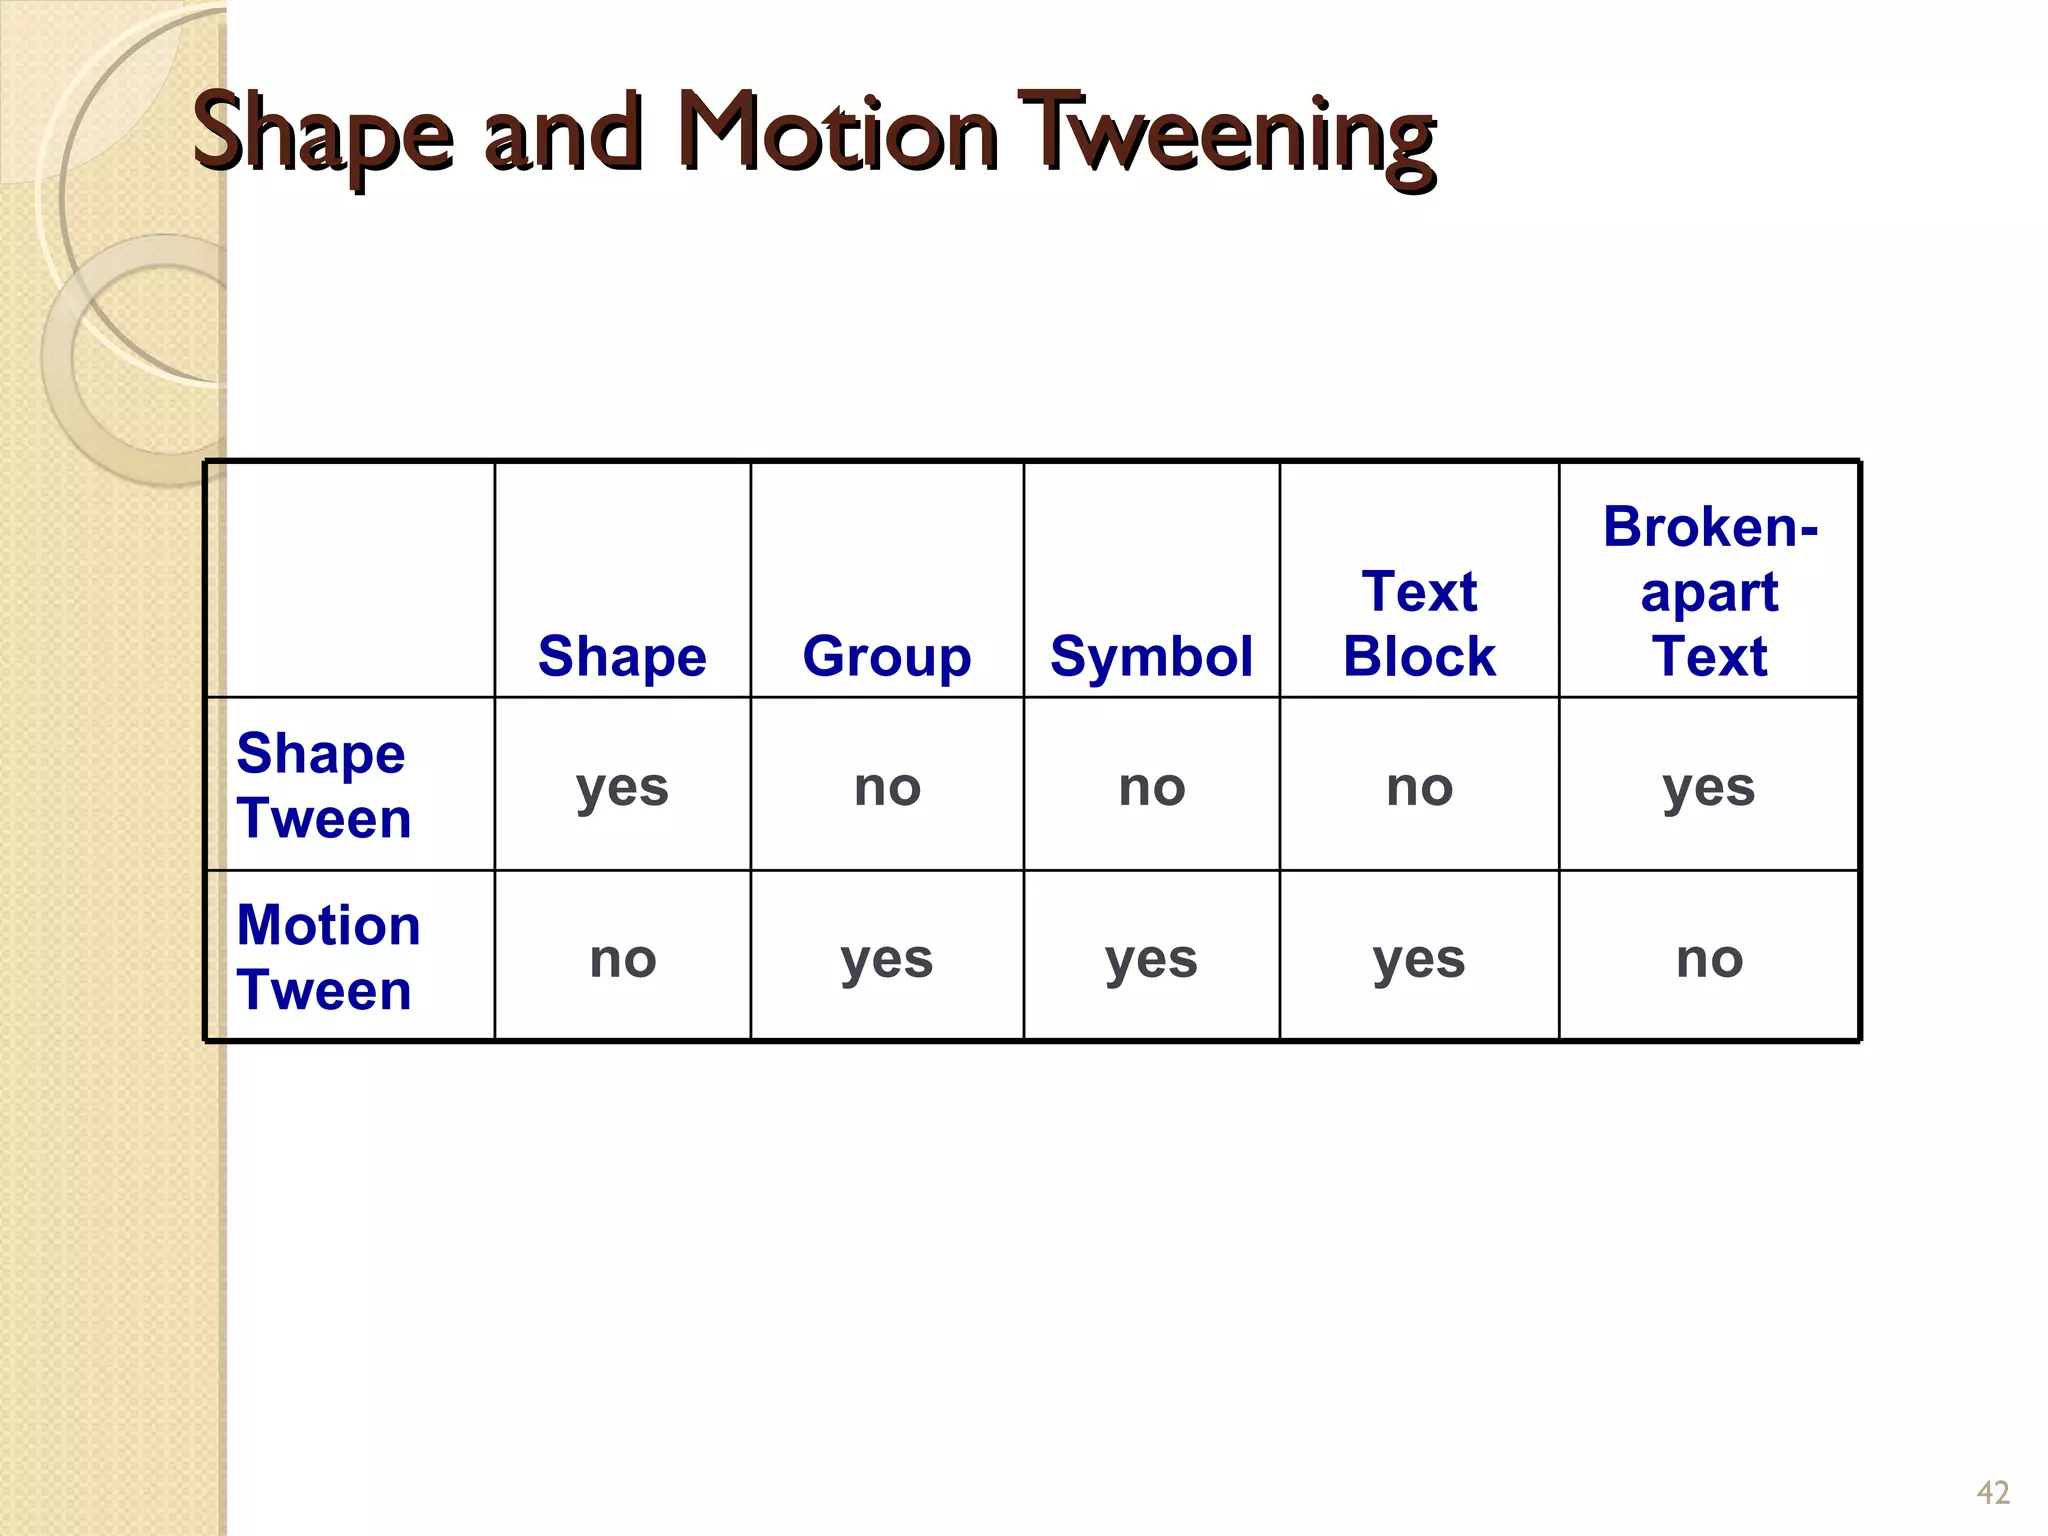
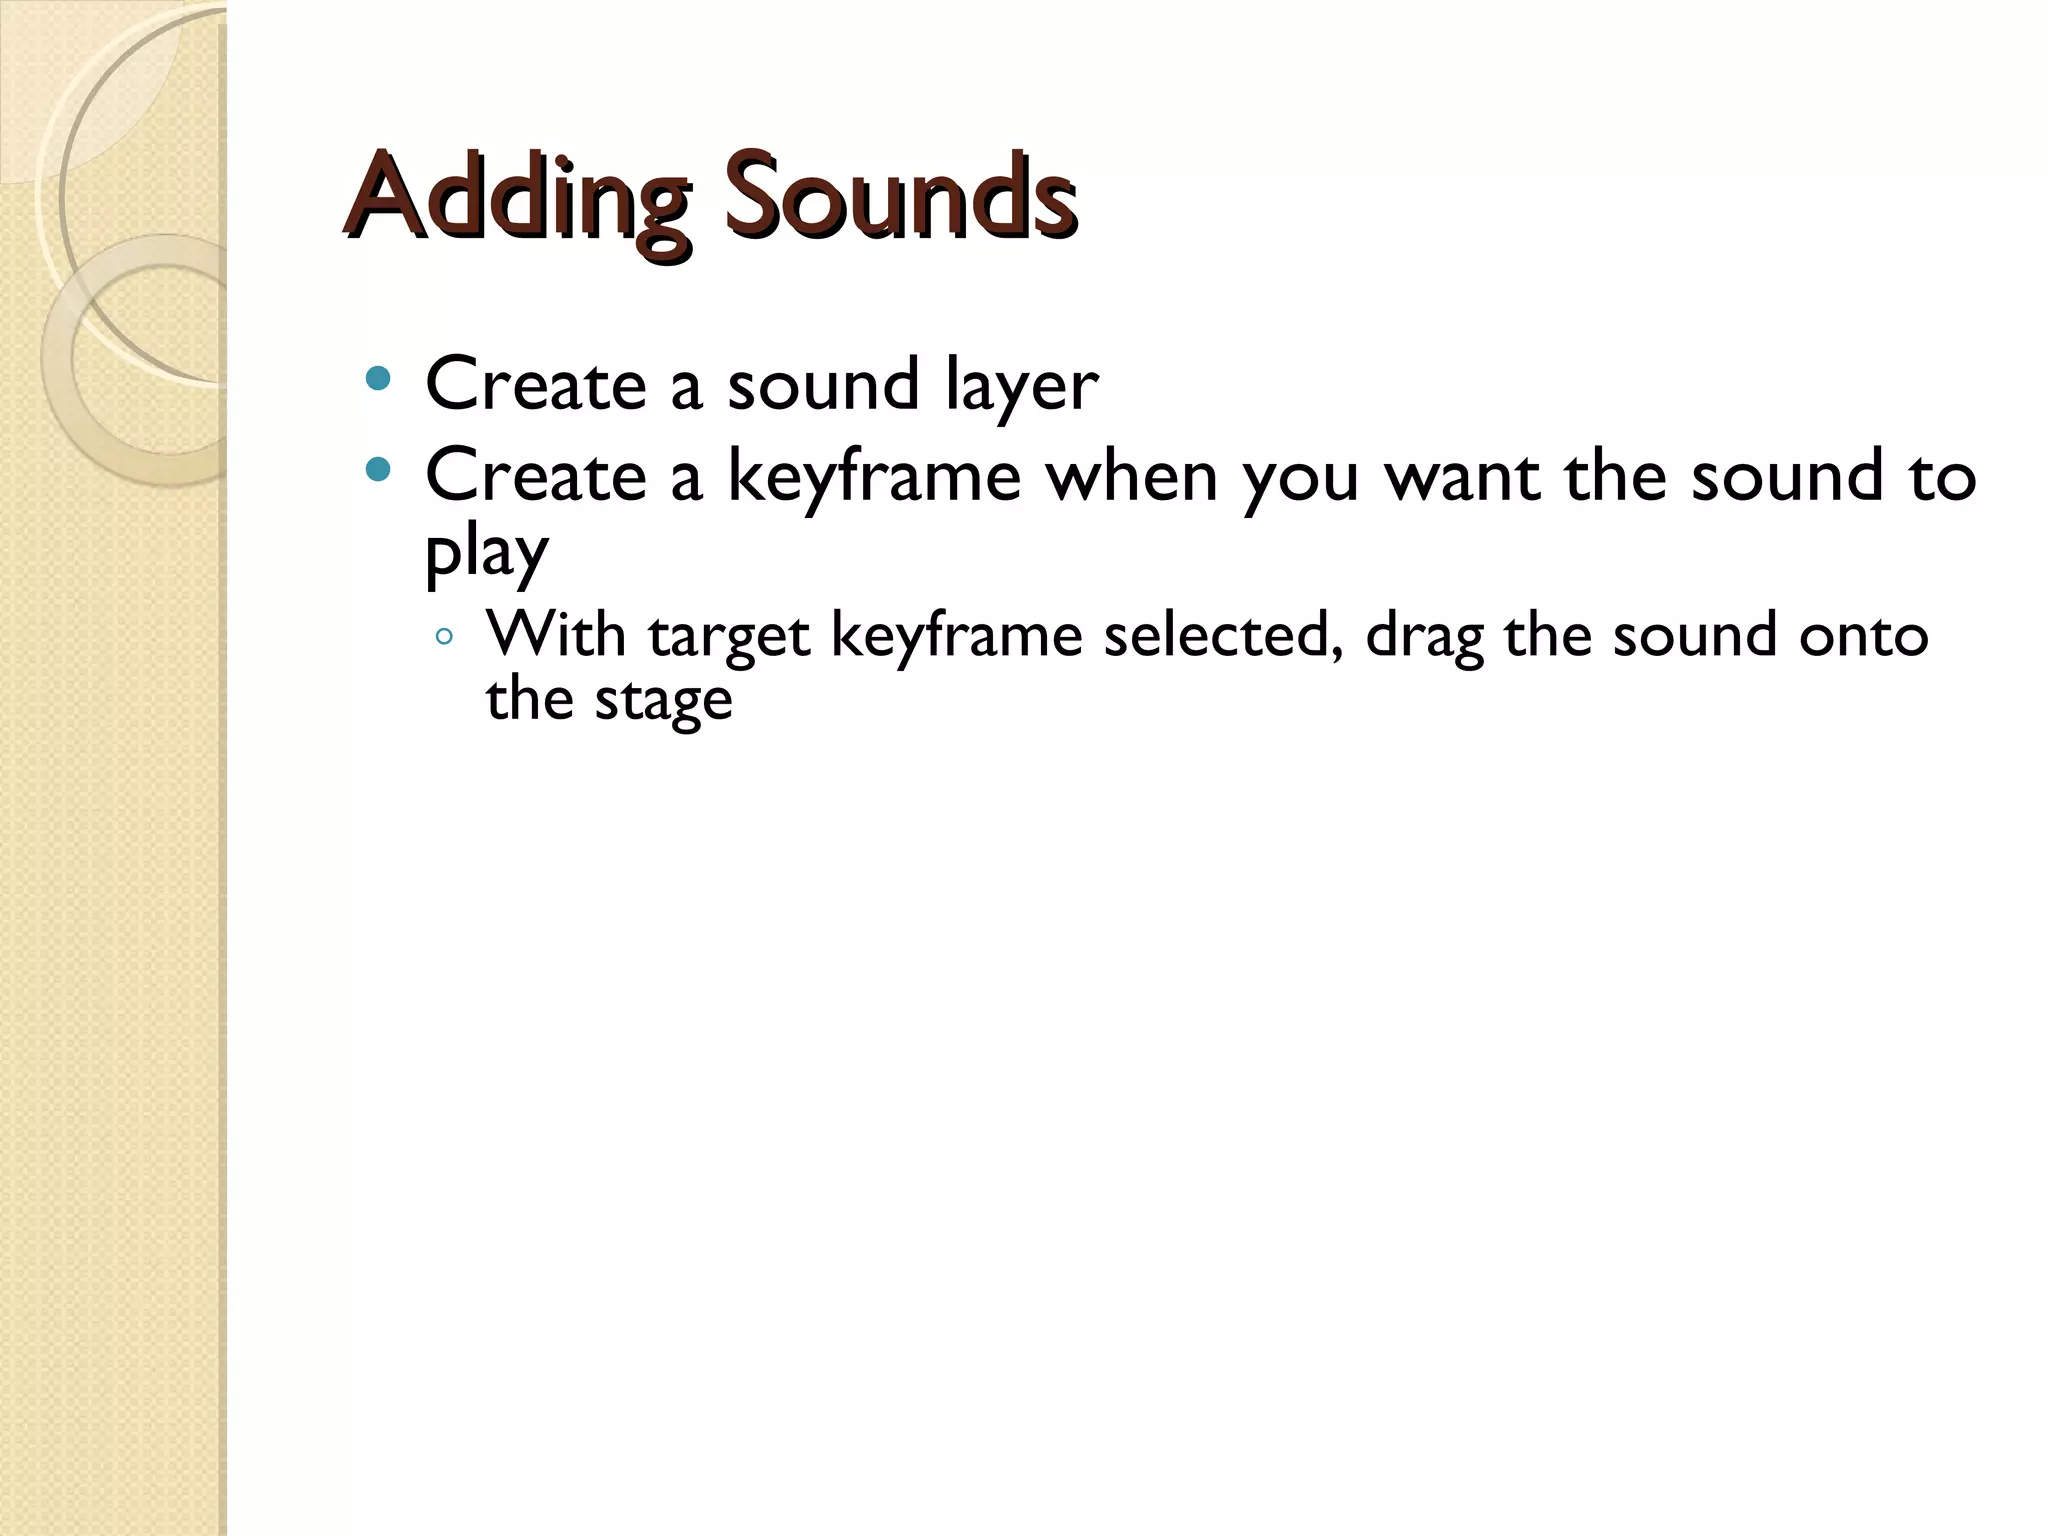
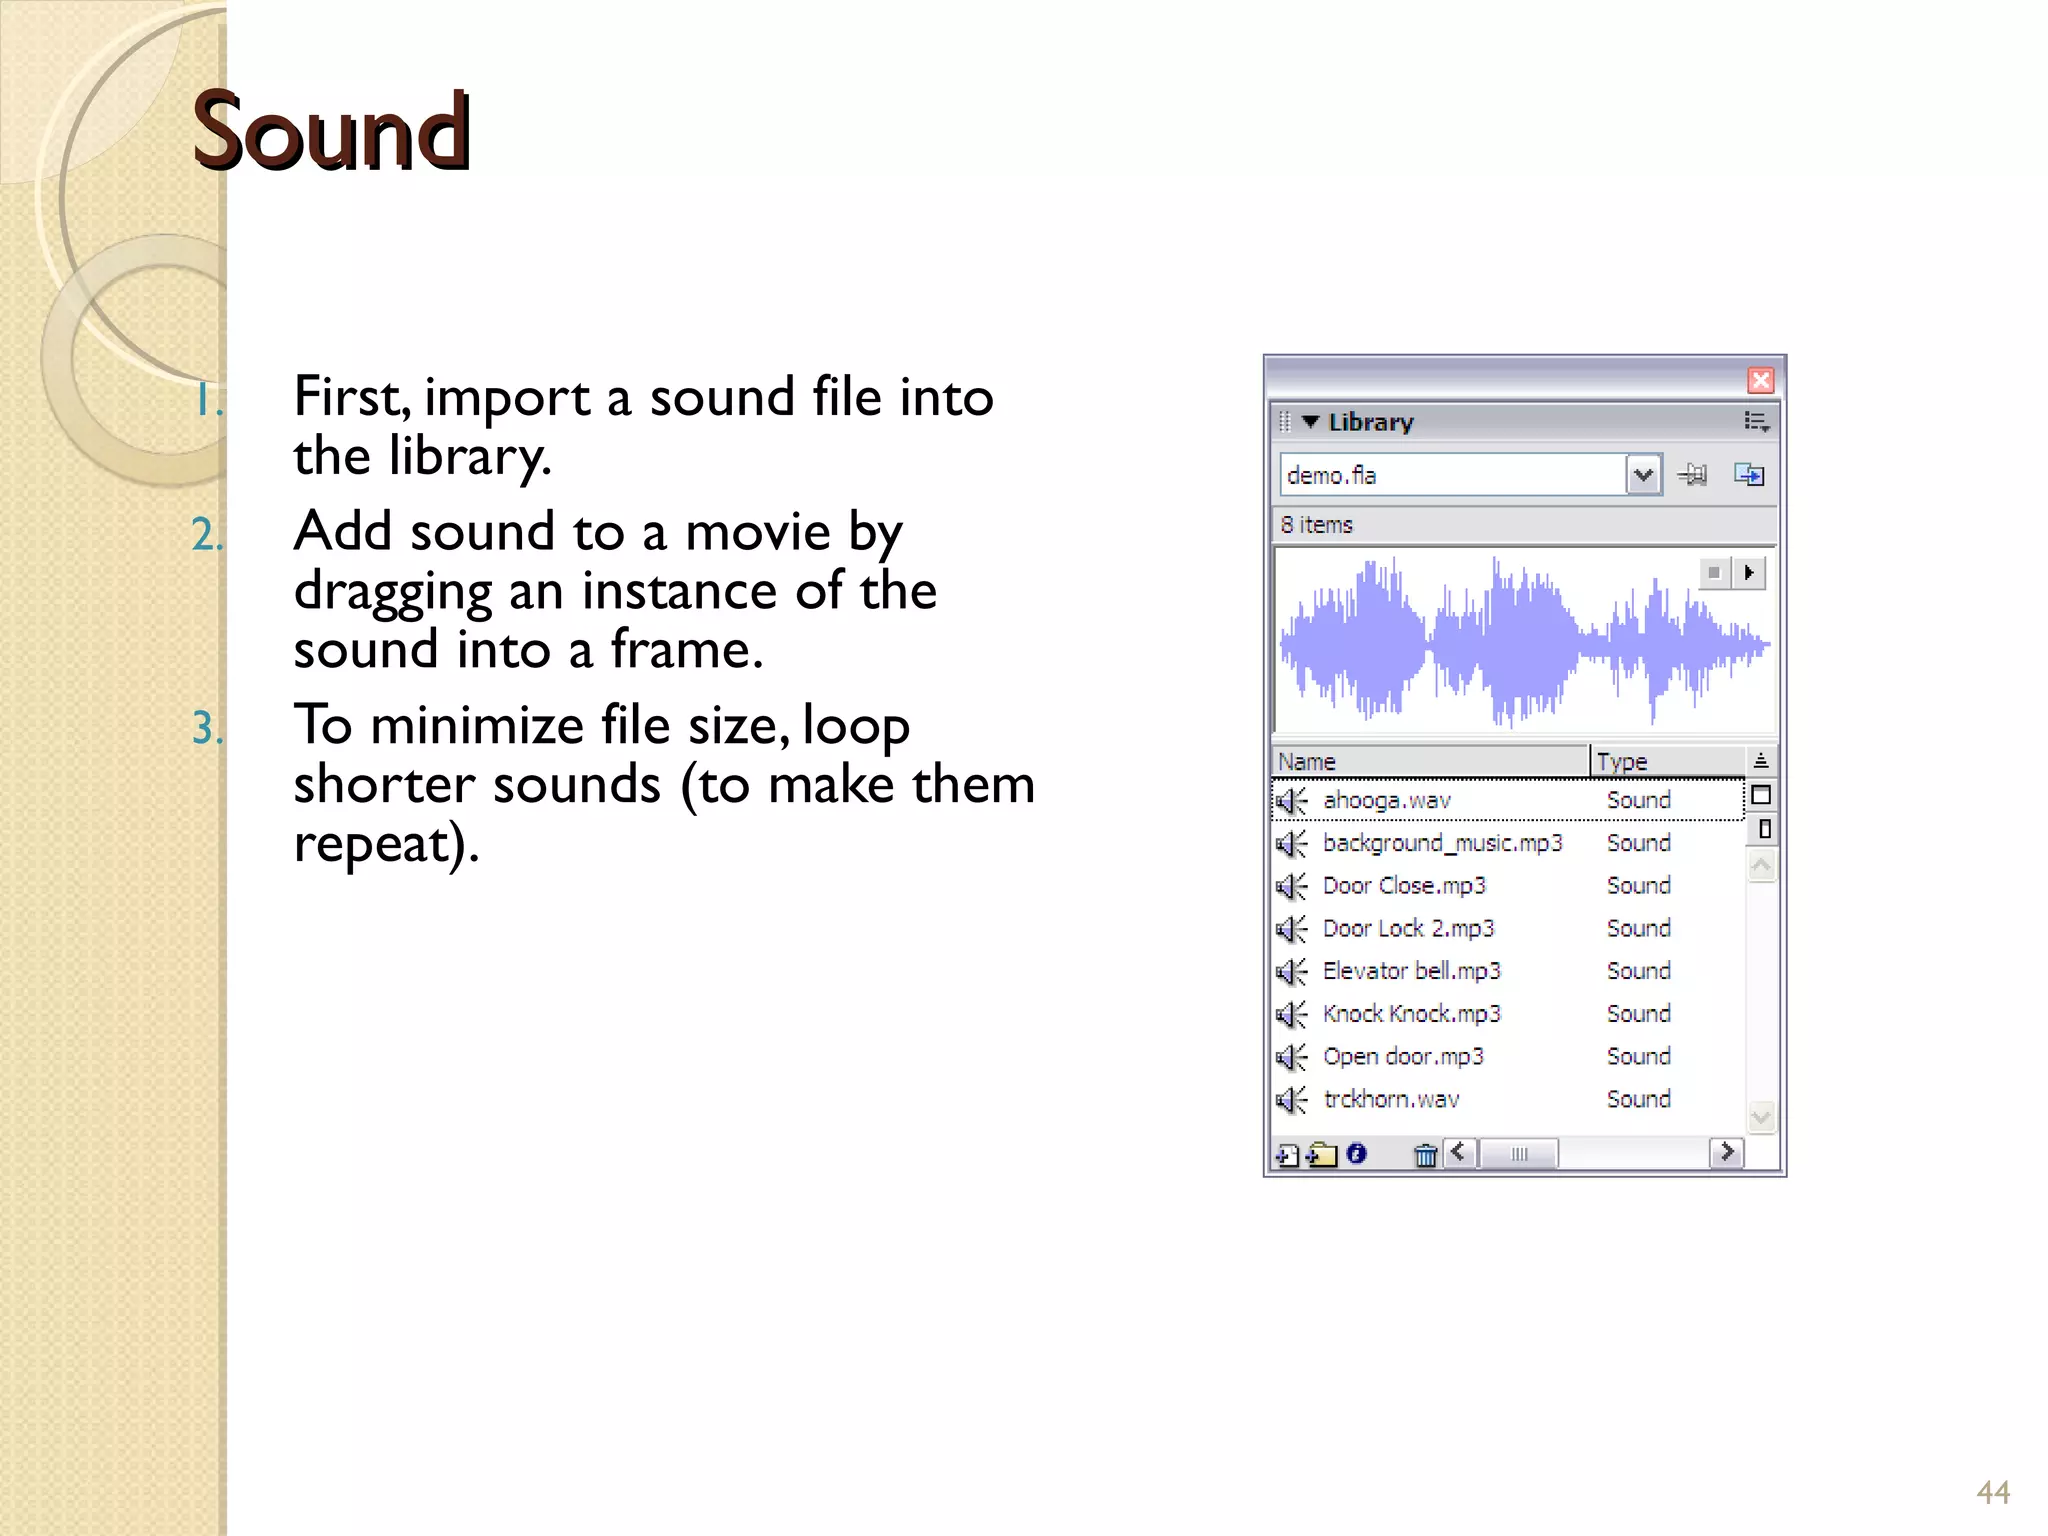

The document provides an overview of the Flash authoring environment and how to create basic animations and publish Flash files. It discusses the Flash interface including the tools, panels, timeline, layers and properties. It also covers creating shapes, symbols, motion tweens, sounds and publishing Flash movies for the web.


![Chapt10 Holes Lecture Animation[1]](https://cdn.slidesharecdn.com/ss_thumbnails/chapt10holeslectureanimation1-091122123853-phpapp02-thumbnail.jpg?width=640&height=640&fit=bounds)