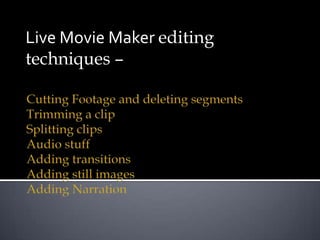
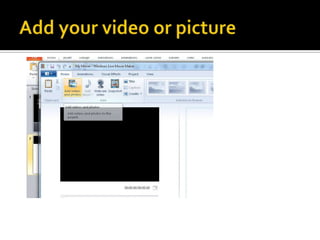
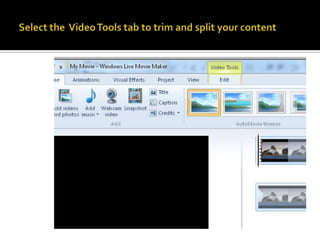
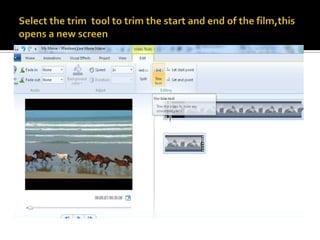
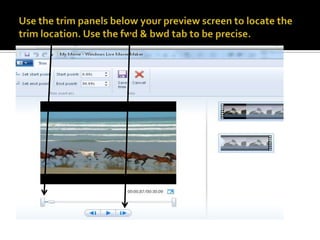
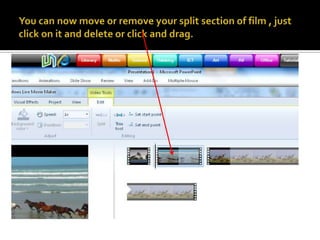
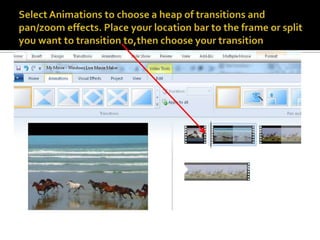
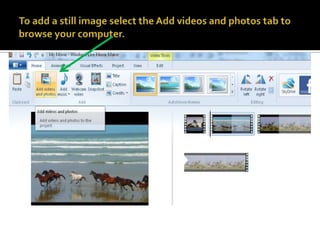
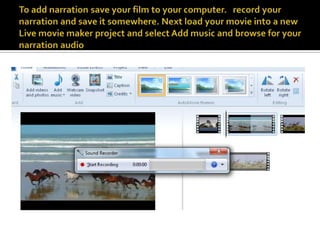
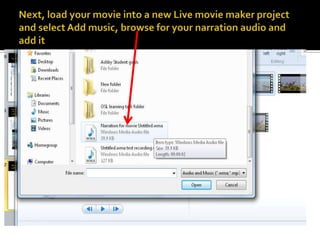
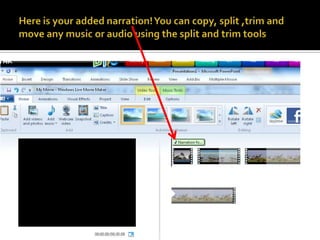
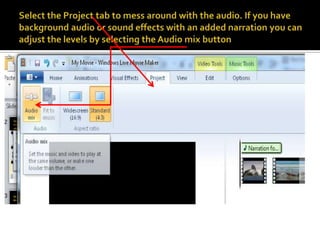
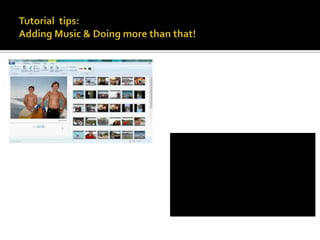
Live Movie Maker editing techniques – Cutting Footage and deleting segmentsTrimming a clip Splitting clipsAudio stuffAdding transitionsAdding still imagesAdding Narration
Add your video or picture
Select the  Video Tools tab to trim and split your content
Select the trim  tool to trim the start and end of the film,this opens a new screen
Use the trim panels below your preview screen to locate the trim location. Use the fwd & bwd tab to be precise.
Move the black location bar to where you want to split your content, select  the split tool to split your content. Move the location bar to the end of the content you wish to split and select the split tool. You can now move or delete your split piece of film
You can now move or remove your split section of film , just click on it and delete or click and drag.
Select Animations to choose a heap of transitions and pan/zoom effects. Place your location bar to the frame or split you want to transition to,then choose your transition
To add a still image select the Add videos and photos tab to browse your computer.
To add music and sound effects click the Add music tab.
To add narration save your film to your computer.   record your narration and save it somewhere. Next load your movie into a new Live movie maker project and select Add music and browse for your narration audio
Next, load your movie into a new Live movie maker project and select Add music, browse for your narration audio and add it
Here is your added narration! You can copy, split ,trim and move any music or audio using the split and trim tools
Select the Project tab to mess around with the audio. If you have background audio or sound effects with an added narration you can adjust the levels by selecting the Audio mix button
Tutorial  tips: Adding Music & Doing more than that!

Movie maker presentation1

  • 1.
    Live Movie Makerediting techniques – Cutting Footage and deleting segmentsTrimming a clip Splitting clipsAudio stuffAdding transitionsAdding still imagesAdding Narration
  • 2.
    Add your videoor picture
  • 3.
    Select the Video Tools tab to trim and split your content
  • 4.
    Select the trim tool to trim the start and end of the film,this opens a new screen
  • 5.
    Use the trimpanels below your preview screen to locate the trim location. Use the fwd & bwd tab to be precise.
  • 6.
    Move the blacklocation bar to where you want to split your content, select the split tool to split your content. Move the location bar to the end of the content you wish to split and select the split tool. You can now move or delete your split piece of film
  • 7.
    You can nowmove or remove your split section of film , just click on it and delete or click and drag.
  • 8.
    Select Animations tochoose a heap of transitions and pan/zoom effects. Place your location bar to the frame or split you want to transition to,then choose your transition
  • 9.
    To add astill image select the Add videos and photos tab to browse your computer.
  • 10.
    To add musicand sound effects click the Add music tab.
  • 11.
    To add narrationsave your film to your computer. record your narration and save it somewhere. Next load your movie into a new Live movie maker project and select Add music and browse for your narration audio
  • 12.
    Next, load yourmovie into a new Live movie maker project and select Add music, browse for your narration audio and add it
  • 13.
    Here is youradded narration! You can copy, split ,trim and move any music or audio using the split and trim tools
  • 14.
    Select the Projecttab to mess around with the audio. If you have background audio or sound effects with an added narration you can adjust the levels by selecting the Audio mix button
  • 15.
    Tutorial tips:Adding Music & Doing more than that!