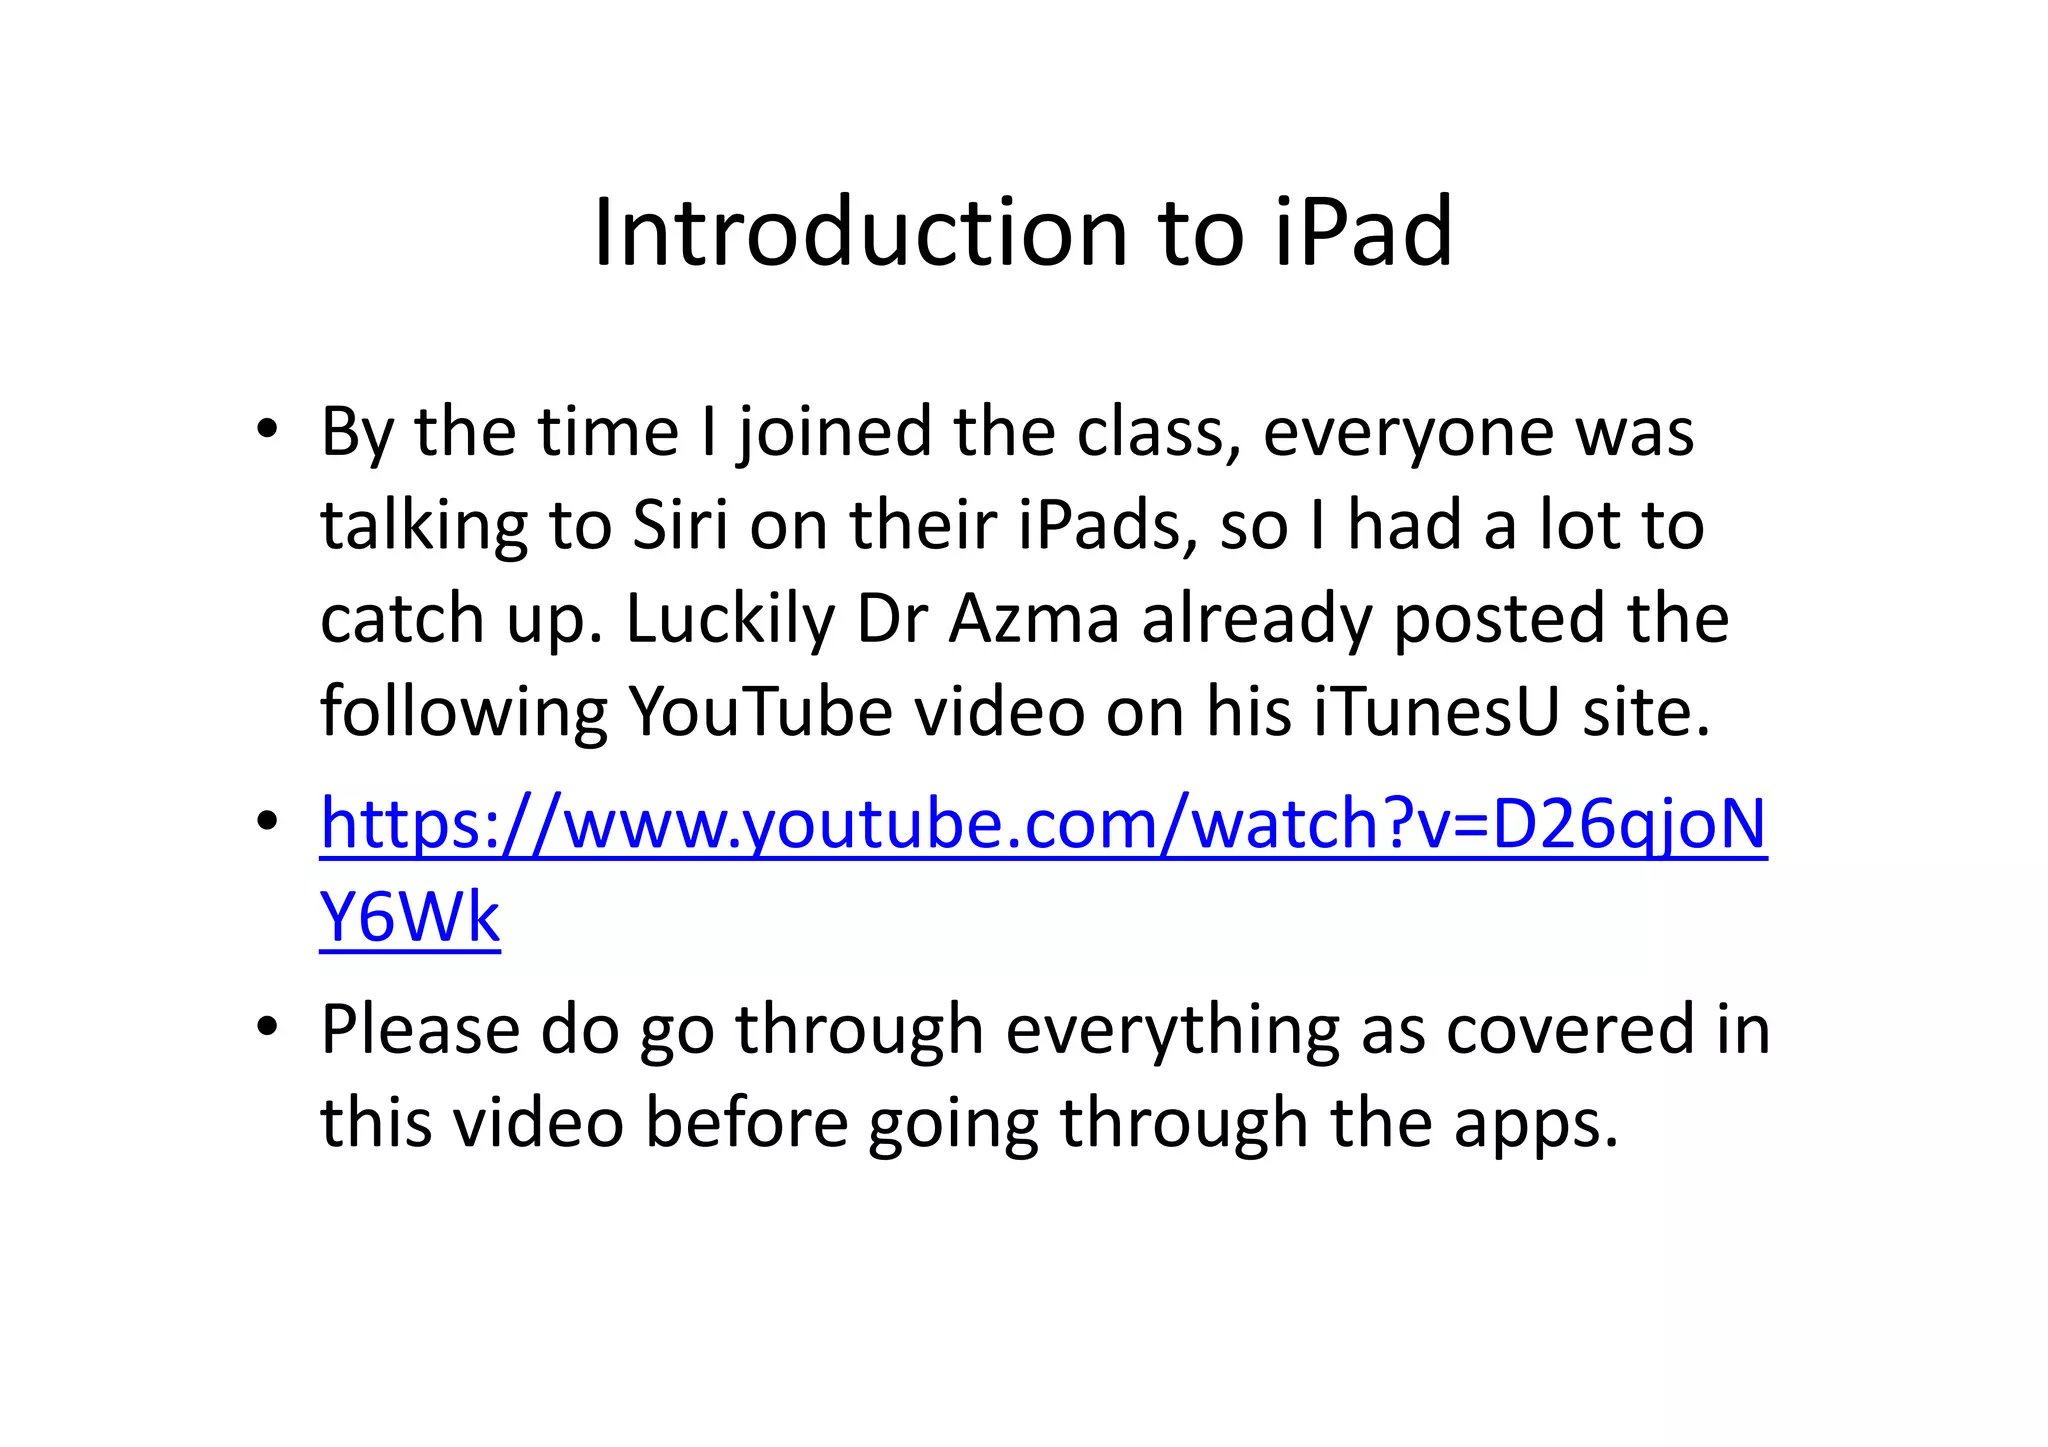
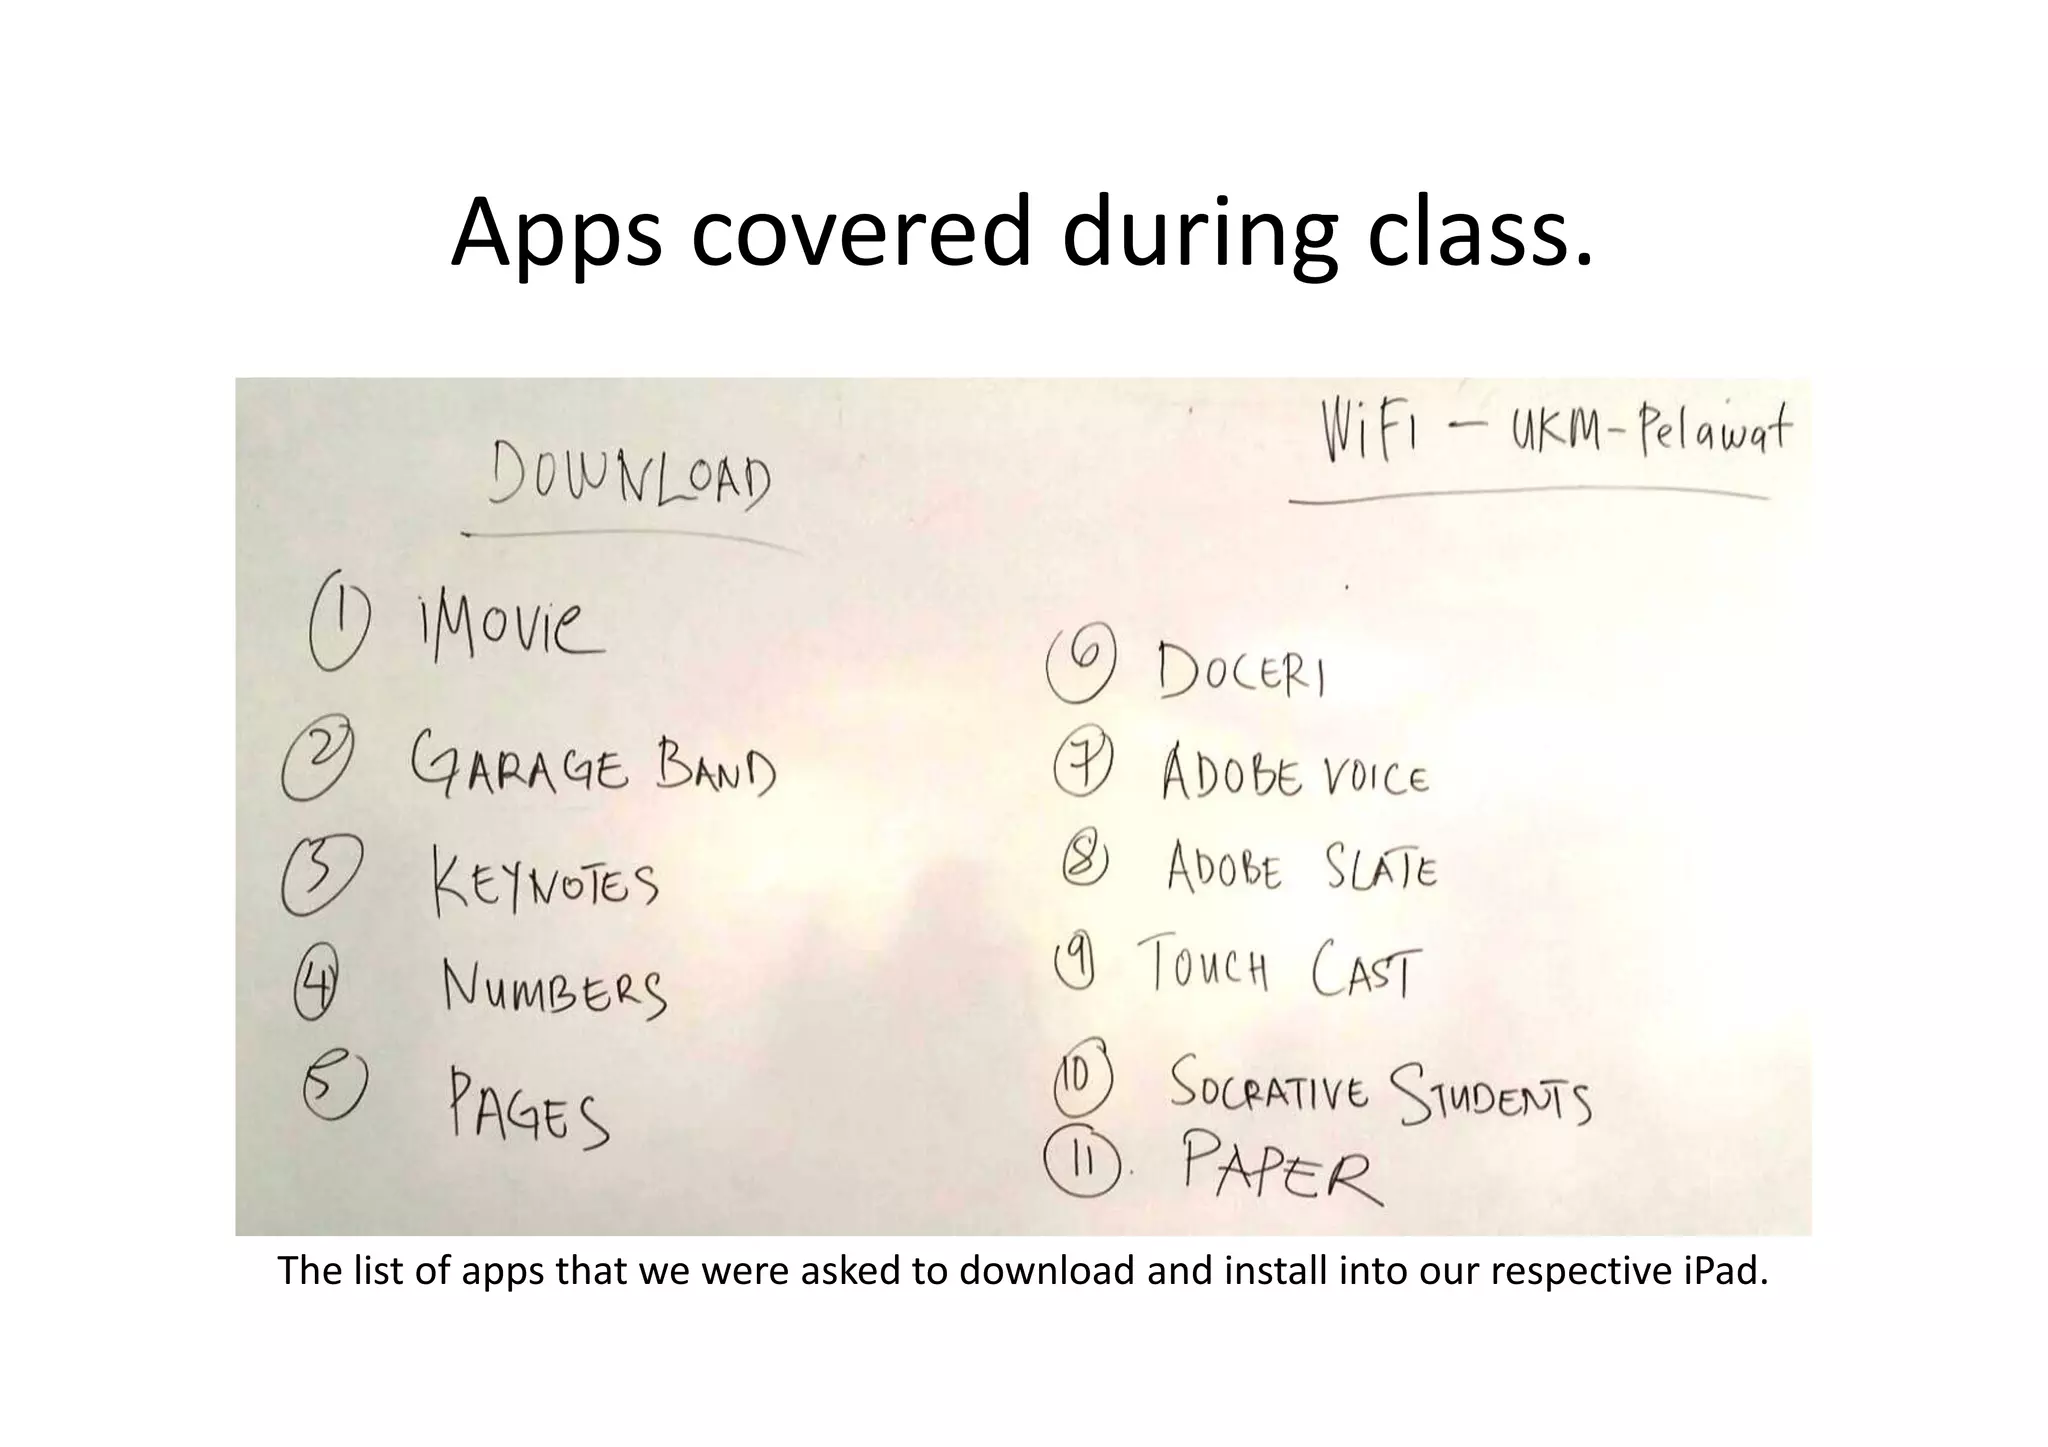
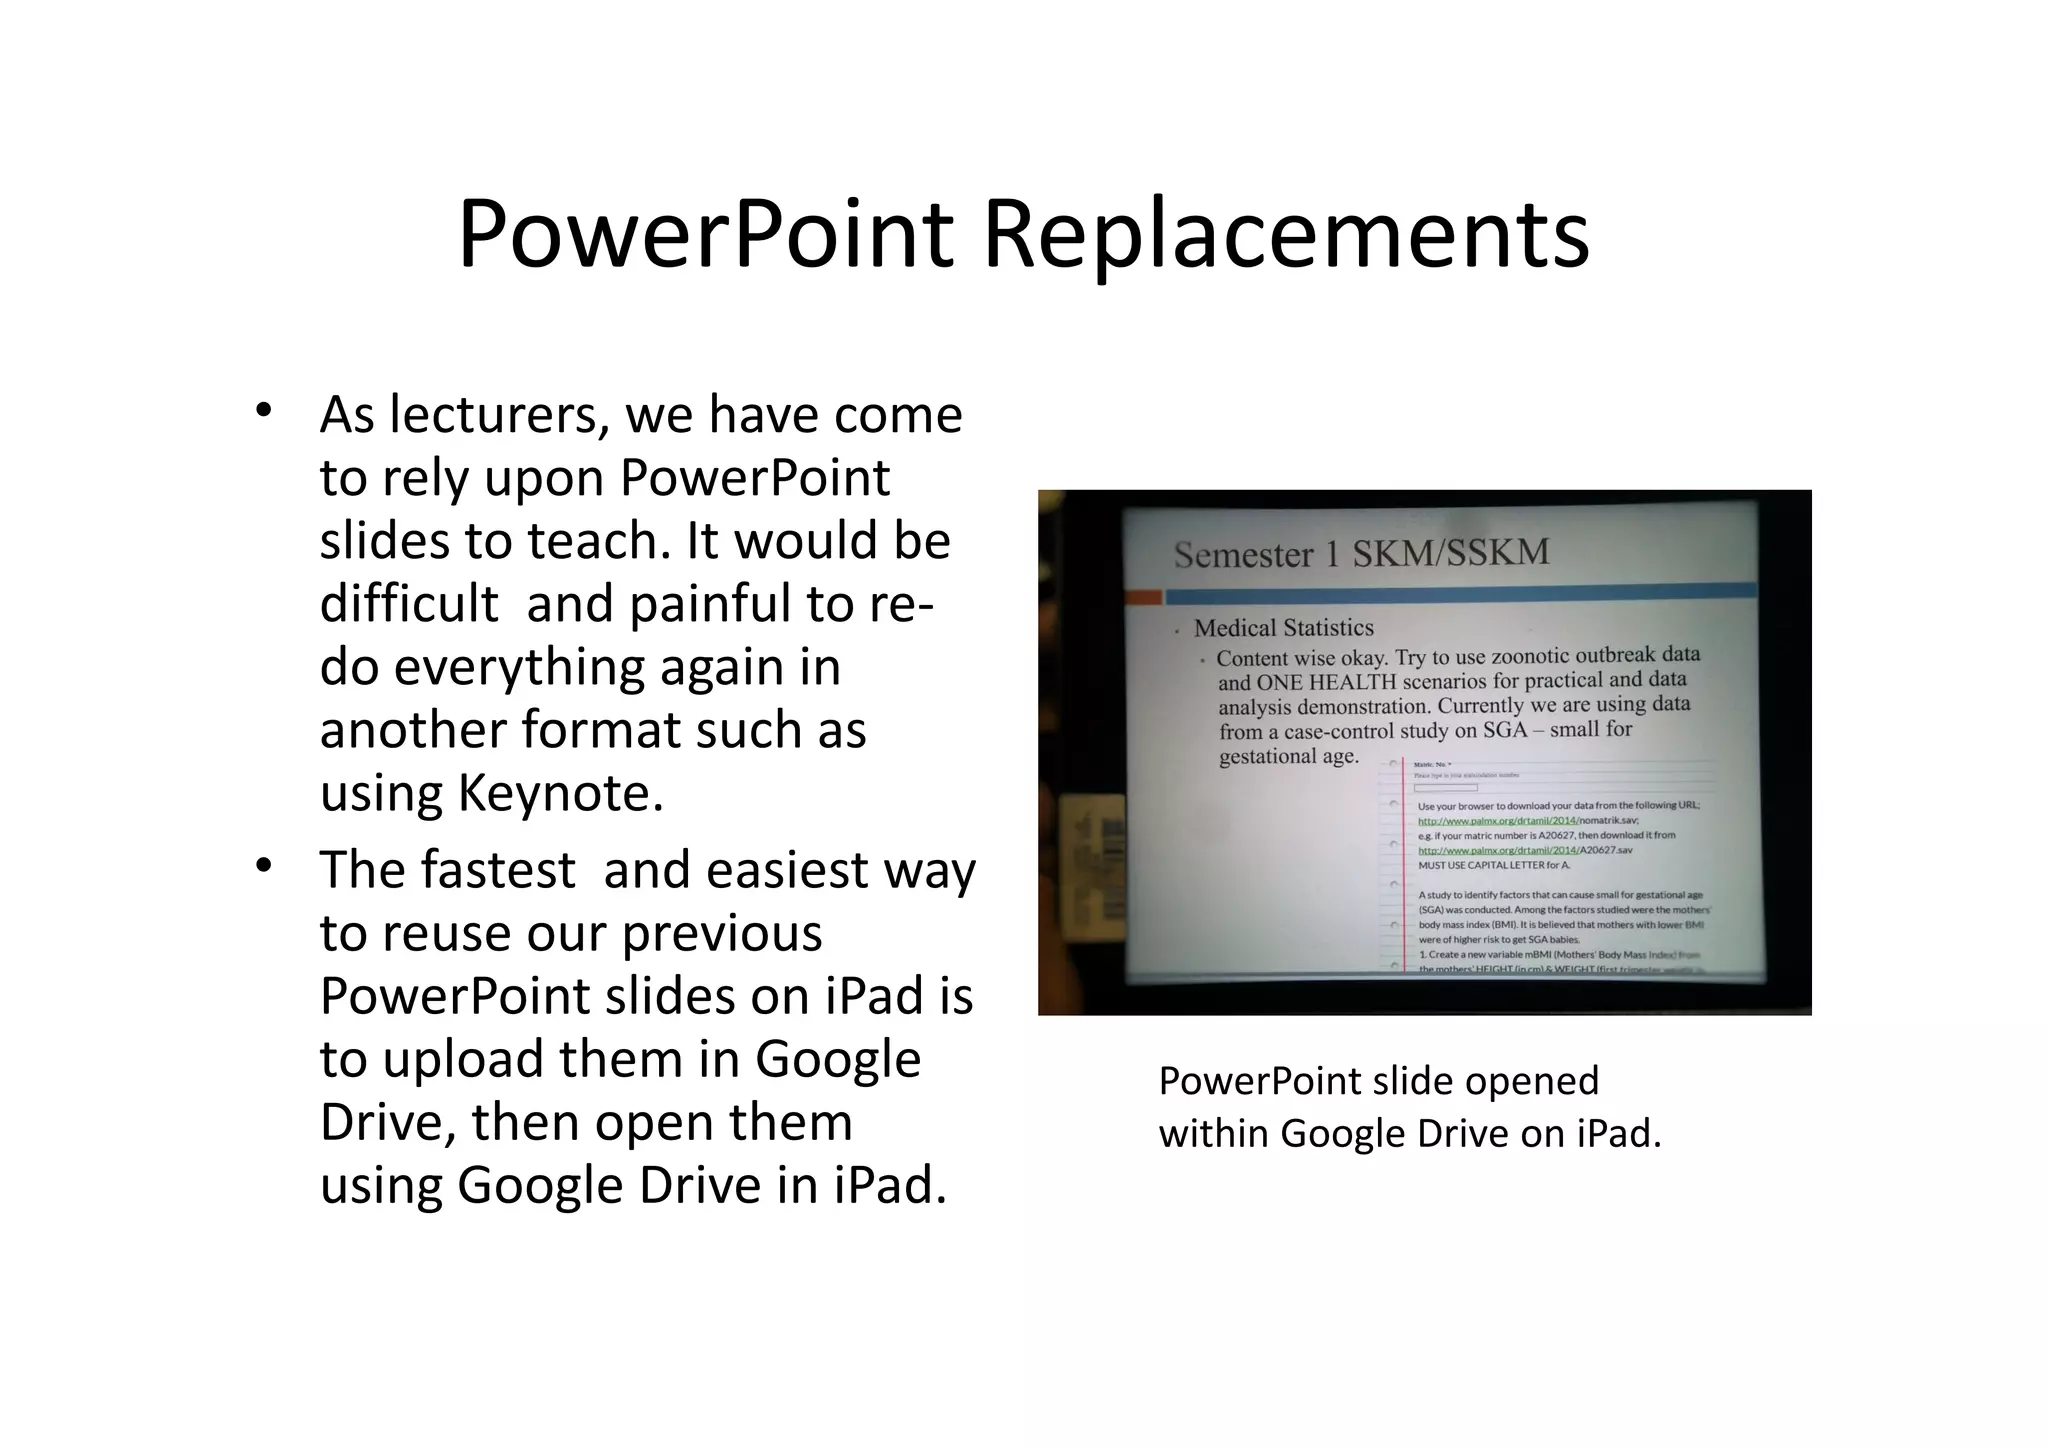
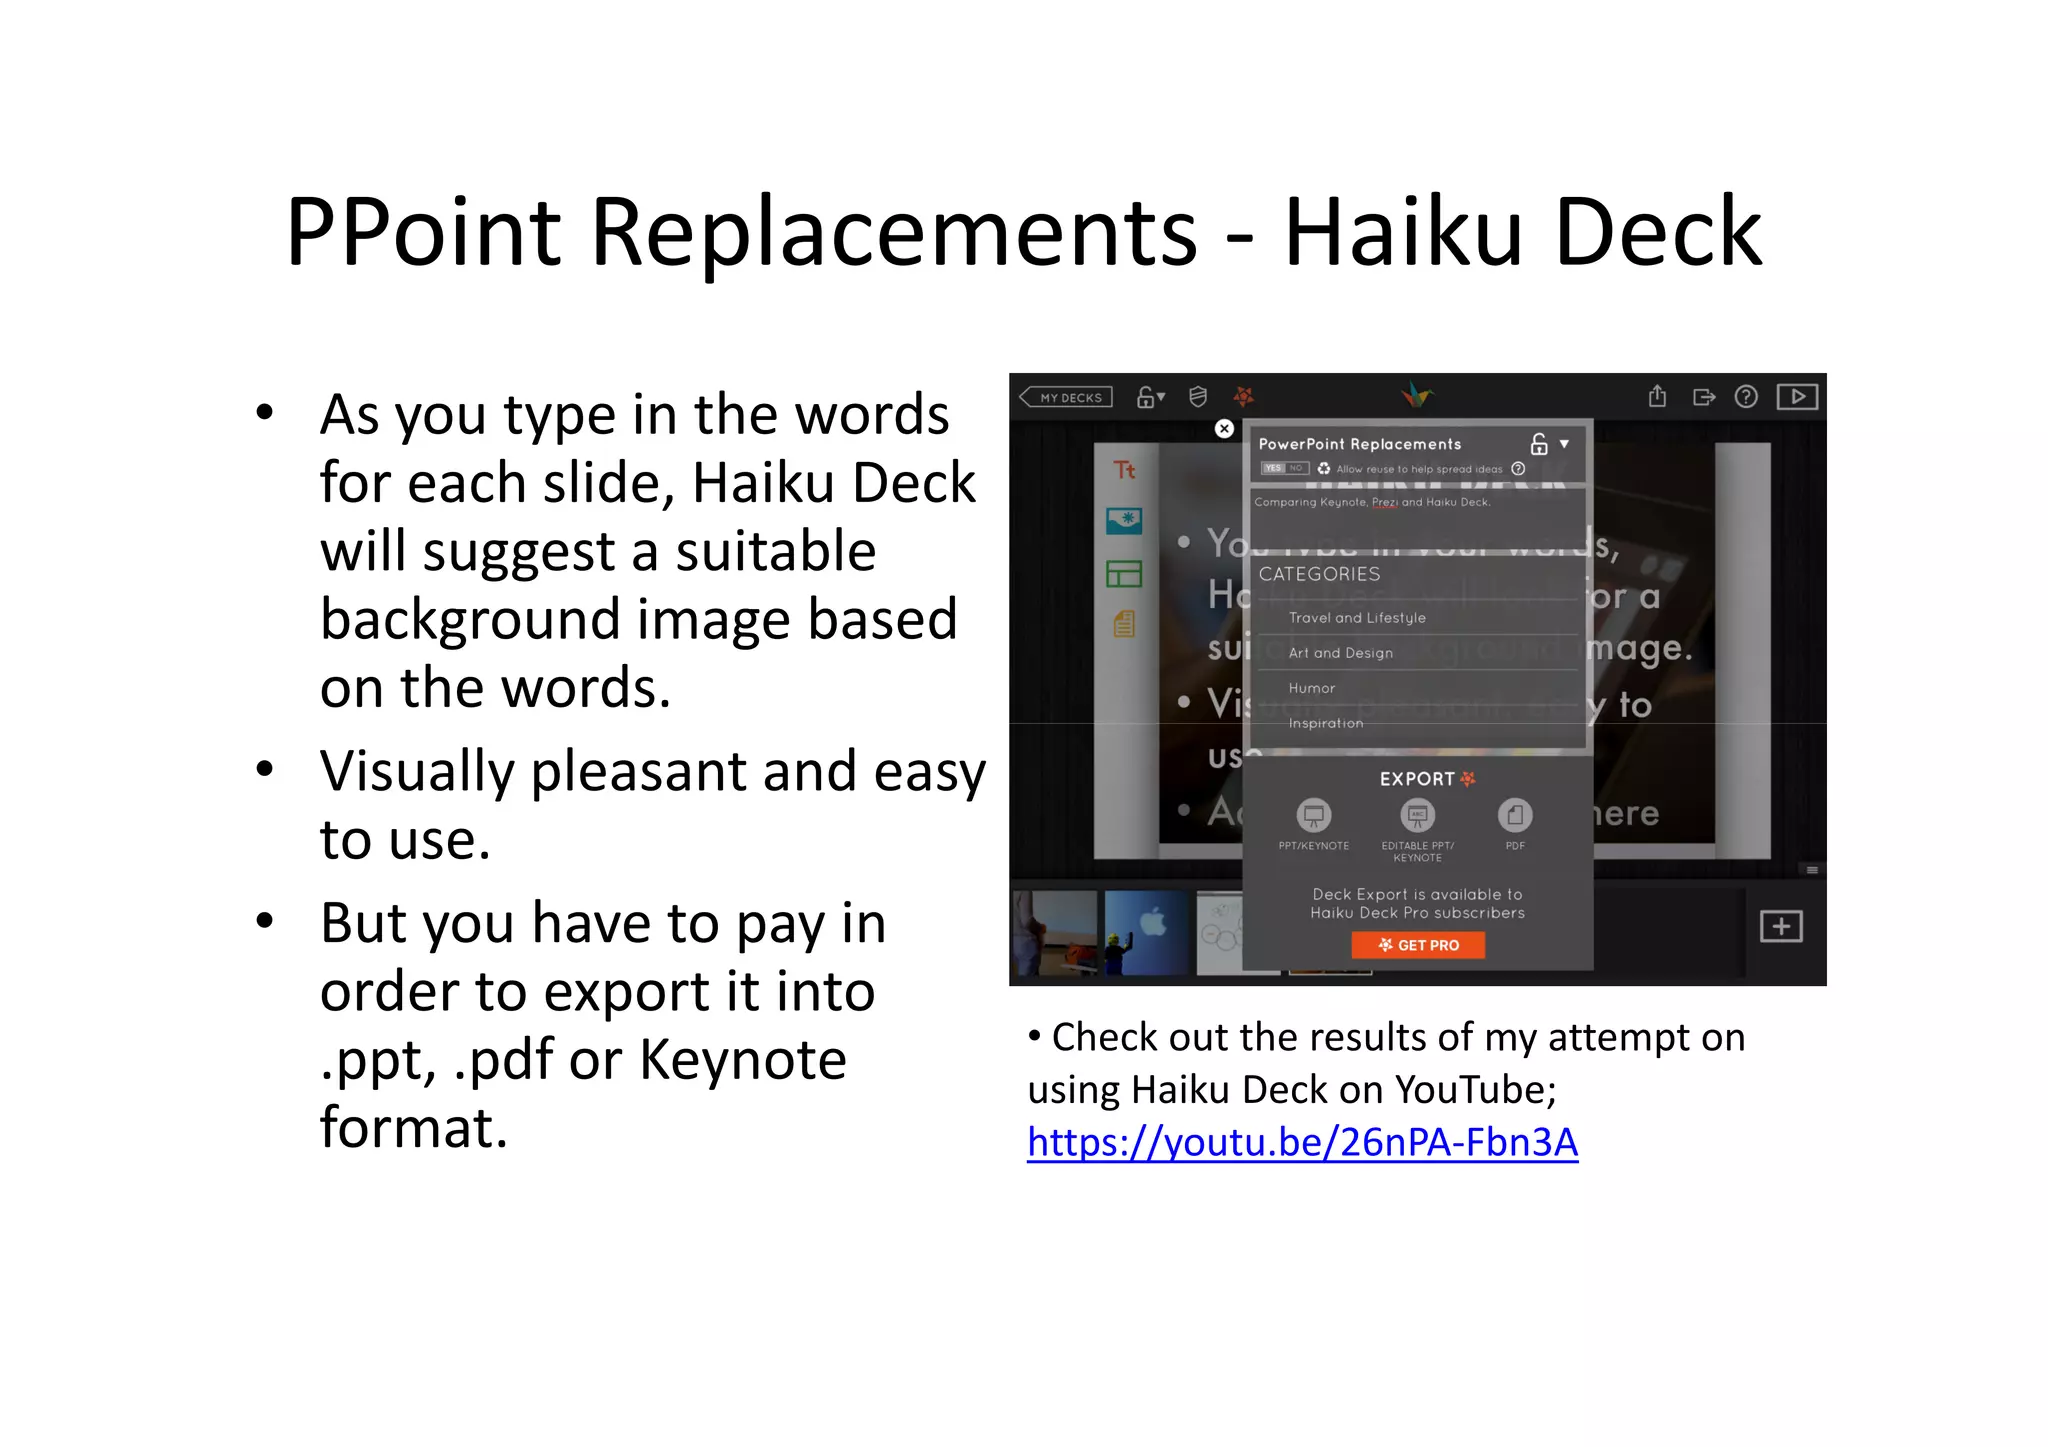
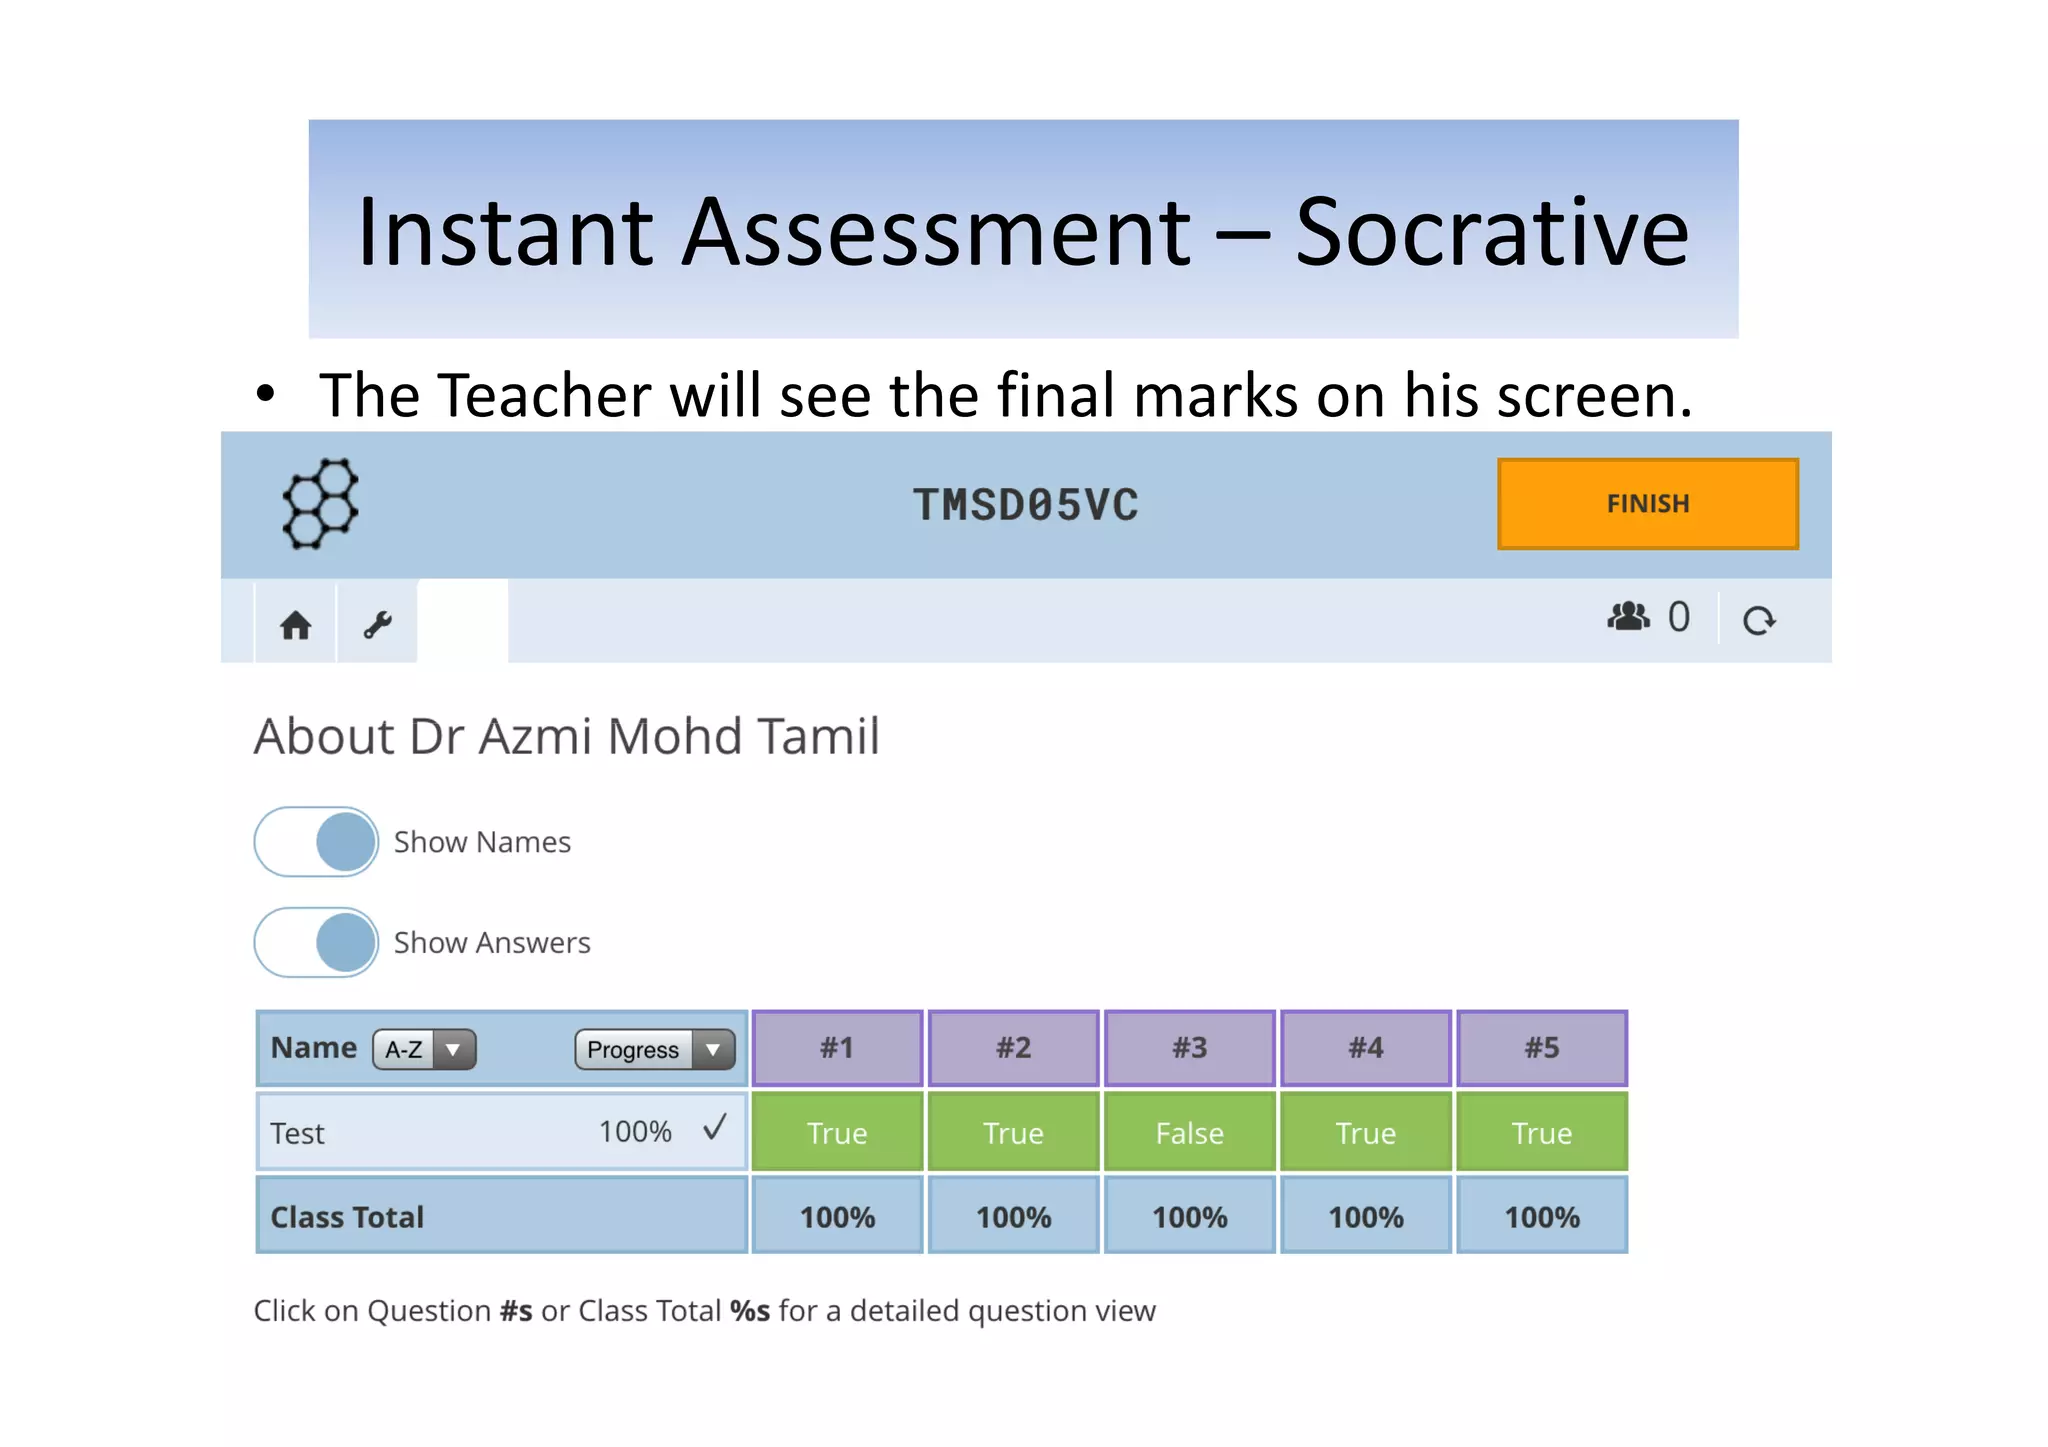
iPad in Education Part 2
Assoc. Prof. Dr Azmi Mohd Tamil (UKM)
partly based on lectures by
Assoc. Prof. Dr Azma Putra (UTeM)
Apple Distinguished Educators
Workshop 17th to 19th December 2015
Sharing the Knowledge
• Based on the 3 days of training with Dr Azma
Putra, I will divide the slides into 3 parts;
– Part 1 – Screencasting the iPad contents onto the
large screen using AirPlay.
– Part 2 – Using iPad apps to create teaching
materials (this presentation).
– Part 3 – Using iTunesU to share teaching materials
with students.
iPad in Education
Part 2 – Creating content using iPad
apps
Caveat Lector
• I am a Windows & Android user. The first time I used
iPad Air 2 was during the workshop.
• I came in late on the first day since I had exams to
handle in HUKM Cheras, so I missed the introduction.
• The iPads that were handed out to us were Wi-Fi
connectivity only, so fast Wi-Fi is a must. Unfortunately
wi-fi UKM-Pelawat & wi-fi UKM-Warga were too slow.
So Dr Helmi Norman & myself converted our MacBook
Air/Win notebook into Wi-Fi routers for participants.
• For Win notebook users, you can convert your
notebook into a router by entering these into
command prompt (please change the wifiname/key);
– netsh wlan set hostednetwork mode=allow ssid=wifiname
key=wifikey
– netsh wlan start hostednetwork
Introduction to iPad
• By the time I joined the class, everyone was
talking to Siri on their iPads, so I had a lot to
catch up. Luckily Dr Azma already posted the
following YouTube video on his iTunesU site.
• https://www.youtube.com/watch?v=D26qjoN
Y6Wk
• Please do go through everything as covered in
this video before going through the apps.
Apps covered during class.
The list of apps that we were asked to download and install into our respective iPad.
Apps as covered during Class
• Paper
• iMovie
• Number
• Garage Band
• Doceri
• Touch Cast
• Keynote
• Adobe Voice
• Socrative Students
• iBook
• Pages
• Adobe Slate
Apps installed during class.
The apps that we were asked to download and install into our respective iPad.
Apps as categorised based on function.
• PowerPoint Replacements
– Keynote
– Prezi*
– Haiku Deck*
• Online Content Creator
(Video)
– TouchCast
– Adobe Voice
– Doceri
– iMovie
– Explain Everything*
• Online Assessment
– Socrative
• Online Content Creator
(ebook)
– Adobe Slate
– iBooks
• Office Replacement Apps
– Numbers (Excel)
– Paper (Paint)
– Pages (Word)
• Useful Tool
– MyScript MathPad (math
symbols)
– GarageBand (music editor)
* Added upon earlier list.
How These Apps Enable Content
Sharing with Students
Source: http://syded.wordpress.com
PowerPoint Replacements
• As lecturers, we have come
to rely upon PowerPoint
slides to teach. It would be
difficult and painful to re-
do everything again in
another format such as
using Keynote.
• The fastest and easiest way
to reuse our previous
PowerPoint slides on iPad is
to upload them in Google
Drive, then open them
using Google Drive in iPad.
PowerPoint slide opened
within Google Drive on iPad.
PPoint Replacements -Keynote
• But if you are starting afresh
on iPad, you can use the
following apps.
– Keynote
– Prezi*
– Haiku Deck*
• Keynote is very similar to
PowerPoint, therefore very
easy to acclimatise yourself to
it.
• You can save the end product
as Keynote, .pdf or .ppt
format, to share with others.
You can even share through
iCloud.
• Check out Dr Azma Putra’s guide on how
to use Keynote on YouTube;
https://www.youtube.com/watch?v=0J1ui
L-7ygI
PPoint Replacements - Prezi
• It is basically a huge
canvas and you paste
anything that you want to
present onto that canvas.
• Then when you present,
you will zoom in and
zoom out from one part
of the canvas to another.
That is the oomph factor.
• Transition is smooth on
iPad, but sucks on my
Windoze web browser.
• Darn difficult for me to
create new frames for
new slides. So I was stuck
after the 6
th
slide.
• Check out the results of my attempt on
using Prezi on YouTube;
https://youtu.be/LfWnAZDiKHU
PPoint Replacements - Haiku Deck
• As you type in the words
for each slide, Haiku Deck
will suggest a suitable
background image based
on the words.
• Visually pleasant and easy
to use.
• But you have to pay in
order to export it into
.ppt, .pdf or Keynote
format.
• Check out the results of my attempt on
using Haiku Deck on YouTube;
https://youtu.be/26nPA-Fbn3A
Content Creation - Video
• For e-learning
enthusiast, just handing
out PowerPoint files is
not enough, somehow
we would like to include
the explanation by the
lecturer along with the
slides.
• So apps that enable us
to do so easily are
greatly appreciated.
• Some apps that were
covered in brief during
class;
– TouchCast
– Adobe Voice
– Doceri
– iMovie
– Explain Everything*
Video Creation – Touch Cast
• A touchcast video is a
video that is fully
browseable, responsive,
and interactive.
• You can combine various
materials such as
Keynote, .pdf files, web
links then annotate them
as you create an
interactive video.
• You can annotate a;
– webpage
– Video
– Images
– Map
– Presentation
– Or any of them together to
create either a touchcast
or an interactive video.
• Just put them into DropBox
& import into Touch Cast.
Video Creation – Touch Cast
• You can decide to record your video either with you
in it or without. I love using Touch Cast.
• Check out my first TouchCast video here;
https://youtu.be/cdS5_eVMjXI
Video Creation – Adobe Voice
• Adobe Voice is a free
iOS app that lets you
make an impact with an
amazing animated
video.
• Something like a
combination of Haiku
Deck & Prezi but you
end up with a beautiful
animated video of your
slides.
• Start by creating a slide,
record your voice, select a
image for background,
add graphics then add
some music. Do this again
and again until you finish
telling your story.
• Check out this video on
Adobe Voice
https://youtu.be/I6f0XM
OHzoM
Video Creation – Doceri
• Doceri is an interactive
whiteboard and
screencast recorder
with tools for hand-
drawn graphics.
• You can import a series
of images into Doceri
then record your
explanation as you draw
upon the images to
illustrate your point.
• Very easy to use. Just
import the image, press
record and start
explaining. Draw lines
on the images as you
talk.
• Check out my video
produced using Doceri
https://youtu.be/3Klg3v
JUIBU
Video Creation – iMovie
• iMovie is a video editing
software application sold
by Apple Inc. for the Mac
and iOS (iPhone, iPad,
iPad Mini and iPod
Touch).
• It was originally released
in 1999 as a Mac OS 8
application bundled with
the first FireWire-enabled
consumer Mac model –
the iMac DV.
• It is very easy and fun to
use. Just pick a template,
insert or record the
relevant clips/images, put
in the explanatory titles
or text, then compile the
video. Good for selling
your course.
• Check out my video
produced using iMovie
https://youtu.be/4ZeFPzR
nDuA
Video Creation – Explain Everything
• Explain Everything is an
easy-to-use design, screen
casting, and interactive
whiteboard app that lets
you annotate, animate,
narrate, import, and export
almost anything to and from
almost anywhere.
• Unfortunately I can’t try it
out since it cost USD4
• Do check out
https://youtu.be/WdzTSeRY
kwg
Content Creation - ebook
• Sometimes a
presentation is not
enough to give the
depth required for the
course. Instead we need
to hand out an ebook
for that.
• So we do need apps
that can create fun an
interactive ebooks.
• Some apps that were
covered in brief during
class;
– Adobe Slate
– iBooks
ebook Creation – Adobe Slate
• Adobe Slate looks like a fun tool to use. It will turn your
next publication into an animated gorgeous visual story.
• Just select the template, add in the images and text and
voila!, it is done.
• Check out https://youtu.be/cmOhIDwIlt4
ebook Creation – iBooks Author
• Dr Azma showed us his
own iBooks on Vibration
and it is a fabulous effort
with animation and
interactivity, created
using iBooks Author.
• iBooks is an e-book
reader application by
Apple Inc. available for
iPad, iPhone & Mac.
• iBooks Author is only
available for Mac with OS
X 10.6.6 or later.
• So with an iPad, you can
only read iBooks.
• To create iBooks, you
need a Mac with iBooks
Author.
• So get a Mac, bro. A
MacIntosh, not a BigMac.
Instant Assessment – Socrative
• The teacher uses Socrative Teacher to set the quiz.
Instant Assessment – Socrative
• Using Socrative Student, students enter the
classroom number and answer the quiz.
Instant Assessment – Socrative
• The Teacher will see the final marks on his screen.
Office Replacements
• It is hard to shift to a
new platform after
years of using Microsoft
Office.
• But for each of the main
apps, there is an
equivalent one in iPad.
• Do check them out. But
when presenting, only
Keynote is required.
• Office Replacement
Apps
– Keynote (PowerPoint)
– Numbers (Excel)
– Pages (Word)
– Paper 53 (Paint)
• Paper 53 is in fact is
like a bunch of papers
that you can write or
draw and show to
others. Just like paper.
Useful Tool – MyScript MathPad
• I teach statistics therefore I have difficulties in
writing math symbols on my slides.
• Dr Azma introduced me to MyScript MathPad
(math symbols) which helps me tremendously.
• You just write in freehand and the apps
change it into the appropriate math symbols
which you could copy and paste onto your
presentation.
Now my slide looks nice!
Next in “iPad in Education”
Part 3: Putting It All Together at
iTunesU

iPad in Education Part 2

  • 1.
    iPad in EducationPart 2 Assoc. Prof. Dr Azmi Mohd Tamil (UKM) partly based on lectures by Assoc. Prof. Dr Azma Putra (UTeM)
  • 2.
    Apple Distinguished Educators Workshop17th to 19th December 2015
  • 3.
    Sharing the Knowledge •Based on the 3 days of training with Dr Azma Putra, I will divide the slides into 3 parts; – Part 1 – Screencasting the iPad contents onto the large screen using AirPlay. – Part 2 – Using iPad apps to create teaching materials (this presentation). – Part 3 – Using iTunesU to share teaching materials with students.
  • 4.
    iPad in Education Part2 – Creating content using iPad apps
  • 5.
    Caveat Lector • Iam a Windows & Android user. The first time I used iPad Air 2 was during the workshop. • I came in late on the first day since I had exams to handle in HUKM Cheras, so I missed the introduction. • The iPads that were handed out to us were Wi-Fi connectivity only, so fast Wi-Fi is a must. Unfortunately wi-fi UKM-Pelawat & wi-fi UKM-Warga were too slow. So Dr Helmi Norman & myself converted our MacBook Air/Win notebook into Wi-Fi routers for participants. • For Win notebook users, you can convert your notebook into a router by entering these into command prompt (please change the wifiname/key); – netsh wlan set hostednetwork mode=allow ssid=wifiname key=wifikey – netsh wlan start hostednetwork
  • 6.
    Introduction to iPad •By the time I joined the class, everyone was talking to Siri on their iPads, so I had a lot to catch up. Luckily Dr Azma already posted the following YouTube video on his iTunesU site. • https://www.youtube.com/watch?v=D26qjoN Y6Wk • Please do go through everything as covered in this video before going through the apps.
  • 7.
    Apps covered duringclass. The list of apps that we were asked to download and install into our respective iPad.
  • 8.
    Apps as coveredduring Class • Paper • iMovie • Number • Garage Band • Doceri • Touch Cast • Keynote • Adobe Voice • Socrative Students • iBook • Pages • Adobe Slate
  • 9.
    Apps installed duringclass. The apps that we were asked to download and install into our respective iPad.
  • 10.
    Apps as categorisedbased on function. • PowerPoint Replacements – Keynote – Prezi* – Haiku Deck* • Online Content Creator (Video) – TouchCast – Adobe Voice – Doceri – iMovie – Explain Everything* • Online Assessment – Socrative • Online Content Creator (ebook) – Adobe Slate – iBooks • Office Replacement Apps – Numbers (Excel) – Paper (Paint) – Pages (Word) • Useful Tool – MyScript MathPad (math symbols) – GarageBand (music editor) * Added upon earlier list.
  • 11.
    How These AppsEnable Content Sharing with Students Source: http://syded.wordpress.com
  • 12.
    PowerPoint Replacements • Aslecturers, we have come to rely upon PowerPoint slides to teach. It would be difficult and painful to re- do everything again in another format such as using Keynote. • The fastest and easiest way to reuse our previous PowerPoint slides on iPad is to upload them in Google Drive, then open them using Google Drive in iPad. PowerPoint slide opened within Google Drive on iPad.
  • 13.
    PPoint Replacements -Keynote •But if you are starting afresh on iPad, you can use the following apps. – Keynote – Prezi* – Haiku Deck* • Keynote is very similar to PowerPoint, therefore very easy to acclimatise yourself to it. • You can save the end product as Keynote, .pdf or .ppt format, to share with others. You can even share through iCloud. • Check out Dr Azma Putra’s guide on how to use Keynote on YouTube; https://www.youtube.com/watch?v=0J1ui L-7ygI
  • 14.
    PPoint Replacements -Prezi • It is basically a huge canvas and you paste anything that you want to present onto that canvas. • Then when you present, you will zoom in and zoom out from one part of the canvas to another. That is the oomph factor. • Transition is smooth on iPad, but sucks on my Windoze web browser. • Darn difficult for me to create new frames for new slides. So I was stuck after the 6 th slide. • Check out the results of my attempt on using Prezi on YouTube; https://youtu.be/LfWnAZDiKHU
  • 15.
    PPoint Replacements -Haiku Deck • As you type in the words for each slide, Haiku Deck will suggest a suitable background image based on the words. • Visually pleasant and easy to use. • But you have to pay in order to export it into .ppt, .pdf or Keynote format. • Check out the results of my attempt on using Haiku Deck on YouTube; https://youtu.be/26nPA-Fbn3A
  • 16.
    Content Creation -Video • For e-learning enthusiast, just handing out PowerPoint files is not enough, somehow we would like to include the explanation by the lecturer along with the slides. • So apps that enable us to do so easily are greatly appreciated. • Some apps that were covered in brief during class; – TouchCast – Adobe Voice – Doceri – iMovie – Explain Everything*
  • 17.
    Video Creation –Touch Cast • A touchcast video is a video that is fully browseable, responsive, and interactive. • You can combine various materials such as Keynote, .pdf files, web links then annotate them as you create an interactive video. • You can annotate a; – webpage – Video – Images – Map – Presentation – Or any of them together to create either a touchcast or an interactive video. • Just put them into DropBox & import into Touch Cast.
  • 18.
    Video Creation –Touch Cast • You can decide to record your video either with you in it or without. I love using Touch Cast. • Check out my first TouchCast video here; https://youtu.be/cdS5_eVMjXI
  • 19.
    Video Creation –Adobe Voice • Adobe Voice is a free iOS app that lets you make an impact with an amazing animated video. • Something like a combination of Haiku Deck & Prezi but you end up with a beautiful animated video of your slides. • Start by creating a slide, record your voice, select a image for background, add graphics then add some music. Do this again and again until you finish telling your story. • Check out this video on Adobe Voice https://youtu.be/I6f0XM OHzoM
  • 20.
    Video Creation –Doceri • Doceri is an interactive whiteboard and screencast recorder with tools for hand- drawn graphics. • You can import a series of images into Doceri then record your explanation as you draw upon the images to illustrate your point. • Very easy to use. Just import the image, press record and start explaining. Draw lines on the images as you talk. • Check out my video produced using Doceri https://youtu.be/3Klg3v JUIBU
  • 21.
    Video Creation –iMovie • iMovie is a video editing software application sold by Apple Inc. for the Mac and iOS (iPhone, iPad, iPad Mini and iPod Touch). • It was originally released in 1999 as a Mac OS 8 application bundled with the first FireWire-enabled consumer Mac model – the iMac DV. • It is very easy and fun to use. Just pick a template, insert or record the relevant clips/images, put in the explanatory titles or text, then compile the video. Good for selling your course. • Check out my video produced using iMovie https://youtu.be/4ZeFPzR nDuA
  • 22.
    Video Creation –Explain Everything • Explain Everything is an easy-to-use design, screen casting, and interactive whiteboard app that lets you annotate, animate, narrate, import, and export almost anything to and from almost anywhere. • Unfortunately I can’t try it out since it cost USD4 • Do check out https://youtu.be/WdzTSeRY kwg
  • 23.
    Content Creation -ebook • Sometimes a presentation is not enough to give the depth required for the course. Instead we need to hand out an ebook for that. • So we do need apps that can create fun an interactive ebooks. • Some apps that were covered in brief during class; – Adobe Slate – iBooks
  • 24.
    ebook Creation –Adobe Slate • Adobe Slate looks like a fun tool to use. It will turn your next publication into an animated gorgeous visual story. • Just select the template, add in the images and text and voila!, it is done. • Check out https://youtu.be/cmOhIDwIlt4
  • 25.
    ebook Creation –iBooks Author • Dr Azma showed us his own iBooks on Vibration and it is a fabulous effort with animation and interactivity, created using iBooks Author. • iBooks is an e-book reader application by Apple Inc. available for iPad, iPhone & Mac. • iBooks Author is only available for Mac with OS X 10.6.6 or later. • So with an iPad, you can only read iBooks. • To create iBooks, you need a Mac with iBooks Author. • So get a Mac, bro. A MacIntosh, not a BigMac.
  • 26.
    Instant Assessment –Socrative • The teacher uses Socrative Teacher to set the quiz.
  • 27.
    Instant Assessment –Socrative • Using Socrative Student, students enter the classroom number and answer the quiz.
  • 28.
    Instant Assessment –Socrative • The Teacher will see the final marks on his screen.
  • 29.
    Office Replacements • Itis hard to shift to a new platform after years of using Microsoft Office. • But for each of the main apps, there is an equivalent one in iPad. • Do check them out. But when presenting, only Keynote is required. • Office Replacement Apps – Keynote (PowerPoint) – Numbers (Excel) – Pages (Word) – Paper 53 (Paint) • Paper 53 is in fact is like a bunch of papers that you can write or draw and show to others. Just like paper.
  • 30.
    Useful Tool –MyScript MathPad • I teach statistics therefore I have difficulties in writing math symbols on my slides. • Dr Azma introduced me to MyScript MathPad (math symbols) which helps me tremendously. • You just write in freehand and the apps change it into the appropriate math symbols which you could copy and paste onto your presentation.
  • 31.
    Now my slidelooks nice!
  • 32.
    Next in “iPadin Education” Part 3: Putting It All Together at iTunesU