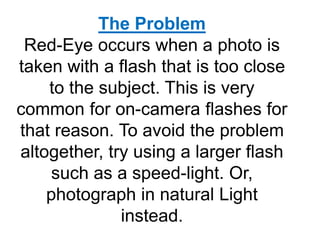
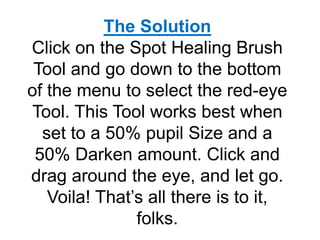
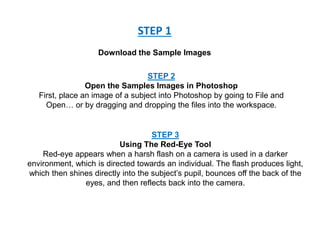
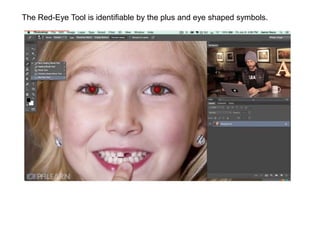
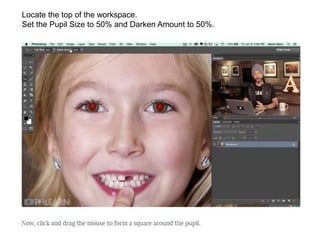
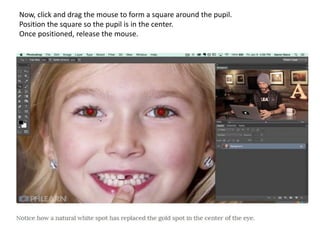
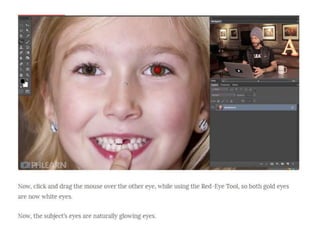
1. The document provides step-by-step instructions for using Photoshop's red-eye removal tool to fix red-eye in photographs caused by on-camera flashes being too close to the subject.
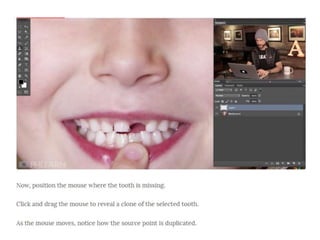
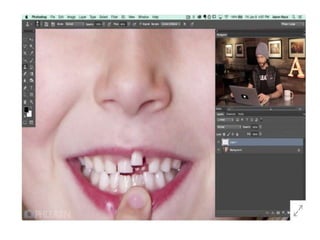
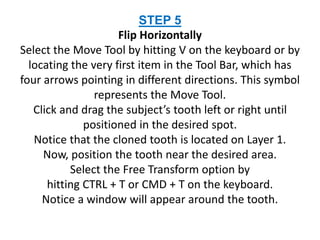
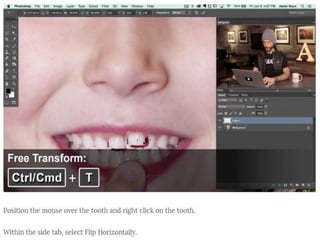
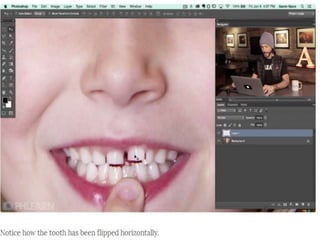
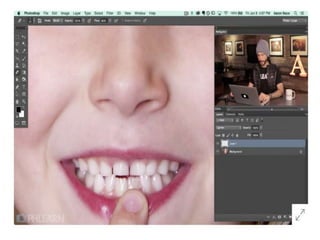
2. It also describes how to use the clone stamp tool to duplicate a missing tooth by sampling from another part of the image and positioning it in the empty space.
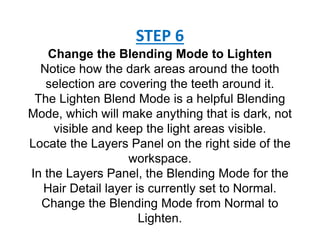
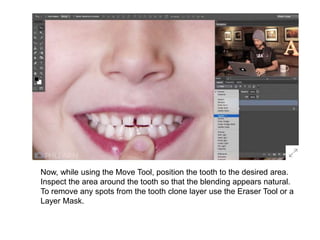
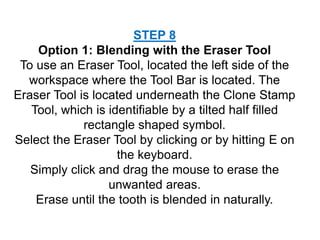
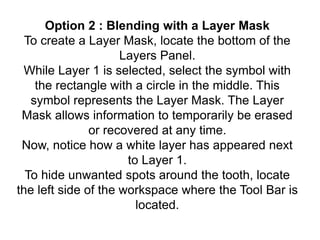
3. Finally, it explains two methods for blending the cloned tooth layer with the background layer - using an eraser tool or creating a layer mask and painting with black and white to reveal or conceal parts of the cloned tooth layer.


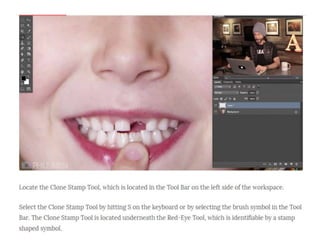
![If the size of the clone stamp brush needs to
be made larger or smaller, hit the [ or ] on the
keyboard to resize the brush to the desired
size.
Position the mouse over the corner of the
tooth that needs to be duplicated.
While Layer 1 is selected, simply
hold Option and click the corner of the tooth to
select the source point of the clone stamp.
Once the source point is selected,
release Option.](https://image.slidesharecdn.com/howtouseredeyeremoval-181204062538/85/How-to-use-red-eye-removal-12-320.jpg)