Downloaded 126 times
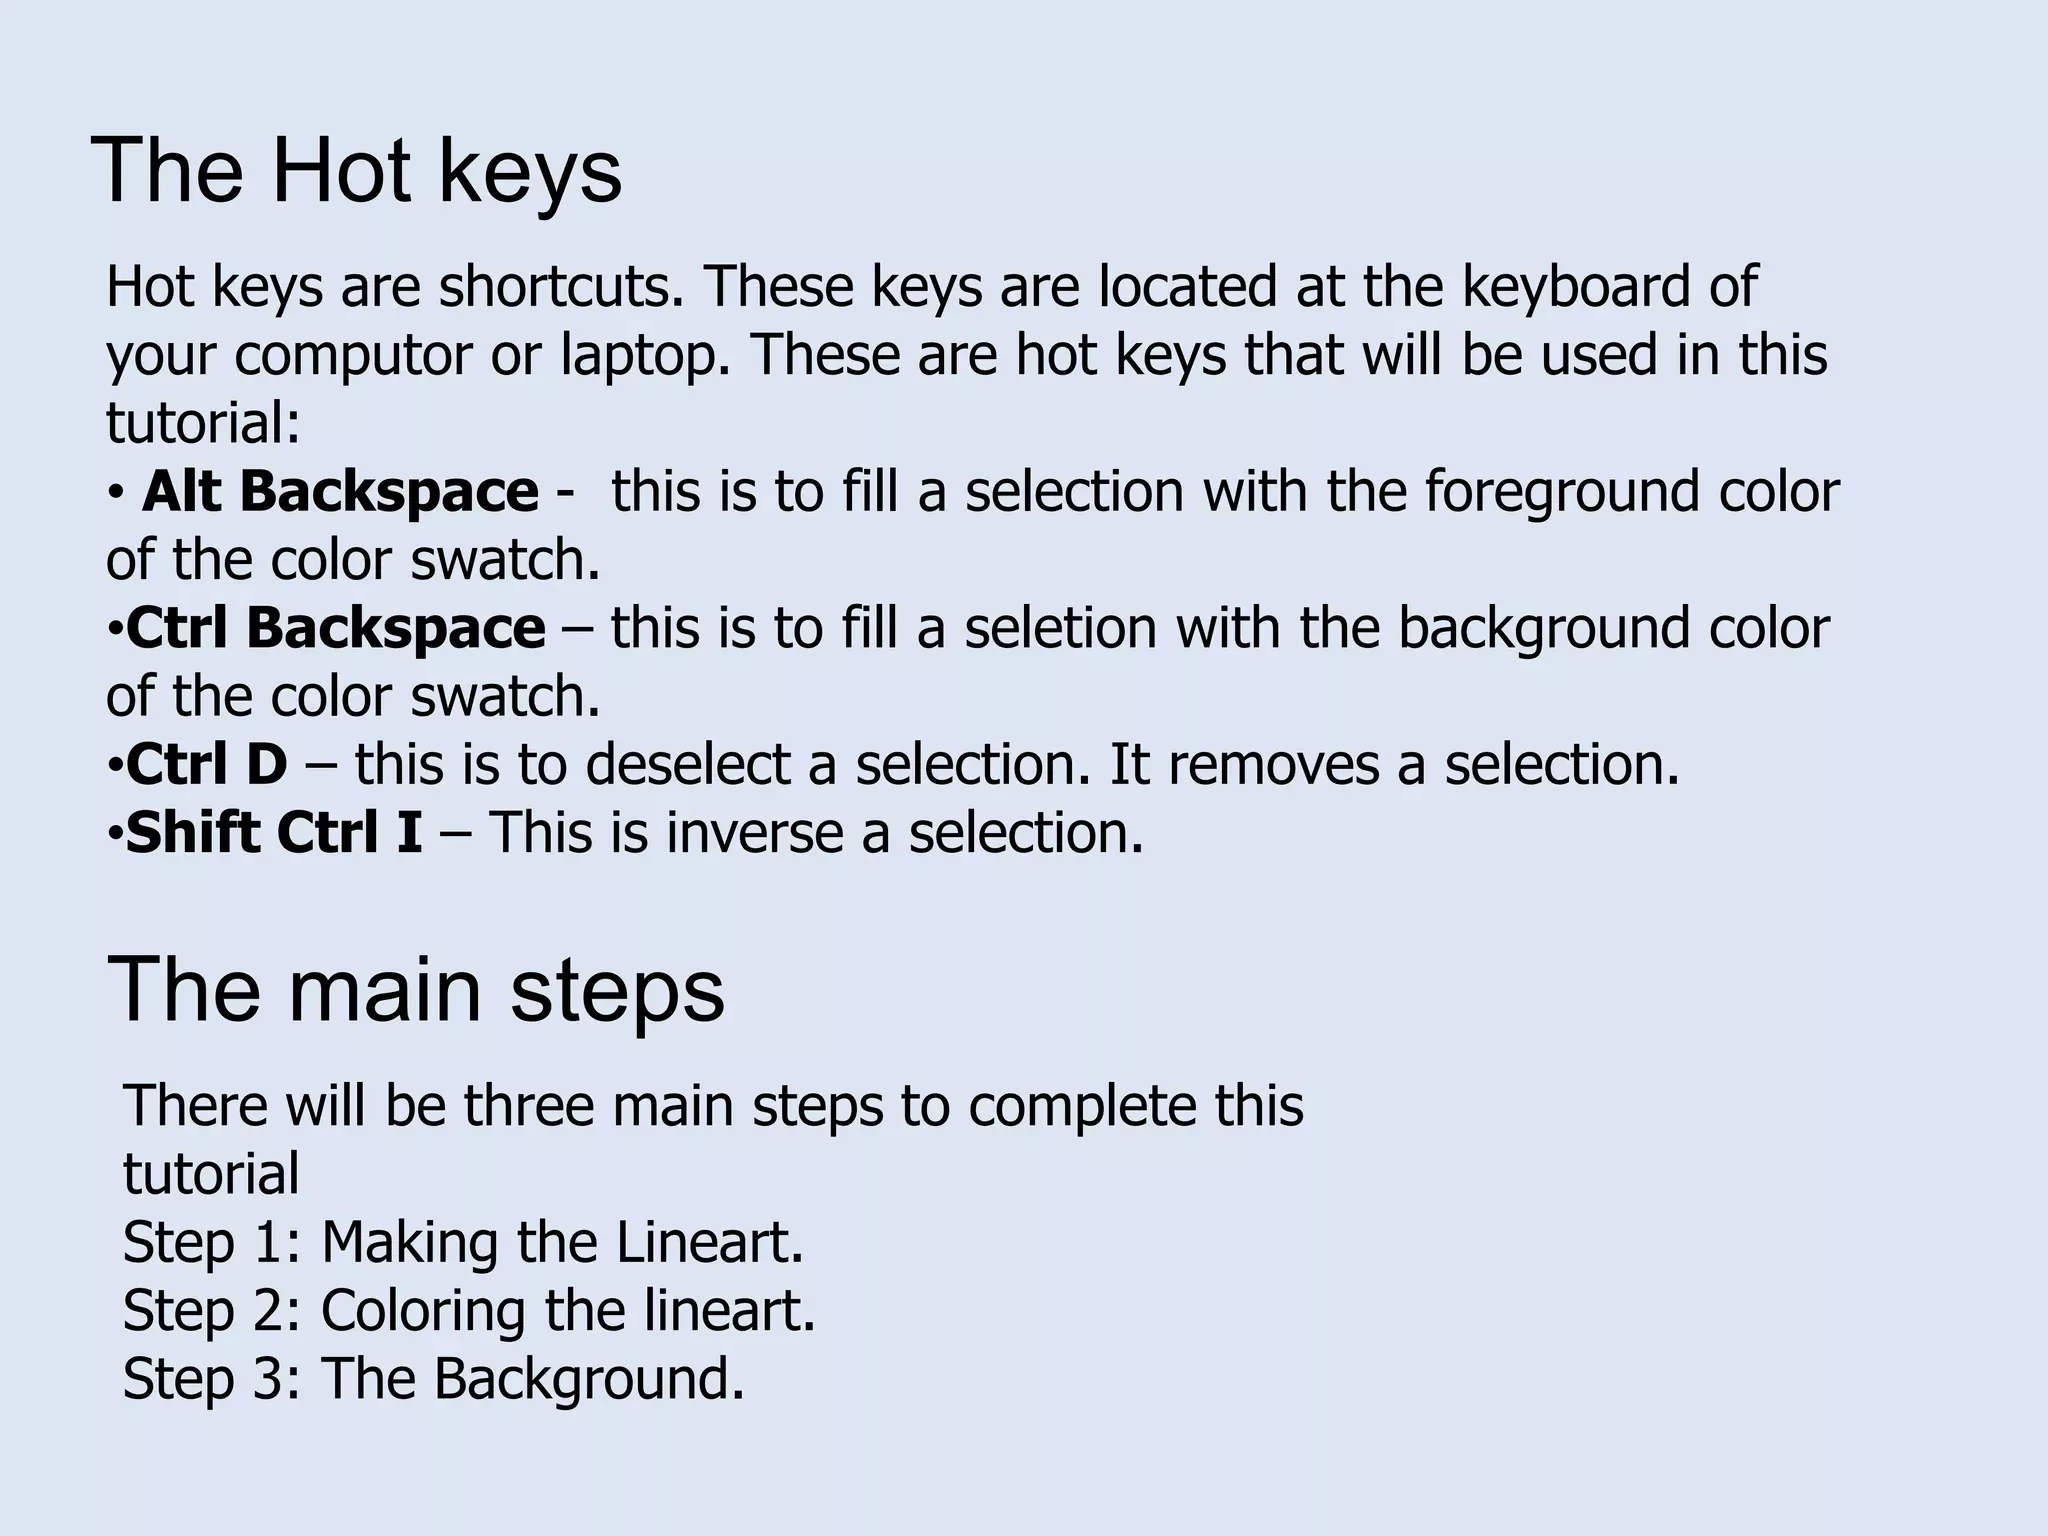
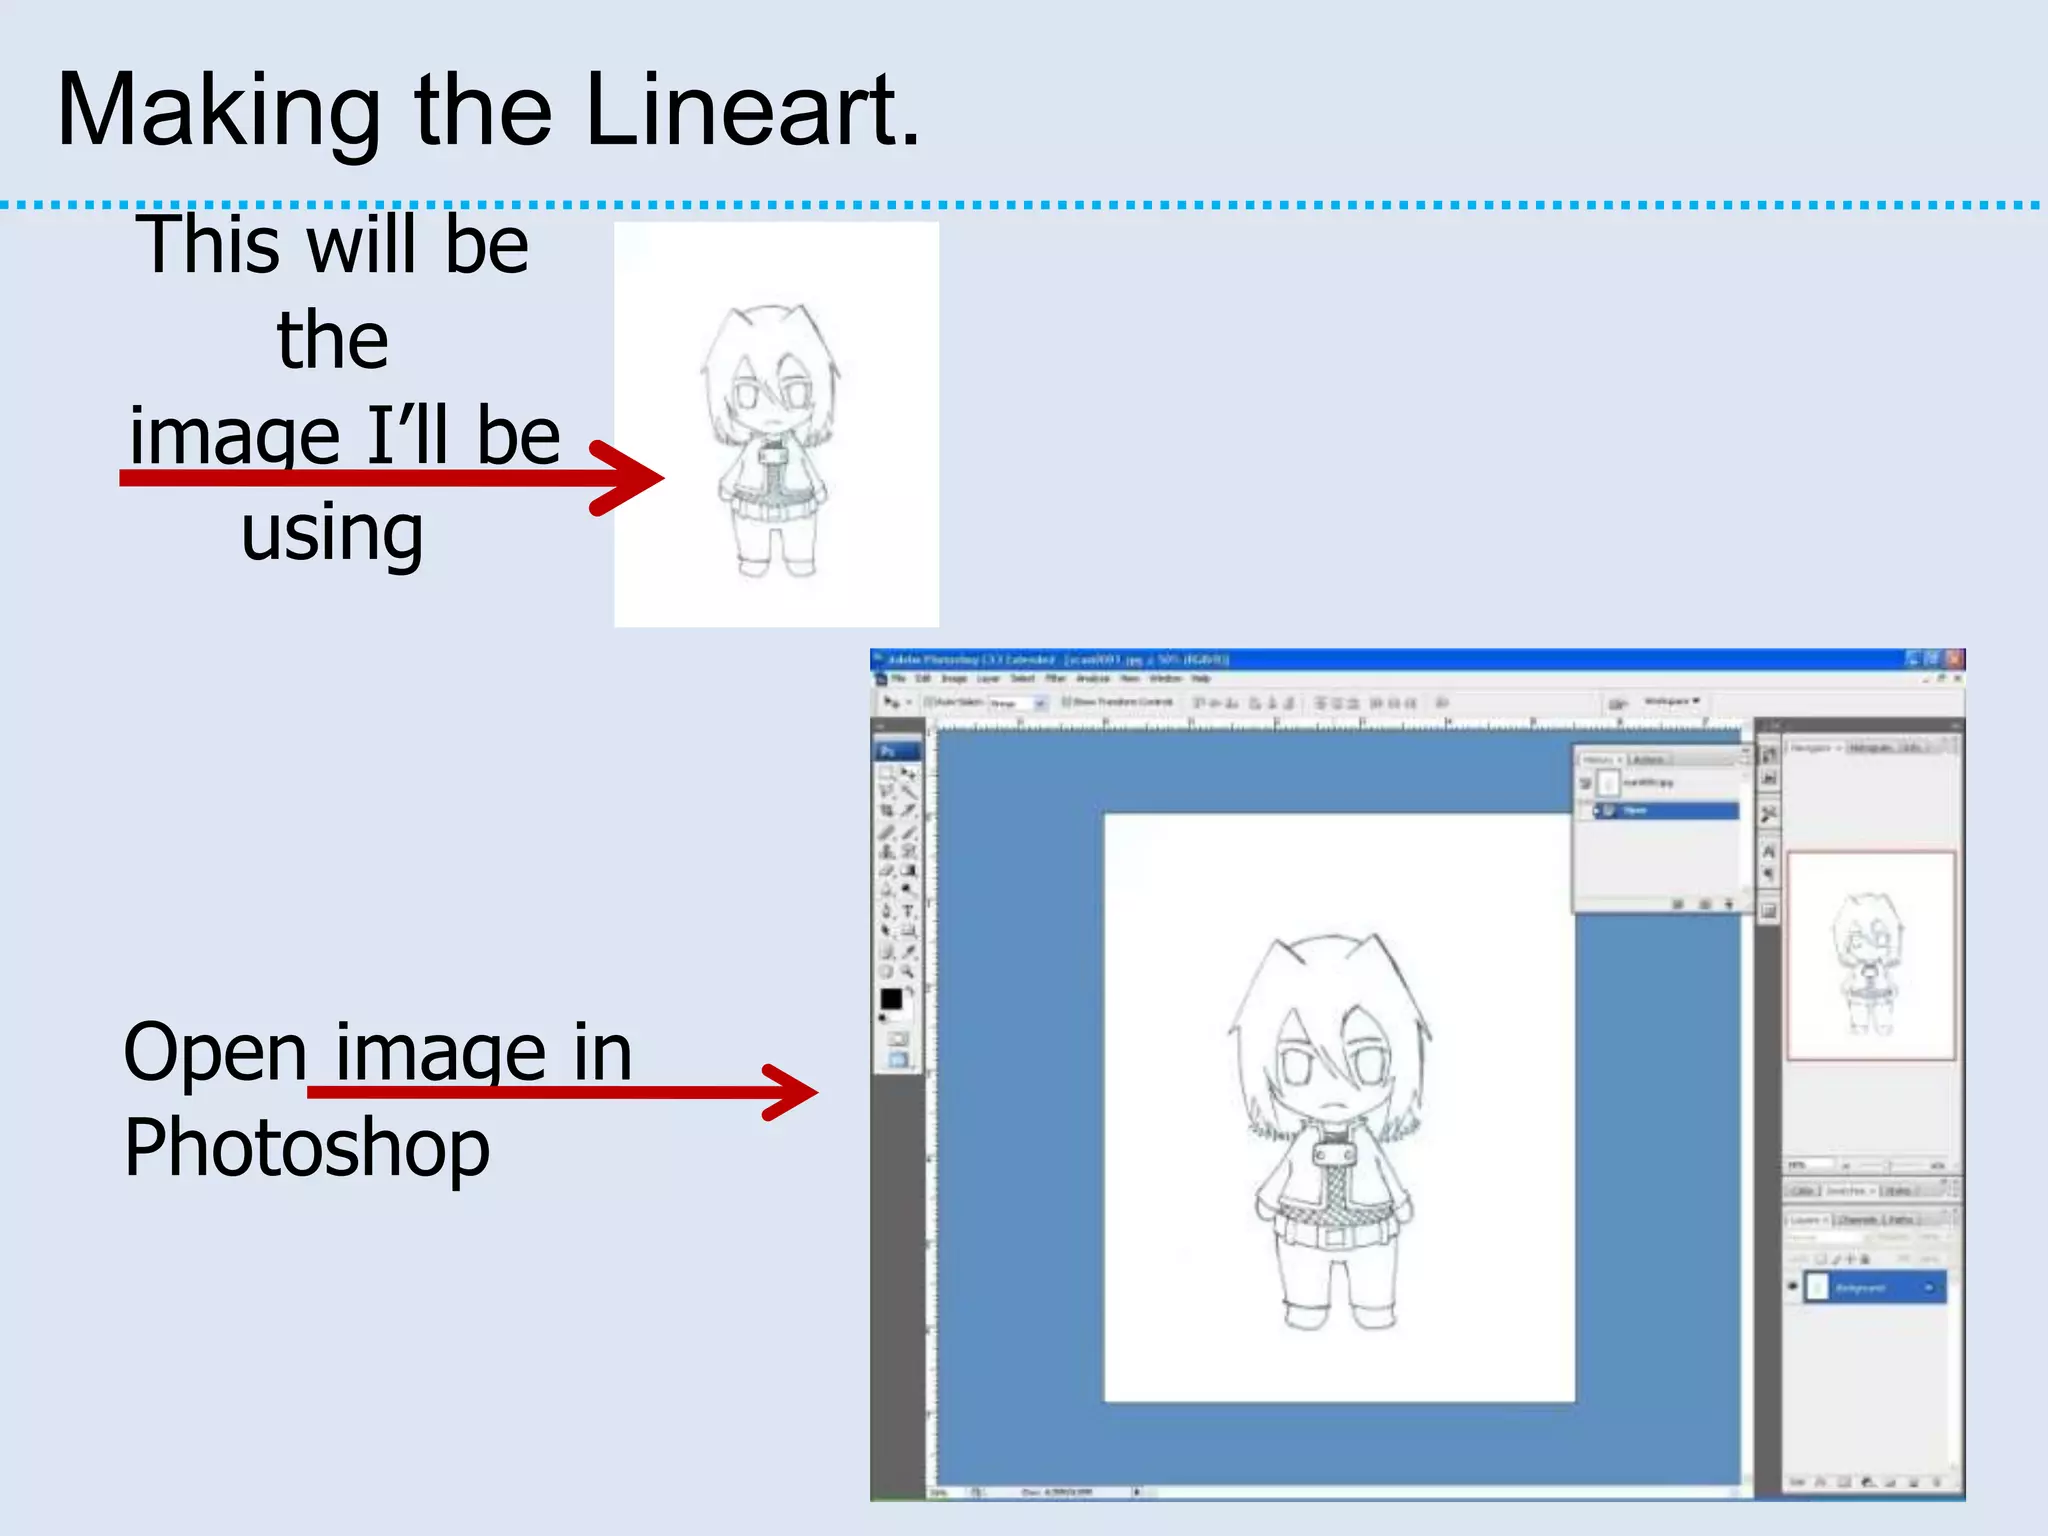
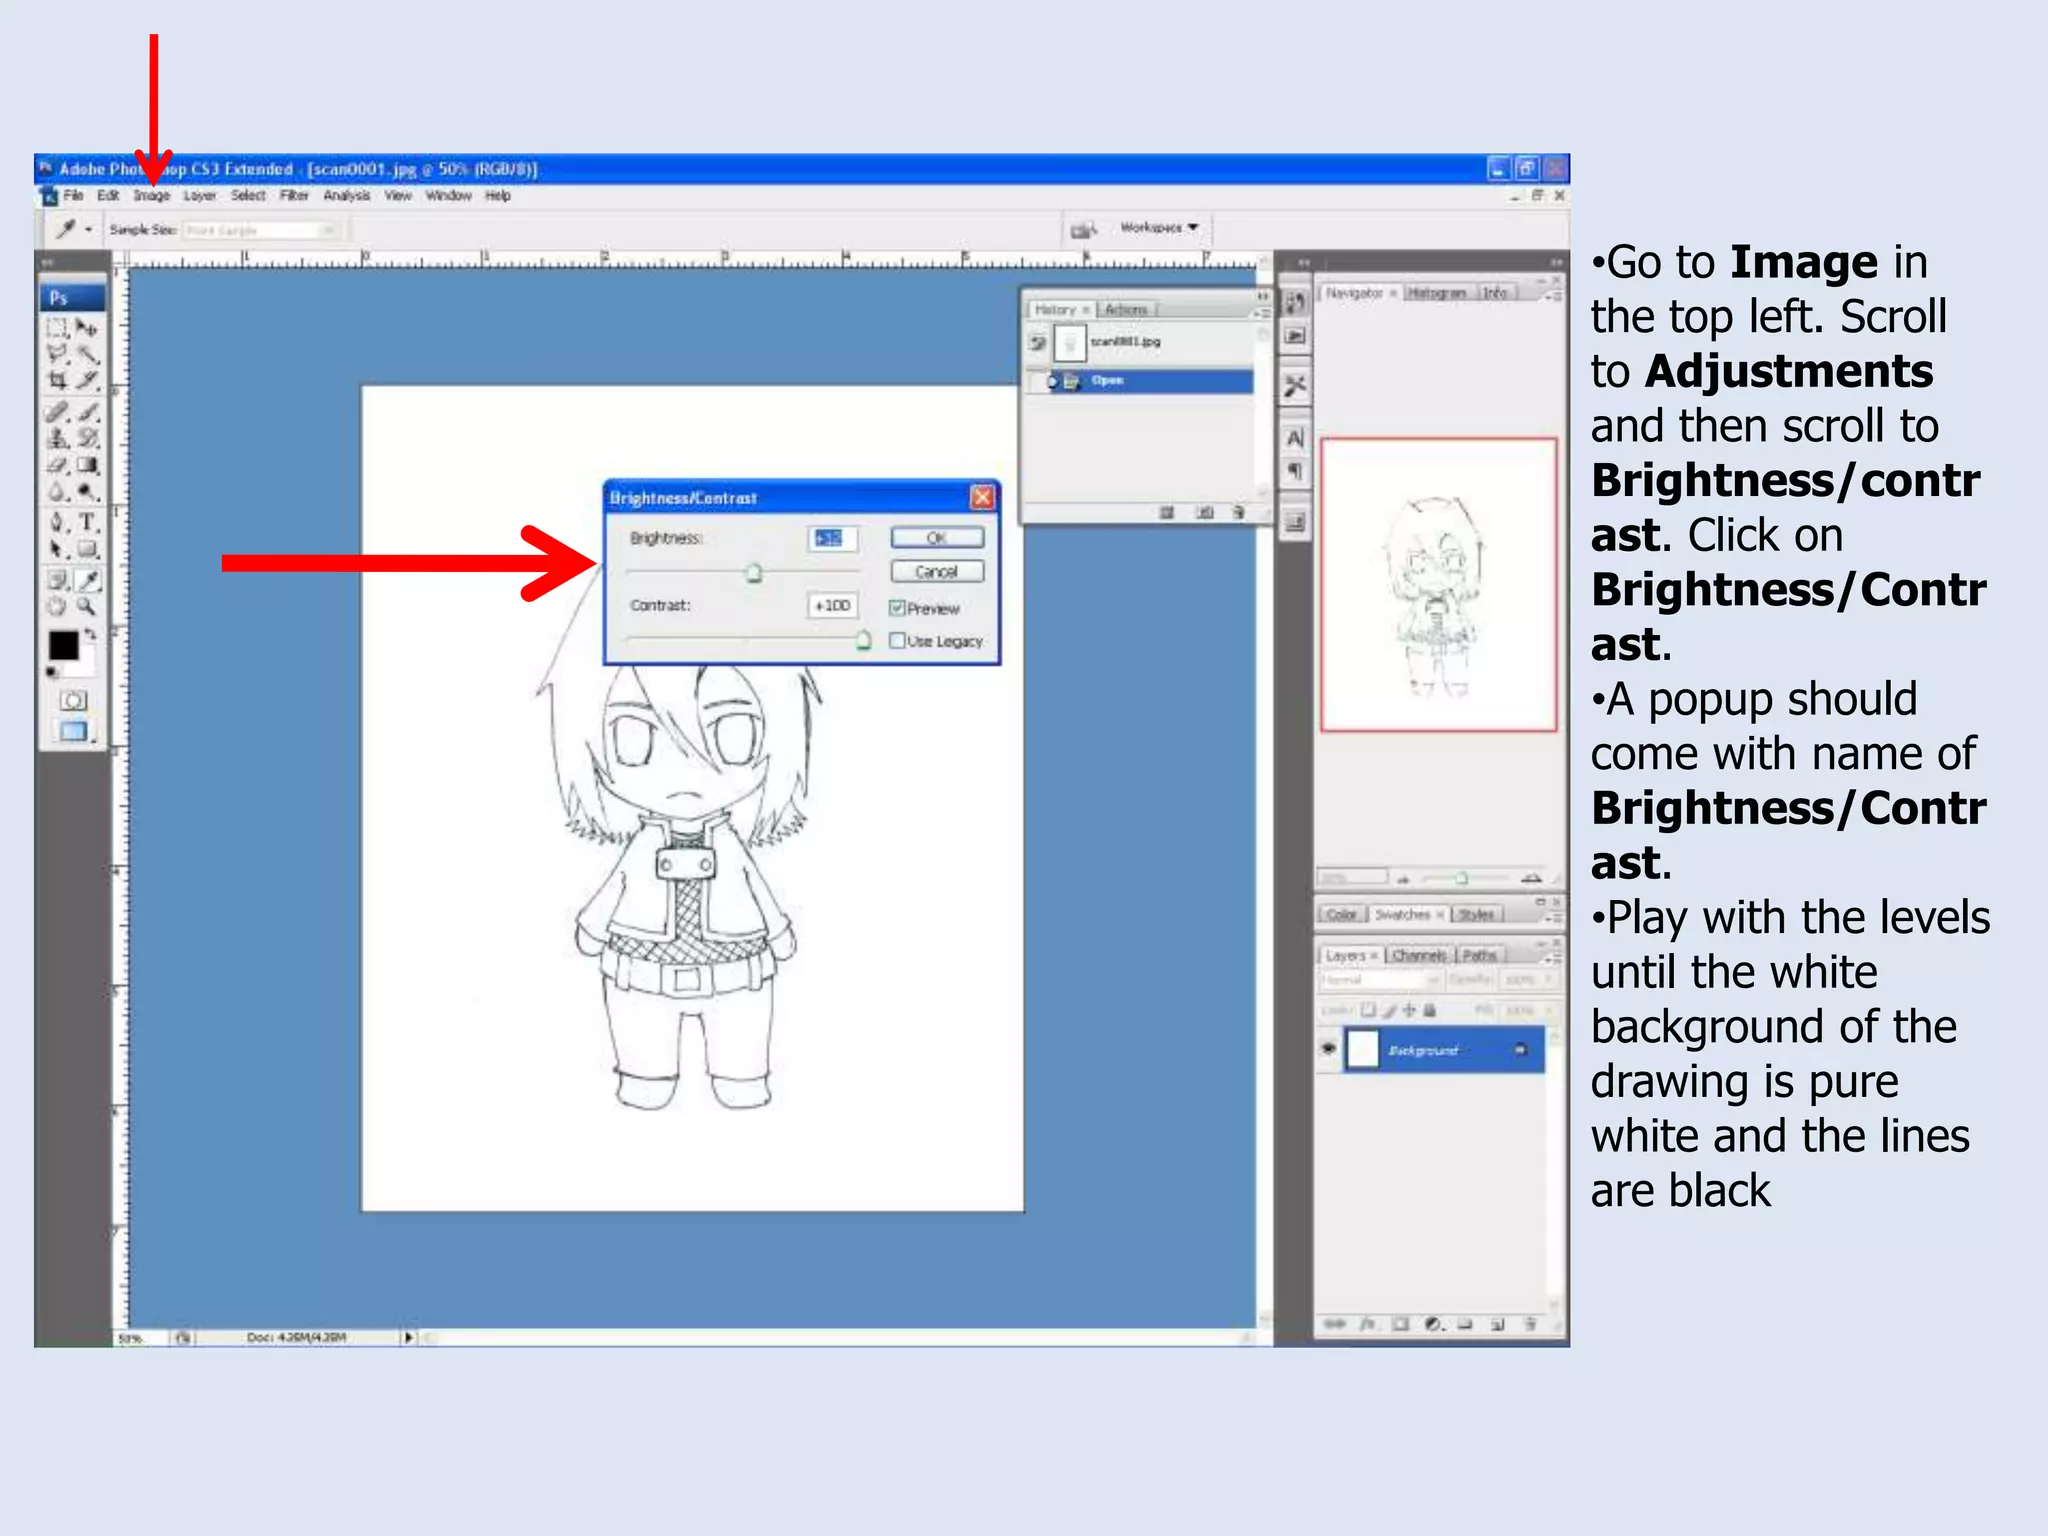
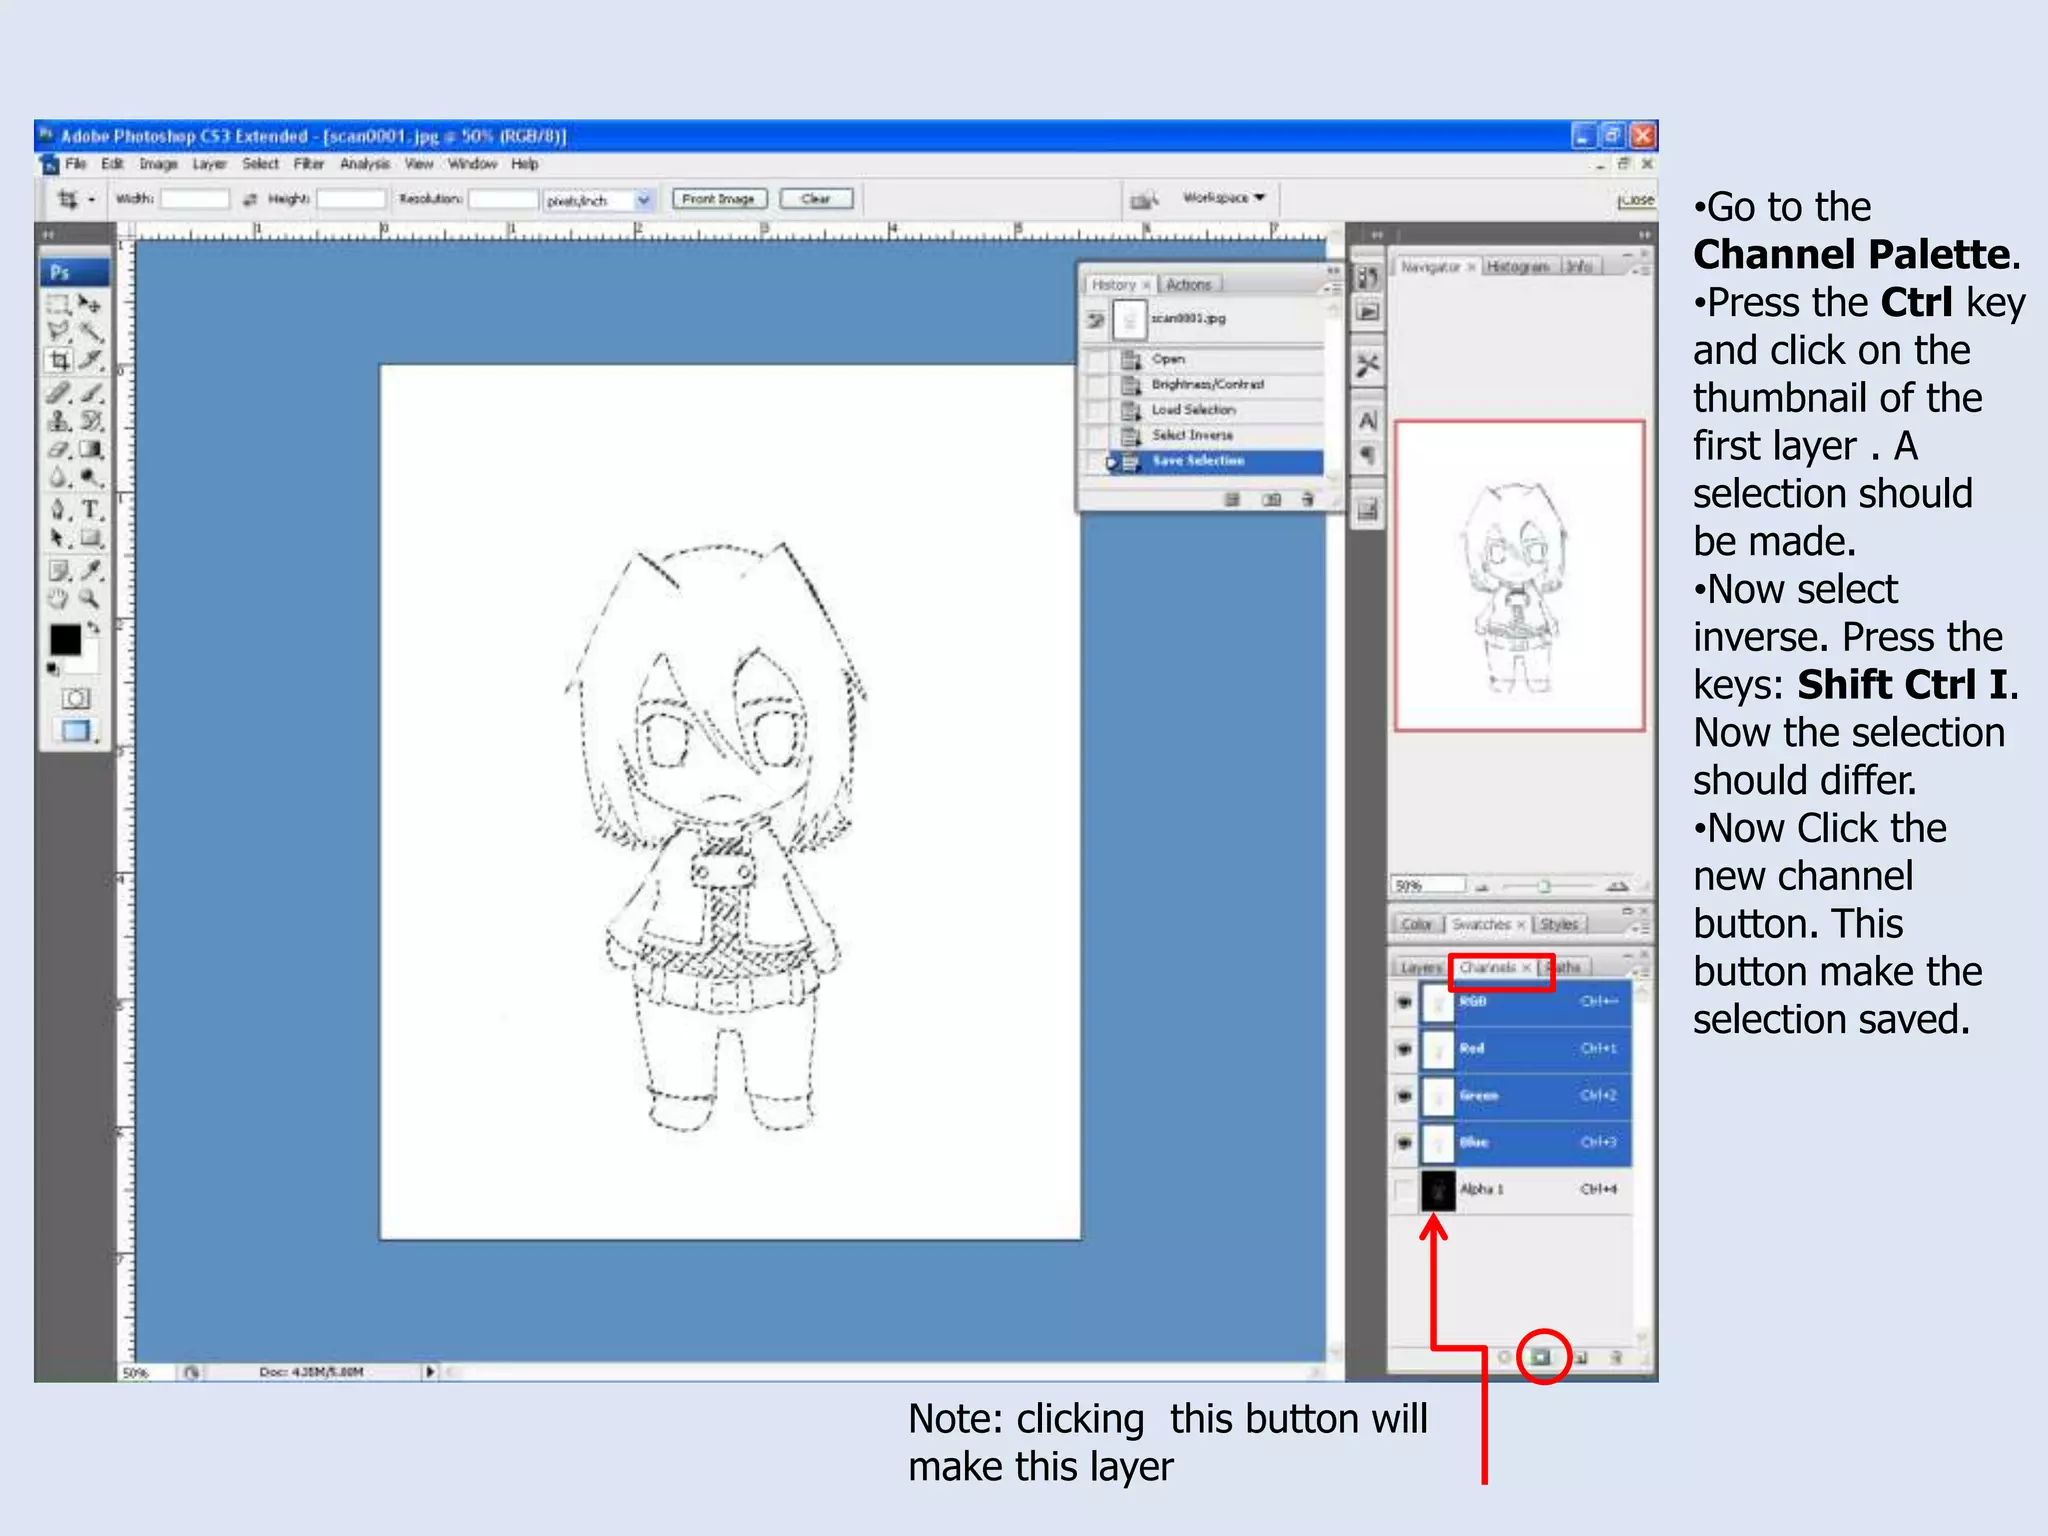
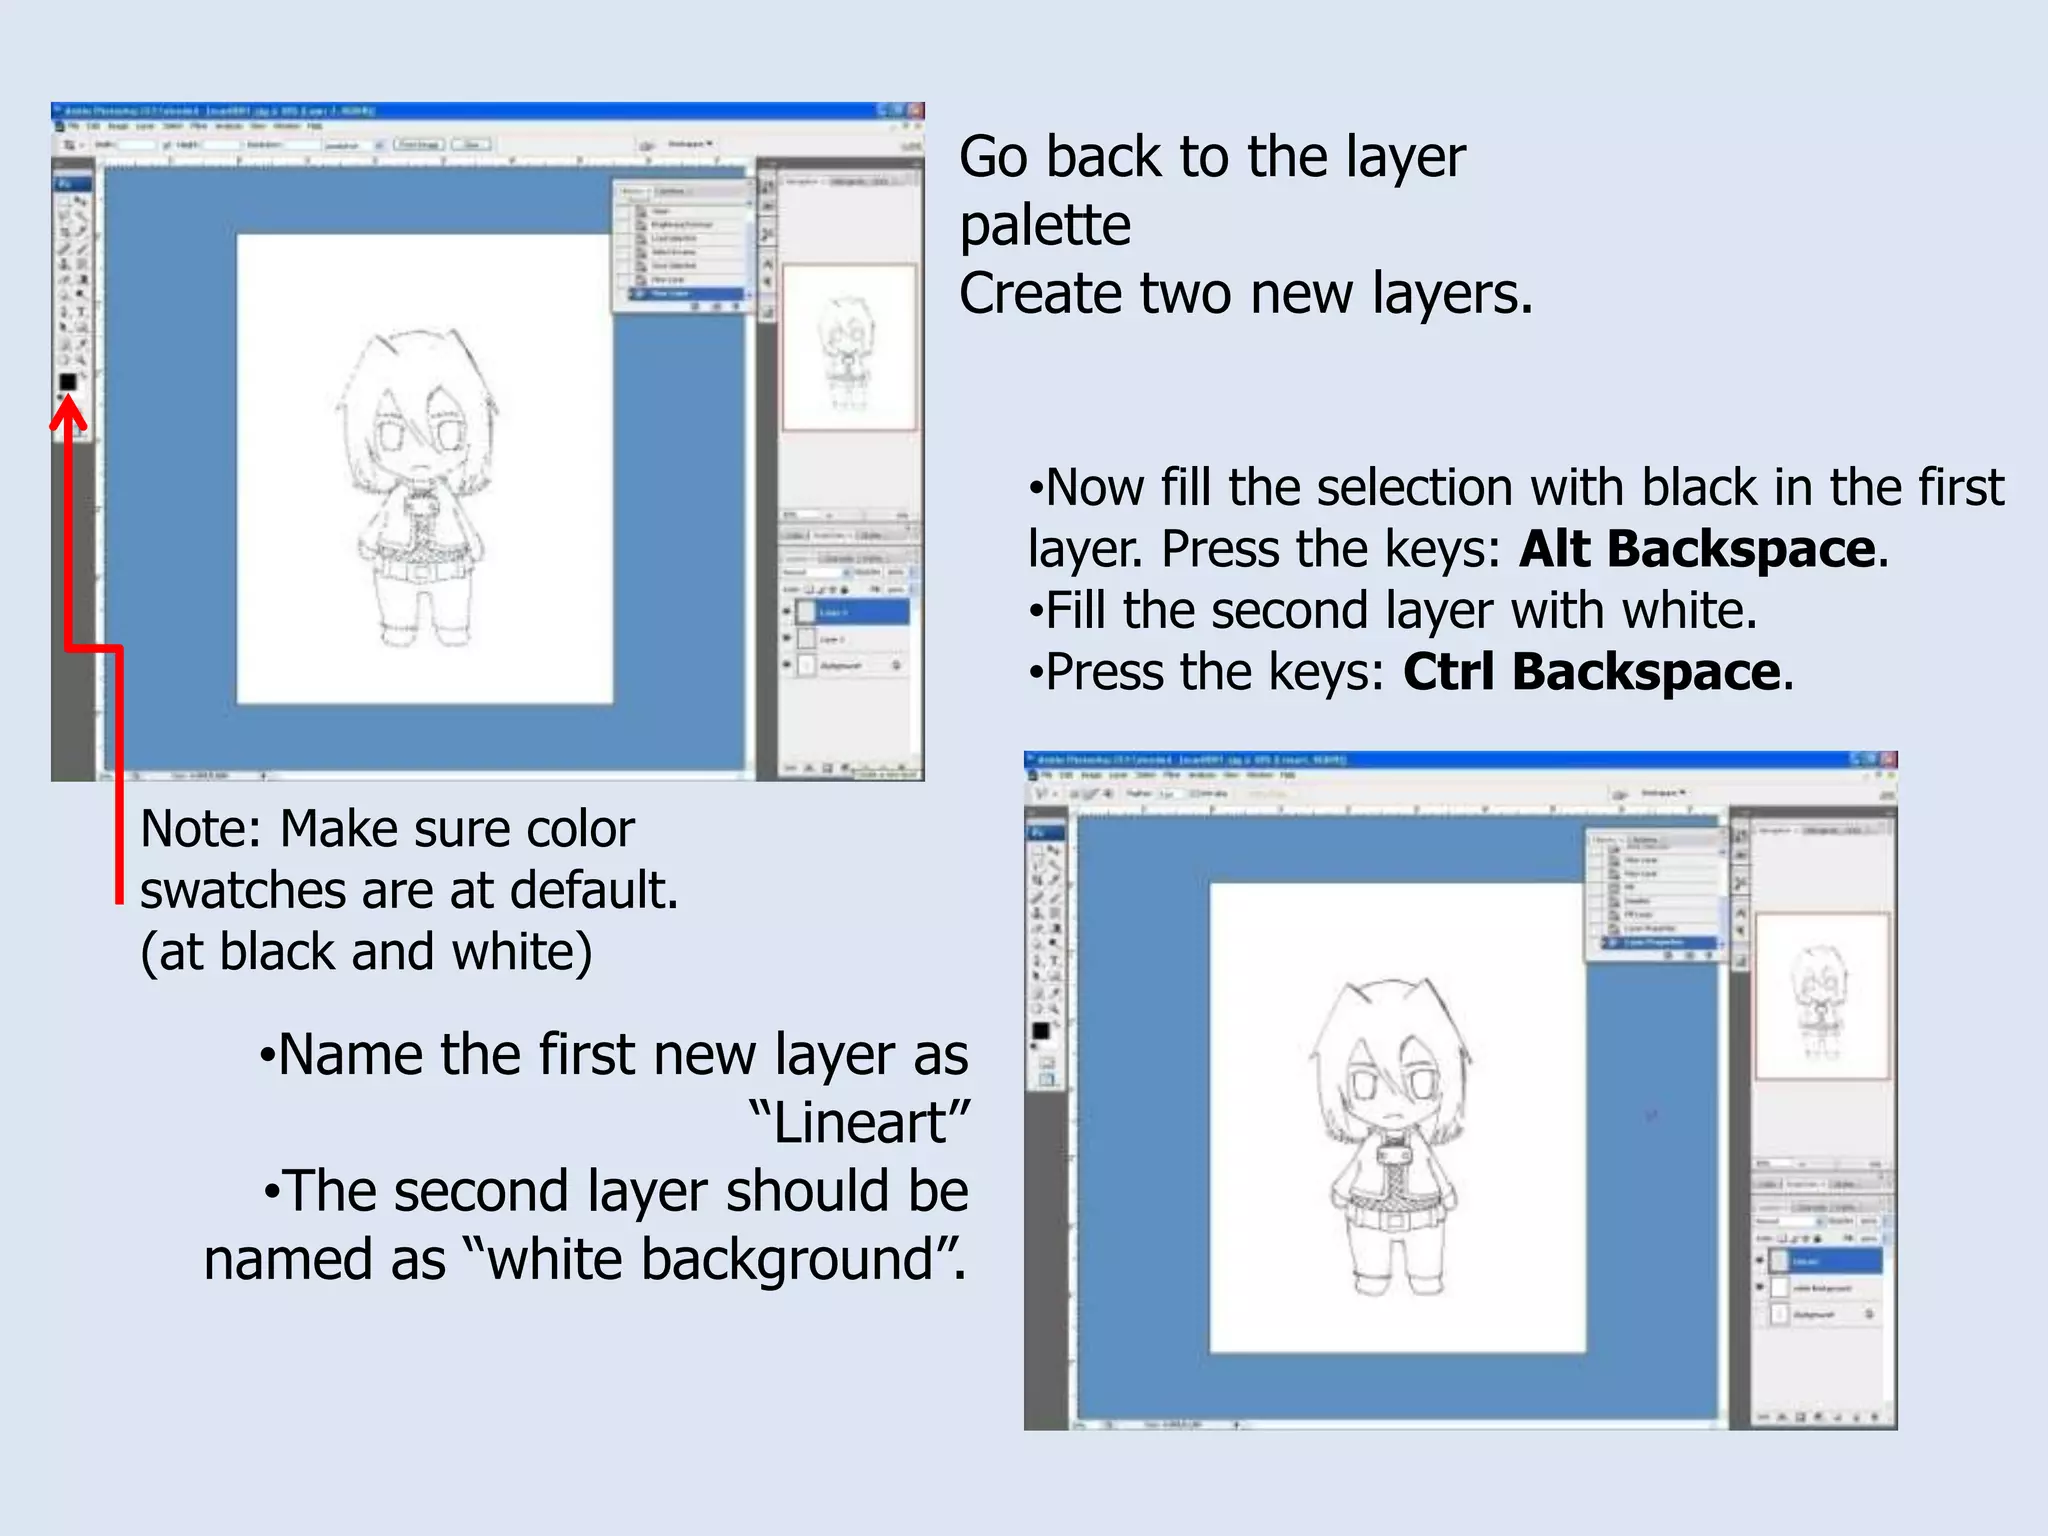

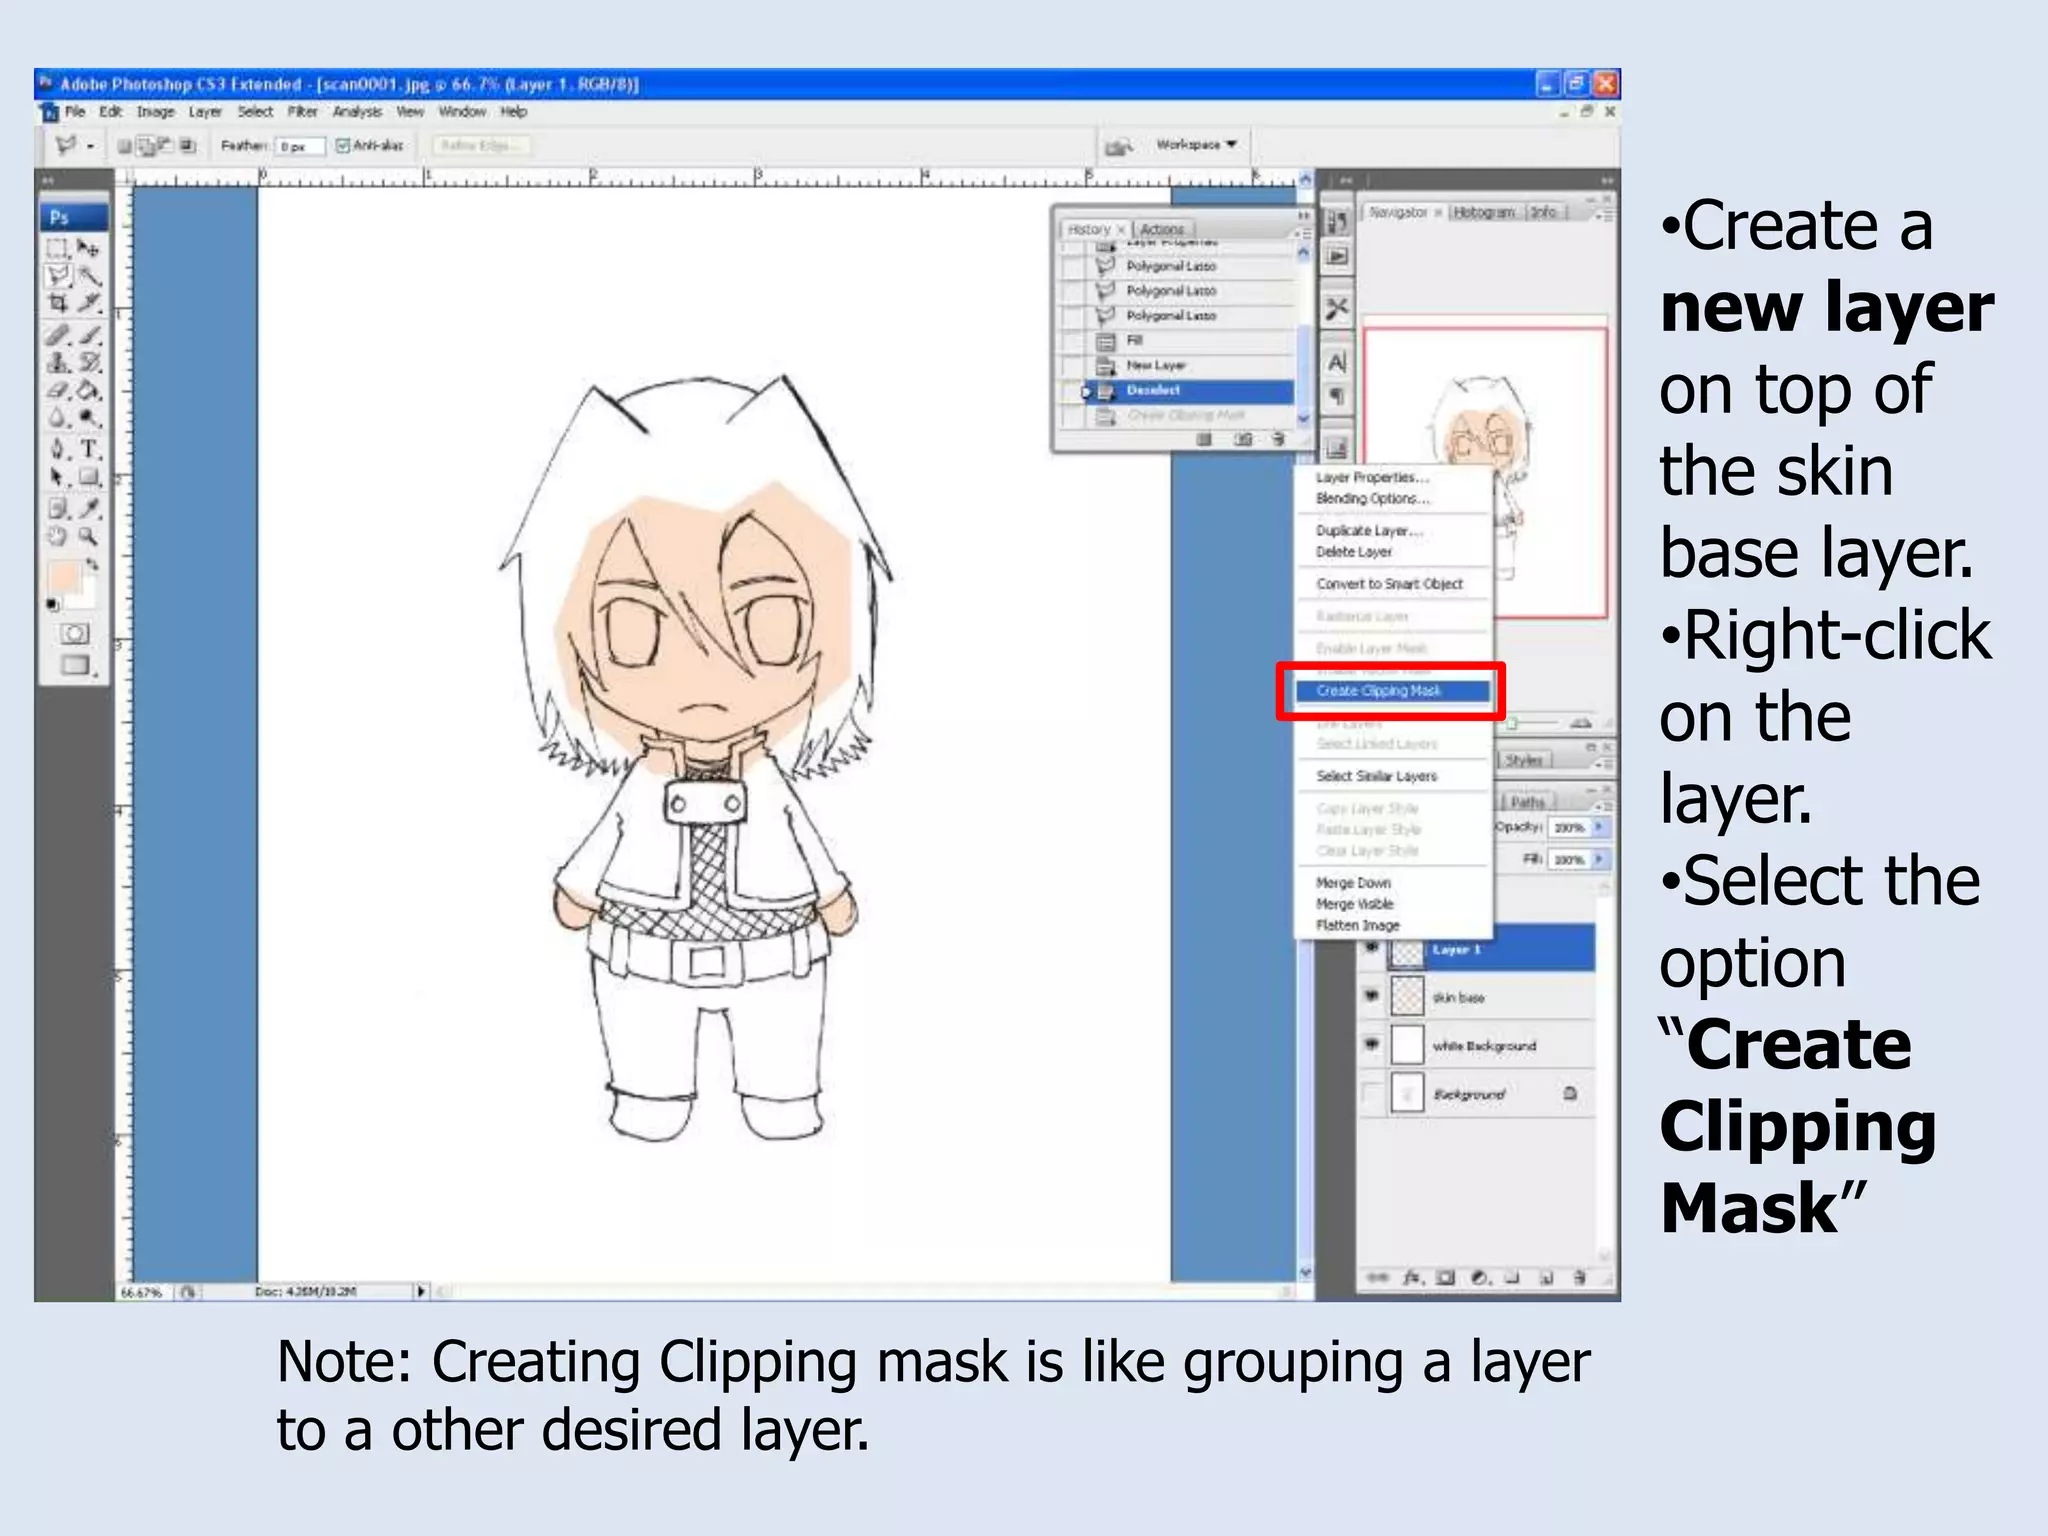
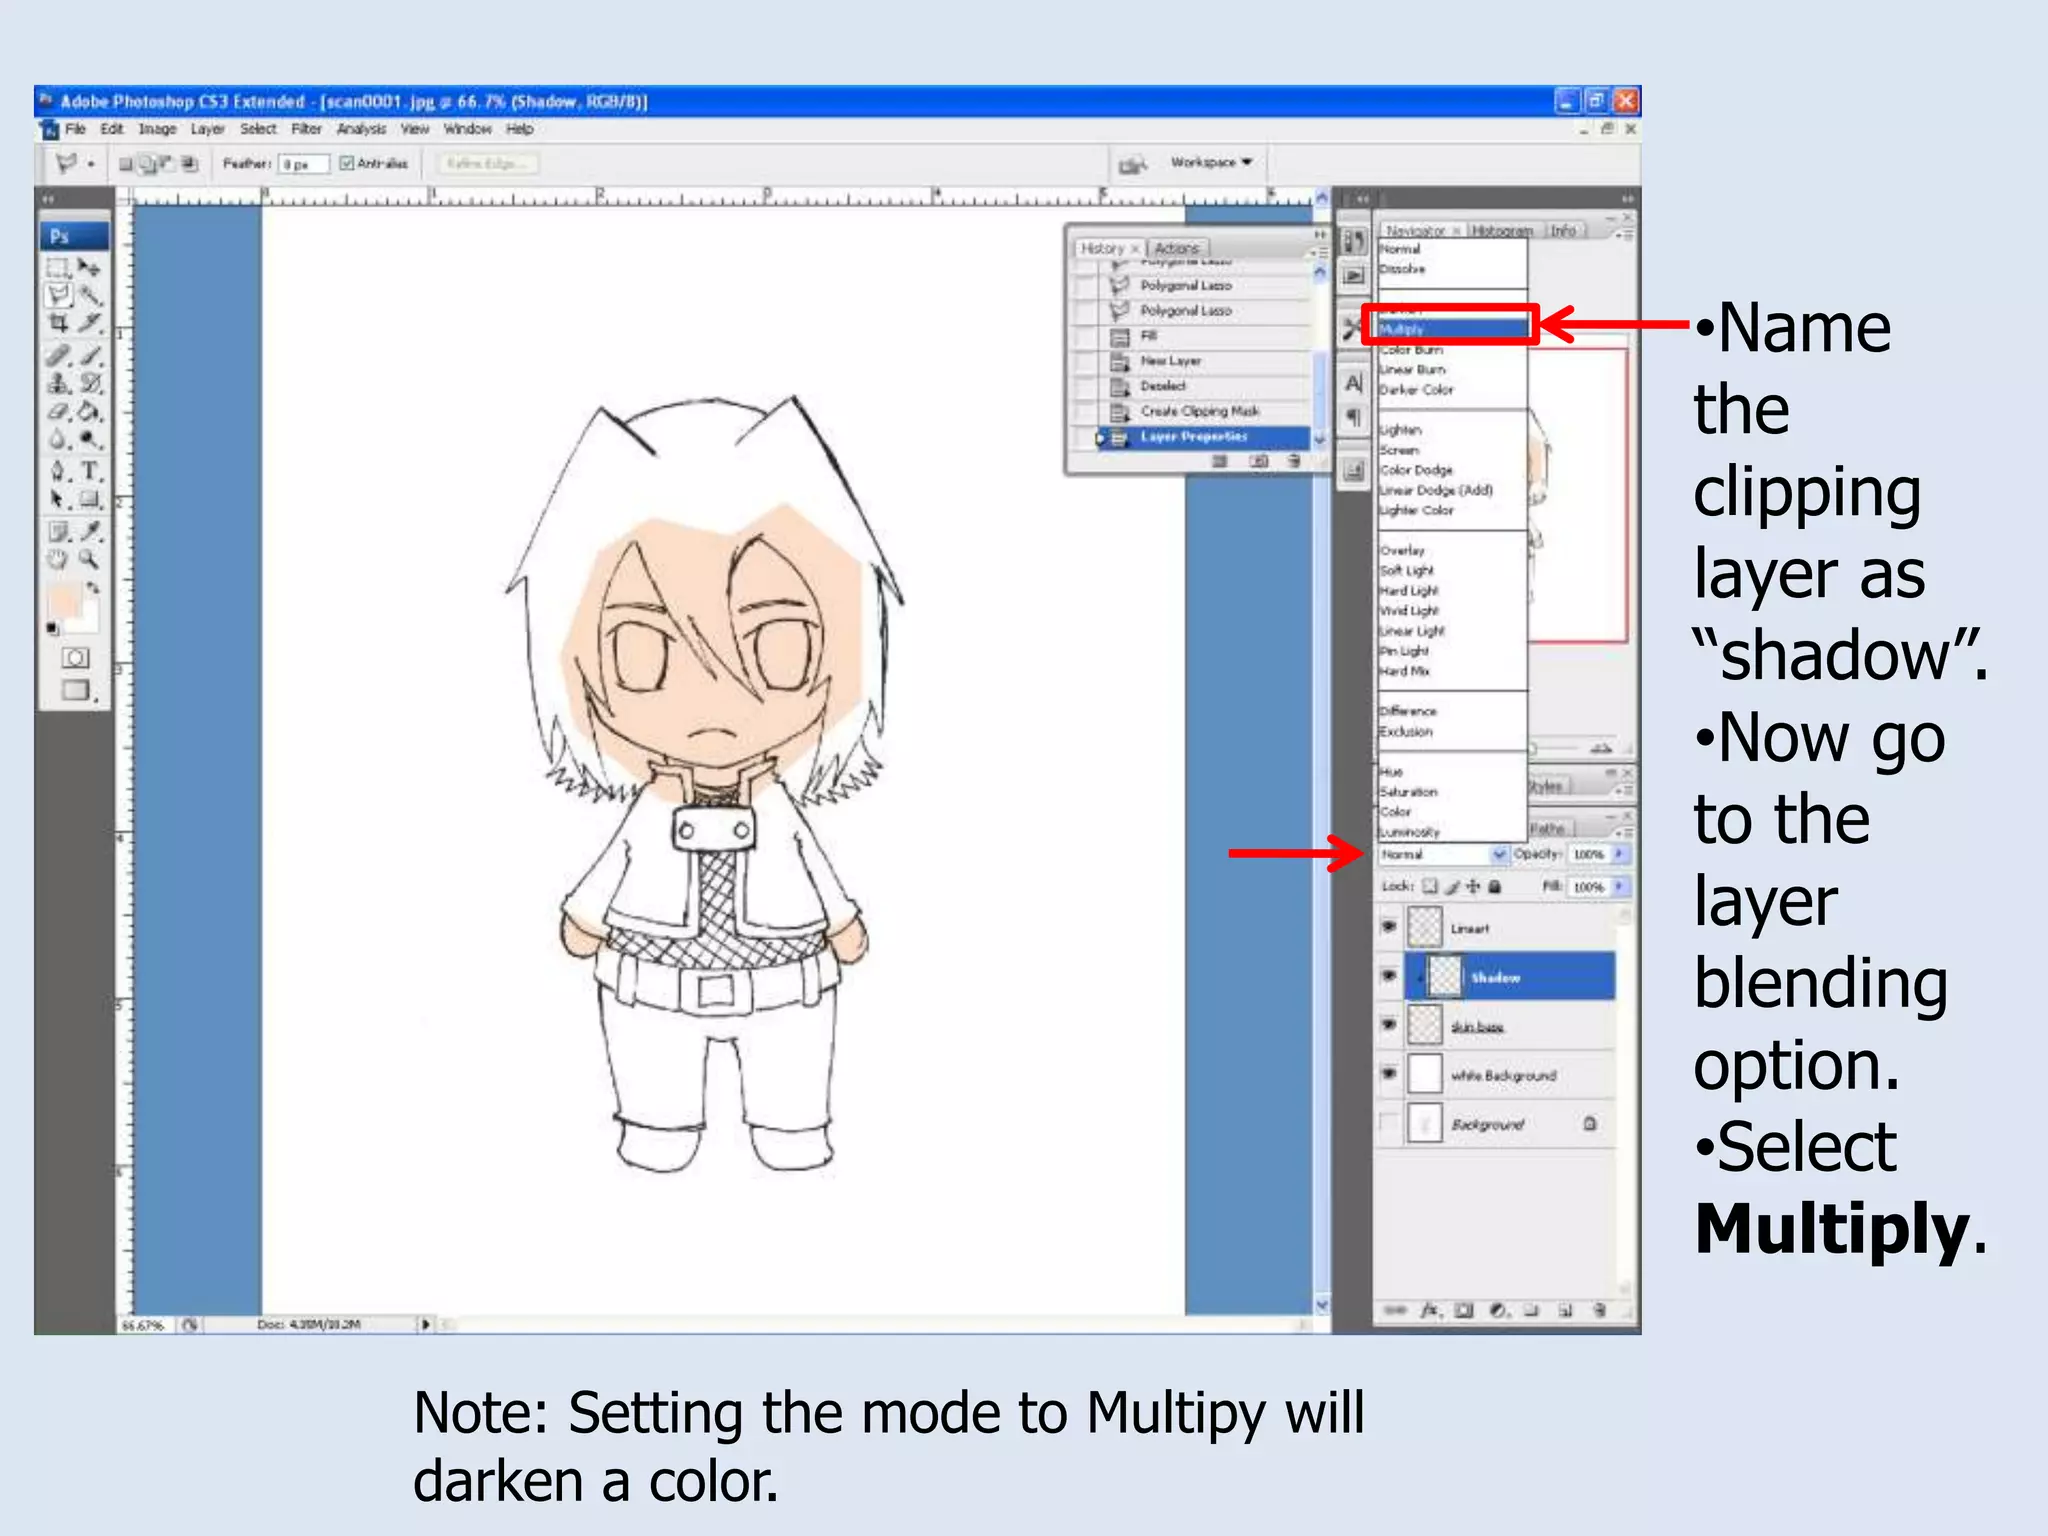
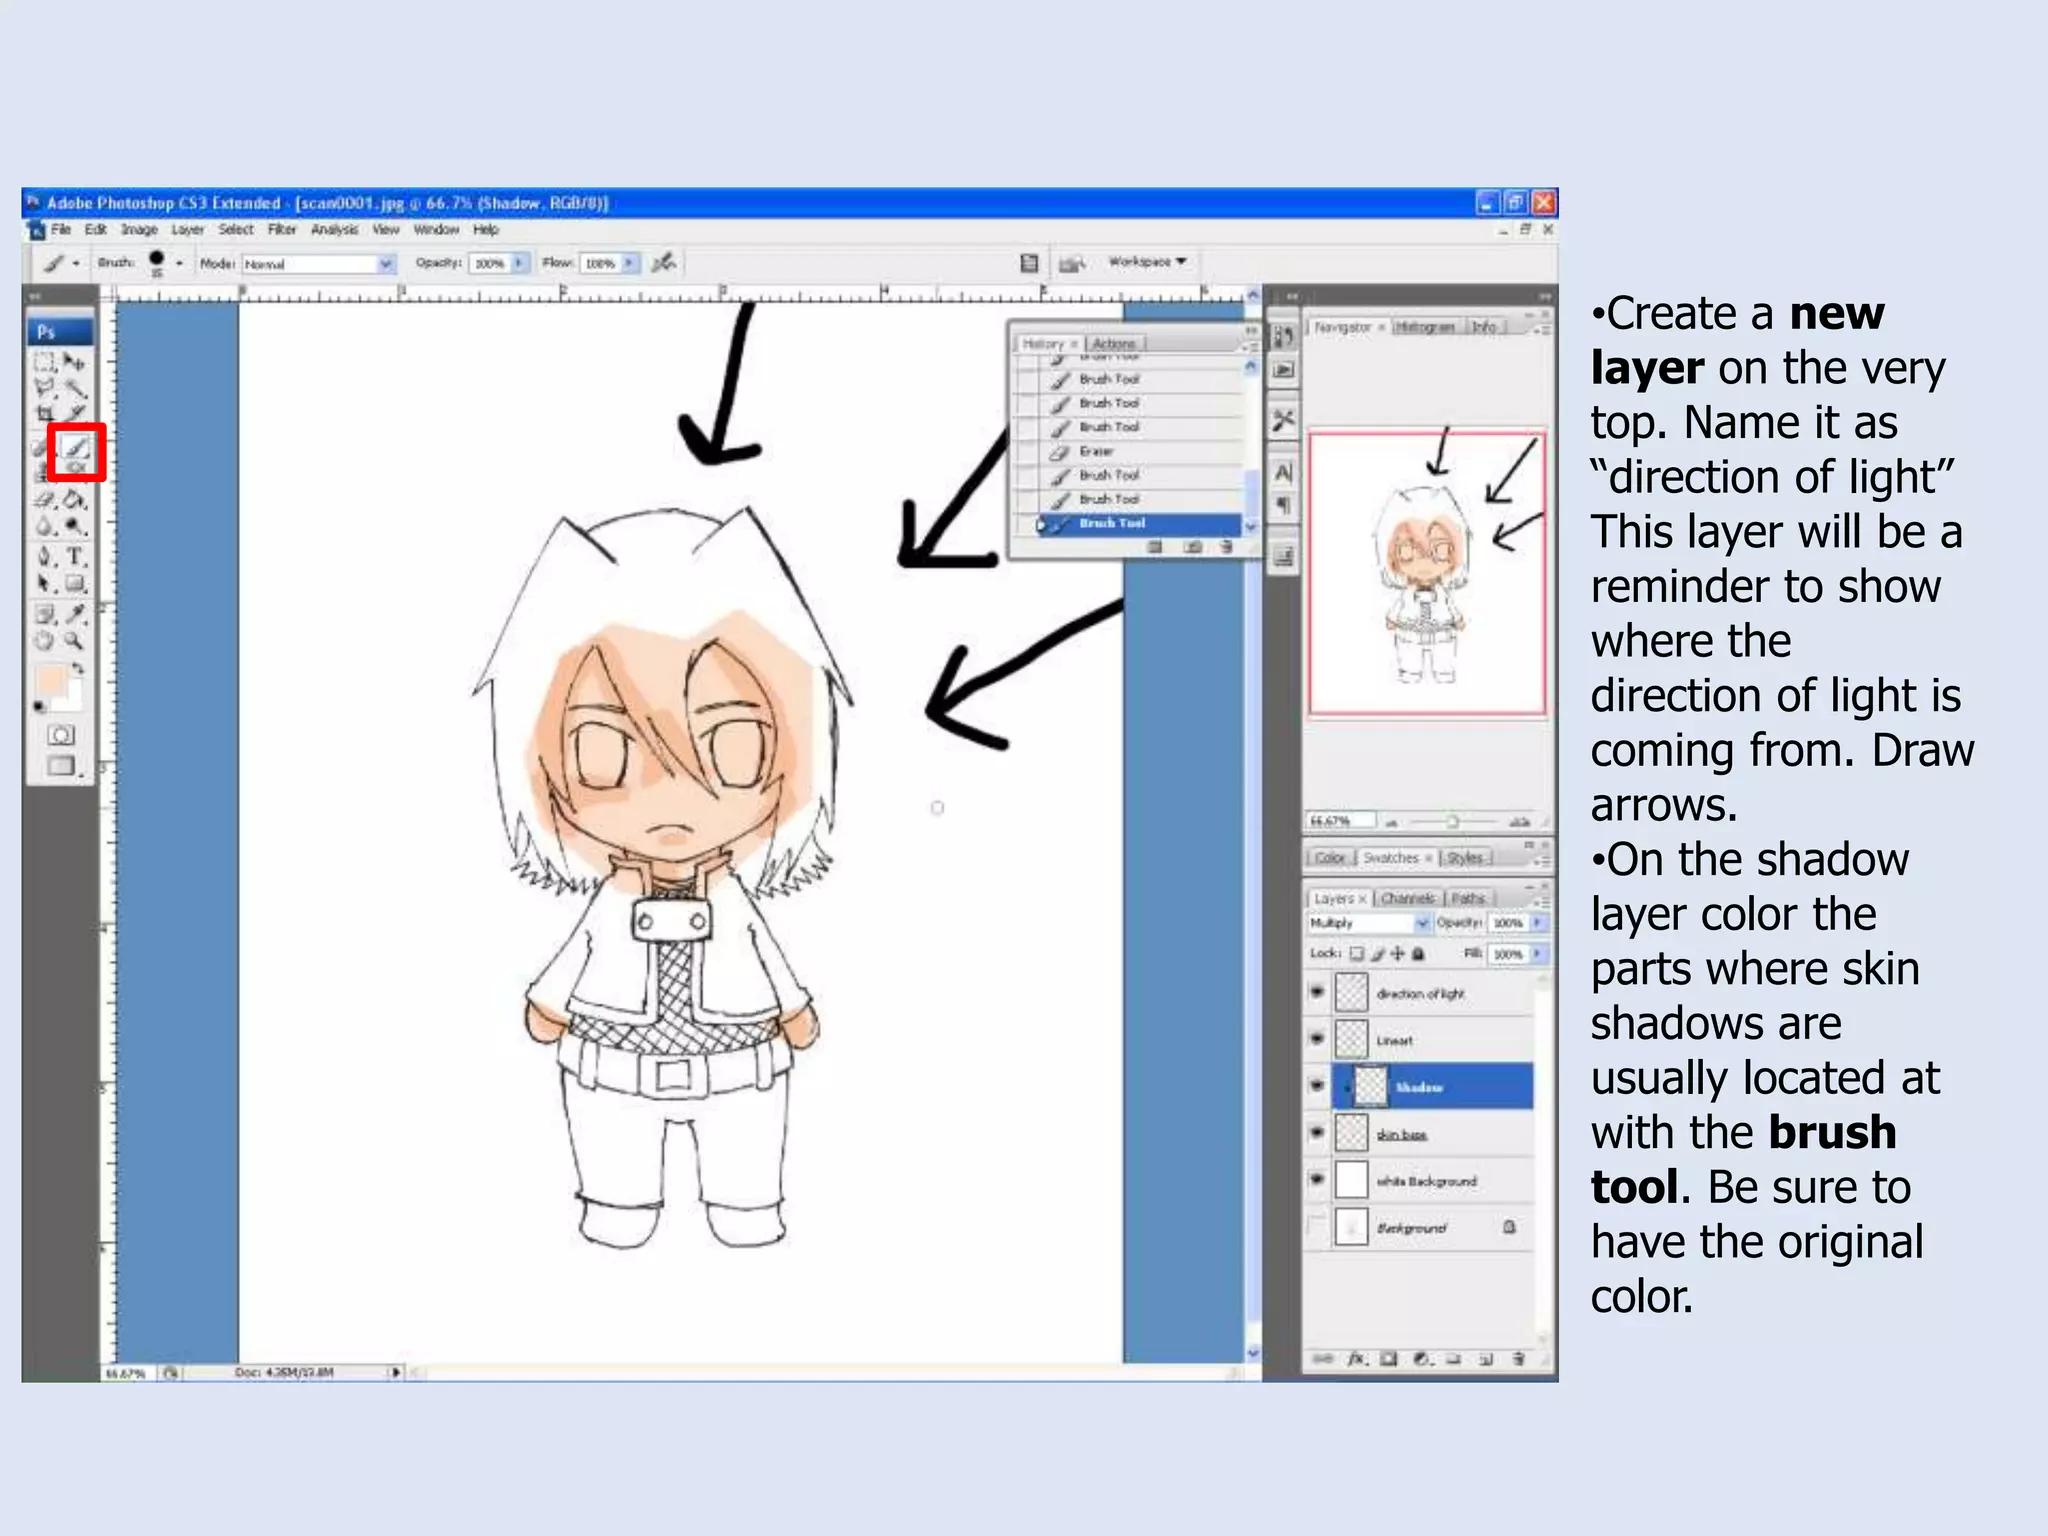

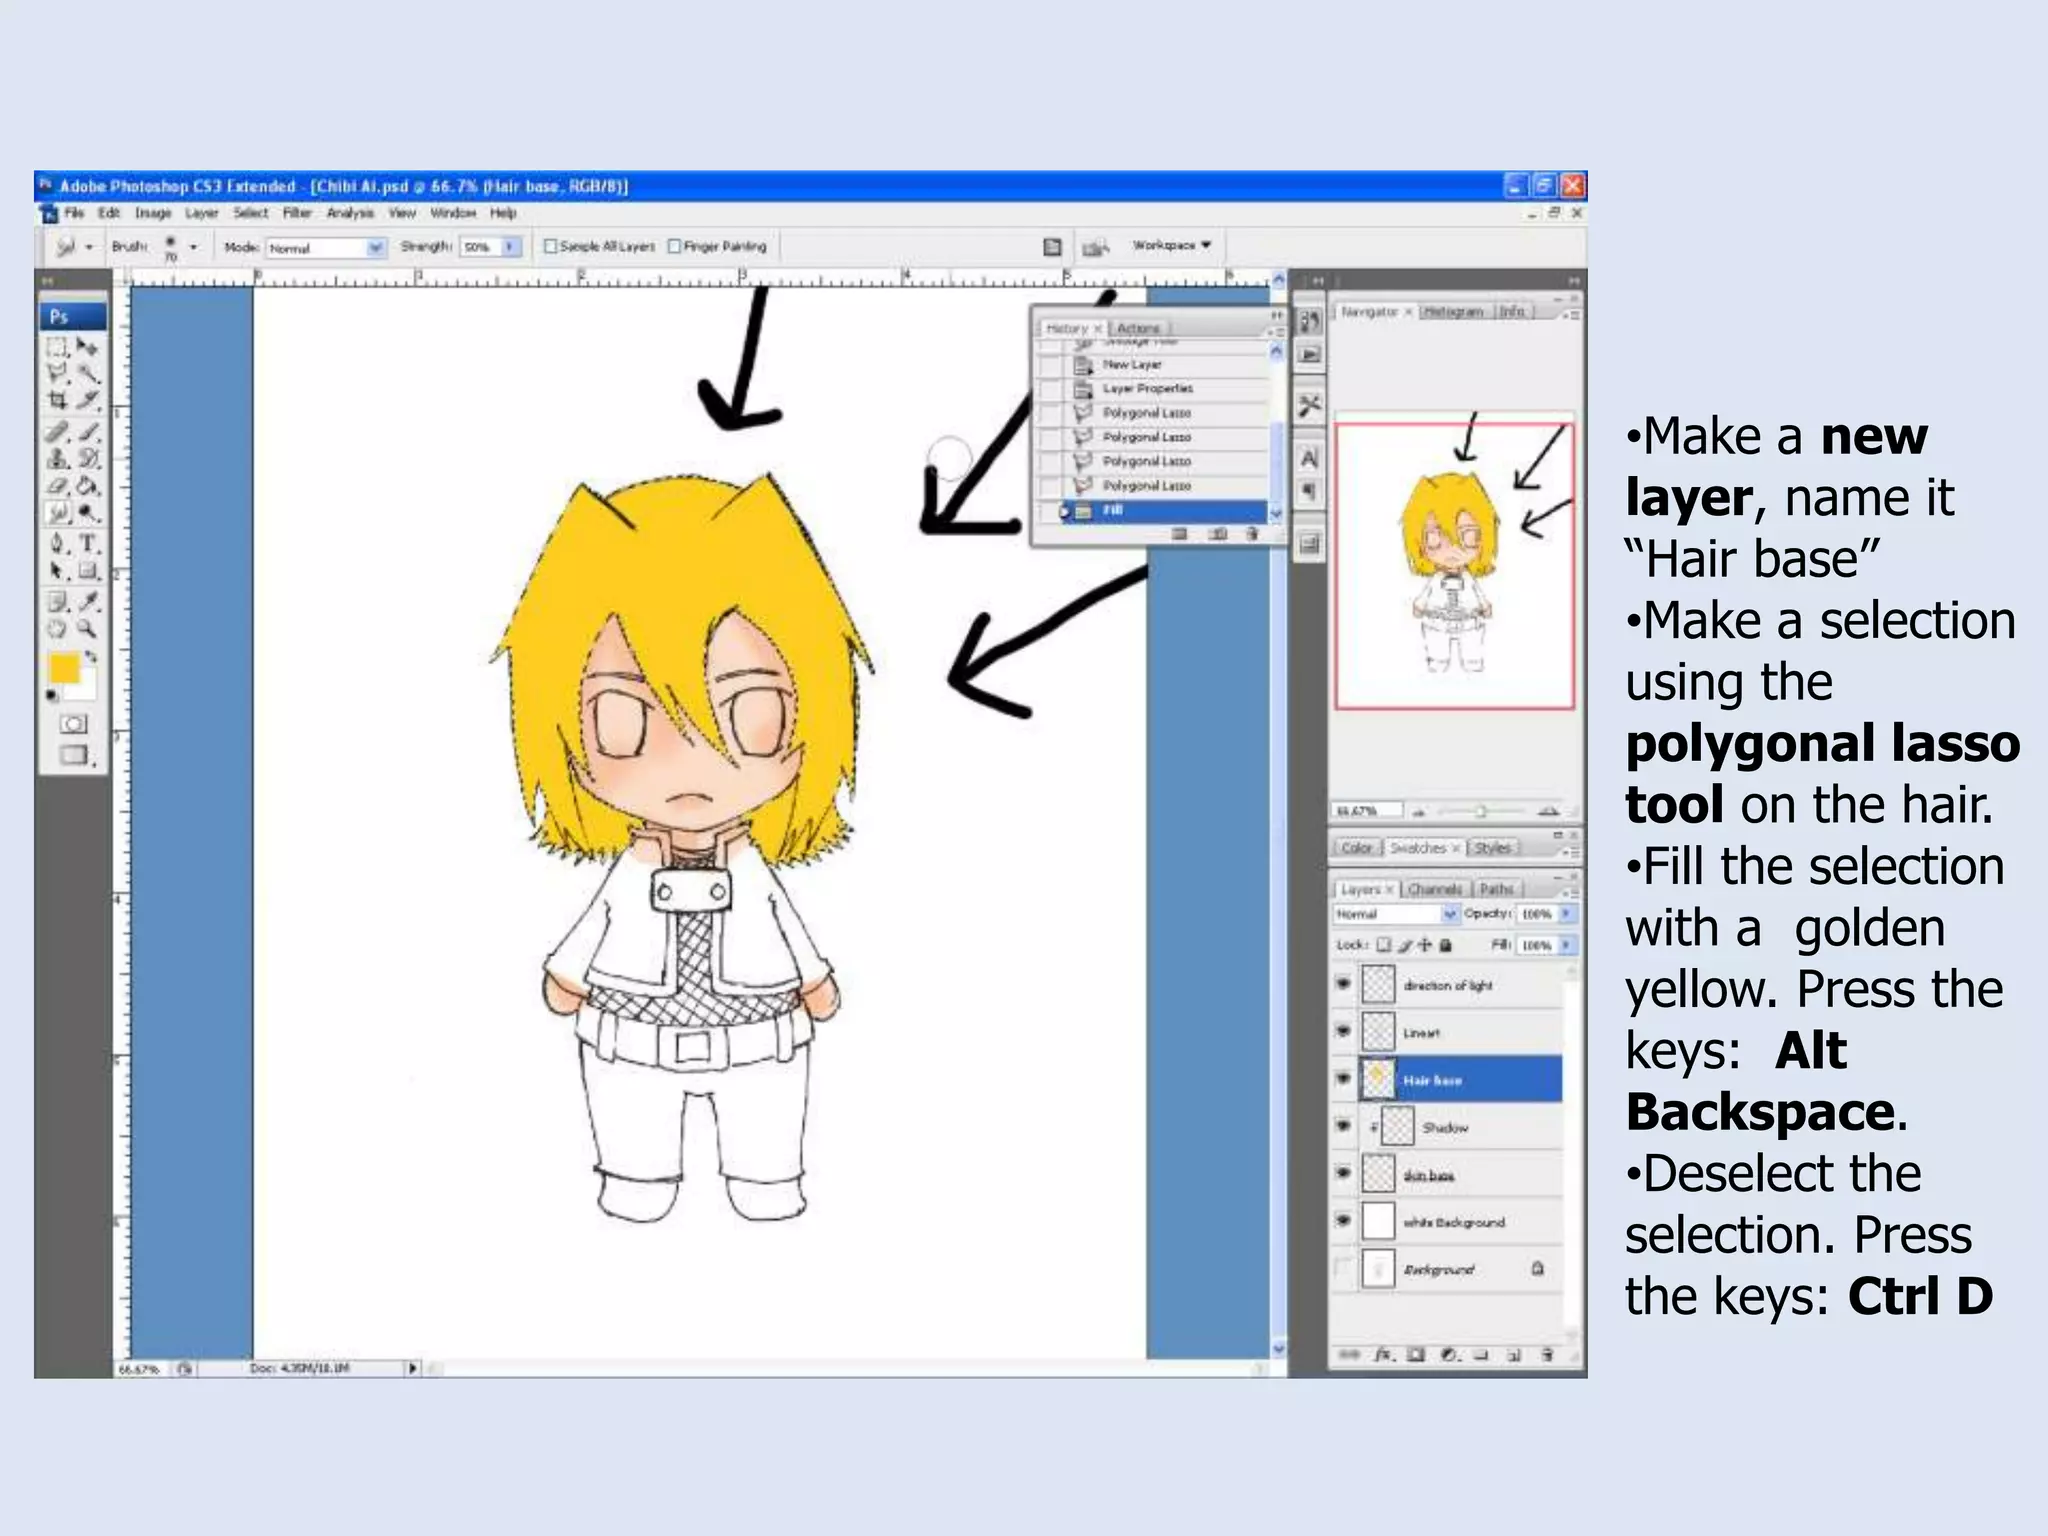
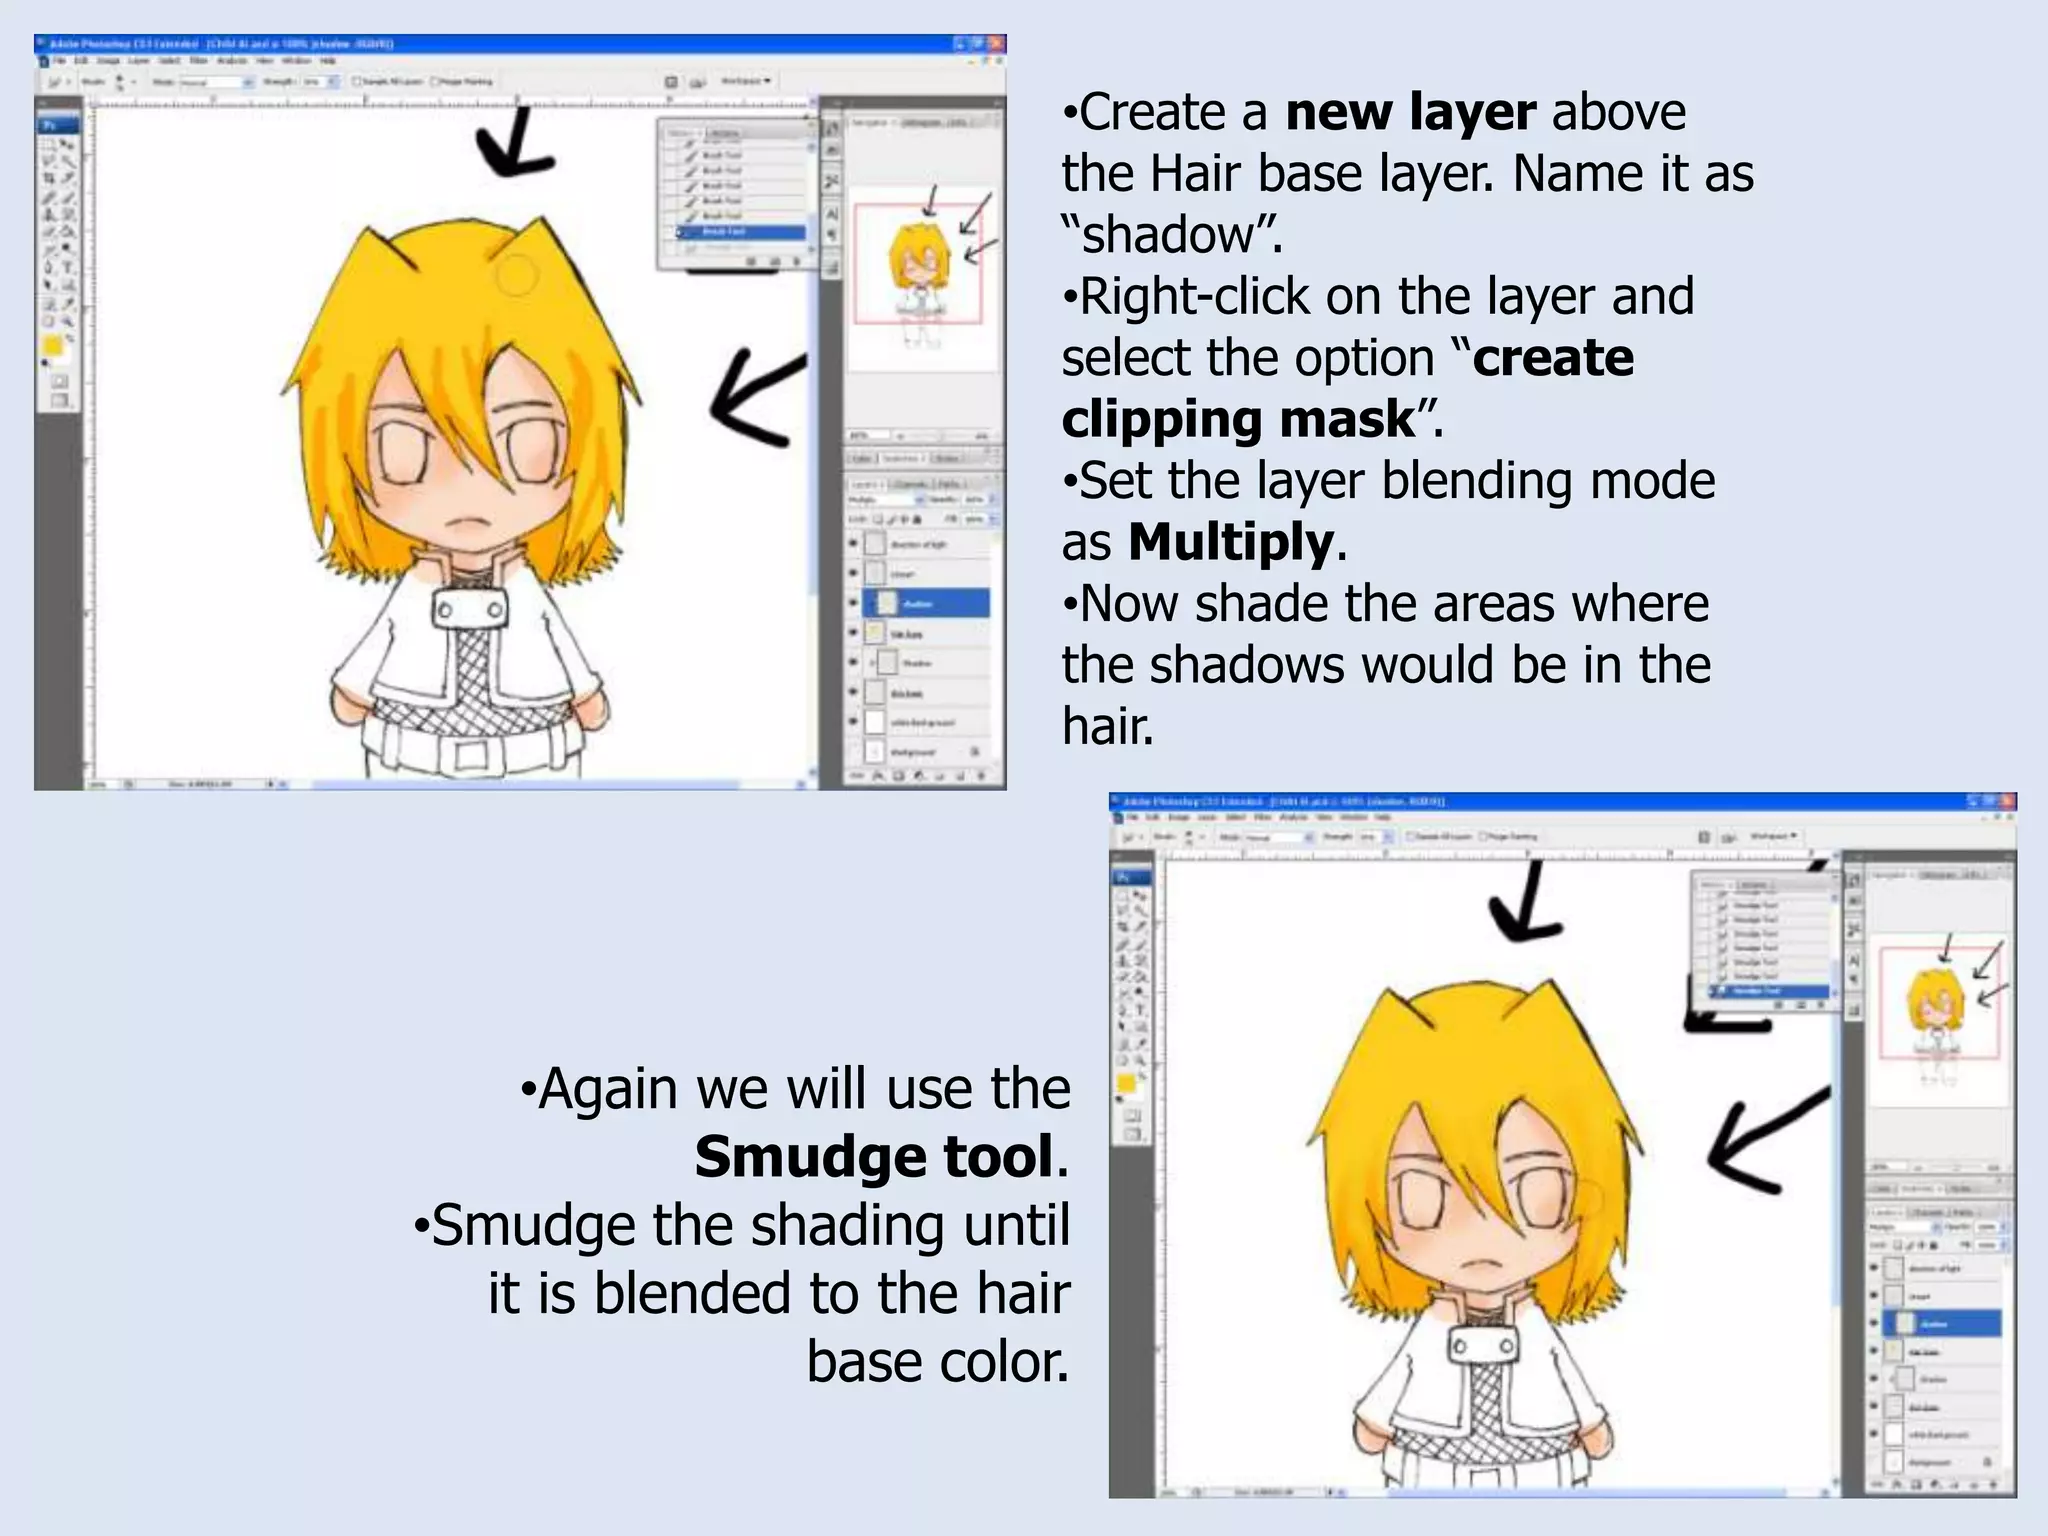
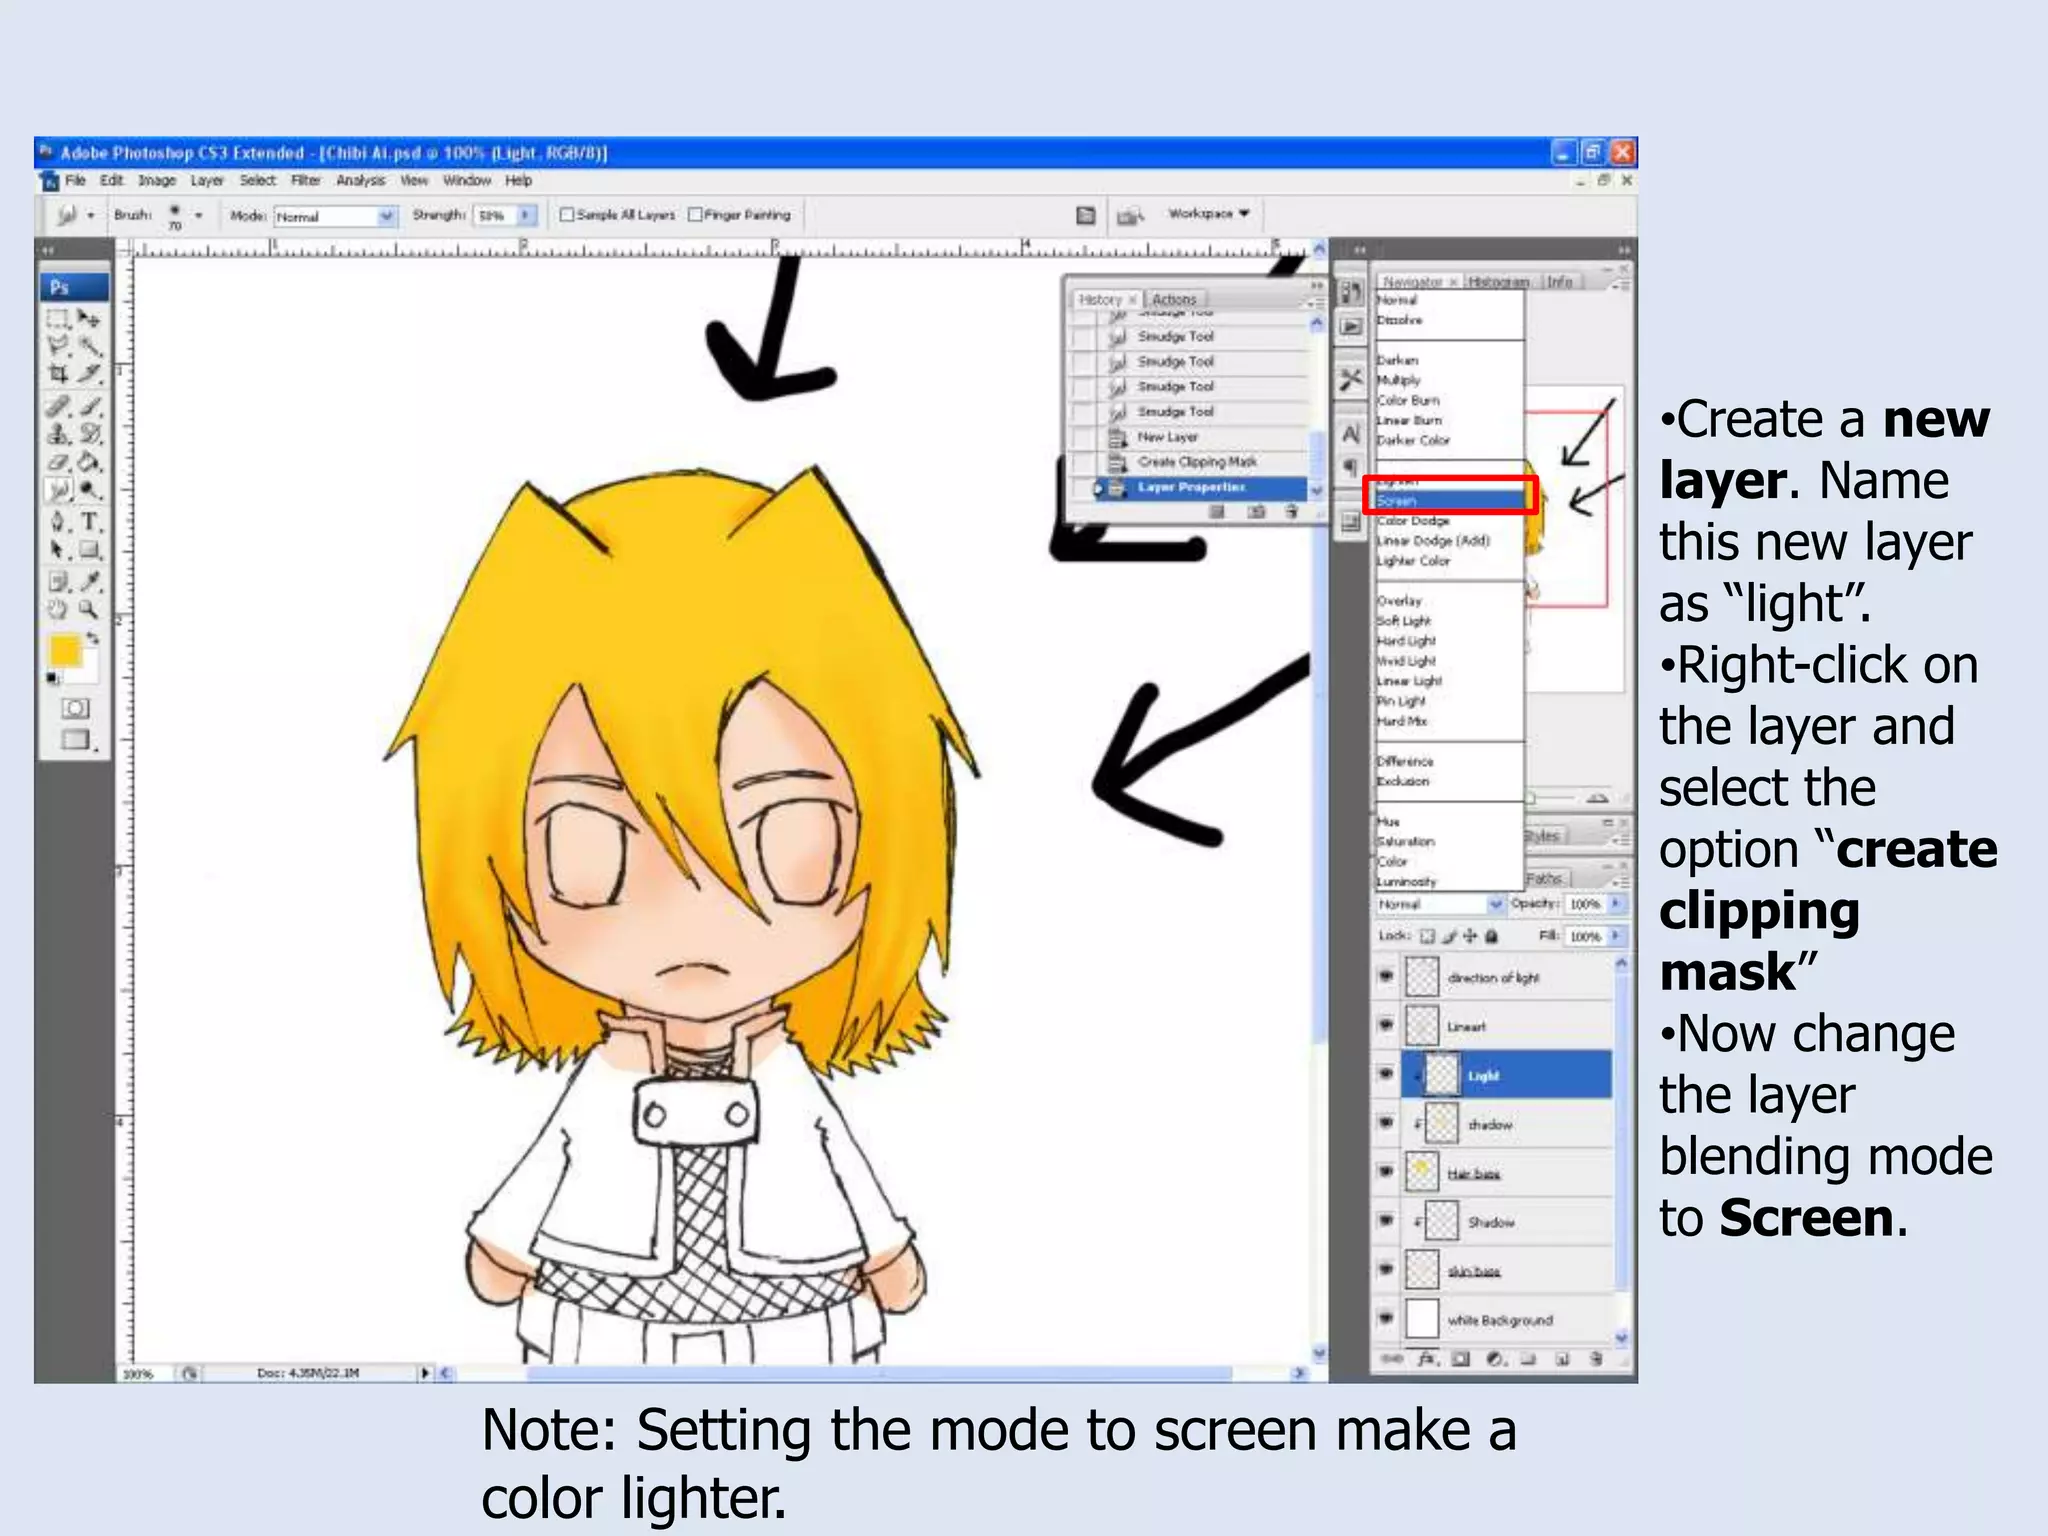
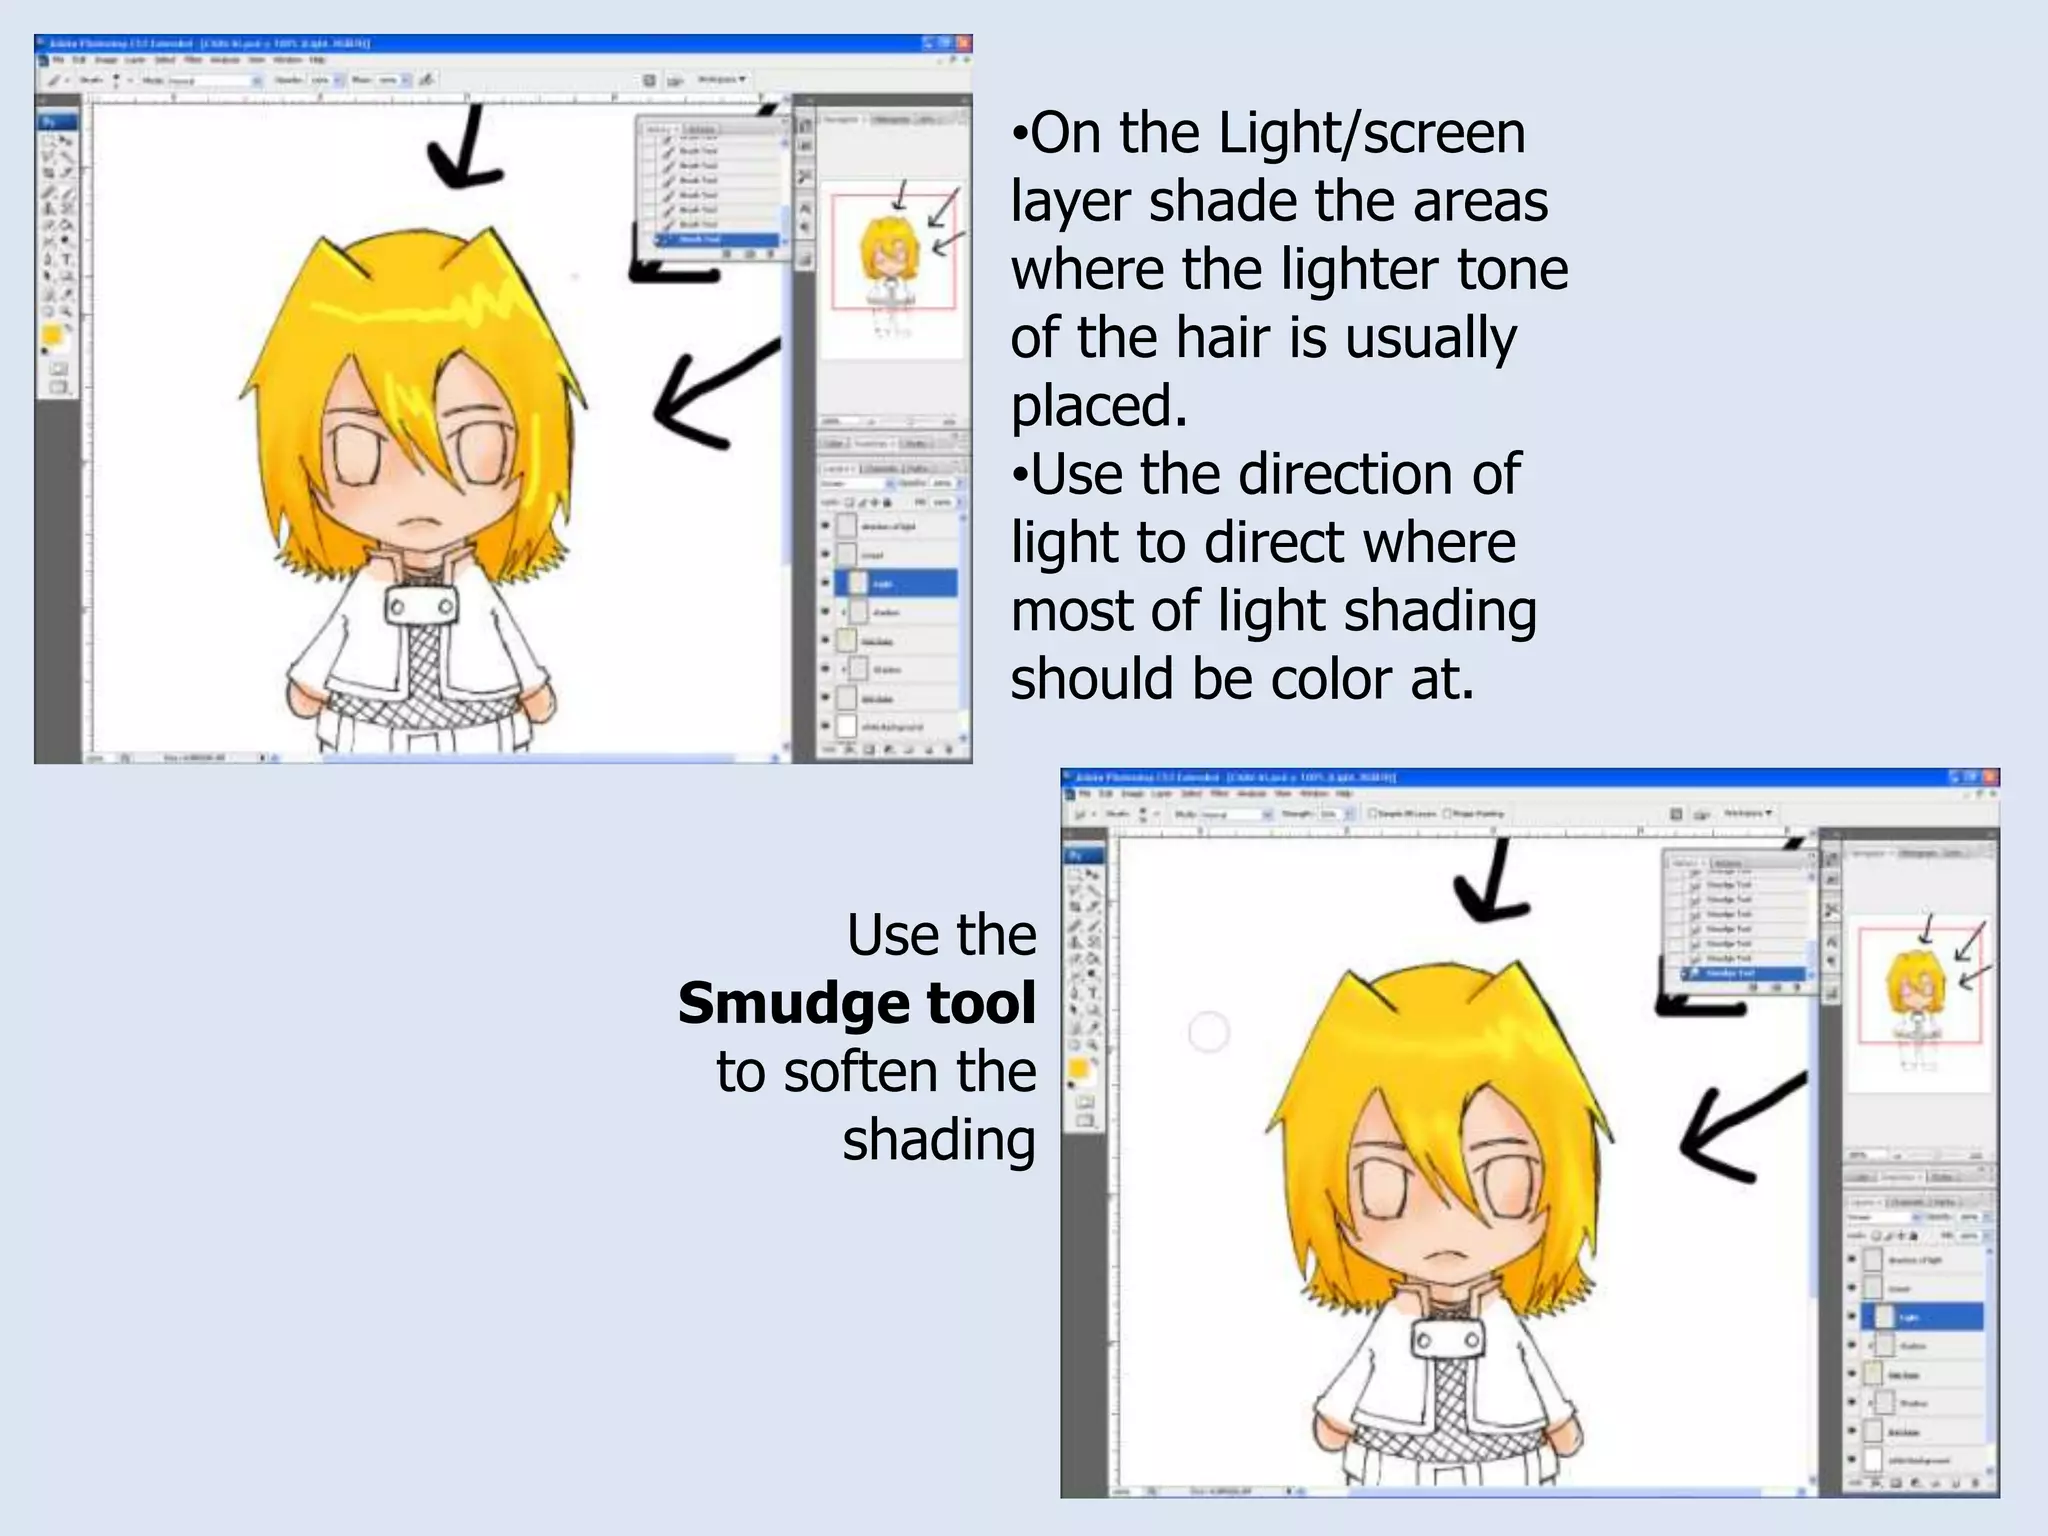

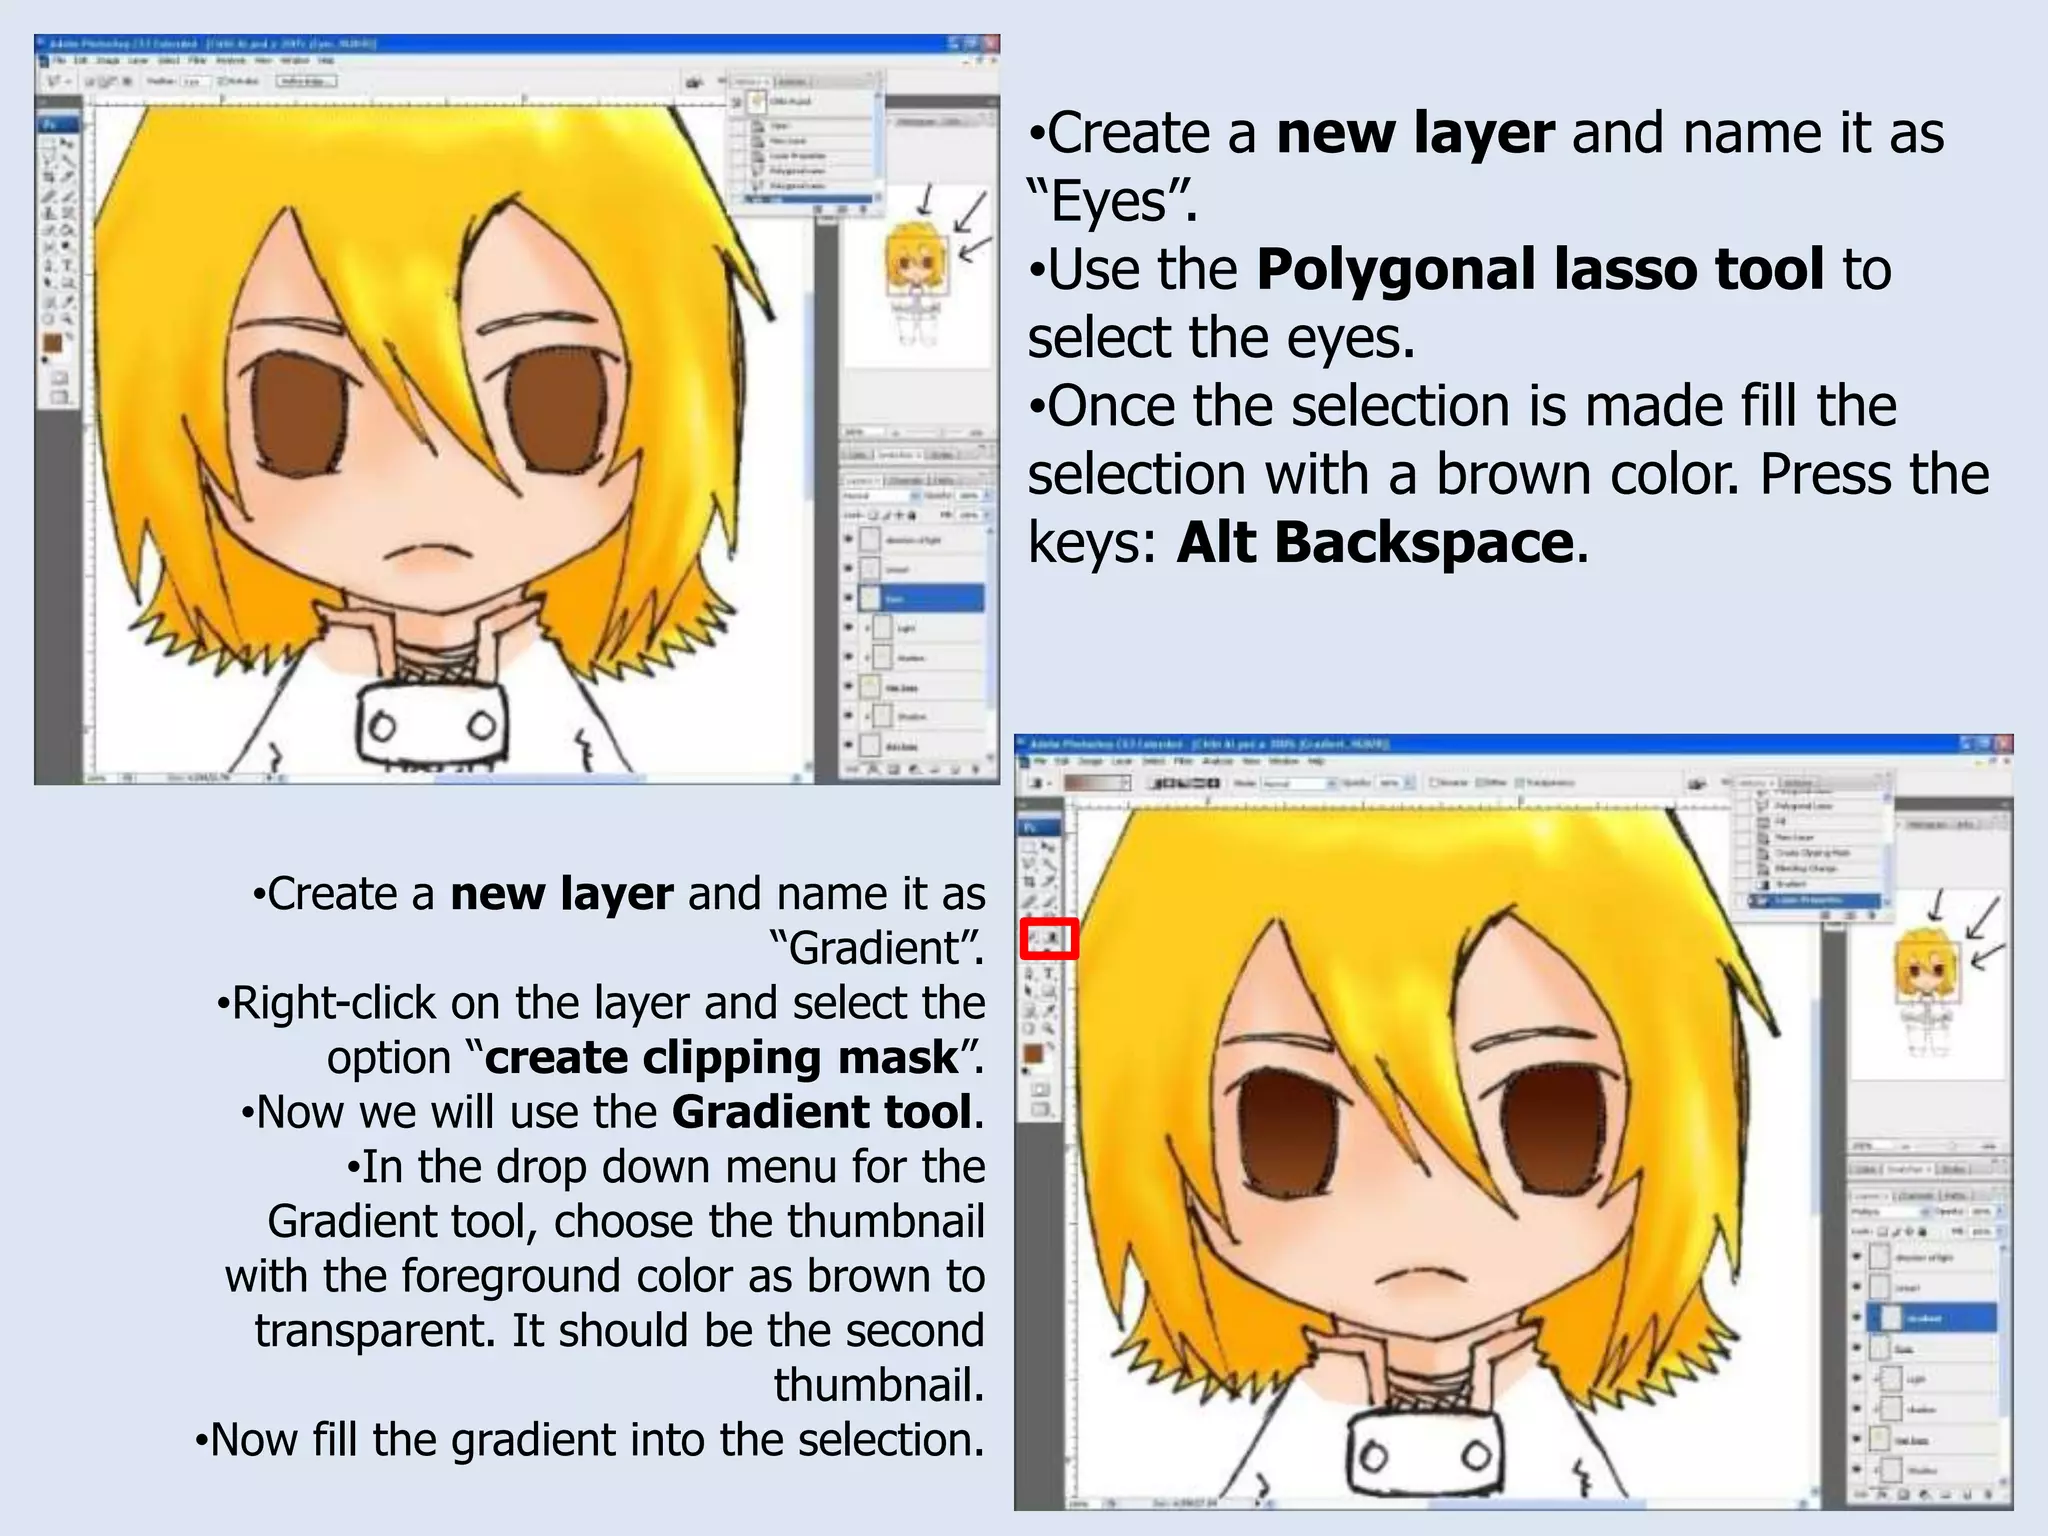

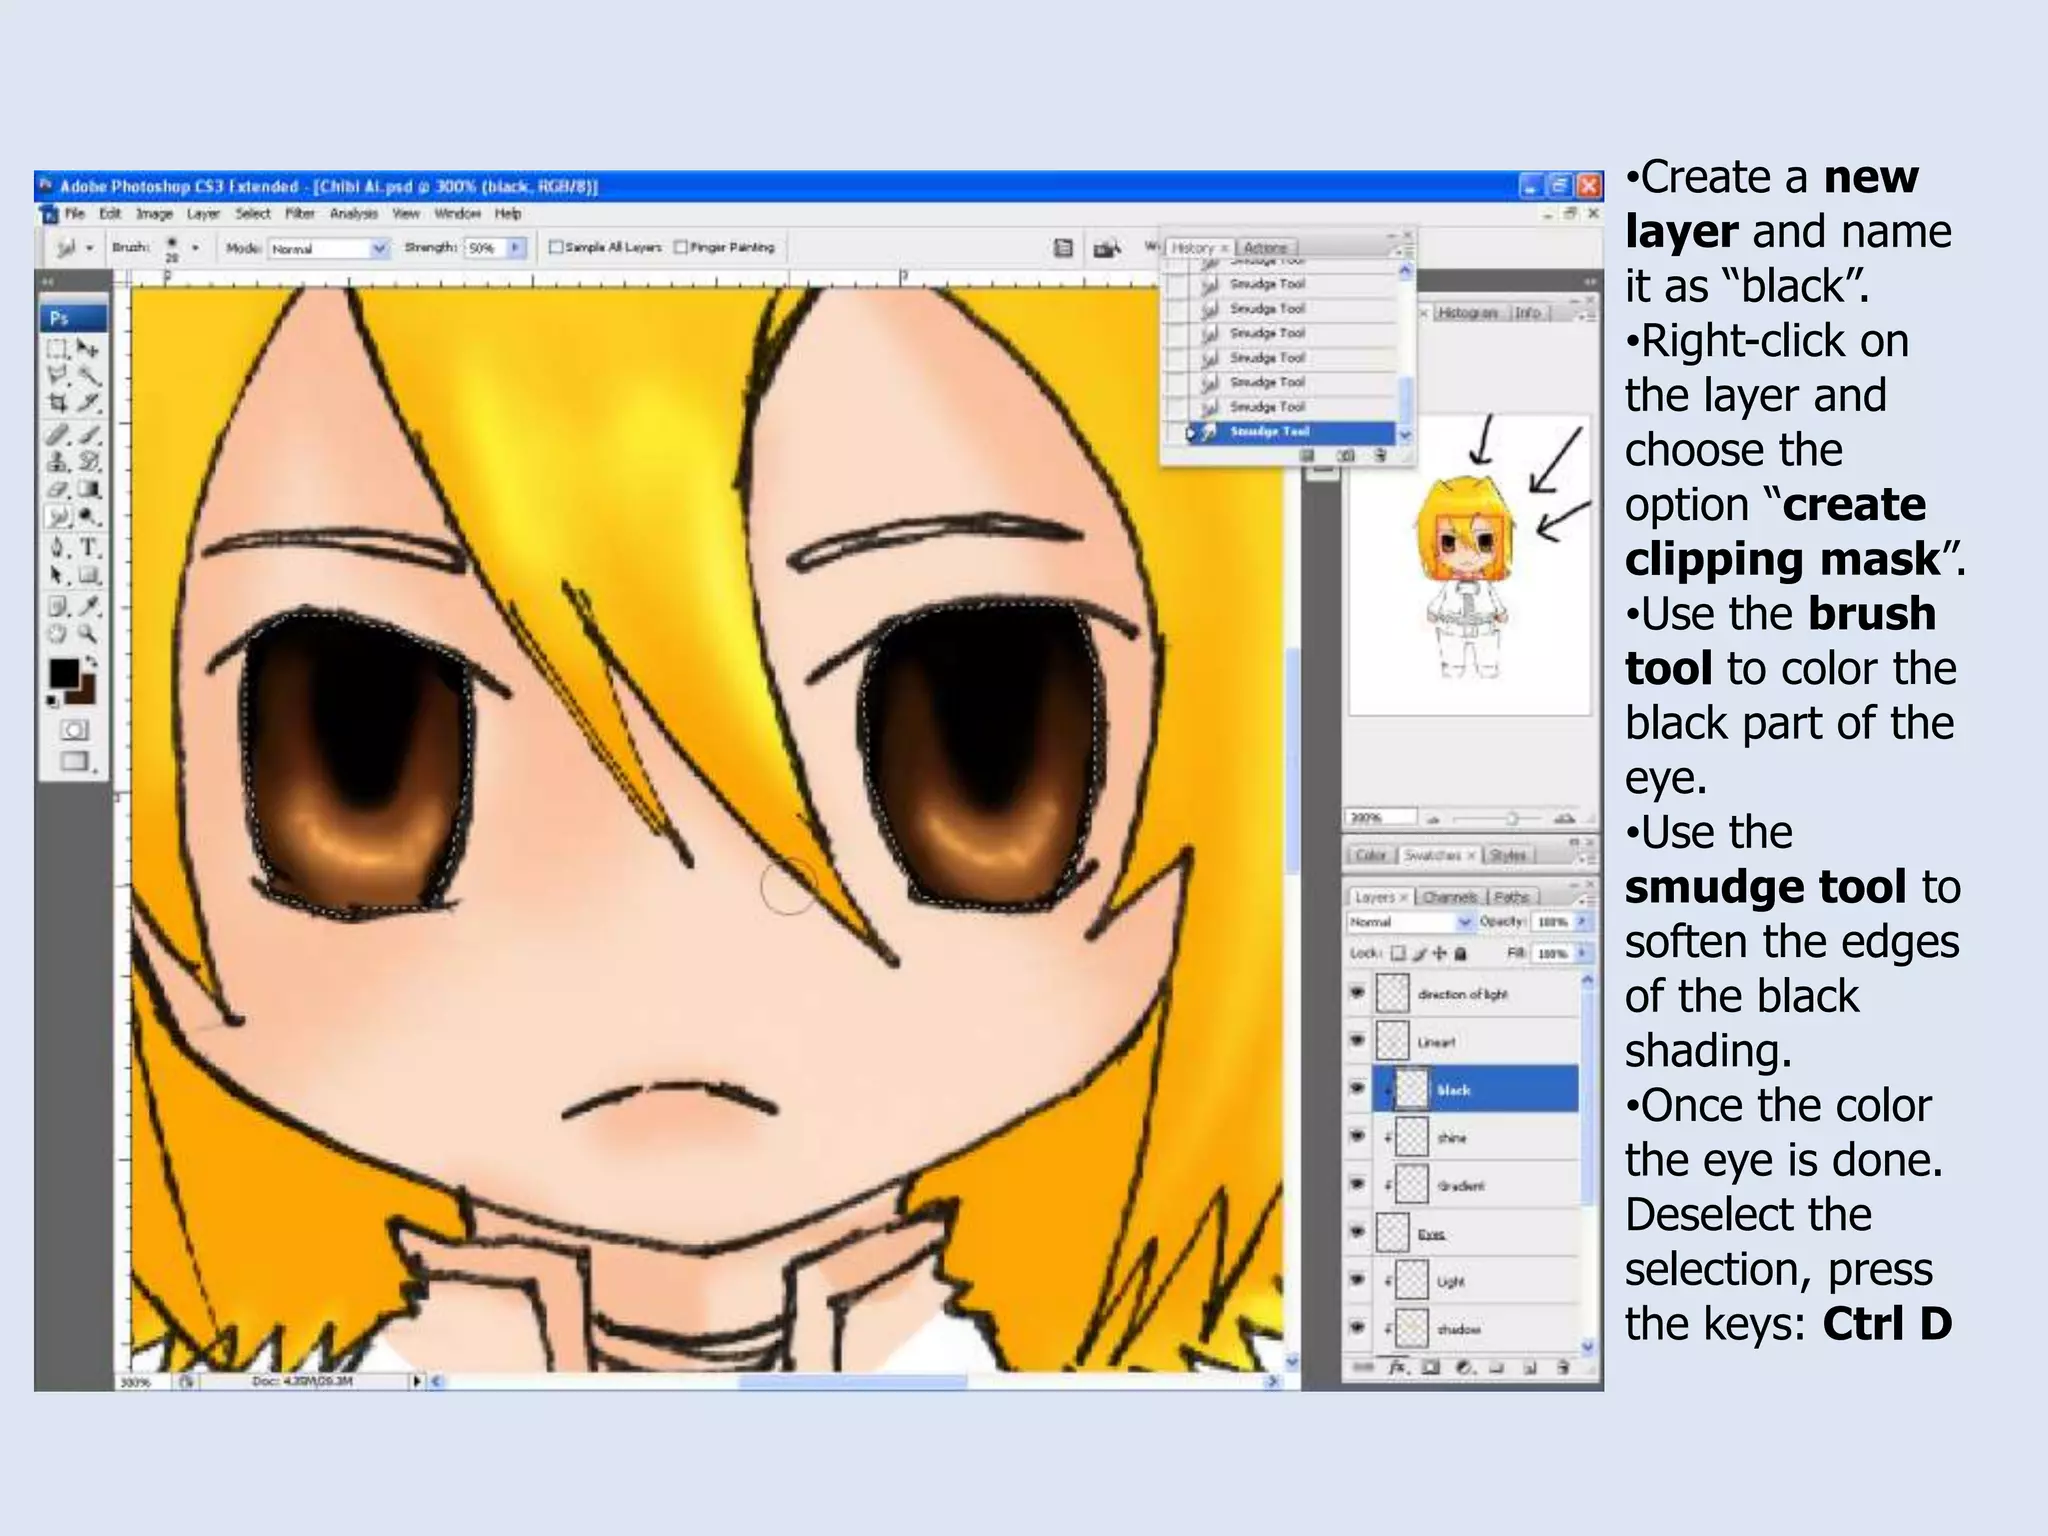
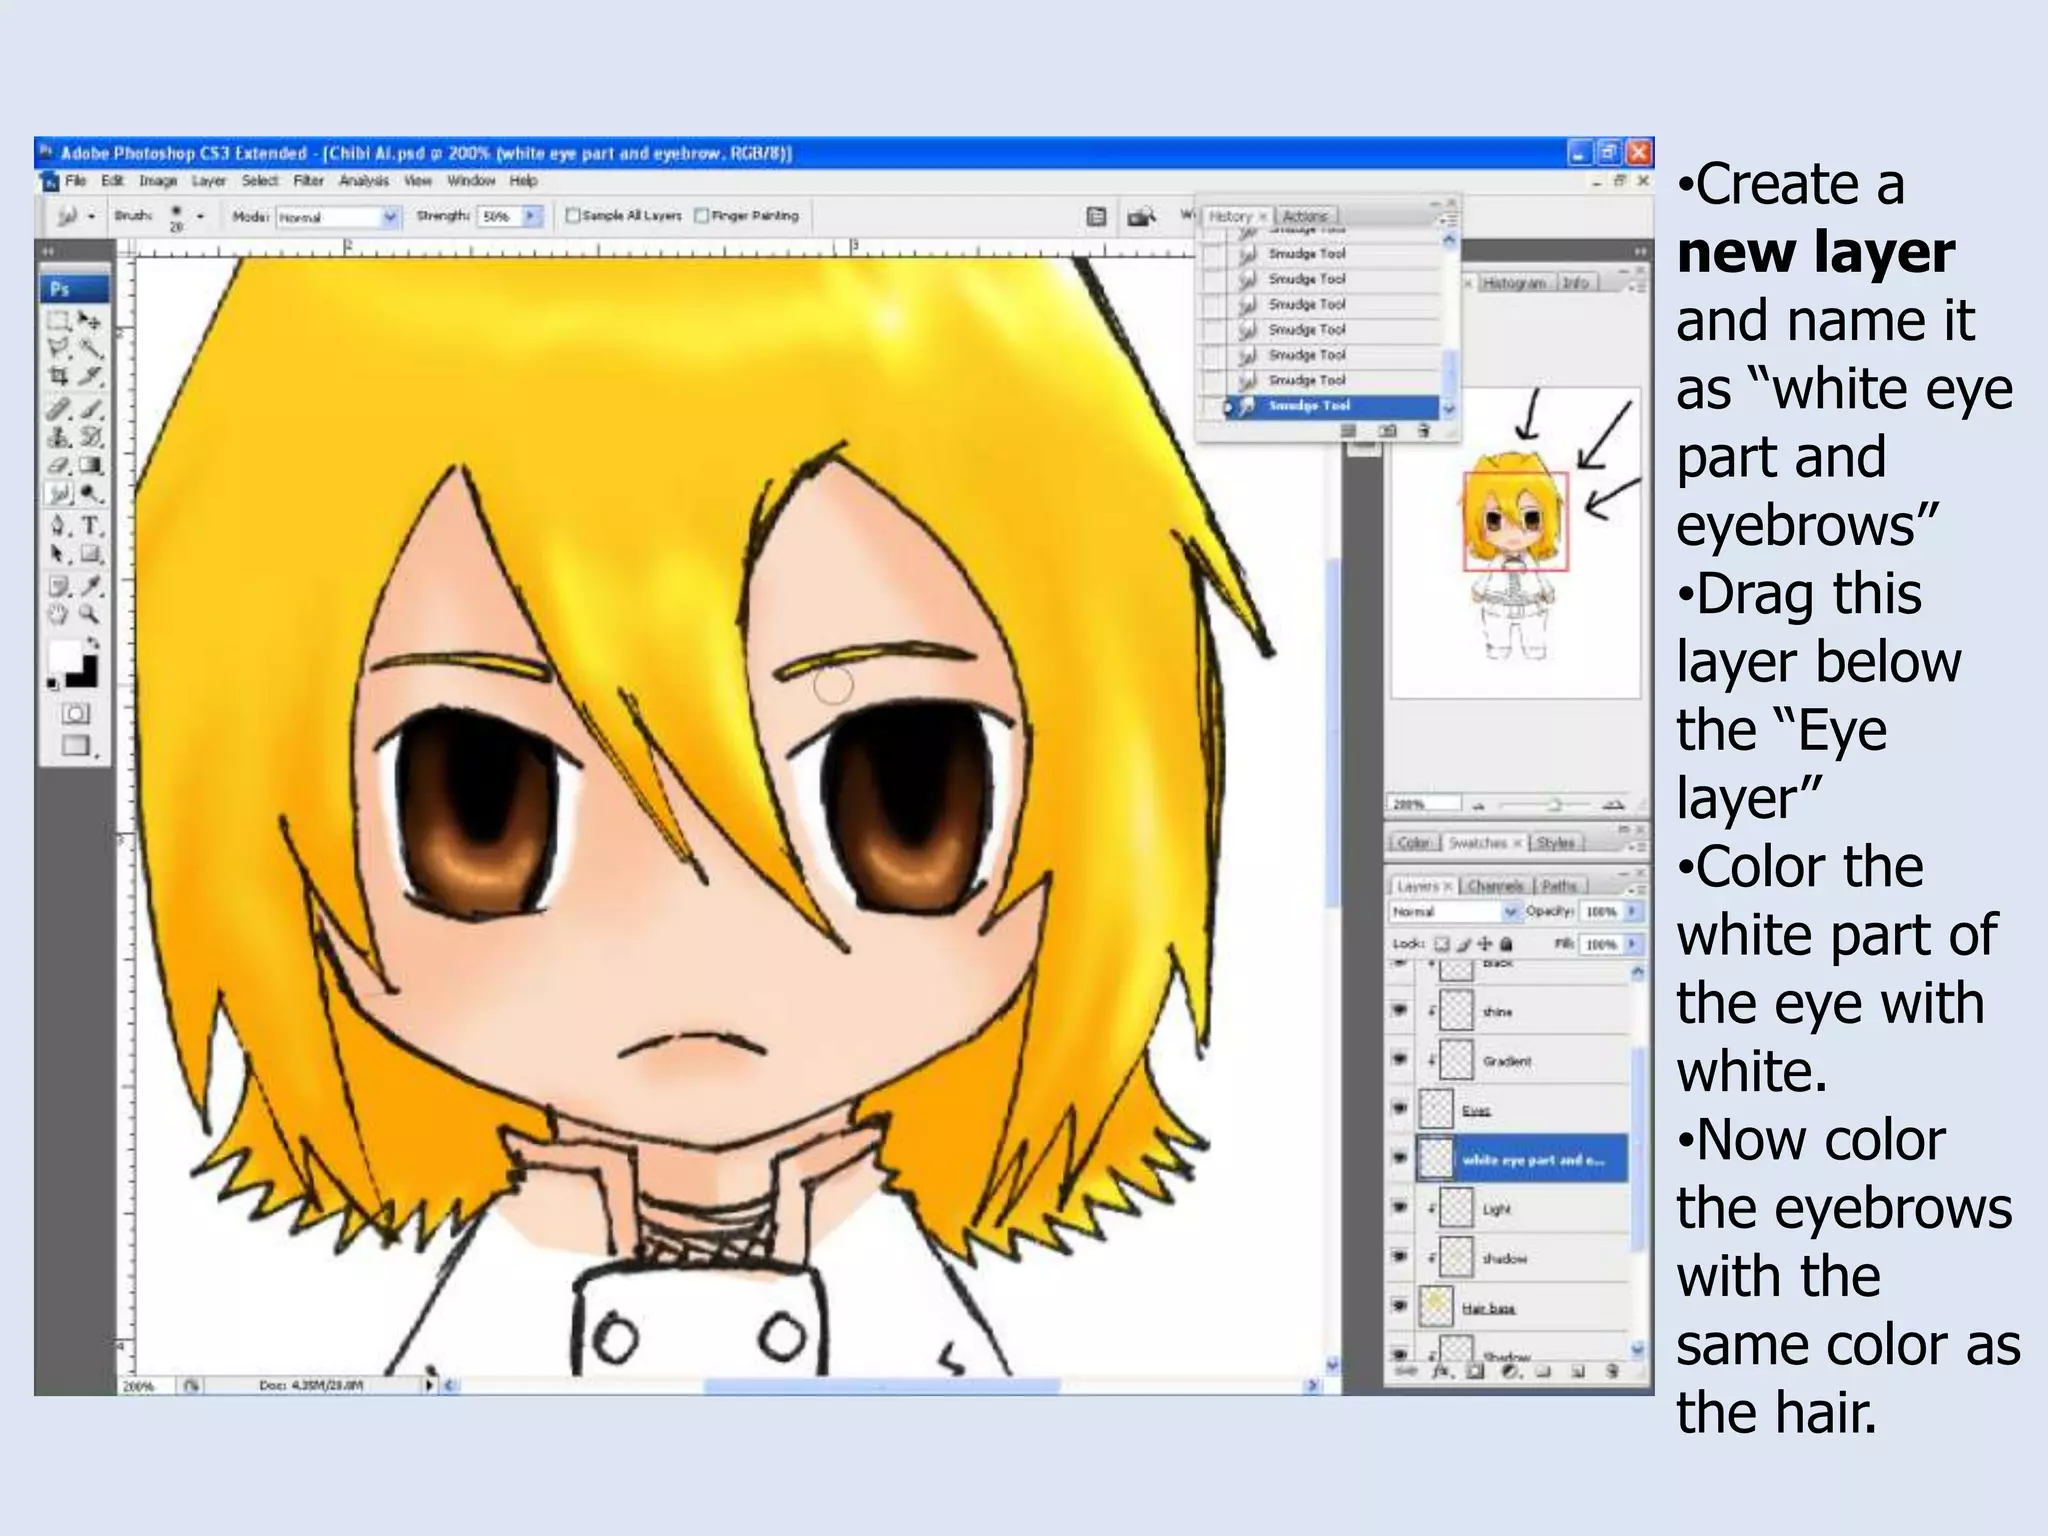
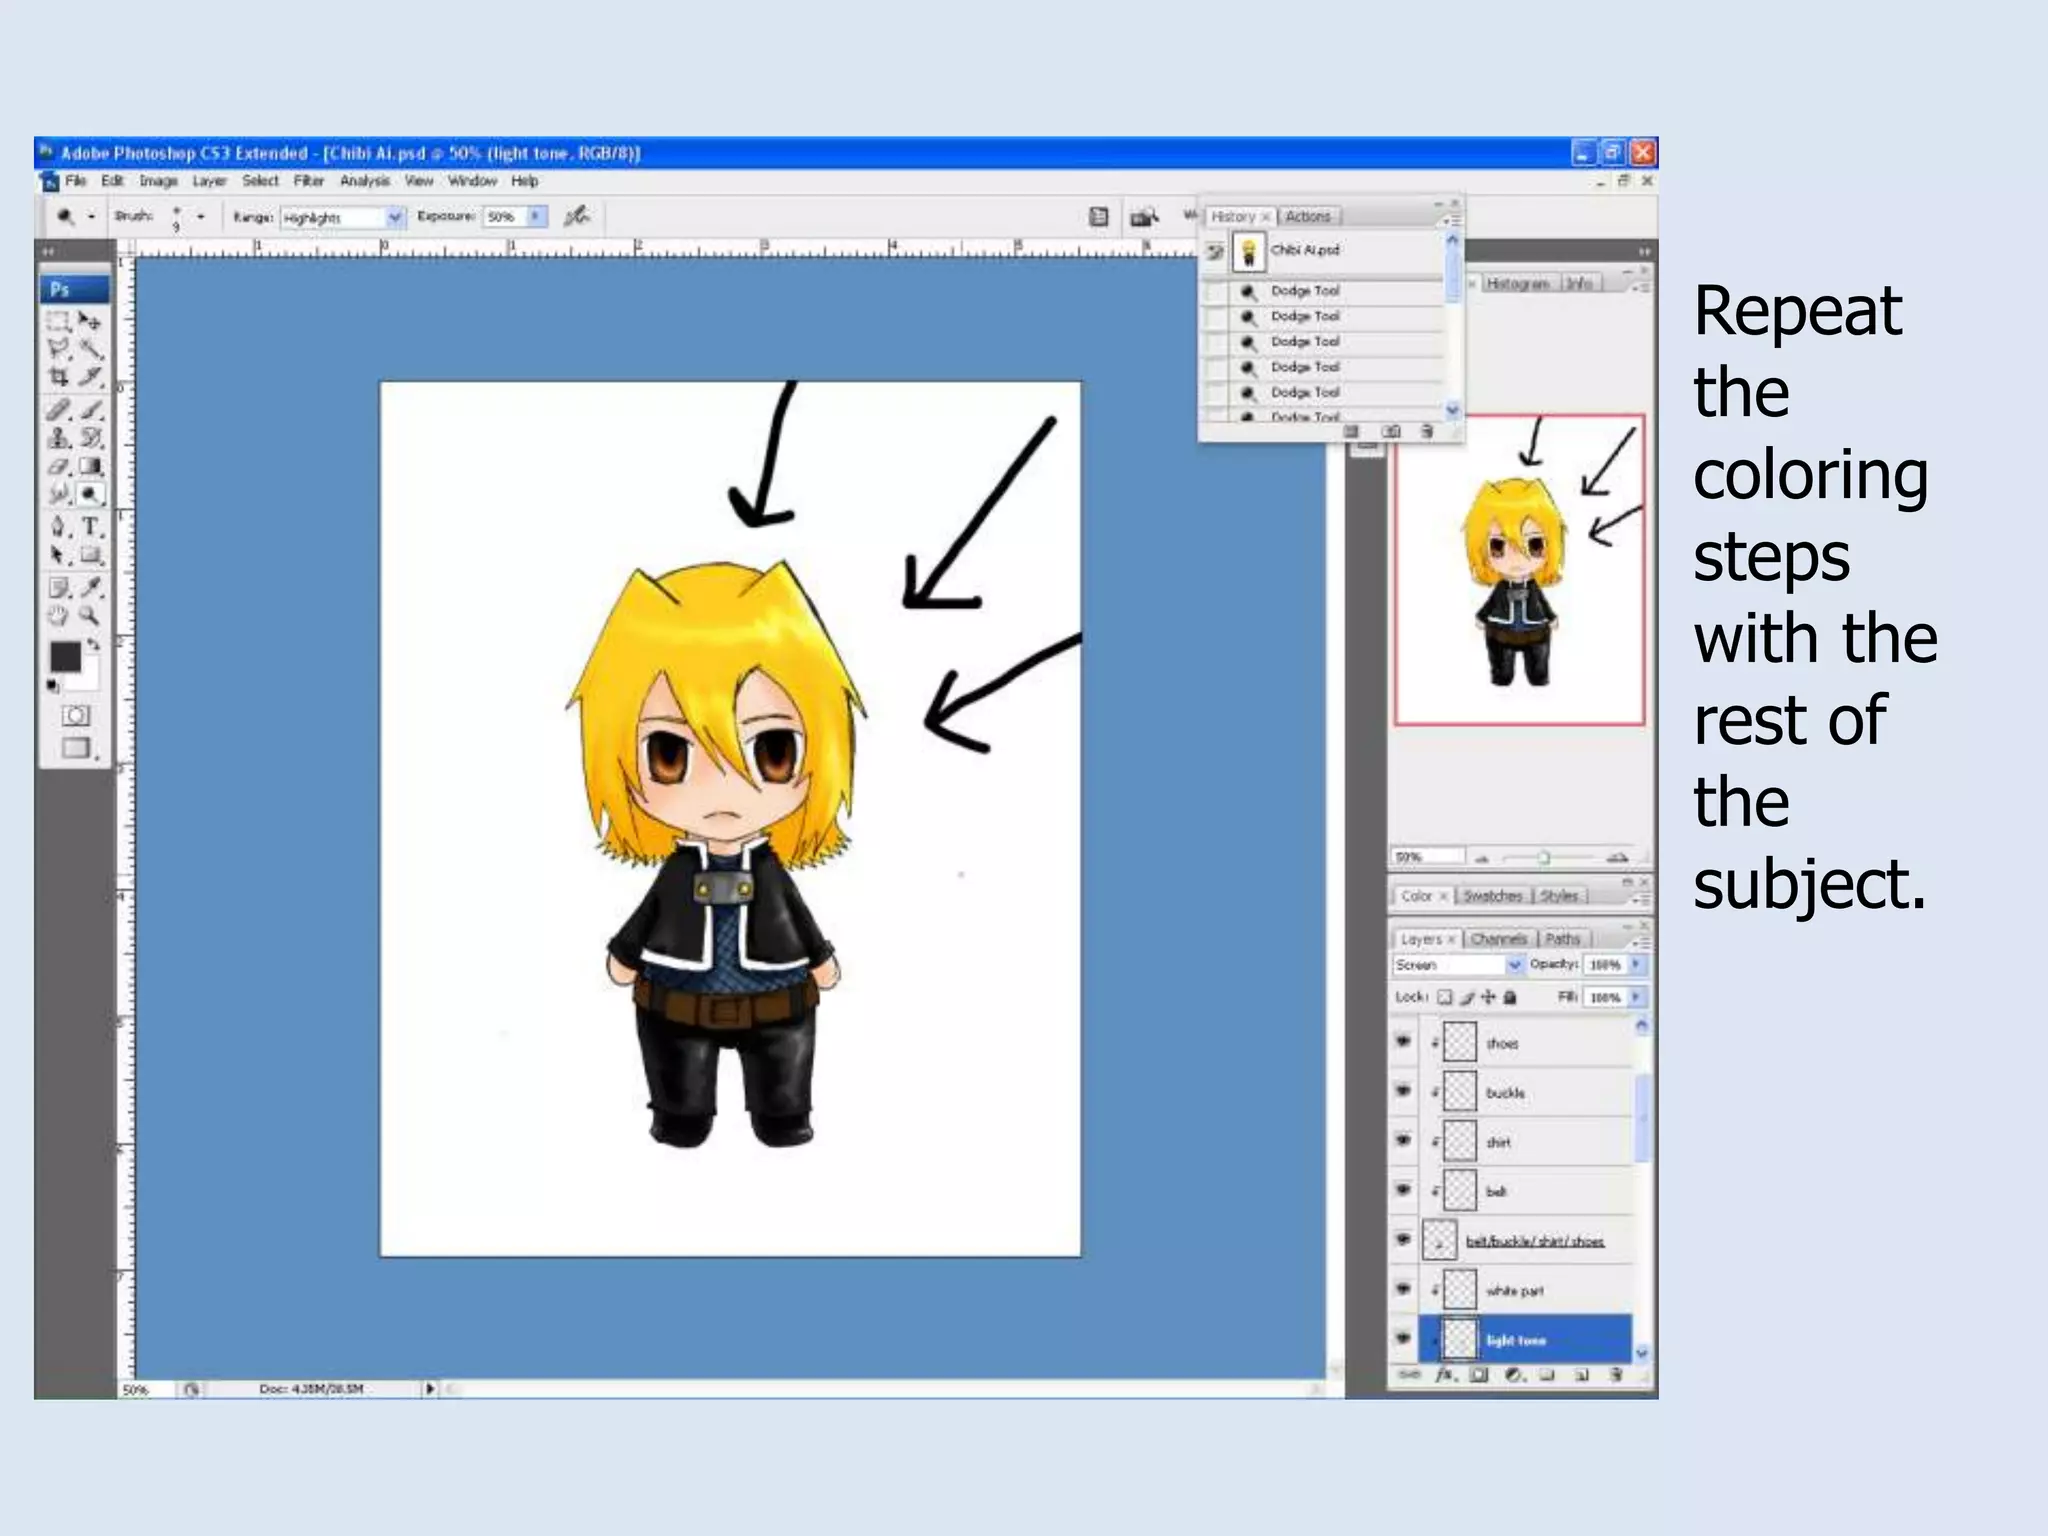
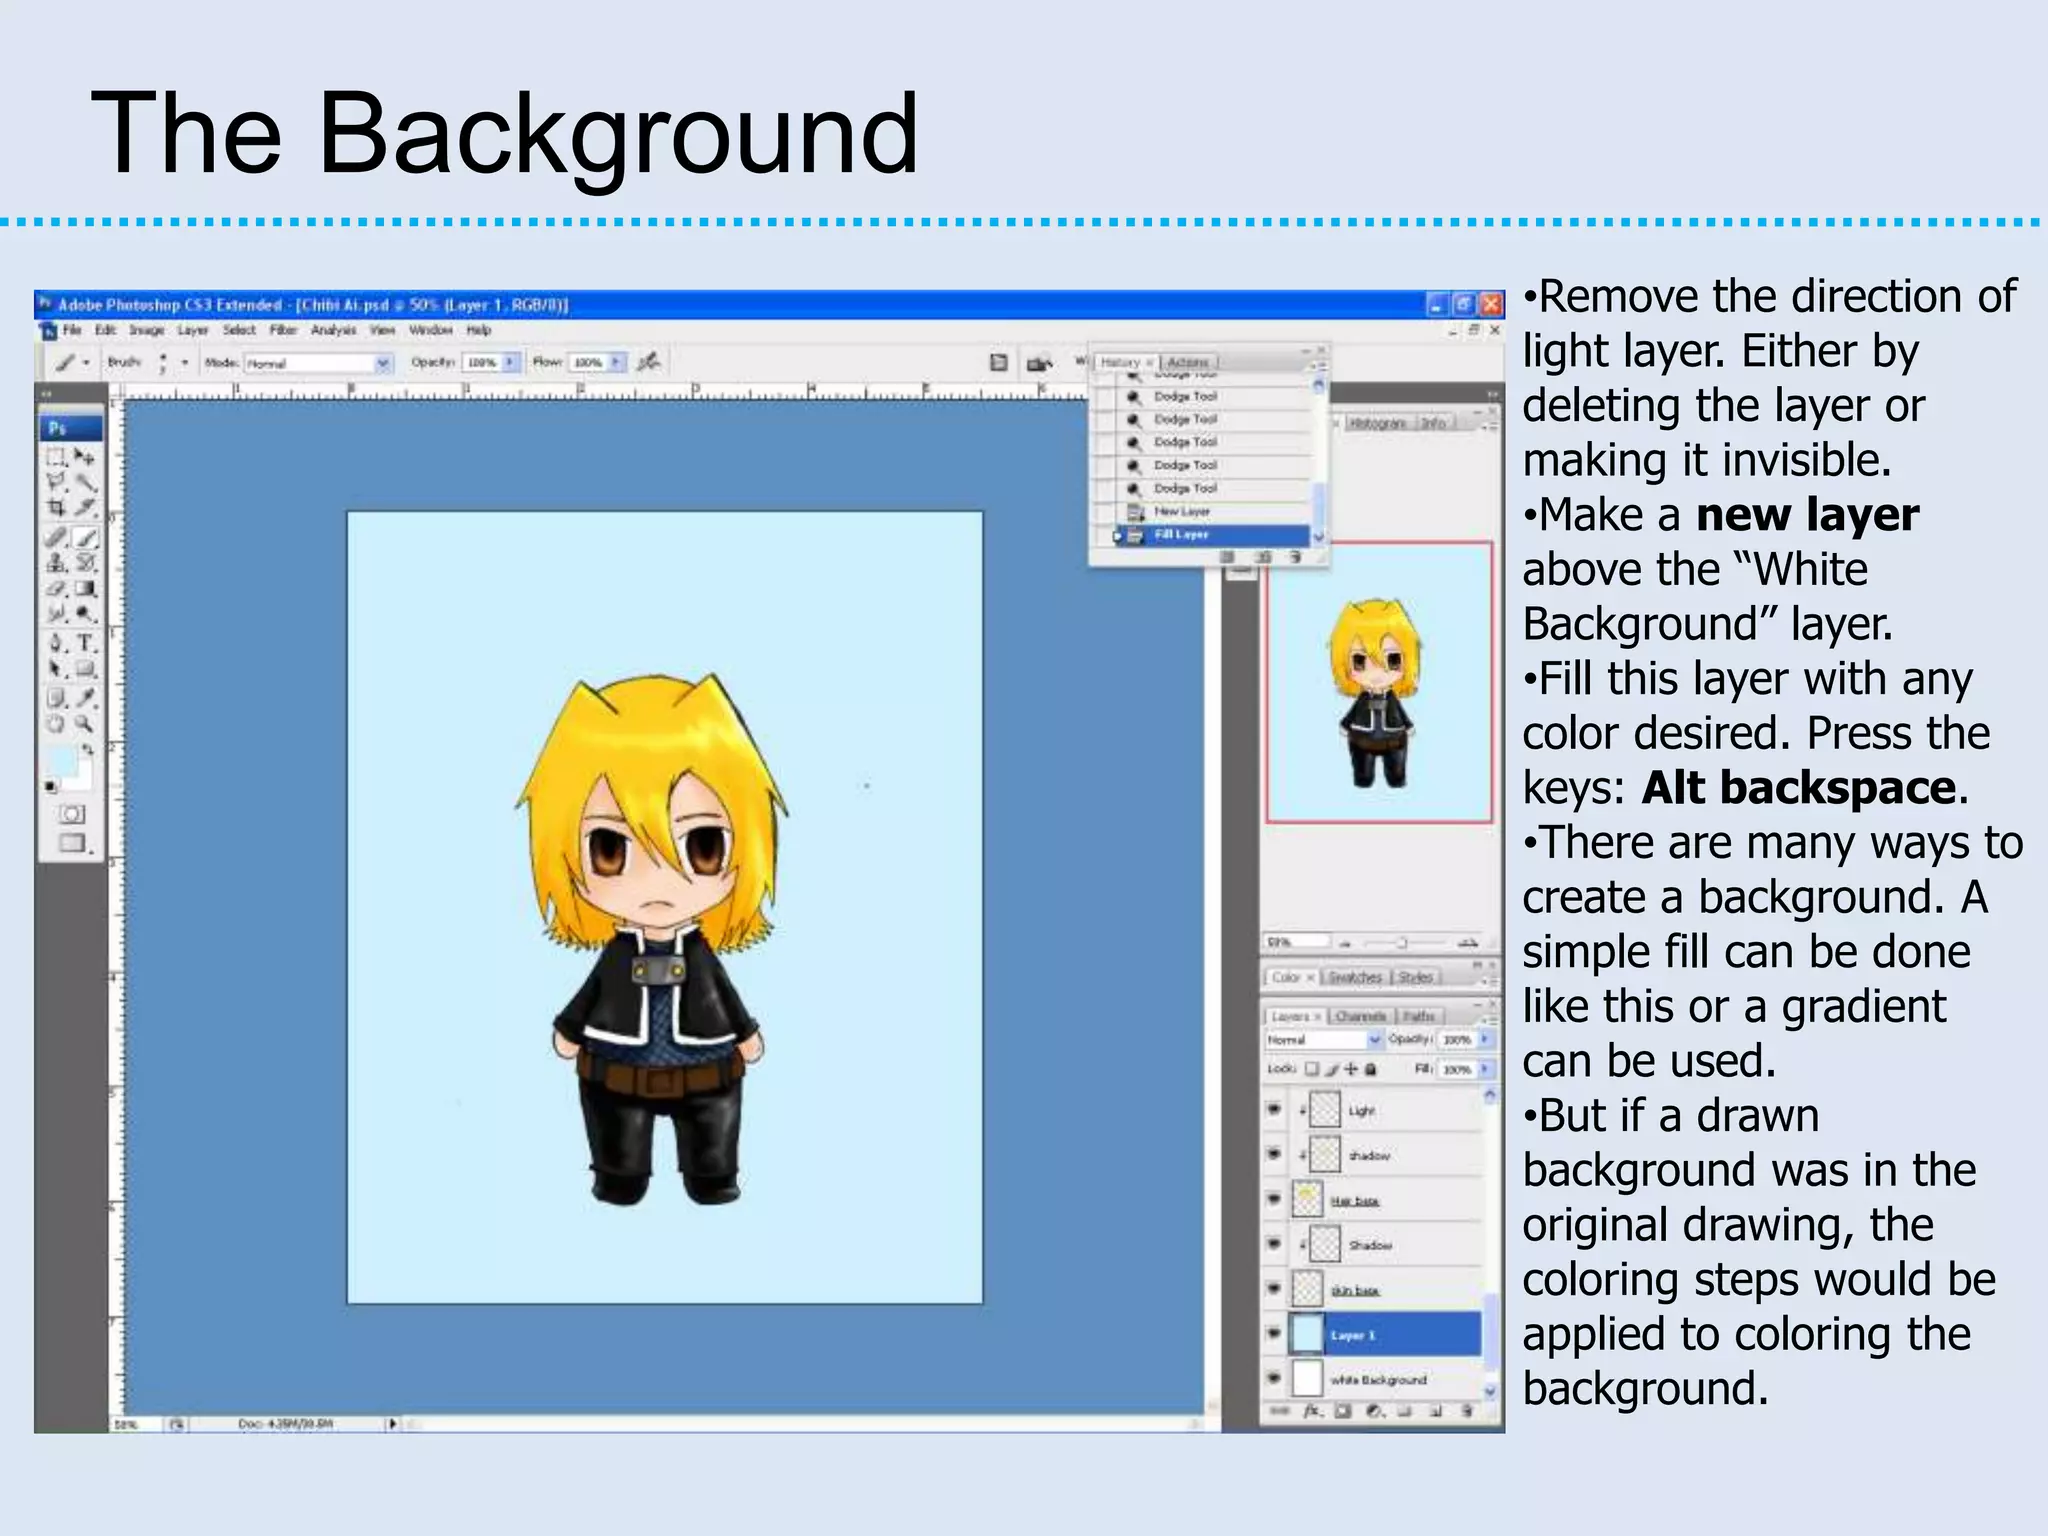

This document provides instructions for creating a lineart and coloring it in Photoshop. It outlines the main steps as making the lineart, coloring the lineart, and adding a background. For making the lineart, it describes selecting the lines, inverting the selection, and filling layers with black and white. For coloring, it explains creating clipping mask layers for different colors like skin, hair, and eyes and using tools like the smudge and dodge tools to blend colors. Finally, it notes that a background color can be filled or a gradient used.


![Christine rose nd. tipones [gr. 11 abm, caritas]](https://cdn.slidesharecdn.com/ss_thumbnails/christinerosend-190129074921-thumbnail.jpg?width=640&height=640&fit=bounds)


![Coded Agents – with UiPath SDK + LangGraph [Virtual Hands-on Workshop]](https://cdn.slidesharecdn.com/ss_thumbnails/codedagentsdeck-251215155422-5497c599-thumbnail.jpg?width=640&height=640&fit=bounds)


