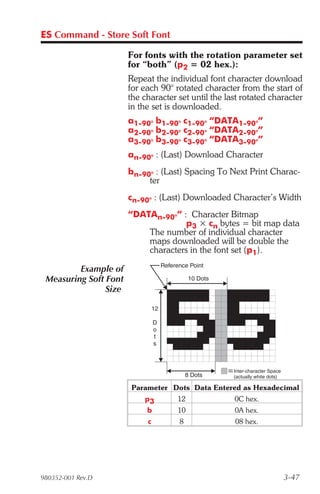
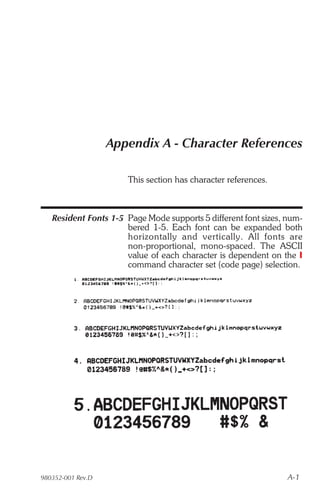
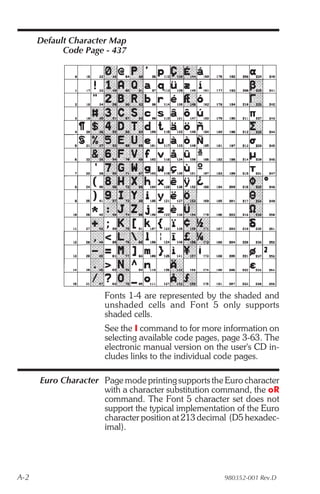
This document provides a programmer's manual for printers using Zebra's EPL2 programming language. It includes sections on printer configuration, command reference which describes each EPL2 command and its usage, and appendices with additional reference information like character sets and cash drawer kicker usage. The manual is intended to help programmers understand how to use EPL2 commands to control printer functions and format print output.

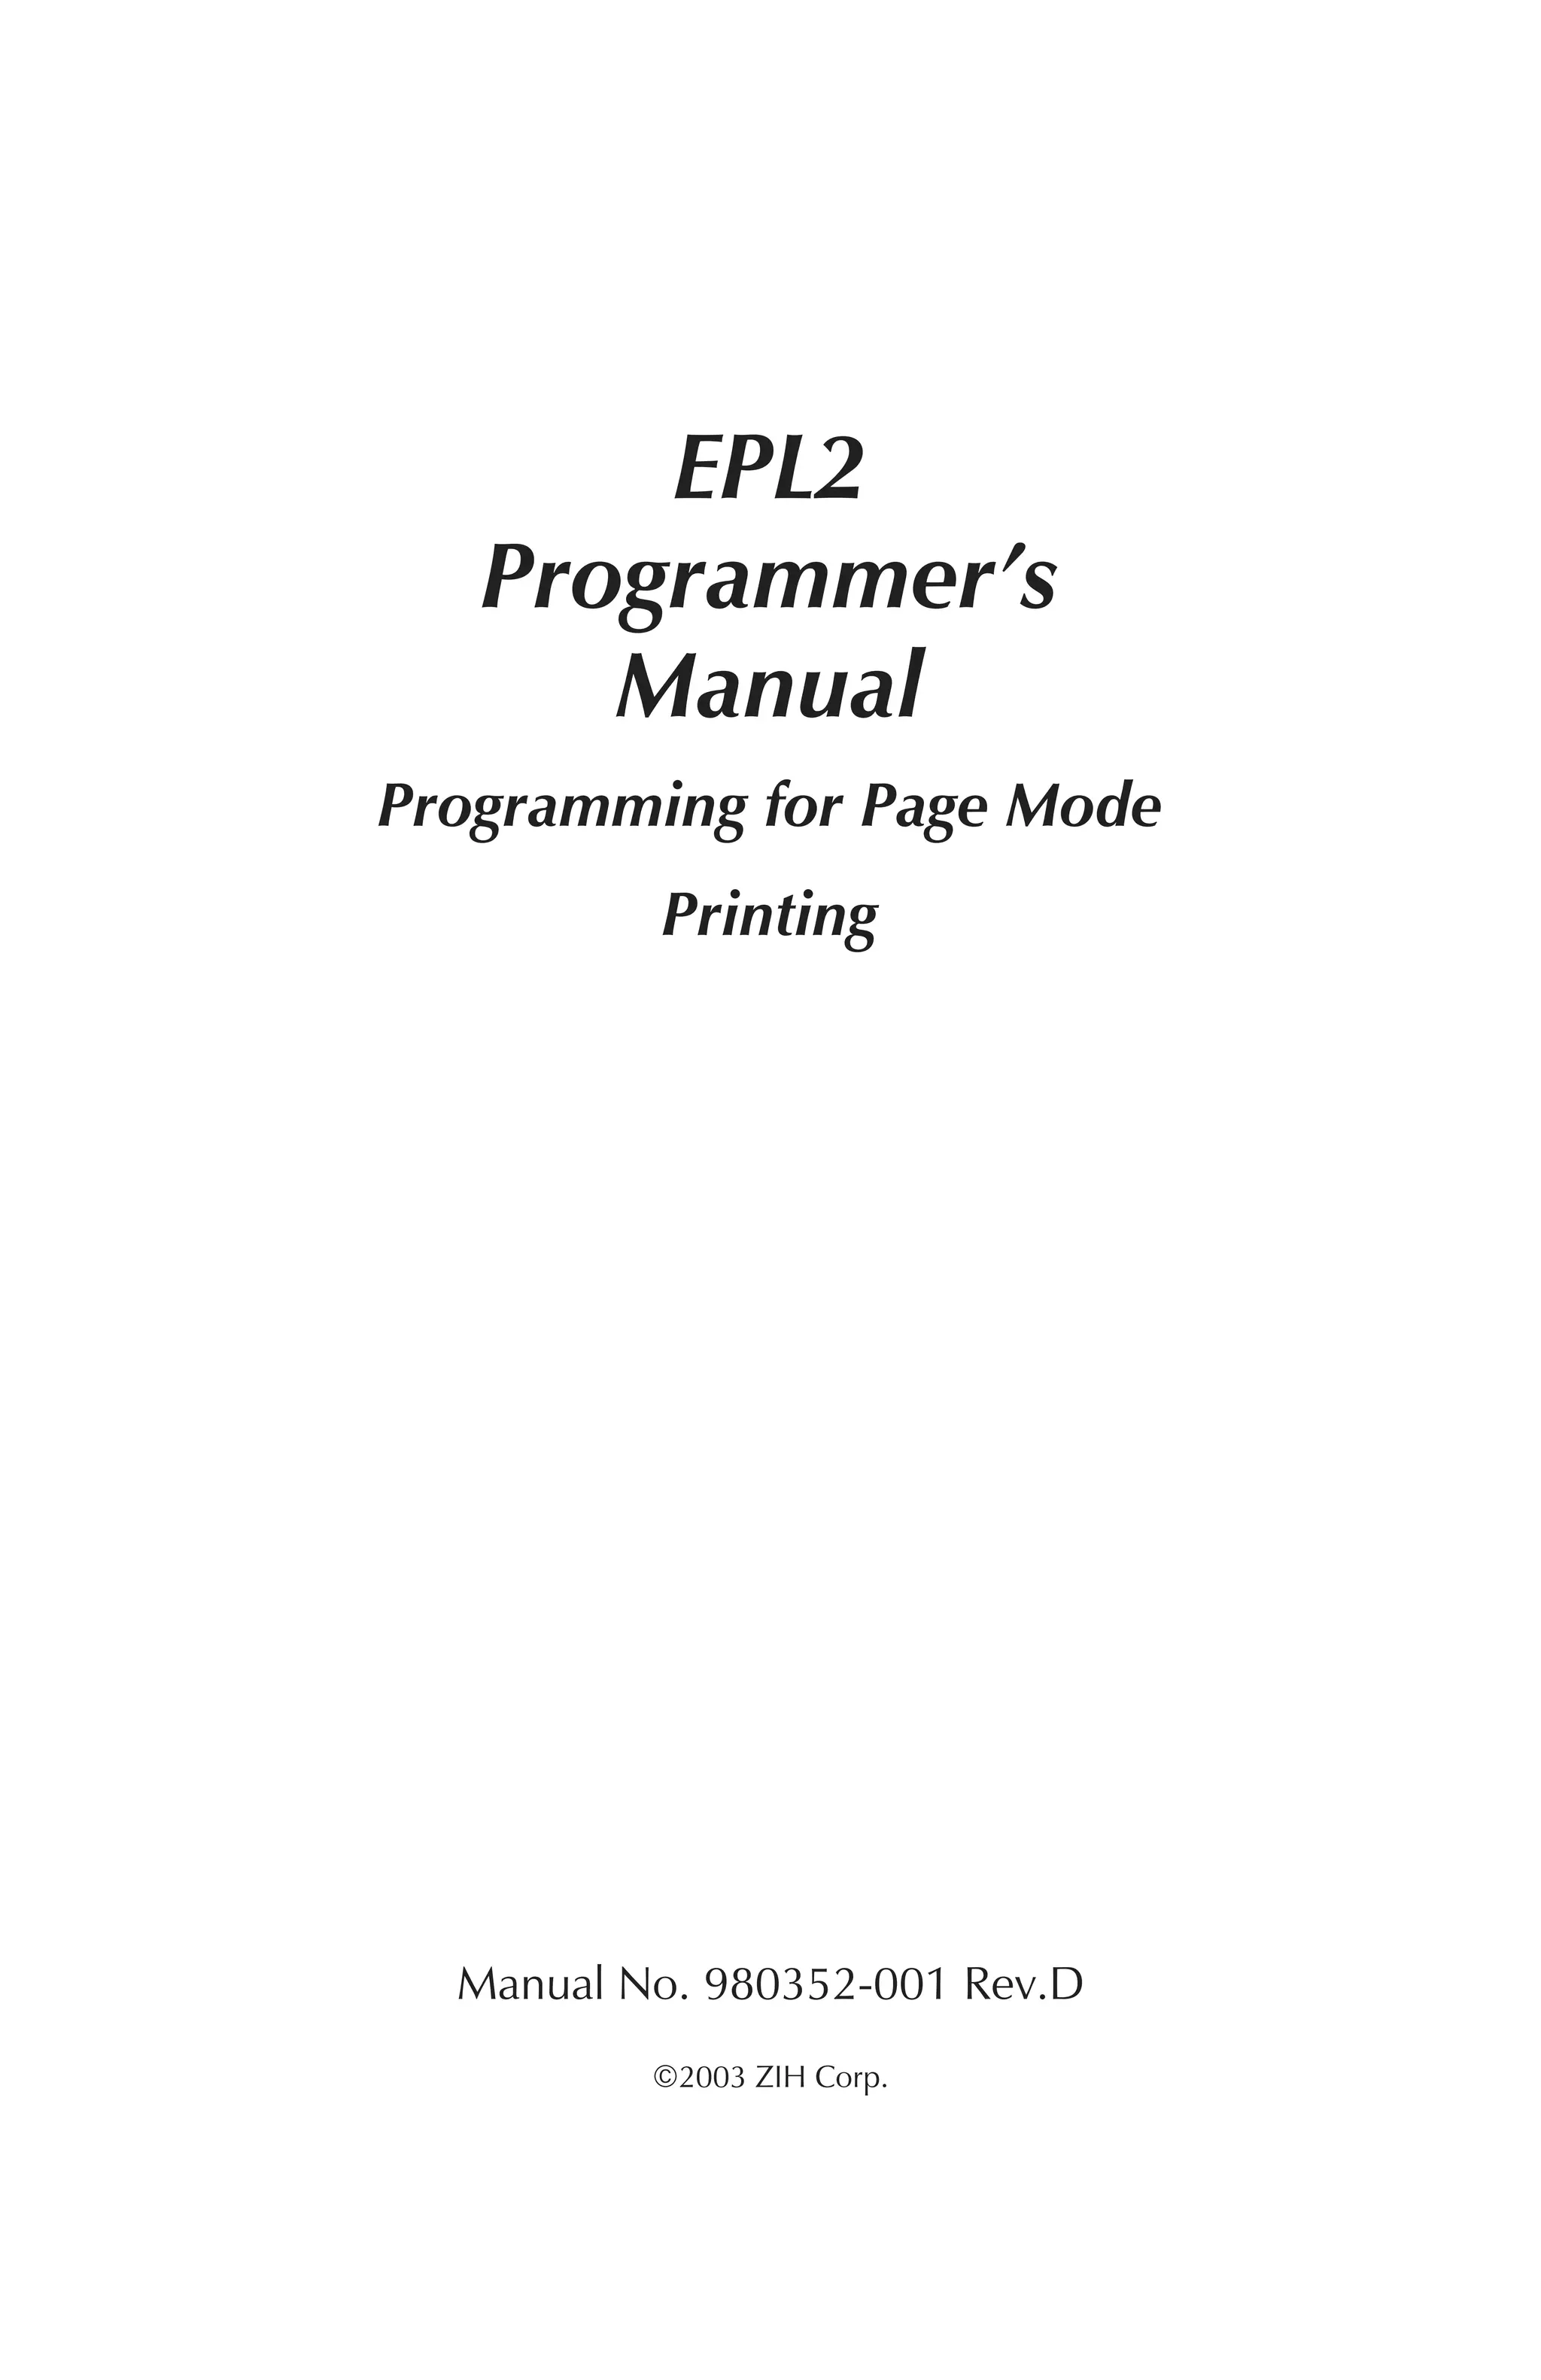
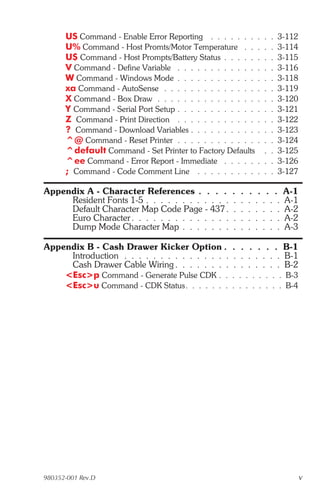

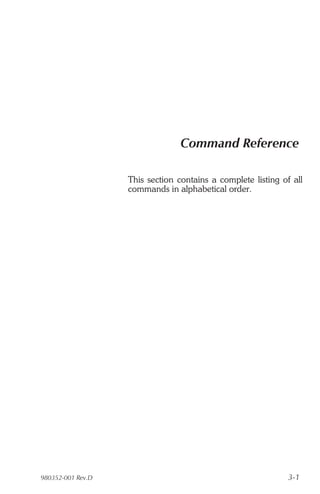
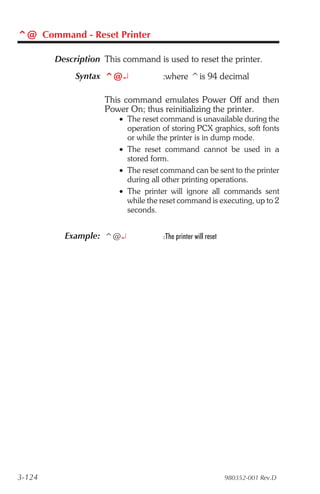
![Command The manual uses the following typographic
Conventions conventions to describe commands.
Example Description
A Commands (Case Sensitive)
p1,p2,p3 Required parameters
[p1, p2, p3] Optional parameters
{Choice 1|Choice 2} Indicates a mandatory choice be-
tween two or more items. You
must include one of the items un-
less all of the items are also en-
closed in square brackets.
This text should be ® The line-continuation character
on one line (®) indicates that code is contin-
ued from one line to the next and
should be typed all on one line.
¿ Line feed character.
“NAME” The name of a form or graphic in
double quote marks.
“DATA” The text or bar code data in dou-
ble quote marks.
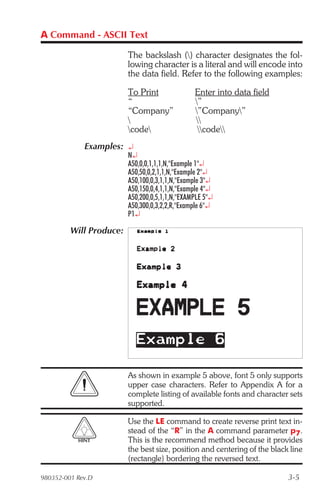
The () character designates that
the character following is a literal
and will encode into the data
field. Refer to the following exam-
ples:
To Print Enter into Data Field
” "
“Company” "Company"
code code
“PROMPT” An ASCII text field that will be
transmitted to the host (via the se-
rial interface) each time this com-
mand is executed.
Attention!!
All commands and alpha character command
parameters are case sensitive!
1-2 980352-001 Rev.D](https://image.slidesharecdn.com/epl2pagemodeprog-100603061744-phpapp01/85/Epl2-page-mode_prog-8-320.jpg)
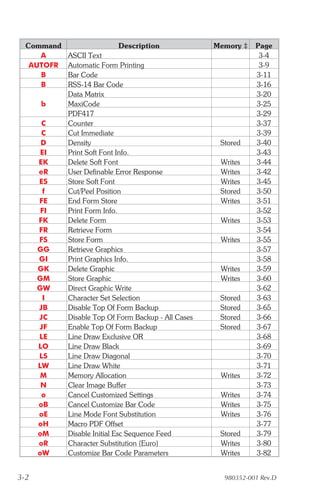
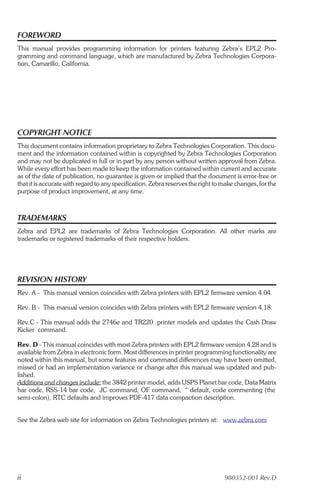
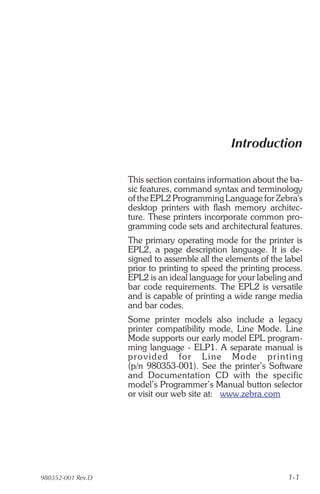
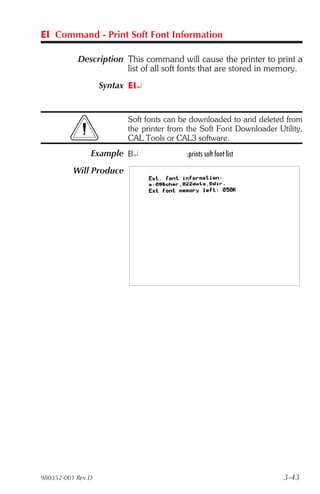
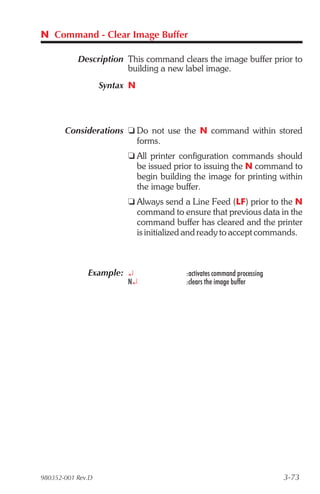
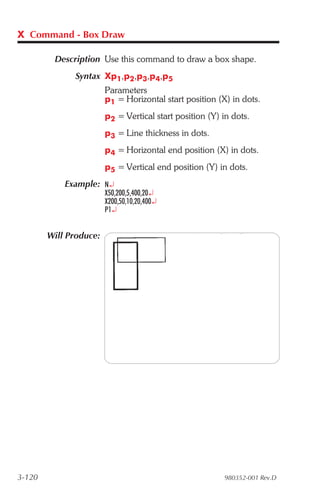
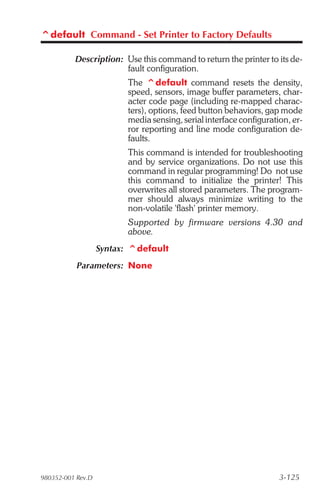
![A Command - ASCII TEXT
Simple Expressions An advanced function of the A command al-
in Data Fields lows addition and subtraction to be performed
on constant and variable values in flash printers.
Syntax Ap1,p2,p3,p4,p5,p6,p7,“DATA”[p8p9p10…]
Parameters For the p1 - p7 and “DATA” parameters -
See first page of A command, page 3-4.
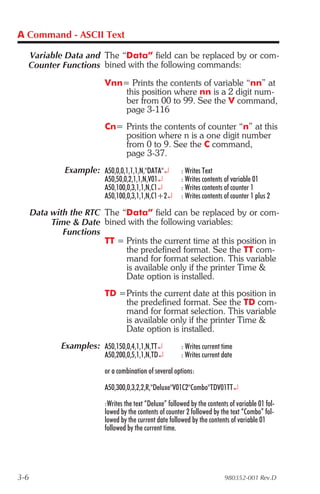
p8 = Required. Must be a variable data field
number, e.g. V00, V01 etc.
p9 = Required. Operator, + or –
p10 = Required. Variable data field number
or constant value.
Valid Number Ranges:
Constant = 0 to 2147483647
Variable = 0 to 2147483647
Result = -2147483648 to 2147483647
t The Expression must start with a variable
field.
t The character field length defined for the first
variable in the expression will be used to for-
mat the result. If the result is of a greater
length than the defined character length, then
the result field will contain ‘X’s.
t A syntax error will be generated during form
storage if the constant value is too large.
t If an error occurs during the evaluation of the
expression, the resultant field will be filled
with ‘X’s.
980352-001 Rev.D 3-7](https://image.slidesharecdn.com/epl2pagemodeprog-100603061744-phpapp01/85/Epl2-page-mode_prog-25-320.jpg)

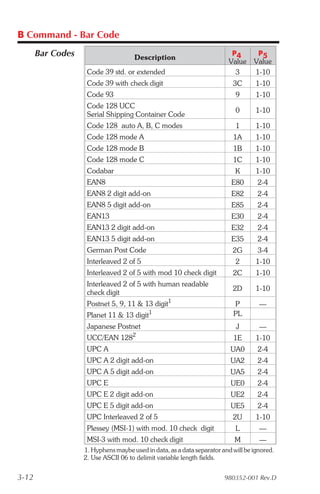

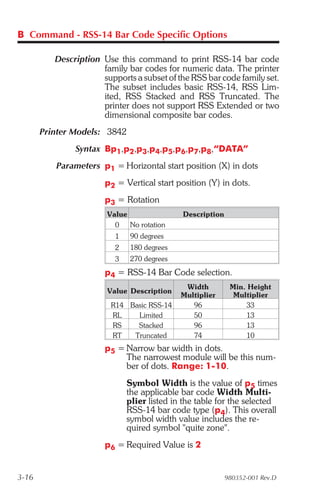
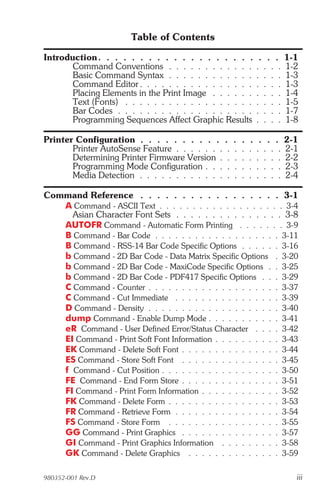
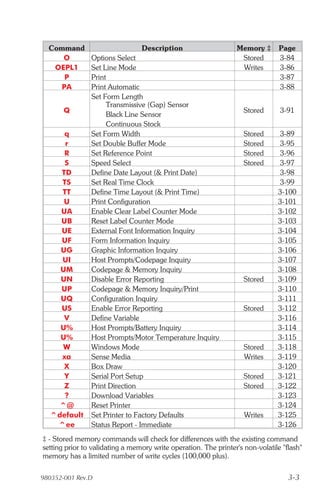
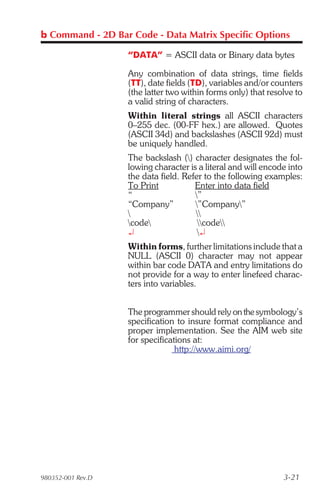
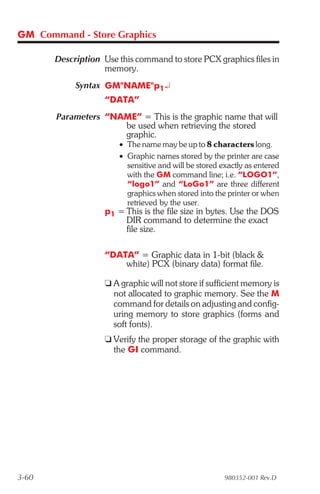
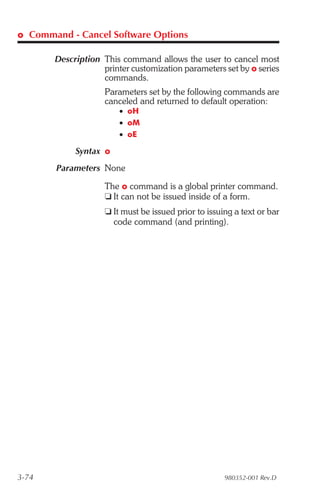
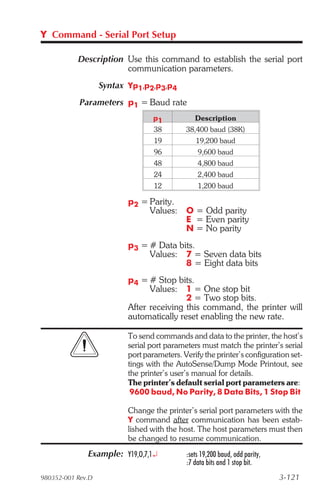
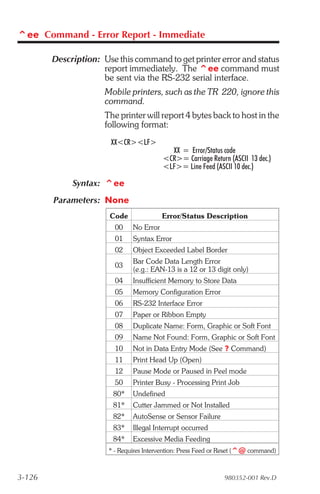
![b Command - 2D Bar Code - Data Matrix Specific Options
Description Use this command to print Data Matrix two di-
mensional bar code symbols. The printer will
automatically interpret and encode data into
Data Matrix bar code symbols, using the ECC
200 data quality format. Individual module size,
columns and rows parameters can be specified
or the printer can automatically calculate and
set one or all of these parameters.
The symbol is made of square modules ar-
ranged within a rectangular shape which in-
cludes a perimeter scan recognition pattern.
The scan recognition pattern produced by the
EPL2 printer also includes a "quiet zone" one
module wide on all outside edges of the bar
code to ensure data integrity.
Printer Models: 3842
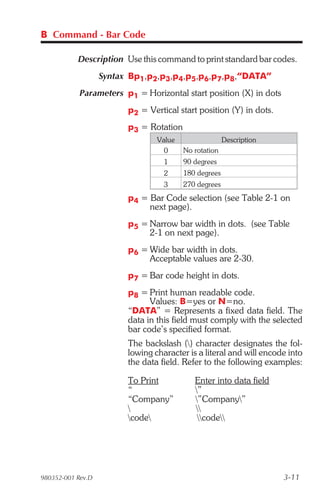
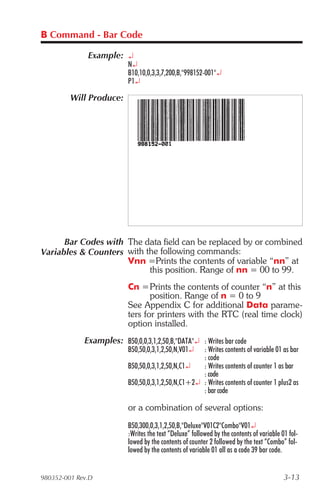
Syntax bp1,p2,p3,[,p4,][,p5][,p6][,p7],”DATA”
Parameters The printer will automatically generate the Data
Matrix bar code using the following parameters.
p1 = Horizontal start position (X) in dots.
p2 = Vertical start position (Y) in dots.
p3 = D - Selects Data Matrix bar codes
Order is not important for parameters p4-p7
Include the prefix letter (c,r,h,or v) to select the
parameter followed by a valid numeric value.
p4 (c) = Number of columns to encode
See the Symbol Geometries table for
valid column values.
p5 (r) = Number of rows to encode
See the Symbol Geometries table for
valid row values.
p6 (h) = Sets the minimum square data
module size used for encoding data.
Range: 1-40 Default: 5
p7 (v) = Selects an inverse image of the bar
code (sometimes known as reverse
video or a negative image).
3-20 980352-001 Rev.D](https://image.slidesharecdn.com/epl2pagemodeprog-100603061744-phpapp01/85/Epl2-page-mode_prog-38-320.jpg)
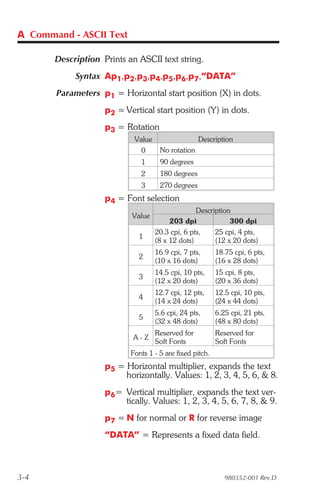
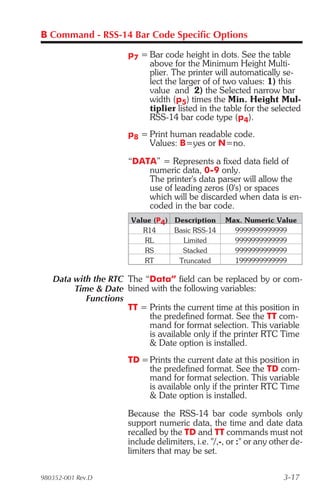
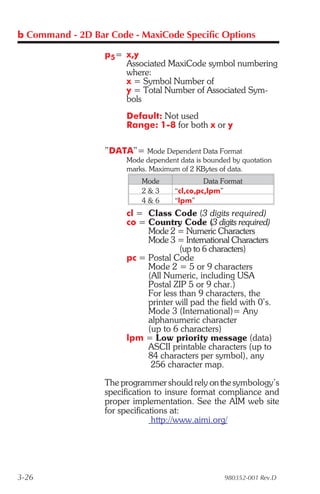
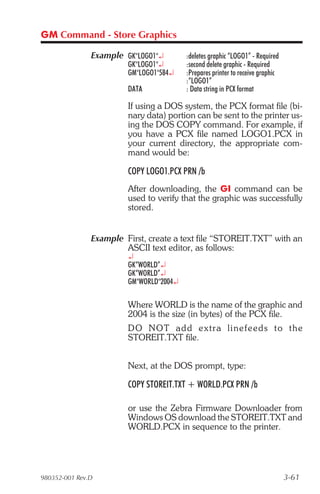
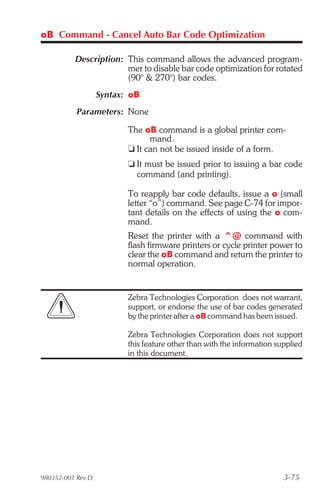
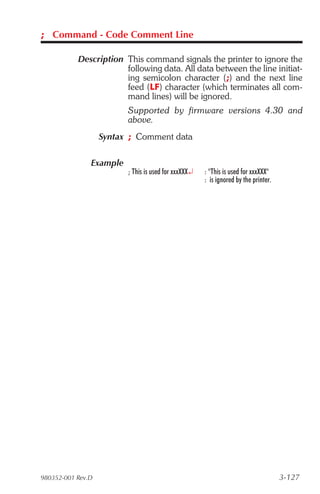
![b Command - 2D Bar Code - MaxiCode Specific Options
Description Use this command to generate MaxiCode bar
code symbols with a single command. The
printer will automatically interpret and encode
data into MaxiCode symbols for data modes 2,
3, 4, and 6. Up to eight symbols can be linked.
Syntax bp1,p2,p3,[p4,][p5,]“DATA”
Parameters p1 = Horizontal start position (X) in dots
p2 = Vertical start position (Y) in dots
p3 = M - Must be “M” for MaxiCode
p4 = Mode Selection
Value Description
Not Used Automatic Selection Mode 2 or 3
M2 Mode 2
M3 Mode 3
m4 Mode 4
m6 Mode 6
1. If p4 (Mx) is not used, the printer will use the
following rules to automatically format the
“DATA” parameter. If the postal code (third
parameter, PC) in the “DATA” is:
• All numeric characters, the printer will auto-
matically select Mode 2.
• Alpha only or alpha-numeric character com-
binations will set the printer to Mode 3.
• Not used, the printer automatically selects
Mode 3.
2. If p4 value is “M2 or M3”, the printer will use
the following rules to format the “Data” param-
eter:
• In Mode 2 - If a non-numeric character is en-
tered in the Postal Code “Data” parameter field,
then the MaxiCode bar code will not print.
• In Mode 3 – If the Postal Code “Data” field
exceed 6 characters, then the additional char-
acters will be truncated from the bar code field.
980352-001 Rev.D 3-25](https://image.slidesharecdn.com/epl2pagemodeprog-100603061744-phpapp01/85/Epl2-page-mode_prog-43-320.jpg)

![Using AIM Specified The EPL printer can use and automatically de-
MaxiCode Data code the AIM ITS (International Technical Stan-
Formatting dards) MaxiCode data format. The printer
detects the message/start header ([)>RS), field
separator (GS), and the end of message marker
(RS EOT) data control strings.
The hexadecimal (ASCII) data control strings
are in the following table. See the EPL2 dump
mode character map in Appendix A.
Control String Hexadecimal Code
Message/Start Header
[ ) > RS 5B 29 3E 1E
Field Separator
GS 1D
End Of Message Marker
RS EOT 1E 04
Syntax bp1,p2,M,p4 “[AIM MaxiCode Data]”
Example b20,400,M,m2”001,840,93065,1692,[)>RS
01GS98XXXZZFDAAFGSSHIPGS309GSGS1/1GS10GS
NGSGSCAMARILLOGSCAGSRSEOT!!!!!!!!!!!!!!!!!!!!!!!”¿
Notes:
1) This programming example represents actual data used to
format a single AIM compliant MaxiCode symbol as pro-
grammed by a major international and domestic shipping com-
pany.
2) The shipper has explicitly set the MaxiCode symbol for
Mode 2. This can be omitted by the programmer and the
printer will auto-select the mode per the rules on page 3-25.
3) The shipper has used the “!” character to pad the symbol’s
data. A scanner reads back all the “Data” within the quotation
marks, including the “!” characters following the End Of Mes-
sage Marker (EOT).
4) All of the data fields in the Low Priority Message are not
used in the example. Some are left empty with the field delim-
iting GS character used as a format field holder.
3-28 980352-001 Rev.D](https://image.slidesharecdn.com/epl2pagemodeprog-100603061744-phpapp01/85/Epl2-page-mode_prog-46-320.jpg)
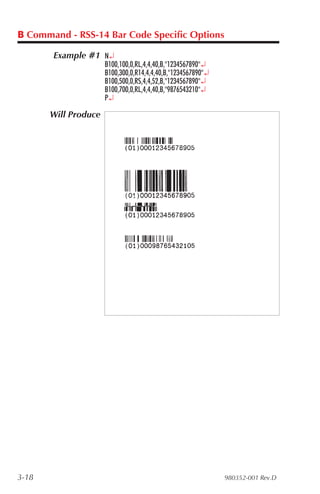
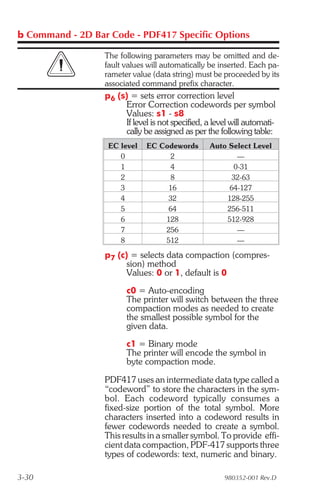
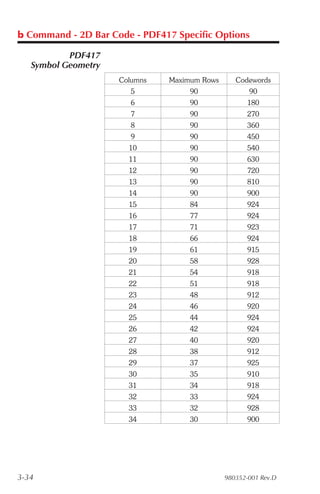
![b Command - 2D Bar Code - PDF417 Specific Options
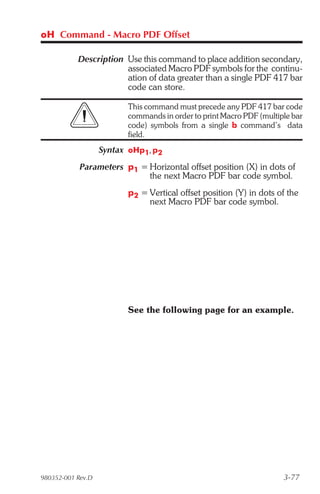
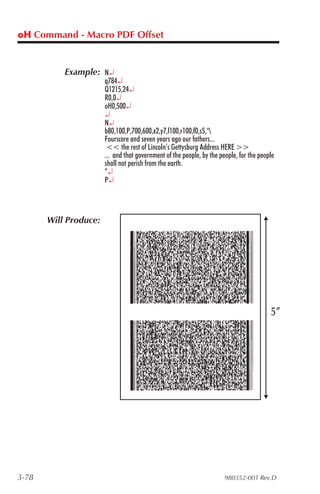
Description Use this command to print PDF 417 and Macro
PDF bar code symbols. The printer will auto-
matically change from PDF417 to Macro PDF
bar code mode if the data sent to the printer ex-
ceeds the maximum amount supported by the
PDF417 symbol. The oH command is used to
place the addition Macro PDF symbols needed
for the continuation data.
The printer will automatically optimize the sym-
bol for readability of data (and use the mini-
mum number of symbols when using Macro
PDF). The symbol’s geometry is adjusted (typi-
cally reducing the size of the symbol) per the de-
fined parameters. The printer will use the largest
module size (bar width and height) and mini-
mize the number of rows and columns.
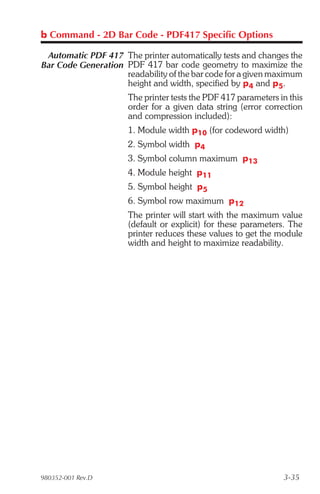
Syntax bp1,p2,p3,p4,p5[,p6][,p7][,p8][,p9][,p10]
[,p11][,p12][,p13][,p14][,p15],”DATA”
Parameters The printer will automatically generate the
PDF417 bar code using the following parameters.
p1 = Horizontal start position (X) in dots
p2 = Vertical start position (Y) in dots
p3 = P - Must be “P” for PDF 417 bar codes
p4 (www) =maximum print width in dots
p5 (hhh) = maximum print height in dots
The programmer should rely on the symbology’s
specification to insure format compliance and
proper implementation. See the AIM web site
for specifications at:
http://www.aimi.org/
980352-001 Rev.D 3-29](https://image.slidesharecdn.com/epl2pagemodeprog-100603061744-phpapp01/85/Epl2-page-mode_prog-47-320.jpg)
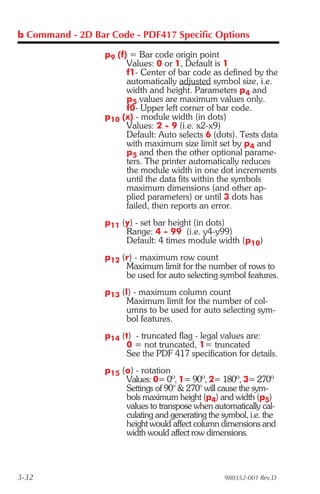
![b Command - 2D Bar Code - PDF417 Specific Options
Auto-Encoding (c0) data compaction method
is set by default, and provides the best compac-
tion. If Binary data compaction (c1) is selected
the symbol will typically be larger. Binary data
compaction may help to minimize the amount
of time it takes a system to scan and decode the
data encoded within the symbol.
Data Type Compaction (Byte by Byte)
Text 2 Characters per codeword
Numeric 2.93 Characters per codeword
Binary 1.2 Bytes per codeword
• Text compaction can be used for uppercase,
lowercase, numbers, space, carriage return,
tab, line feed, and the following characters:
&,:#-.$/+%*=^;@[]_’~!"|(){}`
With text compaction, up to two characters
can be encoded in a single codeword.
• Numeric compaction can be used for num-
bers only. Up to 2.93 characters can be en-
coded in a single codeword.
• Byte compaction can be used for any charac-
ter. But the flexibility comes at a price; byte
compaction encodes only 1.2 characters per
codeword.
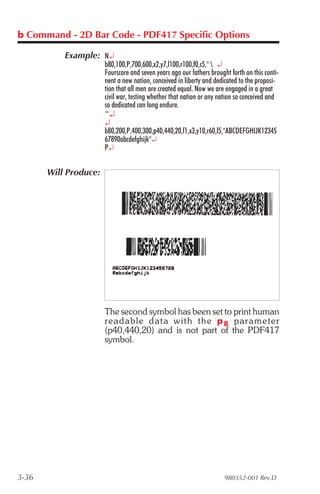
p8 (pxxx,yyy,mm) = print human readable
This parameter is a non-standard
implementor of the PDF417 and is only
recommended for troubleshooting purposes.
Additional variables:
p ="p“ - parameter identifier
xxx = horizontal start location
yyy = vertical start location
mm = maximum characters per line
980352-001 Rev.D 3-31](https://image.slidesharecdn.com/epl2pagemodeprog-100603061744-phpapp01/85/Epl2-page-mode_prog-49-320.jpg)
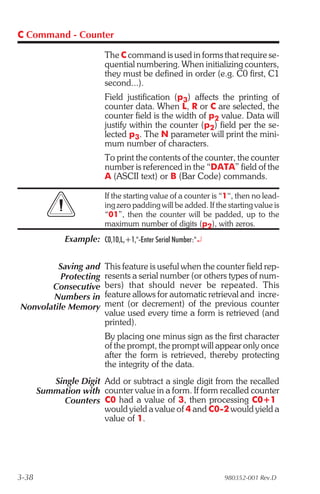
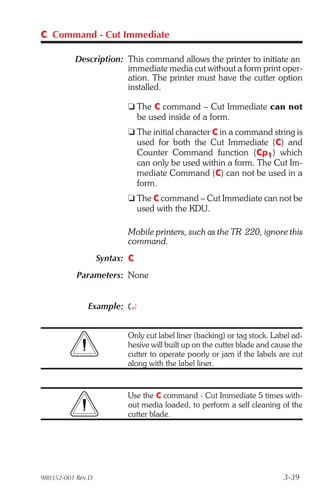
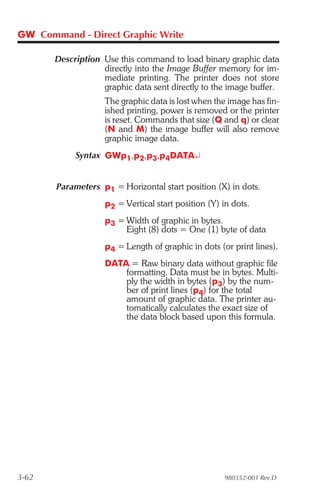
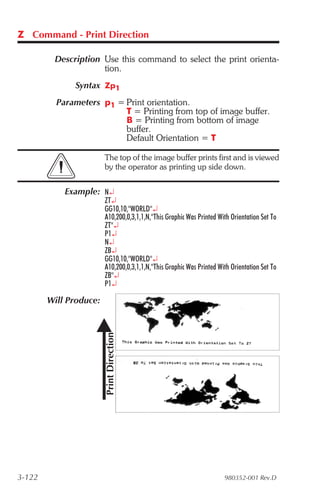
![C Command - Counter
Description The counter (C) command defines one of 10 au-
tomatic counters used in consecutive number-
ing applications (i.e. serial numbers). Counters
must be defined after variables.
For Numeric Serialization Only. The counter
function does not support Alpha or Alpha-Numeric
Serialization.
Syntax Cp1, p2, p3, p4, “[-]PROMPT”
Parameters p1 = Counter number. Range: 0 to 9
p2 = Maximum number of digits for counter.
Range: 1 to 29
p3 = Field Justification.
L = Left R = Right
C = Center N = No Justification
p4 = Step Value. + or - sign followed by a
single digit of 1 - 9. Using a step value
of +0 allows the counter to be used as
an additional variable data field.
“PROMPT”= An ASCII text field that will be
transmitted to the KDU or host (via the
serial interface) each time the command
is executed. Typically used to request
the operator to enter a starting counter
value.
KDU Prompt [-] = Having the first character of the prompt
Options a single minus sign will cause the
prompt to display only once after form
retrieval.
980352-001 Rev.D 3-37](https://image.slidesharecdn.com/epl2pagemodeprog-100603061744-phpapp01/85/Epl2-page-mode_prog-55-320.jpg)
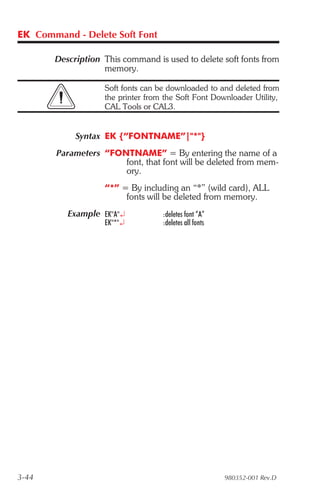
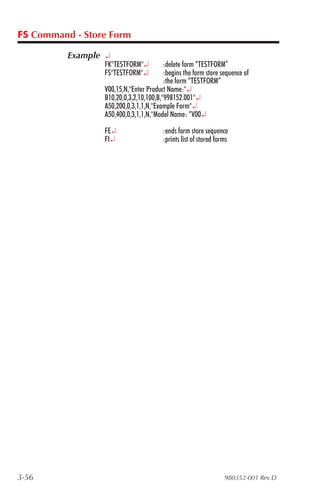
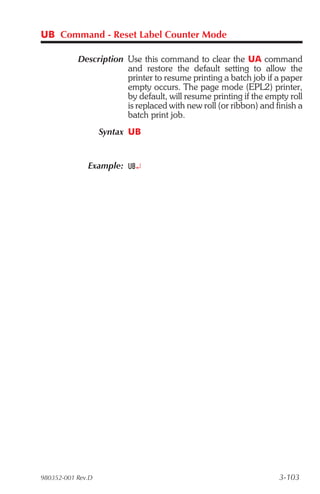
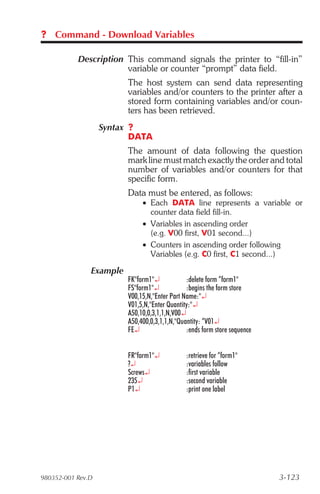
![FK Command - Delete Form
Description This command is used to delete forms from
memory.
Syntax FK [ “FORMNAME” | “*” ]
Parameters “FORMNAME” = By entering the name of a
form, that form will be deleted from
memory.
• The name may be up to 8 characters long.
• Form names stored by the printer are case
sensitive and will be stored exactly as entered
on the FS command line; i.e. “FORM1”,
“form1” and “FoRm1” are three different
forms when stored into the printer or when re-
trieved by the user.
• De leting a sin gle form re quire s the
FK”FORMNAME” be issued twice for each
form to be deleted. Some label generation
programs re-issue forms (form delete and
store) every time a label is printed which re-
duces flash memory life.
“*” = By including an “*” (wild card), ALL
forms will be deleted from memory. The
FK”*” does not need to be issued twice
to delete all forms.
Example FK"AFORM"¿ :deletes form “AFORM”
FK"AFORM"¿ :second delete form “AFORM” required
:for flash printers
FK"*"¿ :deletes all forms
980352-001 Rev.D 3-53](https://image.slidesharecdn.com/epl2pagemodeprog-100603061744-phpapp01/85/Epl2-page-mode_prog-71-320.jpg)
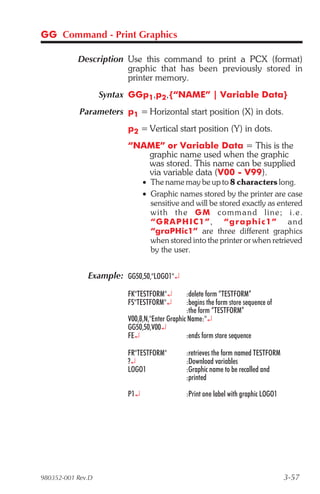

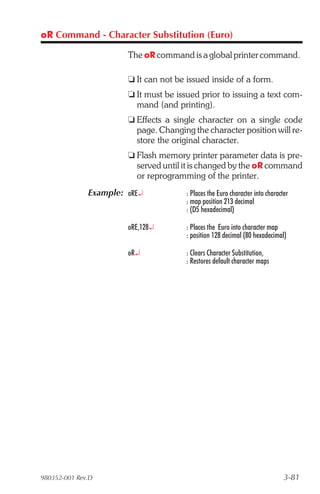
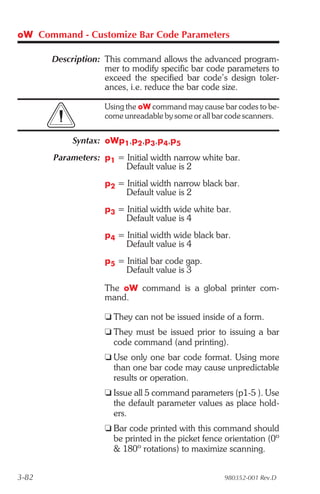
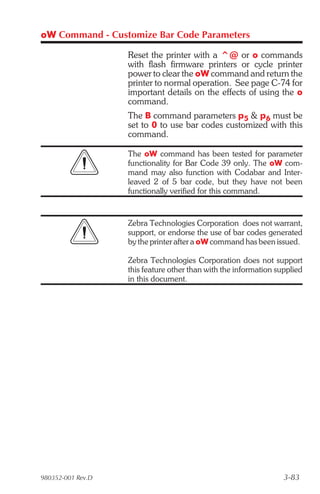
![oR Command - Character Substitution (Euro)
Description This command allows the advanced program-
mer to substitute the Euro currency character
for any ASCII character in printer resident font
numbers 1-4.
The second function this command supports is
the zero character style toggling between a plain
zero character and a zero with a slash.
Character substitution settings are stored in the
printers non-volatile 'flash' memory. The origi-
nal character can be restored by sending the oR
command without a parameter.
Syntax oR [p1,p2]
Parameters: p1 = E
If the p2 parameter is not provided,
then the Euro character will map to
code page position 213 decimal (D5
hexadecimal) for all code pages.
p1 = 0 (zero)
Toggles the zero character:
slash — no slash (out of box default)
p2 = Decimal number
Range: 0 to 255
The active code page’s ASCII character
map position to be replaced by the Euro
character. The Euro character will be ac-
tive in this map position for all code
pages. See the I command for details
on code page selection.
None = No Parameters (p1/p2) resets to all
code pages to original default character
mapping.
Optionally, to reapply normal character opera-
tions, issue a o (111 dec. or 6F hex.) command.
See page 3-74 for important details on the ef-
fects of using the o command.
The Euro character is not supported in Font 5 char-
acter set.
3-80 980352-001 Rev.D](https://image.slidesharecdn.com/epl2pagemodeprog-100603061744-phpapp01/85/Epl2-page-mode_prog-98-320.jpg)
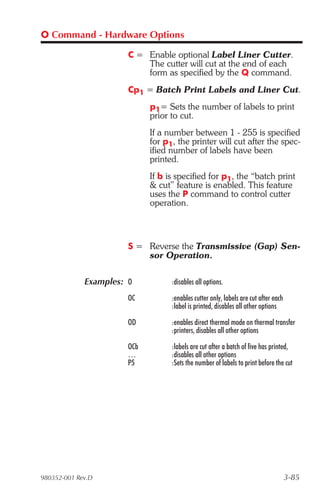
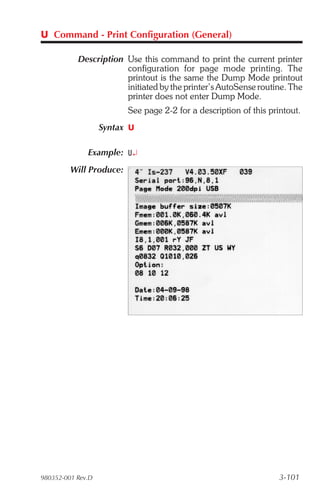
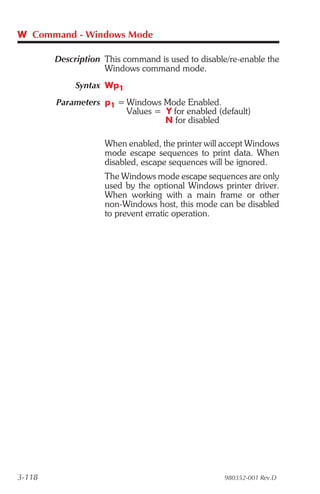
![O Command - Hardware Options
Description Use this command to select various printer op-
tions. Options available vary by printer configu-
ration.
Options selected and enabled in a printer can be
verified by checking the printer configuration
printout, Dump Mode printer status label. See
the U command and the Explanation of the
Status Printout on page 2-2.
Mobile printers, such as the TR 220, ignore this
command.
Syntax O[C[p1], D, L, S]
Parameters D = Enable Direct Thermal Mode, use this
option when using direct thermal media
in a thermal transfer printer.
d = Out of box default Direct Thermal
Mode setting used in a 2844, 2824 or
3842 thermal transfer printer's and is
displayed in the Dump Mode status
printout. Changing the printer to ther-
mal transfer mode or when the printer
detects a transfer ribbon will cause this
option parameter to permanently be re-
moved from the status printout.
L = Enable Label Dispense Mode - Tap
to Print. The printer will present each
label and wait for a tap of the feed
switch before printing the next label. Use
this mode when printing multiple copies
of liner-free labels.
Fp1 = Form Feed Setting.
p1= Sets the type of operation the feed
button .
f = Default, normal operation.
Tap to feed.
r = Reprint last label printed.
i = Ignore the feed button.
3-84 980352-001 Rev.D](https://image.slidesharecdn.com/epl2pagemodeprog-100603061744-phpapp01/85/Epl2-page-mode_prog-102-320.jpg)
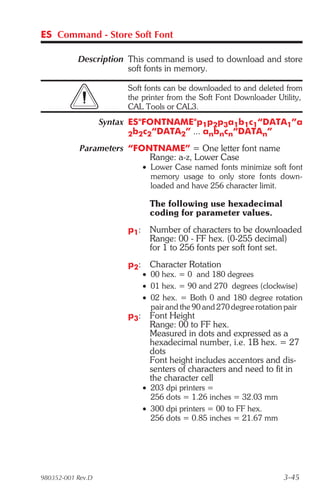
![P Command - Print
Description Use this command to print the contents of the
image buffer.
Syntax Pp1, [p2]
Parameters p1 = Number of label sets.
Range = 1 to 65535
p2 = Number of copies of each label (used in
combination with counters to print mul-
tiple copies of the same label).
Range = 1 to 65535
The P command cannot be used inside of a stored
form sequence. For automatic printing of stored
forms, use the PA command.
Examples: P1¿ :prints one label set
P2,1¿ :prints 2 label sets of one label each
P5,2¿ :prints 5 label sets of 2 labels each
980352-001 Rev.D 3-87](https://image.slidesharecdn.com/epl2pagemodeprog-100603061744-phpapp01/85/Epl2-page-mode_prog-105-320.jpg)
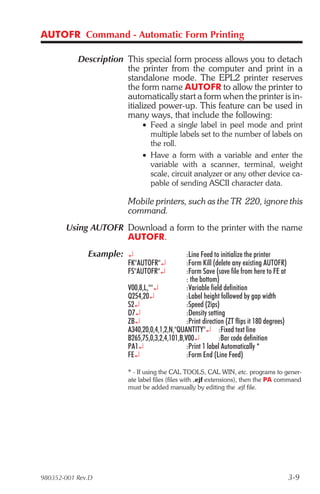
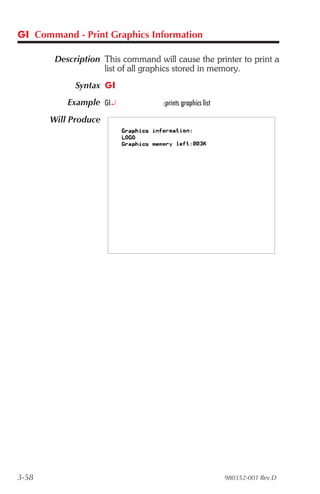
![PA Command - Print Automatic
Description Use this command in a stored form sequence to
automatically print the form (as soon as all vari-
able data has been supplied).
Syntax PAp1, [p2]
Parameters p1 = Number of label sets. Can be variable
data.
Range: 1 to 9999
p2 = Number of copies of the same label.
Can be variable data.
Range: 1 to 9999
Sets the number of copies of each label
(used in combination with counters) to
print multiple copies of the same label.
This value is only set when using coun-
ters.
Example: FK"1"¿ : delete form named “1"
FS"1"¿ : start form store sequence
V00,10,N,"prompt:"¿ : define variable 00
V01,1,N,"prompt:"¿ : define variable 01
V02,4,N,"prompt:"¿ : define variable 02
A24,24,0,4,1,1,N,V00¿: write a line of text including variable
PAV01,V02¿ : print 1 label automatically
FE¿ : end form store sequence
FR"1"¿ : retrieve form “1"
?¿ : get variables
This Is Text¿ : data for V00
3¿ : data for V01= p1- number of sets
2¿ : data for V02= p2 - number of copies
3-88 980352-001 Rev.D](https://image.slidesharecdn.com/epl2pagemodeprog-100603061744-phpapp01/85/Epl2-page-mode_prog-106-320.jpg)
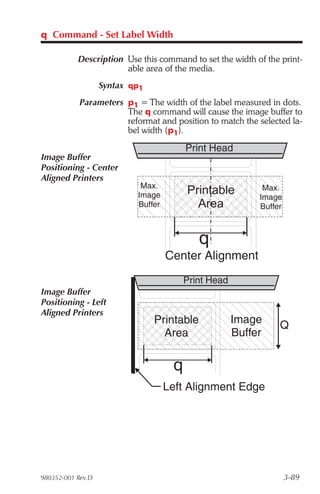
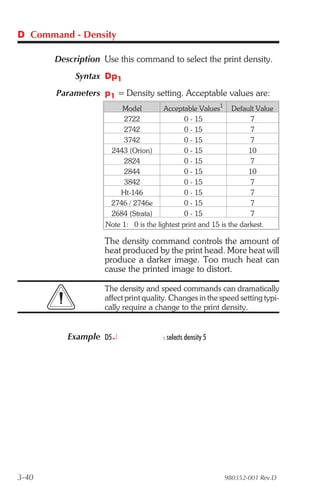
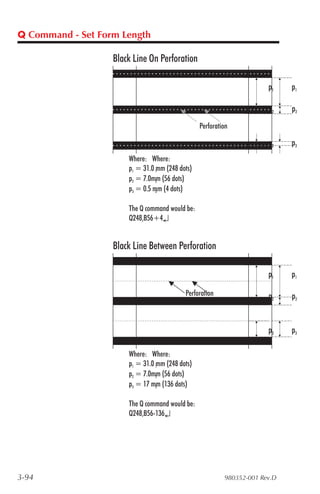
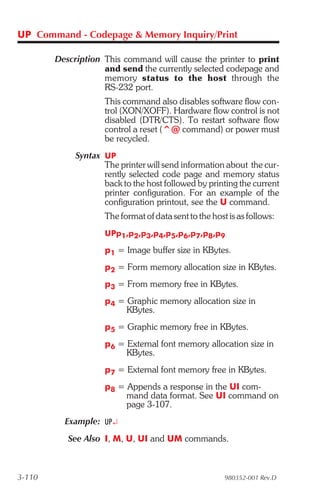
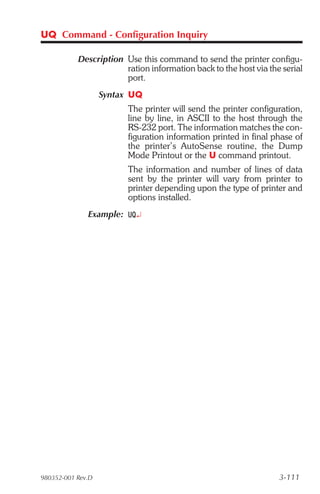
![Q Command - Set Form Length
Description Use this command to set the form and gap length or
black line thickness when using the transmissive
(gap) sensor, black line sensor, or for setting the
printer into the continuous media print mode.
The Q command will cause the printer to recal-
culate and reformat image buffer.
Syntax Qp1,p2[±p3]
Parameters p1 = Label length measured in dots
Default: Set by the AutoSense of media.
Maximum Value: 65535 (dots)
• Distance between edges of the label or black
line marks.
• For continuous mode, the p1 parameter sets
the feed distance between the end of one
form and beginning of the next.
p2 = Gap length or thickness of black line
Range: 16-240 (dots) for 203 dpi printers
[18-240 (dots) for 300dpi printers]
Gap Mode - By default, the printer is in
Gap mode and parameters are set with
the media AutoSense.
Black Line Mode - Set p2 to B plus
black line thickness in dots. See the
Gap mode range.
Continuous Media Mode
Set p2 to 0 (zero)
The transmissive (gap) sensor will be
used to detect the end of media.
±p3 =Offset length measured in dots
• Required for black line mode operation.
• Optional for Gap detect or continuous media
modes. Use only positive offset values.
980352-001 Rev.D 3-91](https://image.slidesharecdn.com/epl2pagemodeprog-100603061744-phpapp01/85/Epl2-page-mode_prog-109-320.jpg)
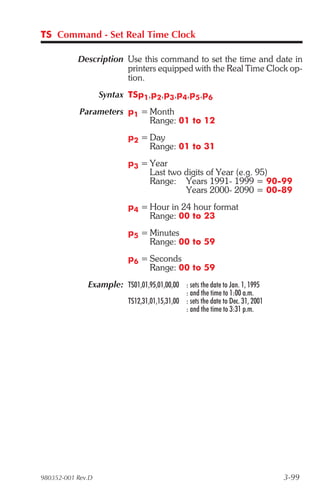
![TD Command - Date Recall & Format Layout
Description Use this command to define the date format and
print date data. The TD variable is inserted
within a Text or Bar Code command's DATA
parameter to print the date. The TD variable
supports offsetting day by up to 253 days (see
examples below for usage).
This command only works in printers equipped with
the Real Time Clock time and date option.
Syntax TDp1[|p2|p3]
Parameters p1, p2, p3 = The parameters describe the
format of the date display. At lease one
parameter must be supplied. Each pa-
rameter can be any of the acceptable
values listed below.
Value Description
y2 Year displayed as 2 digits (95)
y4 Year displayed as 4 digits (1995)
me Month displayed as 3 letters (JAN)
mn Month displayed as 2 digits (01)
dd Day displayed as 2 digits (15)
| = Separator character. The separator may
be any ASCII character value between
032 and 063. The separator character is
printed between the results of each of
the supplied parameters.
Power-Up Default Format - mn-dd-y4
Examples: If the current date is January 15, 2000:
TDy2/me/dd¿ :00/JAN/15
TDdd-me-y4¿ :15-JAN-2000
TDdd,mn,y4¿ :15,01,2000
TDdd/me/y2 :15/09/00
A100,100,0,4,1,2,N,"Today is"TD :Today is 15/09/00
A100,200,0,4,1,2,N,"Next Week-"TD+07 :Next Week-22/09/00
A100,300,0,4,1,2,N,"Next Month-"TD+30 :Next Month-15/10/00
A100,400,0,4,1,2,N,"Two Months-"TD+61 :Two Months-15/11/00
3-98 980352-001 Rev.D](https://image.slidesharecdn.com/epl2pagemodeprog-100603061744-phpapp01/85/Epl2-page-mode_prog-116-320.jpg)
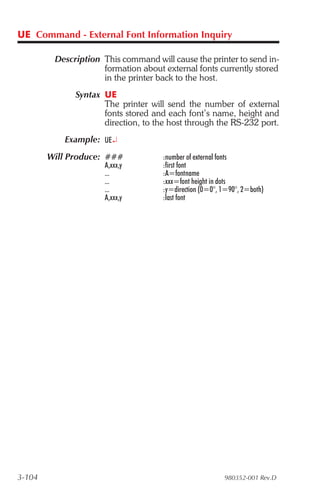
![TT Command - Time Recall & Format Layout
Description Use this command to define the time format and
print time data. The TT variable is inserted
within a Text or Bar Code command's DATA
parameter to print the time.
This command works only in printers equipped with
the Real Time Clock (RTC) time and date option.
Syntax TTp1[|p2|p3][+]
Parameters P1, P2, P3 = h, m, or s
These parameters describe the format of
the time display.
• At lease one parameter must be supplied.
• Each parameter can be any of the values h,
m, or s and are described below.
Value Description
h Hours displayed as 2 digits (e.g. 01)
m Minutes displayed as 2 digits (e.g. 15)
s Seconds displayed as 2 digits (e.g. 00)
[+] = Enable 12 Hour clock format
Appending a + to the end of the com-
mand string selects 12 hour clock mode.
The times will display with an “AM” or
“PM” indicator. Default (no +) = 24
hour clock mode
| = Separator character
The separator may be any ASCII char-
acter value between 032 and 063. The
separator character is printed between
the results of each of the supplied pa-
rameters.
Power-Up Default Format - h:m:s
Examples: If the current time is 1:25 p.m.:
TTh:m:s+¿ : 01:25:00
TTh,m¿ : 13,25
TTh+¿ : 01 PM
3-100 980352-001 Rev.D](https://image.slidesharecdn.com/epl2pagemodeprog-100603061744-phpapp01/85/Epl2-page-mode_prog-118-320.jpg)


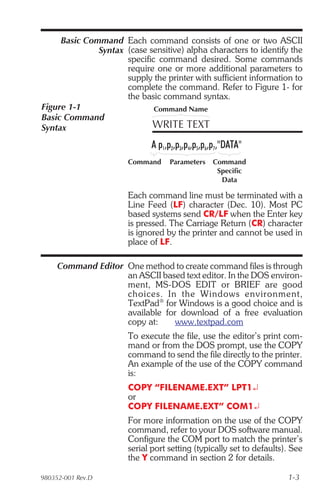
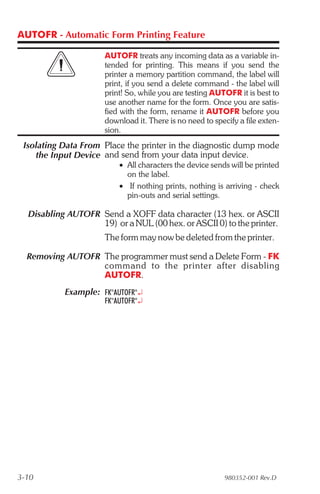
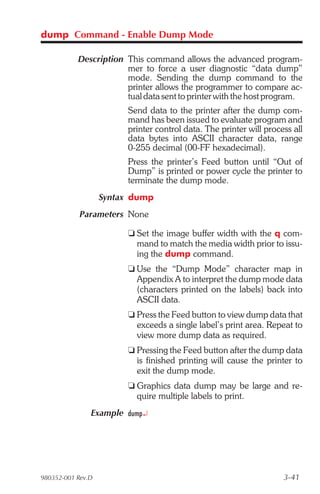
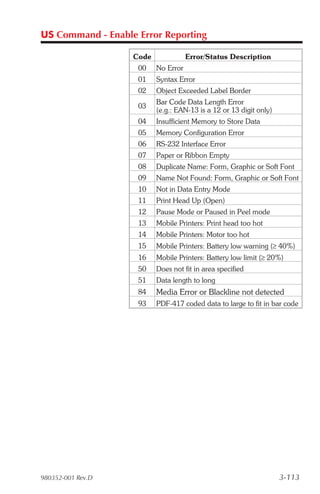
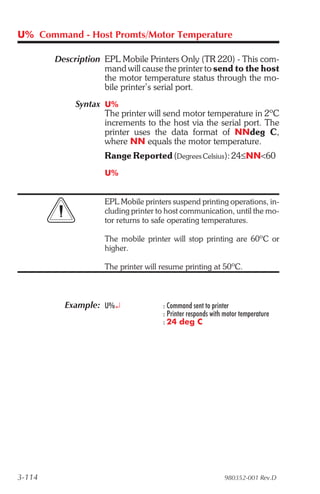
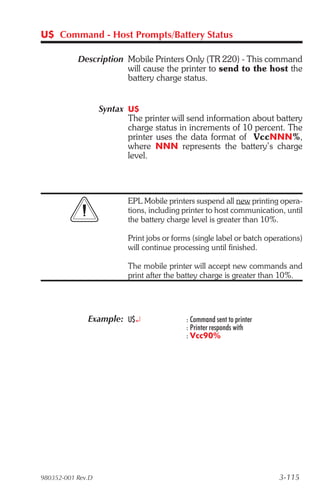
![US Command - Enable Error Reporting
Description Use this command to enable the printer’s status
reporting feature.
• Serial Port - If an error occurs, the printer
will send a NACK(0x15), followed by the er-
ror number, to the computer. If no errors oc-
cur, the printer will echo ACK(0x6) after each
P command.
If paper or ribbon empty occurs, the printer
will send, through the serial port, a”-07” and
“Pnnn” where nnn is the number of labels re-
maining to print.
• Parallel Port - If an error occurs, the printer
will print the error number and the printer’s
indicator(s) LED will indicate an error condi-
tion. See the individual printer user’s manual
for details.
• Mobile Printers Only (TR220) - Addition-
ally enables command error reporting via
printer’s status indicator. The indicator is
turned off by default for this printer only.
Syntax US[p1]
The printer’s default setting is disabled error
reporting.
Parameters p1 = 1 Optional Parameter
If no er rors oc cur, the printer will echo
ACK(0x6) after each label that is successfully
printed.
Use the UN command to disable error re-
porting.
3-112 980352-001 Rev.D](https://image.slidesharecdn.com/epl2pagemodeprog-100603061744-phpapp01/85/Epl2-page-mode_prog-130-320.jpg)
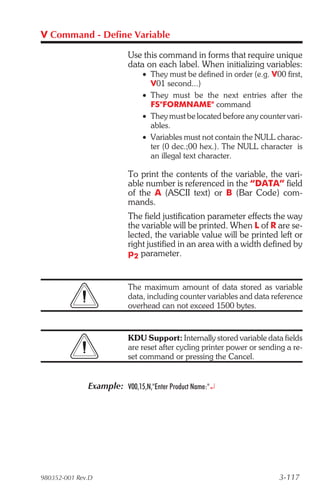
![V Command - Define Variable
Description Use this command to define variable data for
the text and bar code data fields in stored forms.
Variable data can be combined with fixed data
or other data types (counter, date, etc..) in text
or bar code data fields.
Syntax Vp1,p2,p3,“[-]PROMPT”
Parameters p1 = Variable number.
Range: 00 to 99 .
Variable (reference) numbers are se-
quential and must be input into a form
in ascending order.
p2 = Maximum number of characters
Range: 1 to 99 .
This is the maximum number of charac-
ters allowed in the variable field.
p3 = Field Justification.
L = Left R = Right
C = Center N = No Justification
Note: Right and center justification does
not apply to soft fonts.
“PROMPT” = An ASCII text field that will be
transmitted to the host (via the serial in-
terface) each time this command is exe-
cuted.
Use the prompt to ask for a value to be
entered for the variable.
KDU Options [-] = Having the first character of the prompt
a single minus sign will cause the
prompt to display only once after form
retrieval.
KDU Character The KDU allows a maximum of 40 characters
Number Limit for entry into a variable data field and display.
KDU Range (p2 ): 1 to 40, but not to exceed a
total of 1500 bytes for all variables.
3-116 980352-001 Rev.D](https://image.slidesharecdn.com/epl2pagemodeprog-100603061744-phpapp01/85/Epl2-page-mode_prog-134-320.jpg)

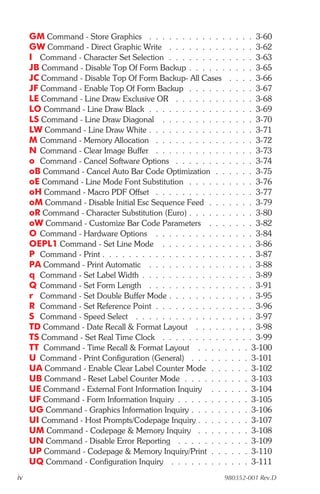
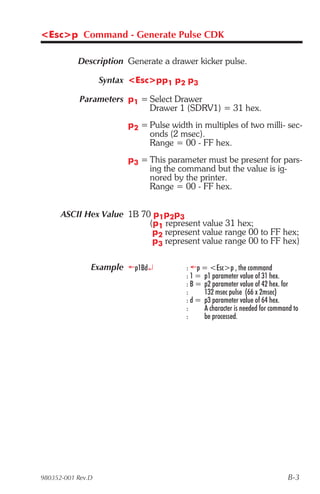
![Dump Mode The printer’s Dump Mode is used to trouble-
Character Map shoot programming. The printer will print all
data as sent in Dump Mode Characters, shown
below.
Hexidecimal - Most Significant Digit
0 1 2 3 4 5 6 7 8 9 A B C D E F
„
0 00
0 16 32
0
48
@
64
P
80
`
96
p
112
€
128
•
144 160
°
176
À
192
Ð
208
à
224
ð
240
J ƒ
1 1 17
!
33
1
49
A
65
Q
81
a
97
q
113
•
129
‘
145
¡
161
±
177
Á
193
Ñ
209
á
225
ñ
241
o
2 " 2 B R b r ‚ ’ ¢ ² Â Ò â ò
Hexidecimal - Least Significant Digit
2 18 34 50 66 82 98 114 130 146 162 178 194 210 226 242
3 ©
3
!
!
19
#
35
3
51
C
67
S
83
c
99
s
115
ƒ
131
“
147
£
163
³
179
Ã
195
Ó
211
ã
227
ó
243
4 ¨ ¶ $ 4 D T d t „ ” ¤ ´ Ä Ô ä ô
4 20 36 52 68 84 100 116 132 148 164 180 196 212 228 244
5 §
5
§
21
%
37
5
53
E
69
U
85
e
101
u
117
…
133
•
149
¥
165
µ
181
Å
197
Õ
213
å
229
õ
245
6 ª
6 22
&
38
6
54
F
70
V
86
f
102
v
118
†
134
–
150
¦
166
¶
182
Æ
198
Ö
214
æ
230
ö
246
— o
7 7 23
'
39
7
55
G W
71 87
g
103
w
119
‡
135
—
151
§
167
·
183
Ç
199
×
215
ç
231
÷
247
8 h ( 8 H X h x ˆ ˜ ¨ ¸ È Ø è ø
8 24 40 56 72 88 104 120 136 152 168 184 200 216 232 248
9 i ) 9 I Y i y ‰ ™ © ¹ É Ù é ù
9 25 41 57 73 89 105 121 137 153 169 185 201 217 233 249
A g * : J Z j z Š š ª º Ê Ú ê ú
10 26 42 58 74 90 106 122 138 154 170 186 202 218 234 250
B G f + ; K [ k { ‹ › « » Ë Û ë û
11 27 43 59 75 91 107 123 139 155 171 187 203 219 235 251
¬
C E , < L l | Œ œ ¬ ¼ Ì Ü ì ü
12 28 44 60 76 92 108 124 140 156 172 188 204 220 236 252
D e n - = M ] m } • • - ½ Í Ý í ý
13 29 45 61 77 93 109 125 141 157 173 189 205 221 237 253
E . > N ^ n ~ Ž ž ® ¾ Î Þ î þ
14 30 46 62 78 94 110 126 142 158 174 190 206 222 238 254
F C ‚ / ? O _ o • Ÿ ¯ ¿ Ï ß ï 256
15 31 47 63 79 95 111 127 143 159 175 191 207 223 239 255
980352-001 Rev.D A-3](https://image.slidesharecdn.com/epl2pagemodeprog-100603061744-phpapp01/85/Epl2-page-mode_prog-149-320.jpg)


![Cimco edit 5 user guide[1]](https://cdn.slidesharecdn.com/ss_thumbnails/cimcoedit5userguide1-110305112440-phpapp01-thumbnail.jpg?width=640&height=640&fit=bounds)


