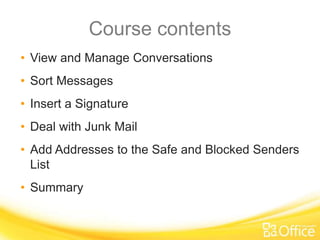
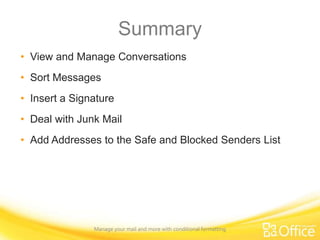
®       ®
Microsoft Outlook 2010 Training

E-Mail Feature

                     NaveenKumar Namachivayam
                         Founder - testTalk Academy
                               http://naveenkumarn.in
Course contents
• View and Manage Conversations
• Sort Messages
• Insert a Signature
• Deal with Junk Mail
• Add Addresses to the Safe and Blocked Senders
  List
• Summary
View and Manage Conversations
          • Conversations are identified in the
            message list by an icon showing
            multiple items.

          • The    messages     within  each
            Conversation are sorted with the
            newest message on top.

          • When you click a Conversation
            header in the message list, the
            Conversation shows in the Reading
            Pane with the newest message on
            top.
View messages within a
     Conversation
       • To expand or open the
         Conversation, click on the message
         header.

       • When you click a message in the
         expanded Conversation, it becomes
         the top message in the Reading
         Pane.
Sort Messages
   • Right click on the respective column
     to sort by fields.
Insert a Signature
• By adding an Electronic Business Card to email
  signatures, your contact information can be included in each
  email message sent.

• Recipients can right-click the card in the signature (or right-
  click the .vcf file attachment) to save the information directly
  to their contacts list.
Step 1: Create Electronic
                 Business Card
•   In a new message, on the Message tab, in the Include group, click
    Signature, and then click Signatures.

•   On the E-mail Signature tab, under Select signature to edit, click the
    signature to which you want to add a business card.

•   If you want to build a new signature, click New, type a name for the
    signature, and then click OK. Then click the name of the new signature in the
    Select signature to edit list.

•   In the Edit Signature box, type the text that you want to include in the
    signature.

•   To add an Electronic Business Card, place your pointer where you want the
    card to appear in the signature text, click Business Card, and then click a
    contact name on the Filed As list. Click OK.
Step 2: Insert a signature in a
                   message
In a new message, on the Message tab, in the Include group, click Signature, and then click
Signatures.


On the E-mail Signature tab, in the Select signature to edit list, select the signature that you
want.

Under Choose default signature, in the E-mail Account list, click an email account that you
want to associate the signature.

In the New messages list, select the signature that you want.


If you want a signature to be included in message replies and in forwarded messages, in the
Replies/forwards list, select the signature. If not, select none.
Deal with Junk Mail
The Junk E-Mail filter in Outlook is your best friend, and really, your best tool for controlling
the flow of whatever you deem "junk" to your Inbox.

•   If you just don't want e-mail from anyone writing from a specific domain, you can block
    messages coming in from the entire domain. You can do this with international domains as
    well. If, down the road, you strike up an ongoing correspondence with someone from that
    domain you blocked previously, you can unblock that specific e-mail address.

•   You can quickly add a sender to your blocked senders list, right after the message comes
    in — a few clicks just one time is all it takes.

You can adjust the Junk Email Filter settings in the Junk E-mail Options dialog box.

On the Home tab, in the Delete group, click Junk, and then click Junk E-mail Options.

On the Home tab, in the Delete group, click Junk, and then click Not Junk.
Add Addresses to the Safe
                    Senders List
SAFE SENDERS LIST

•   To make sure that your message recipients, even if they aren’t an Outlook contact, are on
    your Safe Senders List, do the following.

•   On the Home tab, in the Delete group, click Junk, and then click Junk E-mail Options.

•   On the Safe Senders tab, select the Automatically add people | e-mail to the Safe
    Senders List check box.
Add Addresses to the Blocked
                  Senders List
•   To add names to the Blocked Senders List:

•   On the Home tab, in the Delete group, click Junk, and then click Junk E-
    mail Options.

•   On the Blocked Senders tab, click Add.


•   In the Enter an e-mail address or Internet domain name to be added to
    the list box, enter the name or address that you want to add. For
    example, you can add :

       •    a specific email address, such as someone@example.com

       •    an Internet domain, such as @example.com, or example.com.

•   Click OK and repeat for each entry that you want to add.
Summary
• View and Manage Conversations
• Sort Messages
• Insert a Signature
• Deal with Junk Mail
• Add Addresses to the Safe and Blocked Senders List


               Manage your mail and more with conditional formatting

Email Feature

  • 1.
    ® ® Microsoft Outlook 2010 Training E-Mail Feature NaveenKumar Namachivayam Founder - testTalk Academy http://naveenkumarn.in
  • 2.
    Course contents • Viewand Manage Conversations • Sort Messages • Insert a Signature • Deal with Junk Mail • Add Addresses to the Safe and Blocked Senders List • Summary
  • 3.
    View and ManageConversations • Conversations are identified in the message list by an icon showing multiple items. • The messages within each Conversation are sorted with the newest message on top. • When you click a Conversation header in the message list, the Conversation shows in the Reading Pane with the newest message on top.
  • 5.
    View messages withina Conversation • To expand or open the Conversation, click on the message header. • When you click a message in the expanded Conversation, it becomes the top message in the Reading Pane.
  • 6.
    Sort Messages • Right click on the respective column to sort by fields.
  • 7.
    Insert a Signature •By adding an Electronic Business Card to email signatures, your contact information can be included in each email message sent. • Recipients can right-click the card in the signature (or right- click the .vcf file attachment) to save the information directly to their contacts list.
  • 8.
    Step 1: CreateElectronic Business Card • In a new message, on the Message tab, in the Include group, click Signature, and then click Signatures. • On the E-mail Signature tab, under Select signature to edit, click the signature to which you want to add a business card. • If you want to build a new signature, click New, type a name for the signature, and then click OK. Then click the name of the new signature in the Select signature to edit list. • In the Edit Signature box, type the text that you want to include in the signature. • To add an Electronic Business Card, place your pointer where you want the card to appear in the signature text, click Business Card, and then click a contact name on the Filed As list. Click OK.
  • 9.
    Step 2: Inserta signature in a message In a new message, on the Message tab, in the Include group, click Signature, and then click Signatures. On the E-mail Signature tab, in the Select signature to edit list, select the signature that you want. Under Choose default signature, in the E-mail Account list, click an email account that you want to associate the signature. In the New messages list, select the signature that you want. If you want a signature to be included in message replies and in forwarded messages, in the Replies/forwards list, select the signature. If not, select none.
  • 10.
    Deal with JunkMail The Junk E-Mail filter in Outlook is your best friend, and really, your best tool for controlling the flow of whatever you deem "junk" to your Inbox. • If you just don't want e-mail from anyone writing from a specific domain, you can block messages coming in from the entire domain. You can do this with international domains as well. If, down the road, you strike up an ongoing correspondence with someone from that domain you blocked previously, you can unblock that specific e-mail address. • You can quickly add a sender to your blocked senders list, right after the message comes in — a few clicks just one time is all it takes. You can adjust the Junk Email Filter settings in the Junk E-mail Options dialog box. On the Home tab, in the Delete group, click Junk, and then click Junk E-mail Options. On the Home tab, in the Delete group, click Junk, and then click Not Junk.
  • 11.
    Add Addresses tothe Safe Senders List SAFE SENDERS LIST • To make sure that your message recipients, even if they aren’t an Outlook contact, are on your Safe Senders List, do the following. • On the Home tab, in the Delete group, click Junk, and then click Junk E-mail Options. • On the Safe Senders tab, select the Automatically add people | e-mail to the Safe Senders List check box.
  • 12.
    Add Addresses tothe Blocked Senders List • To add names to the Blocked Senders List: • On the Home tab, in the Delete group, click Junk, and then click Junk E- mail Options. • On the Blocked Senders tab, click Add. • In the Enter an e-mail address or Internet domain name to be added to the list box, enter the name or address that you want to add. For example, you can add : • a specific email address, such as someone@example.com • an Internet domain, such as @example.com, or example.com. • Click OK and repeat for each entry that you want to add.
  • 13.
    Summary • View andManage Conversations • Sort Messages • Insert a Signature • Deal with Junk Mail • Add Addresses to the Safe and Blocked Senders List Manage your mail and more with conditional formatting

Editor's Notes

  • #2 [Notes to trainer: This presentation must beviewed in PowerPoint 2010.If you don’t have PowerPoint 2010, the videos included in the presentation will not play. If you don’t have PowerPoint 2010, download the PowerPoint Viewer to view these files(http://www.microsoft.com/downloads/details.aspx?displaylang=en&FamilyID=cb9bf144%2D1076%2D4615%2D9951%2D294eeb832823).If the yellow security bar appears at the top of the screen in PowerPoint, or if a Codec Unavailable message appears in the video playback window, the presentation might have opened in Protected View. To enable video playback, in the yellow security bar at the top of the PowerPoint window, click Enable Editing. To browse other downloadable Outlook training presentations, see the “Download Office 2010 training” page (http://office.microsoft.com/en-us/powerpoint-help/download-office-2010-training-HA101901726.aspx).For detailed help in customizing this template, see the very last slide. Also, look for additional lesson text in the notes pane of some slides.]
  • #15 Using This TemplateThis Microsoft PowerPoint® template has training content about using conditional formatting in MicrosoftOutlook® 2010 to help manage your Inbox, calendar, and to-do list. Its content is adapted from the Office.com Training course called “Manage your mail and more with conditional formatting.”PowerPoint version: The template must be viewed in PowerPoint 2010. If you don’t have PowerPoint 2010, the videos included in the presentation will not play. If you don’t have PowerPoint 2010, download the PowerPoint Viewer to view these files (http://www.microsoft.com/downloads/details.aspx?displaylang=en&FamilyID=cb9bf144%2D1076%2D4615%2D9951%2D294eeb832823).Video playback:If the yellow security bar appears at the top of the screen in PowerPoint, or if a Codec Unavailable message appears in the video playback window, the presentation might have opened in Protected View. To enable video playback, in the yellow security bar at the top of the PowerPoint window, click Enable Editing.Slide layouts: Each slide has a custom layout. To apply the custom layout to a new slide, right-click the slide thumbnail, point to Layout, and click the layout from the Layout gallery. To alter the layouts, open master view and alter the specific master layout in that view. You can find the layout’s title by pointing to its thumbnail.Animations: Custom animation effects are applied throughout the presentation. These include Float In (Up or Down option), Fade, and Zoom. To alter animation effects, click the Animations tab, and use the Add Animation gallery and Timing options. Effect Options gives you choices about the effect; click Animation Pane on the Animations tab to work with multiple animations. Transitions: One transition, Doors, is used to emphasize sections of the slide show. It’s applied on the Course Contents slide, Lesson slide, and the first test slide. Hyperlinks to online course: The template contains a link to the online version of this training course that takes you to the Quick Reference Card that is published for the course.Headers and footers: The template contains a footer that has the course title. To add footers such as the date or slide numbers, click the Insert tab, and click Header & Footer.