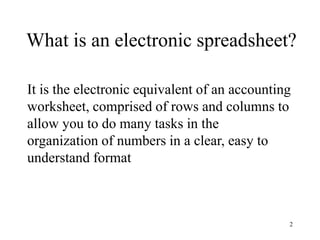
1
Introduction to Spreadsheets
2
What is an electronic spreadsheet?
It is the electronic equivalent of an accounting
worksheet, comprised of rows and columns to
allow you to do many tasks in the
organization of numbers in a clear, easy to
understand format
3
What is an electronic spreadsheet?
• It is a tool to help you calculate budgets, do
economic analysis, statistics, planning,
engineering calculations, …
• Replaces pen, paper and pocket calculator
• Can show diagrams and graphs
• Can input data from other programs
• Can output data to other programs
4
Some Advantages of Spreadsheets
• Spreadsheets are capable of exploring “what-
if”scenarios (e.g. budgets, submitting bids)
• Once it is set up properly, the user can save
time by never having to set up the spreadsheet
again
– Blank spreadsheets are called templates.
– Monthly salaries,grade sheets
5
Spreadsheet terminology
• Row - horizontal axis (designated by numbers)
• Column - vertical axis (designated by letters)
• Cell - intersection of row and column (designated
by an address comprised of the column letter and
row number e.g. A1)
• Block//Range - a rectangular group of one or
more cells (identified by block coordinates (e.g.
A1:G4)
6
Spreadsheet terminology (con’t.)
• Label - alphanumeric
• Value - a number or formula result
• Formula - creates relationships among other cells
• Template - a notebook that has labels, formulas,
and all of the formatting but no actual data (e.g.
actual figures and numbers)
7
How big is a spreadsheet?
• Normally you see 9 columns and 18 rows
• = 162 cells
• One sheet has 256 columns and 65536 rows
• = 1677216 cells
• That is more than 103000 screens
• Would take 34000 A4 pages to print
• Take 194 days to fill at one cell pr second
8
Exploring the Excel Screen
Title bar
Menu toolbar
Standard toolbar
Screen Tip
Active worksheet in
workbook window
Formatting toolbar
Task Pane: organizes
related commands
9
Activating Toolbars
Click on View
and Toolbars
Toolbars sub-
menu appears
Click on desired toolbar
Check indicates active
item; click to
deactivate
10
Moving Around the Worksheet
Working in an active cell
(intersection of a row
and column)
Cell pointer
I-beam: to
place insertion
point
Insertion point:
where text will
be entered
11
Moving Around the Worksheet
• Move cell
pointer
– arrow keys
– scroll bars
• Change pages
– click on tabs
– tab scroll
buttons
12
Moving Around the Worksheet
• Consider cell B4 active
• Note
– thick cross mouse pointer
– row, column buttons highlighted
• After scrolling to right, note …
– row button still highlighted
– name box still shows B4 as active cell
14
Moving Around the Worksheet
To select a column
•Click on the column
heading button
•Whole column is
highlighted
15
Entering Labels
• Click desired cell to make it active
• Label is displayed both in cell and in formula bar as you type
• Label displays out of its column
– as long as other columns are empty
16
Worksheet with Labels
• Note
– Documentation
section
– Label cut off, next cell
occupied
– Labels aligned left
17
Editing a Cell's Information
• Click on desired cell
– Cell pointer moves there
– Contents displayed in
formula bar
• Click mouse pointer
(I-beam) to location
within text
– type, delete, copy, paste
as needed
I
18
Entering Values
• When entering numbers
– do not use commas
– numbers are right justified by default
• To proceed to next cell right use [Tab] or right
arrow key
• To proceed down, use [Enter] key
19
Entering Formulas
• Formulas are mathematical equations
– perform calculations
– always start with an equal sign (=)
• Formula shows in
formula bar
• Note color references
in formula
.
.
.
20
Entering Formulas
• After formula entered and cell pointer
moved
– Formula does not show in formula bar
– Result of calculations
shows in cell where
formula entered
21
Operators
• ^ - exponents
• + - addition
• * - multiplication
• / - division
• - - subtraction
• = - function
22
Order Calculations are Performed
• First exponents
• Then any multiplication and division in the
order they occur
• Then any addition and subtraction in the
order they occur
23
Parentheses
• Operations within parentheses are performed
before those outside.
• Within the parentheses the basic rules are
followed.
• Multiple sets of parentheses, the innermost are
executed first followed by the next set.
24
Built-in functions
• Functions are pre-written formulas
• Functions must start with an equal sign
• Functions takes value(s), perform an operation,
and returns a value(s)
• Values you use with a function are arguments
• =AVERAGE(D3:D7)
– AVERAGE is the function
– D3:D7 is the argument
25
Using Functions
• Advantages of predefined functions
– save time
– more accurate
• Using AutoSum
– Click cell at
bottom of
column
– Click AutoSum
button
– Excel assumes
it should total
the column
– SUM function
inserted
26
Using Functions
• AutoSum can also be used to right of a row
of numbers
27
Using Functions
• Note end results of
using AutoSum
• Note:
– Click AutoSum
button once to
display formula,
again to apply
– SUM formula
displays in
Formula bar
28
Using the Function Insert Feature
• Click on Insert, and Function
• Insert Function dialog box appears
Select function
category
Choose specific
function desired
29
Using the Function Insert Feature
Note calculated result
of inserted function
Animated border
shows selected
range
Formula
appears in cell
Arguments of
function must be
specified
30
Using the Function Insert Feature
Note calculated result
of inserted function

Electronic Spreadsheets

  • 1.
  • 2.
    2 What is anelectronic spreadsheet? It is the electronic equivalent of an accounting worksheet, comprised of rows and columns to allow you to do many tasks in the organization of numbers in a clear, easy to understand format
  • 3.
    3 What is anelectronic spreadsheet? • It is a tool to help you calculate budgets, do economic analysis, statistics, planning, engineering calculations, … • Replaces pen, paper and pocket calculator • Can show diagrams and graphs • Can input data from other programs • Can output data to other programs
  • 4.
    4 Some Advantages ofSpreadsheets • Spreadsheets are capable of exploring “what- if”scenarios (e.g. budgets, submitting bids) • Once it is set up properly, the user can save time by never having to set up the spreadsheet again – Blank spreadsheets are called templates. – Monthly salaries,grade sheets
  • 5.
    5 Spreadsheet terminology • Row- horizontal axis (designated by numbers) • Column - vertical axis (designated by letters) • Cell - intersection of row and column (designated by an address comprised of the column letter and row number e.g. A1) • Block//Range - a rectangular group of one or more cells (identified by block coordinates (e.g. A1:G4)
  • 6.
    6 Spreadsheet terminology (con’t.) •Label - alphanumeric • Value - a number or formula result • Formula - creates relationships among other cells • Template - a notebook that has labels, formulas, and all of the formatting but no actual data (e.g. actual figures and numbers)
  • 7.
    7 How big isa spreadsheet? • Normally you see 9 columns and 18 rows • = 162 cells • One sheet has 256 columns and 65536 rows • = 1677216 cells • That is more than 103000 screens • Would take 34000 A4 pages to print • Take 194 days to fill at one cell pr second
  • 8.
    8 Exploring the ExcelScreen Title bar Menu toolbar Standard toolbar Screen Tip Active worksheet in workbook window Formatting toolbar Task Pane: organizes related commands
  • 9.
    9 Activating Toolbars Click onView and Toolbars Toolbars sub- menu appears Click on desired toolbar Check indicates active item; click to deactivate
  • 10.
    10 Moving Around theWorksheet Working in an active cell (intersection of a row and column) Cell pointer I-beam: to place insertion point Insertion point: where text will be entered
  • 11.
    11 Moving Around theWorksheet • Move cell pointer – arrow keys – scroll bars • Change pages – click on tabs – tab scroll buttons
  • 12.
    12 Moving Around theWorksheet • Consider cell B4 active • Note – thick cross mouse pointer – row, column buttons highlighted • After scrolling to right, note … – row button still highlighted – name box still shows B4 as active cell
  • 13.
    14 Moving Around theWorksheet To select a column •Click on the column heading button •Whole column is highlighted
  • 14.
    15 Entering Labels • Clickdesired cell to make it active • Label is displayed both in cell and in formula bar as you type • Label displays out of its column – as long as other columns are empty
  • 15.
    16 Worksheet with Labels •Note – Documentation section – Label cut off, next cell occupied – Labels aligned left
  • 16.
    17 Editing a Cell'sInformation • Click on desired cell – Cell pointer moves there – Contents displayed in formula bar • Click mouse pointer (I-beam) to location within text – type, delete, copy, paste as needed I
  • 17.
    18 Entering Values • Whenentering numbers – do not use commas – numbers are right justified by default • To proceed to next cell right use [Tab] or right arrow key • To proceed down, use [Enter] key
  • 18.
    19 Entering Formulas • Formulasare mathematical equations – perform calculations – always start with an equal sign (=) • Formula shows in formula bar • Note color references in formula . . .
  • 19.
    20 Entering Formulas • Afterformula entered and cell pointer moved – Formula does not show in formula bar – Result of calculations shows in cell where formula entered
  • 20.
    21 Operators • ^ -exponents • + - addition • * - multiplication • / - division • - - subtraction • = - function
  • 21.
    22 Order Calculations arePerformed • First exponents • Then any multiplication and division in the order they occur • Then any addition and subtraction in the order they occur
  • 22.
    23 Parentheses • Operations withinparentheses are performed before those outside. • Within the parentheses the basic rules are followed. • Multiple sets of parentheses, the innermost are executed first followed by the next set.
  • 23.
    24 Built-in functions • Functionsare pre-written formulas • Functions must start with an equal sign • Functions takes value(s), perform an operation, and returns a value(s) • Values you use with a function are arguments • =AVERAGE(D3:D7) – AVERAGE is the function – D3:D7 is the argument
  • 24.
    25 Using Functions • Advantagesof predefined functions – save time – more accurate • Using AutoSum – Click cell at bottom of column – Click AutoSum button – Excel assumes it should total the column – SUM function inserted
  • 25.
    26 Using Functions • AutoSumcan also be used to right of a row of numbers
  • 26.
    27 Using Functions • Noteend results of using AutoSum • Note: – Click AutoSum button once to display formula, again to apply – SUM formula displays in Formula bar
  • 27.
    28 Using the FunctionInsert Feature • Click on Insert, and Function • Insert Function dialog box appears Select function category Choose specific function desired
  • 28.
    29 Using the FunctionInsert Feature Note calculated result of inserted function Animated border shows selected range Formula appears in cell Arguments of function must be specified
  • 29.
    30 Using the FunctionInsert Feature Note calculated result of inserted function