2. Microsoft Excel
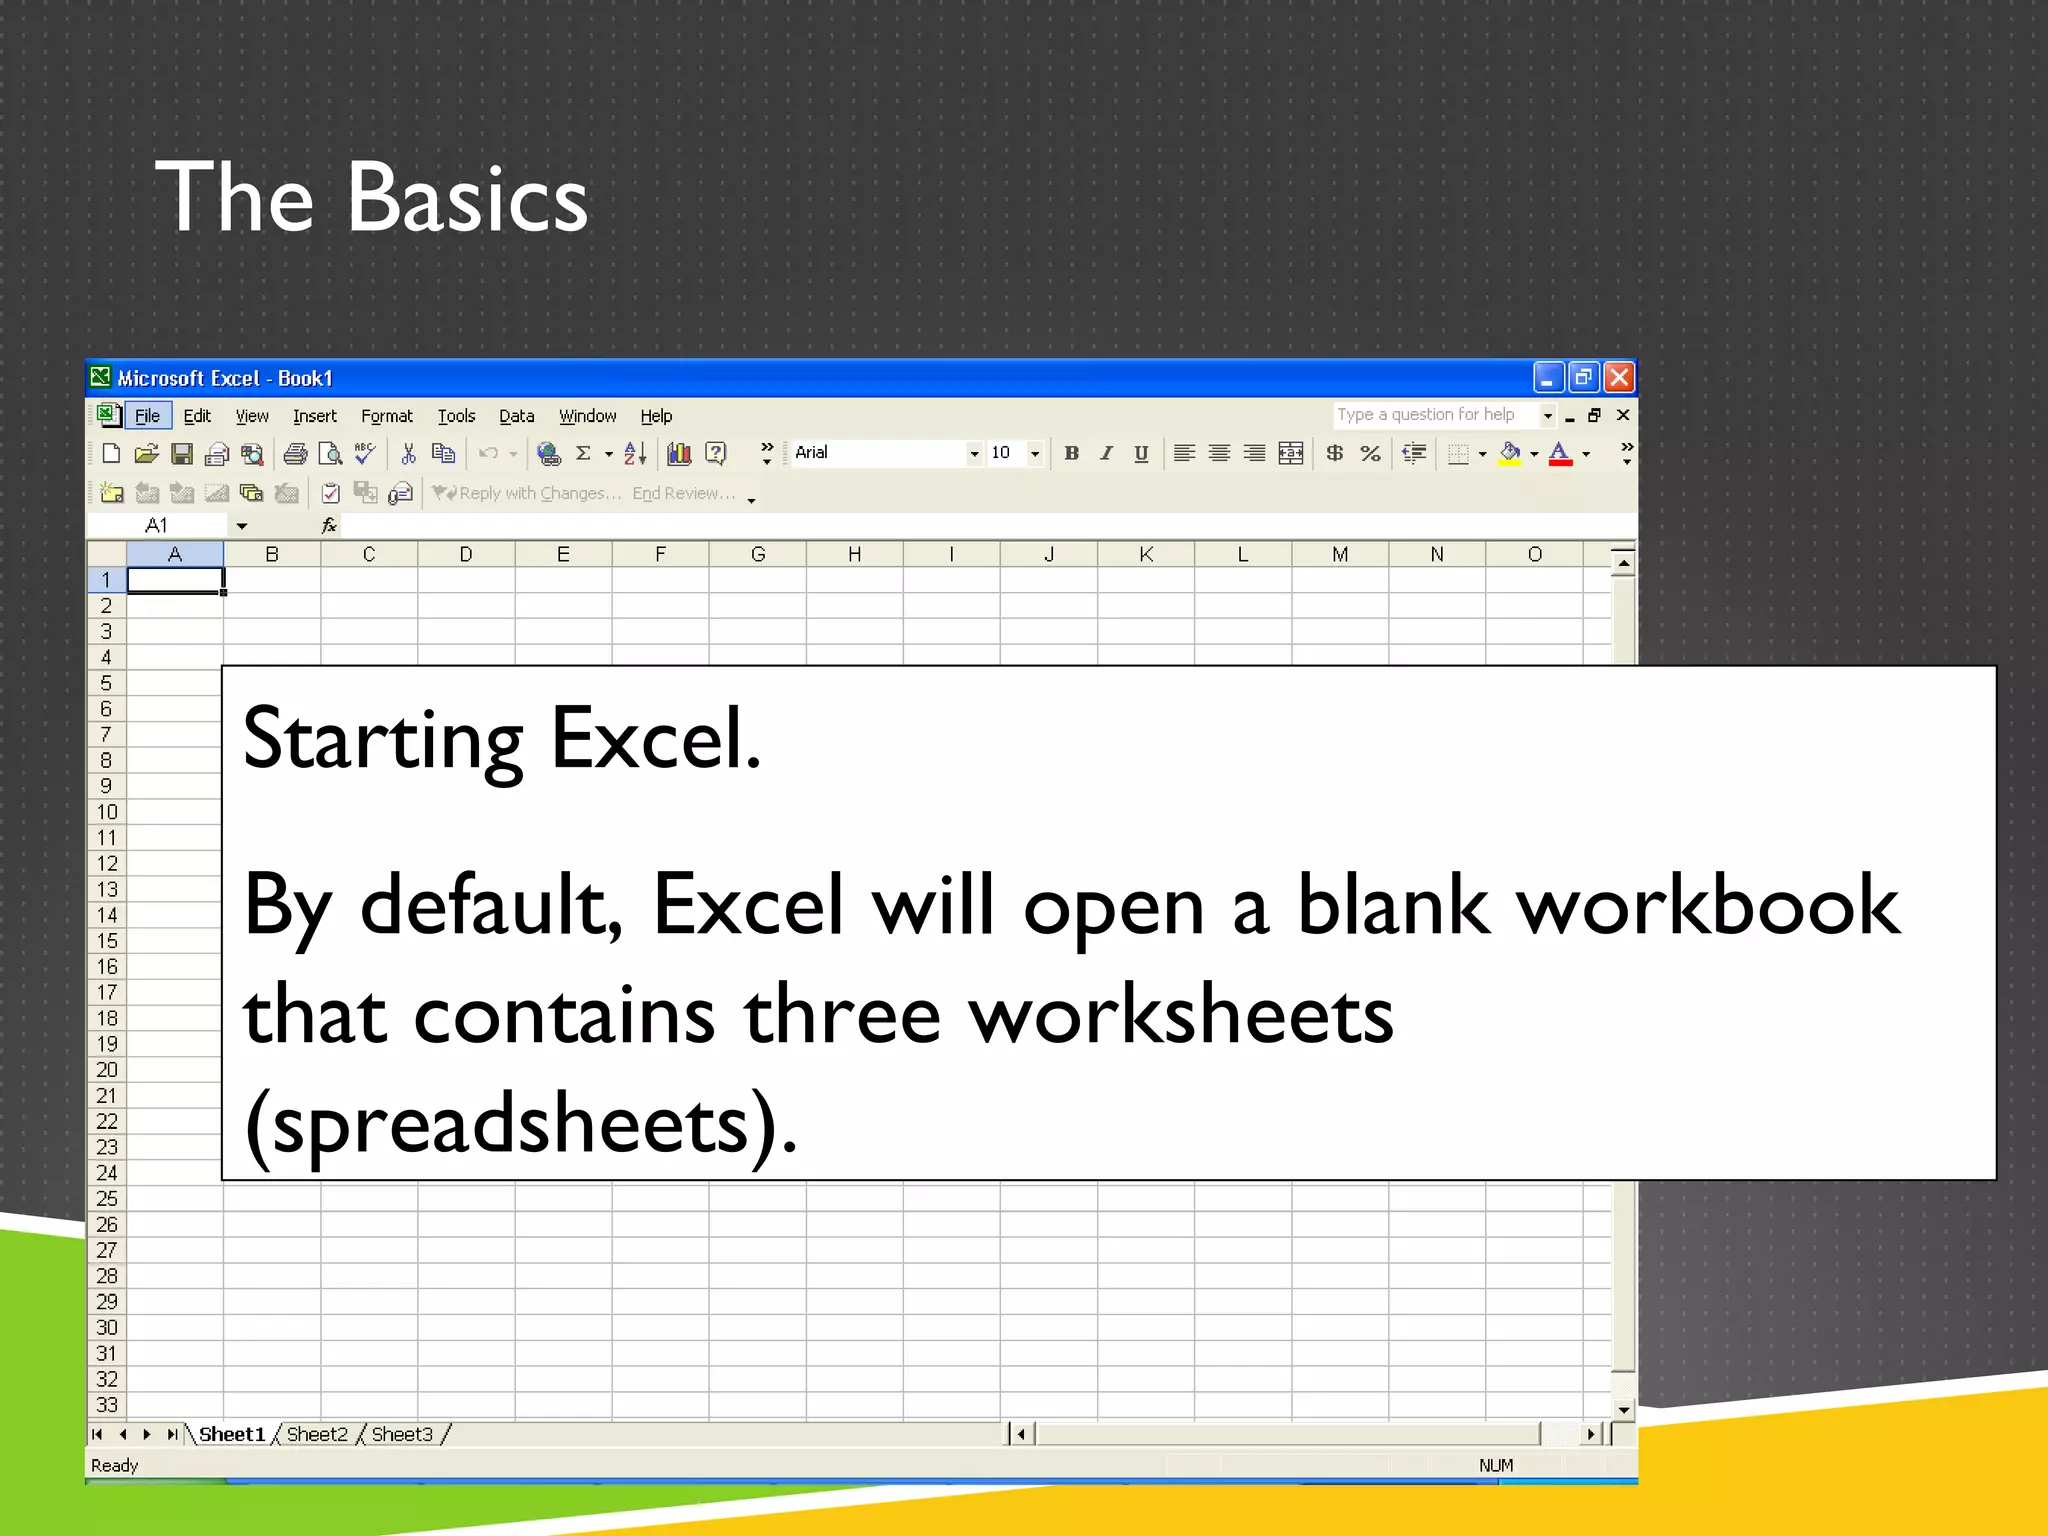
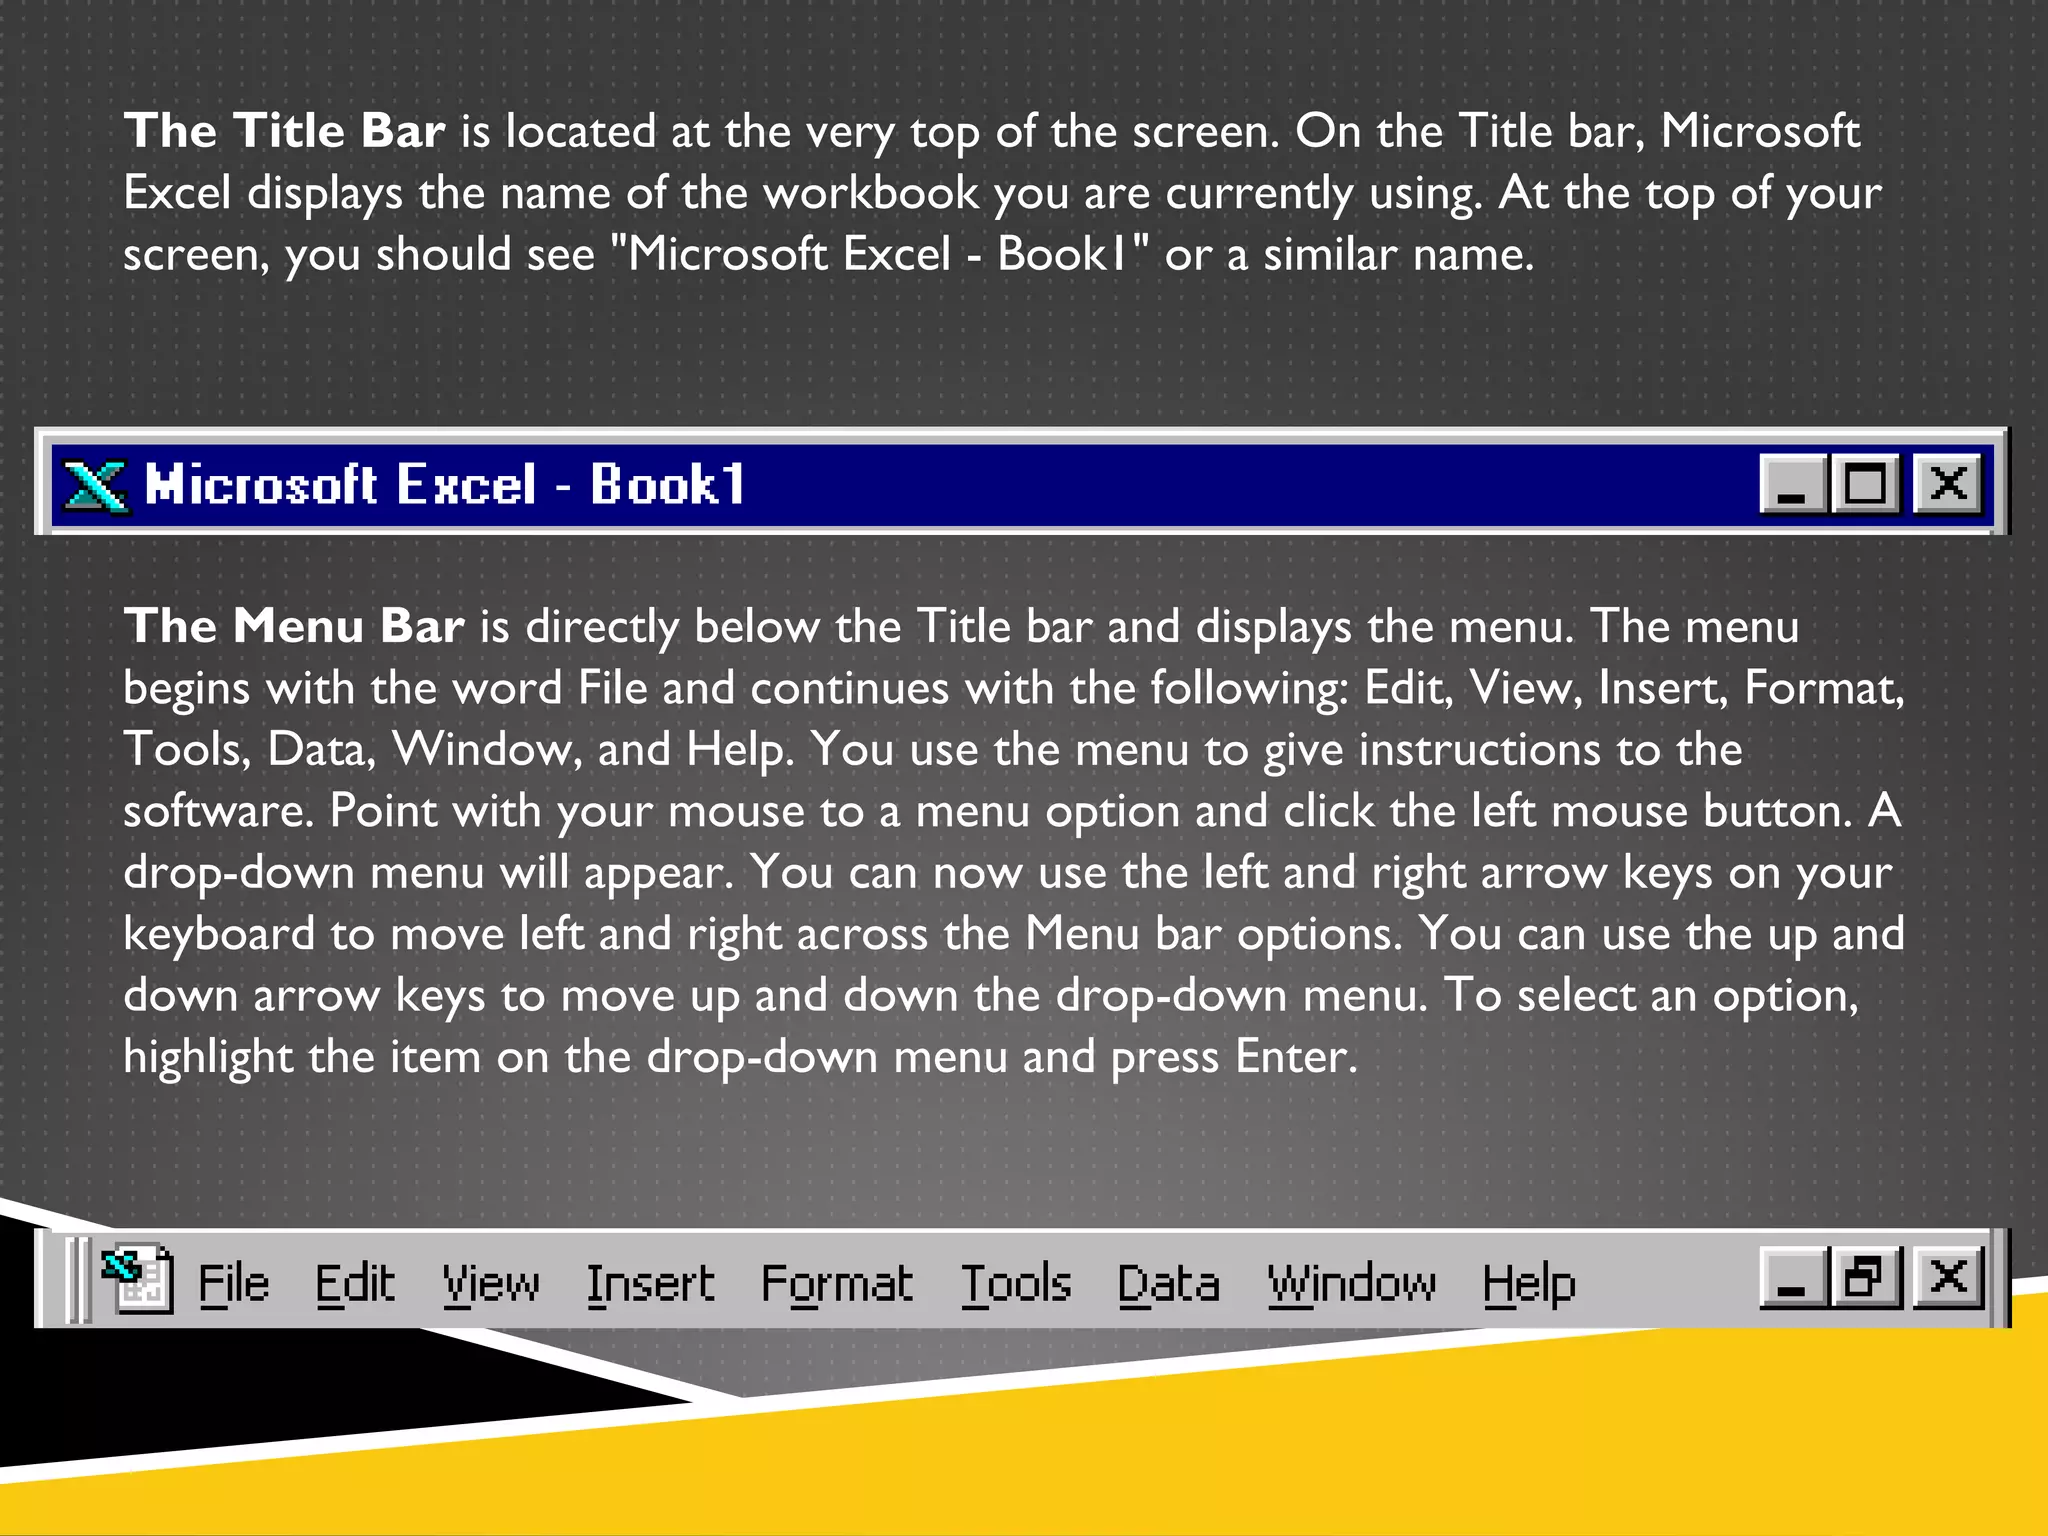
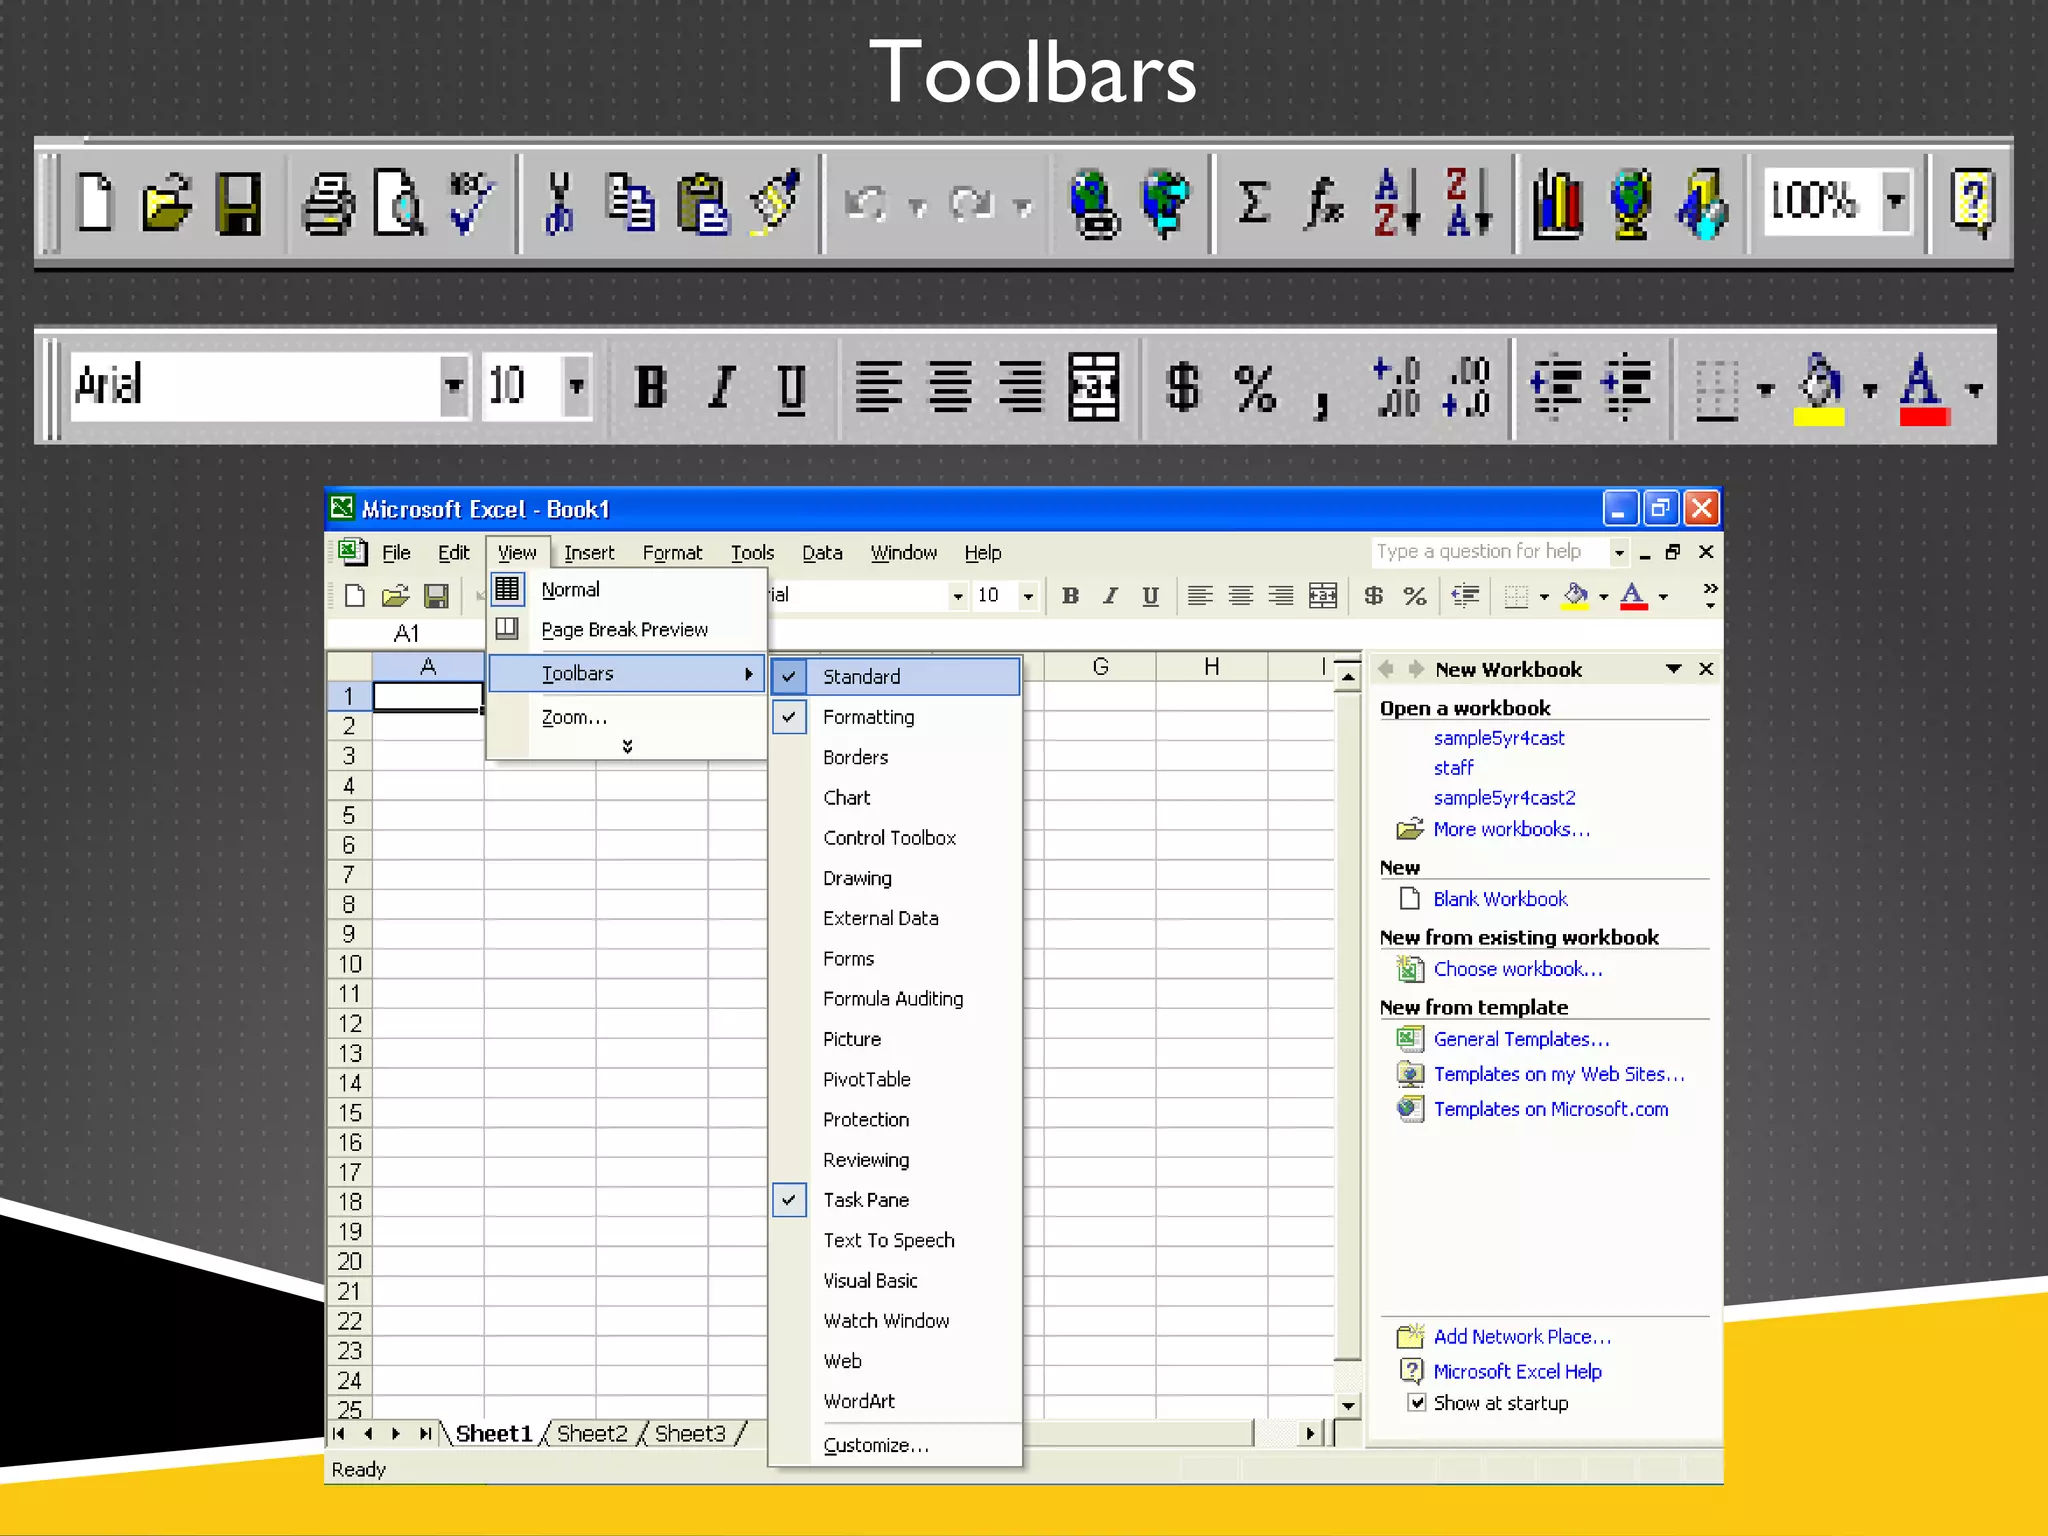
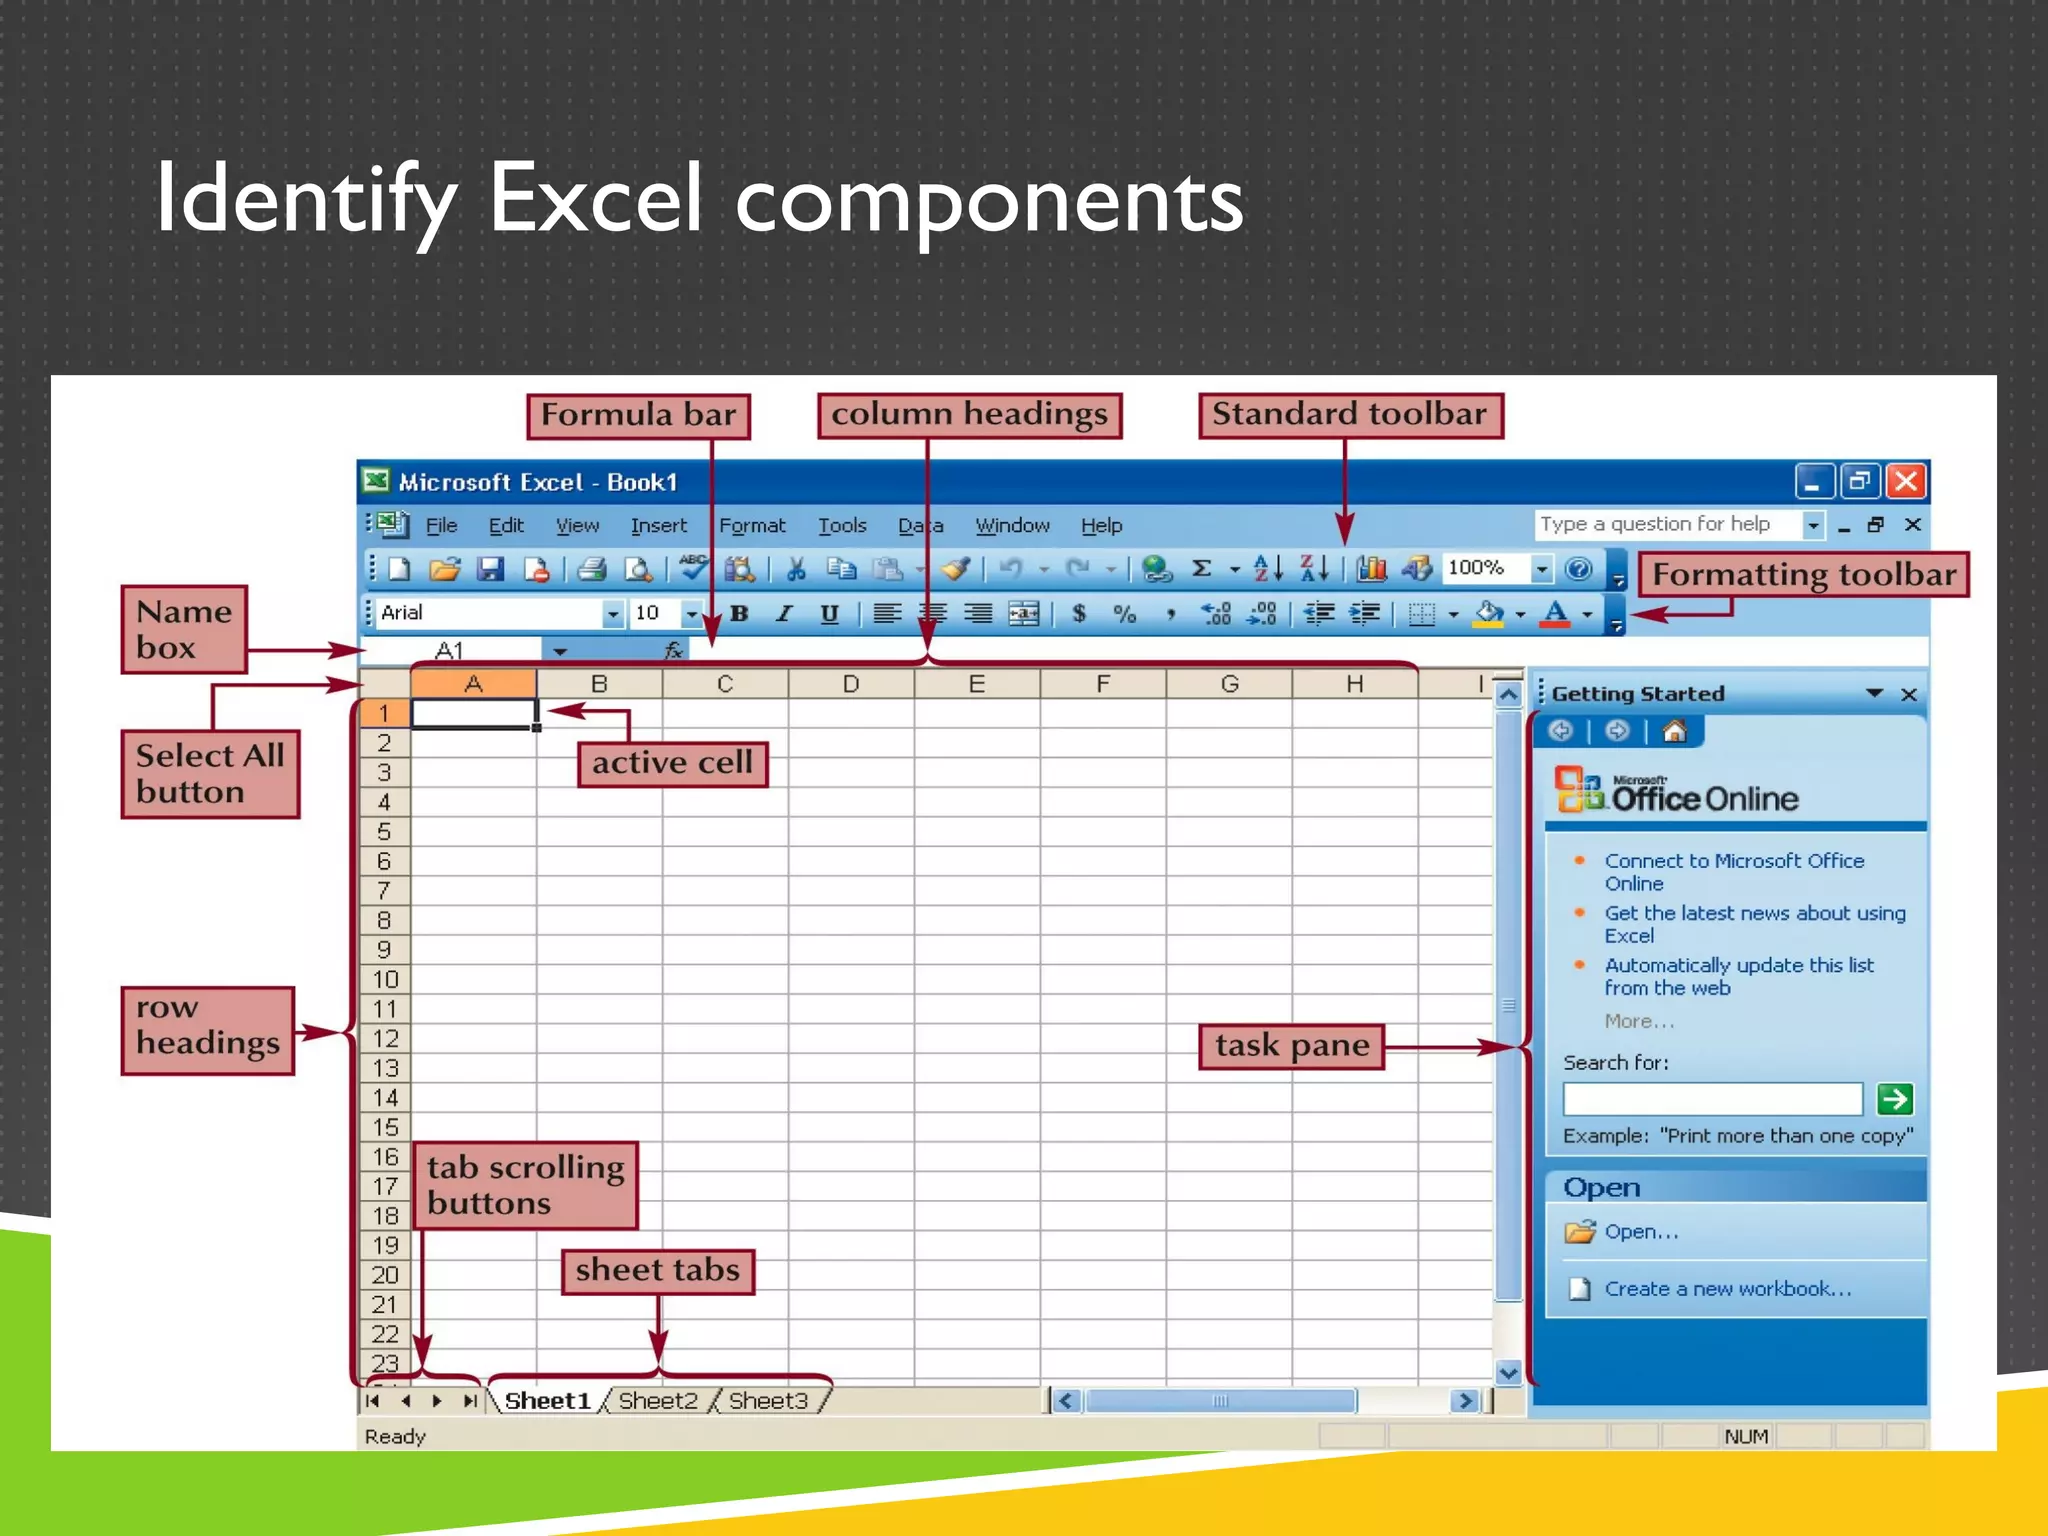
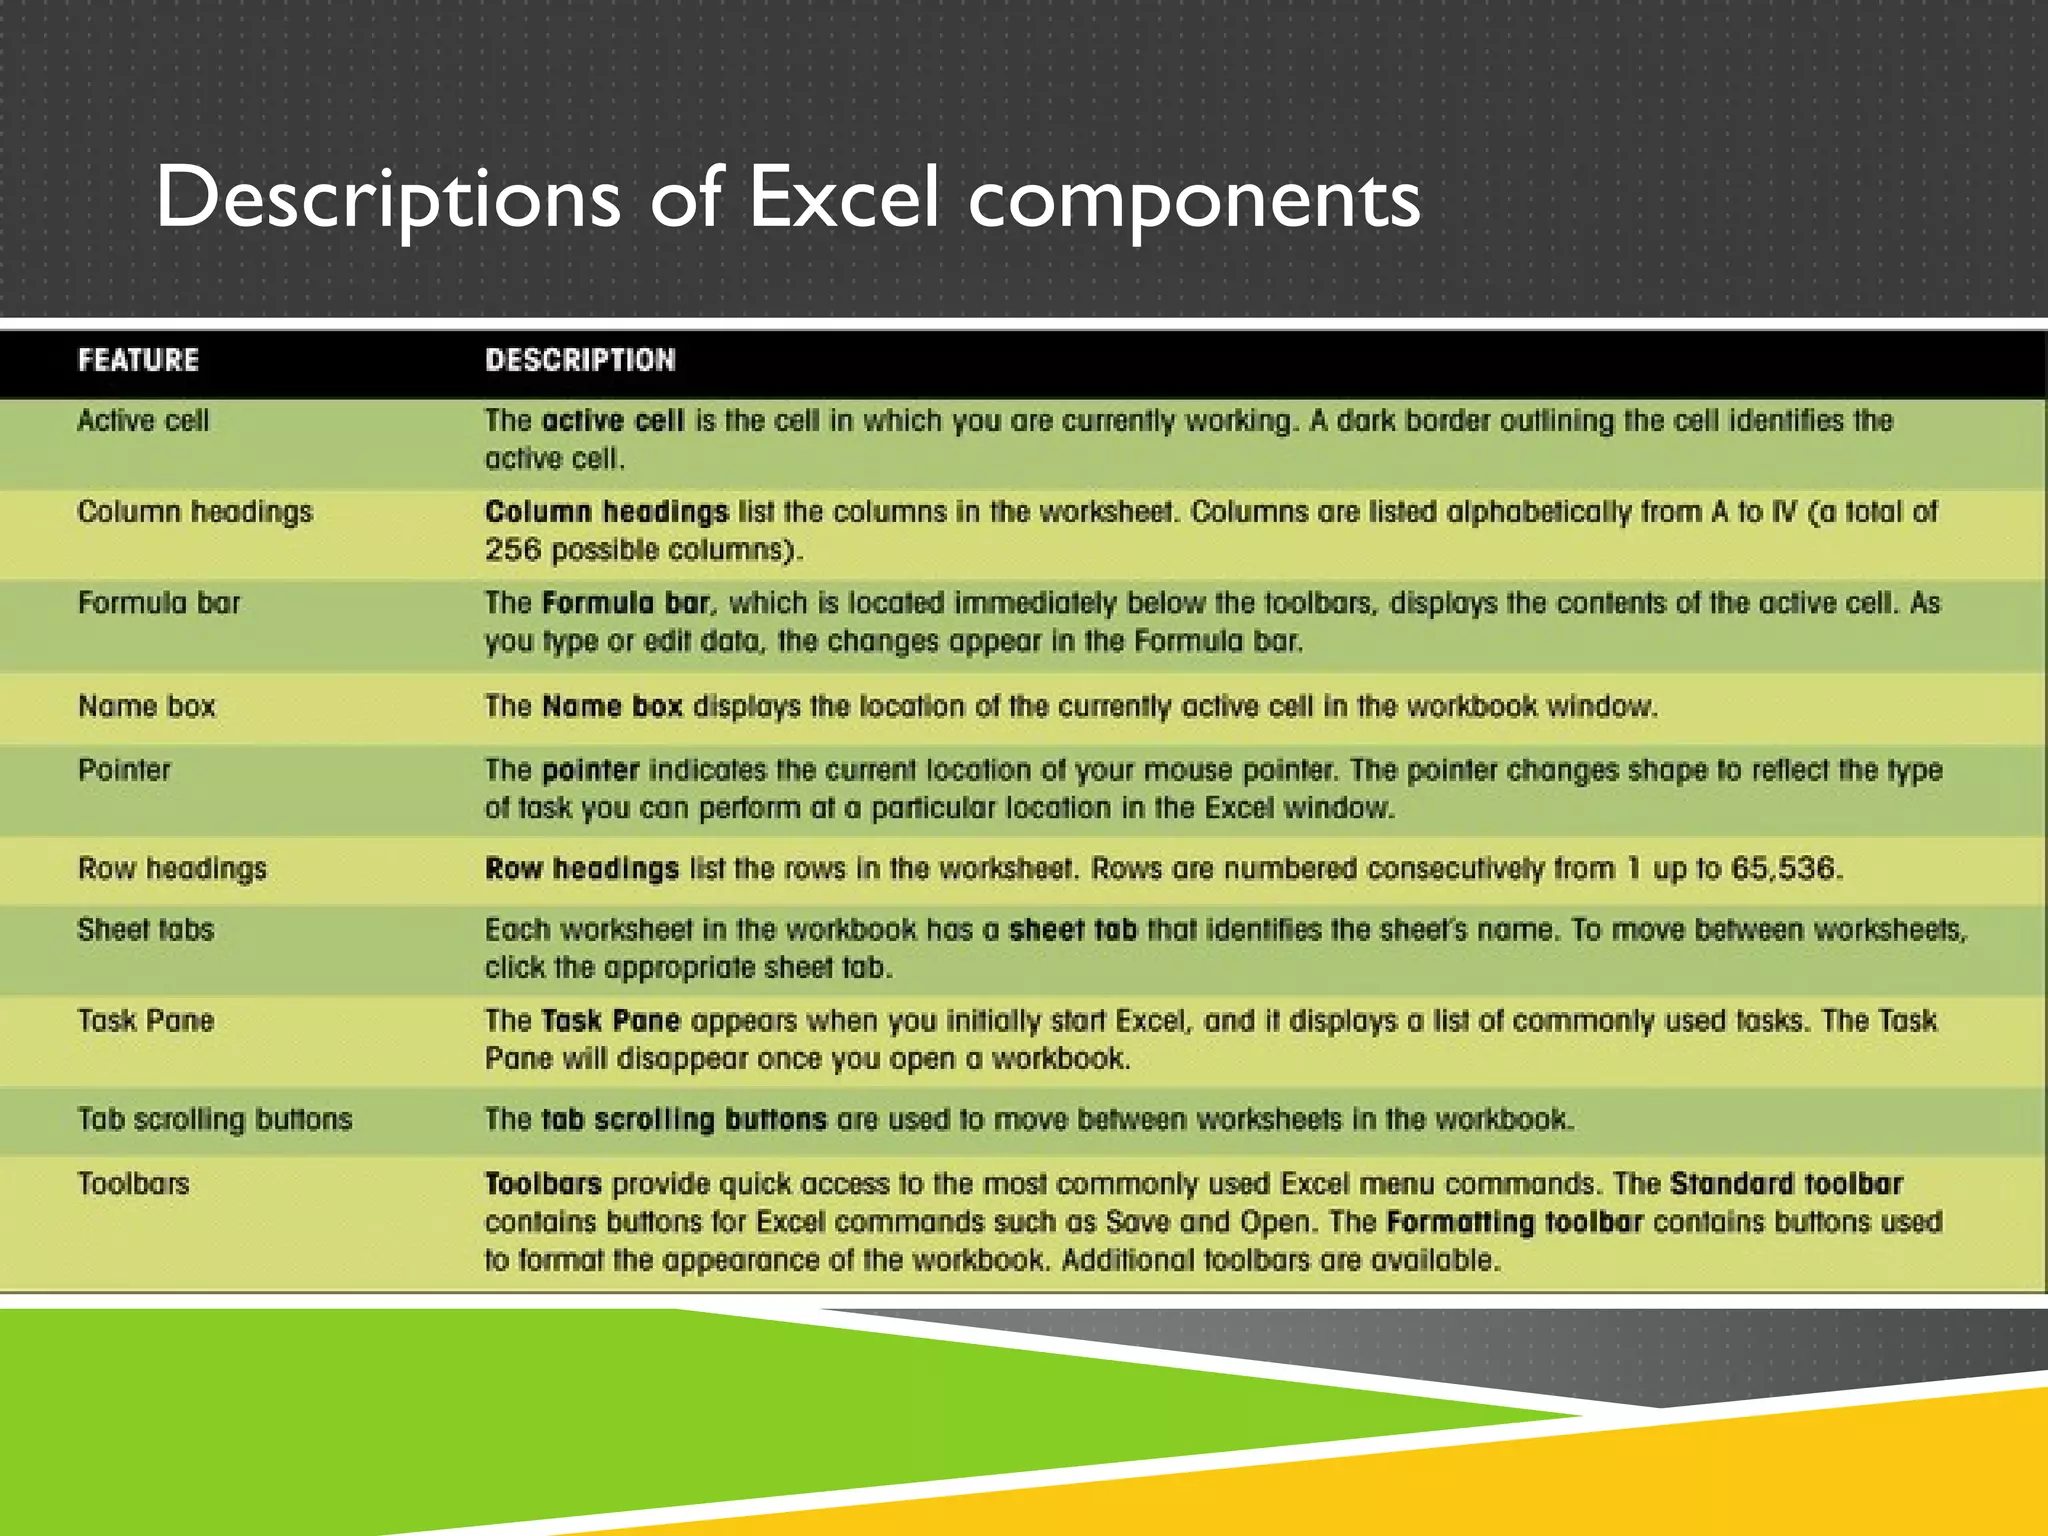
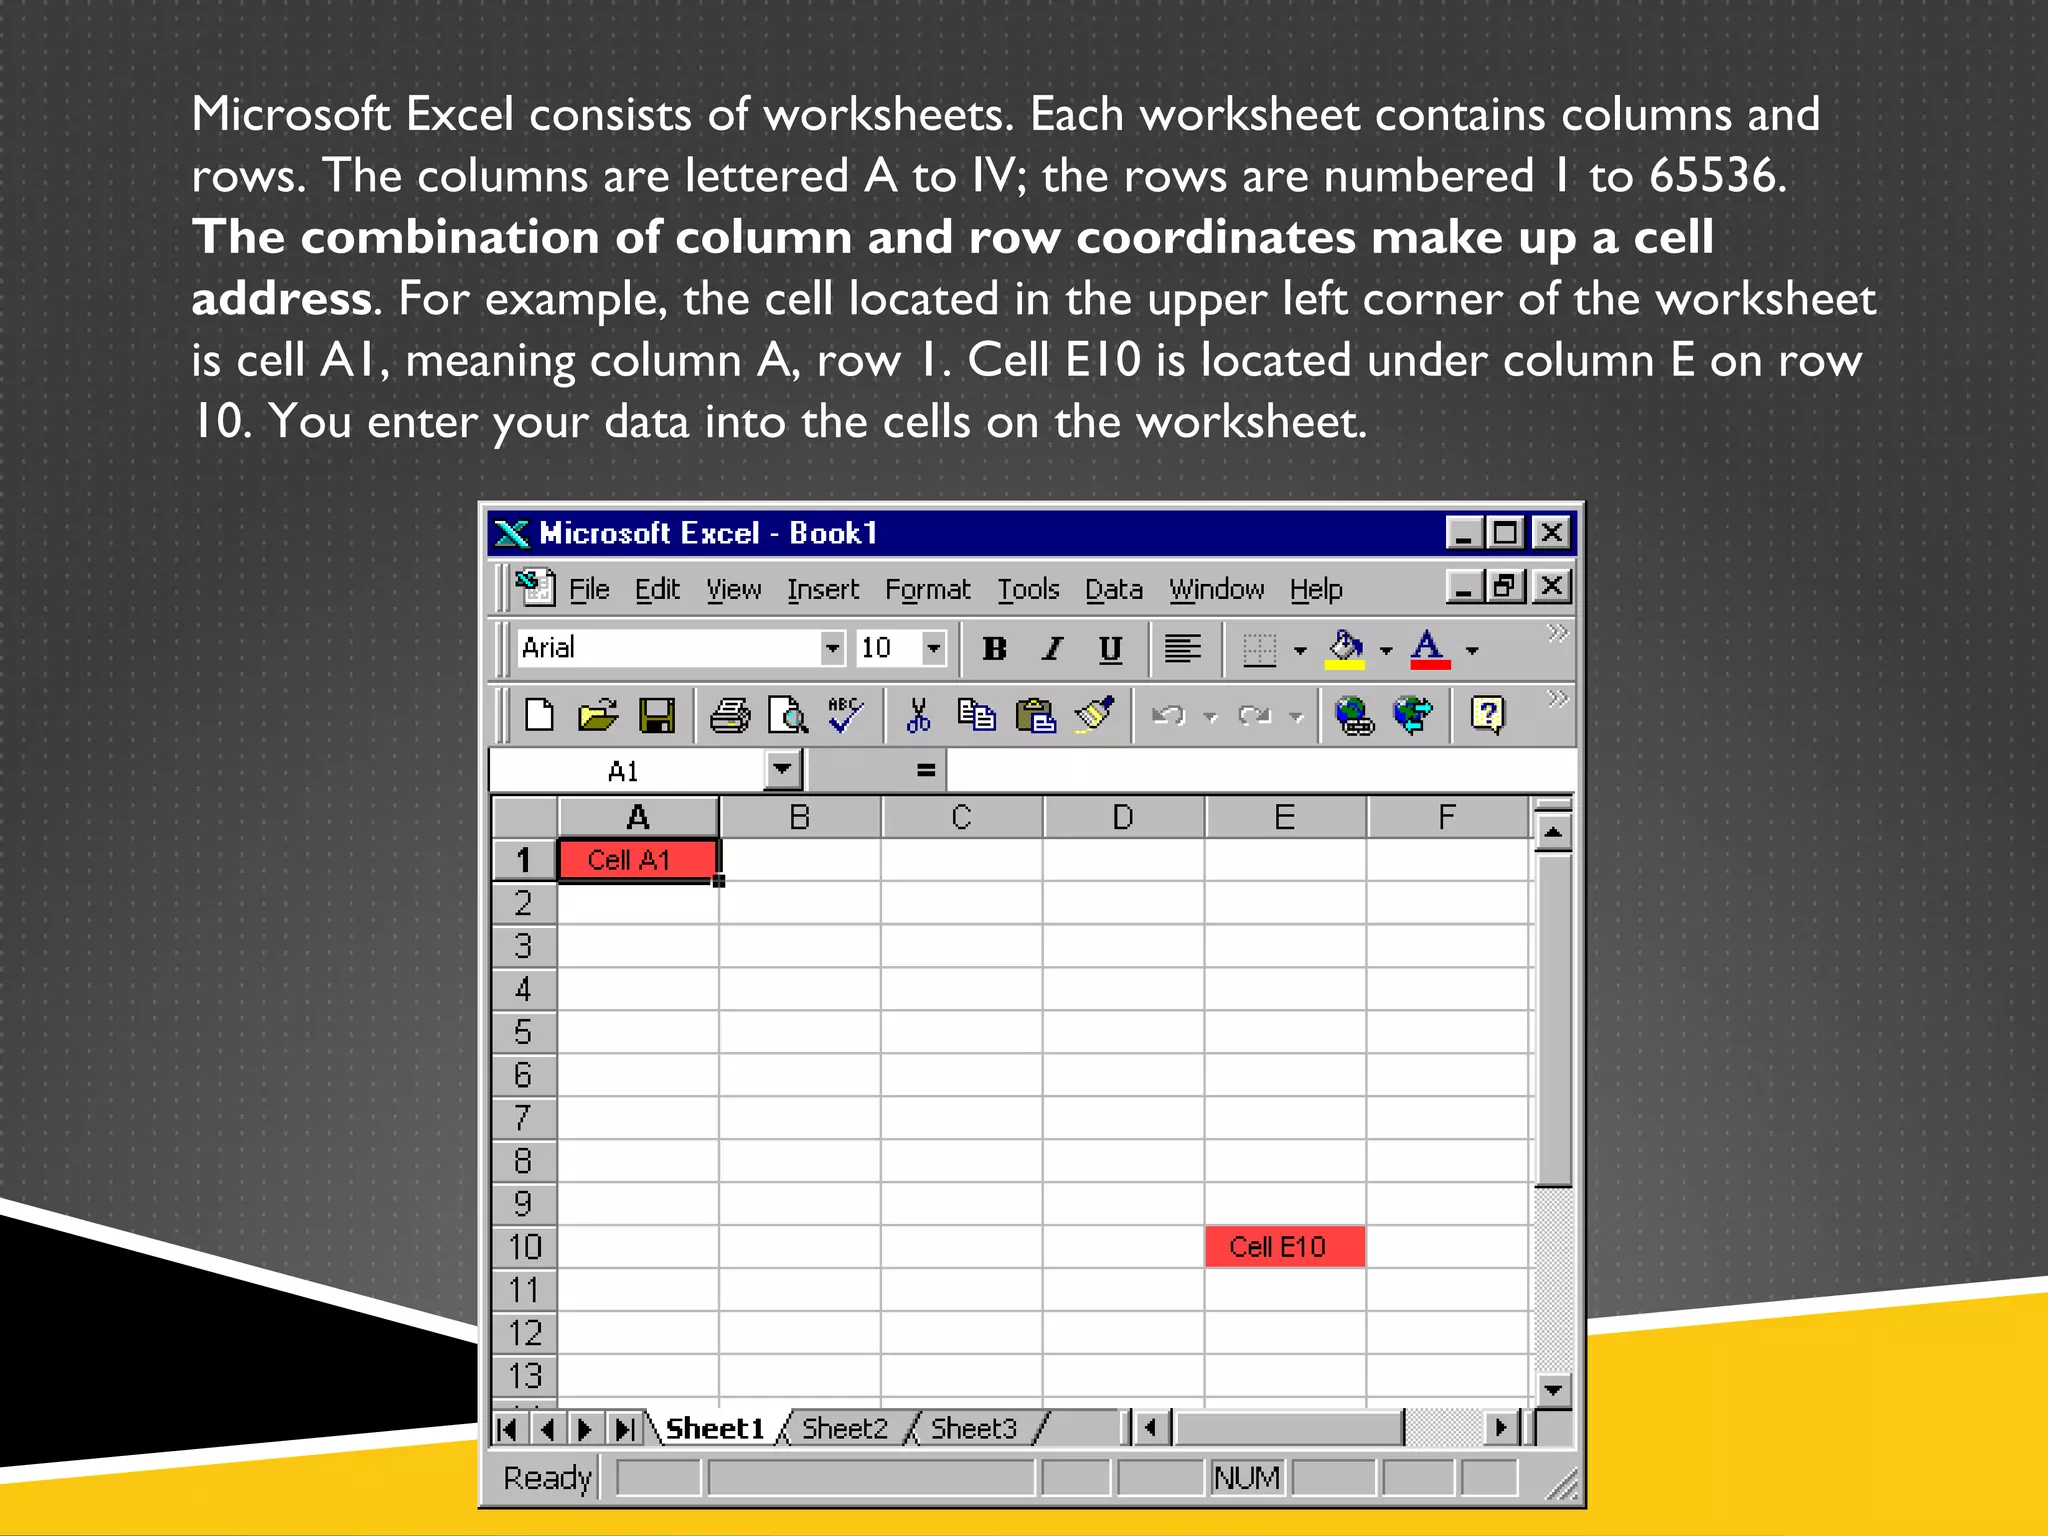
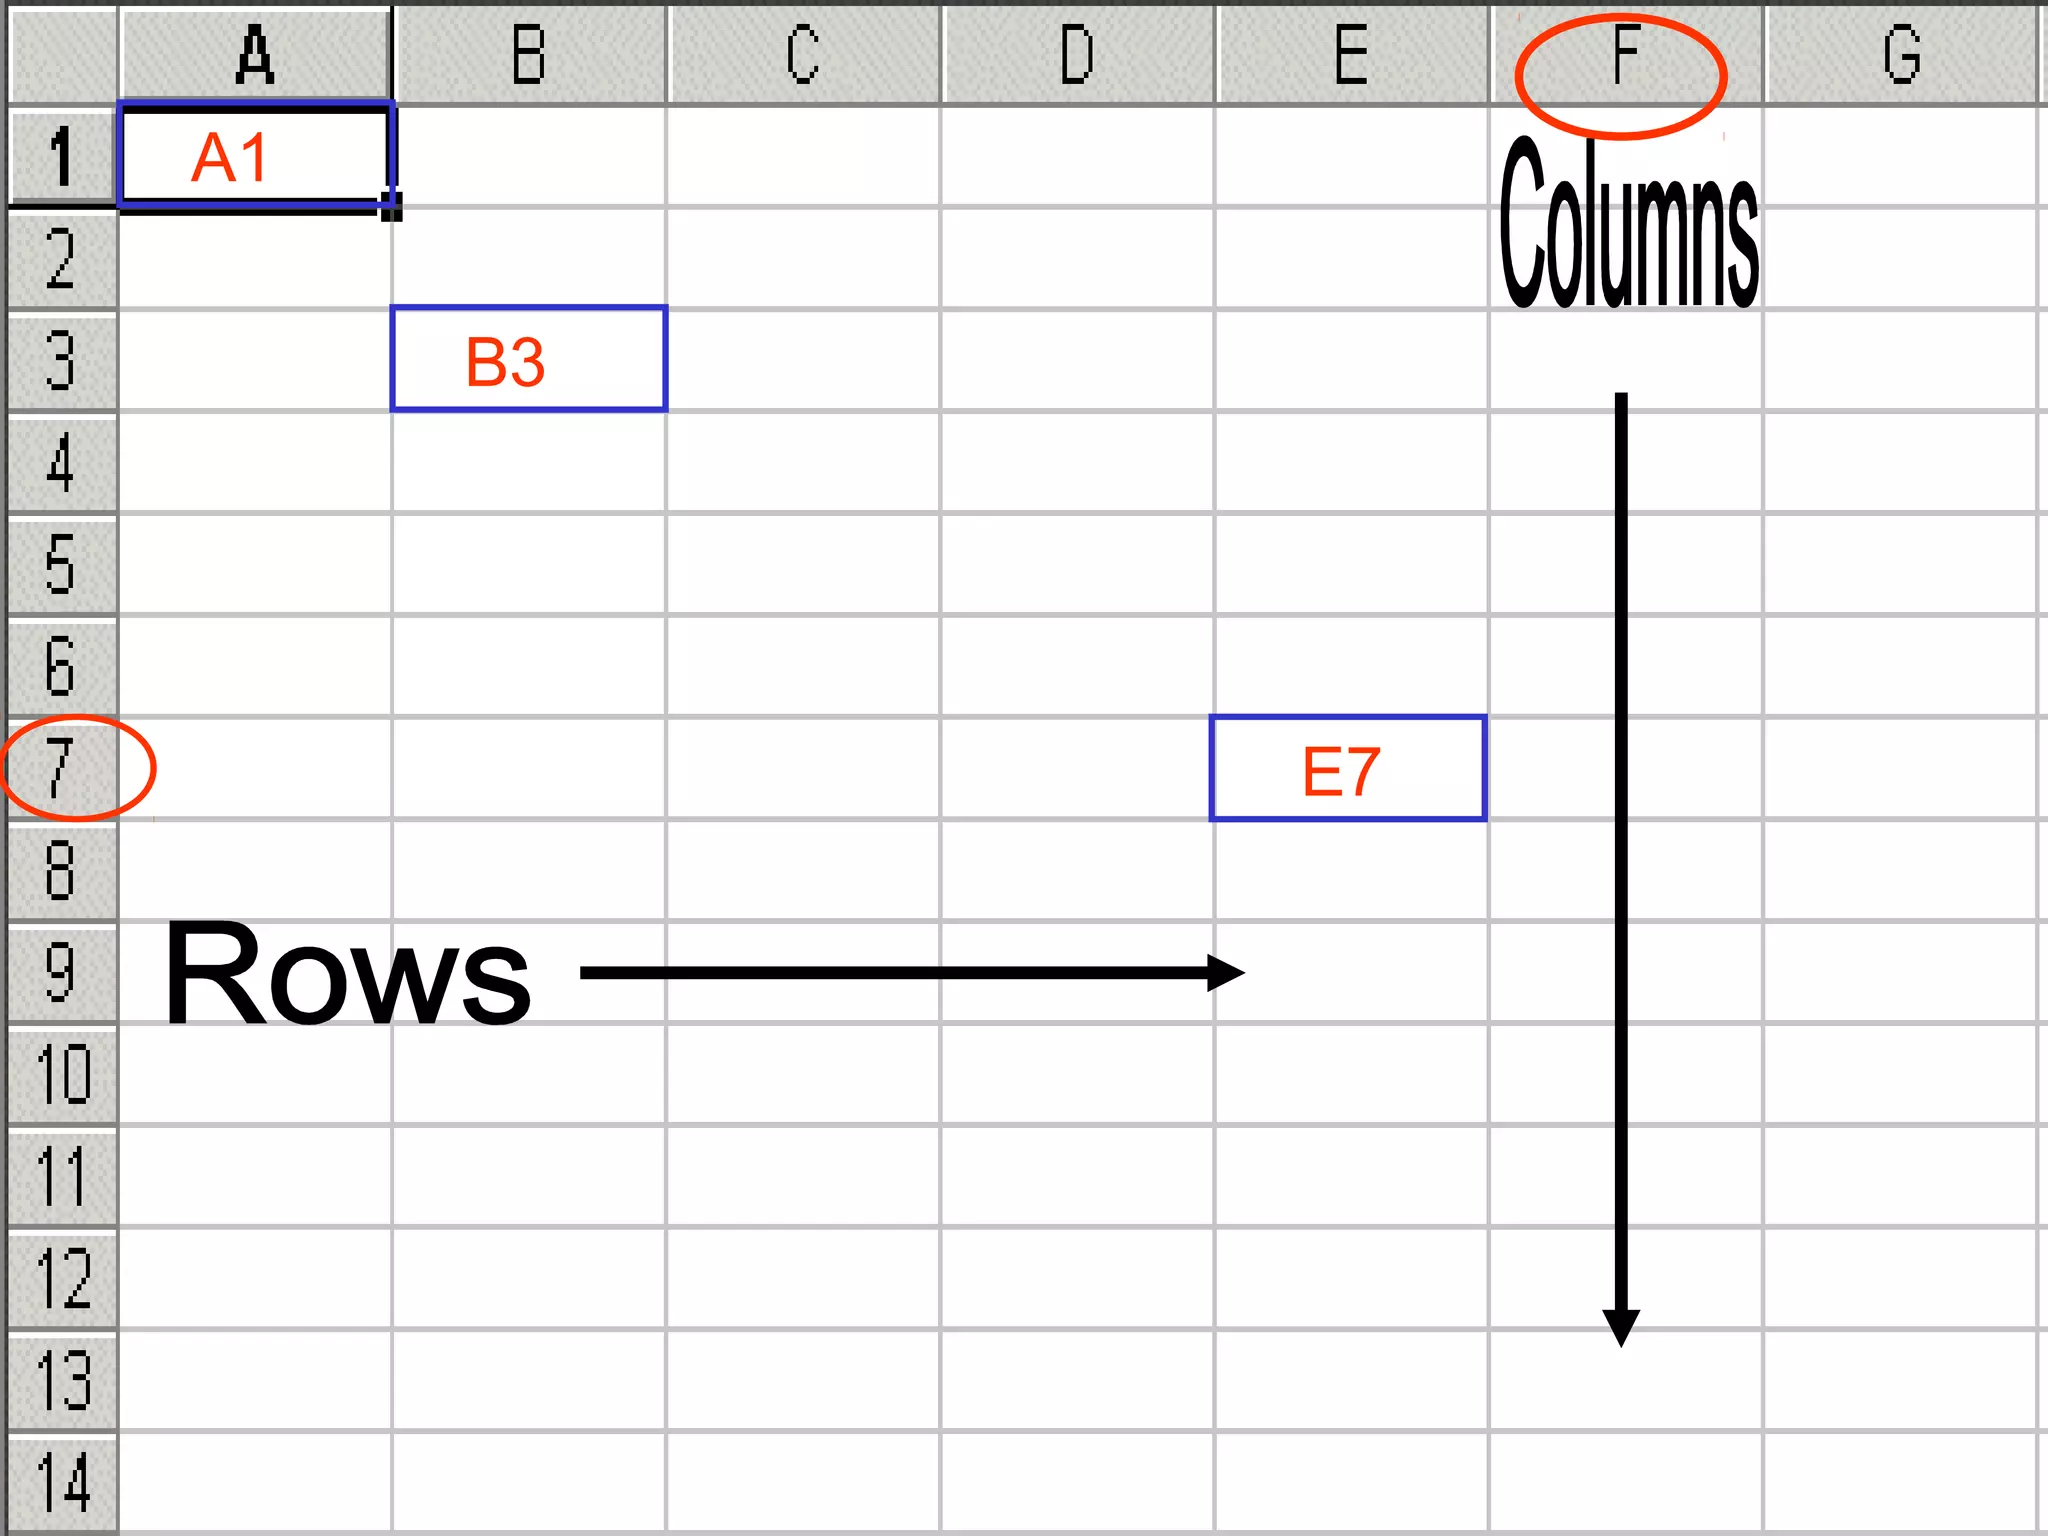
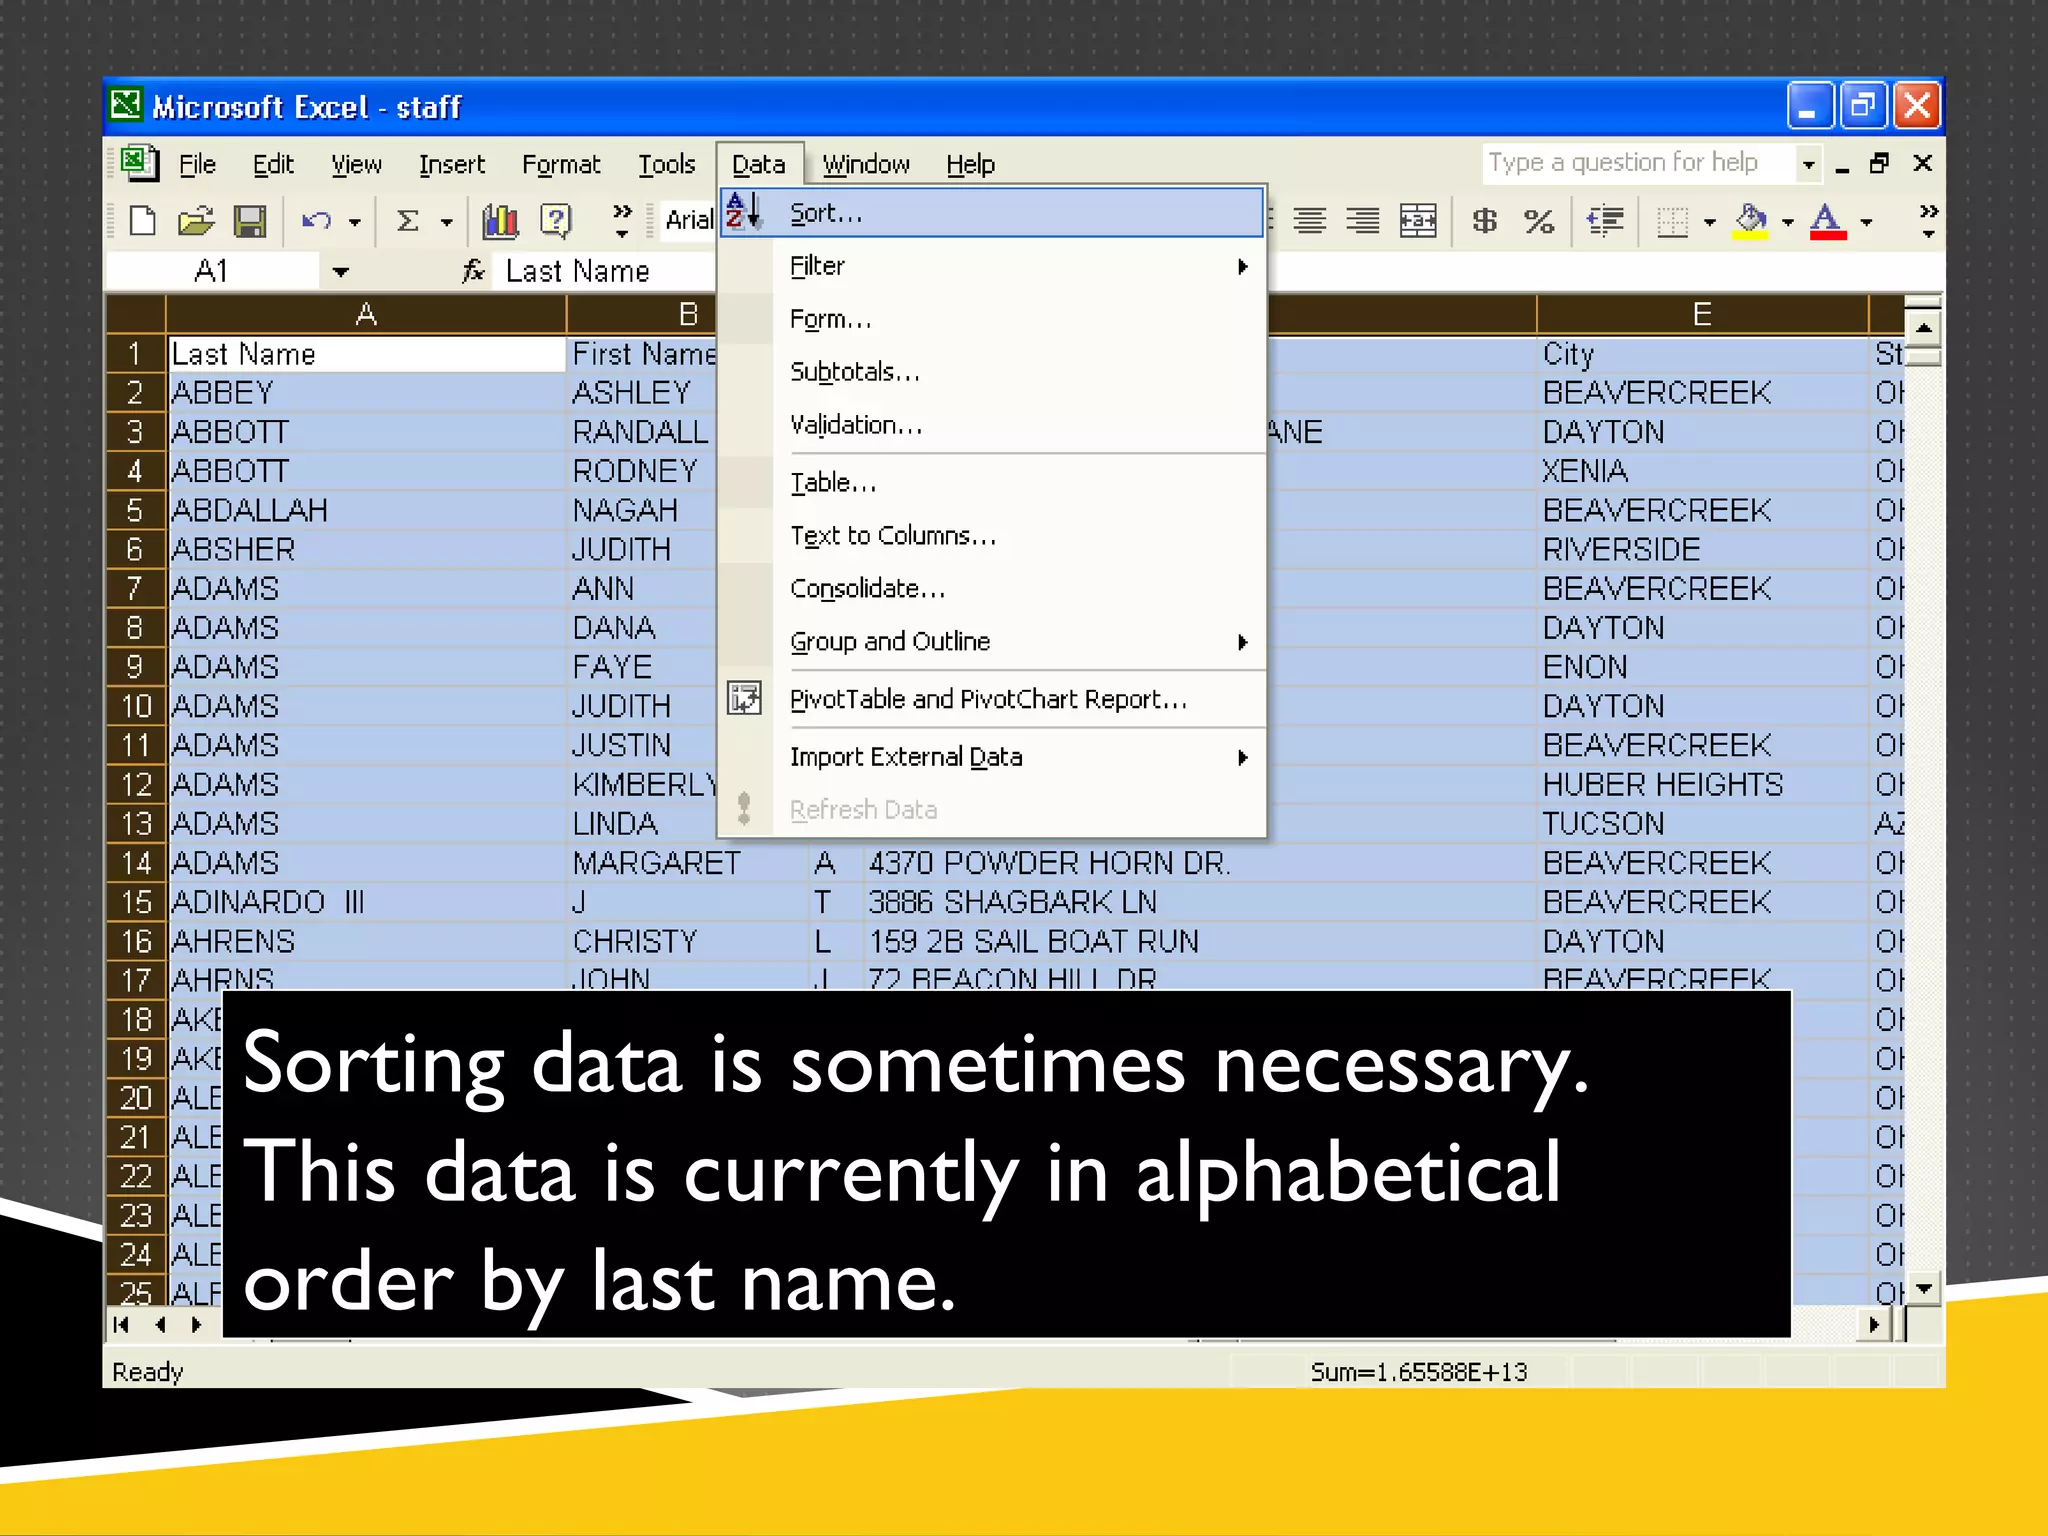
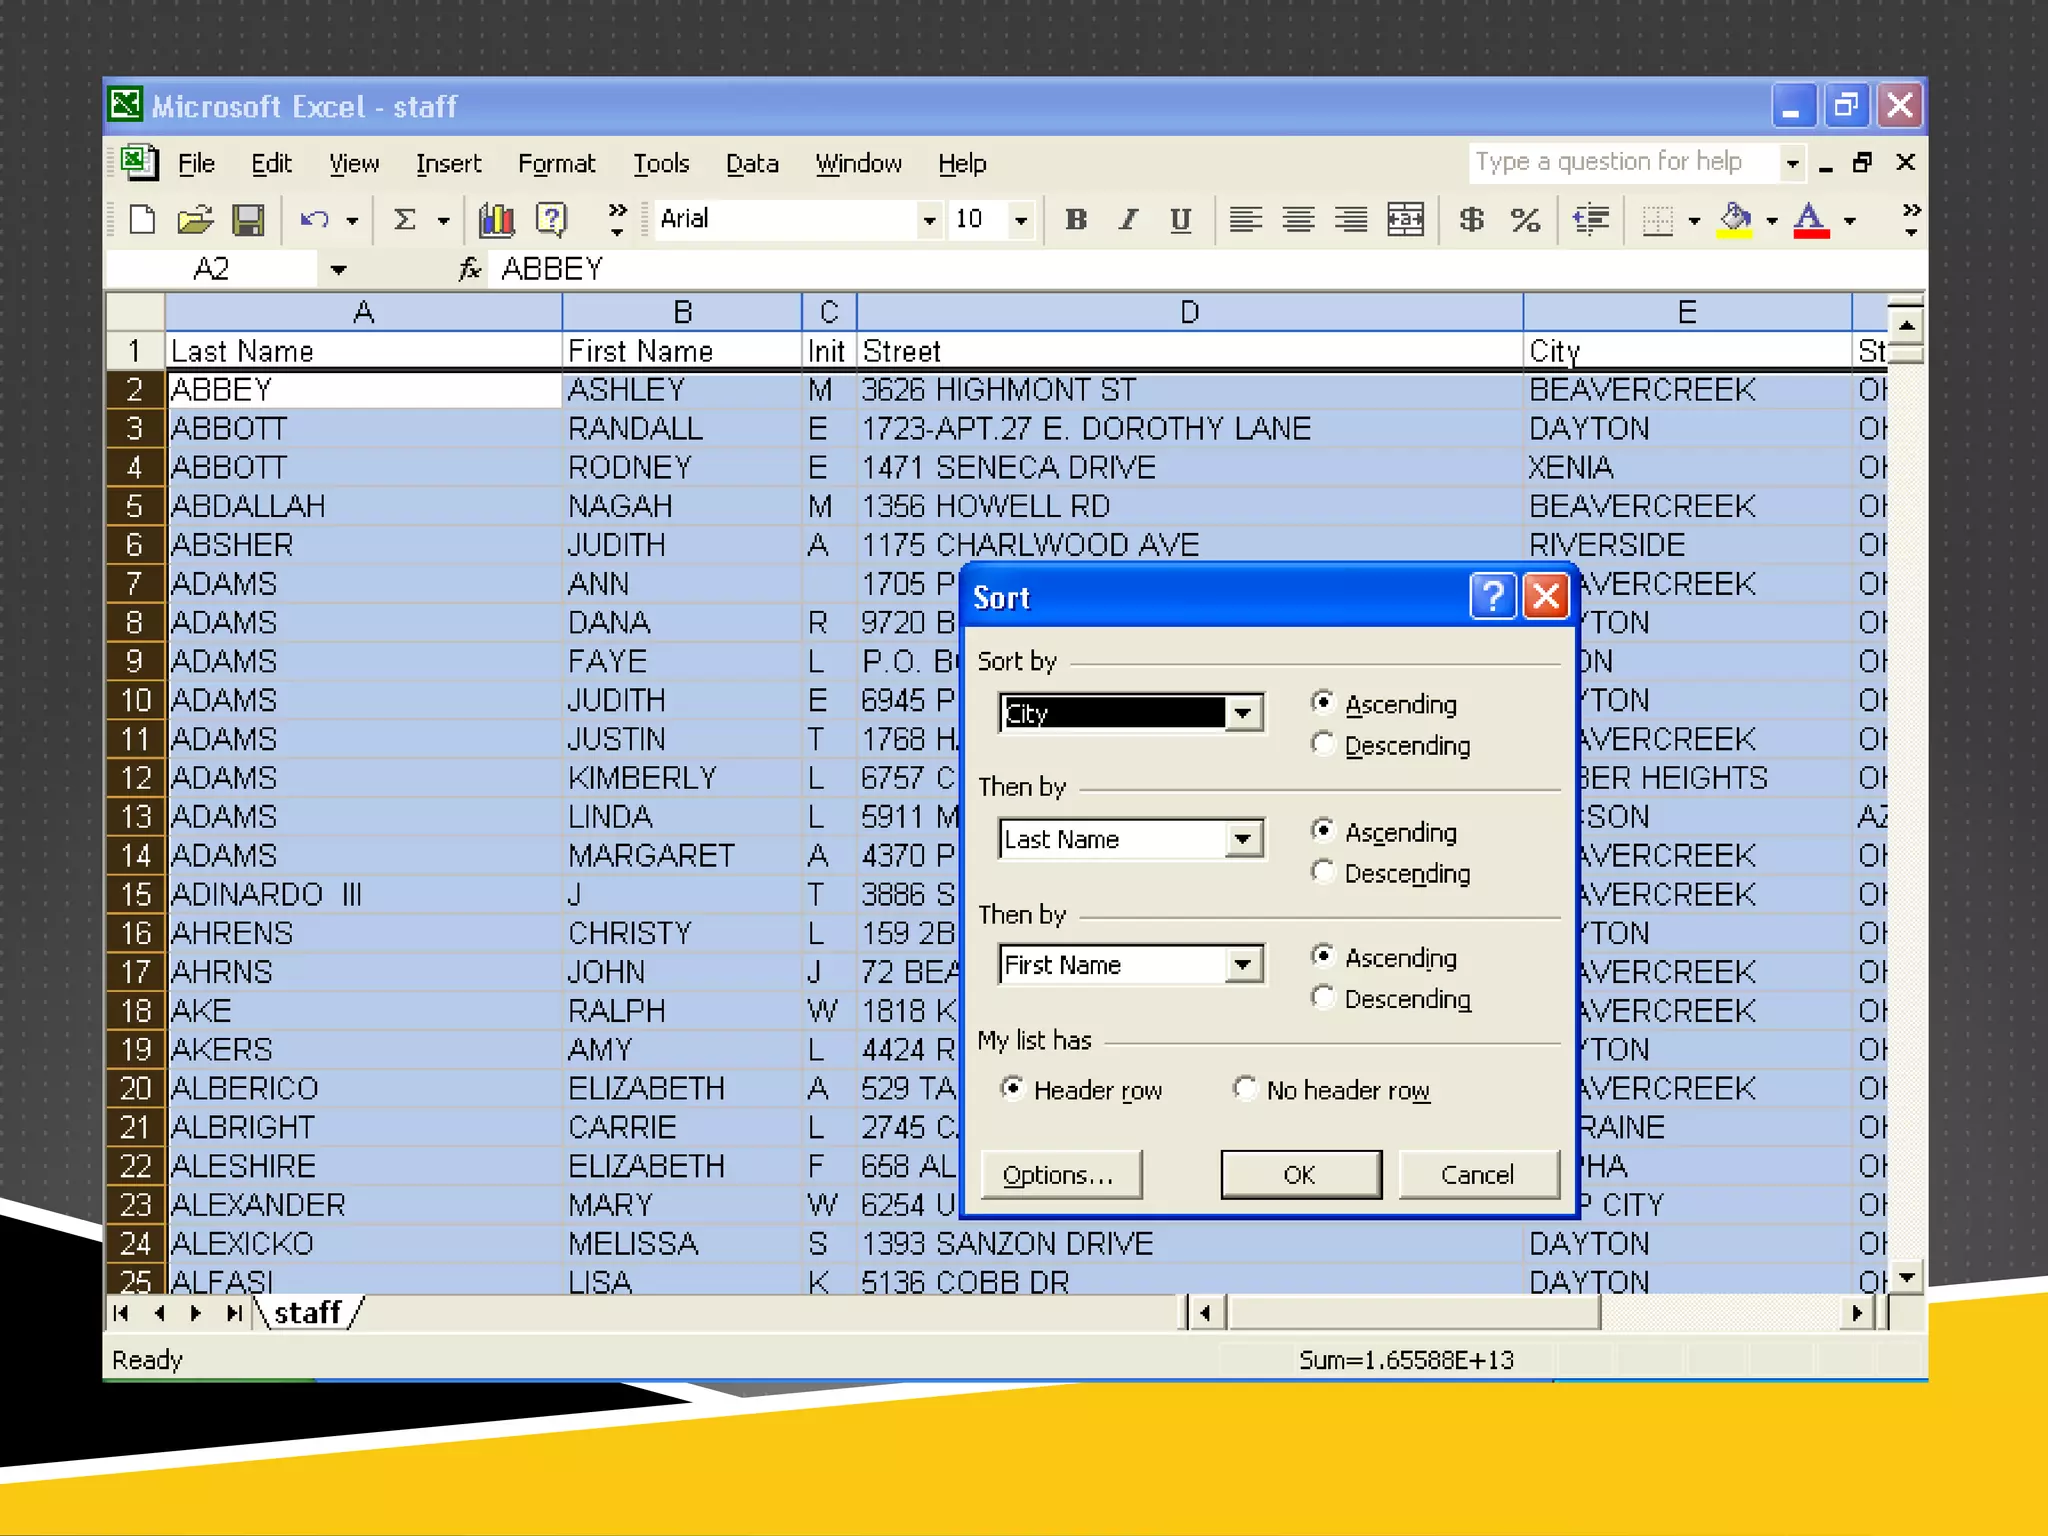
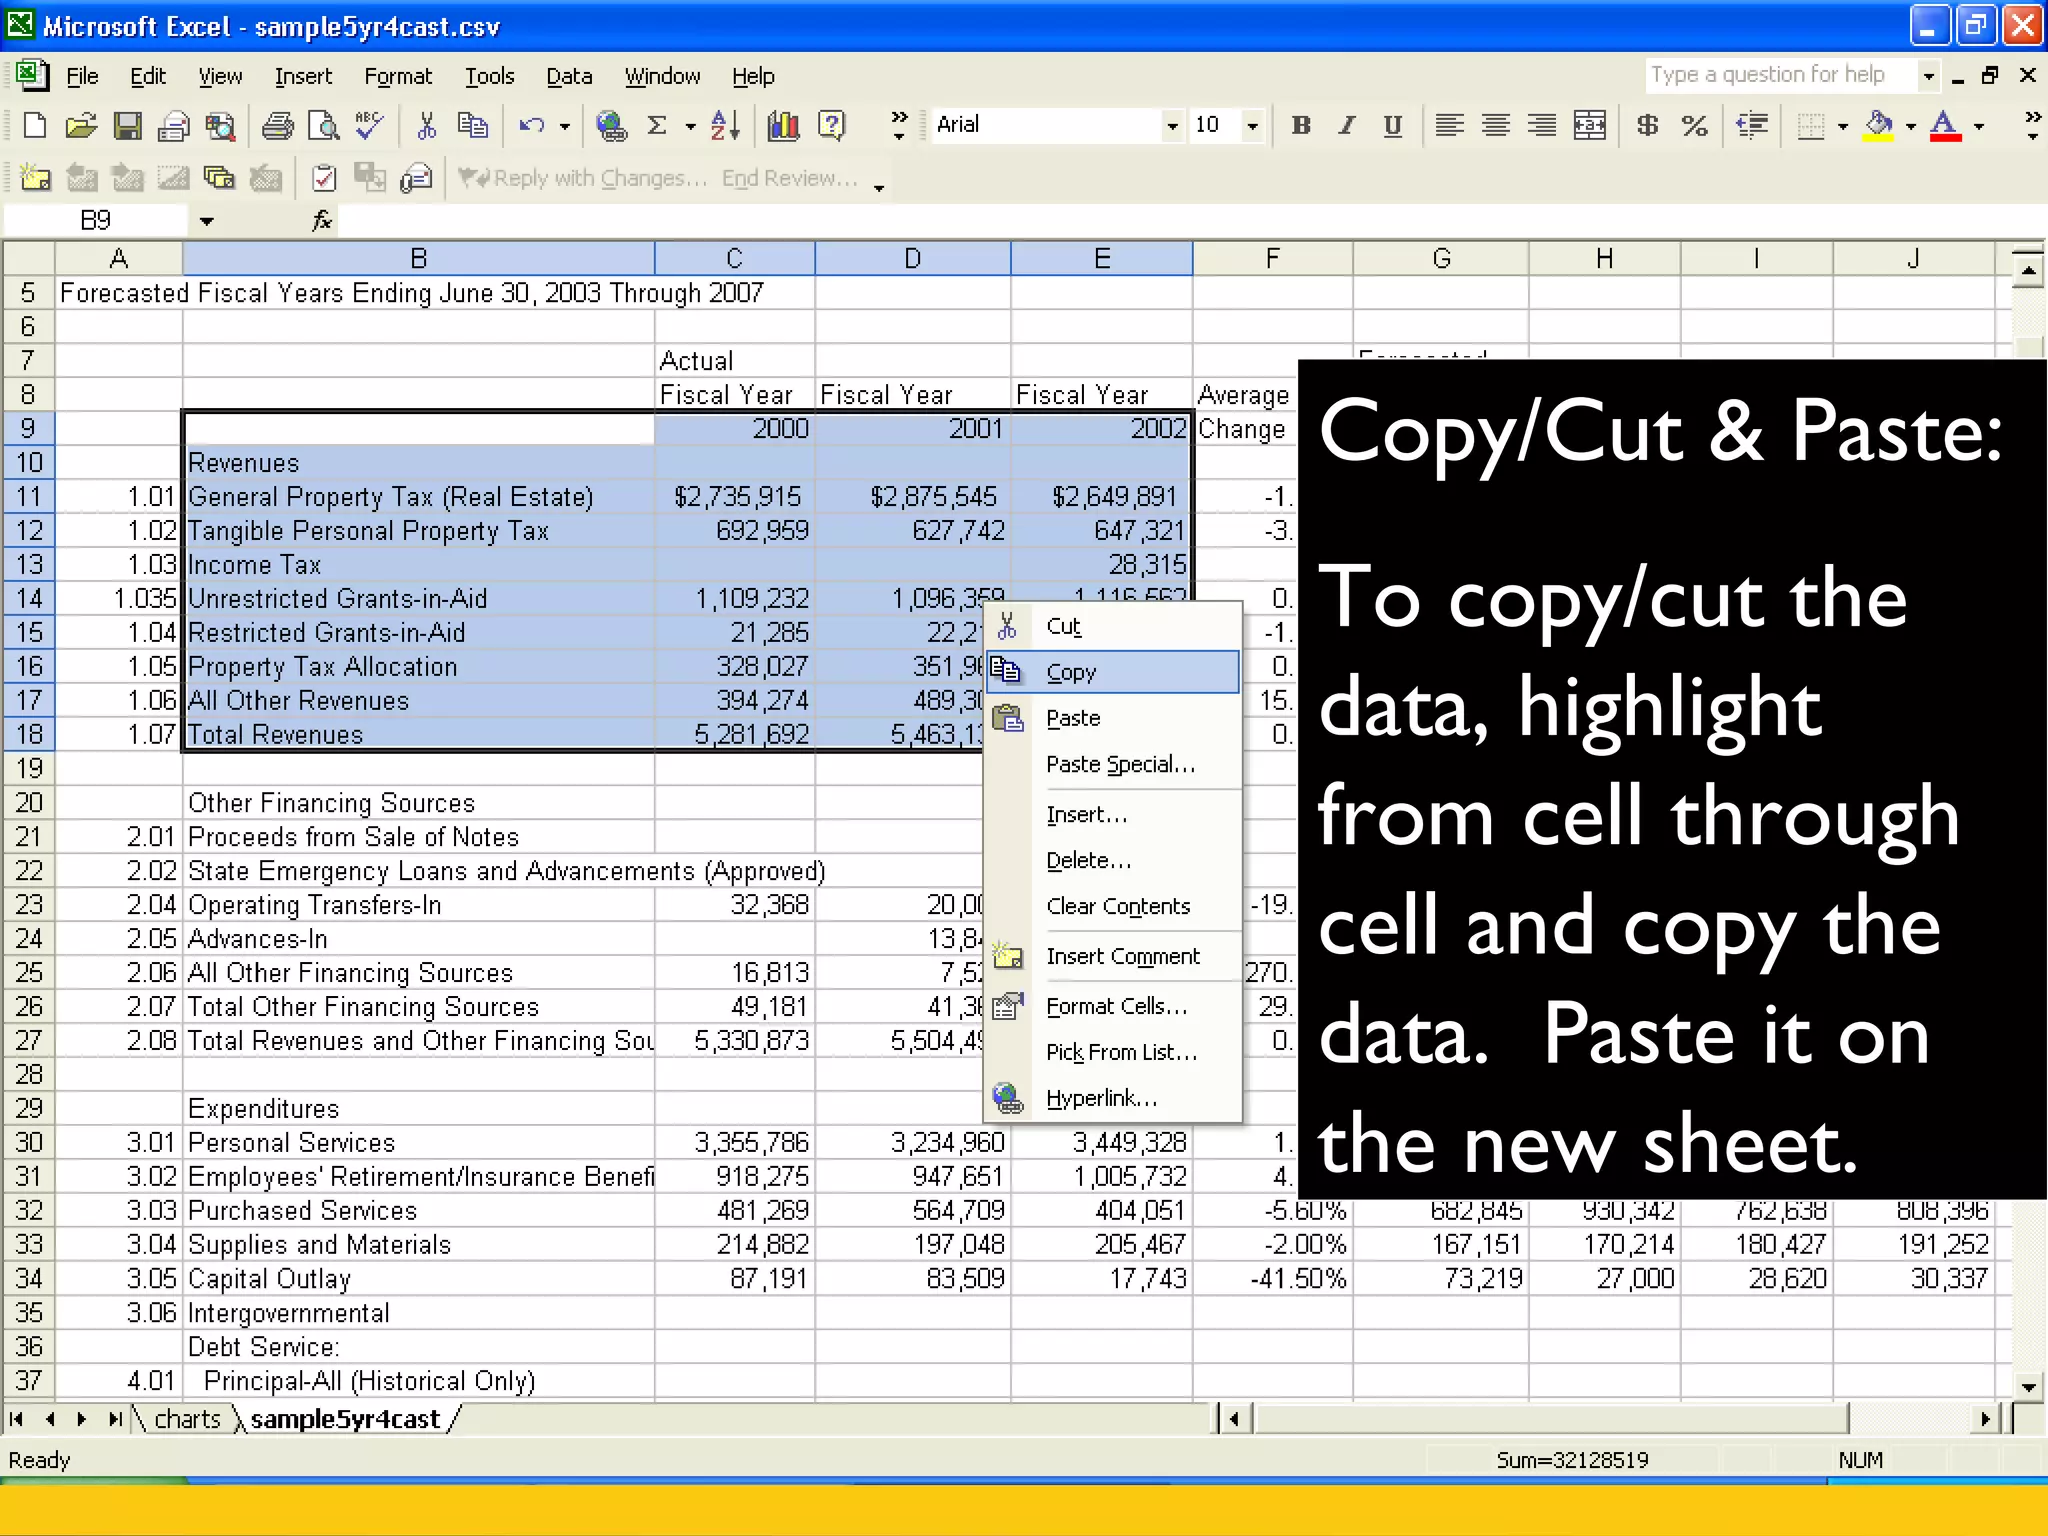
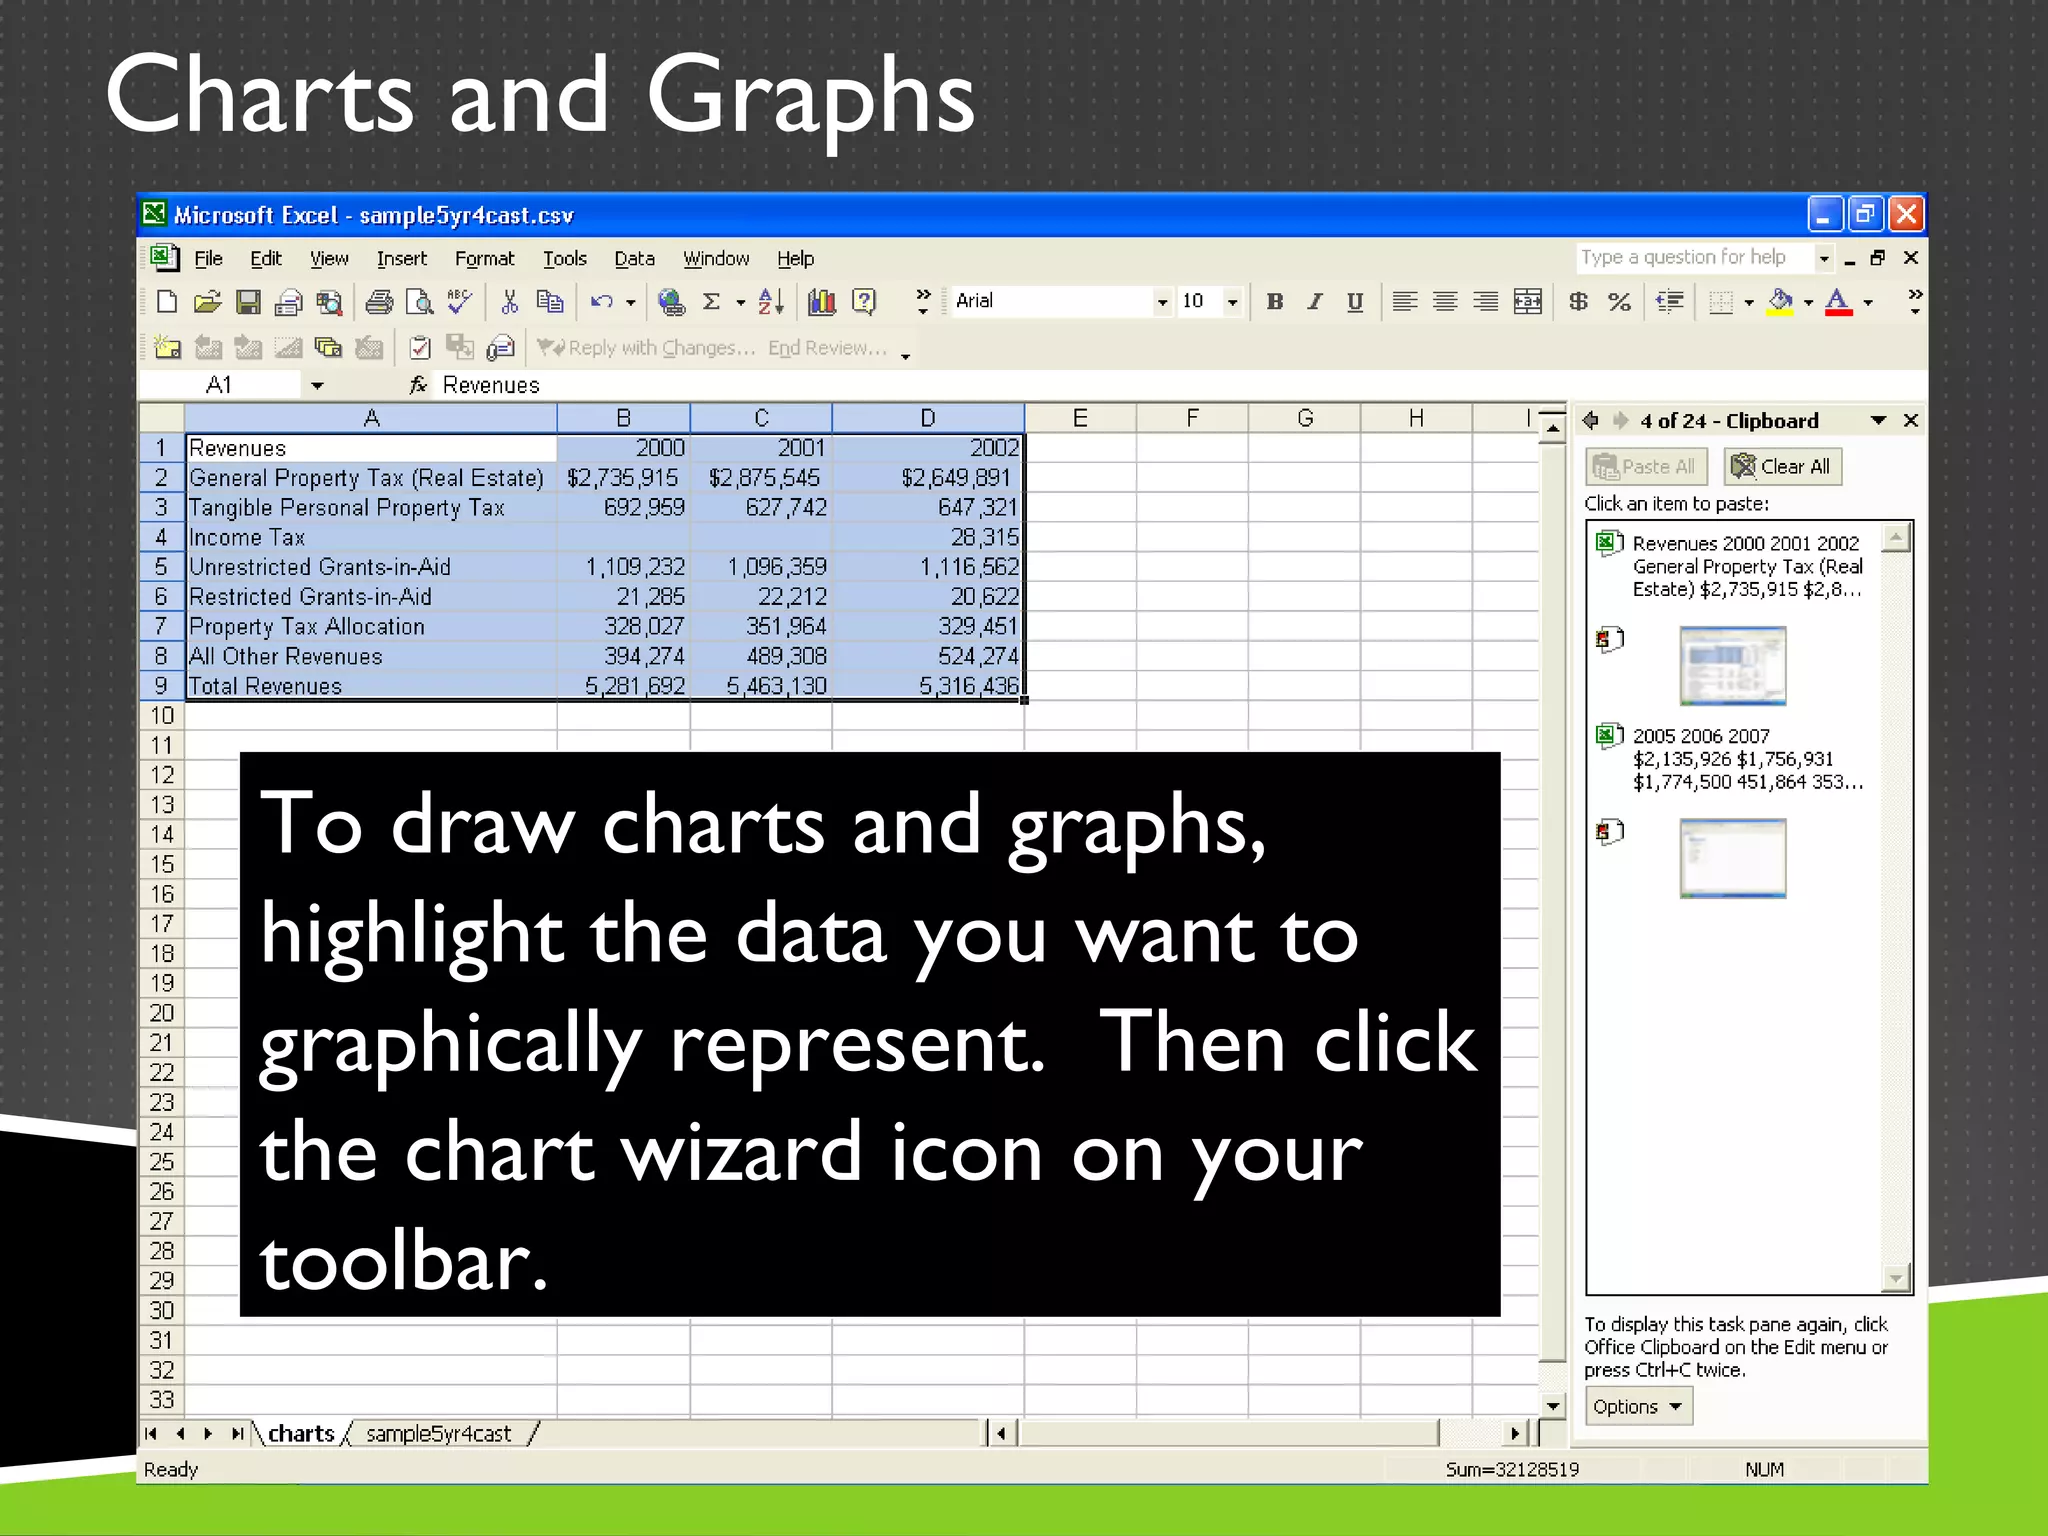
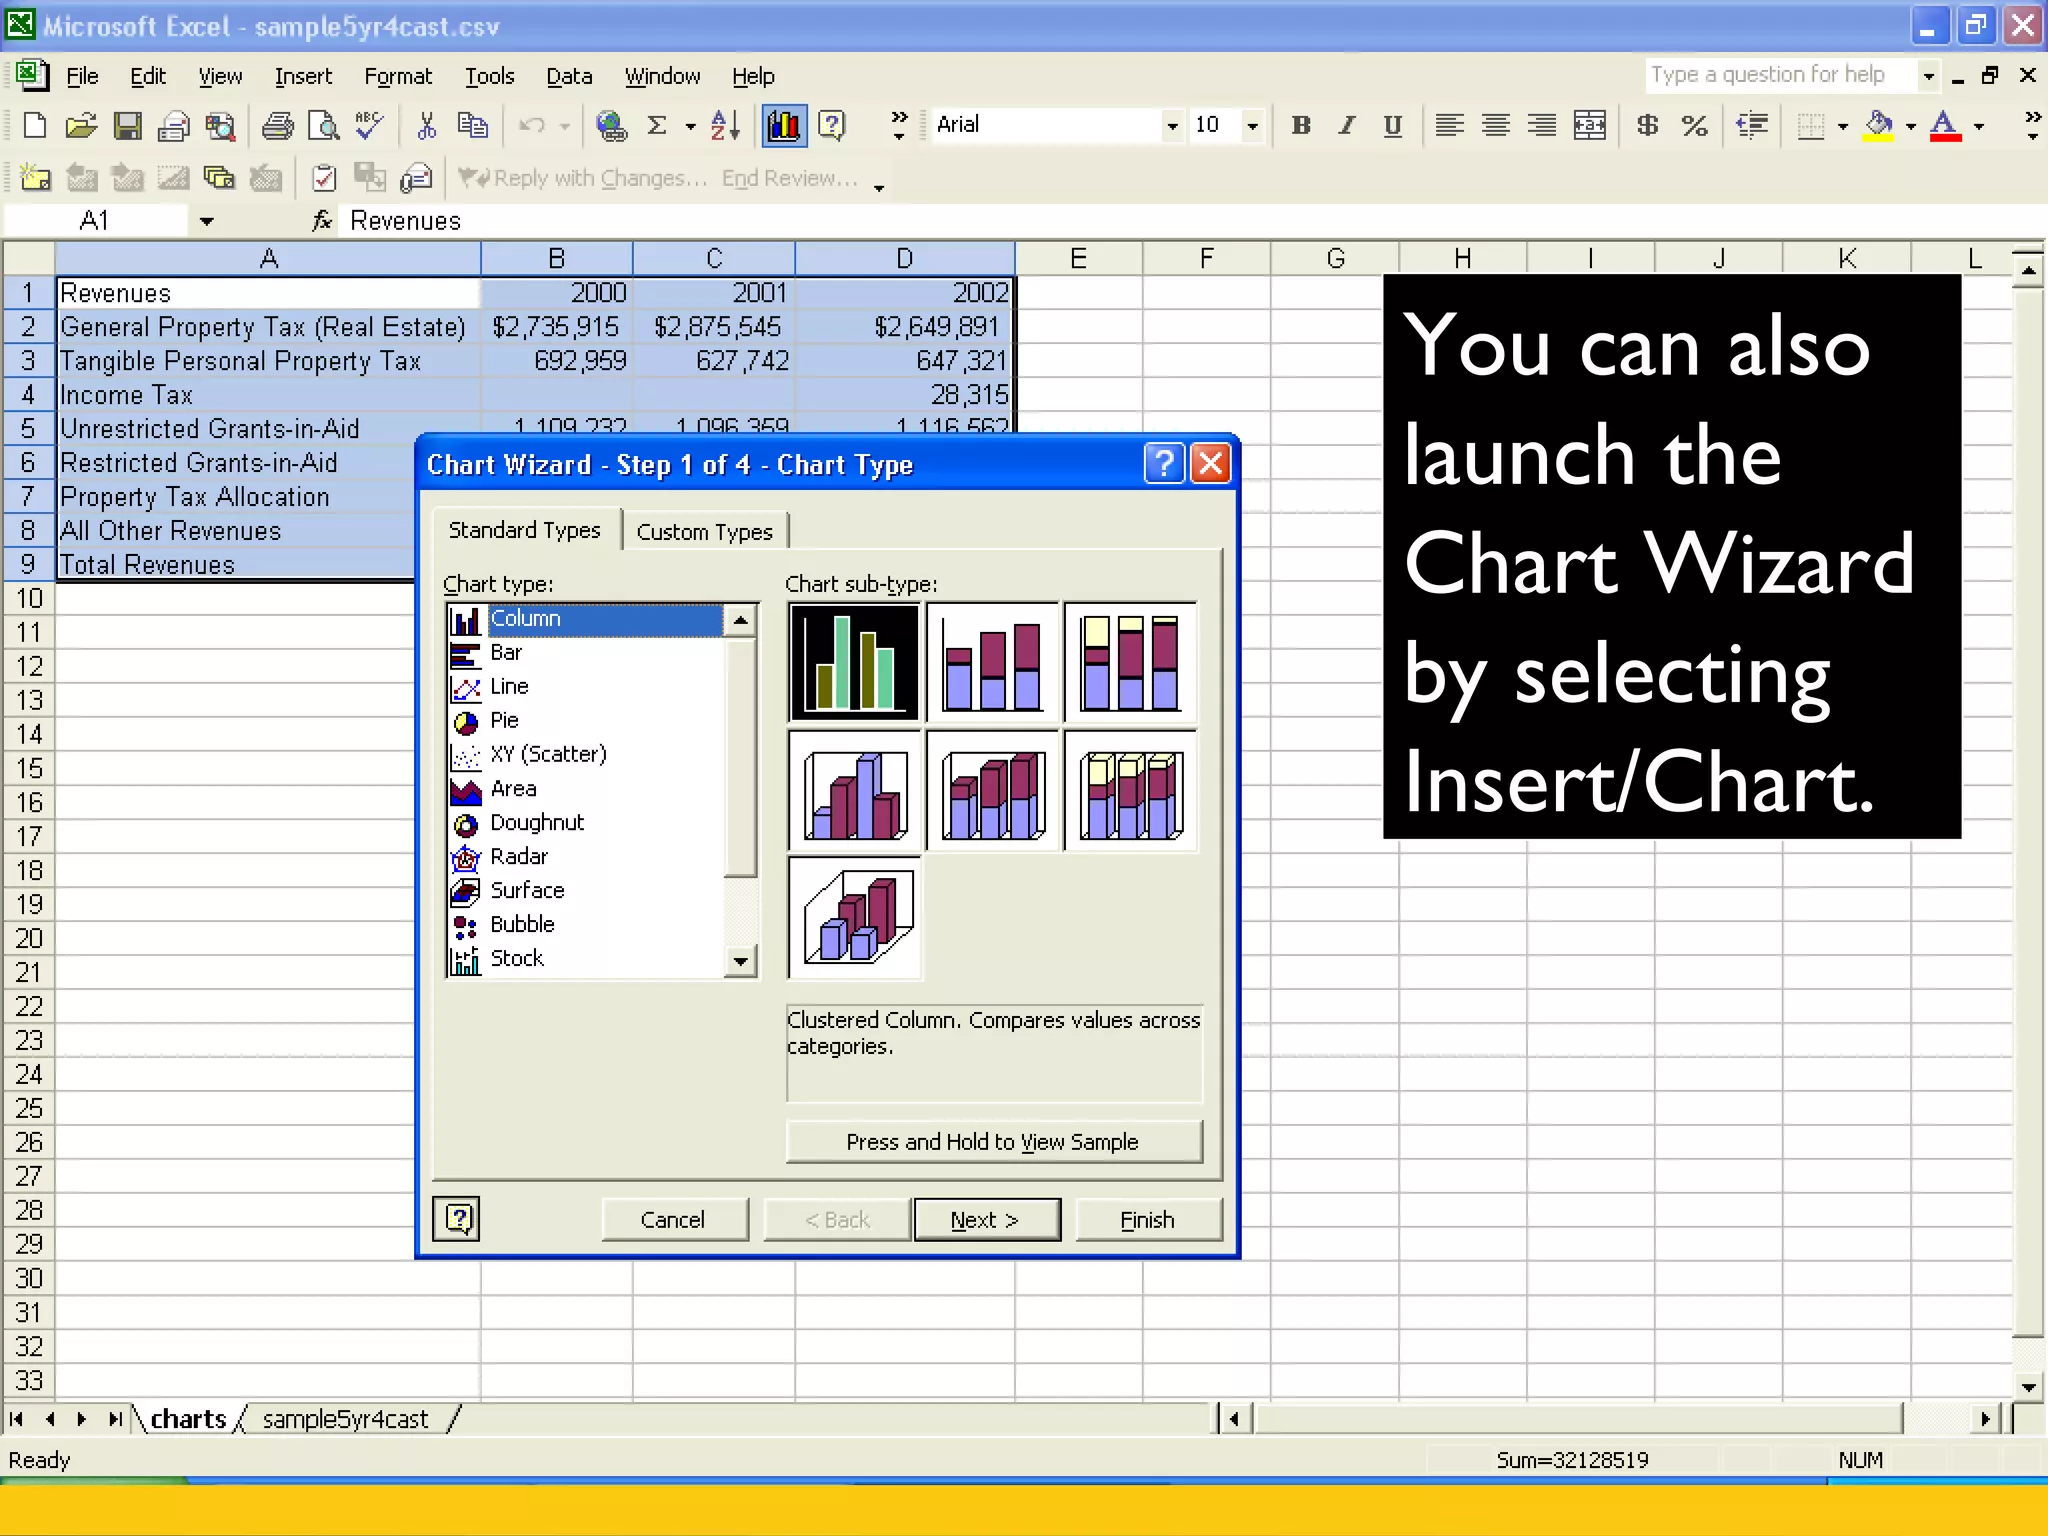
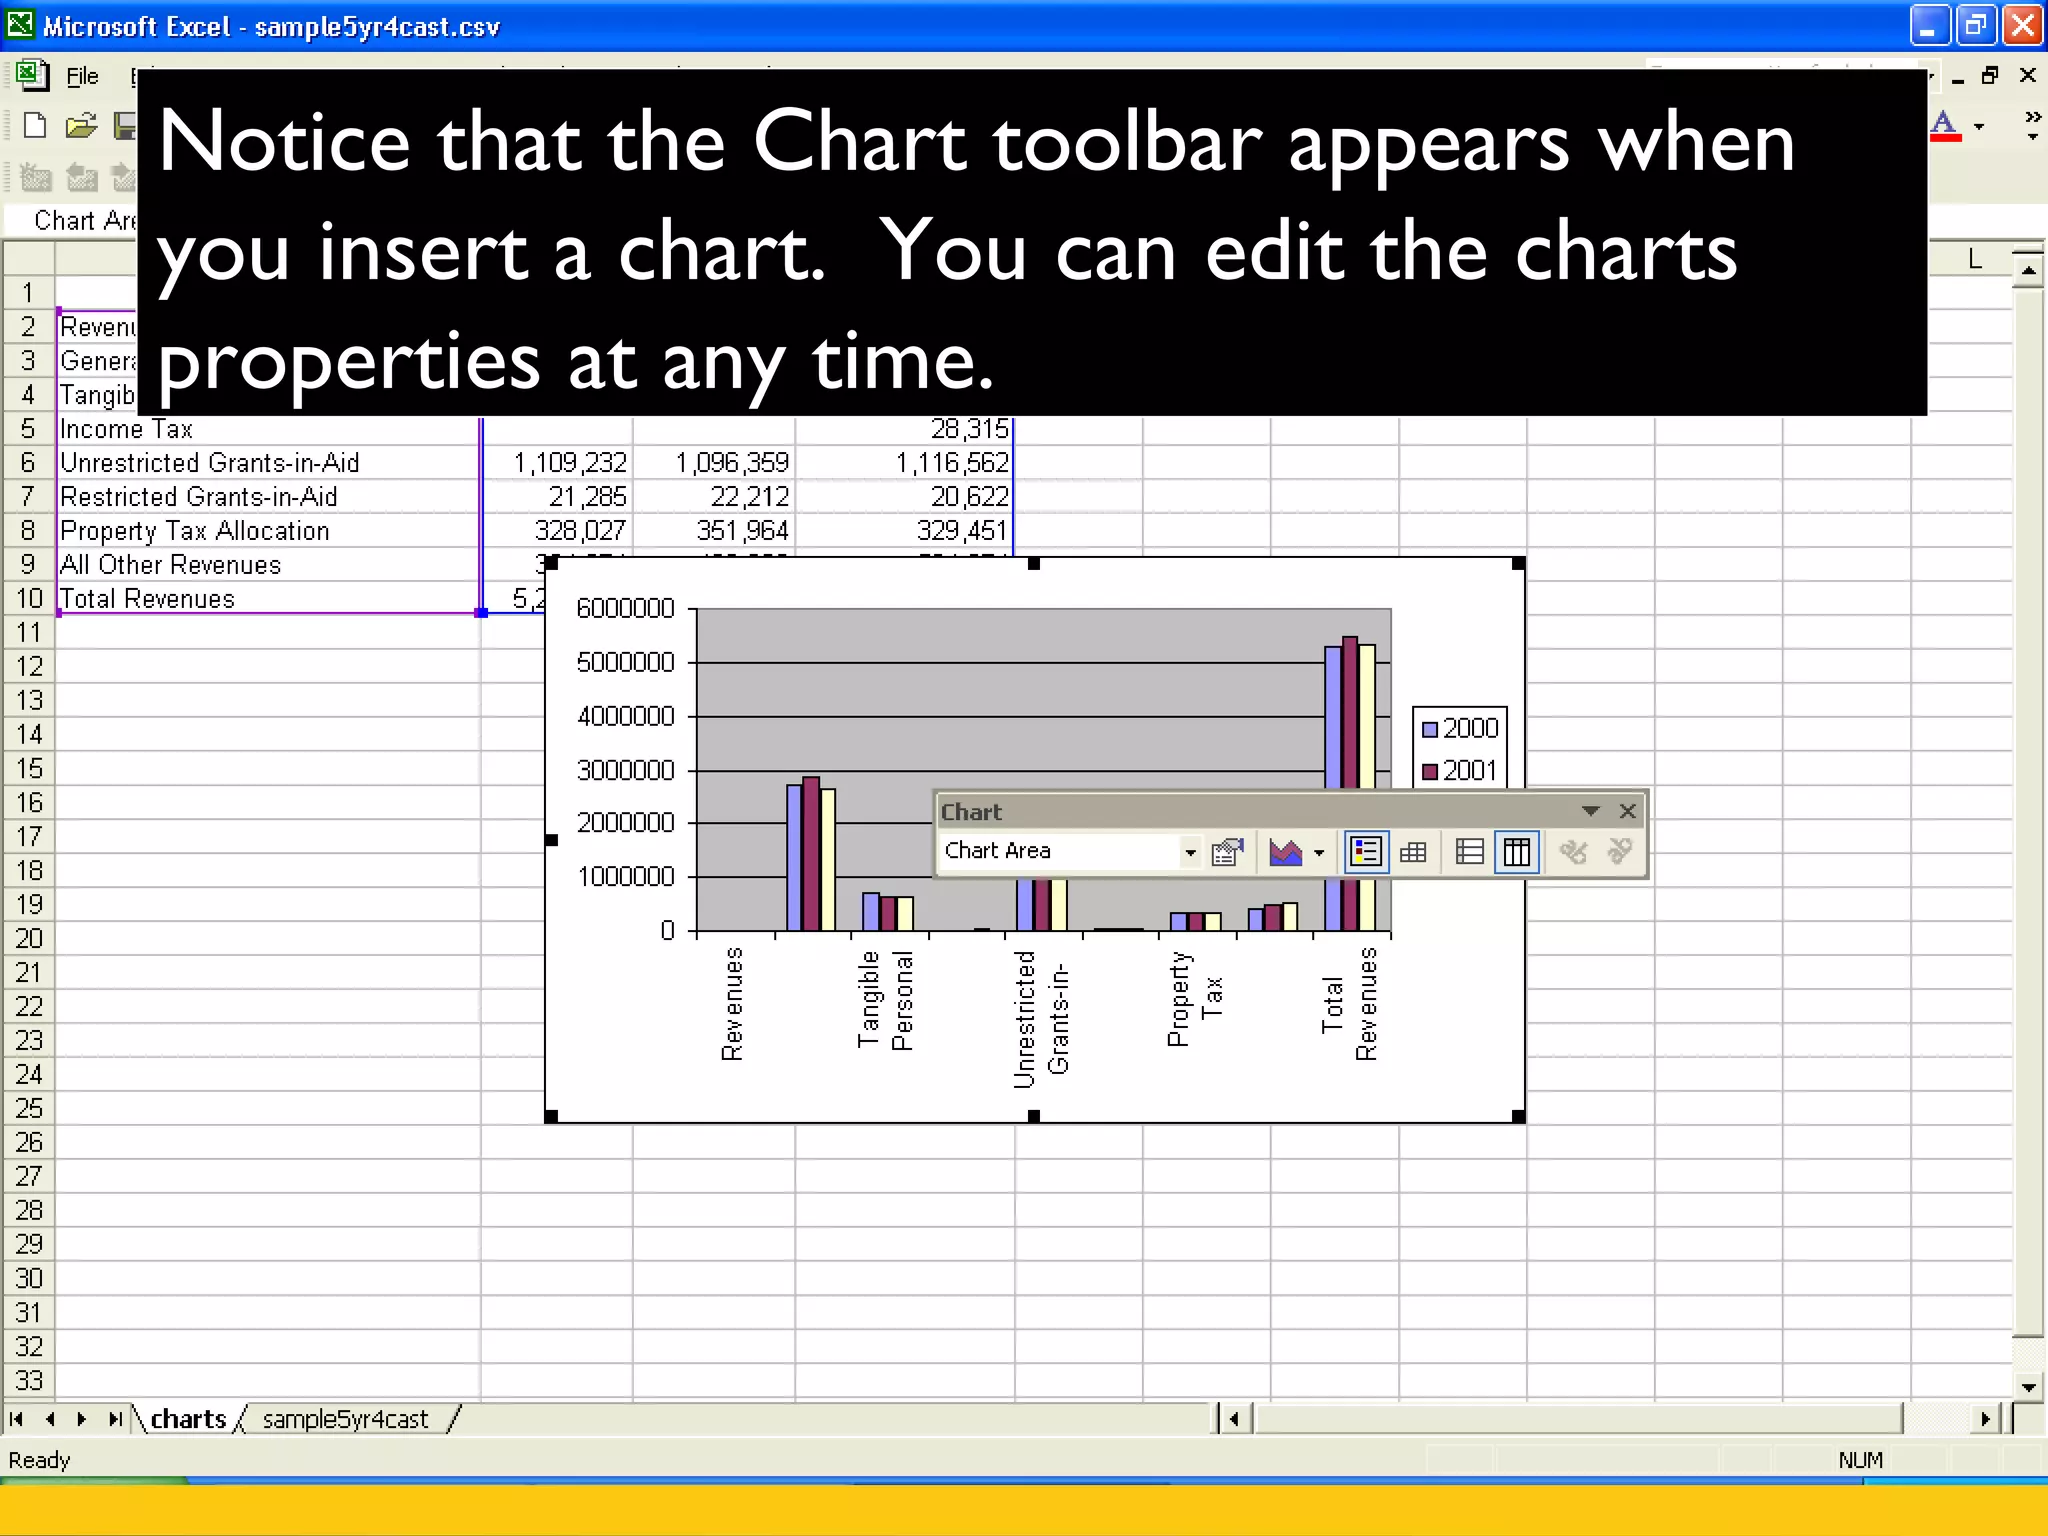
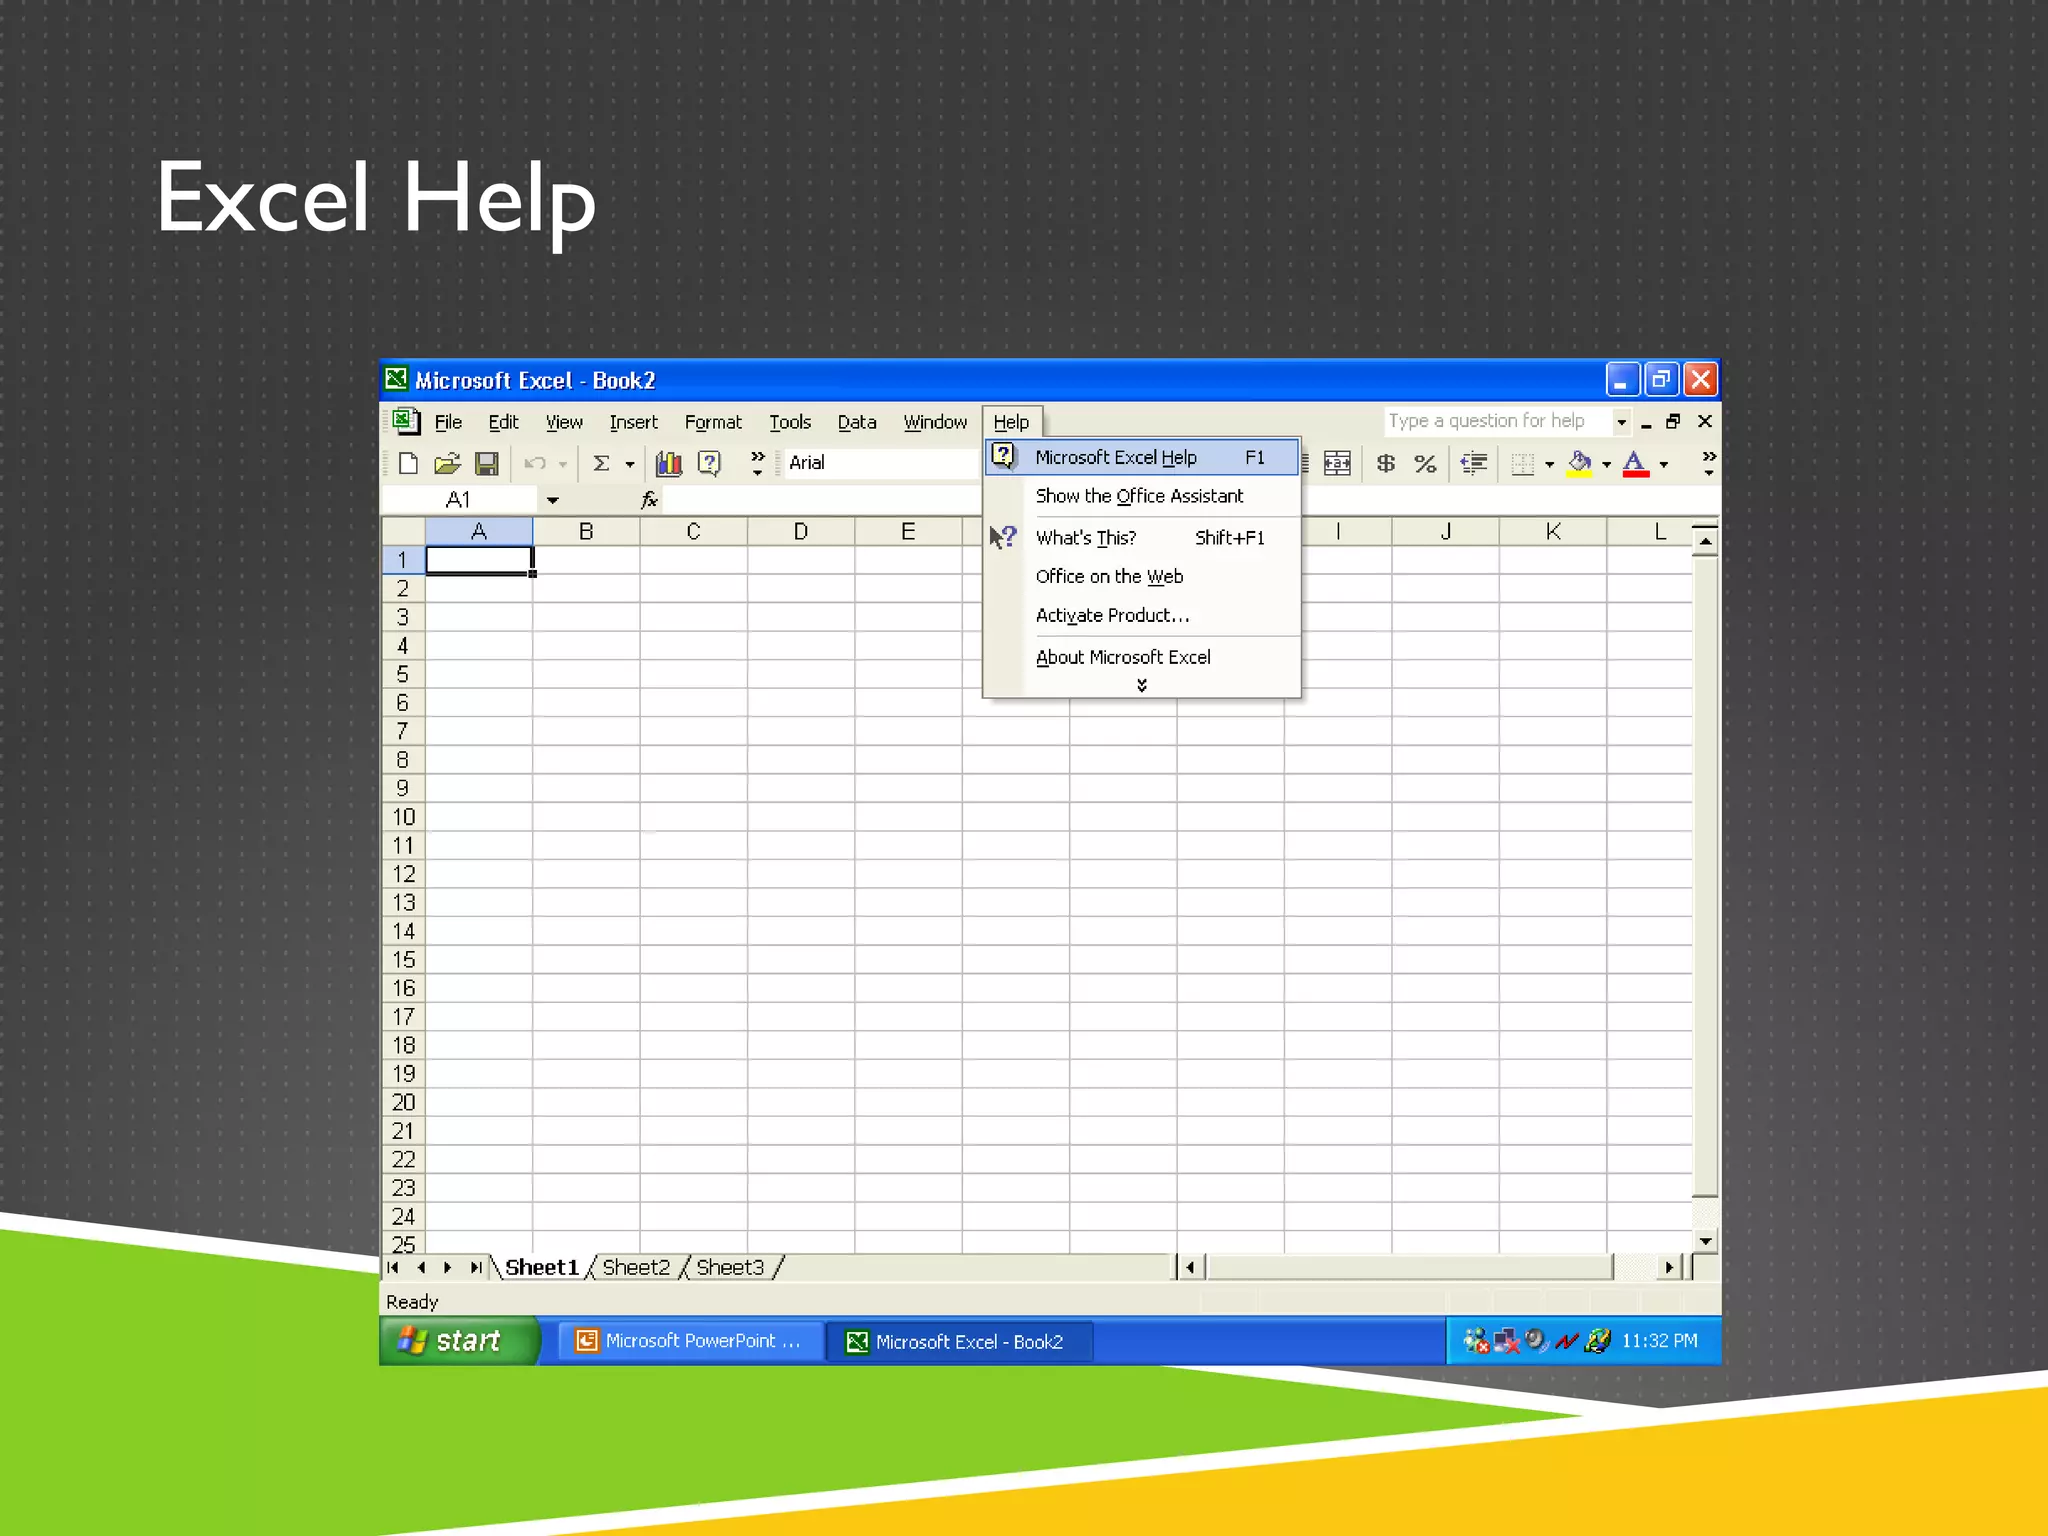
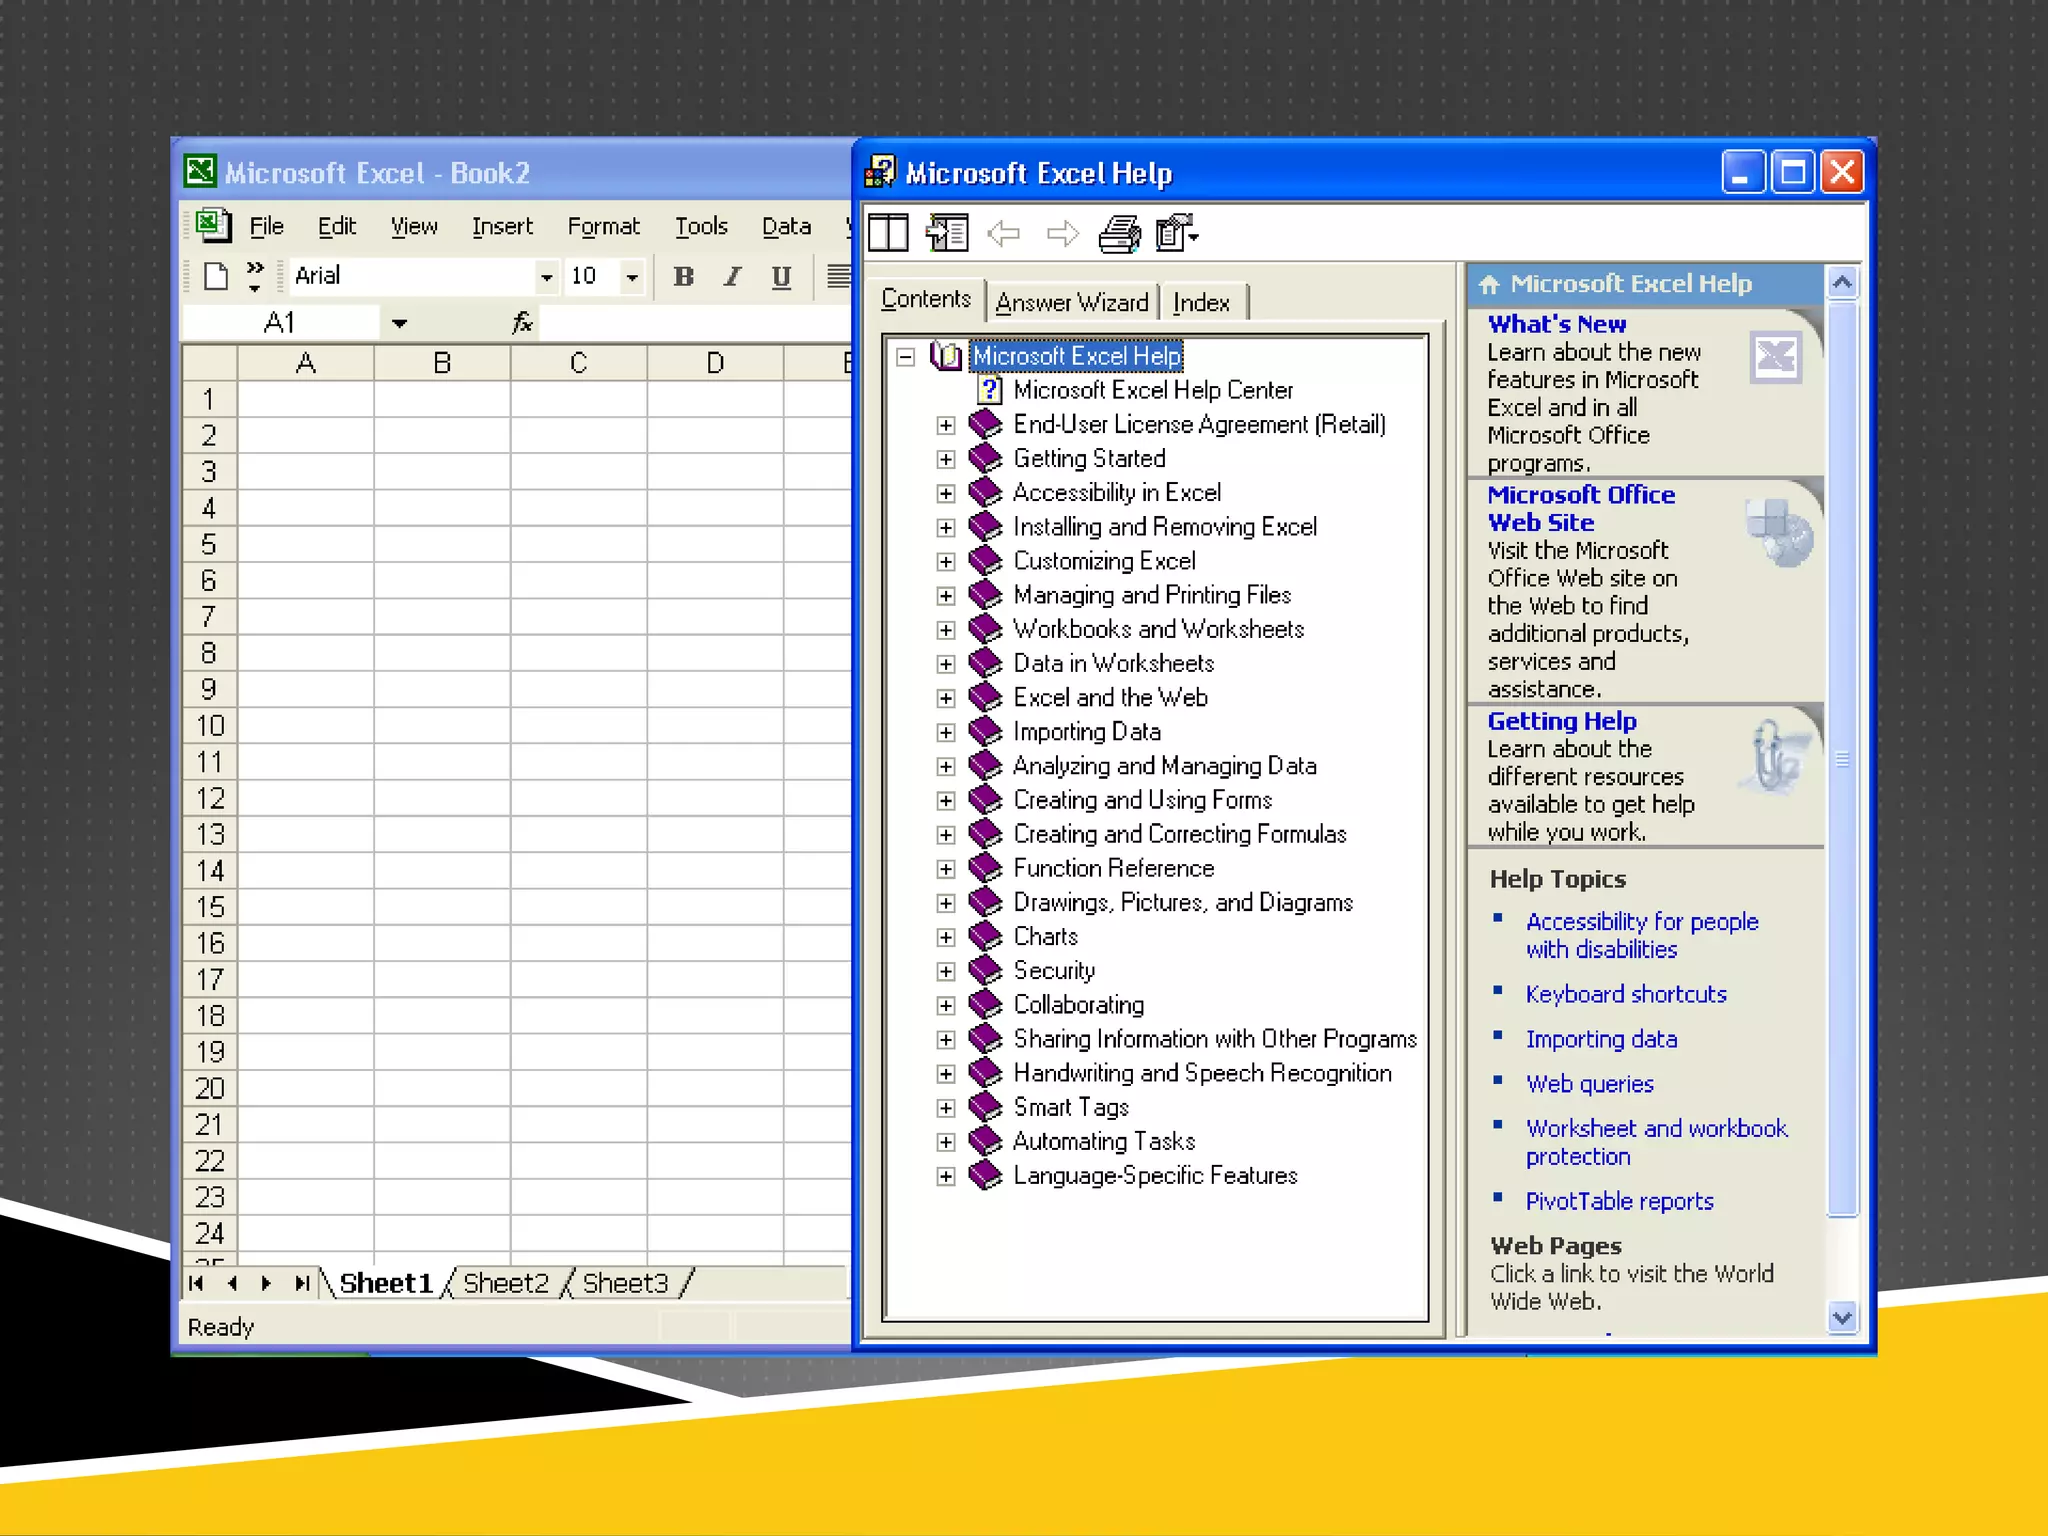
Microsoft Excel is a spreadsheet application
developed by Microsoft. It features calculation,
graphing tools etc. Excel forms part of Microsoft
Office.
Spreadsheet is a type of application program
which manipulates numerical and string data in
rows and columns of cells.
Workbook is a collection of worksheets or
spreadsheets.
3. The Basics
Starting Excel.
By default, Excel will open a blank workbook
that contains three worksheets
(spreadsheets).
4. The Title Bar is located at the very top of the screen. On the Title bar, Microsoft
Excel displays the name of the workbook you are currently using. At the top of your
screen, you should see "Microsoft Excel - Book1" or a similar name.
The Menu Bar is directly below the Title bar and displays the menu. The menu
begins with the word File and continues with the following: Edit, View, Insert, Format,
Tools, Data, Window, and Help. You use the menu to give instructions to the
software. Point with your mouse to a menu option and click the left mouse button. A
drop-down menu will appear. You can now use the left and right arrow keys on your
keyboard to move left and right across the Menu bar options. You can use the up and
down arrow keys to move up and down the drop-down menu. To select an option,
highlight the item on the drop-down menu and press Enter.
8. Microsoft Excel consists of worksheets. Each worksheet contains columns and
rows. The columns are lettered A to IV; the rows are numbered 1 to 65536.
The combination of column and row coordinates make up a cell
address. For example, the cell located in the upper left corner of the worksheet
is cell A1, meaning column A, row 1. Cell E10 is located under column E on row
10. You enter your data into the cells on the worksheet.
10. Entering Data into a Worksheet
To enter data, first make the cell in which you want to enter the data
active by clicking it.
Enter the data (text, formulas, dates, etc.) into the active cell.
Use the Alt+Enter key combination to enter text on multiple lines
within the same cell.
UseTAB key, arrow keys, or ENTER key to navigate among the cells.
12. Cells can be
formatted to help
handle various types
of data. Right click
on a single cell, or a
group of cells, and
select “Format Cells”
from the drop down
menu.
Format CELLS
13. Brief descriptions
of format types can
be seen at the
bottom of the
dialog box. Take a
moment to look
through the
various formatting
options.
14. To change column width:
Put cursor on line between
two columns and drag to the
right to the desired width
17. Sorting data is sometimes necessary.
This data is currently in alphabetical
order by last name.
18.
19. Filter
In order to select a particular form of data from the
numerous cells, we need to filter the data. Filtering
helps us to separate the data we need from the data we
do not need. To Filter the data, we have to click on the
filter tab.
20. To insert an additional
worksheet inside this
workbook, click on
Insert/Worksheet.
21. You can rename the
new sheet by right
clicking on its tab at the
bottom, and selecting
“Rename” from the
menu.
22. Copy/Cut & Paste:
To copy/cut the
data, highlight
from cell through
cell and copy the
data. Paste it on
the new sheet.
23. Copy the Fall worksheet to the worksheets,Winter, Spring, and
Summary
1. Click top of worksheet to
select the entire worksheet
2. Click Copy icon
24. 2. Click on Cell A1
3. Click Paste
4. Change the title to Winter Budget
1. Click Winter Tab
5. Follow the instructions to paste the Fall worksheet
into the Spring and Summary Worksheets
25. To draw charts and graphs,
highlight the data you want to
graphically represent. Then click
the chart wizard icon on your
toolbar.
Charts and Graphs
27. Notice that the Chart toolbar appears when
you insert a chart. You can edit the charts
properties at any time.
28. Formulas and Functions
Formulas are equations that perform calculations on
values in your worksheet.A formula starts with an
equal sign (=). For example, the following formula
multiplies 2 by 3 and then adds 5 to the result. =5+2*3
Functions are predefined formulas that perform
calculations by using specific values, called arguments, in
a particular order, or structure. Functions can be used
to perform simple or complex calculations.
29. Looking at cell I19, we
can see that there are no
special functions
associated with the data.
Using a simple function
can help make regular
updates to the data
easier.
30. For example, if you click
on the Autosum button
while cell I19 is selected,
Excel will identify the
cells to include when
calculating a total amount.
Hit enter to lock the
sum in. Notice that the
function reads:
=SUM(I12:I18)
31. The same can be done using a
formula, instead of a function.
=I12+I13+I14+I15+I16+I17+I18
This long expression helps to
show why functions are handy
tools.
32. Click on the small
down arrow next to
the function symbol
(the epsilon). Select
“More Functions.”