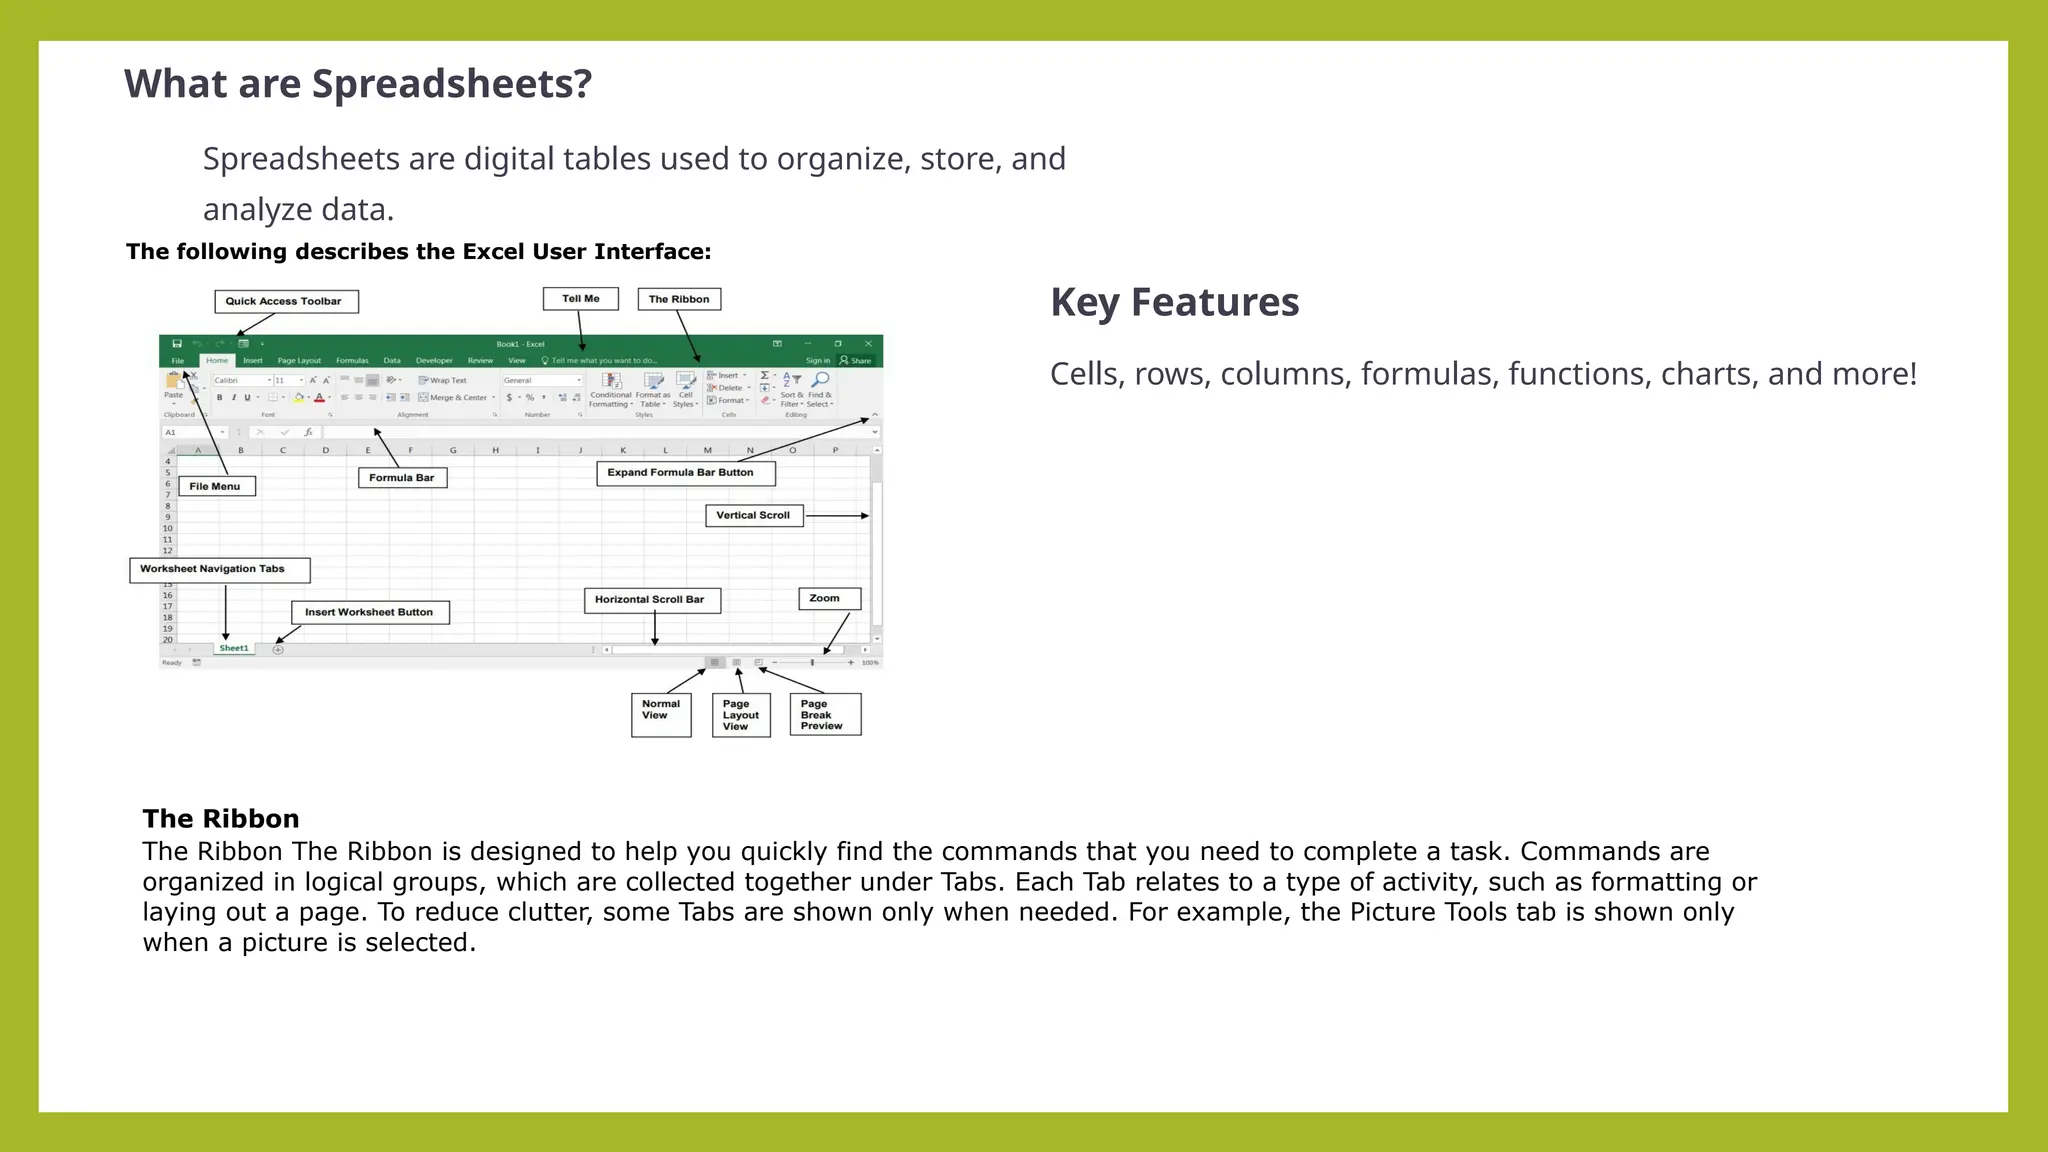
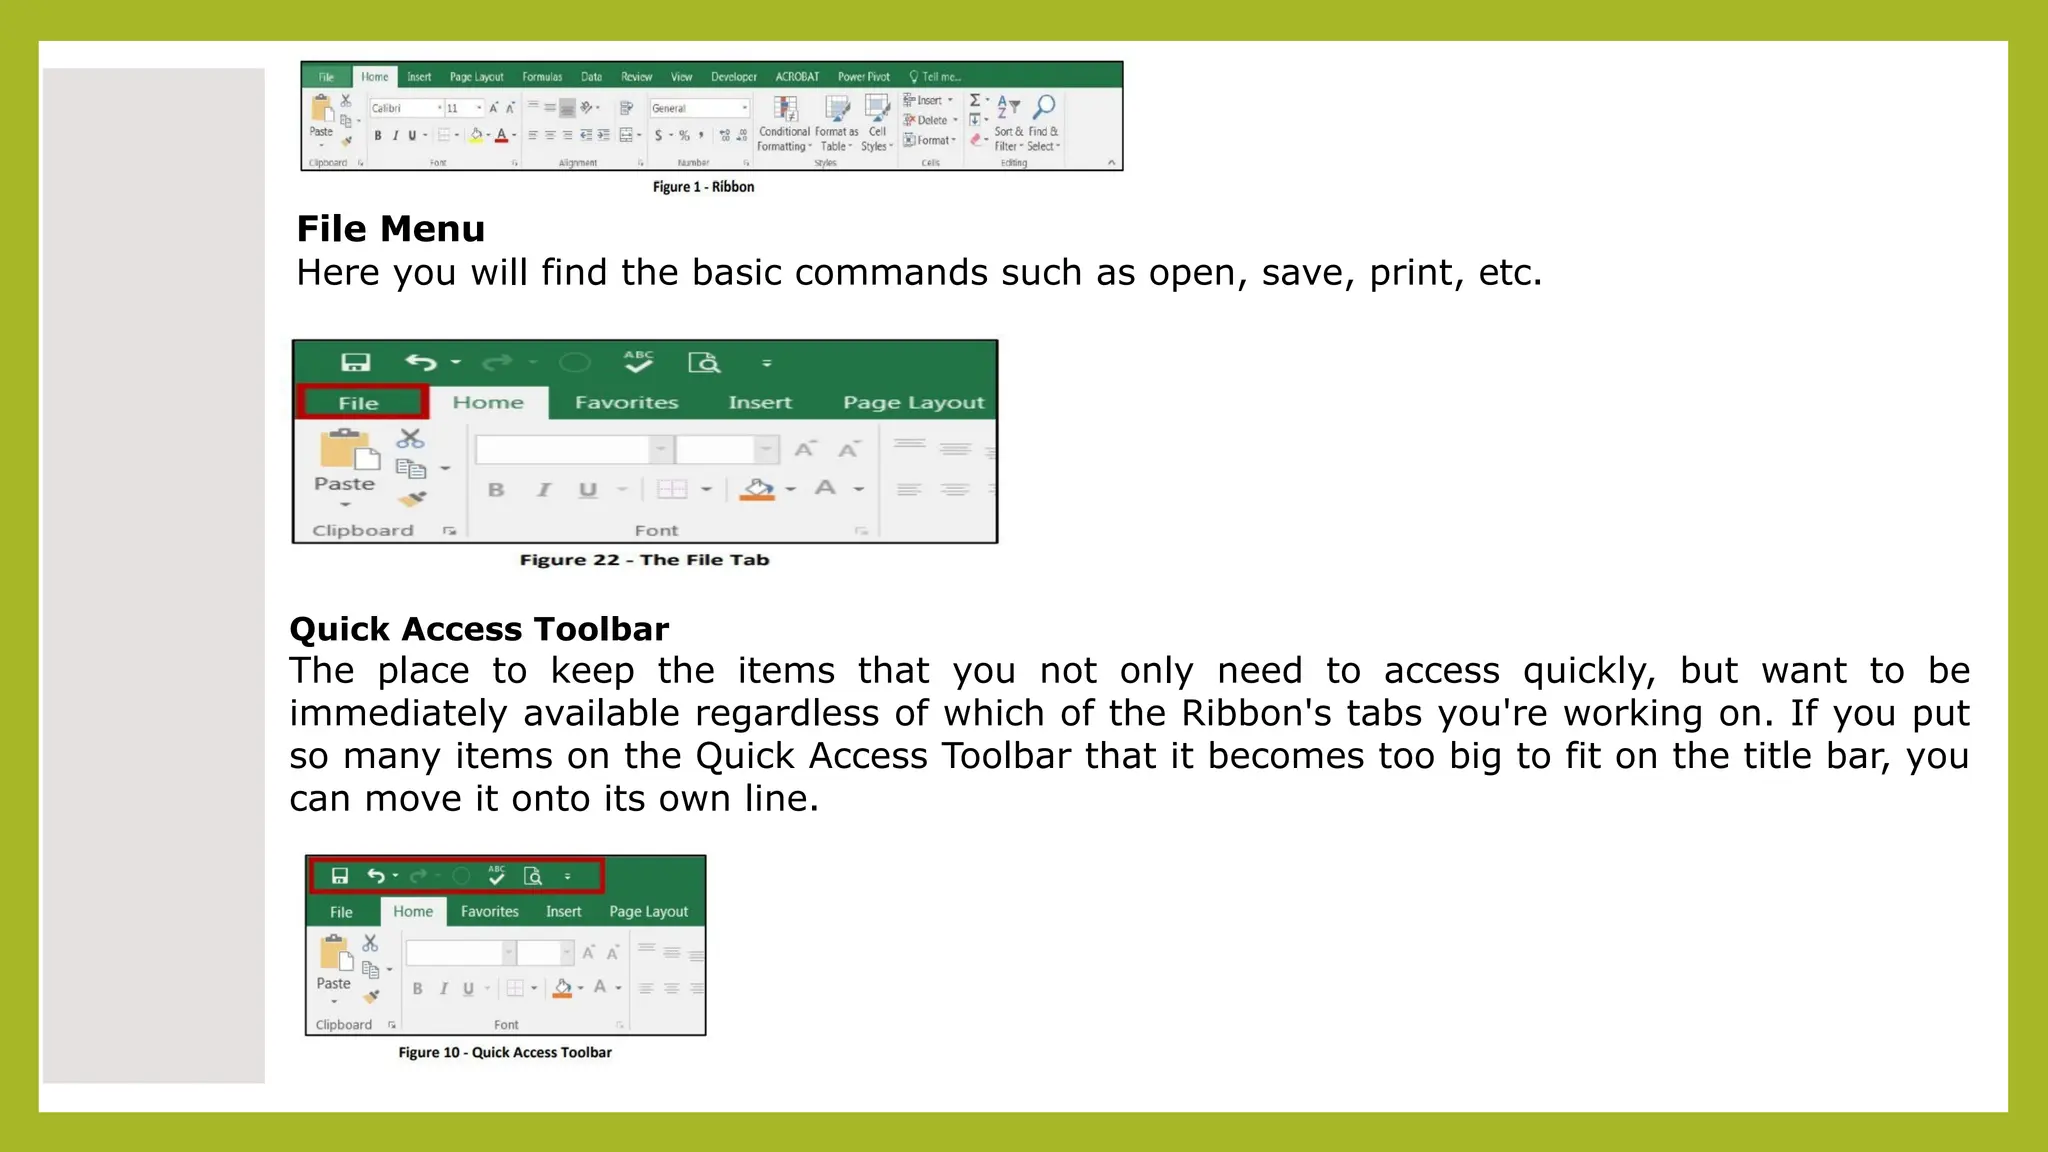
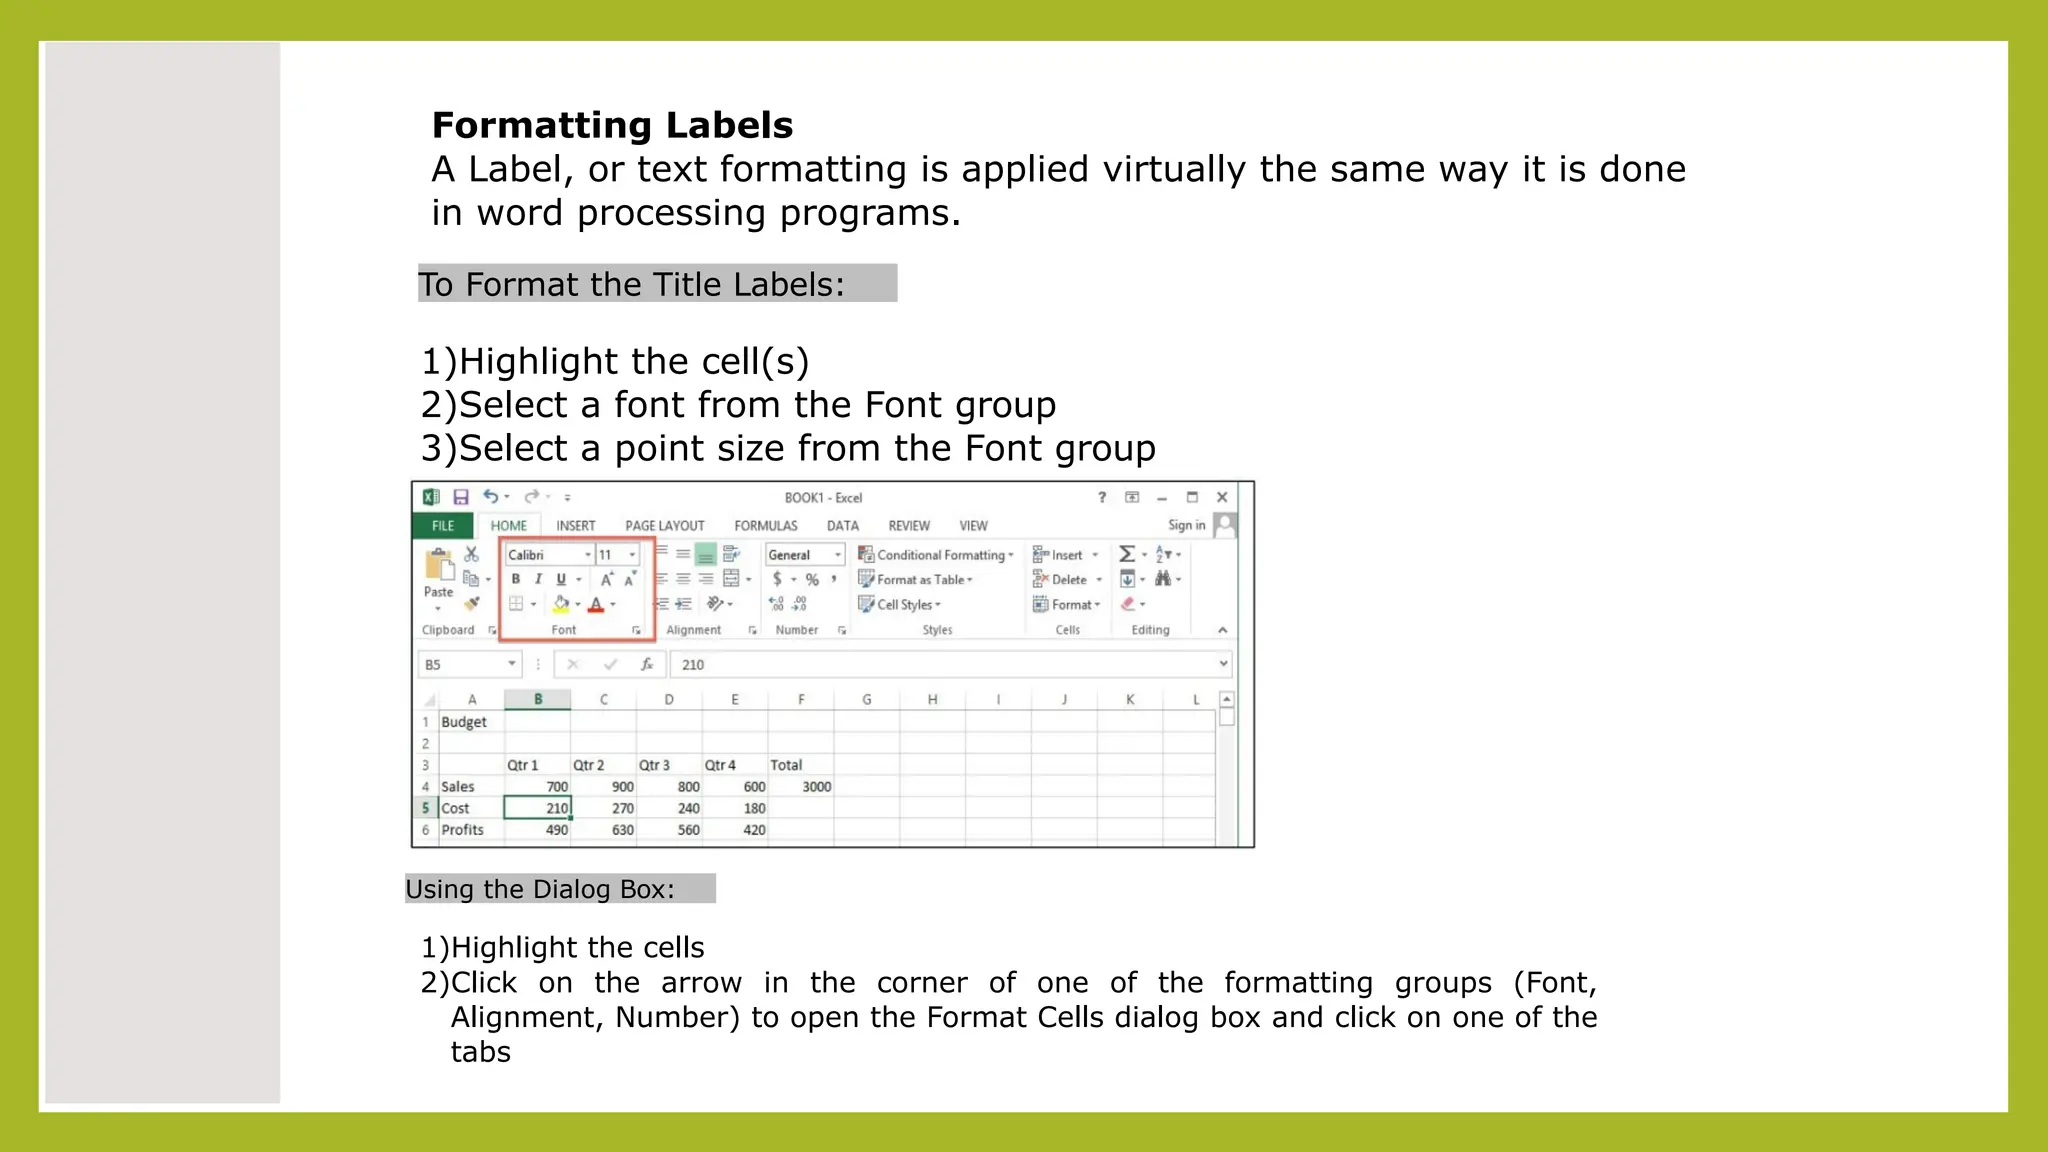
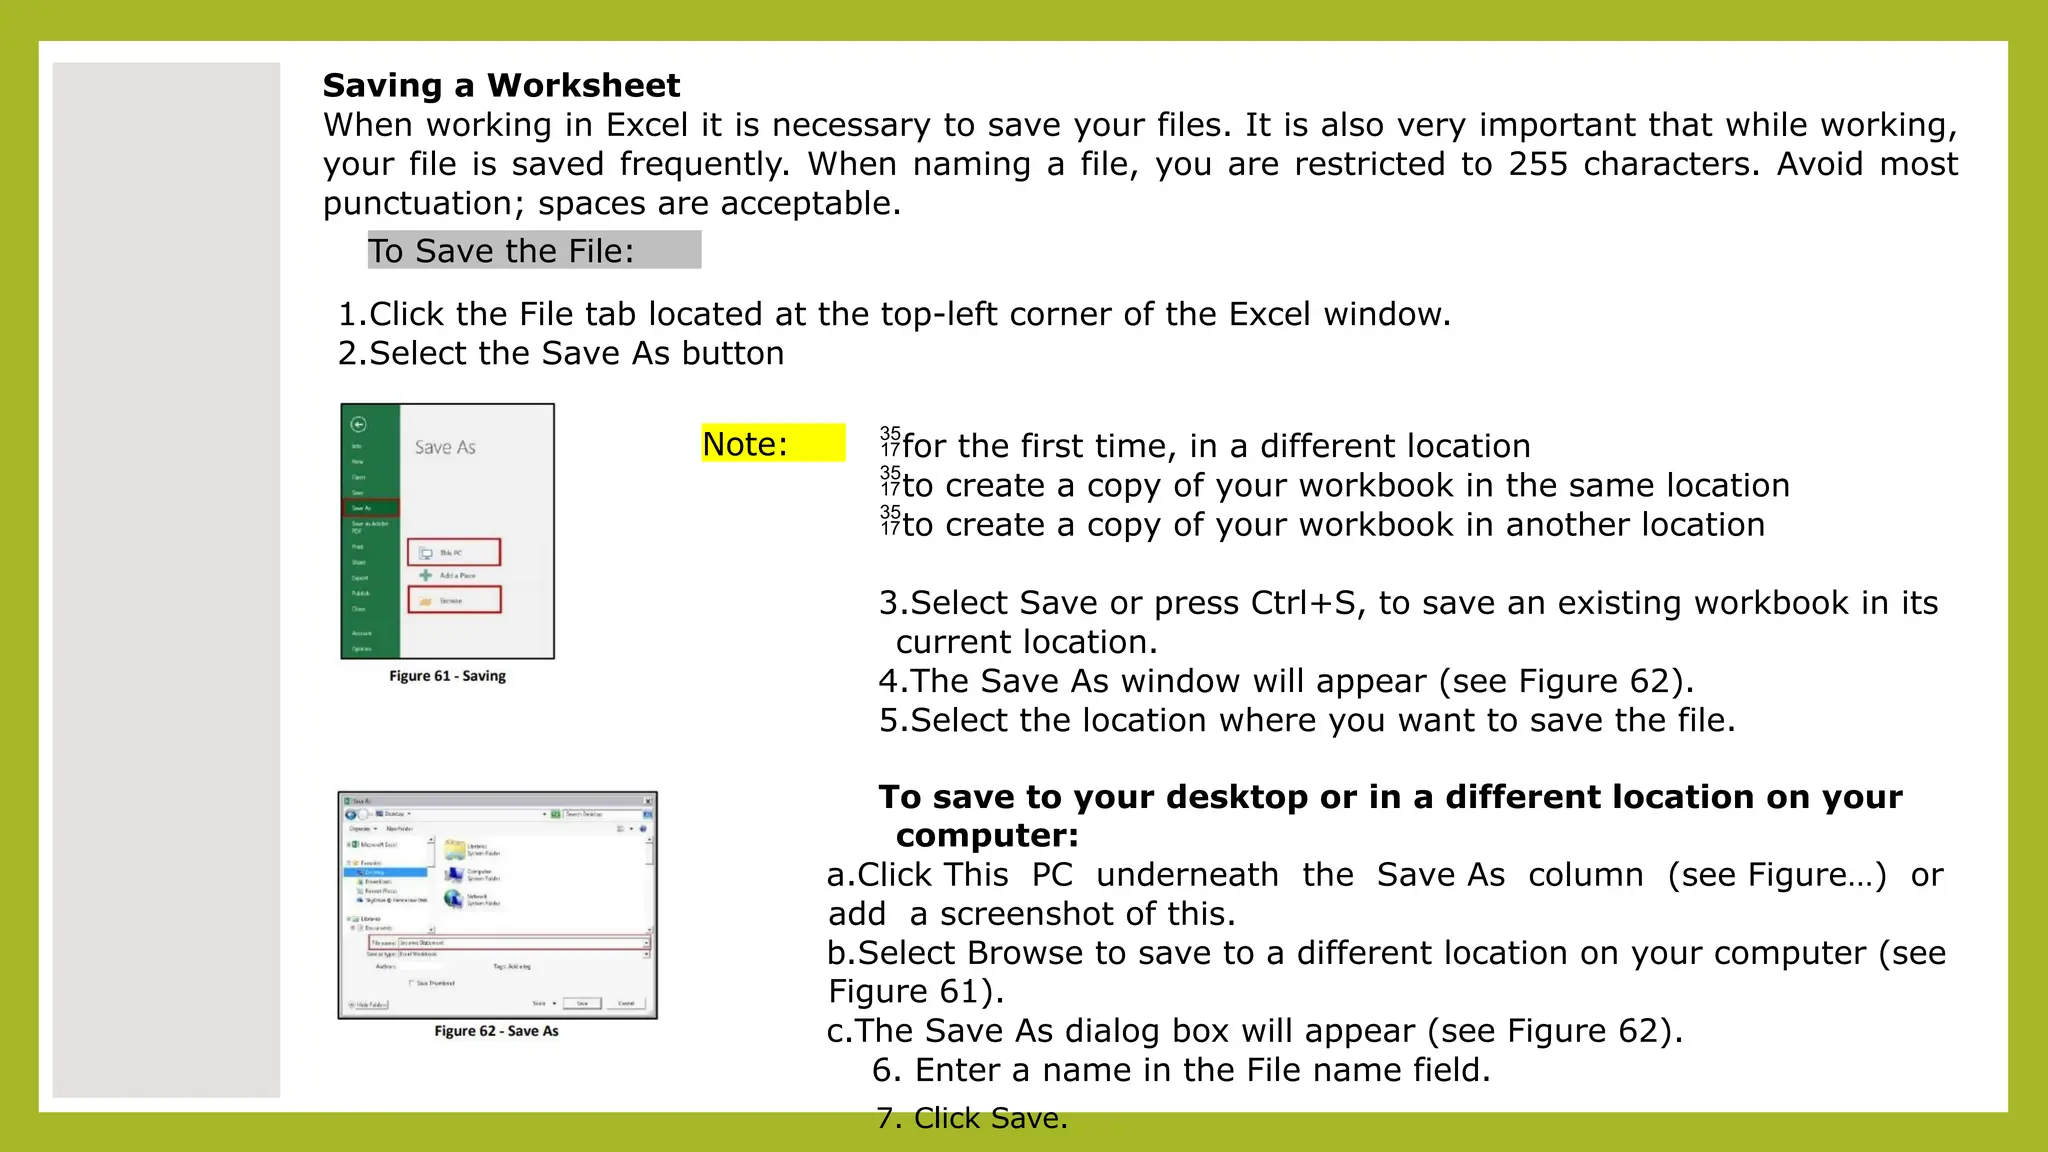
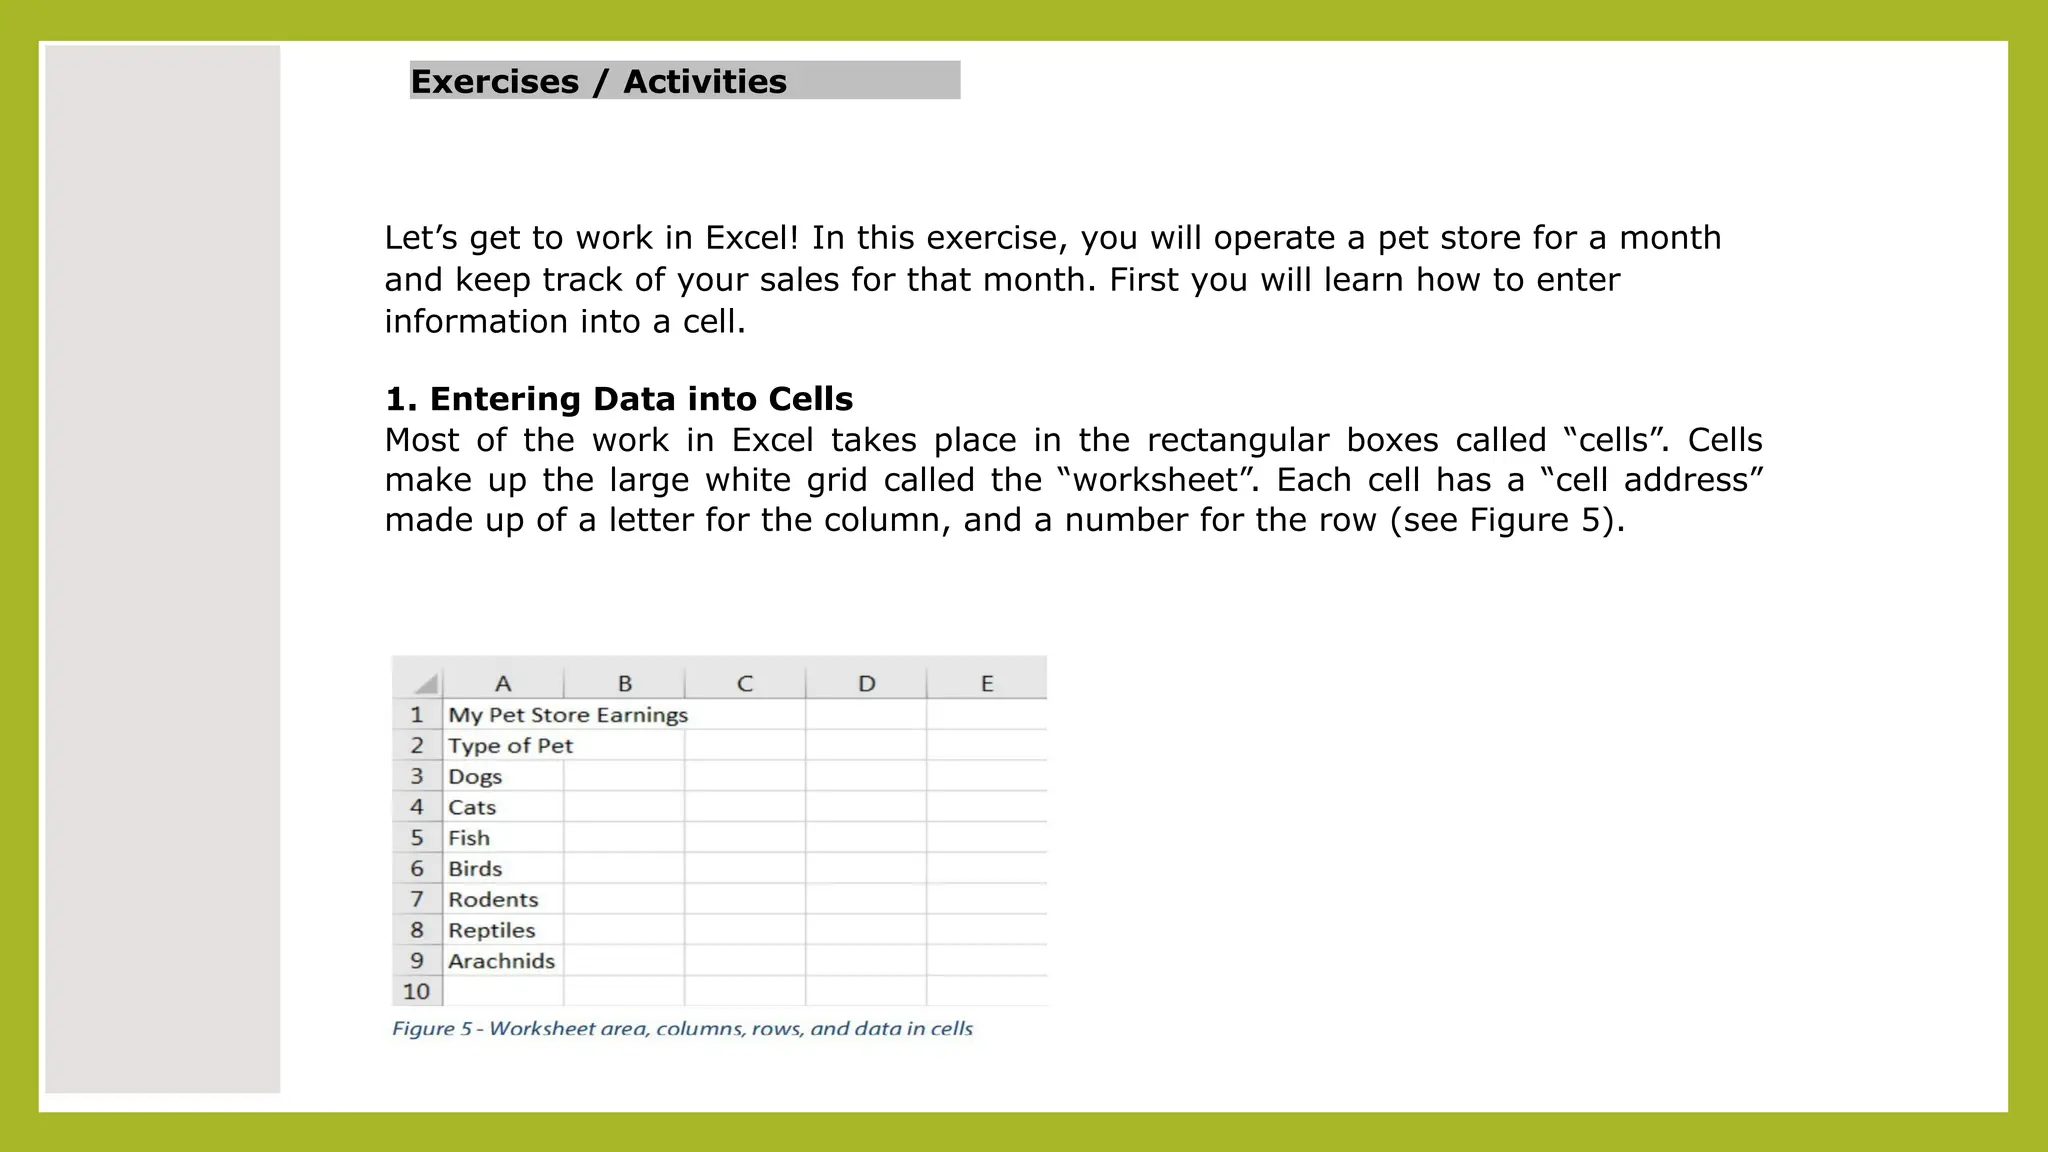
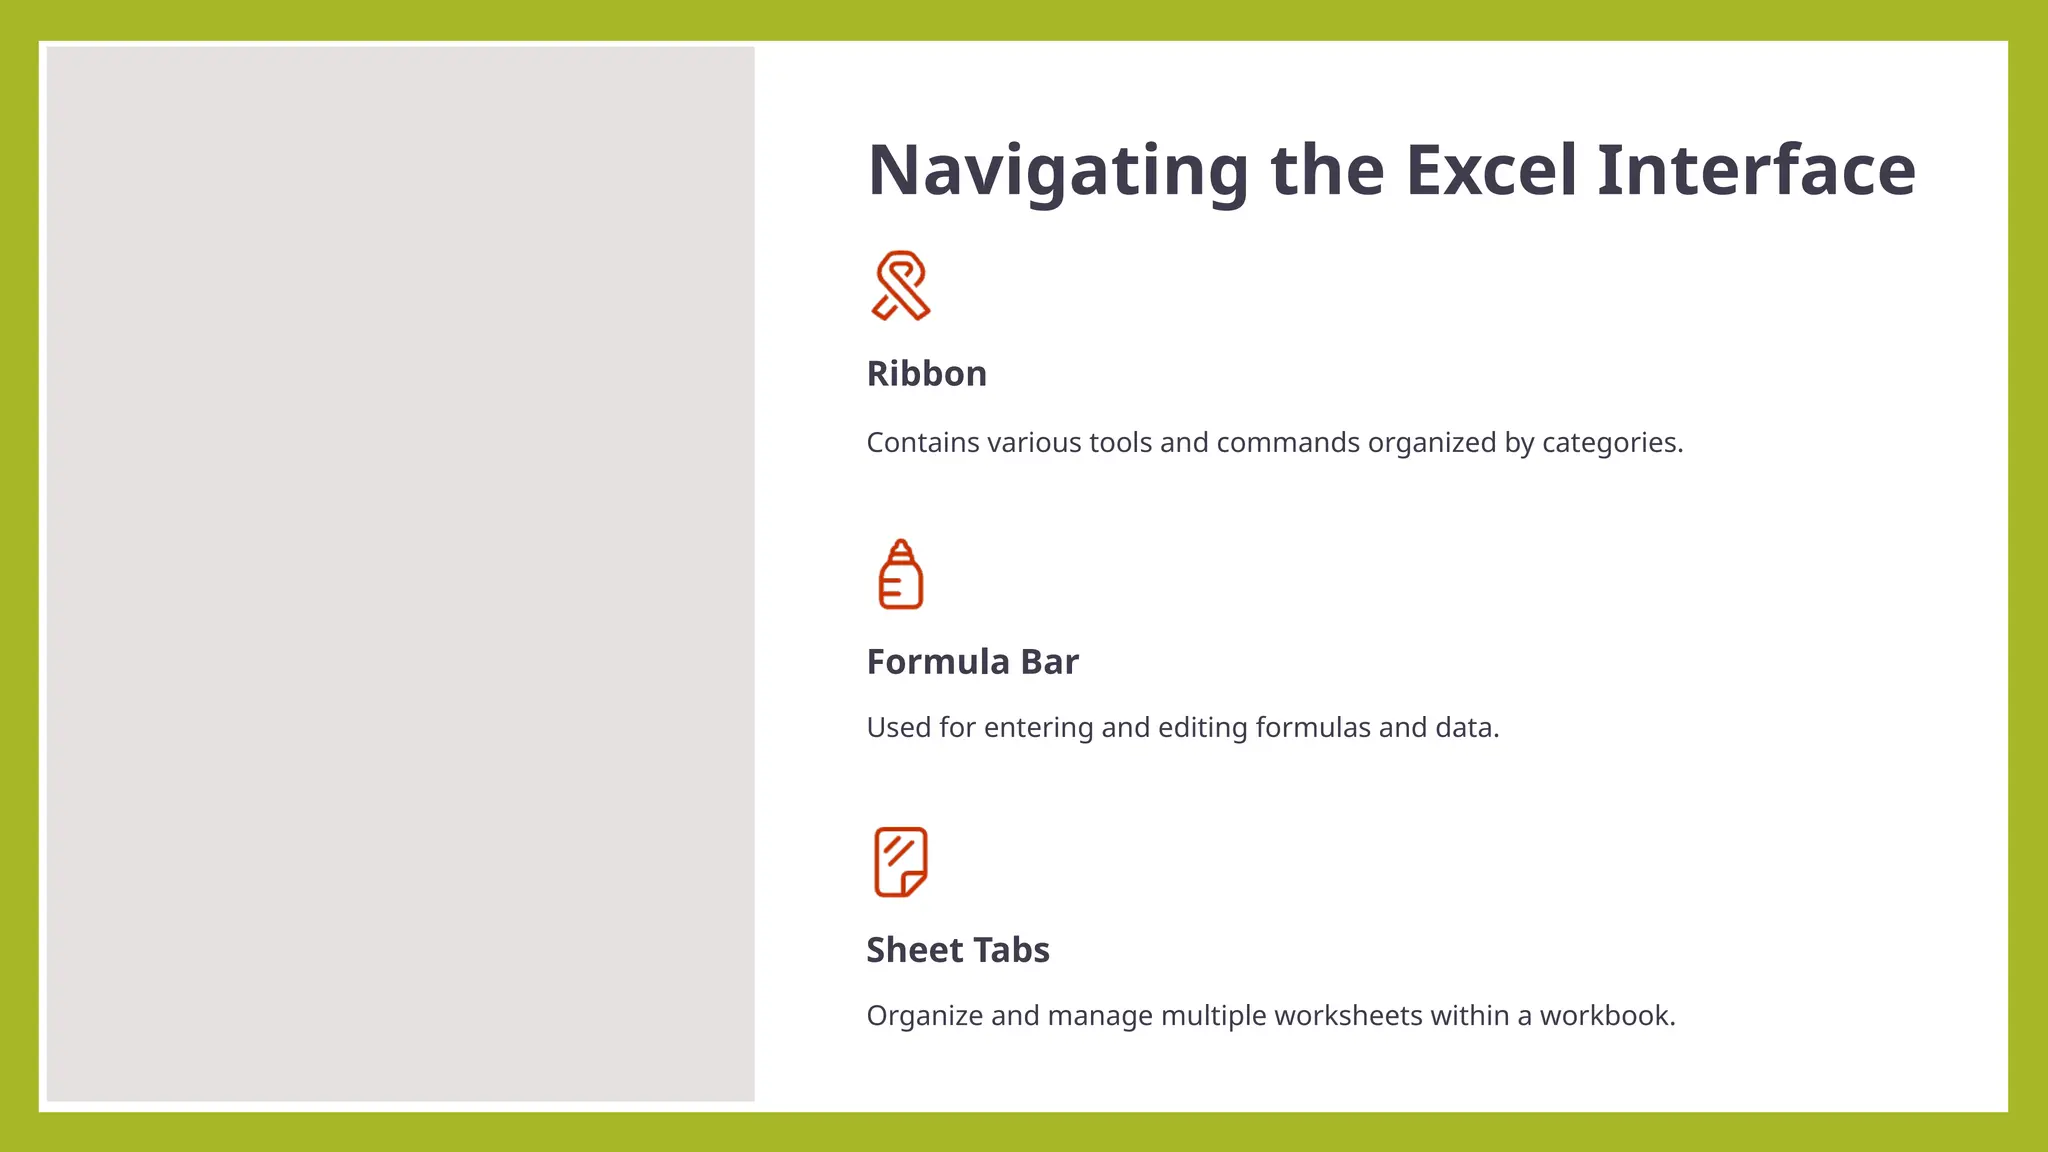
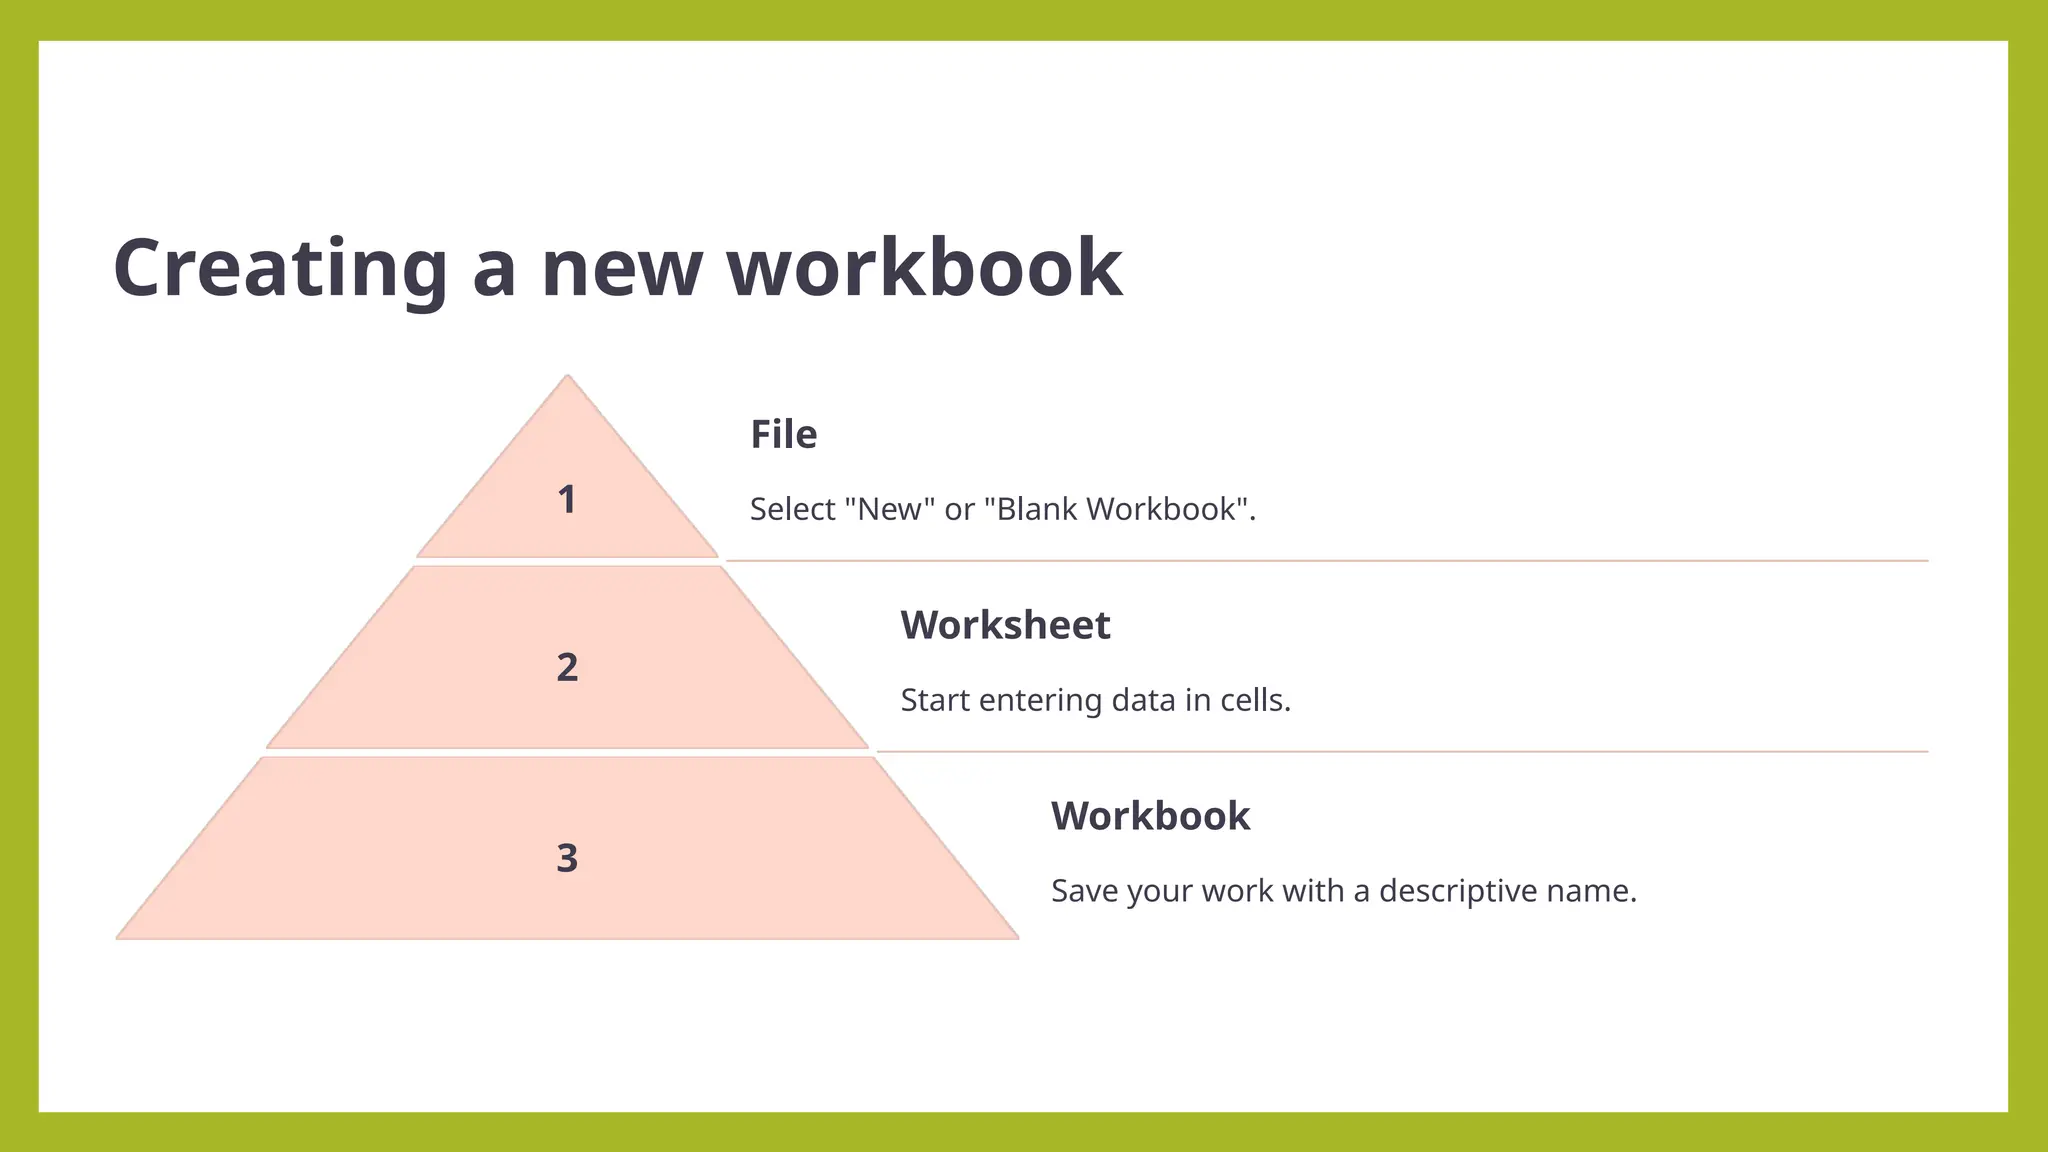
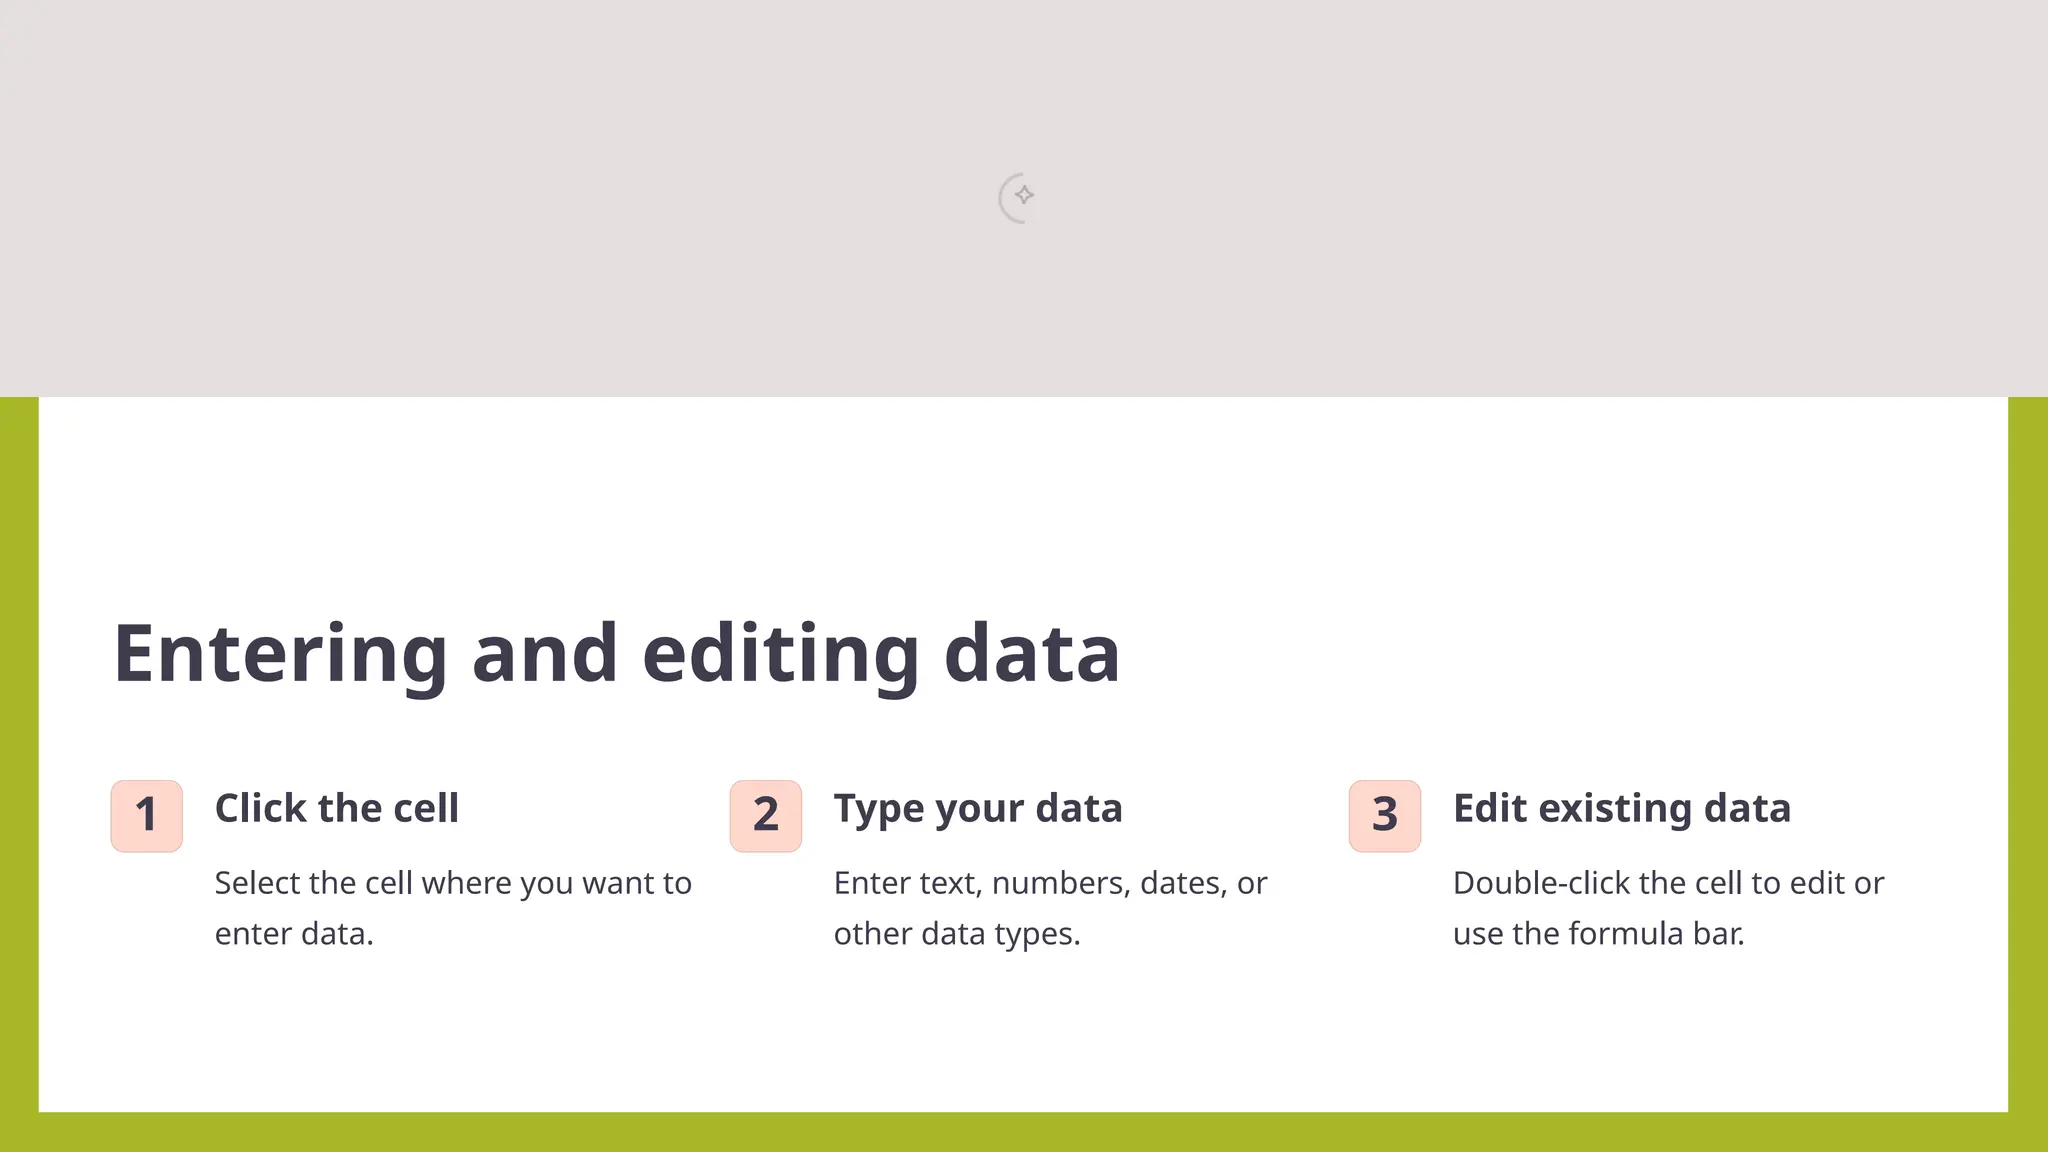
Getting Started with MS Excel
Excel is a spreadsheet program that allows you to store, organize,
and manipulate data. Data can be text, numbers, and formulas. The
data is entered into cells which are organized into columns and
rows. Many people use Excel to keep a budget, use charts and
graphs to show data, track sales for a business, and much more.
□Excel is a computer program used to create electronic
spreadsheets.
□Within excel user can organize data, create chart and
perform calculations.
□Excel is a convenient program because it allow user to
create large
spreadsheets, reference information, and it allows for better
storage of information.
Introduction to spreadsheets
□Excels operates like other Microsoft(MS) office
programs and has many of the same functions and
shortcuts of other MS programs.
□Microsoft excel consists of workbooks. Within each
workbook, there is an infinite number of worksheets.
□Each worksheet contains Columns and Rows.
□Where a column and a row intersect is called a cell. For
e.g. cell D5 is located where column D and row 5 meet.
□The tabs at the bottom of the screen represent different
worksheets within a
workbook. You can use the scrolling buttons on the left to
bring other worksheets into view.
What are Spreadsheets?
Spreadsheets are digital tables used to organize, store, and
analyze data.
Key Features
Cells, rows, columns, formulas, functions, charts, and more!
The following describes the Excel User Interface:
The Ribbon
The Ribbon The Ribbon is designed to help you quickly find the commands that you need to complete a task. Commands are
organized in logical groups, which are collected together under Tabs. Each Tab relates to a type of activity, such as formatting or
laying out a page. To reduce clutter, some Tabs are shown only when needed. For example, the Picture Tools tab is shown only
when a picture is selected.
File Menu
Here you will find the basic commands such as open, save, print, etc.
Quick Access Toolbar
The place to keep the items that you not only need to access quickly, but want to be
immediately available regardless of which of the Ribbon's tabs you're working on. If you put
so many items on the Quick Access Toolbar that it becomes too big to fit on the title bar, you
can move it onto its own line.
Tell Me
This is a text field where you can enter words and phrases about what you want to do
next and quickly get to features you want to use or actions you want to perform. You
can also use Tell Me to find help about what you're looking for, or to use Smart Lookup
to research or define the term you entered.
Formula Bar
A place where you can enter or view formulas or text. Expand Formula Bar Button
This button allows you to expand the formula bar. This is helpful when you have either
a long formula or large piece of text in a cell.
Worksheet Navigation Tabs
By default, every workbook starts with 1 sheet.
Insert Worksheet Button
Click the Insert New Worksheet button to insert a new worksheet in your workbook.
Horizontal/Vertical Scroll
Allows you to scroll vertically/horizontally in the worksheet.
Normal View
This is the “normal view” for working on a spreadsheet in Excel.
Page Layout View
View the document as it will appear on the printed page.
Page Break Preview
View a preview of where pages will break when the document is printed.
Zoom Level
Allows you to quickly zoom in or zoom out of the worksheet.
Backstage View
In Backstage view, you can do the following:
Save and close spreadsheets
Obtain information about spreadsheets
See recent files created and edited
Create new spreadsheets and templates
Share and Export spreadsheets
Print spreadsheets
Obtain help
Close the Excel workbook
Columns and Rows
Column – A vertical line of cells. A letter identifies each column. Notice the Name field
contains the column letter and row number of the first cell of the highlighted range of
cells in the column.
Row – A horizontal line of cells. A number identifies each row. Notice the Name field
contains the column letter and row number of the first cell in the highlighted range of
cells in the row.
Navigating in the Excel Environment Below is a table that will
assist you with navigating/moving around in the Excel
environment.
Highlighting/Selecting Areas Using the Mouse
To Select a Column: Click on the column letter
To Select a Row: Click on the row number
To Select the Entire Worksheet: Click above row 1 and to the left
of column A or hit CTRL A on the keyboard
Entering Text
Any items that are not to be used in calculations are considered, in
Excel’s terminology, labels. This includes numerical information, such
as phone numbers and zip codes. Labels usually include the title,
column and row headings.
To Enter Text/Labels:
1)Click in a cell
2)Type text
3)Press Enter
NOTE: By default, pressing the Enter key will move you
to the cell below the
active cell.
The label actually “lives” in the cell you typed it into. If you type
long text it might appear to be in multiple columns. It is important
to understand this concept when trying to apply formatting to a
cell. Using the formula bar will confirm where the label actually
“lives.”
Autofill
Frequently, it is necessary to enter lists of information. For example, column headings
are often the months of the year or the days of the week. To simplify entering
repetitive or sequential lists of information, Excel has a tool called Autofill. This tool
allows preprogrammed lists, as well as custom lists, to be easily added to a
spreadsheet.
Entering Values
Numerical pieces of information that will be used for calculations are called values.
They are entered the same way as labels. It is important NOT to type values with
characters such as “,” or “$”.
To Enter Values:
1)Navigate to a cell
2)Type a value
3)Press Enter
Long Words and Numbers Long Words - The text spill into
the neighboring cell. If the neighboring cell contains data,
Excel will display as much of will the text as the column will
allow (see Figure 28). Long Numbers - Excel will display the
number in scientific form or as number signs (##) (see
Figure 28).
Formatting Values
Applying formats to any cell(s) can be done either using
the Font, Alignment and Number groups or using the
dialog box which will include all the formatting options.
To Apply the Currency Format:
1)Highlight the cell(s)
2)Click on the Currency Style button
3) If necessary, click on the Increase or Decrease Decimal button on the Number group
To Apply the Comma Format:
1)Highlight cells
2)Click on the Comma Style button on the Number group
3)If necessary, click on the Increase or Decrease Decimal
button Number group
Formatting Labels
A Label, or text formatting is applied virtually the same way it is done
in word processing programs.
To Format the Title Labels:
1)Highlight the cell(s)
2)Select a font from the Font group
3)Select a point size from the Font group
Using the Dialog Box:
1)Highlight the cells
2)Click on the arrow in the corner of one of the formatting groups (Font,
Alignment, Number) to open the Format Cells dialog box and click on one of the
tabs
Saving a Worksheet
When working in Excel it is necessary to save your files. It is also very important that while working,
your file is saved frequently. When naming a file, you are restricted to 255 characters. Avoid most
punctuation; spaces are acceptable.
To Save the File:
1.Click the File tab located at the top-left corner of the Excel window.
2.Select the Save As button
Note: for the first time, in a different location
to create a copy of your workbook in the same location
to create a copy of your workbook in another location
3.Select Save or press Ctrl+S, to save an existing workbook in its
current location.
4.The Save As window will appear (see Figure 62).
5.Select the location where you want to save the file.
To save to your desktop or in a different location on your
computer:
a.Click This PC underneath the Save As column (see Figure…) or
add a screenshot of this.
b.Select Browse to save to a different location on your computer (see
Figure 61).
c.The Save As dialog box will appear (see Figure 62).
6. Enter a name in the File name field.
7. Click Save.
Exercises / Activities
Let’s get to work in Excel! In this exercise, you will operate a pet store for a month
and keep track of your sales for that month. First you will learn how to enter
information into a cell.
1. Entering Data into Cells
Most of the work in Excel takes place in the rectangular boxes called “cells”. Cells
make up the large white grid called the “worksheet”. Each cell has a “cell address”
made up of a letter for the column, and a number for the row (see Figure 5).
Follow these steps to recreate Figure 5:
1.Click into cell A1
2.Type “My Pet Store Earnings”
3.Press “Enter” on the keyboard
4.Type “Type of Pet” in cell A2
5.Continue entering the list of pets shown in Figure 5.
Let’s continue creating this table by adding column
labels:
1.Click into cell B2
2.Type “Number Sold”
3.Press the “Tab” on the keyboard
4.Type “Price” in cell C2
5.Press “Tab”
6.Type “Total per type”
7.The worksheet should look like Figure 6.
2. Basic Formatting - Values
The numbers you type into a cell are called “values”. Working
with values in Excel will begin to show you the power of the
software.
Follow these steps to recreate Figure 8:
1.Type the values you see in columns “B” and “C” in Figure 8.
2.Click into cell B3, type “27”, then press “Enter” on the keyboard.
3.Continue until you’ve added all the values in range B3:C9.
Note: When typing the values in column “C” (prices), do not
include the dollar
V. Reflection
Be guided of the following questions in expressing your learnings on
our lesson through this module.
a.What insights have you gained from your activities?
b.What significant values have you developed while doing your
project?
c.What difficulties did you encounter and how did you overcome
them?
Navigating the Excel Interface
Ribbon
Contains various tools and commands organized by categories.
Formula Bar
Used for entering and editing formulas and data.
Sheet Tabs
Organize and manage multiple worksheets within a workbook.
Creating a new workbook
1
File
Select "New" or "Blank Workbook".
2
Worksheet
Start entering data in cells.
3
Workbook
Save your work with a descriptive name.
Entering and editing data
1 Click the cell
Select the cell where you want to
enter data.
2 Type your data
Enter text, numbers, dates, or
other data types.
3 Edit existing data
Double-click the cell to edit or
use the formula bar.
Formatting cells and text
1
Select cells
Select the cells you want to format.
2
Use the Home tab
Access formatting tools like font, color, alignment, and borders.
3
Apply desired formatting
Choose your desired

Getting-Started-with-MS-Excel In information Tech

  • 1.
    Getting Started withMS Excel Excel is a spreadsheet program that allows you to store, organize, and manipulate data. Data can be text, numbers, and formulas. The data is entered into cells which are organized into columns and rows. Many people use Excel to keep a budget, use charts and graphs to show data, track sales for a business, and much more. □Excel is a computer program used to create electronic spreadsheets. □Within excel user can organize data, create chart and perform calculations. □Excel is a convenient program because it allow user to create large spreadsheets, reference information, and it allows for better storage of information. Introduction to spreadsheets
  • 2.
    □Excels operates likeother Microsoft(MS) office programs and has many of the same functions and shortcuts of other MS programs. □Microsoft excel consists of workbooks. Within each workbook, there is an infinite number of worksheets. □Each worksheet contains Columns and Rows. □Where a column and a row intersect is called a cell. For e.g. cell D5 is located where column D and row 5 meet. □The tabs at the bottom of the screen represent different worksheets within a workbook. You can use the scrolling buttons on the left to bring other worksheets into view.
  • 3.
    What are Spreadsheets? Spreadsheetsare digital tables used to organize, store, and analyze data. Key Features Cells, rows, columns, formulas, functions, charts, and more! The following describes the Excel User Interface: The Ribbon The Ribbon The Ribbon is designed to help you quickly find the commands that you need to complete a task. Commands are organized in logical groups, which are collected together under Tabs. Each Tab relates to a type of activity, such as formatting or laying out a page. To reduce clutter, some Tabs are shown only when needed. For example, the Picture Tools tab is shown only when a picture is selected.
  • 4.
    File Menu Here youwill find the basic commands such as open, save, print, etc. Quick Access Toolbar The place to keep the items that you not only need to access quickly, but want to be immediately available regardless of which of the Ribbon's tabs you're working on. If you put so many items on the Quick Access Toolbar that it becomes too big to fit on the title bar, you can move it onto its own line.
  • 5.
    Tell Me This isa text field where you can enter words and phrases about what you want to do next and quickly get to features you want to use or actions you want to perform. You can also use Tell Me to find help about what you're looking for, or to use Smart Lookup to research or define the term you entered.
  • 6.
    Formula Bar A placewhere you can enter or view formulas or text. Expand Formula Bar Button This button allows you to expand the formula bar. This is helpful when you have either a long formula or large piece of text in a cell. Worksheet Navigation Tabs By default, every workbook starts with 1 sheet. Insert Worksheet Button Click the Insert New Worksheet button to insert a new worksheet in your workbook. Horizontal/Vertical Scroll Allows you to scroll vertically/horizontally in the worksheet. Normal View This is the “normal view” for working on a spreadsheet in Excel. Page Layout View View the document as it will appear on the printed page. Page Break Preview
  • 7.
    View a previewof where pages will break when the document is printed. Zoom Level Allows you to quickly zoom in or zoom out of the worksheet. Backstage View In Backstage view, you can do the following: Save and close spreadsheets Obtain information about spreadsheets See recent files created and edited Create new spreadsheets and templates Share and Export spreadsheets Print spreadsheets Obtain help Close the Excel workbook
  • 8.
    Columns and Rows Column– A vertical line of cells. A letter identifies each column. Notice the Name field contains the column letter and row number of the first cell of the highlighted range of cells in the column. Row – A horizontal line of cells. A number identifies each row. Notice the Name field contains the column letter and row number of the first cell in the highlighted range of cells in the row.
  • 9.
    Navigating in theExcel Environment Below is a table that will assist you with navigating/moving around in the Excel environment.
  • 11.
    Highlighting/Selecting Areas Usingthe Mouse To Select a Column: Click on the column letter To Select a Row: Click on the row number To Select the Entire Worksheet: Click above row 1 and to the left of column A or hit CTRL A on the keyboard Entering Text Any items that are not to be used in calculations are considered, in Excel’s terminology, labels. This includes numerical information, such as phone numbers and zip codes. Labels usually include the title, column and row headings.
  • 12.
    To Enter Text/Labels: 1)Clickin a cell 2)Type text 3)Press Enter NOTE: By default, pressing the Enter key will move you to the cell below the active cell. The label actually “lives” in the cell you typed it into. If you type long text it might appear to be in multiple columns. It is important to understand this concept when trying to apply formatting to a cell. Using the formula bar will confirm where the label actually “lives.”
  • 13.
    Autofill Frequently, it isnecessary to enter lists of information. For example, column headings are often the months of the year or the days of the week. To simplify entering repetitive or sequential lists of information, Excel has a tool called Autofill. This tool allows preprogrammed lists, as well as custom lists, to be easily added to a spreadsheet. Entering Values Numerical pieces of information that will be used for calculations are called values. They are entered the same way as labels. It is important NOT to type values with characters such as “,” or “$”.
  • 14.
    To Enter Values: 1)Navigateto a cell 2)Type a value 3)Press Enter Long Words and Numbers Long Words - The text spill into the neighboring cell. If the neighboring cell contains data, Excel will display as much of will the text as the column will allow (see Figure 28). Long Numbers - Excel will display the number in scientific form or as number signs (##) (see Figure 28).
  • 15.
    Formatting Values Applying formatsto any cell(s) can be done either using the Font, Alignment and Number groups or using the dialog box which will include all the formatting options.
  • 16.
    To Apply theCurrency Format: 1)Highlight the cell(s) 2)Click on the Currency Style button 3) If necessary, click on the Increase or Decrease Decimal button on the Number group To Apply the Comma Format: 1)Highlight cells 2)Click on the Comma Style button on the Number group 3)If necessary, click on the Increase or Decrease Decimal button Number group
  • 17.
    Formatting Labels A Label,or text formatting is applied virtually the same way it is done in word processing programs. To Format the Title Labels: 1)Highlight the cell(s) 2)Select a font from the Font group 3)Select a point size from the Font group Using the Dialog Box: 1)Highlight the cells 2)Click on the arrow in the corner of one of the formatting groups (Font, Alignment, Number) to open the Format Cells dialog box and click on one of the tabs
  • 18.
    Saving a Worksheet Whenworking in Excel it is necessary to save your files. It is also very important that while working, your file is saved frequently. When naming a file, you are restricted to 255 characters. Avoid most punctuation; spaces are acceptable. To Save the File: 1.Click the File tab located at the top-left corner of the Excel window. 2.Select the Save As button Note: for the first time, in a different location to create a copy of your workbook in the same location to create a copy of your workbook in another location 3.Select Save or press Ctrl+S, to save an existing workbook in its current location. 4.The Save As window will appear (see Figure 62). 5.Select the location where you want to save the file. To save to your desktop or in a different location on your computer: a.Click This PC underneath the Save As column (see Figure…) or add a screenshot of this. b.Select Browse to save to a different location on your computer (see Figure 61). c.The Save As dialog box will appear (see Figure 62). 6. Enter a name in the File name field. 7. Click Save.
  • 19.
    Exercises / Activities Let’sget to work in Excel! In this exercise, you will operate a pet store for a month and keep track of your sales for that month. First you will learn how to enter information into a cell. 1. Entering Data into Cells Most of the work in Excel takes place in the rectangular boxes called “cells”. Cells make up the large white grid called the “worksheet”. Each cell has a “cell address” made up of a letter for the column, and a number for the row (see Figure 5).
  • 20.
    Follow these stepsto recreate Figure 5: 1.Click into cell A1 2.Type “My Pet Store Earnings” 3.Press “Enter” on the keyboard 4.Type “Type of Pet” in cell A2 5.Continue entering the list of pets shown in Figure 5. Let’s continue creating this table by adding column labels: 1.Click into cell B2 2.Type “Number Sold” 3.Press the “Tab” on the keyboard 4.Type “Price” in cell C2 5.Press “Tab” 6.Type “Total per type” 7.The worksheet should look like Figure 6.
  • 21.
    2. Basic Formatting- Values The numbers you type into a cell are called “values”. Working with values in Excel will begin to show you the power of the software. Follow these steps to recreate Figure 8: 1.Type the values you see in columns “B” and “C” in Figure 8. 2.Click into cell B3, type “27”, then press “Enter” on the keyboard. 3.Continue until you’ve added all the values in range B3:C9.
  • 22.
    Note: When typingthe values in column “C” (prices), do not include the dollar
  • 25.
    V. Reflection Be guidedof the following questions in expressing your learnings on our lesson through this module. a.What insights have you gained from your activities? b.What significant values have you developed while doing your project? c.What difficulties did you encounter and how did you overcome them?
  • 46.
    Navigating the ExcelInterface Ribbon Contains various tools and commands organized by categories. Formula Bar Used for entering and editing formulas and data. Sheet Tabs Organize and manage multiple worksheets within a workbook.
  • 47.
    Creating a newworkbook 1 File Select "New" or "Blank Workbook". 2 Worksheet Start entering data in cells. 3 Workbook Save your work with a descriptive name.
  • 48.
    Entering and editingdata 1 Click the cell Select the cell where you want to enter data. 2 Type your data Enter text, numbers, dates, or other data types. 3 Edit existing data Double-click the cell to edit or use the formula bar.
  • 49.
    Formatting cells andtext 1 Select cells Select the cells you want to format. 2 Use the Home tab Access formatting tools like font, color, alignment, and borders. 3 Apply desired formatting Choose your desired