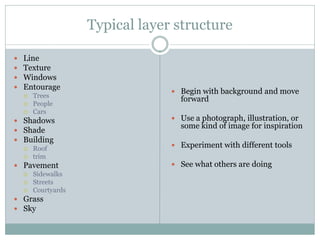
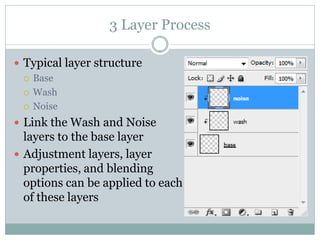
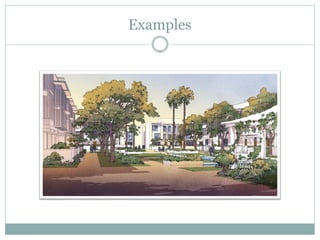
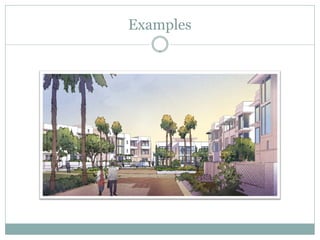
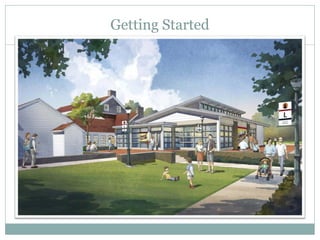
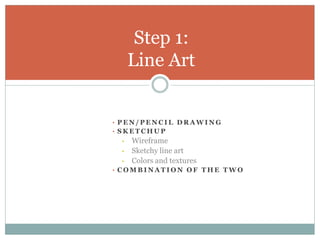
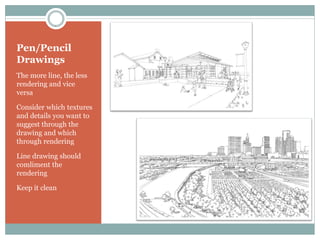
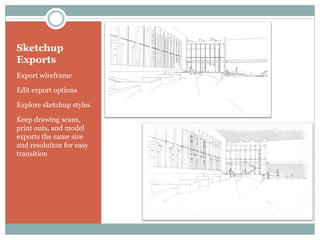
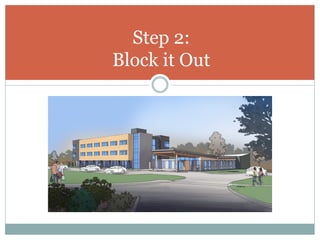
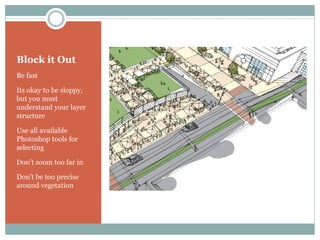
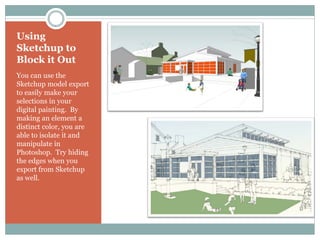
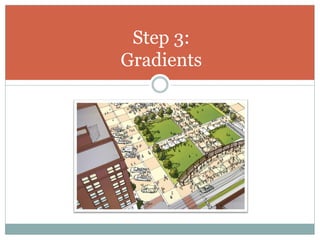
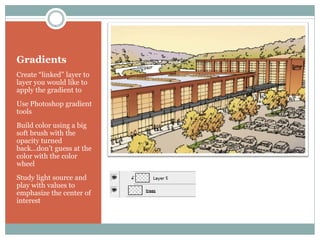
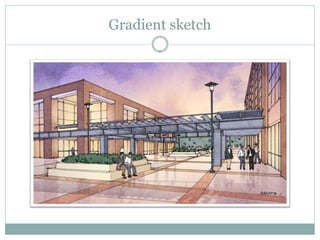
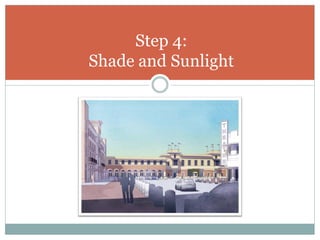
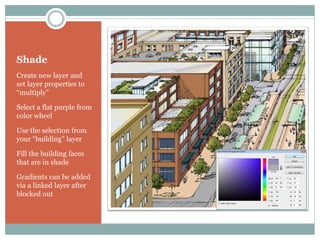
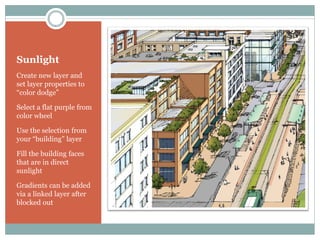
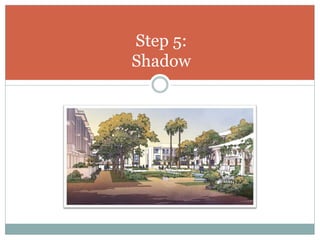
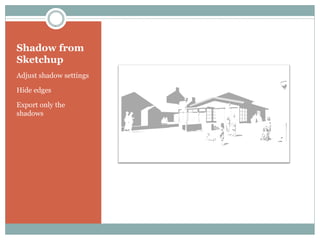
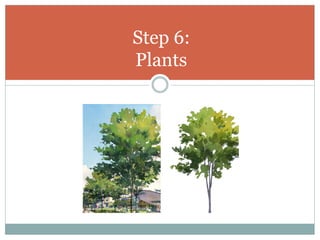
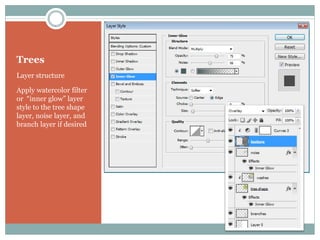
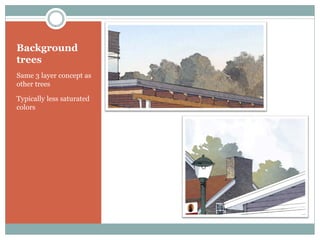
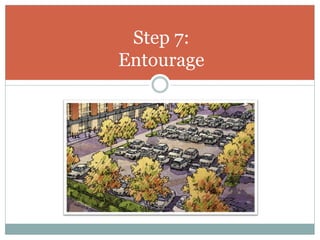
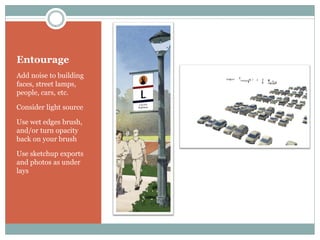
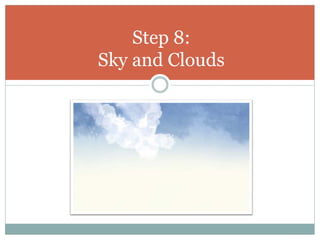
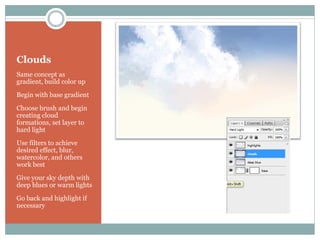
Digital Painting in Photoshop


            JOHN J. ZANETTA


  VISIT AND FOLLOW ME ON THE FOLLOWING
                  PAGES!
           ZANETTA ILLUSTRATION
              FACEBOOK PAGE
                 TWITTER
                LINKED IN
                 YOUTUBE
Brushes
Typical layer structure

   Line
   Texture
   Windows
   Entourage
                               Begin with background and move
       Trees
                                forward
       People
       Cars
 Shadows                      Use a photograph, illustration, or
                                some kind of image for inspiration
 Shade
 Building
   Roof
                               Experiment with different tools
   trim
 Pavement                     See what others are doing
   Sidewalks
   Streets
   Courtyards
 Grass
 Sky
3 Layer Process

 Typical layer structure
   Base

   Wash

   Noise

 Link the Wash and Noise
  layers to the base layer
 Adjustment layers, layer
  properties, and blending
  options can be applied to each
  of these layers
Examples
Examples
Examples
Examples
Examples
Getting Started
Step 1:
     Line Art


• PEN/PENCIL DRAWING
• SKETCHUP
 •   Wireframe
 •   Sketchy line art
 •   Colors and textures
• COMBINATION OF THE TWO
Pen/Pencil
Drawings
The more line, the less
rendering and vice
versa

Consider which textures
and details you want to
suggest through the
drawing and which
through rendering

Line drawing should
comliment the
rendering

Keep it clean
Sketchup
Exports
Export wireframe

Edit export options

Explore sketchup styles

Keep drawing scans,
print outs, and model
exports the same size
and resolution for easy
transition
Wireframe/
hand drawn
combination
A combination of
exported line from
sketchup and hand
drawings can be
combined.
Step 2:
Block it Out
Block it Out
Be fast

Its okay to be sloppy,
but you must
understand your layer
structure

Use all available
Photoshop tools for
selecting

Don’t zoom too far in

Don’t be too precise
around vegetation
Using
Sketchup to
Block it Out
You can use the
Sketchup model export
to easily make your
selections in your
digital painting. By
making an element a
distinct color, you are
able to isolate it and
manipulate in
Photoshop. Try hiding
the edges when you
export from Sketchup
as well.
Block it Out Time Lapse
Step 3:
Gradients
Gradients

Before Gradient         After Gradient
Gradients
Create “linked” layer to
layer you would like to
apply the gradient to
Use Photoshop gradient
tools
Build color using a big
soft brush with the
opacity turned
back…don’t guess at the
color with the color
wheel
Study light source and
play with values to
emphasize the center of
interest
Gradient sketch
Gradient Time Lapse
Step 4:
Shade and Sunlight
Shade
Create new layer and
set layer properties to
“multiply”

Select a flat purple from
color wheel

Use the selection from
your “building” layer

Fill the building faces
that are in shade

Gradients can be added
via a linked layer after
blocked out
Sunlight
Create new layer and
set layer properties to
“color dodge”

Select a flat purple from
color wheel

Use the selection from
your “building” layer

Fill the building faces
that are in direct
sunlight

Gradients can be added
via a linked layer after
blocked out
Shade Time Lapse
Step 5:
Shadow
Shadow from
Sketchup
Adjust shadow settings

Hide edges

Export only the
shadows
Importing
your shadows
into the
painting
Place layer beneath line
but above color layers

Layer blending option
should be set to
multiply

Adjust color of shadows
through adjustment
layers

Use your selections to
mask out any areas that
you do not want
shadows
Shadow Time Lapse
Step 6:
Plants
Trees
Begin with some kind of
image of a tree, pull
opacity back to draw
over top

Create branch structure
on one layer

Next layer should be
shape of foliage

Make separate layer for
wash effect

Make final layer for
“noise”
Trees
Layer structure

Apply watercolor filter
or “inner glow” layer
style to the tree shape
layer, noise layer, and
branch layer if desired
Tree Demo Time Lapse
Background
trees
Same 3 layer concept as
other trees

Typically less saturated
colors
Background Tree Demo
Shrub Demo Time Lapse
Step 7:
Entourage
Entourage
Add noise to building
faces, street lamps,
people, cars, etc.

Consider light source

Use wet edges brush,
and/or turn opacity
back on your brush

Use sketchup exports
and photos as under
lays
Entourage Demo
Step 8:
Sky and Clouds
Clouds
Same concept as
gradient, build color up
Begin with base gradient
Choose brush and begin
creating cloud
formations, set layer to
hard light
Use filters to achieve
desired effect, blur,
watercolor, and others
work best
Give your sky depth with
deep blues or warm lights
Go back and highlight if
necessary
Sky Time Lapse
Step 9:
Finishing Touches
Finishing Touches

 Darken corners using the multiply layer and a soft
    brush, similar to photographers
   Use adjustment layers to achieve best contrast, tonal
    range, and saturation
   Add warmth or more contrast to the focal point
   Add textures
   Flatten image and apply watercolor filter, you can do
    this with or without the line.
Using photos
for textures
Play around with filter
options

Use overlay to add color
and tone to the area
that the texture willl
cover

Pull the opacity back so
that the texture does
not overpower the rest
of the textures in the
image
Textures
Textures should be
placed on top of the
color but underneath
the line art

Use overlay blending
option

Use adjustment layers
to maintain tonal values
of drawing
Final Time Lapse

Digital Painting Using Photoshop

  • 1.
    Digital Painting inPhotoshop JOHN J. ZANETTA VISIT AND FOLLOW ME ON THE FOLLOWING PAGES! ZANETTA ILLUSTRATION FACEBOOK PAGE TWITTER LINKED IN YOUTUBE
  • 2.
  • 3.
    Typical layer structure  Line  Texture  Windows  Entourage  Begin with background and move  Trees forward  People  Cars  Shadows  Use a photograph, illustration, or some kind of image for inspiration  Shade  Building  Roof  Experiment with different tools  trim  Pavement  See what others are doing  Sidewalks  Streets  Courtyards  Grass  Sky
  • 4.
    3 Layer Process Typical layer structure  Base  Wash  Noise  Link the Wash and Noise layers to the base layer  Adjustment layers, layer properties, and blending options can be applied to each of these layers
  • 6.
  • 7.
  • 8.
  • 9.
  • 10.
  • 11.
  • 12.
    Step 1: Line Art • PEN/PENCIL DRAWING • SKETCHUP • Wireframe • Sketchy line art • Colors and textures • COMBINATION OF THE TWO
  • 13.
    Pen/Pencil Drawings The more line,the less rendering and vice versa Consider which textures and details you want to suggest through the drawing and which through rendering Line drawing should comliment the rendering Keep it clean
  • 14.
    Sketchup Exports Export wireframe Edit exportoptions Explore sketchup styles Keep drawing scans, print outs, and model exports the same size and resolution for easy transition
  • 15.
    Wireframe/ hand drawn combination A combinationof exported line from sketchup and hand drawings can be combined.
  • 16.
  • 17.
    Block it Out Befast Its okay to be sloppy, but you must understand your layer structure Use all available Photoshop tools for selecting Don’t zoom too far in Don’t be too precise around vegetation
  • 18.
    Using Sketchup to Block itOut You can use the Sketchup model export to easily make your selections in your digital painting. By making an element a distinct color, you are able to isolate it and manipulate in Photoshop. Try hiding the edges when you export from Sketchup as well.
  • 19.
    Block it OutTime Lapse
  • 20.
  • 21.
  • 22.
    Gradients Create “linked” layerto layer you would like to apply the gradient to Use Photoshop gradient tools Build color using a big soft brush with the opacity turned back…don’t guess at the color with the color wheel Study light source and play with values to emphasize the center of interest
  • 23.
  • 24.
  • 25.
  • 26.
    Shade Create new layerand set layer properties to “multiply” Select a flat purple from color wheel Use the selection from your “building” layer Fill the building faces that are in shade Gradients can be added via a linked layer after blocked out
  • 27.
    Sunlight Create new layerand set layer properties to “color dodge” Select a flat purple from color wheel Use the selection from your “building” layer Fill the building faces that are in direct sunlight Gradients can be added via a linked layer after blocked out
  • 28.
  • 29.
  • 30.
    Shadow from Sketchup Adjust shadowsettings Hide edges Export only the shadows
  • 31.
    Importing your shadows into the painting Placelayer beneath line but above color layers Layer blending option should be set to multiply Adjust color of shadows through adjustment layers Use your selections to mask out any areas that you do not want shadows
  • 32.
  • 33.
  • 34.
    Trees Begin with somekind of image of a tree, pull opacity back to draw over top Create branch structure on one layer Next layer should be shape of foliage Make separate layer for wash effect Make final layer for “noise”
  • 35.
    Trees Layer structure Apply watercolorfilter or “inner glow” layer style to the tree shape layer, noise layer, and branch layer if desired
  • 36.
  • 37.
    Background trees Same 3 layerconcept as other trees Typically less saturated colors
  • 38.
  • 39.
  • 40.
  • 41.
    Entourage Add noise tobuilding faces, street lamps, people, cars, etc. Consider light source Use wet edges brush, and/or turn opacity back on your brush Use sketchup exports and photos as under lays
  • 42.
  • 43.
  • 44.
    Clouds Same concept as gradient,build color up Begin with base gradient Choose brush and begin creating cloud formations, set layer to hard light Use filters to achieve desired effect, blur, watercolor, and others work best Give your sky depth with deep blues or warm lights Go back and highlight if necessary
  • 45.
  • 46.
  • 47.
    Finishing Touches  Darkencorners using the multiply layer and a soft brush, similar to photographers  Use adjustment layers to achieve best contrast, tonal range, and saturation  Add warmth or more contrast to the focal point  Add textures  Flatten image and apply watercolor filter, you can do this with or without the line.
  • 48.
    Using photos for textures Playaround with filter options Use overlay to add color and tone to the area that the texture willl cover Pull the opacity back so that the texture does not overpower the rest of the textures in the image
  • 49.
    Textures Textures should be placedon top of the color but underneath the line art Use overlay blending option Use adjustment layers to maintain tonal values of drawing
  • 50.