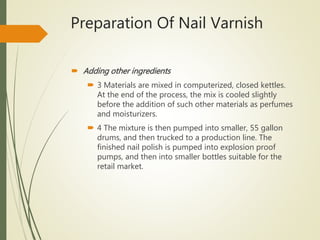
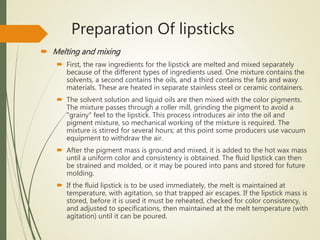
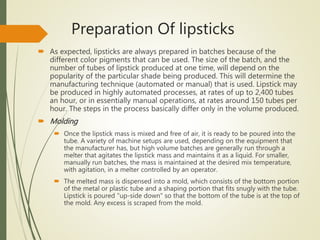
Manicure preparations - nail polishes, nail enamel removers, nail art (definitions, formulations, method of preparation, pictures, evaluations) Dosage form
lipstick PowerPoint part of a cosmetic unit -1. Definition 2.Objective 3.Ideal properties 4. How it works 5.whats in lipstick, Composition 6.Formulation, Preparation 6. Manufacturing 7.Types 8.Defect 9.Evaluations
full ppt on Lipstick Presented by: Ohekar Ojal
sandip university,nashik
school of fashion and beauty cosmetology.
for any other ppt please mail me
on mmcoeandrodevelopers@gmail.com
Lipstick is made of dyes and pigments in a fragranced oil-wax base. The primary ingredients found in lipstick are wax, oil, alcohol, and pigment.
To make lipstick, the various ingredients are first melted separately, and then the oils and solvents are ground together with the desired color pigments.
The manufacturing process consists of melting and mixing the lipstick’s components; pouring the mixture into the tube; and finally packaging the product for sale.
There are two special tests for lipstick: the Heat Test and the Rupture Test.
Home Scale Lipstick Production:
We tried to recreate this process at home by using
• Colored crayons instead of pigments.
• Petroleum Jelly (Vaseline) instead of wax.
• Baby oil instead of industrial oil.
The result as expected: we got our own Red Lipstick!
THIS PRESENTATION IS TO GIVE AN INFO ABOUT LIPSTICKS .... IT WAS CATEGORISED AS A COSMETIC PRODUCT FOR 3RD BPHARM STUDENTS IN THE 5TH SEMESTER. THIS PRESENTATION WILL HELP THEM AS A FASTRACK REFERENCE FOR EXAMS AND ALSO FOR COMPETITIVE EXAMINATIONS..
Cosmetics Industry Case Study: Manufacturing & Making LipstickMatt Smith
Find the solution for one of the toughest mixing applications in cosmetics & toiletries, making lipstick. Read this case study on the Process, the Problem and the Solution.
THIS PRESENTATION CONTAINS INFORMATION ABOUT SHAMPOOS , WHICH WAS DESCRIBED AS A COSMETIC
PREPARATION FOR 3RD BPHARMACY STUDENTS IN THEIR 5th SEMESTER...
The changing dynamics and new challenges facing the North American petrochemi...Platts
A comprehensive review of the developments in shale gas affecting the North American petrochemical markets
• The benefits and detriments of the shale gas revolution
• Feedstock advantage spurs investment in new cracker builds and expansions
• New polyethylene capacities and exports to Latin America
• Lighter feed slates and the negative impact on heavier products, disconnect in ethylene/propylene production.
• Most significant in propylene as constraints impact pricing and facilitate volatility. Spillover effect for derivative products.
• Pending supply increases. Will it be enough?
• The shale boom and its impact on aromatics
• Lighter feed slates at crackers curbs aromatics output, negatively impact downstream products such as styrene, PTA, and PET
• Increased crude from shale plays and impact on crude import/export balance
• Northeast refineries shift to lighter crudes, trend likely to continue going forward.
• Conclusion
• What does this mean for the US petrochemical landscape going forward?
• How will this impact/alter global petrochemical trade flows?
Shampoo
Human Hair Structure
Introduction
Shampoo is a hair care product that is used for the removal of oils, dirt, skin particles, dandruff, environmental pollutants and other contaminant particles that gradually build up in hair.
Introduction
Ideal Properties
Functions of Shampoo
Classification
Classification
Based on Appearance:
Powder Shampoos
Liquid Shampoos or Lotion
Gel Shampoos or Solid Cream
Classification
Classification
II. Based on Use or Function:
Conditioning Shampoos
Antidandruff and Therapeutic
Baby
Balancing
Clarifying
Classification
III. Based on Origin:
Compositions
Shampoos are typically composed of 10 to 30 ingredients.
Several types of ingredients are particularly important, including “Surfactants" that aid in cleansing and lathering.
“Conditioners" and “Active ingredients" that affect the hair and scalp.
“Additives" that stabilize the product.
Compositions
Compositions
Compositions
Compositions
Manufacturing Process
Some pearlising agents are waxy solids at ambient temperature and require melting in a drum oven or similar before use.
Demineralised water is most commonly used in order to minimise contamination of the product.
No further processing is required after blending, and the product may be packed off directly from the mixing vessel.
Manufacturing Process
For preparing liquid shampoo,
Triethanalamine lauvyl sulfate,
stearic acid are heated to about 650C.
Water & preservatives are also heated to 650C.
Both the solutions are mixed together and then cooled.
Perfumes are added after that. The shampoo thus prepared is bottled by automatic bottle filling machine.
Quality Control Tests
a)Foam Stability
Cylinder shake method was used for determining foaming ability.
50ml of the 1% shampoo solution was put into a 250ml graduated cylinder and cover the cylinder with hand and shaken for 10 times. The total volumes of the foam contents after 1 minute shaking were recorded. The foam volume was calculated. Foam should retain for atleast 5mins.
Foam Stability = V2-V1
Quality Control Tests
b)Skin – irritation Test:
Draize test in Rabbits where a patch test technique is used on the intact skin of Albino Rabbits.
A set of 6Rabbits used for testing each material.
Shampoos should be tested only for a short duration thatis,not more than(NMT)4hours as these products come in contact with skin only for a short duration.
These preparations are diluted between concentrations of 8 to 10%.
Quality Control Tests
c)Wetting Action:
Canvas disk is used, is one inch in diameter is floated on the surface of a solution and the time required for it to sink is measured accurately.
Quality Control Tests
d)Viscosity:
Is determined using Brookefield Viscometer.
100ml of shampoo is taken in a beaker and spindle is dipped in it for about 5min and then reading is taken.
Quality Control
Dental waxes are combinations of various types of waxes
compounded to provide desired physical properties. This presentation includes data on following subtopics of dental waxes: Definition
history, characteristic, classification of waxes, composition, uses of waxes and
properties.
Oil Eraser is a new bio-based hydrophobic oleophilic foam (EPA approved) that can absorb 80 times its own weight in petrochemicals.
It's durable, re-usable, and suitable for a variety of environmental and industrial applications. This seemingly impossible product could revolutionize preservation and reclamation efforts.
This is a presentation by Dada Robert in a Your Skill Boost masterclass organised by the Excellence Foundation for South Sudan (EFSS) on Saturday, the 25th and Sunday, the 26th of May 2024.
He discussed the concept of quality improvement, emphasizing its applicability to various aspects of life, including personal, project, and program improvements. He defined quality as doing the right thing at the right time in the right way to achieve the best possible results and discussed the concept of the "gap" between what we know and what we do, and how this gap represents the areas we need to improve. He explained the scientific approach to quality improvement, which involves systematic performance analysis, testing and learning, and implementing change ideas. He also highlighted the importance of client focus and a team approach to quality improvement.
Unit 8 - Information and Communication Technology (Paper I).pdfThiyagu K
This slides describes the basic concepts of ICT, basics of Email, Emerging Technology and Digital Initiatives in Education. This presentations aligns with the UGC Paper I syllabus.
The Roman Empire A Historical Colossus.pdfkaushalkr1407
The Roman Empire, a vast and enduring power, stands as one of history's most remarkable civilizations, leaving an indelible imprint on the world. It emerged from the Roman Republic, transitioning into an imperial powerhouse under the leadership of Augustus Caesar in 27 BCE. This transformation marked the beginning of an era defined by unprecedented territorial expansion, architectural marvels, and profound cultural influence.
The empire's roots lie in the city of Rome, founded, according to legend, by Romulus in 753 BCE. Over centuries, Rome evolved from a small settlement to a formidable republic, characterized by a complex political system with elected officials and checks on power. However, internal strife, class conflicts, and military ambitions paved the way for the end of the Republic. Julius Caesar’s dictatorship and subsequent assassination in 44 BCE created a power vacuum, leading to a civil war. Octavian, later Augustus, emerged victorious, heralding the Roman Empire’s birth.
Under Augustus, the empire experienced the Pax Romana, a 200-year period of relative peace and stability. Augustus reformed the military, established efficient administrative systems, and initiated grand construction projects. The empire's borders expanded, encompassing territories from Britain to Egypt and from Spain to the Euphrates. Roman legions, renowned for their discipline and engineering prowess, secured and maintained these vast territories, building roads, fortifications, and cities that facilitated control and integration.
The Roman Empire’s society was hierarchical, with a rigid class system. At the top were the patricians, wealthy elites who held significant political power. Below them were the plebeians, free citizens with limited political influence, and the vast numbers of slaves who formed the backbone of the economy. The family unit was central, governed by the paterfamilias, the male head who held absolute authority.
Culturally, the Romans were eclectic, absorbing and adapting elements from the civilizations they encountered, particularly the Greeks. Roman art, literature, and philosophy reflected this synthesis, creating a rich cultural tapestry. Latin, the Roman language, became the lingua franca of the Western world, influencing numerous modern languages.
Roman architecture and engineering achievements were monumental. They perfected the arch, vault, and dome, constructing enduring structures like the Colosseum, Pantheon, and aqueducts. These engineering marvels not only showcased Roman ingenuity but also served practical purposes, from public entertainment to water supply.
How to Split Bills in the Odoo 17 POS ModuleCeline George
Bills have a main role in point of sale procedure. It will help to track sales, handling payments and giving receipts to customers. Bill splitting also has an important role in POS. For example, If some friends come together for dinner and if they want to divide the bill then it is possible by POS bill splitting. This slide will show how to split bills in odoo 17 POS.
Read| The latest issue of The Challenger is here! We are thrilled to announce that our school paper has qualified for the NATIONAL SCHOOLS PRESS CONFERENCE (NSPC) 2024. Thank you for your unwavering support and trust. Dive into the stories that made us stand out!
Palestine last event orientationfvgnh .pptxRaedMohamed3
An EFL lesson about the current events in Palestine. It is intended to be for intermediate students who wish to increase their listening skills through a short lesson in power point.
Welcome to TechSoup New Member Orientation and Q&A (May 2024).pdfTechSoup
In this webinar you will learn how your organization can access TechSoup's wide variety of product discount and donation programs. From hardware to software, we'll give you a tour of the tools available to help your nonprofit with productivity, collaboration, financial management, donor tracking, security, and more.
Synthetic Fiber Construction in lab .pptxPavel ( NSTU)
Synthetic fiber production is a fascinating and complex field that blends chemistry, engineering, and environmental science. By understanding these aspects, students can gain a comprehensive view of synthetic fiber production, its impact on society and the environment, and the potential for future innovations. Synthetic fibers play a crucial role in modern society, impacting various aspects of daily life, industry, and the environment. ynthetic fibers are integral to modern life, offering a range of benefits from cost-effectiveness and versatility to innovative applications and performance characteristics. While they pose environmental challenges, ongoing research and development aim to create more sustainable and eco-friendly alternatives. Understanding the importance of synthetic fibers helps in appreciating their role in the economy, industry, and daily life, while also emphasizing the need for sustainable practices and innovation.
We all have good and bad thoughts from time to time and situation to situation. We are bombarded daily with spiraling thoughts(both negative and positive) creating all-consuming feel , making us difficult to manage with associated suffering. Good thoughts are like our Mob Signal (Positive thought) amidst noise(negative thought) in the atmosphere. Negative thoughts like noise outweigh positive thoughts. These thoughts often create unwanted confusion, trouble, stress and frustration in our mind as well as chaos in our physical world. Negative thoughts are also known as “distorted thinking”.
Students, digital devices and success - Andreas Schleicher - 27 May 2024..pptxEduSkills OECD
Andreas Schleicher presents at the OECD webinar ‘Digital devices in schools: detrimental distraction or secret to success?’ on 27 May 2024. The presentation was based on findings from PISA 2022 results and the webinar helped launch the PISA in Focus ‘Managing screen time: How to protect and equip students against distraction’ https://www.oecd-ilibrary.org/education/managing-screen-time_7c225af4-en and the OECD Education Policy Perspective ‘Students, digital devices and success’ can be found here - https://oe.cd/il/5yV
2. Preparation Of Nail Varnish
Mixing the pigment with nitrocellulose and plasticizer
1 The pigments are mixed with nitrocellulose and plasticizer using a
"two-roll" differential speed mill. This mill grinds the pigment between a
pair of rollers that are able to work with increasing speed as the pigment
is ground down. The goal is to produce fine dispersion of the color. A
variation of this mill is the Banbury Mixer (used also in the production of
rubber for rubber bands).
2 When properly and fully milled, the mixture is removed from the mill in
sheet form and then broken up into small chips for mixing with the
solvent. The mixing is performed in stainless steel kettles that can hold
anywhere from 5 to 2,000 gallons. Stainless steel must be used because
the nitrocellulose is extremely reactive in the presence of iron. The
kettles are jacketed so that the mixture can be cooled by circulating cold
water or another liquid around the outside of the kettle. The
temperature of the kettle, and the rate of cooling, are controlled by both
computers and technicians. This step is performed in a special room or
area designed to control the hazards of fire and explosion. Most modern
factories perform this step in an area with walls that will close in if an
alarm sounds and, in the event of explosion, with ceilings that will safely
blow off without endangering the rest of the structure.
3. Adding other ingredients
3 Materials are mixed in computerized, closed kettles.
At the end of the process, the mix is cooled slightly
before the addition of such other materials as perfumes
and moisturizers.
4 The mixture is then pumped into smaller, 55 gallon
drums, and then trucked to a production line. The
finished nail polish is pumped into explosion proof
pumps, and then into smaller bottles suitable for the
retail market.
Preparation Of Nail Varnish
4. Preparation Of Nail Polish
Remover
Nail polish remover is an organic solvent used to remove
nail polish from the nails.
Composition of ...
Acetone (carbon, hydrogen, oxygen) C3H6O
Ethyl Acetate- colorless, flammable liquid
Butyl Acetate- production of lacquers
Aloe Vera- protects and conditions the nails
Glycerin- helps nails and skin from drying out
Cetyl Acetate- skin conditioning agent and emollient
Petroleum- chemical compound with 5 membered lactam
Phthalic Anhydride- made from crystalline
5. Preparation Of Nail Polish
Remover
Nail polish remover is made up of acetone which is very
powerful and effective when taking off nail polish. The formula
of acetone is C3H6O. Acetone is made up of carbon, hydrogen,
and oxygen combined. It is a chemical that is found naturally in
the environment and is produced in factories all over. However
some acetone is man-made.
Petroleum-derived components is the next ingredient.
Petroleum is the basic ingredient in many cosmetics todays as
well as mineral oil. Petroleum is produced in oil making
factories. It is made up of a refined oil. It is a fossil fuel and is
made naturally from dead plants and animals.
Nail polish remover can be made in home by using a liquid
paint thinner bought from any store since acetone cannot be
made in home.
6. Preparation Of Hair Dyes
Checking ingredients
1 Before a batch of hair dye is made, the ingredients must be
certified. That is, the chemicals must be tested to make sure
they are what they are labeled, and that they are the proper
potency. Certification may be done by the manufacturer in-
house. In many cases, the ingredients arrive from a reputable
distributor who has provided a Certificate of Analysis, and this
satisfies the manufacturer's requirements.
Weighing
2 Next a worker weighs out the ingredients for the batch. For
some ingredients, only a small amount is necessary in the
batch. But if a very large batch is being made, and several
ingredients are needed in large amounts, these may be piped
in from storage tanks.
7. Preparation Of Hair Dyes
Mixing
4 The pre-mix is then added to a larger tank, containing the
other ingredients of the hair dye. In a small batch, the tanks
used may hold about 1,600 lbs (725 kg), and they are portable.
A worker wheels the pre-mix tank to the second mix tank and
pours the ingredients in. For a very large batch, the tanks may
hold 10 times as much as the portable tanks, and in this case
they are connected by pipes.
In a formula in which no pre-mixing is required, after checking
and weighing, the in gredients go directly to the mixing step.
The ingredients are simply mixed in the tank until the proper
consistency is reached.
If a heated pre-mix is used, the second mix solution must be
allowed to cool. The ingredients that follow the pre-mix may
be additional solvents, surfactants, and alkalizers. If the formula
includes alcohol, it is no added until the mix reaches
104°F(40°C), so that it does not evaporate. Fragrances too are
often added at the end of the mix.
8. Preparation Of Hair Dyes
Filling
5 The finished batch of hair dye is then piped or delivered to a
tank in the filling area. A nozzle from this tank lets a measured
amount of hair dye into bottles, moving beneath it on a belt.
The filled bottles continue on the belt to machines, which affix
labels and cap them.
Packaging
6 From the filling area, the bottles are taken to the packaging
line. At the packaging line, the hair dye bottle is put in a box,
together with any other elements such as a bottle of developer
or special finishing shampoo, instruction sheet, and gloves and
cap, or any other tools provided for the consumer. After the
package is complete, it is put in a shipping carton. The full
cartons are then taken to the warehouse to await distribution.
9. Preparation Of lipsticks
Melting and mixing
First, the raw ingredients for the lipstick are melted and mixed separately
because of the different types of ingredients used. One mixture contains the
solvents, a second contains the oils, and a third contains the fats and waxy
materials. These are heated in separate stainless steel or ceramic containers.
The solvent solution and liquid oils are then mixed with the color pigments.
The mixture passes through a roller mill, grinding the pigment to avoid a
"grainy" feel to the lipstick. This process introduces air into the oil and
pigment mixture, so mechanical working of the mixture is required. The
mixture is stirred for several hours; at this point some producers use vacuum
equipment to withdraw the air.
After the pigment mass is ground and mixed, it is added to the hot wax mass
until a uniform color and consistency is obtained. The fluid lipstick can then
be strained and molded, or it may be poured into pans and stored for future
molding.
If the fluid lipstick is to be used immediately, the melt is maintained at
temperature, with agitation, so that trapped air escapes. If the lipstick mass is
stored, before it is used it must be reheated, checked for color consistency,
and adjusted to specifications, then maintained at the melt temperature (with
agitation) until it can be poured.
10. Preparation Of lipsticks
As expected, lipsticks are always prepared in batches because of the
different color pigments that can be used. The size of the batch, and the
number of tubes of lipstick produced at one time, will depend on the
popularity of the particular shade being produced. This will determine the
manufacturing technique (automated or manual) that is used. Lipstick may
be produced in highly automated processes, at rates of up to 2,400 tubes
an hour, or in essentially manual operations, at rates around 150 tubes per
hour. The steps in the process basically differ only in the volume produced.
Molding
Once the lipstick mass is mixed and free of air, it is ready to be poured into the
tube. A variety of machine setups are used, depending on the equipment that
the manufacturer has, but high volume batches are generally run through a
melter that agitates the lipstick mass and maintains it as a liquid. For smaller,
manually run batches, the mass is maintained at the desired mix temperature,
with agitation, in a melter controlled by an operator.
The melted mass is dispensed into a mold, which consists of the bottom portion
of the metal or plastic tube and a shaping portion that fits snugly with the tube.
Lipstick is poured "up-side down" so that the bottom of the tube is at the top of
the mold. Any excess is scraped from the mold.
11. Preparation Of lipsticks
Molding (cont.)
The lipstick is cooled (automated molds are kept cold; manually
produced molds are transferred to a refrigeration unit) and
separated from the mold, and the bottom of the tube is sealed.
The lipstick then passes through a flaming cabinet (or is flamed by
hand) to seal pinholes and improve the finish. The lipstick is
visually inspected for air holes, mold separation lines, or
blemishes, and is reworked if necessary.
For obvious reasons, rework of the lipstick must be limited,
demonstrating the importance of the early steps in removing air
from the lipstick mass. Lipstick is reworked by hand with a spatula.
This can be done in-line, or the tube can be removed from the
manufacturing process and reworked.
12. Preparation Of lipsticks
Labeling and packaging
After the lipstick is retracted and the tube is capped, the lipstick is ready
for labeling and packaging. Labels identify the batch and are applied as
part of the automated operation. While there is a great deal of emphasis
on quality and appearance of the finished lipstick product, less emphasis is
placed on the appearance of lip balms. Lip balms are always produced in
an automated process (except for experimental or test batches). The
heated liquid is poured into the tube in the retracted position; the tube is
then capped by machine—a far less laborious process.
The final step in the manufacturing process is the packaging of the lipstick
tube. There are a variety of packaging options available, ranging from bulk
packs to individual packs, and including packaging as a component in a
makeup kit or special promotional offering. Lip balms are packaged in
bulk, generally with minimum protection to prevent shipping damage.
Packaging for lipsticks varies, depending on what will happen at the point
of sale in the retail outlet. Packaging may or may not be highly automated,
and the package used depends on the end use of the product rather than
on the manufacturing process.
13. Applications of Various
Cosmetics
NAIL VARNISH: Women use nail polishes for decorating their
nails. While rest of people use them to fix small tears in window
screen, prevent rust, cover up car nicks, mark and label different
things, slow the process of cracked windshield, protect sensitive
skin by covering up skin irritating metals on cloths, prevent
broken glasses, increase lifetime of glasses, waterproof matches
and to seal envelops.
NAIL POLISH RMOVER: For girls it’s just a nail polish remover. But
for rest of homosapiens it’s a lot more than that. It’s used for
cleaning things, restoring floor from little cracks, rejuvenating
stained china, shining shoes, erasing superglue, reviving a watch
from cuts and dings, making marker disappear, cleaning razors
and eliminating bathtub ring (getting rid of soap and scum
stains).
14. Applications of Various
Cosmetics
HAIR DYES: Hair dyes are used for changing the colour of
the hair.
LIPSTICKS: Lipsticks are used for colouring the lips by girls
and women. They are also used as emergency firestarter, to
write something (when u can’t find something else to write
with), as lip or skin balm, for camouflaging, as grease or
lubricant, for bartering things with girls :D and lipstick tubes
can be used as containers.
Editor's Notes
Textured and layered background with title
(Advanced)
Tip: Some shape effects on this slide are created with the Combine Shapes commands. To access this command, you must add it to the Quick Access Toolbar, located above the File tab. To customize the Quick Access Toolbar, do the following:
Click the arrow next to the Quick Access Toolbar, and then under Customize Quick Access Toolbar click More Commands.
In the PowerPoint Options dialog box, in the Choose commands from list, select All Commands.
In the list of commands, click Combine Shapes, and then click Add.
To reproduce the shape effects on this slide, do the following:
On the Home tab, in the Slides group, click Layout, and then click Blank.
Also on the Home tab, in the Drawing group, click Shapes, and then under Rectangles click Rectangle.
On the slide, drag to draw a rectangle.
Select the rectangle. Under Drawing Tools, on the Format tab, in the Shape Styles group, click Shape Fill, point to Gradient, and then click More Gradients. In the Format Shape dialog box, click Fill in the left pane, in the Fill pane, click Gradient fill, and then do the following:
In the Type list, select Linear.
In the Angle box, enter 160°.
Under Gradient stops, click Add gradient stop or Remove gradient stop until four stops appear in the slider.
Also under Gradient stops, customize the gradient stops as follows:
Select the first stop in the slider, and then do the following:
In the Position box, enter 0%.
Click the button next to Color, click More Colors, and then in the Colors dialog box, on the Custom tab, enter values for Red: 200, Green: 149, and Blue: 4.
In the Transparency box, enter 79%.
Select the next stop in the slider, and then do the following:
In the Position box, enter 29%.
Click the button next to Color, click More Colors, and then in the Colors dialog box, on the Custom tab, enter values for Red: 124, Green: 93, and Blue: 30.
In the Transparency box, enter 84%.
Select the next stop in the slider, and then do the following:
In the Position box, enter 68%.
Click the button next to Color, click More Colors, and then in the Colors dialog box, on the Custom tab, enter values for Red: 131, Green: 104, and Blue: 7.
In the Transparency box, enter 74%.
Select the last stop in the slider, and then do the following:
In the Position box, enter 100%.
Click the button next to Color, click More Colors, and then in the Colors dialog box, on the Custom tab, enter values for Red: 98, Green: 61, and Blue: 40.
In the Transparency box, enter 51%.
Also in the Format Shape dialog box, click Line Color in the left pane, in the Line Color pane, select No line.
Also in the Format Shape dialog box, click Glow and Soft Edges in the left pane, in the Glow and Soft Edges pane, under Soft Edges, in the Size box, enter 5 pt.
Also in the Format Shape dialog box, click Size in the left pane, in the Size pane, enter 1.83” in the Height box and 10.33” in the Width box.
On the Home tab, in the Drawing group, click Arrange, point to Align, and then do the following:
Click Align to Slide.
Click Align Center.
To reproduce the clip art effects on this slide, do the following:
On the Insert tab, in the Images group, click Clip Art. In the Clip Art pane, in the Search for box, enter 00437948, select the Include Office.com content check box, and then click Go. Select the clip art file in the pane to insert it into the slide. (Note: If you choose another clip art file, the clip art must be in the Windows Metafile format [.wmf].)
Drag the clip art from the Clip Art pane to the slide.
Select the clip art. Under Picture Tools, on the Format tab, in the Size group, enter 6.99” in the Height box and 7.5” in the Width box.
On the Home tab, in the Drawing group, click Arrange, and then click Ungroup.
In the Microsoft Office PowerPoint dialog box, click Yes.
On the slide, select the converted clip art. On the Home tab, in the Editing group, click Select, and then click Selection Pane.
In the Selection and Visibility pane, select the top-level group. On the Home tab, in the Drawing group, click Arrange, and then click Ungroup.
Also in the Selection and Visibility pane, select the Autoshape object, and then press DELETE.
Press and hold CTRL, and then select all the clip art shapes. On the Quick Access Toolbar, click Combine Shapes, and then click Shape Union.
Position the new freeform shape in the bottom left corner of the slide so that it extends beyond the left and bottom edges of the slide.
Select the freeform shape. Under Drawing Tools, on the Format tab, in the Shape Styles group, click Shape Fill, point to Gradients, and then click More Gradients. In the Format Shape dialog box, click Fill in the left pane, in the Fill pane, click Solid fill, and then do the following:
Click the button next to Color, click More Colors, and then in the Colors dialog box, on the Custom tab, enter values for Red: 84, Green: 65, and Blue: 54.
In the Transparency box, enter 99%
Also in the Format Picture dialog box, click Glow and Soft Edges in the left pane, in the Glow and Soft Edges pane, under Glow, do the following:
Click the button next to Color, click More Colors, and then in the Colors dialog box, on the Custom tab, enter values for Red: 104, Green: 71, and Blue: 34.
In the Size box, enter 7 pt.
In the Transparency box, enter 90%.
To reproduce the text effects on this slide, do the following:
On the Insert tab, in the Text group, click Text Box.
On the slide, drag to draw a text box.
Enter text in the text box, and then select the text. On the Home tab, in the Font group, select Garamond from the Font list, select 54 pt. from the Font Size list, and then click Bold.
Under Drawing Tools, on the Format tab, in the WordArt Styles group, click the Format Text Effects dialog box launcher. In the Format Text Effects dialog box, click Shadow in the left pane, in the Shadow pane, do the following:
In the Transparency box, enter 70%.
In the Blur box, enter 5 pt.
In the Angle box, enter 315°.
In the Distance box, enter 4 pt.
Drag the text box inside the rectangle and on the right side of the slide.
To reproduce the first background layer on this slide, do the following:
On the Home tab, in the Drawing group, click Shapes, and then under Rectangles click Rectangle.
On the slide, drag to draw a rectangle.
Select the rectangle. Under Drawing Tools, on the Format tab, in the Shape Styles group, click the Format Shape dialog box launcher. In the Format Shape dialog box, click Fill in the left pane, in the Fill pane, click Picture or texture fill, and then do the following:
Click the button next to Texture, and then click Stationary (fourth row).
Clear the Tile picture as texture check box.
Also in the Format Shape dialog box, click Line Color in the left pane, in the Line Color pane, click No line.
Also in the Format Shape dialog box, click Size in the left pane, in the Size pane, under Size and rotate, enter 7.5” in the Height box and 10” in the Width box.
Select the rectangle. On the Home tab, in the Clipboard group, click Copy.
Press DELETE to delete the rectangle.
Also on the Home tab, in the Clipboard group, click the arrow below Paste, and select Paste Special. In the Paste Special dialog box, select Paste, and then under As, select Picture (PNG).
Select the picture. Under Picture Tools, on the Format tab, in the Adjust group, click Artistic Effects, and then click Artistic Effects Options. In the Format Picture dialog box, click Artistic Effects in the left pane, in the Artistic Effects pane, click the button next to Artistic Effect, and then click Paint Brush (second row).
Also in the Artistic Effects pane, do the following:
In the Transparency box, enter 15%.
In the Brush Size box, enter 2.
Also in the Format Picture dialog box, click Picture Color in the left pane, in the Picture Color pane, do the following:
Under Color Saturation, in the Saturation box, enter 200%.
Under Color Tone, click the button next to Presets and then click Temperature: 5,300 K.
Also in the Format Picture dialog box, click Picture Corrections in the left pane, in the Picture Corrections pane, do the following:
Under Sharpen and Soften, in the box next to Sharpen, enter -70%.
Under Brightness and Contrast, in the Contrast box, enter -10%.
Select the rectangle. On the Home tab, in the Drawing group, click Arrange, point to Align, and then do the following:
Click Align Middle.
Click Align Center.
On the Home tab, in the Drawing group, click Arrange, and then click Send to Back.
To reproduce the second background layer on this slide, do the following:
On the Home tab, in the Drawing group, click the button next to Shapes, and then under Rectangles click Rectangle.
On the slide, drag to draw a rectangle.
Select the rectangle. Under Drawing Tools, on the Format tab, in the Shape Styles group, click the Format Shape dialog box launcher. In the Format Shape dialog box, click Fill in the left pane, in the Fill pane, click Gradient fill, and then do the following:
In the Type list, select Linear.
In the Angle box, enter 160°.
Under Gradient stops, click Add gradient stop or Remove gradient stop until four stops appear in the slider.
Also under Gradient stops, customize the gradient stops as follows:
Select the first stop in the slider, and then do the following:
In the Position box, enter 0%.
Click the button next to Color, and then under Theme Colors click Black, Text 1 (first row).
In the Transparency box, enter 100%.
Select the next stop in the slider, and then do the following:
In the Position box, enter 29%.
Click the button next to Color, click More Colors, and then in the Colors dialog box, on the Custom tab, enter values for Red: 36, Green: 25, and Blue: 15.
In the Transparency box, enter 100%.
Select the next stop in the slider, and then do the following:
In the Position box, enter 68%.
Click the button next to Color, click More Colors, and then in the Colors dialog box, on the Custom tab, enter values for Red: 104, Green: 71, and Blue: 34.
In the Transparency box, enter 68%
Select the last stop in the slider, and then do the following:
In the Position box, enter 100%.
Click the button next to Color, click More Colors, and then in the Colors dialog box, on the Custom tab, enter values for Red: 84, Green: 65, and Blue: 54.
In the Transparency box, enter 37%.
Also in the Format Shape dialog box, click Line Color in the left pane, in the Line Color pane, select No line.
Also in the Format Shape dialog box, click Size in the left pane, in the Size pane, under Size and rotate, enter 7.5” in the Height box and 10” in the Width box.
Select the rectangle. On the Home tab, in the Drawing group, click Arrange, point to Align, and then do the following:
Click Align Middle.
Click Align Center.
To reproduce the third background layer on this slide, do the following:
On the Home tab, in the Drawing group, click Shapes, and then under Rectangles click Rectangle.
On the slide, drag to draw a rectangle.
Select the rectangle. Under Drawing Tools, on the Format tab, in the Shape Styles group, click the Format Shape dialog box. In the Format Shape dialog box, click Fill in the left pane, in the Fill pane, select Picture or texture fill, and then do the following:
Click the button next to Texture, and then click Cork (fifth row).
Clear the Tile picture as texture check box.
Under Stretch options, in the Transparency box, enter 84%.
Also in the Format Picture dialog box, click Line Color in the left pane, in the Line Color pane, select No line.
Also in the Format Picture dialog box, click Artistic Effects in the left pane, in the Artistic Effects pane, click the button next to Artistic Effect, click Paint Brush (second row), and then in the Brush Size box, enter 1.
Also in the Format Picture dialog box, click Picture Corrections in the left pane, in the Picture Corrections pane, under Brightness and Contrast, enter 1% in the Brightness box and 26% in the Contrast box.
Also in the Format Picture dialog box, click Size in the left pane, in the Size pane, under Size and rotate, enter 7.5” in the Height box and 10” in the Width box.
Select the rectangle. On the Home tab, in the Drawing group, click Arrange, point to Align, and then do the following:
Click Align Middle.
Click Align Center.
To reproduce the fourth background layer on this slide, do the following:
On the Home tab, in the Drawing group, click Shapes, and then under Rectangles click Rectangle.
On the slide, drag to draw a rectangle.
Select the rectangle. Under Drawing Tools, on the Format tab, in the Shape Styles group, click the Format Shape dialog box. In the Format Shape dialog box, click Fill in the left pane, in the Fill pane, select Picture or texture fill, and then do the following:
Click the button next to Texture, and then click Granite (third row).
Under Tiling options, in the Transparency box, enter 90%.
Also in the Format Picture dialog box, click Line Color in the left pane, in the Line Color pane, select No line.
Also in the Format Picture dialog box, click Artistic Effects in the left pane, in the Artistic Effects pane, click the button next to Artistic Effect, click Photocopy (fifth row), and then do the following:
In the Transparency box, enter 94%.
In the Detail box, enter 9.
Also in the Format Picture dialog box, click Picture Corrections in the left pane, in the Picture Corrections pane, under Brightness and Contrast, in the Contrast box, enter 35%.
Also in the Format Shape dialog box, click Size in the left pane, in the Size pane, under Size and rotate, enter 7.5” in the Height box and 10” in the Width box.
Select the rectangle. On the Home tab, in the Drawing group, click Arrange, point to Align, and then do the following:
Click Align Middle.
Click Align Center.