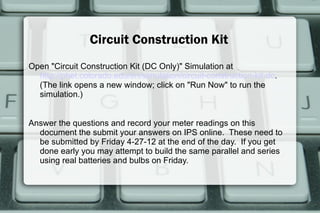
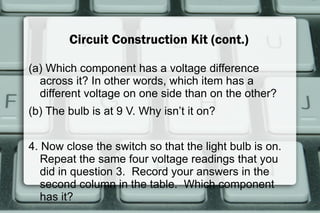
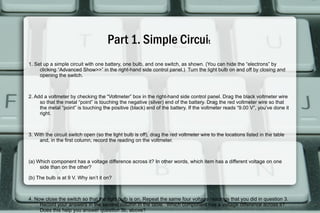
Circuit Construction Kit
Open "Circuit Construction Kit (DC Only)" Simulation at
  http://phet.colorado.edu/en/simulation/circuit-construction-kit-dc.
  (The link opens a new window; click on "Run Now" to run the
  simulation.)


Answer the questions and record your meter readings on this
  document the submit your answers on IPS online. These need to
  be submitted by Friday 4-27-12 at the end of the day. If you get
  done early you may attempt to build the same parallel and series
  using real batteries and bulbs on Friday.
Circuit Construction Kit (cont.)

(a) Which component has a voltage difference
  across it? In other words, which item has a
  different voltage on one side than on the other?
(b) The bulb is at 9 V. Why isn’t it on?


4. Now close the switch so that the light bulb is on.
   Repeat the same four voltage readings that you
   did in question 3. Record your answers in the
   second column in the table. Which component
   has it?
Part 1. Simple Circuit
1. Set up a simple circuit with one battery, one bulb, and one switch, as shown. (You can hide the “electrons” by
     clicking “Advanced Show>>” in the right-hand side control panel.) Turn the light bulb on and off by closing and
     opening the switch.


2. Add a voltmeter by checking the “Voltmeter” box in the right-hand side control panel. Drag the black voltmeter wire
     so that the metal “point” is touching the negative (silver) end of the battery. Drag the red voltmeter wire so that
     the metal “point” is touching the positive (black) end of the battery. If the voltmeter reads “9.00 V”, you’ve done it
     right.


3. With the circuit switch open (so the light bulb is off), drag the red voltmeter wire to the locations listed in the table
     and, in the first column, record the reading on the voltmeter.


(a) Which component has a voltage difference across it? In other words, which item has a different voltage on one
     side than on the other?

(b) The bulb is at 9 V. Why isn’t it on?


4. Now close the switch so that the light bulb is on. Repeat the same four voltage readings that you did in question 3.
     Record your answers in the second column in the table. Which component has a voltage difference across it?
     Does this help you answer question 3b, above?
Part 2. Series Circuit
1. Set up a series circuit with one battery, two bulbs, and one switch, as shown. (You can
    either add a bulb to your previous circuit or click “Reset” and start over, whichever is
    easier for you.)


2. Add a voltmeter by checking the “Voltmeter” box in the right-hand side control panel. Drag
    the black voltmeter wire so that the metal “point” is touching the negative (silver) end of
    the battery. Drag the red voltmeter wire so that the metal “point” is touching the positive
    (black) end of the battery. If the voltmeter reads “9.00 V”, you’ve done it right.


3. Close the switch so that the bulbs light up. (What do you notice about the brightness of the
    bulbs compared to the previous circuit?) Use the red voltmeter wire to measure the
    voltage on both sides of both bulbs. Calculate the voltage difference across each bulb and
    record it in the table (which will be the left bulb, the right bulb, the left side of bulb, the
    right side of bulb, and the voltage difference for this bulb (left minus right).
4. Right-click on the bulb on the right and select “Change Resistance” from the menu that
    pops up. Enter “20” for the new resistance. Repeat your measurements and calculations
    from step 3. Which bulb (the high resistance or the low resistance) requires more voltage
    (energy) for the charges to get through it?
Part 3. Parallel Circuit
1. Set up a parallel circuit with one battery, two bulbs, and one switch, as
    shown. (Again, you can either rearrange your previous circuit or start
    over. I find it easier to start over with this one. If you rearrange, make
    sure you reset the resistance of each bulb to 10.)
2. Add a voltmeter by checking the “Voltmeter” box in the right-hand side
    control panel. Drag the black voltmeter wire so that the metal “point” is
    touching the negative (silver) end of the battery. Drag the red voltmeter
    wire so that the metal “point” is touching the positive (black) end of the
    battery. If the voltmeter reads “9.00 V”, you’ve done it right.
3. Close the switch so that the bulbs light up. (What do you notice about the
    brightness of the bulbs compared to the previous circuit?) Use the red
    voltmeter wire to measure the voltage on both sides of both bulbs.
    Calculate the voltage difference across each bulb and record it.
4. Right-click on the bulb on the right and select “Change Resistance” from
    the menu that pops up. Enter “20” for the new resistance. Repeat step 3.
Table of Contents
                              With the switch open   with the switch closed

rightside of the bulb
 left side of the bulb

   right side of the switch
left side of the switch

Circuit construction kit 4 27-2012

  • 1.
    Circuit Construction Kit Open"Circuit Construction Kit (DC Only)" Simulation at http://phet.colorado.edu/en/simulation/circuit-construction-kit-dc. (The link opens a new window; click on "Run Now" to run the simulation.) Answer the questions and record your meter readings on this document the submit your answers on IPS online. These need to be submitted by Friday 4-27-12 at the end of the day. If you get done early you may attempt to build the same parallel and series using real batteries and bulbs on Friday.
  • 2.
    Circuit Construction Kit(cont.) (a) Which component has a voltage difference across it? In other words, which item has a different voltage on one side than on the other? (b) The bulb is at 9 V. Why isn’t it on? 4. Now close the switch so that the light bulb is on. Repeat the same four voltage readings that you did in question 3. Record your answers in the second column in the table. Which component has it?
  • 3.
    Part 1. SimpleCircuit 1. Set up a simple circuit with one battery, one bulb, and one switch, as shown. (You can hide the “electrons” by clicking “Advanced Show>>” in the right-hand side control panel.) Turn the light bulb on and off by closing and opening the switch. 2. Add a voltmeter by checking the “Voltmeter” box in the right-hand side control panel. Drag the black voltmeter wire so that the metal “point” is touching the negative (silver) end of the battery. Drag the red voltmeter wire so that the metal “point” is touching the positive (black) end of the battery. If the voltmeter reads “9.00 V”, you’ve done it right. 3. With the circuit switch open (so the light bulb is off), drag the red voltmeter wire to the locations listed in the table and, in the first column, record the reading on the voltmeter. (a) Which component has a voltage difference across it? In other words, which item has a different voltage on one side than on the other? (b) The bulb is at 9 V. Why isn’t it on? 4. Now close the switch so that the light bulb is on. Repeat the same four voltage readings that you did in question 3. Record your answers in the second column in the table. Which component has a voltage difference across it? Does this help you answer question 3b, above?
  • 4.
    Part 2. SeriesCircuit 1. Set up a series circuit with one battery, two bulbs, and one switch, as shown. (You can either add a bulb to your previous circuit or click “Reset” and start over, whichever is easier for you.) 2. Add a voltmeter by checking the “Voltmeter” box in the right-hand side control panel. Drag the black voltmeter wire so that the metal “point” is touching the negative (silver) end of the battery. Drag the red voltmeter wire so that the metal “point” is touching the positive (black) end of the battery. If the voltmeter reads “9.00 V”, you’ve done it right. 3. Close the switch so that the bulbs light up. (What do you notice about the brightness of the bulbs compared to the previous circuit?) Use the red voltmeter wire to measure the voltage on both sides of both bulbs. Calculate the voltage difference across each bulb and record it in the table (which will be the left bulb, the right bulb, the left side of bulb, the right side of bulb, and the voltage difference for this bulb (left minus right). 4. Right-click on the bulb on the right and select “Change Resistance” from the menu that pops up. Enter “20” for the new resistance. Repeat your measurements and calculations from step 3. Which bulb (the high resistance or the low resistance) requires more voltage (energy) for the charges to get through it?
  • 5.
    Part 3. ParallelCircuit 1. Set up a parallel circuit with one battery, two bulbs, and one switch, as shown. (Again, you can either rearrange your previous circuit or start over. I find it easier to start over with this one. If you rearrange, make sure you reset the resistance of each bulb to 10.) 2. Add a voltmeter by checking the “Voltmeter” box in the right-hand side control panel. Drag the black voltmeter wire so that the metal “point” is touching the negative (silver) end of the battery. Drag the red voltmeter wire so that the metal “point” is touching the positive (black) end of the battery. If the voltmeter reads “9.00 V”, you’ve done it right. 3. Close the switch so that the bulbs light up. (What do you notice about the brightness of the bulbs compared to the previous circuit?) Use the red voltmeter wire to measure the voltage on both sides of both bulbs. Calculate the voltage difference across each bulb and record it. 4. Right-click on the bulb on the right and select “Change Resistance” from the menu that pops up. Enter “20” for the new resistance. Repeat step 3.
  • 6.
    Table of Contents With the switch open with the switch closed rightside of the bulb left side of the bulb right side of the switch left side of the switch