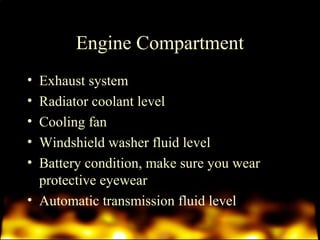
Introduction to Apparatus 
Inspection and Maintenance 
Chapter 3
Fire Apparatus 
• Fire Apparatus must always be ready to 
respond. 
• Regardless of whether the truck responds to 
an emergency call once an hour or once a 
month. 
• It must also be capable of performing in the 
manner for which it was designed at a 
moment’s notice.
Maintenance 
• Keeping apparatus in a state of usefulness 
or readiness. 
• The driver/operator should be able to 
perform basic maintenance functions.
Repair 
• Restoring or replacing that which has 
become inoperable. 
• Repair functions are carried out by qualified 
mechanics.
Preventive Maintenance 
• Ensures apparatus reliability 
• Reduction in the frequency and cost of 
repairs 
• Cuts the out-of-service time
Purpose of Preventive 
Maintenance 
• To try to eliminate unexpected and 
catastrophic apparatus failures that could be 
life and/or property threatening.
FD Maintenance SOP’s 
• Who should perform certain maintenance 
functions 
• When maintenance and inspection should 
be performed 
• How detected problems should be corrected
FD Maintenance SOP’s 
• What items driver/operators are responsible 
for checking and which conditions they are 
allowed to correct on their own 
• How the process should be documented and 
transmitted to the proper person
Maintenance & Inspection 
Records 
• May be needed in a warranty claim to 
document that the necessary maintenance 
was performed 
• Are likely to be scrutinized by accident 
investigators in the event of an accident 
• Can assist in the decision whether to 
purchase new apparatus in lieu of continued 
repairs
Keeping Your Apparatus 
Clean 
• Ensures good public relations 
• Facilitates inspection 
• Promotes a longer vehicle life 
• Keeps the oncoming shift happy
Keeping Your Apparatus 
Clean 
• Over cleaning when using any combination 
of degreasing agents, steam cleaners, and/or 
pressure washing equipment on the 
underside of the apparatus can remove 
lubrication from the chassis, engine, pump, 
and aerial device components and cause 
unnecessary wear
Washing Your Apparatus 
• Use only cold water during the first 6 
months, this in effect hardens the paint & 
keeps it from spotting 
• Use a garden hose without a nozzle 
• Set the pressure so that that the stream from 
the end of the hose is no more than 1 foot in 
length…
Washing Your Apparatus 
• Never remove dust or grit by dry rubbing 
• Use a good grade automotive shampoo, 
while following the directions on the 
container 
• Never use extremely hot water or while the 
surface of the vehicle is hot
Washing Your Apparatus 
• Rinse as much of the loose dirt from the vehicle as 
possible prior to washing with shampoo 
• Try to wash mud, dirt, grease, and road salts off 
the vehicle before they have a chance to dry 
• Never use gasoline or other solvents to remove 
grease or tar from the painted surfaces 
• Dry with a clean chamois rinsed frequently with 
clean water
Washing Your Apparatus 
• Once a new vehicles finish is properly 
cured (according to the owners 
manual), you may then use garden hoses 
with nozzles or pressure washers may be 
used to speed the cleaning of the apparatus 
• Always be sure to hand wash with soapy 
water on a regular basis to ensure proper 
cleanliness
Glass Care 
• Use warm soapy water or commercial glass 
cleaners with paper towels or cloth rags 
• Never use dry rags or towels by their selves, 
because they may allow grit to scratch the 
surface 
• Never use putty knives, razor blades, steel 
wool or other metal objects to clean the 
glass or remove deposits
Interior Cleaning 
• Make sure the vehicle is well ventilated 
when using any cleaning products inside the 
cab or crew riding area 
• Do not use volatile cleaning agents, such as 
acetone, lacquer thinner, enamel reducer, 
nail polish remover, laundry detergent, 
bleach, gasoline, naphtha or tetrachloride to 
clean interior surfaces
Waxing 
• Follow the apparatus manufacturer’s 
instructions regarding the application of 
wax or similar polishes 
• On many newer apparatus the application of 
these products is no longer necessary, and 
in fact may damage clear-coat protective-seal 
finishes that are applied over paints
Waxing 
• Do not apply waxes or polishes until the 
paint is at least six months old 
• Wash & dry the apparatus before applying 
polish or wax 
• Apply wax or polish with a soft cloth and 
buff with a soft cloth or mechanical buffer
Specific Components 
& Systems Maintenance
Clutch Free Play 
• Is the distance that the pedal must be 
pushed before the throw-out bearing 
actually contacts the clutch release fingers 
• Insufficient free play shortens the life of the 
throw-out bearing and causes the clutch to 
slip, overheat, and wear out sooner than 
necessary
Clutch Free Play 
• Excessive free play may result in the clutch 
not releasing completely, which can cause 
harsh shifting, gear clash, and damage to 
the gear teeth
Steering Wheel Free Play 
• Steering wheel play should be no more than 
10 degrees in either direction
Steering Wheel Free Play 
• On a steering wheel with a 20-inch 
diameter,this will mean a play of about 20 
inches in either direction 
• Play that exceeds these parameters could 
indicate a serious steering problem that 
could result in the driver/operator losing 
control of the apparatus under otherwise 
reasonable driving conditions
Braking Systems 
• Most modern large fire apparatus are 
equipped with air-operated braking systems 
• Smaller late-model and some older large 
apparatus are equipped with hydraulic 
braking systems 
• Most newer apparatus regardless of the 
brake system, are equipped with antilock 
braking systems (ABS)
Braking Systems 
• ABS reduces the possibility of the apparatus 
being thrown into a skid when the brakes 
are fully applied 
• On apparatus equipped with air brakes, the 
air pressure should build to sufficient level 
to allow vehicle operations within 60 
seconds of starting
Braking Systems 
• New apparatus should be able to come to a 
complete stop from a speed of 20 mph in a 
distance not to exceed 35 feet 
• The parking brake should hold the 
apparatus in place on grades up to 20%
Braking Systems 
• Apparatus with air brakes are to be 
equipped with an air protection valve that 
prevents the air horns from being operated 
when the pressure in the air reservoir drops 
below 80 psi
Electrical Load Management 
System (ELMS) 
• The purpose of the apparatus ELMS is to 
prevent an overload of the vehicles 
electrical generation system 
• The ELMS load sequencer turns various 
lights on at specified intervals so that the 
start-up electrical load for all of the devices 
does not occur at the same time
Electrical Load Management 
System (ELMS) 
• The ELMS monitor “watches” the system 
for added electrical loads that threaten 
threaten to overload the system 
• If and when an overload condition occurs, 
the ELMS monitor shuts down less 
important electrical equipment to prevent 
overloading. This process is called load 
shedding
Chains 
• During periods of inclement weather (ice, 
snow, sleet & such forecast), it may be 
desirable to activate the chains and make 
sure they are operating properly
Windshield Washer Fluid 
Reservoir 
• It is recommended that the windshield 
washer fluid reservoir be refilled any time it 
is less than ½ full 
• Windshield washer fluids are commercially 
available, and compatibility from one brand 
to another is usually not a concern
Chassis 
• To select the proper chassis lubricant, 
consider the requirements of the unit to be 
lubricated, the characteristics of the 
lubricants, and the manufacturer’s 
recommendations 
• The manufacturer’s manual will 
“recommend” the Society of Automotive 
Engineers (SAE) numbers for the engine oil
Chassis 
• The SAE number indicates only the oil’s 
viscosity 
• Essential characteristics of oil are corrosion 
protection, foaming, sludging, and carbon 
accumulation, which may be controlled by 
the refiner 
• Different types of oils should not be mixed
Fire Pump 
• Any time a fire pump has been operated at draft 
from a static water supply, the pump and the 
piping should be thoroughly flushed before the 
apparatus is placed back in service 
• If untreated water has been used to fill the tank, it 
should be drained, and the tank should be flushed 
and refilled with clean water as soon as possible
Inspection Procedures 
• The driver/operator should follow a 
systematic procedure for inspecting his/her 
apparatus. Having a systematic method 
helps ensure that all important items are 
checked every time the inspection is made
Circle or Walk Around Method 
• This method involves the driver/operator 
starting at the drivers door on the cab and 
working around the apparatus in a 
clockwise pattern.
Approaching the Apparatus 
• Look for any general problems 
• Vehicle body damage or leaning to one side 
are examples of things that should be 
readily apparent 
• Look beneath the vehicle for spots that 
would indicate leaking vehicle fluids such 
as water, coolant, oil, brake fluid, hydraulic 
fluid, or transmission fluid
Left & Right Front Side 
• The first portion checked should be the driver’s 
side front 
• Each door should close tightly & the door latch 
should work as it was designed to 
• Make sure that all door window glass is intact & 
clean 
• Make sure all steps, platforms, handrails, tools and 
ladders are securely mounted and without 
deformation
Tires & Wheels 
• A quick visual of the wheel should indicate 
any broken or bent studs, lugs or clamps 
• Each lug nut should be tested by hand 
• Wheels should not be cracked or bent 
• Accumulations of brake dust on the wheels 
• Check for fluid leaks, seals that retain axle 
gear oil may show slight seepage and still 
be serviceable
Tires & Wheels 
• Trails of fluid on the wheel and or tire are 
unacceptable 
• Check the suspension components found 
behind the wheel and tire 
• Check for proper tire inflation, too much or 
too little pressure can damage the tire and 
cause bad handling characteristics
Tires & Wheels 
• Valve stem condition, should not be 
cracked, cut or loose 
• Tire condition, check for proper tread depth, 
tread separation, excessive wear to the 
sidewalls, cuts or objects impaled in the tire
Front Inspection 
• Significant body damage 
• Front axle, steering system, pump piping if 
present 
• Windshield wipers, should be held snug to 
the windshield with the appropriate amount 
of tension 
• All lights should be checked for cracked 
lenses and that all bulbs are working
Rear Side Inspection 
• Apparent body damage 
• All lights working 
• Check to make sure dual tires are not 
rubbing 
• Splash guards in place 
• Hose loads 
• Make sure the proper amount of supply 
hose is loaded
In Cab Inspection 
• Seat and mirrors adjusted to fit the driver/operator 
• All electrical switches in the off position prior to 
starting the vehicle 
• When an engine is started for non-emergency 
runs, do not run at a full load until the engine has 
had time to warm up to it’s normal operating 
temperature 
• Seatbelts/restraints
In Cab Inspection 
• Mirrors should not be bent or broken 
• Tilt steering wheel working properly 
• Assure the gauges are all working properly 
and show to be operating in normal 
functioning range 
• Fuel gauge should show at least ¾ full at all 
times
In Cab Inspection 
• The speedometer should be at or very near zero 
when parked 
• Electrical switches working properly 
• Turn signals 
• High beam switches 
• Heating & A/C controls 
• Radio controls 
• Audible warning devices
In Cab Inspection 
• Computer or mobile data devices 
• Windshield wiper controls 
• Window defroster 
• Automatic snow chains 
• Pump switch 
• Any other obvious damaged or missing 
components
Engine Compartment 
• Should be checked without engine running 
• Check for proper operation of cab lift 
motors and pumps 
• Engine crankcase oil level 
• Engine air filter 
• Emergency shutdown, test according to 
manufacturer’s instructions
Engine Compartment 
• Exhaust system 
• Radiator coolant level 
• Cooling fan 
• Windshield washer fluid level 
• Battery condition, make sure you wear 
protective eyewear 
• Automatic transmission fluid level
Engine Compartment 
• Power steering fluid 
• Brake fluid on hydraulic brake systems 
• Air system 
• Belts 
• Check for any leaks, fluid or air 
• Electrical wiring
Daily Inspections 
• Operate the pump drive control 
• Make sure auxiliary fuel tank is full 
• Make sure all gauges on the pump panel are 
working properly 
• Make sure all hand lines are completely 
drained of water 
• Operate the controls to check or inspect the 
pump
Daily Inspections 
• Check to make sure all the valve controls 
are in the proper position 
• Inspect the water & foam tanks 
• Check the underside of the apparatus and 
inside compartments for evidence of water 
or foam leaks 
• Test roof and bumper turrets 
• Check all extinguishers
Weekly Inspections 
• Flush the pump with clear water if it is your 
departments policy to carry a pump full of 
water 
• Open all of the valves and drains and push 
water through the system till it runs clear 
• Check and clean the intake strainers 
• Operate the pump primer & make sure it’s 
oil reservoir is full
Weekly Inspections 
• Check the pump gear box for proper oil 
level and traces of water 
• Operate the changeover valve while 
pumping from the booster tank in the case 
of a multi stage pump 
• Check the packing glands for excessive 
leaks 
• Recalibrate the flowmeter
Weekly Inspections 
• Operate the pump pressure control devices 
• Test the accuracy of the foam proportioning 
system (consult IFSTA’s Principles of 
Foam Fire Fighting manual for more 
information on foam system testing) 
• Refer to the manufacturer’s 
recommendations for additional 
instructions, if any
Video Time 
ACTION Training systems, Inc. 
APPARATUS INSPECTION 
& MAINTENANCE

Inspection & Maintenance

  • 1.
    Introduction to Apparatus Inspection and Maintenance Chapter 3
  • 2.
    Fire Apparatus •Fire Apparatus must always be ready to respond. • Regardless of whether the truck responds to an emergency call once an hour or once a month. • It must also be capable of performing in the manner for which it was designed at a moment’s notice.
  • 3.
    Maintenance • Keepingapparatus in a state of usefulness or readiness. • The driver/operator should be able to perform basic maintenance functions.
  • 4.
    Repair • Restoringor replacing that which has become inoperable. • Repair functions are carried out by qualified mechanics.
  • 5.
    Preventive Maintenance •Ensures apparatus reliability • Reduction in the frequency and cost of repairs • Cuts the out-of-service time
  • 6.
    Purpose of Preventive Maintenance • To try to eliminate unexpected and catastrophic apparatus failures that could be life and/or property threatening.
  • 7.
    FD Maintenance SOP’s • Who should perform certain maintenance functions • When maintenance and inspection should be performed • How detected problems should be corrected
  • 8.
    FD Maintenance SOP’s • What items driver/operators are responsible for checking and which conditions they are allowed to correct on their own • How the process should be documented and transmitted to the proper person
  • 9.
    Maintenance & Inspection Records • May be needed in a warranty claim to document that the necessary maintenance was performed • Are likely to be scrutinized by accident investigators in the event of an accident • Can assist in the decision whether to purchase new apparatus in lieu of continued repairs
  • 10.
    Keeping Your Apparatus Clean • Ensures good public relations • Facilitates inspection • Promotes a longer vehicle life • Keeps the oncoming shift happy
  • 11.
    Keeping Your Apparatus Clean • Over cleaning when using any combination of degreasing agents, steam cleaners, and/or pressure washing equipment on the underside of the apparatus can remove lubrication from the chassis, engine, pump, and aerial device components and cause unnecessary wear
  • 12.
    Washing Your Apparatus • Use only cold water during the first 6 months, this in effect hardens the paint & keeps it from spotting • Use a garden hose without a nozzle • Set the pressure so that that the stream from the end of the hose is no more than 1 foot in length…
  • 13.
    Washing Your Apparatus • Never remove dust or grit by dry rubbing • Use a good grade automotive shampoo, while following the directions on the container • Never use extremely hot water or while the surface of the vehicle is hot
  • 14.
    Washing Your Apparatus • Rinse as much of the loose dirt from the vehicle as possible prior to washing with shampoo • Try to wash mud, dirt, grease, and road salts off the vehicle before they have a chance to dry • Never use gasoline or other solvents to remove grease or tar from the painted surfaces • Dry with a clean chamois rinsed frequently with clean water
  • 15.
    Washing Your Apparatus • Once a new vehicles finish is properly cured (according to the owners manual), you may then use garden hoses with nozzles or pressure washers may be used to speed the cleaning of the apparatus • Always be sure to hand wash with soapy water on a regular basis to ensure proper cleanliness
  • 16.
    Glass Care •Use warm soapy water or commercial glass cleaners with paper towels or cloth rags • Never use dry rags or towels by their selves, because they may allow grit to scratch the surface • Never use putty knives, razor blades, steel wool or other metal objects to clean the glass or remove deposits
  • 17.
    Interior Cleaning •Make sure the vehicle is well ventilated when using any cleaning products inside the cab or crew riding area • Do not use volatile cleaning agents, such as acetone, lacquer thinner, enamel reducer, nail polish remover, laundry detergent, bleach, gasoline, naphtha or tetrachloride to clean interior surfaces
  • 18.
    Waxing • Followthe apparatus manufacturer’s instructions regarding the application of wax or similar polishes • On many newer apparatus the application of these products is no longer necessary, and in fact may damage clear-coat protective-seal finishes that are applied over paints
  • 19.
    Waxing • Donot apply waxes or polishes until the paint is at least six months old • Wash & dry the apparatus before applying polish or wax • Apply wax or polish with a soft cloth and buff with a soft cloth or mechanical buffer
  • 20.
    Specific Components &Systems Maintenance
  • 21.
    Clutch Free Play • Is the distance that the pedal must be pushed before the throw-out bearing actually contacts the clutch release fingers • Insufficient free play shortens the life of the throw-out bearing and causes the clutch to slip, overheat, and wear out sooner than necessary
  • 22.
    Clutch Free Play • Excessive free play may result in the clutch not releasing completely, which can cause harsh shifting, gear clash, and damage to the gear teeth
  • 23.
    Steering Wheel FreePlay • Steering wheel play should be no more than 10 degrees in either direction
  • 25.
    Steering Wheel FreePlay • On a steering wheel with a 20-inch diameter,this will mean a play of about 20 inches in either direction • Play that exceeds these parameters could indicate a serious steering problem that could result in the driver/operator losing control of the apparatus under otherwise reasonable driving conditions
  • 26.
    Braking Systems •Most modern large fire apparatus are equipped with air-operated braking systems • Smaller late-model and some older large apparatus are equipped with hydraulic braking systems • Most newer apparatus regardless of the brake system, are equipped with antilock braking systems (ABS)
  • 27.
    Braking Systems •ABS reduces the possibility of the apparatus being thrown into a skid when the brakes are fully applied • On apparatus equipped with air brakes, the air pressure should build to sufficient level to allow vehicle operations within 60 seconds of starting
  • 28.
    Braking Systems •New apparatus should be able to come to a complete stop from a speed of 20 mph in a distance not to exceed 35 feet • The parking brake should hold the apparatus in place on grades up to 20%
  • 30.
    Braking Systems •Apparatus with air brakes are to be equipped with an air protection valve that prevents the air horns from being operated when the pressure in the air reservoir drops below 80 psi
  • 31.
    Electrical Load Management System (ELMS) • The purpose of the apparatus ELMS is to prevent an overload of the vehicles electrical generation system • The ELMS load sequencer turns various lights on at specified intervals so that the start-up electrical load for all of the devices does not occur at the same time
  • 32.
    Electrical Load Management System (ELMS) • The ELMS monitor “watches” the system for added electrical loads that threaten threaten to overload the system • If and when an overload condition occurs, the ELMS monitor shuts down less important electrical equipment to prevent overloading. This process is called load shedding
  • 33.
    Chains • Duringperiods of inclement weather (ice, snow, sleet & such forecast), it may be desirable to activate the chains and make sure they are operating properly
  • 34.
    Windshield Washer Fluid Reservoir • It is recommended that the windshield washer fluid reservoir be refilled any time it is less than ½ full • Windshield washer fluids are commercially available, and compatibility from one brand to another is usually not a concern
  • 35.
    Chassis • Toselect the proper chassis lubricant, consider the requirements of the unit to be lubricated, the characteristics of the lubricants, and the manufacturer’s recommendations • The manufacturer’s manual will “recommend” the Society of Automotive Engineers (SAE) numbers for the engine oil
  • 36.
    Chassis • TheSAE number indicates only the oil’s viscosity • Essential characteristics of oil are corrosion protection, foaming, sludging, and carbon accumulation, which may be controlled by the refiner • Different types of oils should not be mixed
  • 37.
    Fire Pump •Any time a fire pump has been operated at draft from a static water supply, the pump and the piping should be thoroughly flushed before the apparatus is placed back in service • If untreated water has been used to fill the tank, it should be drained, and the tank should be flushed and refilled with clean water as soon as possible
  • 38.
    Inspection Procedures •The driver/operator should follow a systematic procedure for inspecting his/her apparatus. Having a systematic method helps ensure that all important items are checked every time the inspection is made
  • 39.
    Circle or WalkAround Method • This method involves the driver/operator starting at the drivers door on the cab and working around the apparatus in a clockwise pattern.
  • 41.
    Approaching the Apparatus • Look for any general problems • Vehicle body damage or leaning to one side are examples of things that should be readily apparent • Look beneath the vehicle for spots that would indicate leaking vehicle fluids such as water, coolant, oil, brake fluid, hydraulic fluid, or transmission fluid
  • 42.
    Left & RightFront Side • The first portion checked should be the driver’s side front • Each door should close tightly & the door latch should work as it was designed to • Make sure that all door window glass is intact & clean • Make sure all steps, platforms, handrails, tools and ladders are securely mounted and without deformation
  • 43.
    Tires & Wheels • A quick visual of the wheel should indicate any broken or bent studs, lugs or clamps • Each lug nut should be tested by hand • Wheels should not be cracked or bent • Accumulations of brake dust on the wheels • Check for fluid leaks, seals that retain axle gear oil may show slight seepage and still be serviceable
  • 44.
    Tires & Wheels • Trails of fluid on the wheel and or tire are unacceptable • Check the suspension components found behind the wheel and tire • Check for proper tire inflation, too much or too little pressure can damage the tire and cause bad handling characteristics
  • 45.
    Tires & Wheels • Valve stem condition, should not be cracked, cut or loose • Tire condition, check for proper tread depth, tread separation, excessive wear to the sidewalls, cuts or objects impaled in the tire
  • 46.
    Front Inspection •Significant body damage • Front axle, steering system, pump piping if present • Windshield wipers, should be held snug to the windshield with the appropriate amount of tension • All lights should be checked for cracked lenses and that all bulbs are working
  • 47.
    Rear Side Inspection • Apparent body damage • All lights working • Check to make sure dual tires are not rubbing • Splash guards in place • Hose loads • Make sure the proper amount of supply hose is loaded
  • 48.
    In Cab Inspection • Seat and mirrors adjusted to fit the driver/operator • All electrical switches in the off position prior to starting the vehicle • When an engine is started for non-emergency runs, do not run at a full load until the engine has had time to warm up to it’s normal operating temperature • Seatbelts/restraints
  • 49.
    In Cab Inspection • Mirrors should not be bent or broken • Tilt steering wheel working properly • Assure the gauges are all working properly and show to be operating in normal functioning range • Fuel gauge should show at least ¾ full at all times
  • 50.
    In Cab Inspection • The speedometer should be at or very near zero when parked • Electrical switches working properly • Turn signals • High beam switches • Heating & A/C controls • Radio controls • Audible warning devices
  • 51.
    In Cab Inspection • Computer or mobile data devices • Windshield wiper controls • Window defroster • Automatic snow chains • Pump switch • Any other obvious damaged or missing components
  • 52.
    Engine Compartment •Should be checked without engine running • Check for proper operation of cab lift motors and pumps • Engine crankcase oil level • Engine air filter • Emergency shutdown, test according to manufacturer’s instructions
  • 53.
    Engine Compartment •Exhaust system • Radiator coolant level • Cooling fan • Windshield washer fluid level • Battery condition, make sure you wear protective eyewear • Automatic transmission fluid level
  • 54.
    Engine Compartment •Power steering fluid • Brake fluid on hydraulic brake systems • Air system • Belts • Check for any leaks, fluid or air • Electrical wiring
  • 55.
    Daily Inspections •Operate the pump drive control • Make sure auxiliary fuel tank is full • Make sure all gauges on the pump panel are working properly • Make sure all hand lines are completely drained of water • Operate the controls to check or inspect the pump
  • 56.
    Daily Inspections •Check to make sure all the valve controls are in the proper position • Inspect the water & foam tanks • Check the underside of the apparatus and inside compartments for evidence of water or foam leaks • Test roof and bumper turrets • Check all extinguishers
  • 57.
    Weekly Inspections •Flush the pump with clear water if it is your departments policy to carry a pump full of water • Open all of the valves and drains and push water through the system till it runs clear • Check and clean the intake strainers • Operate the pump primer & make sure it’s oil reservoir is full
  • 58.
    Weekly Inspections •Check the pump gear box for proper oil level and traces of water • Operate the changeover valve while pumping from the booster tank in the case of a multi stage pump • Check the packing glands for excessive leaks • Recalibrate the flowmeter
  • 59.
    Weekly Inspections •Operate the pump pressure control devices • Test the accuracy of the foam proportioning system (consult IFSTA’s Principles of Foam Fire Fighting manual for more information on foam system testing) • Refer to the manufacturer’s recommendations for additional instructions, if any
  • 60.
    Video Time ACTIONTraining systems, Inc. APPARATUS INSPECTION & MAINTENANCE