Downloaded 131 times


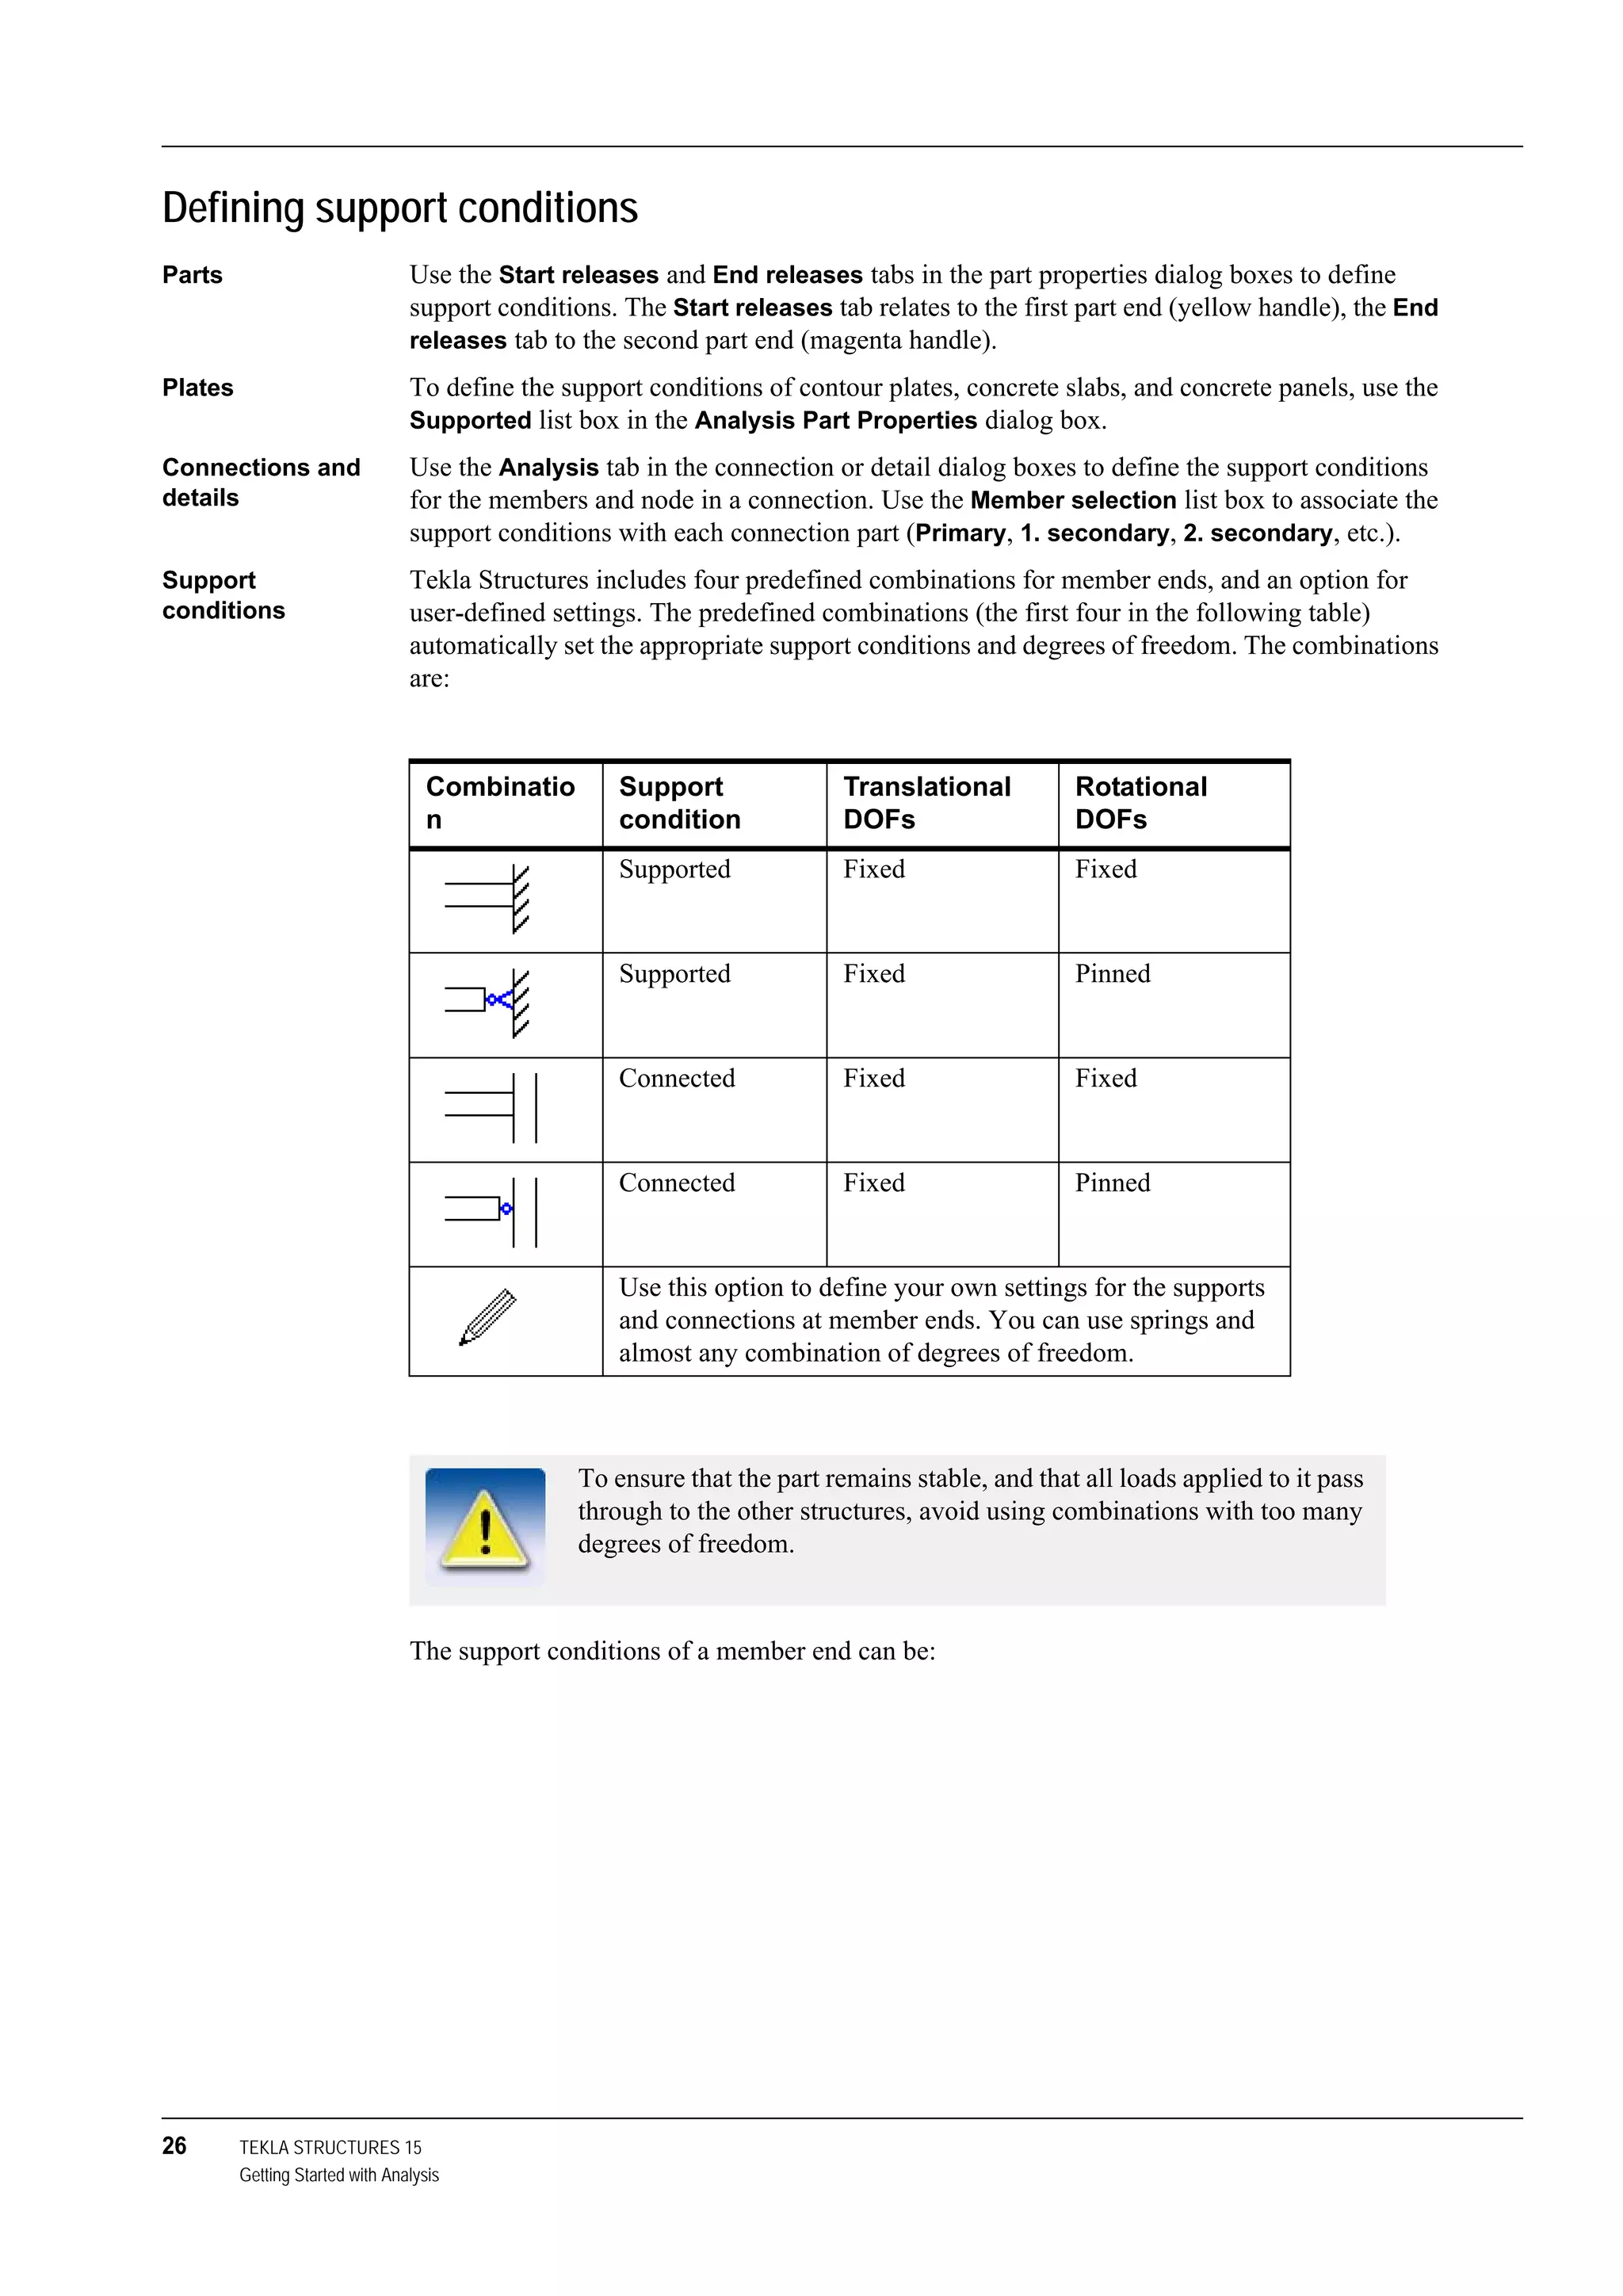
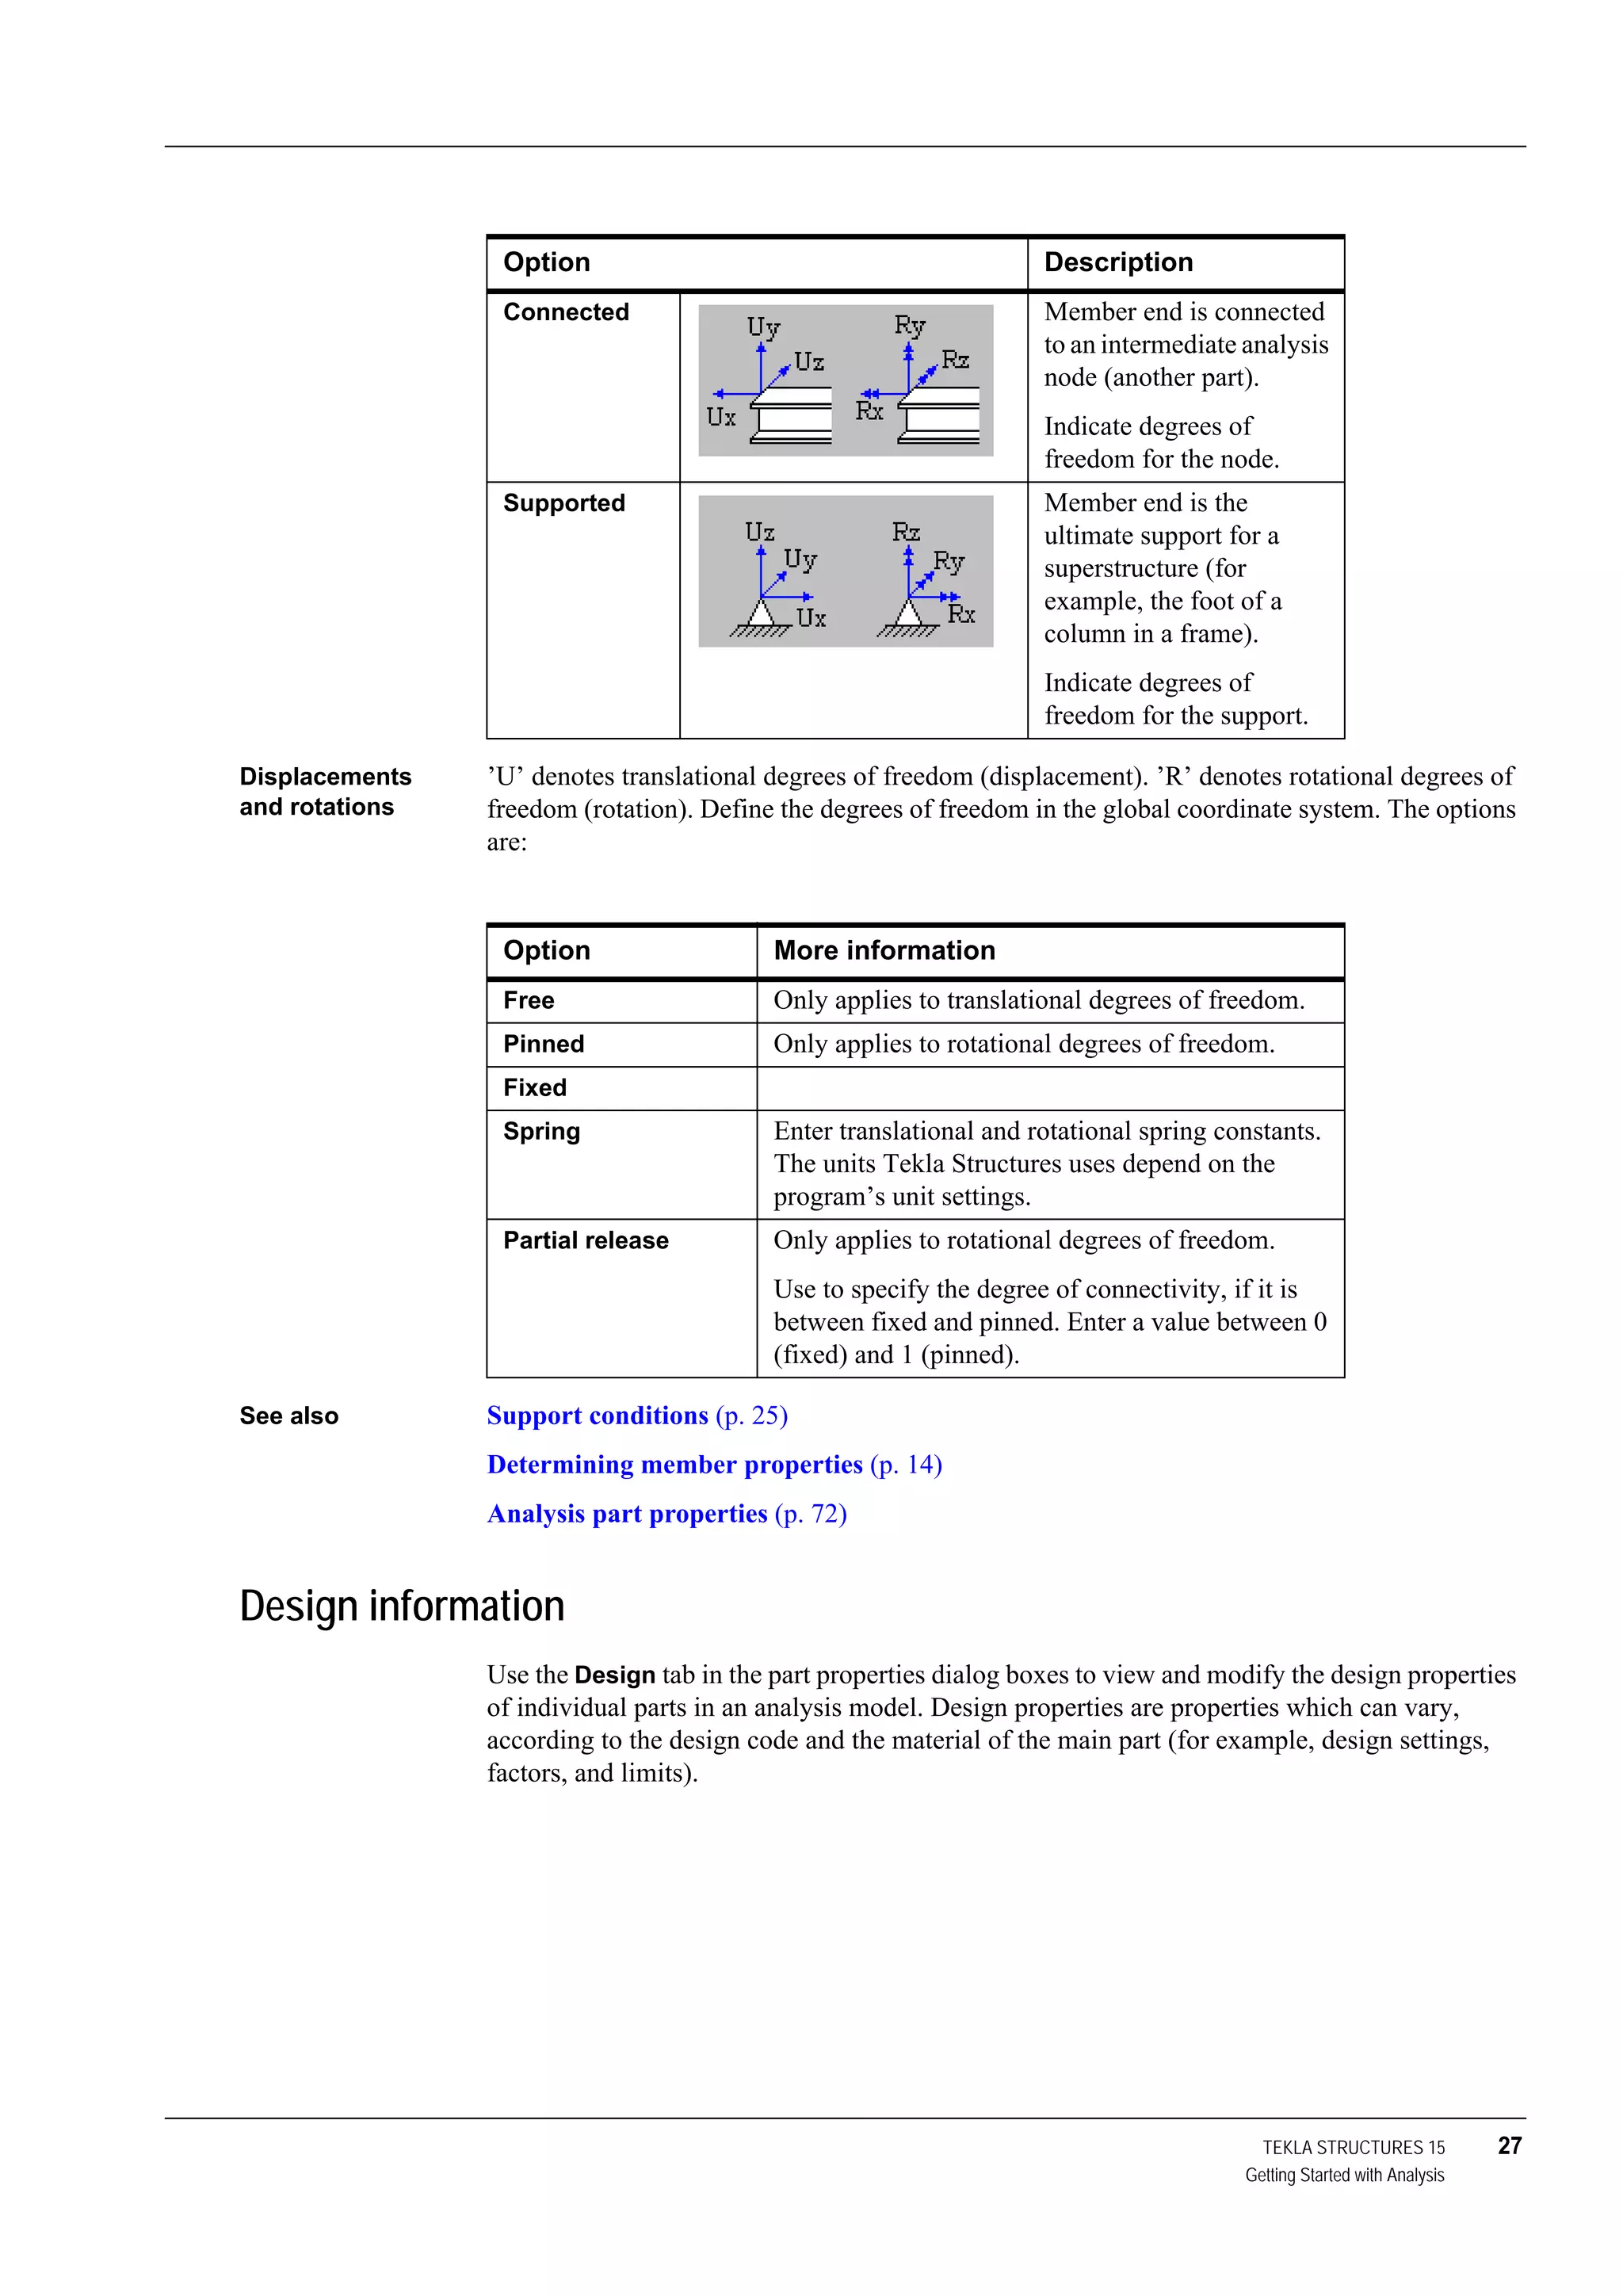
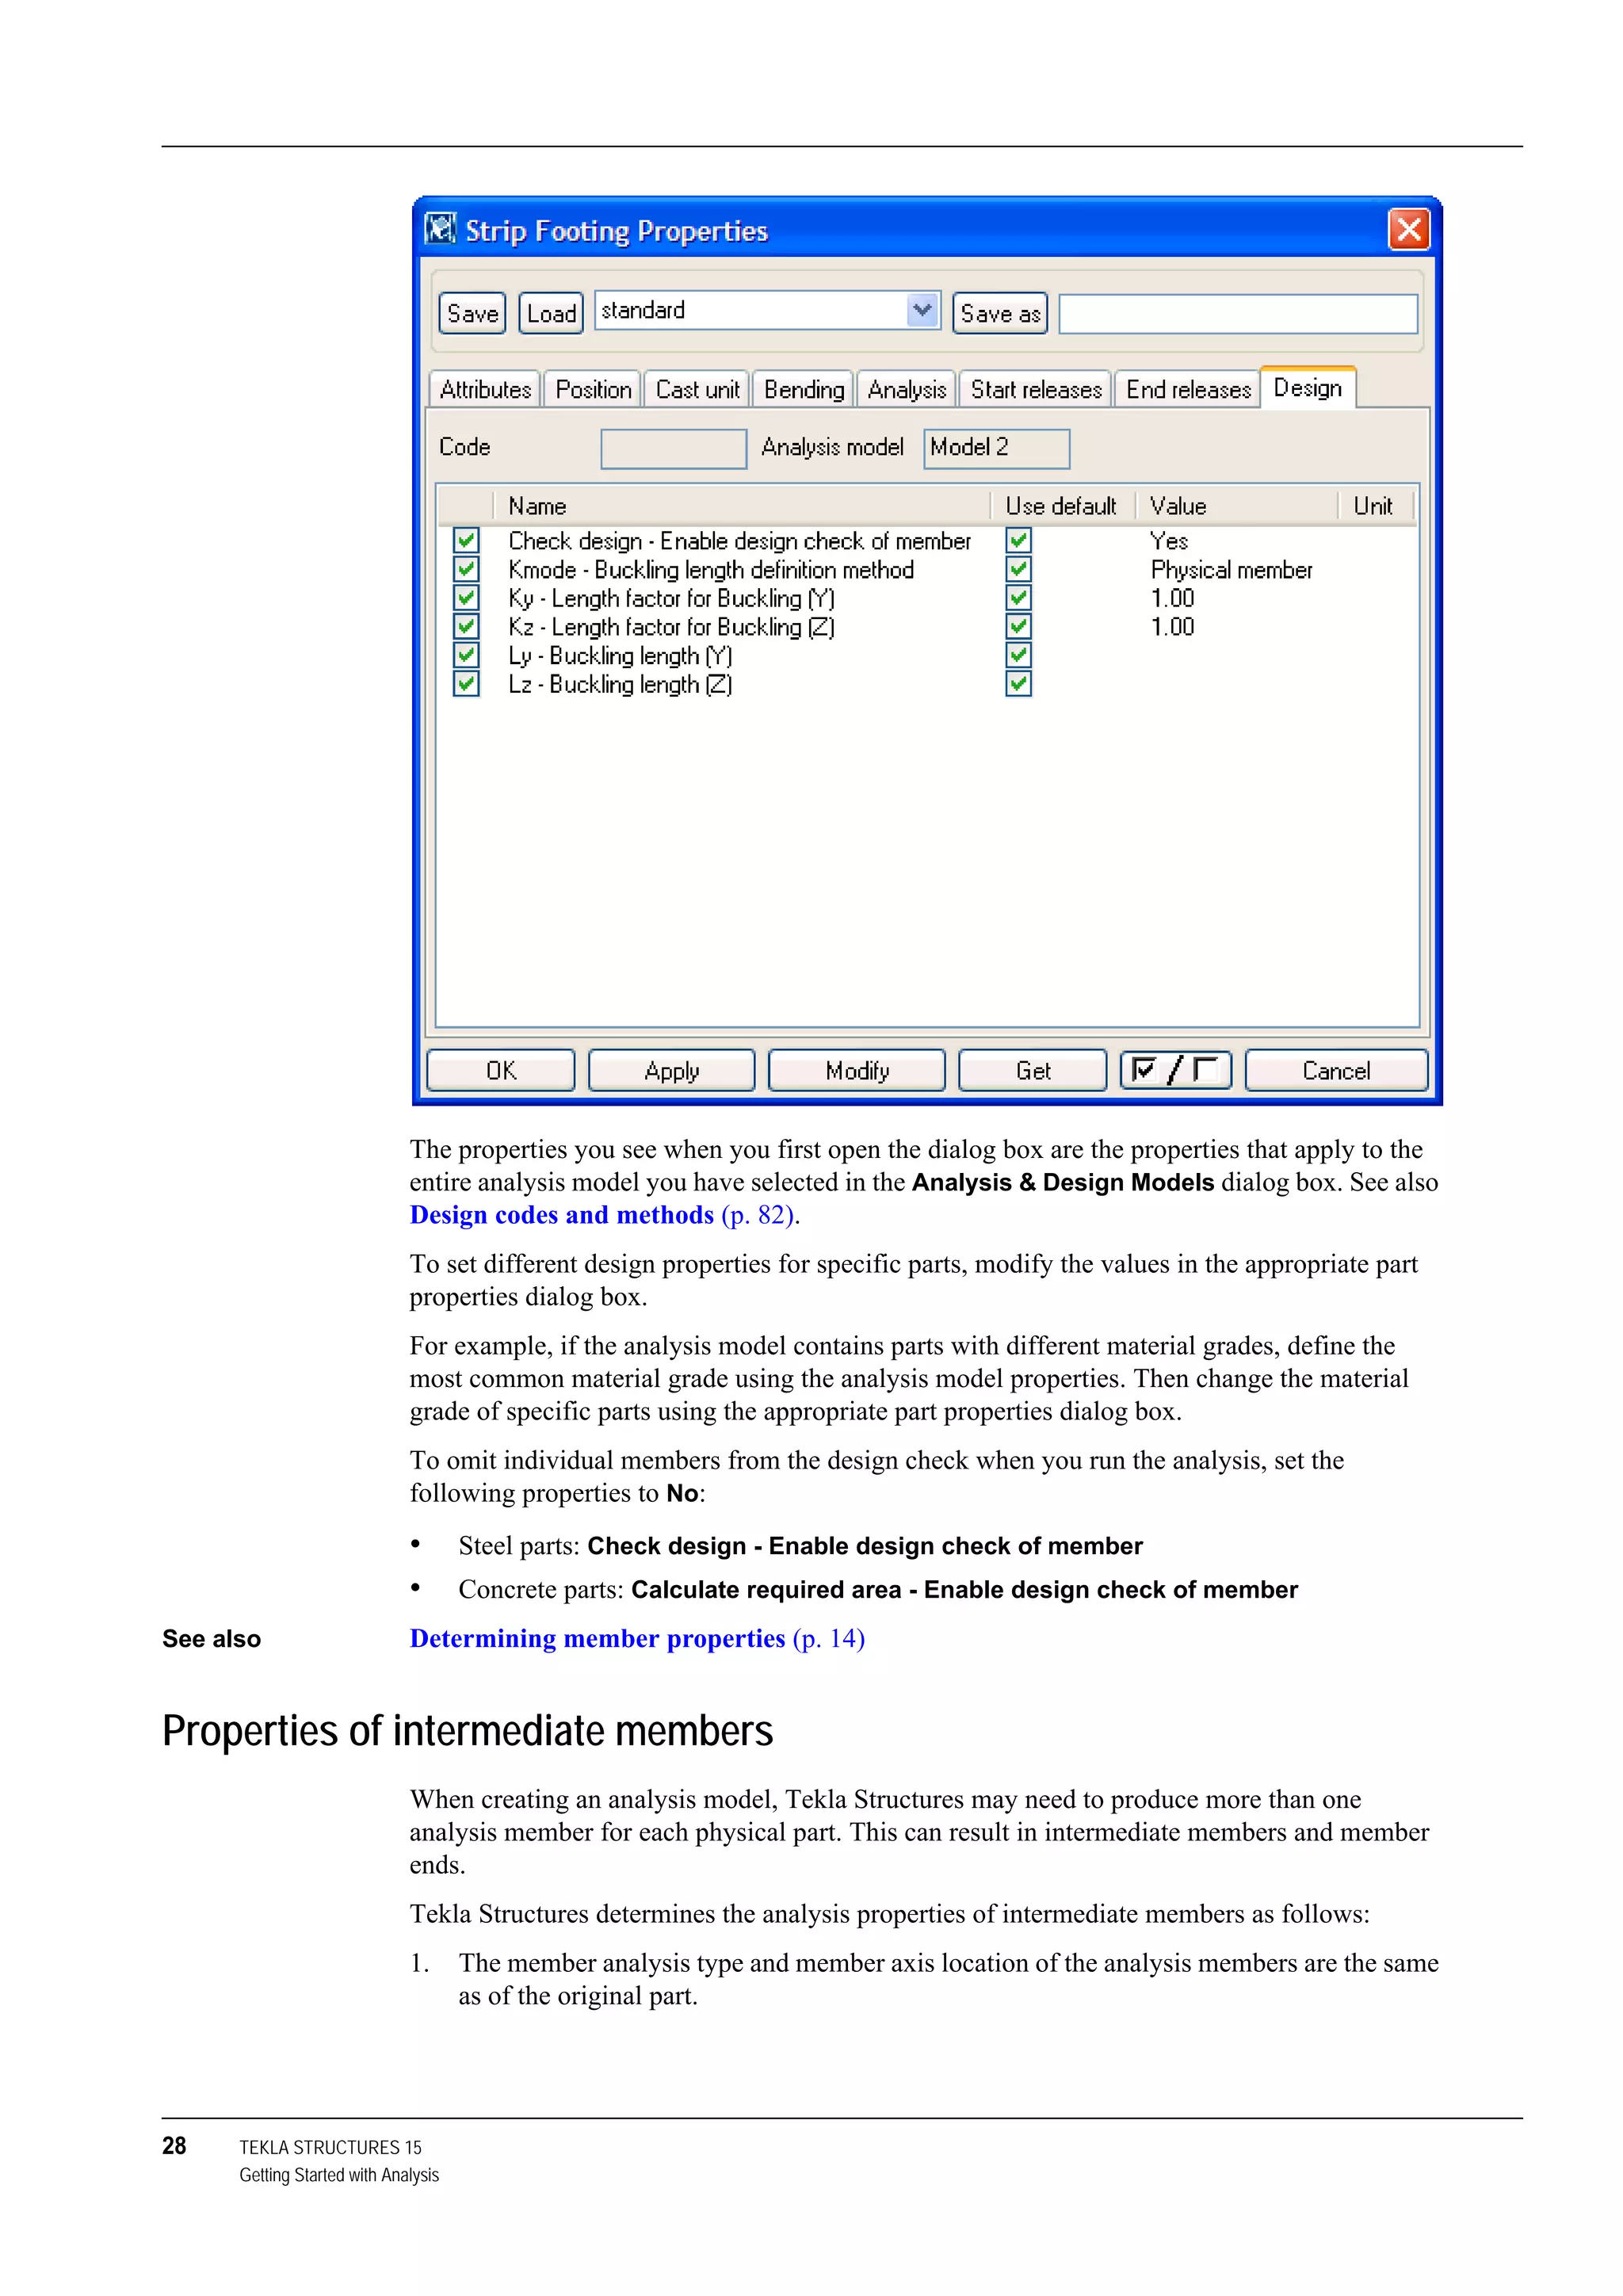
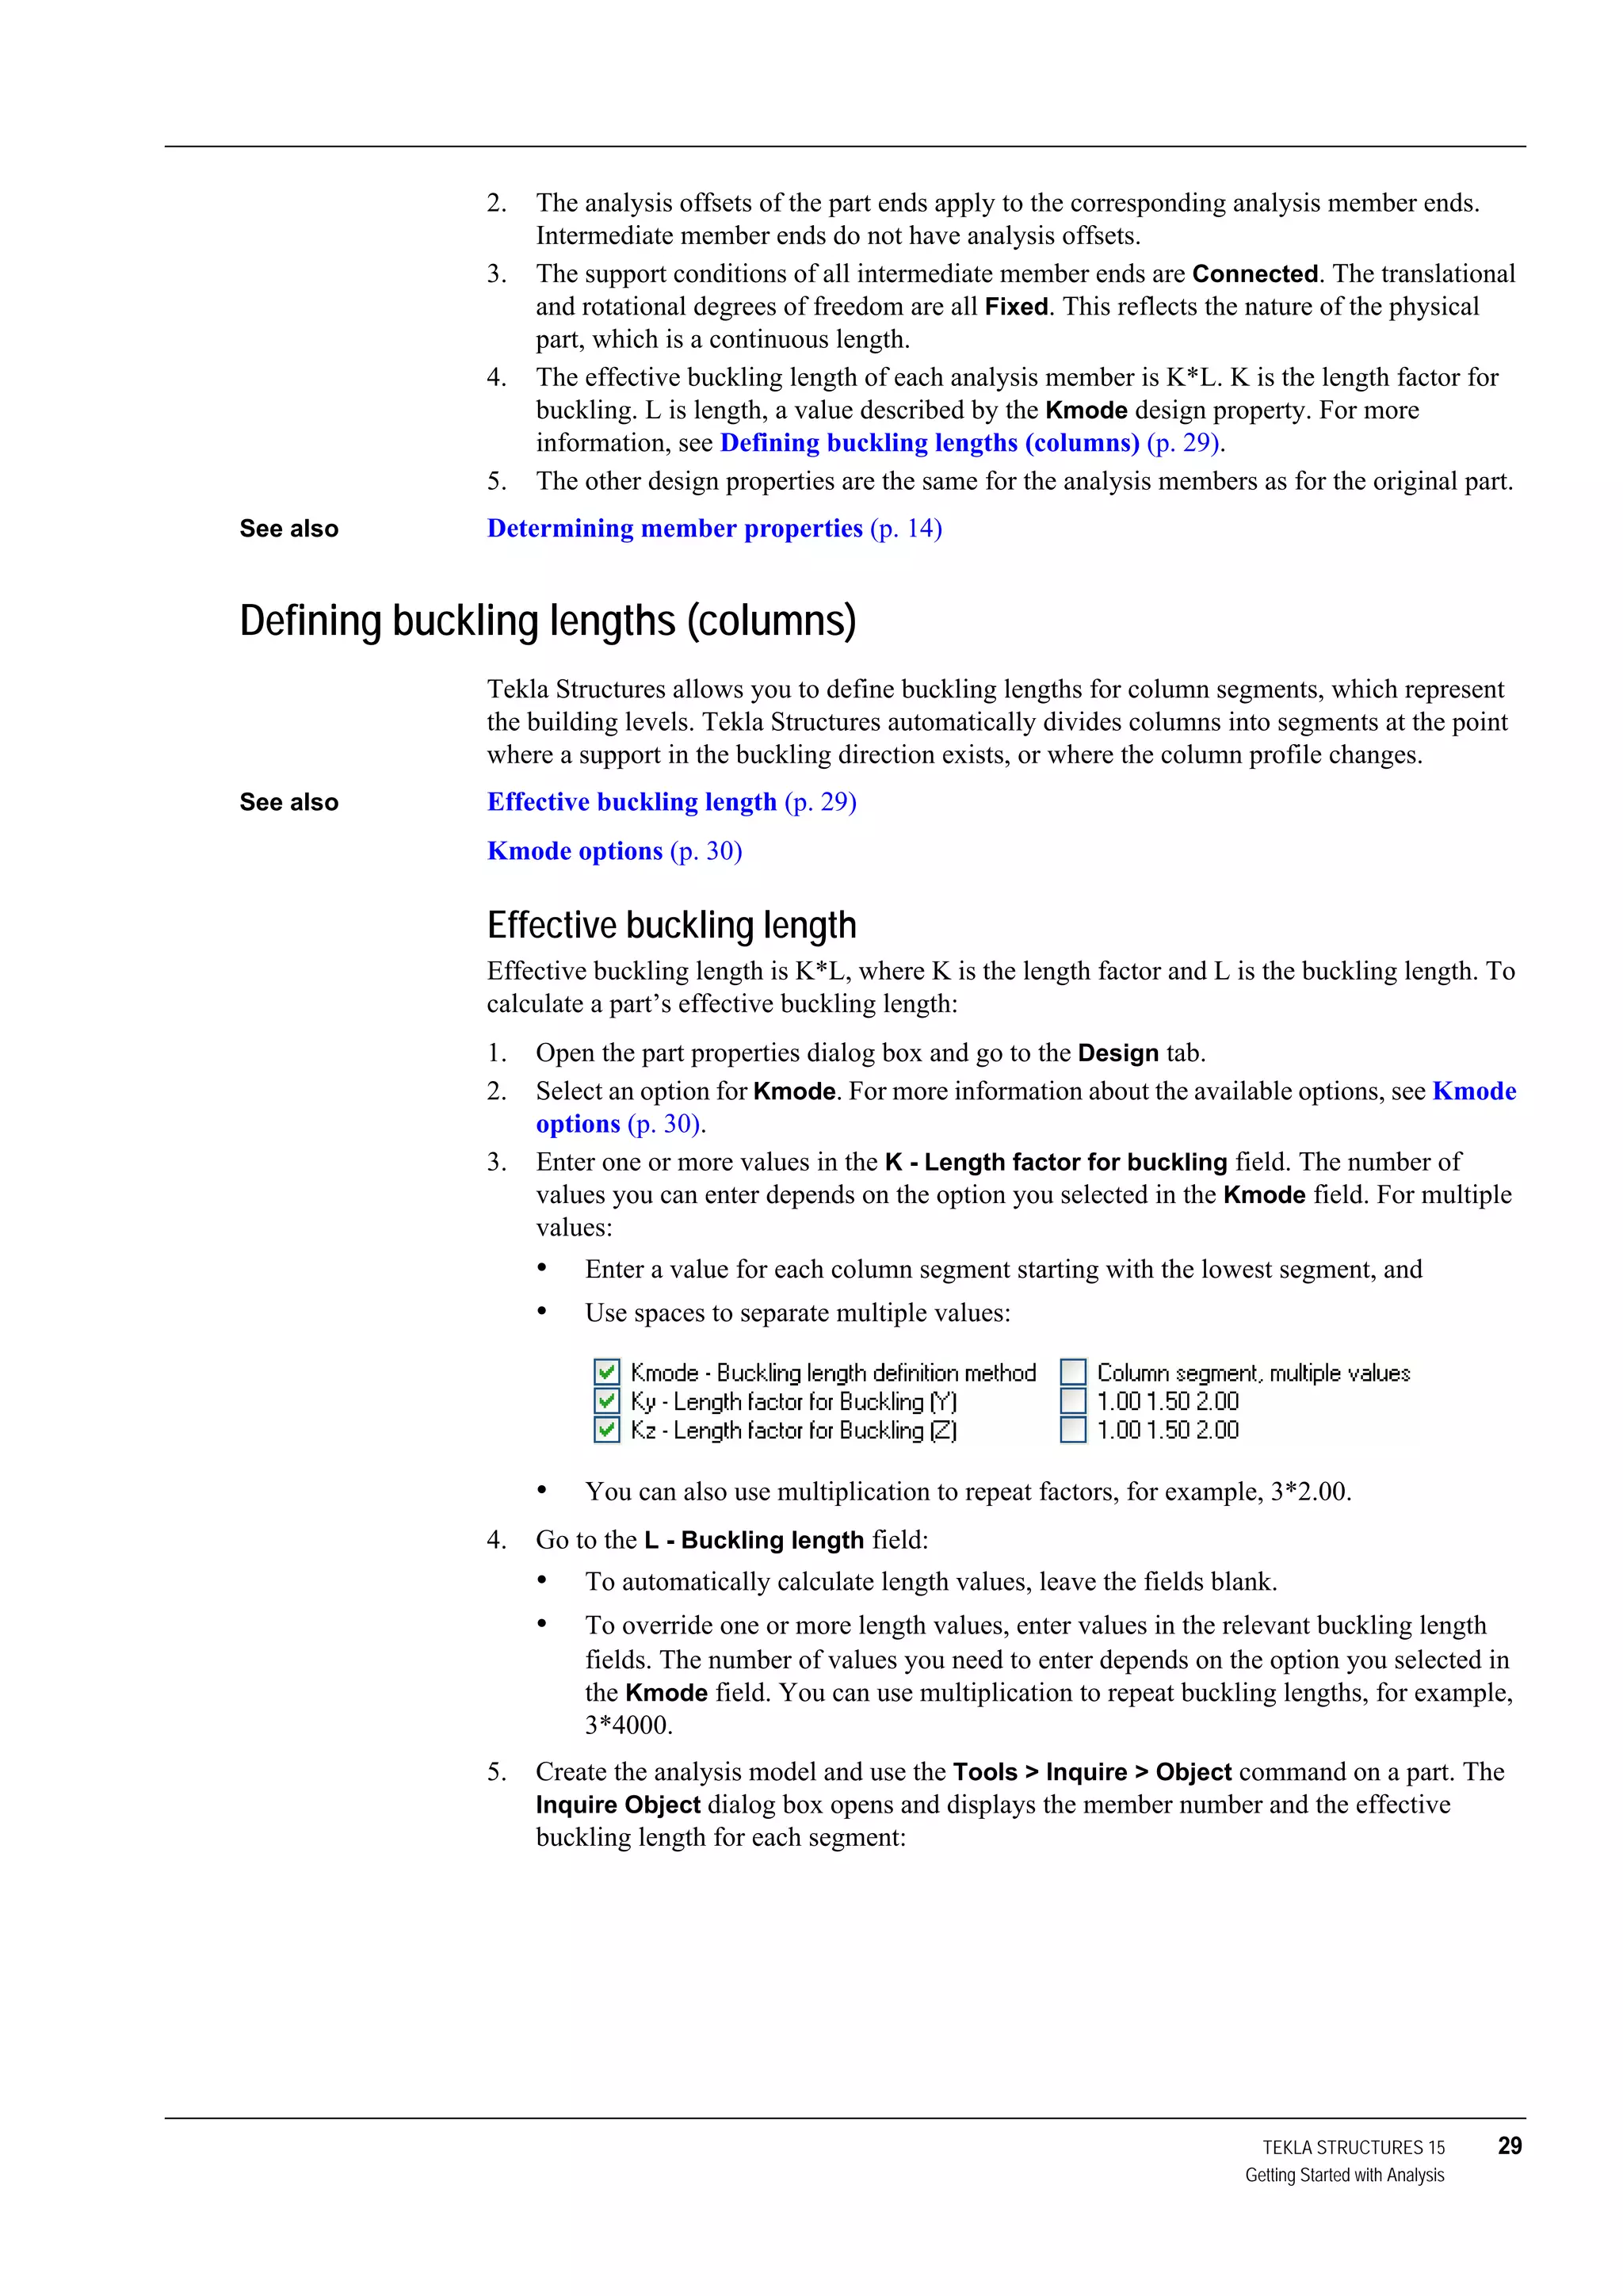


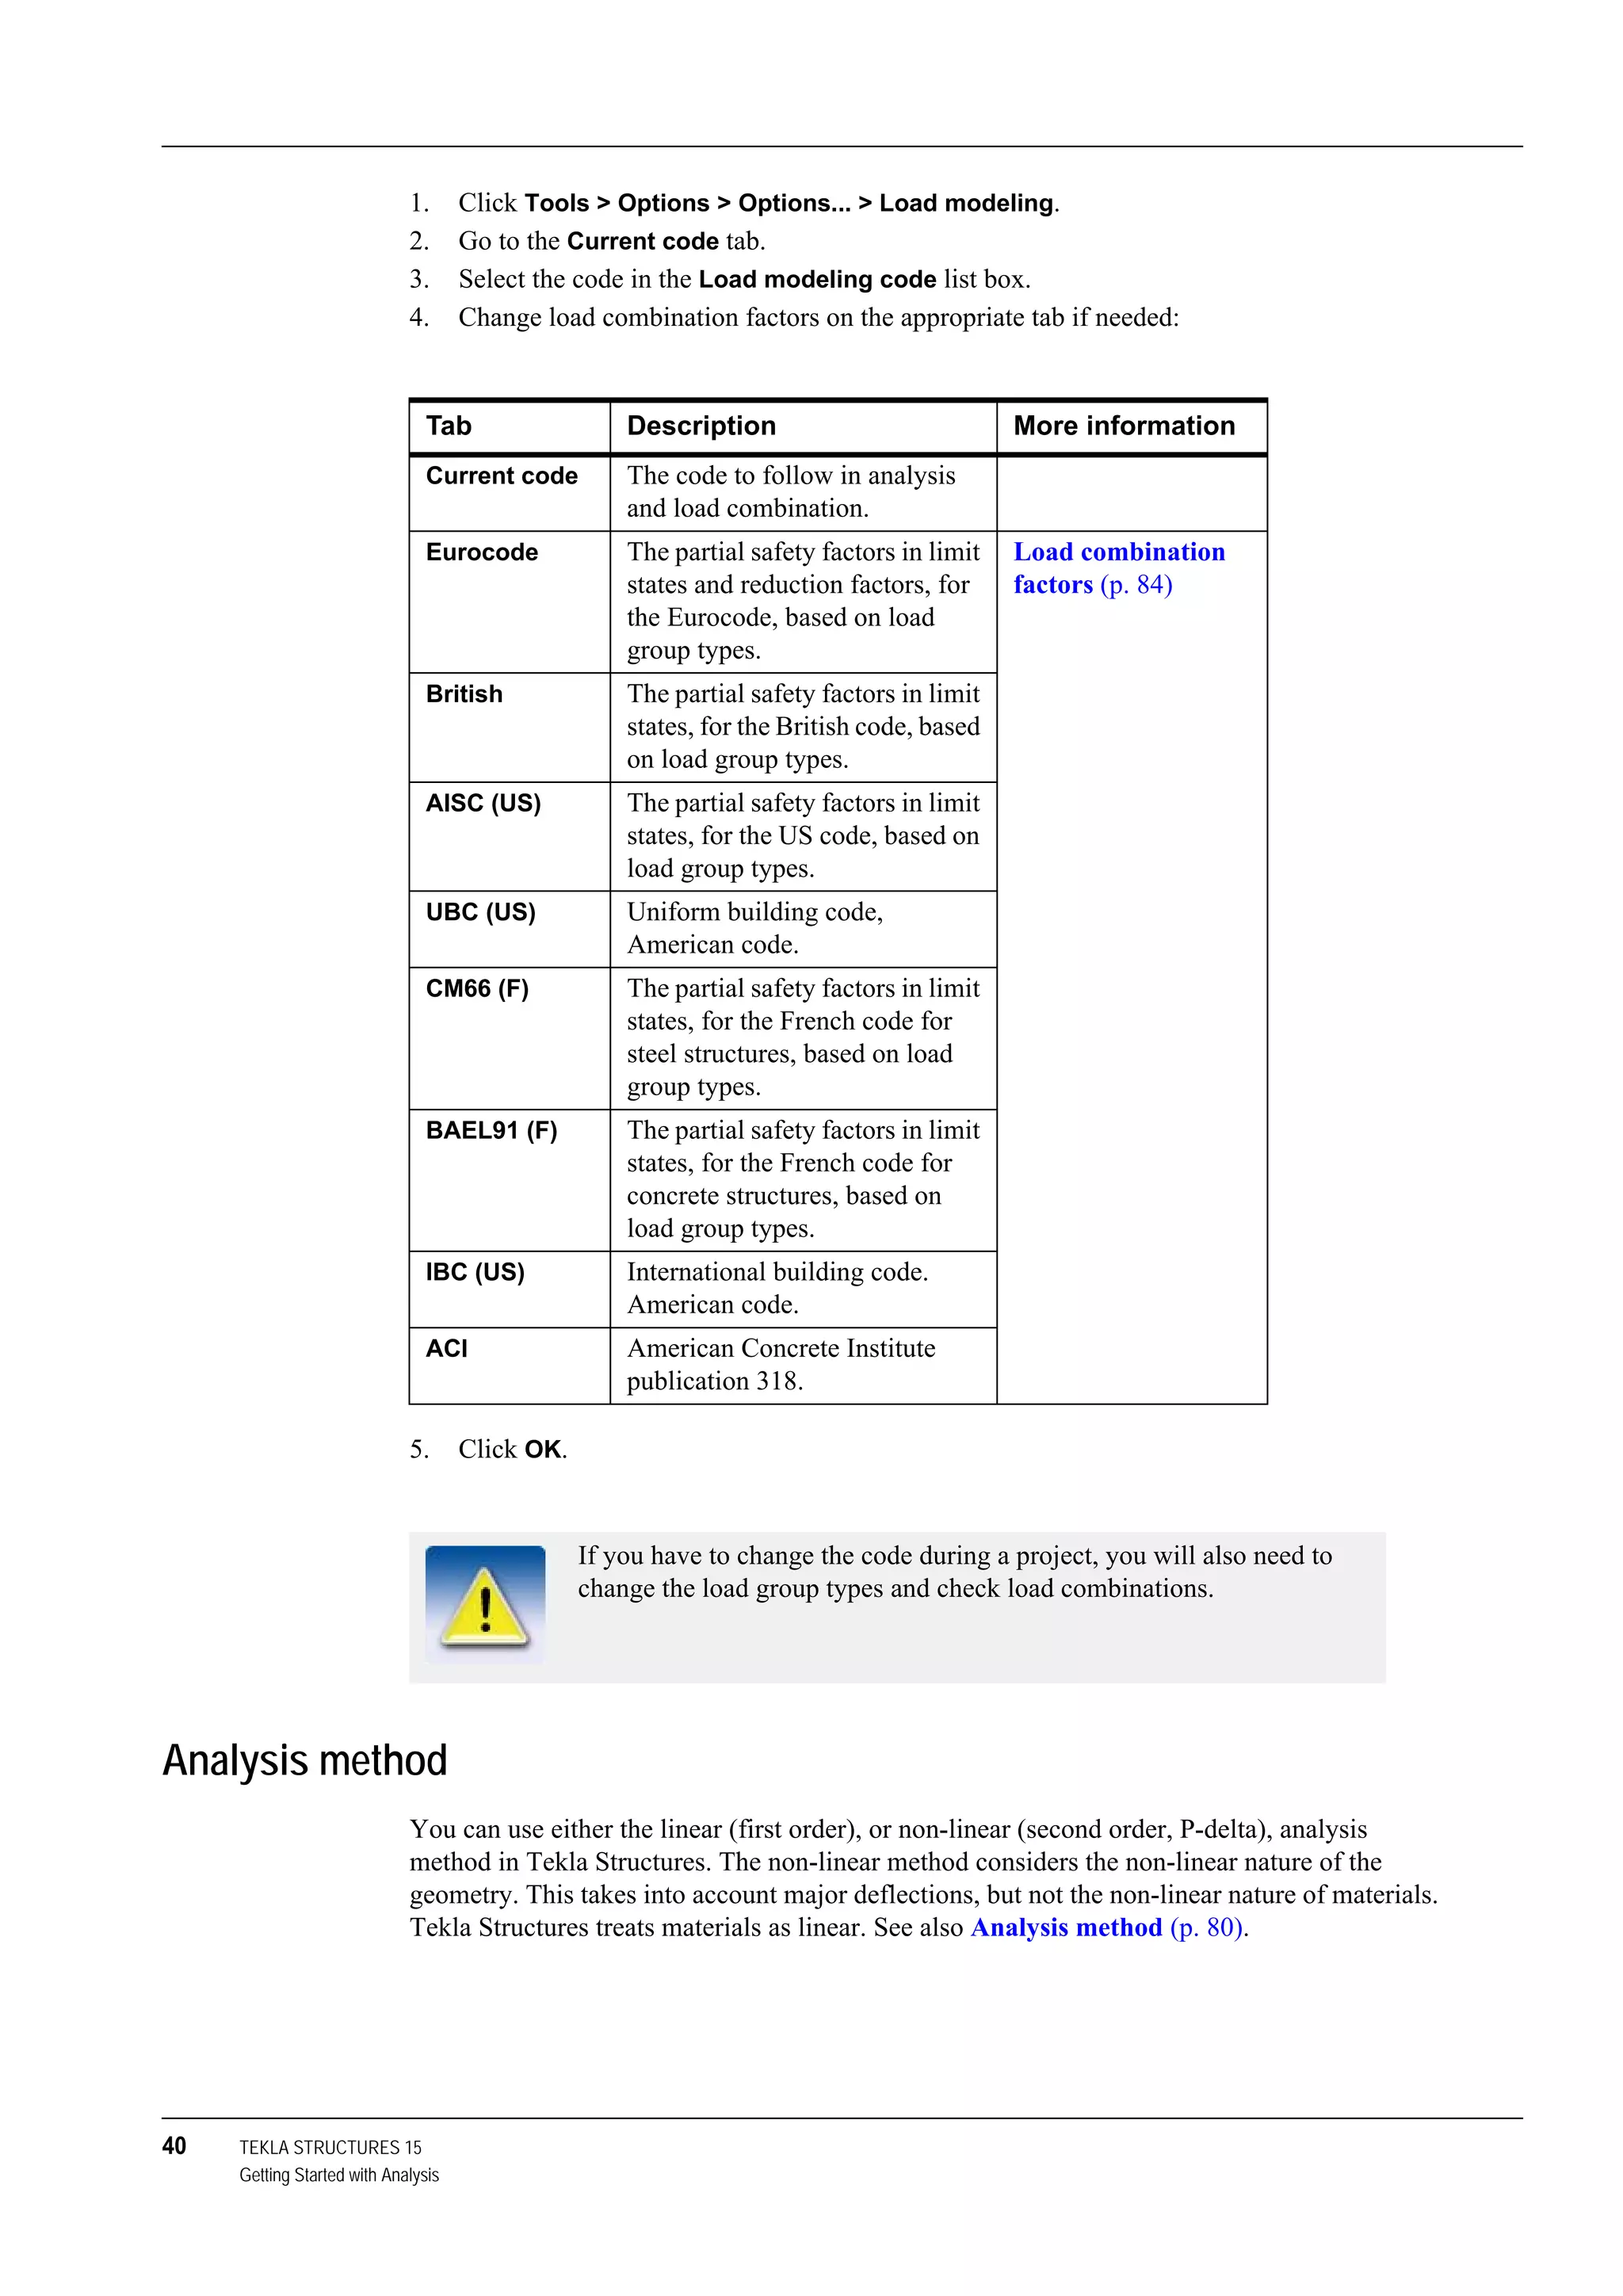


This document is the analysis manual for Tekla Structures version 15.0. It provides information on determining member properties, defining support conditions, fine-tuning analysis models, and working with loads and load groups for structural analysis in the software. The manual explains concepts like members, elements, and nodes in the analysis model and how to account for properties of different object types. It also describes settings that can be adjusted for the analysis such as load modeling code and method.