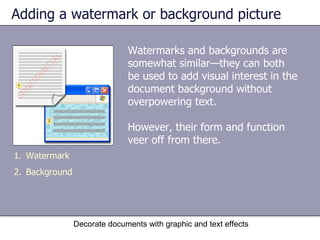
Microsoft ®  Office  Word  2003 Training Decorate documents with graphic and text effects Peace River Distributing presents:
Course contents Overview: Bringing your document to life Lesson 1: Adding a watermark or background picture Lesson 2: Adding a border, shading, or fill effect Lesson 3: Creating special text effects Decorate documents with graphic and text effects Each lesson includes a list of suggested tasks and a set of test questions.
Your document is complete, but something’s missing, and you don’t have a lot of time to hand-craft graphical pizzazz. Overview: Bringing your document to life Decorate documents with graphic and text effects Word has a large, built-in store of attractive backgrounds, borders, shading, and graphical text effects that you can apply quickly to the page or to text for instant effect. This course shows you how.
Course goals Add a watermark or background. Create borders and shading effects on text, tables, and entire pages.  Animate text and create other graphical text effects.  Decorate documents with graphic and text effects
Lesson 1 Adding a watermark or background picture
Adding a watermark or background picture Watermarks and backgrounds are somewhat similar—they can both be used to add visual interest in the document background without overpowering text. However, their form and function veer off from there.  Decorate documents with graphic and text effects Watermark Background
Adding a watermark or background picture The picture illustrates the most significant difference between the two types of images:  Decorate documents with graphic and text effects Watermark Background Watermarks are intended to appear in printed documents, behind the text. Backgrounds are used in Web pages.
Add a watermark to a printed document You can add two types of watermark to a document: a picture or text.  You insert both from the  Printed Watermark  dialog box (on the  Format  menu,  Background  submenu). Decorate documents with graphic and text effects The watermark is visible behind text but doesn’t obscure it.
Add a watermark to a printed document For pictures, you can choose from any image on your hard disk or from clip art in the Microsoft Clip Organizer.  Decorate documents with graphic and text effects The watermark is visible behind text but doesn’t obscure it. For text, you can select the text you want from the drop-down list or type your own text, and select font, size, and color the same way you do for regular document text.
Add a watermark to a printed document Once it’s inserted, you can see your watermark in print layout view (click  Print Layout  on the  View  menu), or in the printed document. Decorate documents with graphic and text effects The watermark is visible behind text but doesn’t obscure it.
Add a background to a Web page Web page backgrounds can take a number of forms: Decorate documents with graphic and text effects Decorative background on a Web page Solid color Texture, such as different color marble or woodgrain effects A pattern, such as stripes or checkerboards A picture from your hard disk
Add a background to a Web page To choose and add a background, use the  Fill Effects  dialog box (also on the  Format  menu,  Background  submenu).  Decorate documents with graphic and text effects Decorative background on a Web page
Suggestions for practice Add a watermark. Add a background. Decorate documents with graphic and text effects Online practice   (requires Word 2003)
Test 1, question 1 What is the main purpose of a watermark? (Pick one answer.) Decorate documents with graphic and text effects Authenticate your document as the original.  Add a dappled, water-like finish to your printed document. Communicate useful information or add visual interest without overpowering the main text of the document.
Test 1, question 1: Answer Communicate useful information or add visual interest without overpowering the main text of the document.  Decorate documents with graphic and text effects You can add text watermarks such as “Confidential,” “Draft,” or any designator you choose. You can also add graphical watermarks. Both sit behind your text so that they don’t obscure it.
Test 1, question 2 What is the main difference between backgrounds and watermarks? (Pick one answer.) Decorate documents with graphic and text effects Backgrounds are always solid colors, and watermarks are always transparent images. Backgrounds are intended for documents that will be viewed on the Web, and watermarks for printed documents or documents that will be displayed in print layout view.  There is no difference. The two serve the same function.
Test 1, question 2: Answer Backgrounds are intended for documents that will be viewed on the Web, and watermarks for printed documents or documents that will be displayed in print layout view. Decorate documents with graphic and text effects Word helps you with this. For example, when you add a background fill effect, Word automatically switches to Web layout view if you’re not already there. And you cannot add a printed watermark if you’re in Web layout view; Word makes the  Printed Watermark  command unavailable.
Lesson 2 Adding a border, shading,  or fill effect
Adding a border, shading, or fill effect Borders, shading, and decorative fill effects aren’t just for holiday newsletters. Word offers a range of options for framing and emphasizing text, tables and table cells, graphics, and entire pages.  This lesson introduces these ready-made and customizable options and shows you the basics of how to add them to your document.  Decorate documents with graphic and text effects Decorative page border and a graphic with a gradient fill
Page borders You can add full or partial borders to any portion of any page of a document. Word provides a variety of built-in page borders, from businesslike to fancy. You start from the  Page Border  tab in the  Borders and Shading  dialog box ( Format  menu).  Decorate documents with graphic and text effects Document with a graphical page border
Page borders From the  Page Border  tab, you can choose: Decorate documents with graphic and text effects Document with a graphical page border The type of overall border, from a simple box to shadowed to 3-D to a custom style of your design.  The line style, color, and thickness. The artistic style, which can be fun if your document is informal or tied to a special occasion, event, or holiday.
Page borders Decorate documents with graphic and text effects Document with a graphical page border You can preview the design right inside the dialog box, so it’s easy to see how your chosen effects will look.
Borders for text, tables, and graphics You can put borders around discrete chunks of text to set them apart. You can also use borders to set off tables and graphics, as shown in the picture.  To add a border, you select the text, table, table cell, or graphic. Then open the  Borders and Shading  dialog box, click the  Borders  tab, and choose the style, width, color, and so on. Decorate documents with graphic and text effects Borders and shading applied to text, the page, tables, and graphics
Borders for text, tables, and graphics Note that if you’re working with AutoShapes (a particular type of Word graphic that you insert by using the  AutoShapes  command), the method for adding a border is different.  Decorate documents with graphic and text effects Borders and shading applied to text, the page, tables, and graphics After selecting the shape, you use the  Line Color   and  Line  Style   buttons on the  Drawing  toolbar.
Shading You can add shading to text, tables, or pages by using the  Shading  tab in the  Borders and Shading  dialog box. As with borders, you can experiment with colors and styles, and preview the effects.  Decorate documents with graphic and text effects Shading emphasizes the heading and pull quote.
Shading Here, that preview is particularly helpful because the color and gradient you choose for the shading can make the words on the page hard to read.  Decorate documents with graphic and text effects Shading emphasizes the heading and pull quote. You always want to make sure that the effect you choose doesn’t overpower the text itself.
Shading As with borders, the shading for AutoShapes works differently than it does for text and tables. Select the shape, and then use the  Fill Color  button  on the  Drawing  toolbar.  Decorate documents with graphic and text effects Shading emphasizes the heading and pull quote.
Quick table effects If you specifically want to set apart or spruce up a table, take a look at the Table AutoFormat feature. It provides built-in border, shading, and color schemes.  The schemes are great because the designs are unified and professional, and they save you the hassle of manually applying separate effects.  Decorate documents with graphic and text effects Table with a Table AutoFormat scheme
Quick table effects To apply a Table AutoFormat scheme, first select the table you want. Then click through and make your choices in the  Table AutoFormat  dialog box ( Table  menu).  Decorate documents with graphic and text effects Table with a Table AutoFormat scheme The preview shows exactly what your choice will look like. If you feel creative, or if you find a style that you like but want to change a piece of it, you can modify it.
Quick table effects You can also use Table AutoFormat as you’re creating a new table: In the  Insert Table  dialog box ( Table  menu,  Insert  command), click  AutoFormat .  Decorate documents with graphic and text effects Table with a Table AutoFormat scheme
Graphic fill effects You can color drawing objects—AutoShapes, text boxes, WordArt, and objects on the drawing canvas—with fill effects such as gradients. If you have one of these types of objects in your document and want to add a fill, first select it.  Decorate documents with graphic and text effects The AutoShape smiley face has a gradient fill.
Graphic fill effects Then on the  Drawing  toolbar, click the arrow next to the  Fill Color  button  to open the  Fill Effects  dialog box.  Decorate documents with graphic and text effects The AutoShape smiley face has a gradient fill. Use the tabs to add patterns, gradients, textures, and other effects.
Suggestions for practice Add a page border. Shade a heading.  Format a table.  Add a gradient fill to a shape. Decorate documents with graphic and text effects Online practice   (requires Word 2003)
Test 2, question 1 To add borders or shading to text or to a whole page, you start from which central place? (Pick one answer.) Decorate documents with graphic and text effects The  Borders and Shading  dialog box.  The  Font  dialog box.  The  Drawing  toolbar.
Test 2, question 1: Answer The  Borders and Shading  dialog box.  Decorate documents with graphic and text effects To access this dialog box, which has separate tabs for each type of effect, you click  Borders and Shading  on the  Format  menu.
Test 2, question 2 What’s the quickest way to add visual formatting to a table? (Pick one answer.) Decorate documents with graphic and text effects Add borders to individual rows and columns, and then apply shading in the same sequence. Apply a Table AutoFormat scheme.
Test 2, question 2: Answer Apply a Table AutoFormat scheme.  Decorate documents with graphic and text effects Word offers an array of built-in coordinated table schemes with borders, shading, colors, and other formatting that you can apply all at once instead of in separate steps.
Lesson 3 Creating special text effects
Creating special text effects How do you emphasize text? Often it’s the old standbys, bold and italic, or maybe the occasional application of all caps.  But Word offers a range of graphical formatting gems—such as embossing, drop caps, WordArt, and animations—that can add strong visual impact when used sparingly. Decorate documents with graphic and text effects Drop cap, embossed text, WordArt, and text animation
Special font effects You can add a great deal of impact to text just by changing the font effect.  Start by opening the  Font  dialog box ( Format  menu). Under  Effects , in the center section, you’ll see four effects.  Decorate documents with graphic and text effects Shadow, outline, emboss, and engrave font effects
Special font effects Decorate documents with graphic and text effects Shadow, outline, emboss, and engrave font effects Shadow  darkens text and adds a slight shadow behind it.  Outline  removes the solid fill of the text, leaving  just an outline.  Emboss  makes the text look like it’s raised off the page in relief.  Engrave  makes the text appear pressed into the page.
Special font effects Some usage tips Decorate documents with graphic and text effects Shadow, outline, emboss, and engrave font effects These effects often show up best when you use a larger font size.  In many cases, the effects look great when used in combination with other more basic effects, such as different fonts and font styles (for example, bold and italic).
Special font effects Some usage tips Decorate documents with graphic and text effects Shadow, outline, emboss, and engrave font effects Like anything fancy, these effects tend to work best when used sparingly, for example when limited to headings or emphasis text.
Create a drop cap Think of an ancient illuminated text, or the start of a fairy tale. That “O” in “Once upon a time.” In modern typography, that’s referred to as a drop cap.  It’s easy to create a drop cap in Word to convey elegance at the start of your document.  Decorate documents with graphic and text effects The drop cap elegantly emphasizes the first letter on the page.
Create a drop cap Select the letter you want to turn into a drop cap, and then click  Drop Cap  on the  Format  menu.  Decorate documents with graphic and text effects The drop cap elegantly emphasizes the first letter on the page.  The letter you selected appears in a text box, where you can select it and make changes if you want, just the way you would with regular text.
Add WordArt WordArt gives your words a graphic edge, turning any text into a shadowed, skewed, rotated, or stretched version of itself. To add WordArt, you use the WordArt Gallery, which you get to from the  Insert  menu,  Picture  command, or by clicking the  Insert WordArt  button  on the  Drawing  toolbar.  Decorate documents with graphic and text effects WordArt provides quick effects such as shading and 3-D.
Add WordArt Once you insert WordArt, you can use the  WordArt  toolbar to change it. Decorate documents with graphic and text effects WordArt provides quick effects such as shading and 3-D.  The toolbar appears as soon as you insert and then select the WordArt, and lets you change things like the curve of the text, the background color, the space between letters, and so on.
Animate text If you’re working on a Web page or a Word document that will be viewed online, you can animate text. It’s a matter of adding a simple font effect. Just select the text that you want to animate—for example, a heading—and then open the  Font  dialog box ( Format  menu). On the  Text Effects  tab, choose from the selection of animation effects.  Decorate documents with graphic and text effects The Sparkle Text animation effect
Animate text As with any high-impact effect, it’s best to use text animation sparingly, limiting your application to individual words and short phrases.  Decorate documents with graphic and text effects The Sparkle Text animation effect Otherwise, you risk diluting the impact, causing visual clutter, and in extreme cases, rendering text unreadable.
Suggestions for practice Add a high-impact font effect.  Animate text.  Insert WordArt.  Decorate documents with graphic and text effects Online practice   (requires Word 2003)
Test 3, question 1 Which of the following “best practice” guidelines applies to the use of special text effects? (Pick one answer.) Decorate documents with graphic and text effects Be sparing.  Variety makes the biggest impact.  Consistency is key; for example, if one heading is animated, they all should be.
Test 3, question 1: Answer Be sparing.  Decorate documents with graphic and text effects Special text effects have the most impact when you limit them.
Test 3, question 2 How would you change WordArt that you just inserted? (Pick one answer.) Decorate documents with graphic and text effects Use the  Drawing  toolbar.  Choose options on the  AutoShapes  menu.  Use the  WordArt  toolbar.
Test 3, question 2: Answer Use the  WordArt  toolbar.  Decorate documents with graphic and text effects This toolbar appears as soon as you insert and select the WordArt, and you can use it to change many aspects of the WordArt’s appearance.
Quick Reference Card For a summary of the tasks covered in this course, view the  Quick Reference Card .  Decorate documents with graphic and text effects
USING THIS TEMPLATE See the notes pane or view the full notes page ( View  menu) for detailed help on this template.

07 ms office

  • 1.
    Microsoft ® Office Word 2003 Training Decorate documents with graphic and text effects Peace River Distributing presents:
  • 2.
    Course contents Overview:Bringing your document to life Lesson 1: Adding a watermark or background picture Lesson 2: Adding a border, shading, or fill effect Lesson 3: Creating special text effects Decorate documents with graphic and text effects Each lesson includes a list of suggested tasks and a set of test questions.
  • 3.
    Your document iscomplete, but something’s missing, and you don’t have a lot of time to hand-craft graphical pizzazz. Overview: Bringing your document to life Decorate documents with graphic and text effects Word has a large, built-in store of attractive backgrounds, borders, shading, and graphical text effects that you can apply quickly to the page or to text for instant effect. This course shows you how.
  • 4.
    Course goals Adda watermark or background. Create borders and shading effects on text, tables, and entire pages. Animate text and create other graphical text effects. Decorate documents with graphic and text effects
  • 5.
    Lesson 1 Addinga watermark or background picture
  • 6.
    Adding a watermarkor background picture Watermarks and backgrounds are somewhat similar—they can both be used to add visual interest in the document background without overpowering text. However, their form and function veer off from there. Decorate documents with graphic and text effects Watermark Background
  • 7.
    Adding a watermarkor background picture The picture illustrates the most significant difference between the two types of images: Decorate documents with graphic and text effects Watermark Background Watermarks are intended to appear in printed documents, behind the text. Backgrounds are used in Web pages.
  • 8.
    Add a watermarkto a printed document You can add two types of watermark to a document: a picture or text. You insert both from the Printed Watermark dialog box (on the Format menu, Background submenu). Decorate documents with graphic and text effects The watermark is visible behind text but doesn’t obscure it.
  • 9.
    Add a watermarkto a printed document For pictures, you can choose from any image on your hard disk or from clip art in the Microsoft Clip Organizer. Decorate documents with graphic and text effects The watermark is visible behind text but doesn’t obscure it. For text, you can select the text you want from the drop-down list or type your own text, and select font, size, and color the same way you do for regular document text.
  • 10.
    Add a watermarkto a printed document Once it’s inserted, you can see your watermark in print layout view (click Print Layout on the View menu), or in the printed document. Decorate documents with graphic and text effects The watermark is visible behind text but doesn’t obscure it.
  • 11.
    Add a backgroundto a Web page Web page backgrounds can take a number of forms: Decorate documents with graphic and text effects Decorative background on a Web page Solid color Texture, such as different color marble or woodgrain effects A pattern, such as stripes or checkerboards A picture from your hard disk
  • 12.
    Add a backgroundto a Web page To choose and add a background, use the Fill Effects dialog box (also on the Format menu, Background submenu). Decorate documents with graphic and text effects Decorative background on a Web page
  • 13.
    Suggestions for practiceAdd a watermark. Add a background. Decorate documents with graphic and text effects Online practice (requires Word 2003)
  • 14.
    Test 1, question1 What is the main purpose of a watermark? (Pick one answer.) Decorate documents with graphic and text effects Authenticate your document as the original. Add a dappled, water-like finish to your printed document. Communicate useful information or add visual interest without overpowering the main text of the document.
  • 15.
    Test 1, question1: Answer Communicate useful information or add visual interest without overpowering the main text of the document. Decorate documents with graphic and text effects You can add text watermarks such as “Confidential,” “Draft,” or any designator you choose. You can also add graphical watermarks. Both sit behind your text so that they don’t obscure it.
  • 16.
    Test 1, question2 What is the main difference between backgrounds and watermarks? (Pick one answer.) Decorate documents with graphic and text effects Backgrounds are always solid colors, and watermarks are always transparent images. Backgrounds are intended for documents that will be viewed on the Web, and watermarks for printed documents or documents that will be displayed in print layout view. There is no difference. The two serve the same function.
  • 17.
    Test 1, question2: Answer Backgrounds are intended for documents that will be viewed on the Web, and watermarks for printed documents or documents that will be displayed in print layout view. Decorate documents with graphic and text effects Word helps you with this. For example, when you add a background fill effect, Word automatically switches to Web layout view if you’re not already there. And you cannot add a printed watermark if you’re in Web layout view; Word makes the Printed Watermark command unavailable.
  • 18.
    Lesson 2 Addinga border, shading, or fill effect
  • 19.
    Adding a border,shading, or fill effect Borders, shading, and decorative fill effects aren’t just for holiday newsletters. Word offers a range of options for framing and emphasizing text, tables and table cells, graphics, and entire pages. This lesson introduces these ready-made and customizable options and shows you the basics of how to add them to your document. Decorate documents with graphic and text effects Decorative page border and a graphic with a gradient fill
  • 20.
    Page borders Youcan add full or partial borders to any portion of any page of a document. Word provides a variety of built-in page borders, from businesslike to fancy. You start from the Page Border tab in the Borders and Shading dialog box ( Format menu). Decorate documents with graphic and text effects Document with a graphical page border
  • 21.
    Page borders Fromthe Page Border tab, you can choose: Decorate documents with graphic and text effects Document with a graphical page border The type of overall border, from a simple box to shadowed to 3-D to a custom style of your design. The line style, color, and thickness. The artistic style, which can be fun if your document is informal or tied to a special occasion, event, or holiday.
  • 22.
    Page borders Decoratedocuments with graphic and text effects Document with a graphical page border You can preview the design right inside the dialog box, so it’s easy to see how your chosen effects will look.
  • 23.
    Borders for text,tables, and graphics You can put borders around discrete chunks of text to set them apart. You can also use borders to set off tables and graphics, as shown in the picture. To add a border, you select the text, table, table cell, or graphic. Then open the Borders and Shading dialog box, click the Borders tab, and choose the style, width, color, and so on. Decorate documents with graphic and text effects Borders and shading applied to text, the page, tables, and graphics
  • 24.
    Borders for text,tables, and graphics Note that if you’re working with AutoShapes (a particular type of Word graphic that you insert by using the AutoShapes command), the method for adding a border is different. Decorate documents with graphic and text effects Borders and shading applied to text, the page, tables, and graphics After selecting the shape, you use the Line Color and Line Style buttons on the Drawing toolbar.
  • 25.
    Shading You canadd shading to text, tables, or pages by using the Shading tab in the Borders and Shading dialog box. As with borders, you can experiment with colors and styles, and preview the effects. Decorate documents with graphic and text effects Shading emphasizes the heading and pull quote.
  • 26.
    Shading Here, thatpreview is particularly helpful because the color and gradient you choose for the shading can make the words on the page hard to read. Decorate documents with graphic and text effects Shading emphasizes the heading and pull quote. You always want to make sure that the effect you choose doesn’t overpower the text itself.
  • 27.
    Shading As withborders, the shading for AutoShapes works differently than it does for text and tables. Select the shape, and then use the Fill Color button on the Drawing toolbar. Decorate documents with graphic and text effects Shading emphasizes the heading and pull quote.
  • 28.
    Quick table effectsIf you specifically want to set apart or spruce up a table, take a look at the Table AutoFormat feature. It provides built-in border, shading, and color schemes. The schemes are great because the designs are unified and professional, and they save you the hassle of manually applying separate effects. Decorate documents with graphic and text effects Table with a Table AutoFormat scheme
  • 29.
    Quick table effectsTo apply a Table AutoFormat scheme, first select the table you want. Then click through and make your choices in the Table AutoFormat dialog box ( Table menu). Decorate documents with graphic and text effects Table with a Table AutoFormat scheme The preview shows exactly what your choice will look like. If you feel creative, or if you find a style that you like but want to change a piece of it, you can modify it.
  • 30.
    Quick table effectsYou can also use Table AutoFormat as you’re creating a new table: In the Insert Table dialog box ( Table menu, Insert command), click AutoFormat . Decorate documents with graphic and text effects Table with a Table AutoFormat scheme
  • 31.
    Graphic fill effectsYou can color drawing objects—AutoShapes, text boxes, WordArt, and objects on the drawing canvas—with fill effects such as gradients. If you have one of these types of objects in your document and want to add a fill, first select it. Decorate documents with graphic and text effects The AutoShape smiley face has a gradient fill.
  • 32.
    Graphic fill effectsThen on the Drawing toolbar, click the arrow next to the Fill Color button to open the Fill Effects dialog box. Decorate documents with graphic and text effects The AutoShape smiley face has a gradient fill. Use the tabs to add patterns, gradients, textures, and other effects.
  • 33.
    Suggestions for practiceAdd a page border. Shade a heading. Format a table. Add a gradient fill to a shape. Decorate documents with graphic and text effects Online practice (requires Word 2003)
  • 34.
    Test 2, question1 To add borders or shading to text or to a whole page, you start from which central place? (Pick one answer.) Decorate documents with graphic and text effects The Borders and Shading dialog box. The Font dialog box. The Drawing toolbar.
  • 35.
    Test 2, question1: Answer The Borders and Shading dialog box. Decorate documents with graphic and text effects To access this dialog box, which has separate tabs for each type of effect, you click Borders and Shading on the Format menu.
  • 36.
    Test 2, question2 What’s the quickest way to add visual formatting to a table? (Pick one answer.) Decorate documents with graphic and text effects Add borders to individual rows and columns, and then apply shading in the same sequence. Apply a Table AutoFormat scheme.
  • 37.
    Test 2, question2: Answer Apply a Table AutoFormat scheme. Decorate documents with graphic and text effects Word offers an array of built-in coordinated table schemes with borders, shading, colors, and other formatting that you can apply all at once instead of in separate steps.
  • 38.
    Lesson 3 Creatingspecial text effects
  • 39.
    Creating special texteffects How do you emphasize text? Often it’s the old standbys, bold and italic, or maybe the occasional application of all caps. But Word offers a range of graphical formatting gems—such as embossing, drop caps, WordArt, and animations—that can add strong visual impact when used sparingly. Decorate documents with graphic and text effects Drop cap, embossed text, WordArt, and text animation
  • 40.
    Special font effectsYou can add a great deal of impact to text just by changing the font effect. Start by opening the Font dialog box ( Format menu). Under Effects , in the center section, you’ll see four effects. Decorate documents with graphic and text effects Shadow, outline, emboss, and engrave font effects
  • 41.
    Special font effectsDecorate documents with graphic and text effects Shadow, outline, emboss, and engrave font effects Shadow darkens text and adds a slight shadow behind it. Outline removes the solid fill of the text, leaving just an outline. Emboss makes the text look like it’s raised off the page in relief. Engrave makes the text appear pressed into the page.
  • 42.
    Special font effectsSome usage tips Decorate documents with graphic and text effects Shadow, outline, emboss, and engrave font effects These effects often show up best when you use a larger font size. In many cases, the effects look great when used in combination with other more basic effects, such as different fonts and font styles (for example, bold and italic).
  • 43.
    Special font effectsSome usage tips Decorate documents with graphic and text effects Shadow, outline, emboss, and engrave font effects Like anything fancy, these effects tend to work best when used sparingly, for example when limited to headings or emphasis text.
  • 44.
    Create a dropcap Think of an ancient illuminated text, or the start of a fairy tale. That “O” in “Once upon a time.” In modern typography, that’s referred to as a drop cap. It’s easy to create a drop cap in Word to convey elegance at the start of your document. Decorate documents with graphic and text effects The drop cap elegantly emphasizes the first letter on the page.
  • 45.
    Create a dropcap Select the letter you want to turn into a drop cap, and then click Drop Cap on the Format menu. Decorate documents with graphic and text effects The drop cap elegantly emphasizes the first letter on the page. The letter you selected appears in a text box, where you can select it and make changes if you want, just the way you would with regular text.
  • 46.
    Add WordArt WordArtgives your words a graphic edge, turning any text into a shadowed, skewed, rotated, or stretched version of itself. To add WordArt, you use the WordArt Gallery, which you get to from the Insert menu, Picture command, or by clicking the Insert WordArt button on the Drawing toolbar. Decorate documents with graphic and text effects WordArt provides quick effects such as shading and 3-D.
  • 47.
    Add WordArt Onceyou insert WordArt, you can use the WordArt toolbar to change it. Decorate documents with graphic and text effects WordArt provides quick effects such as shading and 3-D. The toolbar appears as soon as you insert and then select the WordArt, and lets you change things like the curve of the text, the background color, the space between letters, and so on.
  • 48.
    Animate text Ifyou’re working on a Web page or a Word document that will be viewed online, you can animate text. It’s a matter of adding a simple font effect. Just select the text that you want to animate—for example, a heading—and then open the Font dialog box ( Format menu). On the Text Effects tab, choose from the selection of animation effects. Decorate documents with graphic and text effects The Sparkle Text animation effect
  • 49.
    Animate text Aswith any high-impact effect, it’s best to use text animation sparingly, limiting your application to individual words and short phrases. Decorate documents with graphic and text effects The Sparkle Text animation effect Otherwise, you risk diluting the impact, causing visual clutter, and in extreme cases, rendering text unreadable.
  • 50.
    Suggestions for practiceAdd a high-impact font effect. Animate text. Insert WordArt. Decorate documents with graphic and text effects Online practice (requires Word 2003)
  • 51.
    Test 3, question1 Which of the following “best practice” guidelines applies to the use of special text effects? (Pick one answer.) Decorate documents with graphic and text effects Be sparing. Variety makes the biggest impact. Consistency is key; for example, if one heading is animated, they all should be.
  • 52.
    Test 3, question1: Answer Be sparing. Decorate documents with graphic and text effects Special text effects have the most impact when you limit them.
  • 53.
    Test 3, question2 How would you change WordArt that you just inserted? (Pick one answer.) Decorate documents with graphic and text effects Use the Drawing toolbar. Choose options on the AutoShapes menu. Use the WordArt toolbar.
  • 54.
    Test 3, question2: Answer Use the WordArt toolbar. Decorate documents with graphic and text effects This toolbar appears as soon as you insert and select the WordArt, and you can use it to change many aspects of the WordArt’s appearance.
  • 55.
    Quick Reference CardFor a summary of the tasks covered in this course, view the Quick Reference Card . Decorate documents with graphic and text effects
  • 56.
    USING THIS TEMPLATESee the notes pane or view the full notes page ( View menu) for detailed help on this template.

Editor's Notes

  • #2 [ Note to trainer : For detailed help in customizing this template, see the very last slide. Also, look for additional lesson text in the notes pane of some slides.]
  • #8 In addition, watermarks offer the capability to add additional text behind the main text, for example “Confidential.” The next two sections describe how to add watermarks and backgrounds, and show some examples of the effects you can achieve.
  • #10 Tip for picture watermarks Once you’ve selected the image, you can optionally scale it and wash it out so that it’s not as visible behind text. Tip for text watermarks You can also set transparency and diagonal or horizontal layout.
  • #13 Note : In Microsoft Office Word 2003 you can print your Web page including the background. If you wish to do this, on the Tools menu, click Options , and then click the Print tab. Then in the Include with document section, select the Background colors and images check box.
  • #14 [ Note to trainer : With Word 2003 installed on your computer, you can click the link in the slide to go to an online practice. In the practice, you can work through each of these tasks in Word, with instructions to guide you. Important : If you don’t have Word 2003, you won’t be able to access the practice instructions.]
  • #24 Putting borders around chunks of text adds visual punch to things like headings and direct quotations. When you select your border options, you can preview your choices right in the dialog box, just as you can on the Page Border tab.
  • #25 Tip: If you’re working with a table, there’s a cool way to quickly add a unified border, shading, and color scheme: Use the Table AutoFormat feature. You’ll learn about it in a later section, “Quick table effects.”
  • #31 Tip: You can add stripe patterns to a table without applying an entire AutoFormat scheme.
  • #34 [ Note to trainer : With Word 2003 installed on your computer, you can click the link in the slide to go to an online practice. In the practice, you can work through each of these tasks in Word, with instructions to guide you. Important : If you don’t have Word 2003, you won’t be able to access the practice instructions.]
  • #44 As you’ve seen in previous lessons, the best way to figure out what works is to try different combinations and see the results in the Preview section of the dialog box.
  • #46 Note: You can turn only a single letter into drop caps; even if you select a block of text, only the first letter is affected. Also worth noting is that only the first letter of a paragraph can become a drop cap.
  • #48 You can also display the WordArt toolbar yourself by pointing to Toolbars on the View menu, and then clicking WordArt .
  • #51 [ Note to trainer : With Word 2003 installed on your computer, you can click the link in the slide to go to an online practice. In the practice, you can work through each of these tasks in Word, with instructions to guide you. Important : If you don’t have Word 2003, you won’t be able to access the practice instructions.]
  • #57 Using This Template This Microsoft Office PowerPoint ® template has training content about using Word 2003 to enliven your document with graphical elements and visual effects. It’s geared for you to present to a group and customize as necessary. This template’s content is adapted from the Microsoft Office Online Training course called “Audio course: Decorate documents with backgrounds, borders, and text effects.” Features of the template Title slide: On the very first slide, there is placeholder text over which you should type the name of your company. Or you can delete the text box altogether if you don’t want this text. Animations: Custom animation effects are applied throughout. These effects play in previous versions back to Microsoft PowerPoint 2000. They include the entrance effects called Peek and Stretch , and sometimes the Dissolve effect. To alter animation effects, go to the Slide Show menu, click Custom Animation , and work with the options that appear. If this presentation contains a Macromedia Flash animation: To play the Flash file, you must register a Microsoft ActiveX ® control, called Shockwave Flash Object, on your computer. To do this, download the latest version of the Macromedia Flash Player from the Macromedia Web site. Slide transitions: The Wipe Down transition is applied throughout the show. If you want a different one, go to the Slide Show menu, click Slide Transition , and work with the options that appear. Hyperlinks to online course: The template contains links to the online version of this training course. The links take you to the hands-on practice session for each lesson and to the Quick Reference Card that is published for this course. Please take note: You must have Word 2003 installed to view the hands-on practice sessions. Headers and footers: The template contains a footer that has the course title. You can change or remove the footers in the Header and Footer dialog box (which opens from the View menu).