SlideShare a Scribd company logo
File Management
Basics for Managing Your Files
What exactly is file management?
 File management is the process of placing,
naming, and organizing files and folders in a
seemingly logical manner.
 File management on the computer is similar to
how someone would arrange documents and
important papers in a filing cabinet.
 Related papers and documents are placed into
an appropriately named folder and that folder
is then placed into the appropriate level or
section of the file cabinet.
 Similarly, on the computer, file management
would consist of sorting and arranging a group
of files into specific folders so that similar or
related files are located together.
Basics
Why do I need to manage my files?
 An unorganized computer is very similar to any
unorganized room or a messy desk, with stuff
placed haphazardly around in no logical
location.
 It creates a problem if you need to find
something in a hurry and have no clue where
to find the document.
 And if you don’t have a clue on how to start
organizing what you have, whether that be
files on your computer or a pile of recipes and
receipts, this class will help you.
Basics
How do I manage my files?
 Use Windows Explorer to rearrange and
organize your files by:
 Creating folders and subfolders
 Moving files to specific folders
 Renaming files logically for easy retrieval
 Save new files in a specifically designated
folder as you create them
Basics
What is Windows Explorer?
Basics
Desktop
Basics
How to Open Windows Explorer
 Double-click the My Computer icon on the desktop.
OR
 Right-click on the
Start button.
 Select Explore
from the menu.
Basics
What is file hierarchy?
 When organizing the contents of ones
computer, it is essential to understand how
files and folders are connected.
 A well organized computer will consist of many
folders and subfolder which are located in a
logical sequence.
 The order, or rank, in which folders and file are
linked is often referred to as file hierarchy and
the route to a file is known as its path.
Basics
What is a file?
 A file is a piece of information which is stored
on a computer.
 A file can be something as basic as a Microsoft
Word Document to something as intricate as a
video.
 Files are often accessed from within another
program and are defined by a specific file
extension.
 More about file extensions later.
Basics
File Name
 A file name is made up of two parts:
(1) the name of the document and (2) the file
extension.
 You may name a file anything you wish, but
you should probably name a file something you
are likely to remember later.
 Use only letters and numbers in your file
names -- Special characters like "-", "/", "&",
must be avoided in the file name.
Basics
File Name
 The second part of a file name is the
extension.
 In the file text.doc, the word text is the file
name and the .doc is the extension.
 A period always separates the two.
 The extension identifies what kind of a
document you have.
Basics
File Extensions
 Some examples of file extensions are:
 .txt : plain text
 .doc : Microsoft Word Document
 .htm or .html : Web document
 .gif , .jpg , .bmp : image
 .ppt : PowerPoint Presentation
 .exe : Executable
Basics
No file extensions showing
 Microsoft, in it’s infinite wisdom, does not show
the file extensions.
 It is highly recommended that you turn file
extensions ON before you begin moving files.
 By seeing the file extension, you can usually
tell the type of file by looking at the entire file
name with extension.
 How do you turn file extensions on? See the
next slide.
Basics
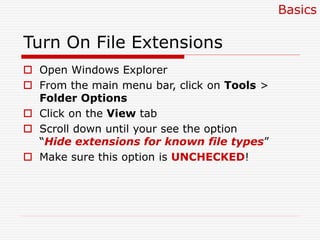
Turn On File Extensions
 Open Windows Explorer
 From the main menu bar, click on Tools >
Folder Options
 Click on the View tab
 Scroll down until your see the option
“Hide extensions for known file types”
 Make sure this option is UNCHECKED!
Basics
Make sure “Hide
extensions for
known file types” is
UNCHECKED!
Basics
What is a folder?
 A folder is basically a box or container in which
files are held.
 Folders are used to group together related files
 Folders are somewhat like drawers in a file
cabinet.
 On a computer, a folder is used to contain all
like files together, such as music in one folder,
documents in another, and so on.
 Thus, organizing files in this manner, files can
readily be found without sifting through a
plethora of files to find the one you want.
Basics
What is a subfolder?
 Subfolders are simply folders which are placed
within another folder.
 In theory, subfolders are similar to folders
within folders in a filing cabinet.
 The cabinet is the main folder which holds all
the folders, or files, but each folder is a
subfolder and is responsible for storing specific
types of files.
 You can create subfolders within subfolders.
Basics
EXERCISE
 Right-click on the desktop area, and select
NEW, then FOLDER
 Type in your first name
 Hit Enter
Basics
File Management
Viewing Files and Folders
File Icons
 Your computer represents files with icons.
 By looking at a file's icon, you can tell at a
glance what kind of file it is.
 Here are some common file icons:
 You can tell what kind of file an icon
represents by its appearance
Viewing Files and Folders
 There are several ways to arrange and identify
files when viewing them in folders.
 There are pros and cons each one, and in most
cases, the display mode is strictly personal
preference.
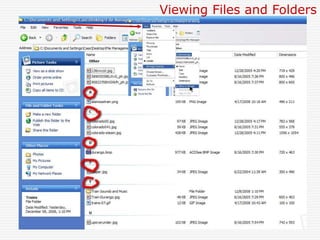
Viewing Files and Folders
How do I do it?
 One way:
In Windows Explorer, right-click in an area of
empty space.
 On the popup menu, click on Arrange
Icons By and allow the sub menu to
appear.
 Choose the mode in which you want the files
and folders to be displayed.
 The mode that is currently selected will be
represented with a black dot beside it.
 Another Way: See next slide.
Viewing Files and Folders
View Display Options
 Of the various view modes, all display the file/folder name
and are represented with a icon, which corresponds to the
type of file.
 In Windows Explorer, click on the down arrow as shown
below:
Viewing Files and Folders
File Display Options
 When a folder is open, you can access each of
the following view options on the View menu.
 Thumbnails
 Tiles
 Filmstrip
 Icons
 List
 Details
Viewing Files and Folders
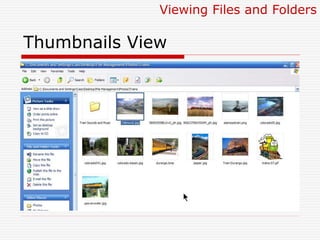
Thumbnails View
 Displays the images a folder contains on a
folder icon so you can quickly identify the
contents of the folder.
 For example, if you store pictures in several
different folders, in Thumbnails view, you can
tell at a glance which folder contains the
pictures you want.
 Windows displays up to four images on a folder
background, by default.
 Or, you can choose one picture to identify a
folder in Thumbnails view.
Viewing Files and Folders
Thumbnails
 The complete folder name is displayed under
the thumbnail.
 This can be helpful when browsing through
pictures but won’t help much if there is no
image to display.
 Of all the display options, this one is the
slowest because the computer has to retrieve
and develop each individual thumbnail.
Viewing Files and Folders
Thumbnails View
Viewing Files and Folders
Tiles
 This option displays all the files and folders with a medium
sized icon, and the name of the file/folder.
 For images and music files, other information such as the
resolution or record name are also shown.
Viewing Files and Folders
Filmstrip View
 Filmstrip view is available in picture folders.
 Your pictures appear in a single row of
thumbnail images.
 You can scroll through your pictures using the
left and right arrow buttons.
 If you click a picture, it is displayed as a larger
image above the other pictures.
 To edit, print, or save the image to another
folder, double-click the picture.
Viewing Files and Folders
Icon
 This option displays a medium sized icon and
the name of the file/folder.
 In this view you can display your files and
folders in groups.
Viewing Files and Folders
List View
 Displays the contents of a folder as a list of file
or folder names preceded by small icons.
 This view is useful if your folder contains many
files and you want to scan the list for a file
name.
 You can sort your files and folders in this view;
however, you cannot display your files in
groups.
 Of all the view modes, this is quickest.
Viewing Files and Folders
LIST
Viewing Files and Folders
Details View
 In Details view, Windows lists the contents of
the open folder and provides detailed
information about your files, including name,
type, size, and date modified.
 You can customize the various details which
are shown by clicking anywhere along the
‘details’ bar and placing check marks next to
the properties you wish to view.
 In Details view you can also show your files in
groups.
 To choose the details you want to display, on
the View menu, click Choose Details.
Viewing Files and Folders
DETAILS
Viewing Files and Folders
Arranging Files
 There are various ways of arranging files:
1. by name (alphabetically)
2. by size
3. by type
4. by the date modified.
Viewing Files and Folders
Reverse the Display Order
 If you choose to arrange your files by clicking
on the option which is already chosen, it will
reverse the order in which the icons are
displayed.
 For example, if the files are displayed by Name
from A to Z and you choose to display them by
name again, they will appear in reverse order
(from Z to A).
Viewing Files and Folders
Show In Groups
 Allows you to group your files by any detail of
the file, such as name, size, type, or date
modified.
 For example, if you group by file type, image
files appear in one group, Microsoft Word files
appear in another group, and Excel files in
another.
 Show in Groups is available in the Thumbnails,
Tiles, Icons, and Details views.
 To show your files in groups, on the View
menu, point to Arrange Icons by, and then
click Show in Groups.
Viewing Files and Folders
File Management
Copying and Moving Files and Folders
Copy and move files and folders
 Occasionally, you might want to change where files
are stored on your computer. You might want to
move files to a different folder, for example, or copy
them to removable media (such as CDs or memory
cards) to share with another person.
 Most people copy and move files using a method
called drag and drop. Start by opening the folder
that contains the file or folder you want to move.
Then open the folder where you want to move it to.
Position the folder windows on the desktop so you
can see the contents of both of them.
 Next, drag the file or folder from the first folder to
the second folder. That's all there is to it.
Copying and Moving Files and Folders
Copy a file or folder – 3 ways
Open Windows Explorer
1. Click the file or folder you want to copy.
 Under File and Folder Tasks, click Copy
this file or Copy this folder.
 In Copy Items, select the drive or folder you
want to copy to, and then click Copy.
2. You can also copy a file or folder by right-clicking
on the file or folder and choosing Copy.
3. You can copy a file or folder by using the Main
Menu and choosing Edit, then Copy.
Copying and Moving Files and Folders
1
2
3
Copying and Moving Files and Folders
Copy a file or folder
 You can copy more than one file or folder at a
time.
 To select consecutive files or folders, click the
first item, press and hold down SHIFT, and
then click the last item.
 To select nonconsecutive files or folders, press
and hold down CTRL, and then click each item.
Copying and Moving Files and Folders
Create a new folder – 3 ways
Open Windows Explorer
1. Under File and Folder Tasks, click Make a
new folder.
 A new folder is displayed with the default
name, New Folder, selected.
 Type a name for the new folder, and then
press ENTER.
2. You can create a new folder by right-clicking a
blank area in a folder window or on the
desktop, pointing to New, and then clicking
Folder.
3. You can also create a new folder under FILE
on the main menu, then NEW, then FOLDER
Copying and Moving Files and Folders
Delete a file or folder
Click the file or folder you want to delete.
 Under File and Folder Tasks, click Delete this
file or Delete this folder.
 You can also delete files or folders by right-clicking
the file or folder and then clicking Delete.
 To permanently delete a file, press and hold down
SHIFT and drag it to the Recycle Bin. The item is
permanently deleted and cannot be retrieved from
the Recycle Bin.
 You can also simply click on the file to be deleted,
then simply press the Delete button on your
keyboard.
Copying and Moving Files and Folders
Copying vs. Moving
 When using the drag-and-drop method, you
might notice that sometimes the file or folder is
copied and at other times it is moved. Why?
 If you are dragging an item between folders that
are on the same hard drive, then the items are
moved so two copies of the same file or folder
aren't created on the same hard drive.
 If you drag the item to a folder that's on a
different hard drive or to removable media like
a CD or flash drive, then the item is copied. That
way the file or folder isn't removed from its
original location.
Copying and Moving Files and Folders
Moving a file or folder
 Click the file or folder you want to move.
 Under File and Folder Tasks, click Move this file
or Move this folder.
 In Move Items, click the new location for the file or
folder, and then click Move.
 To select a consecutive group of files, click the first
file, press and hold down SHIFT, and then click the
last file.
 To select files or folders in nonconsecutive order,
press and hold down CTRL, and then click the items
you want.
 You can also move a file or folder by dragging it to
the desired location.
Copying and Moving Files and Folders
Dragging Files
When you drag a file This is what happens
Into a folder on the same disk The file is moved to the
destination folder
Into a folder on a different disk The file is copied to the folder
on the destination disk
Into the navigation pane of a
folder
Nothing. You can’t add files to
the navigation pane.
Copying and Moving Files and Folders
Dragging Folders
When you drag a folder This is what happens
Into a folder on the same disk The folder is moved to the
destination folder
Into a folder on a different disk The folder is copied to the
folder on the destination disk
Into the navigation pane of a
folder
A link to the folder is added to
the navigation page and the
link is then available from the
Navigation pane of every folder.
Copying and Moving Files and Folders
Drag and Drop
 The most common way to copy and move files
and folders is by using the drag-and-drop
method, which means that you select one or
more files and drag them to another location.
 For example, you can drag a file to the Recycle
Bin to delete the file, or drag a file to a folder
to copy or move it to that location.
 When organizing files, it is easier to have two
instances of Windows Explorer open to allow
dropping and dragging to each window, which
is much easier than the cut/move/copy/paste
options.
Copying and Moving Files and Folders
Drag and Drop
Copying and Moving Files and Folders
The Bare Necessities
Skills all PC users should know and use
Save As and Save
 There are two ways to save a file: ‘Save As’ and
‘Save’.
 ‘Save As’ is used the first time a file is being saved
and allows the user to dictate where the file is to be
saved and permits the user to give the file a name.
 ‘Save’, which is used after the file has already been
given a name and location, is the method that the
program uses to apply changes to the file.
 Within most applications, both ‘Save’ and ‘Save As’
can be accessed by clicking on the File button.
 Remember to click on Save often while modifying a
file. This way, in case something happens (i.e.
power failure) there is less chance that any
changes you have made will be lost.
Basic Skills
Windows XP Folders
 A folder’s name can consist of a maximum of
255 characters.
 A path describes how to find a file starting at
the root directory
Basic Skills
Change name of a file or folder
 Using Windows Explorer, locate the file or folder
you want to rename.
 Click (highlight) on the file or folder you want to
rename.
 Under File and Folder Tasks, click Rename this
file or Rename this folder.
 Type the new name, and then press ENTER.
 You can also rename a file or folder by right-clicking
it and then clicking Rename.
Basic Skills
Rename Folder
Basic Skills
EXERCISE
 Right click on the folder on the desktop named
“your name”
 Choose “Rename” from the menu
 Add your last initial (in CAP) to the end of your
first name
 Hit ENTER
Basic Skills
File Type Associations
 File association allows you to associate a file
extension with a program.
 Every file should have a file association.
 When you want to open a file, the associated
program will run to open it based on its
extension.
 Windows Explorer |Tools | Folder Options |
File Types tab
 In the Folder Options window, click the File
Types tab.
 To change a file association select an extension
and click Change.
Basic Skills
Shortcuts
 Shortcuts are a quick and easy access links to
actual programs, files, or folders.
 A shortcut is “signpost” pointing to a frequently
used program. Shortcuts are either placed on
the desktop or in a folder.
 Saves time in locating a program, since one
doesn’t have to search for it with Windows
Explorer or from the Start Button.
Basic Skills
File Management
Recycle Bin
Recycle Bin
To delete or restore files in the Recycle Bin:
 On the desktop, double-click Recycle Bin.
 Do one of the following:
 To restore an item, right-click it, and then click
Restore.
 To restore all of the items, on the Edit menu,
click Select All, and then on the File menu,
click Restore.
 To delete an item, right-click it, and then click
Delete.
 To delete all of the items, on the File menu,
click Empty Recycle Bin.
Recycle Bin
Recycle Bin NOTES:
 Deleting an item from the Recycle Bin permanently
removes it from your computer. Items deleted from the
Recycle Bin cannot be restored.
 You can also delete items by dragging them into the
Recycle Bin. If you press SHIFT while dragging, the item
is deleted from your computer without being stored in
the Recycle Bin.
 Restoring an item in the Recycle Bin returns that item to
its original location.
 To retrieve several items at once, hold down CTRL, and
then click each item that you want to retrieve. When you
have finished selecting the items that you want to
retrieve, on the File menu, click Restore.
 If you restore a file that was originally located in a
deleted folder, the folder is recreated in its original
location, and then the file is restored in that folder.
Recycle Bin
You cannot restore:
 Items deleted from network locations.
 Items deleted from removable media (such as
3.5-inch disks or flash drives).
 Items that are larger than the storage capacity
of the Recycle Bin.
Recycle Bin
What you need to know about
deleting files…
 When you delete a file using the delete command or
selecting the file and pressing delete on the keyboard
the file is not yet gone.
 Most files first go to the recycle bin – in order for
your file to be really gone you need to empty the
recycle bin.
 You can also get file back from the recycle bin by
restoring them.
 To restore a file that is in the recycle bin use the right
mouse key and then select restore – the file will go
back to where is was deleted from.
 Items in your recycle bin are still taking up space on
your hard drive.
Recycle Bin
Retrieve a deleted file
 To retrieve a file you have deleted, double-click
the Recycle Bin icon on your desktop.
 Right-click the file you want to retrieve, and
then click Restore.
Recycle Bin
File Management
Using Search to locate files
Finding files
 When you need to find a particular file, you'll
often know that it's located somewhere in a
common folder like Documents or Pictures.
 Unfortunately, actually locating the file you
want might mean browsing through hundreds
of files and subfolders—not an easy task.
 To save yourself time and effort, use the
Search box to find your file.
Using Search to locate files
Find Files Using Search
 Open Windows Explorer/My Computer
 The left pane of the window will change to
reveal the search form
Using Search to locate files
Find Files Using Search
 Type in all of part of the file name
for which you are searching.
 In this instance, type in
lighthouse (case does not matter
– I always use lowercase because
it requires less keystrokes)
 Make sure “Look in” says My
Computer
 Click on Search
 The left pane will display search
results
Using Search to locate files
File Management
Let’s get to work!
Exercises with Folders
 We will create new folders.
 We will be performing the following actions on
existing folders:
 Delete
 Copy
 Cut
 Paste
 Rename
Let’s get to work!
Exercises
 Double-click on your desktop folder with your
name
 Create a sub-folder within your folder named
“Documents”
 Create a sub-folder within your folder named
“Photos”
 Create a sub-folder within your folder named
“Music”
 Create a sub-folder within your folder named
“Classes”
Let’s get to work!
Create subfolders in subfolders
 Double-click to open subfolder named “Photos”
 Create subfolder named Lighthouses
 Now open Windows Explorer/My Computer
 Hit the minimize button and resize window to
fit half of screen
 Now open Windows Explorer/My Computer
again
 Resize the window to fit the other half of your
screen
Let’s get to work!
Create subfolders in subfolders
 Using the right window of Explorer, using
Search, find folder on your computer named
“lighthouses” under the folder named “Photos”
 Move one file to new Lighthouses folder
 Using Ctrl, move every other file to the folder
 Using Shift, move all remaining files
Let’s get to work!
Copy Entire Folder
 Make sure your are in the root of your Photos
folder
 Create subfolder named Trains
 Find on your computer the folder named
“Trains” within the “Photos” folder
 Open Trains folder
 Use Ctrl-A to select all files
 Drag files to your folder named Trains.
Let’s get to work!
Move Files
 Double-click to open subfolder named “Music”
 Create subfolder named “Country”
 Create subfolder named “Christmas”
 Create subfolder named “Instrumental)
 Using search, find folder on your computer
named “Country” under the folder named
“Music”
 Use Ctrl-A to select all files, right-click and
drag all files to your Country folder.
 Do the same thing with Christmas and
Instrumental.
Let’s get to work!
Move Folders
 Locate folder named Documents
 Click to select and then drag entire folder to
YourName folder
 Locate folder named Classes
 Right-click on folder and drag to YourName
folder
Let’s get to work!
Rename a series of files
 Choose the folder where the files are located
 Select the files you want to rename.
 On the File menu, click Rename.
 Type the new name, and then press ENTER.
 All of the files in the series will be named in
sequence using the new name you type.
Example: If you type Birthday, the other files
in the series will be named Birthday (1),
Birthday (2), and so on.
Let’s get to work!

More Related Content

What's hot

19 ref share 2.0 – sharing your refworks database
19 ref share 2.0 – sharing your refworks database19 ref share 2.0 – sharing your refworks database
19 ref share 2.0 – sharing your refworks database
UCT
 
2 1 working in an end note library
2  1 working in an end note library 2  1 working in an end note library
2 1 working in an end note library
Abdelmonim Osman
 
Information and Communications Technology (ICT) General Application Software
 Information and Communications Technology (ICT)  General Application Software Information and Communications Technology (ICT)  General Application Software
Information and Communications Technology (ICT) General Application Software
Love Steven
 
Storage Mediums and Fragmentation
Storage Mediums and FragmentationStorage Mediums and Fragmentation
Storage Mediums and FragmentationJonathan Reid
 
Zotero-4-firefox-history
Zotero-4-firefox-historyZotero-4-firefox-history
Zotero-4-firefox-history
paulwe1
 
Files - saving and opening
Files - saving and openingFiles - saving and opening
Files - saving and opening
Lisa Hartman
 
A L Computer Basics2
A L  Computer  Basics2A L  Computer  Basics2
A L Computer Basics2Cobliden
 
Groove2007
Groove2007Groove2007
Groove2007
venky546
 
File and directory
File and directoryFile and directory
File and directory
Sunil Kafle
 
9 backup your end note library
9  backup your end note library9  backup your end note library
9 backup your end note library
Abdelmonim Osman
 
Organizing google drive
Organizing google driveOrganizing google drive
Organizing google drive
Lisa Tody
 

What's hot (12)

19 ref share 2.0 – sharing your refworks database
19 ref share 2.0 – sharing your refworks database19 ref share 2.0 – sharing your refworks database
19 ref share 2.0 – sharing your refworks database
 
2 1 working in an end note library
2  1 working in an end note library 2  1 working in an end note library
2 1 working in an end note library
 
Information and Communications Technology (ICT) General Application Software
 Information and Communications Technology (ICT)  General Application Software Information and Communications Technology (ICT)  General Application Software
Information and Communications Technology (ICT) General Application Software
 
Storage Mediums and Fragmentation
Storage Mediums and FragmentationStorage Mediums and Fragmentation
Storage Mediums and Fragmentation
 
Zotero-4-firefox-history
Zotero-4-firefox-historyZotero-4-firefox-history
Zotero-4-firefox-history
 
Files - saving and opening
Files - saving and openingFiles - saving and opening
Files - saving and opening
 
Beginner word class_1
Beginner word class_1Beginner word class_1
Beginner word class_1
 
A L Computer Basics2
A L  Computer  Basics2A L  Computer  Basics2
A L Computer Basics2
 
Groove2007
Groove2007Groove2007
Groove2007
 
File and directory
File and directoryFile and directory
File and directory
 
9 backup your end note library
9  backup your end note library9  backup your end note library
9 backup your end note library
 
Organizing google drive
Organizing google driveOrganizing google drive
Organizing google drive
 

Similar to File managment

ITFT - Window explorer
ITFT - Window explorerITFT - Window explorer
ITFT - Window explorer
Blossom Sood
 
Lesson 1.pptx
Lesson 1.pptxLesson 1.pptx
Lesson 1.pptx
Rammel1
 
Power Point Lesson 10 Part1
Power Point  Lesson 10  Part1Power Point  Lesson 10  Part1
Power Point Lesson 10 Part1Nasir Jumani
 
More on MS Windows 10
More on MS Windows 10More on MS Windows 10
More on MS Windows 10
mdkhan197
 
WinSIG Windows & File Explorer
WinSIG Windows & File ExplorerWinSIG Windows & File Explorer
WinSIG Windows & File Explorer
hewie
 
05 Network, Files And Folders
05 Network, Files And Folders05 Network, Files And Folders
05 Network, Files And FoldersBuffalo Seminary
 
Power Point Lesson 09 Part 2
Power Point Lesson 09 Part 2Power Point Lesson 09 Part 2
Power Point Lesson 09 Part 2Nasir Jumani
 
Windows Basic
Windows BasicWindows Basic
Windows Basic
Jack Frost
 
Windows Basic
Windows BasicWindows Basic
Windows Basic
Jack Frost
 
File management
File managementFile management
File management
Mukund Trivedi
 
Degonto, File management system in fisheries science
Degonto, File management  system in fisheries scienceDegonto, File management  system in fisheries science
Degonto, File management system in fisheries science
Degonto Islam
 
Managing my Files in PaperClipPlus
Managing my Files in PaperClipPlusManaging my Files in PaperClipPlus
Managing my Files in PaperClipPlus
Fred Domke
 
IS100 Week 4
IS100 Week 4IS100 Week 4
IS100 Week 4
METU-Informatics
 
Apple file organising
Apple file organisingApple file organising
Apple file organisingJacqui Sharp
 
Degonto file management
Degonto file managementDegonto file management
Degonto file management
Degonto Islam
 
1.5 File Management Presentation.pptx
1.5 File Management Presentation.pptx1.5 File Management Presentation.pptx
1.5 File Management Presentation.pptx
ARYAN552812
 
File System & Managing files & Properties.pptx
File System & Managing files & Properties.pptxFile System & Managing files & Properties.pptx
File System & Managing files & Properties.pptx
sureshrajan38
 
Find option.39
Find option.39Find option.39
Find option.39myrajendra
 

Similar to File managment (20)

ITFT - Window explorer
ITFT - Window explorerITFT - Window explorer
ITFT - Window explorer
 
Lesson 1.pptx
Lesson 1.pptxLesson 1.pptx
Lesson 1.pptx
 
Power Point Lesson 10 Part1
Power Point  Lesson 10  Part1Power Point  Lesson 10  Part1
Power Point Lesson 10 Part1
 
More on MS Windows 10
More on MS Windows 10More on MS Windows 10
More on MS Windows 10
 
WinSIG Windows & File Explorer
WinSIG Windows & File ExplorerWinSIG Windows & File Explorer
WinSIG Windows & File Explorer
 
05 Network, Files And Folders
05 Network, Files And Folders05 Network, Files And Folders
05 Network, Files And Folders
 
Unit B Windows 7
Unit B Windows 7Unit B Windows 7
Unit B Windows 7
 
Power Point Lesson 09 Part 2
Power Point Lesson 09 Part 2Power Point Lesson 09 Part 2
Power Point Lesson 09 Part 2
 
Windows Basic
Windows BasicWindows Basic
Windows Basic
 
Windows Basic
Windows BasicWindows Basic
Windows Basic
 
File management
File managementFile management
File management
 
File management
File managementFile management
File management
 
Degonto, File management system in fisheries science
Degonto, File management  system in fisheries scienceDegonto, File management  system in fisheries science
Degonto, File management system in fisheries science
 
Managing my Files in PaperClipPlus
Managing my Files in PaperClipPlusManaging my Files in PaperClipPlus
Managing my Files in PaperClipPlus
 
IS100 Week 4
IS100 Week 4IS100 Week 4
IS100 Week 4
 
Apple file organising
Apple file organisingApple file organising
Apple file organising
 
Degonto file management
Degonto file managementDegonto file management
Degonto file management
 
1.5 File Management Presentation.pptx
1.5 File Management Presentation.pptx1.5 File Management Presentation.pptx
1.5 File Management Presentation.pptx
 
File System & Managing files & Properties.pptx
File System & Managing files & Properties.pptxFile System & Managing files & Properties.pptx
File System & Managing files & Properties.pptx
 
Find option.39
Find option.39Find option.39
Find option.39
 

More from sateesh pareek

GST
GST GST
Best PPT
Best PPTBest PPT
Best PPT
sateesh pareek
 
Numbers
NumbersNumbers
Digital Marketing A Smart Learning and Practice
Digital Marketing A Smart Learning and PracticeDigital Marketing A Smart Learning and Practice
Digital Marketing A Smart Learning and Practice
sateesh pareek
 
Digital-marketing as a Business Development tools for beginners
Digital-marketing as a Business Development tools for beginnersDigital-marketing as a Business Development tools for beginners
Digital-marketing as a Business Development tools for beginners
sateesh pareek
 
Ashtech company profile
Ashtech company profileAshtech company profile
Ashtech company profile
sateesh pareek
 

More from sateesh pareek (7)

GST
GST GST
GST
 
Best PPT
Best PPTBest PPT
Best PPT
 
Numbers
NumbersNumbers
Numbers
 
Digital Marketing A Smart Learning and Practice
Digital Marketing A Smart Learning and PracticeDigital Marketing A Smart Learning and Practice
Digital Marketing A Smart Learning and Practice
 
Digital-marketing as a Business Development tools for beginners
Digital-marketing as a Business Development tools for beginnersDigital-marketing as a Business Development tools for beginners
Digital-marketing as a Business Development tools for beginners
 
Management
ManagementManagement
Management
 
Ashtech company profile
Ashtech company profileAshtech company profile
Ashtech company profile
 

Recently uploaded

aaaaaaaaaaaaaaaaaaaaaaaaaaaaaaaaaaaaaaaaa
aaaaaaaaaaaaaaaaaaaaaaaaaaaaaaaaaaaaaaaaaaaaaaaaaaaaaaaaaaaaaaaaaaaaaaaaaaaaaaaaaa
aaaaaaaaaaaaaaaaaaaaaaaaaaaaaaaaaaaaaaaaa
siemaillard
 
Acetabularia Information For Class 9 .docx
Acetabularia Information For Class 9  .docxAcetabularia Information For Class 9  .docx
Acetabularia Information For Class 9 .docx
vaibhavrinwa19
 
Thesis Statement for students diagnonsed withADHD.ppt
Thesis Statement for students diagnonsed withADHD.pptThesis Statement for students diagnonsed withADHD.ppt
Thesis Statement for students diagnonsed withADHD.ppt
EverAndrsGuerraGuerr
 
Operation Blue Star - Saka Neela Tara
Operation Blue Star   -  Saka Neela TaraOperation Blue Star   -  Saka Neela Tara
Operation Blue Star - Saka Neela Tara
Balvir Singh
 
BÀI TẬP BỔ TRỢ TIẾNG ANH GLOBAL SUCCESS LỚP 3 - CẢ NĂM (CÓ FILE NGHE VÀ ĐÁP Á...
BÀI TẬP BỔ TRỢ TIẾNG ANH GLOBAL SUCCESS LỚP 3 - CẢ NĂM (CÓ FILE NGHE VÀ ĐÁP Á...BÀI TẬP BỔ TRỢ TIẾNG ANH GLOBAL SUCCESS LỚP 3 - CẢ NĂM (CÓ FILE NGHE VÀ ĐÁP Á...
BÀI TẬP BỔ TRỢ TIẾNG ANH GLOBAL SUCCESS LỚP 3 - CẢ NĂM (CÓ FILE NGHE VÀ ĐÁP Á...
Nguyen Thanh Tu Collection
 
Unit 8 - Information and Communication Technology (Paper I).pdf
Unit 8 - Information and Communication Technology (Paper I).pdfUnit 8 - Information and Communication Technology (Paper I).pdf
Unit 8 - Information and Communication Technology (Paper I).pdf
Thiyagu K
 
CLASS 11 CBSE B.St Project AIDS TO TRADE - INSURANCE
CLASS 11 CBSE B.St Project AIDS TO TRADE - INSURANCECLASS 11 CBSE B.St Project AIDS TO TRADE - INSURANCE
CLASS 11 CBSE B.St Project AIDS TO TRADE - INSURANCE
BhavyaRajput3
 
The Roman Empire A Historical Colossus.pdf
The Roman Empire A Historical Colossus.pdfThe Roman Empire A Historical Colossus.pdf
The Roman Empire A Historical Colossus.pdf
kaushalkr1407
 
Instructions for Submissions thorugh G- Classroom.pptx
Instructions for Submissions thorugh G- Classroom.pptxInstructions for Submissions thorugh G- Classroom.pptx
Instructions for Submissions thorugh G- Classroom.pptx
Jheel Barad
 
Francesca Gottschalk - How can education support child empowerment.pptx
Francesca Gottschalk - How can education support child empowerment.pptxFrancesca Gottschalk - How can education support child empowerment.pptx
Francesca Gottschalk - How can education support child empowerment.pptx
EduSkills OECD
 
The approach at University of Liverpool.pptx
The approach at University of Liverpool.pptxThe approach at University of Liverpool.pptx
The approach at University of Liverpool.pptx
Jisc
 
Unit 2- Research Aptitude (UGC NET Paper I).pdf
Unit 2- Research Aptitude (UGC NET Paper I).pdfUnit 2- Research Aptitude (UGC NET Paper I).pdf
Unit 2- Research Aptitude (UGC NET Paper I).pdf
Thiyagu K
 
The basics of sentences session 5pptx.pptx
The basics of sentences session 5pptx.pptxThe basics of sentences session 5pptx.pptx
The basics of sentences session 5pptx.pptx
heathfieldcps1
 
Honest Reviews of Tim Han LMA Course Program.pptx
Honest Reviews of Tim Han LMA Course Program.pptxHonest Reviews of Tim Han LMA Course Program.pptx
Honest Reviews of Tim Han LMA Course Program.pptx
timhan337
 
Model Attribute Check Company Auto Property
Model Attribute  Check Company Auto PropertyModel Attribute  Check Company Auto Property
Model Attribute Check Company Auto Property
Celine George
 
Embracing GenAI - A Strategic Imperative
Embracing GenAI - A Strategic ImperativeEmbracing GenAI - A Strategic Imperative
Embracing GenAI - A Strategic Imperative
Peter Windle
 
Phrasal Verbs.XXXXXXXXXXXXXXXXXXXXXXXXXX
Phrasal Verbs.XXXXXXXXXXXXXXXXXXXXXXXXXXPhrasal Verbs.XXXXXXXXXXXXXXXXXXXXXXXXXX
Phrasal Verbs.XXXXXXXXXXXXXXXXXXXXXXXXXX
MIRIAMSALINAS13
 
Mule 4.6 & Java 17 Upgrade | MuleSoft Mysore Meetup #46
Mule 4.6 & Java 17 Upgrade | MuleSoft Mysore Meetup #46Mule 4.6 & Java 17 Upgrade | MuleSoft Mysore Meetup #46
Mule 4.6 & Java 17 Upgrade | MuleSoft Mysore Meetup #46
MysoreMuleSoftMeetup
 
special B.ed 2nd year old paper_20240531.pdf
special B.ed 2nd year old paper_20240531.pdfspecial B.ed 2nd year old paper_20240531.pdf
special B.ed 2nd year old paper_20240531.pdf
Special education needs
 
CACJapan - GROUP Presentation 1- Wk 4.pdf
CACJapan - GROUP Presentation 1- Wk 4.pdfCACJapan - GROUP Presentation 1- Wk 4.pdf
CACJapan - GROUP Presentation 1- Wk 4.pdf
camakaiclarkmusic
 

Recently uploaded (20)

aaaaaaaaaaaaaaaaaaaaaaaaaaaaaaaaaaaaaaaaa
aaaaaaaaaaaaaaaaaaaaaaaaaaaaaaaaaaaaaaaaaaaaaaaaaaaaaaaaaaaaaaaaaaaaaaaaaaaaaaaaaa
aaaaaaaaaaaaaaaaaaaaaaaaaaaaaaaaaaaaaaaaa
 
Acetabularia Information For Class 9 .docx
Acetabularia Information For Class 9  .docxAcetabularia Information For Class 9  .docx
Acetabularia Information For Class 9 .docx
 
Thesis Statement for students diagnonsed withADHD.ppt
Thesis Statement for students diagnonsed withADHD.pptThesis Statement for students diagnonsed withADHD.ppt
Thesis Statement for students diagnonsed withADHD.ppt
 
Operation Blue Star - Saka Neela Tara
Operation Blue Star   -  Saka Neela TaraOperation Blue Star   -  Saka Neela Tara
Operation Blue Star - Saka Neela Tara
 
BÀI TẬP BỔ TRỢ TIẾNG ANH GLOBAL SUCCESS LỚP 3 - CẢ NĂM (CÓ FILE NGHE VÀ ĐÁP Á...
BÀI TẬP BỔ TRỢ TIẾNG ANH GLOBAL SUCCESS LỚP 3 - CẢ NĂM (CÓ FILE NGHE VÀ ĐÁP Á...BÀI TẬP BỔ TRỢ TIẾNG ANH GLOBAL SUCCESS LỚP 3 - CẢ NĂM (CÓ FILE NGHE VÀ ĐÁP Á...
BÀI TẬP BỔ TRỢ TIẾNG ANH GLOBAL SUCCESS LỚP 3 - CẢ NĂM (CÓ FILE NGHE VÀ ĐÁP Á...
 
Unit 8 - Information and Communication Technology (Paper I).pdf
Unit 8 - Information and Communication Technology (Paper I).pdfUnit 8 - Information and Communication Technology (Paper I).pdf
Unit 8 - Information and Communication Technology (Paper I).pdf
 
CLASS 11 CBSE B.St Project AIDS TO TRADE - INSURANCE
CLASS 11 CBSE B.St Project AIDS TO TRADE - INSURANCECLASS 11 CBSE B.St Project AIDS TO TRADE - INSURANCE
CLASS 11 CBSE B.St Project AIDS TO TRADE - INSURANCE
 
The Roman Empire A Historical Colossus.pdf
The Roman Empire A Historical Colossus.pdfThe Roman Empire A Historical Colossus.pdf
The Roman Empire A Historical Colossus.pdf
 
Instructions for Submissions thorugh G- Classroom.pptx
Instructions for Submissions thorugh G- Classroom.pptxInstructions for Submissions thorugh G- Classroom.pptx
Instructions for Submissions thorugh G- Classroom.pptx
 
Francesca Gottschalk - How can education support child empowerment.pptx
Francesca Gottschalk - How can education support child empowerment.pptxFrancesca Gottschalk - How can education support child empowerment.pptx
Francesca Gottschalk - How can education support child empowerment.pptx
 
The approach at University of Liverpool.pptx
The approach at University of Liverpool.pptxThe approach at University of Liverpool.pptx
The approach at University of Liverpool.pptx
 
Unit 2- Research Aptitude (UGC NET Paper I).pdf
Unit 2- Research Aptitude (UGC NET Paper I).pdfUnit 2- Research Aptitude (UGC NET Paper I).pdf
Unit 2- Research Aptitude (UGC NET Paper I).pdf
 
The basics of sentences session 5pptx.pptx
The basics of sentences session 5pptx.pptxThe basics of sentences session 5pptx.pptx
The basics of sentences session 5pptx.pptx
 
Honest Reviews of Tim Han LMA Course Program.pptx
Honest Reviews of Tim Han LMA Course Program.pptxHonest Reviews of Tim Han LMA Course Program.pptx
Honest Reviews of Tim Han LMA Course Program.pptx
 
Model Attribute Check Company Auto Property
Model Attribute  Check Company Auto PropertyModel Attribute  Check Company Auto Property
Model Attribute Check Company Auto Property
 
Embracing GenAI - A Strategic Imperative
Embracing GenAI - A Strategic ImperativeEmbracing GenAI - A Strategic Imperative
Embracing GenAI - A Strategic Imperative
 
Phrasal Verbs.XXXXXXXXXXXXXXXXXXXXXXXXXX
Phrasal Verbs.XXXXXXXXXXXXXXXXXXXXXXXXXXPhrasal Verbs.XXXXXXXXXXXXXXXXXXXXXXXXXX
Phrasal Verbs.XXXXXXXXXXXXXXXXXXXXXXXXXX
 
Mule 4.6 & Java 17 Upgrade | MuleSoft Mysore Meetup #46
Mule 4.6 & Java 17 Upgrade | MuleSoft Mysore Meetup #46Mule 4.6 & Java 17 Upgrade | MuleSoft Mysore Meetup #46
Mule 4.6 & Java 17 Upgrade | MuleSoft Mysore Meetup #46
 
special B.ed 2nd year old paper_20240531.pdf
special B.ed 2nd year old paper_20240531.pdfspecial B.ed 2nd year old paper_20240531.pdf
special B.ed 2nd year old paper_20240531.pdf
 
CACJapan - GROUP Presentation 1- Wk 4.pdf
CACJapan - GROUP Presentation 1- Wk 4.pdfCACJapan - GROUP Presentation 1- Wk 4.pdf
CACJapan - GROUP Presentation 1- Wk 4.pdf
 

File managment

  • 1. File Management Basics for Managing Your Files
  • 2. What exactly is file management?  File management is the process of placing, naming, and organizing files and folders in a seemingly logical manner.  File management on the computer is similar to how someone would arrange documents and important papers in a filing cabinet.  Related papers and documents are placed into an appropriately named folder and that folder is then placed into the appropriate level or section of the file cabinet.  Similarly, on the computer, file management would consist of sorting and arranging a group of files into specific folders so that similar or related files are located together. Basics
  • 3. Why do I need to manage my files?  An unorganized computer is very similar to any unorganized room or a messy desk, with stuff placed haphazardly around in no logical location.  It creates a problem if you need to find something in a hurry and have no clue where to find the document.  And if you don’t have a clue on how to start organizing what you have, whether that be files on your computer or a pile of recipes and receipts, this class will help you. Basics
  • 4. How do I manage my files?  Use Windows Explorer to rearrange and organize your files by:  Creating folders and subfolders  Moving files to specific folders  Renaming files logically for easy retrieval  Save new files in a specifically designated folder as you create them Basics
  • 5. What is Windows Explorer? Basics
  • 7. How to Open Windows Explorer  Double-click the My Computer icon on the desktop. OR  Right-click on the Start button.  Select Explore from the menu. Basics
  • 8. What is file hierarchy?  When organizing the contents of ones computer, it is essential to understand how files and folders are connected.  A well organized computer will consist of many folders and subfolder which are located in a logical sequence.  The order, or rank, in which folders and file are linked is often referred to as file hierarchy and the route to a file is known as its path. Basics
  • 9. What is a file?  A file is a piece of information which is stored on a computer.  A file can be something as basic as a Microsoft Word Document to something as intricate as a video.  Files are often accessed from within another program and are defined by a specific file extension.  More about file extensions later. Basics
  • 10. File Name  A file name is made up of two parts: (1) the name of the document and (2) the file extension.  You may name a file anything you wish, but you should probably name a file something you are likely to remember later.  Use only letters and numbers in your file names -- Special characters like "-", "/", "&", must be avoided in the file name. Basics
  • 11. File Name  The second part of a file name is the extension.  In the file text.doc, the word text is the file name and the .doc is the extension.  A period always separates the two.  The extension identifies what kind of a document you have. Basics
  • 12. File Extensions  Some examples of file extensions are:  .txt : plain text  .doc : Microsoft Word Document  .htm or .html : Web document  .gif , .jpg , .bmp : image  .ppt : PowerPoint Presentation  .exe : Executable Basics
  • 13. No file extensions showing  Microsoft, in it’s infinite wisdom, does not show the file extensions.  It is highly recommended that you turn file extensions ON before you begin moving files.  By seeing the file extension, you can usually tell the type of file by looking at the entire file name with extension.  How do you turn file extensions on? See the next slide. Basics
  • 14. Turn On File Extensions  Open Windows Explorer  From the main menu bar, click on Tools > Folder Options  Click on the View tab  Scroll down until your see the option “Hide extensions for known file types”  Make sure this option is UNCHECKED! Basics
  • 15. Make sure “Hide extensions for known file types” is UNCHECKED! Basics
  • 16. What is a folder?  A folder is basically a box or container in which files are held.  Folders are used to group together related files  Folders are somewhat like drawers in a file cabinet.  On a computer, a folder is used to contain all like files together, such as music in one folder, documents in another, and so on.  Thus, organizing files in this manner, files can readily be found without sifting through a plethora of files to find the one you want. Basics
  • 17. What is a subfolder?  Subfolders are simply folders which are placed within another folder.  In theory, subfolders are similar to folders within folders in a filing cabinet.  The cabinet is the main folder which holds all the folders, or files, but each folder is a subfolder and is responsible for storing specific types of files.  You can create subfolders within subfolders. Basics
  • 18. EXERCISE  Right-click on the desktop area, and select NEW, then FOLDER  Type in your first name  Hit Enter Basics
  • 20. File Icons  Your computer represents files with icons.  By looking at a file's icon, you can tell at a glance what kind of file it is.  Here are some common file icons:  You can tell what kind of file an icon represents by its appearance
  • 21. Viewing Files and Folders  There are several ways to arrange and identify files when viewing them in folders.  There are pros and cons each one, and in most cases, the display mode is strictly personal preference. Viewing Files and Folders
  • 22. How do I do it?  One way: In Windows Explorer, right-click in an area of empty space.  On the popup menu, click on Arrange Icons By and allow the sub menu to appear.  Choose the mode in which you want the files and folders to be displayed.  The mode that is currently selected will be represented with a black dot beside it.  Another Way: See next slide. Viewing Files and Folders
  • 23. View Display Options  Of the various view modes, all display the file/folder name and are represented with a icon, which corresponds to the type of file.  In Windows Explorer, click on the down arrow as shown below: Viewing Files and Folders
  • 24. File Display Options  When a folder is open, you can access each of the following view options on the View menu.  Thumbnails  Tiles  Filmstrip  Icons  List  Details Viewing Files and Folders
  • 25. Thumbnails View  Displays the images a folder contains on a folder icon so you can quickly identify the contents of the folder.  For example, if you store pictures in several different folders, in Thumbnails view, you can tell at a glance which folder contains the pictures you want.  Windows displays up to four images on a folder background, by default.  Or, you can choose one picture to identify a folder in Thumbnails view. Viewing Files and Folders
  • 26. Thumbnails  The complete folder name is displayed under the thumbnail.  This can be helpful when browsing through pictures but won’t help much if there is no image to display.  Of all the display options, this one is the slowest because the computer has to retrieve and develop each individual thumbnail. Viewing Files and Folders
  • 28. Tiles  This option displays all the files and folders with a medium sized icon, and the name of the file/folder.  For images and music files, other information such as the resolution or record name are also shown. Viewing Files and Folders
  • 29. Filmstrip View  Filmstrip view is available in picture folders.  Your pictures appear in a single row of thumbnail images.  You can scroll through your pictures using the left and right arrow buttons.  If you click a picture, it is displayed as a larger image above the other pictures.  To edit, print, or save the image to another folder, double-click the picture. Viewing Files and Folders
  • 30.
  • 31. Icon  This option displays a medium sized icon and the name of the file/folder.  In this view you can display your files and folders in groups. Viewing Files and Folders
  • 32. List View  Displays the contents of a folder as a list of file or folder names preceded by small icons.  This view is useful if your folder contains many files and you want to scan the list for a file name.  You can sort your files and folders in this view; however, you cannot display your files in groups.  Of all the view modes, this is quickest. Viewing Files and Folders
  • 34. Details View  In Details view, Windows lists the contents of the open folder and provides detailed information about your files, including name, type, size, and date modified.  You can customize the various details which are shown by clicking anywhere along the ‘details’ bar and placing check marks next to the properties you wish to view.  In Details view you can also show your files in groups.  To choose the details you want to display, on the View menu, click Choose Details. Viewing Files and Folders
  • 36. Arranging Files  There are various ways of arranging files: 1. by name (alphabetically) 2. by size 3. by type 4. by the date modified. Viewing Files and Folders
  • 37. Reverse the Display Order  If you choose to arrange your files by clicking on the option which is already chosen, it will reverse the order in which the icons are displayed.  For example, if the files are displayed by Name from A to Z and you choose to display them by name again, they will appear in reverse order (from Z to A). Viewing Files and Folders
  • 38. Show In Groups  Allows you to group your files by any detail of the file, such as name, size, type, or date modified.  For example, if you group by file type, image files appear in one group, Microsoft Word files appear in another group, and Excel files in another.  Show in Groups is available in the Thumbnails, Tiles, Icons, and Details views.  To show your files in groups, on the View menu, point to Arrange Icons by, and then click Show in Groups. Viewing Files and Folders
  • 39. Viewing Files and Folders
  • 40. File Management Copying and Moving Files and Folders
  • 41. Copy and move files and folders  Occasionally, you might want to change where files are stored on your computer. You might want to move files to a different folder, for example, or copy them to removable media (such as CDs or memory cards) to share with another person.  Most people copy and move files using a method called drag and drop. Start by opening the folder that contains the file or folder you want to move. Then open the folder where you want to move it to. Position the folder windows on the desktop so you can see the contents of both of them.  Next, drag the file or folder from the first folder to the second folder. That's all there is to it. Copying and Moving Files and Folders
  • 42. Copy a file or folder – 3 ways Open Windows Explorer 1. Click the file or folder you want to copy.  Under File and Folder Tasks, click Copy this file or Copy this folder.  In Copy Items, select the drive or folder you want to copy to, and then click Copy. 2. You can also copy a file or folder by right-clicking on the file or folder and choosing Copy. 3. You can copy a file or folder by using the Main Menu and choosing Edit, then Copy. Copying and Moving Files and Folders
  • 43. 1 2 3 Copying and Moving Files and Folders
  • 44. Copy a file or folder  You can copy more than one file or folder at a time.  To select consecutive files or folders, click the first item, press and hold down SHIFT, and then click the last item.  To select nonconsecutive files or folders, press and hold down CTRL, and then click each item. Copying and Moving Files and Folders
  • 45. Create a new folder – 3 ways Open Windows Explorer 1. Under File and Folder Tasks, click Make a new folder.  A new folder is displayed with the default name, New Folder, selected.  Type a name for the new folder, and then press ENTER. 2. You can create a new folder by right-clicking a blank area in a folder window or on the desktop, pointing to New, and then clicking Folder. 3. You can also create a new folder under FILE on the main menu, then NEW, then FOLDER Copying and Moving Files and Folders
  • 46. Delete a file or folder Click the file or folder you want to delete.  Under File and Folder Tasks, click Delete this file or Delete this folder.  You can also delete files or folders by right-clicking the file or folder and then clicking Delete.  To permanently delete a file, press and hold down SHIFT and drag it to the Recycle Bin. The item is permanently deleted and cannot be retrieved from the Recycle Bin.  You can also simply click on the file to be deleted, then simply press the Delete button on your keyboard. Copying and Moving Files and Folders
  • 47. Copying vs. Moving  When using the drag-and-drop method, you might notice that sometimes the file or folder is copied and at other times it is moved. Why?  If you are dragging an item between folders that are on the same hard drive, then the items are moved so two copies of the same file or folder aren't created on the same hard drive.  If you drag the item to a folder that's on a different hard drive or to removable media like a CD or flash drive, then the item is copied. That way the file or folder isn't removed from its original location. Copying and Moving Files and Folders
  • 48. Moving a file or folder  Click the file or folder you want to move.  Under File and Folder Tasks, click Move this file or Move this folder.  In Move Items, click the new location for the file or folder, and then click Move.  To select a consecutive group of files, click the first file, press and hold down SHIFT, and then click the last file.  To select files or folders in nonconsecutive order, press and hold down CTRL, and then click the items you want.  You can also move a file or folder by dragging it to the desired location. Copying and Moving Files and Folders
  • 49. Dragging Files When you drag a file This is what happens Into a folder on the same disk The file is moved to the destination folder Into a folder on a different disk The file is copied to the folder on the destination disk Into the navigation pane of a folder Nothing. You can’t add files to the navigation pane. Copying and Moving Files and Folders
  • 50. Dragging Folders When you drag a folder This is what happens Into a folder on the same disk The folder is moved to the destination folder Into a folder on a different disk The folder is copied to the folder on the destination disk Into the navigation pane of a folder A link to the folder is added to the navigation page and the link is then available from the Navigation pane of every folder. Copying and Moving Files and Folders
  • 51. Drag and Drop  The most common way to copy and move files and folders is by using the drag-and-drop method, which means that you select one or more files and drag them to another location.  For example, you can drag a file to the Recycle Bin to delete the file, or drag a file to a folder to copy or move it to that location.  When organizing files, it is easier to have two instances of Windows Explorer open to allow dropping and dragging to each window, which is much easier than the cut/move/copy/paste options. Copying and Moving Files and Folders
  • 52. Drag and Drop Copying and Moving Files and Folders
  • 53.
  • 54. The Bare Necessities Skills all PC users should know and use
  • 55. Save As and Save  There are two ways to save a file: ‘Save As’ and ‘Save’.  ‘Save As’ is used the first time a file is being saved and allows the user to dictate where the file is to be saved and permits the user to give the file a name.  ‘Save’, which is used after the file has already been given a name and location, is the method that the program uses to apply changes to the file.  Within most applications, both ‘Save’ and ‘Save As’ can be accessed by clicking on the File button.  Remember to click on Save often while modifying a file. This way, in case something happens (i.e. power failure) there is less chance that any changes you have made will be lost. Basic Skills
  • 56. Windows XP Folders  A folder’s name can consist of a maximum of 255 characters.  A path describes how to find a file starting at the root directory Basic Skills
  • 57. Change name of a file or folder  Using Windows Explorer, locate the file or folder you want to rename.  Click (highlight) on the file or folder you want to rename.  Under File and Folder Tasks, click Rename this file or Rename this folder.  Type the new name, and then press ENTER.  You can also rename a file or folder by right-clicking it and then clicking Rename. Basic Skills
  • 59. EXERCISE  Right click on the folder on the desktop named “your name”  Choose “Rename” from the menu  Add your last initial (in CAP) to the end of your first name  Hit ENTER Basic Skills
  • 60. File Type Associations  File association allows you to associate a file extension with a program.  Every file should have a file association.  When you want to open a file, the associated program will run to open it based on its extension.  Windows Explorer |Tools | Folder Options | File Types tab  In the Folder Options window, click the File Types tab.  To change a file association select an extension and click Change. Basic Skills
  • 61. Shortcuts  Shortcuts are a quick and easy access links to actual programs, files, or folders.  A shortcut is “signpost” pointing to a frequently used program. Shortcuts are either placed on the desktop or in a folder.  Saves time in locating a program, since one doesn’t have to search for it with Windows Explorer or from the Start Button. Basic Skills
  • 63. Recycle Bin To delete or restore files in the Recycle Bin:  On the desktop, double-click Recycle Bin.  Do one of the following:  To restore an item, right-click it, and then click Restore.  To restore all of the items, on the Edit menu, click Select All, and then on the File menu, click Restore.  To delete an item, right-click it, and then click Delete.  To delete all of the items, on the File menu, click Empty Recycle Bin. Recycle Bin
  • 64. Recycle Bin NOTES:  Deleting an item from the Recycle Bin permanently removes it from your computer. Items deleted from the Recycle Bin cannot be restored.  You can also delete items by dragging them into the Recycle Bin. If you press SHIFT while dragging, the item is deleted from your computer without being stored in the Recycle Bin.  Restoring an item in the Recycle Bin returns that item to its original location.  To retrieve several items at once, hold down CTRL, and then click each item that you want to retrieve. When you have finished selecting the items that you want to retrieve, on the File menu, click Restore.  If you restore a file that was originally located in a deleted folder, the folder is recreated in its original location, and then the file is restored in that folder. Recycle Bin
  • 65. You cannot restore:  Items deleted from network locations.  Items deleted from removable media (such as 3.5-inch disks or flash drives).  Items that are larger than the storage capacity of the Recycle Bin. Recycle Bin
  • 66. What you need to know about deleting files…  When you delete a file using the delete command or selecting the file and pressing delete on the keyboard the file is not yet gone.  Most files first go to the recycle bin – in order for your file to be really gone you need to empty the recycle bin.  You can also get file back from the recycle bin by restoring them.  To restore a file that is in the recycle bin use the right mouse key and then select restore – the file will go back to where is was deleted from.  Items in your recycle bin are still taking up space on your hard drive. Recycle Bin
  • 67. Retrieve a deleted file  To retrieve a file you have deleted, double-click the Recycle Bin icon on your desktop.  Right-click the file you want to retrieve, and then click Restore. Recycle Bin
  • 68. File Management Using Search to locate files
  • 69. Finding files  When you need to find a particular file, you'll often know that it's located somewhere in a common folder like Documents or Pictures.  Unfortunately, actually locating the file you want might mean browsing through hundreds of files and subfolders—not an easy task.  To save yourself time and effort, use the Search box to find your file. Using Search to locate files
  • 70. Find Files Using Search  Open Windows Explorer/My Computer  The left pane of the window will change to reveal the search form Using Search to locate files
  • 71. Find Files Using Search  Type in all of part of the file name for which you are searching.  In this instance, type in lighthouse (case does not matter – I always use lowercase because it requires less keystrokes)  Make sure “Look in” says My Computer  Click on Search  The left pane will display search results Using Search to locate files
  • 73. Exercises with Folders  We will create new folders.  We will be performing the following actions on existing folders:  Delete  Copy  Cut  Paste  Rename Let’s get to work!
  • 74. Exercises  Double-click on your desktop folder with your name  Create a sub-folder within your folder named “Documents”  Create a sub-folder within your folder named “Photos”  Create a sub-folder within your folder named “Music”  Create a sub-folder within your folder named “Classes” Let’s get to work!
  • 75. Create subfolders in subfolders  Double-click to open subfolder named “Photos”  Create subfolder named Lighthouses  Now open Windows Explorer/My Computer  Hit the minimize button and resize window to fit half of screen  Now open Windows Explorer/My Computer again  Resize the window to fit the other half of your screen Let’s get to work!
  • 76. Create subfolders in subfolders  Using the right window of Explorer, using Search, find folder on your computer named “lighthouses” under the folder named “Photos”  Move one file to new Lighthouses folder  Using Ctrl, move every other file to the folder  Using Shift, move all remaining files Let’s get to work!
  • 77. Copy Entire Folder  Make sure your are in the root of your Photos folder  Create subfolder named Trains  Find on your computer the folder named “Trains” within the “Photos” folder  Open Trains folder  Use Ctrl-A to select all files  Drag files to your folder named Trains. Let’s get to work!
  • 78. Move Files  Double-click to open subfolder named “Music”  Create subfolder named “Country”  Create subfolder named “Christmas”  Create subfolder named “Instrumental)  Using search, find folder on your computer named “Country” under the folder named “Music”  Use Ctrl-A to select all files, right-click and drag all files to your Country folder.  Do the same thing with Christmas and Instrumental. Let’s get to work!
  • 79. Move Folders  Locate folder named Documents  Click to select and then drag entire folder to YourName folder  Locate folder named Classes  Right-click on folder and drag to YourName folder Let’s get to work!
  • 80. Rename a series of files  Choose the folder where the files are located  Select the files you want to rename.  On the File menu, click Rename.  Type the new name, and then press ENTER.  All of the files in the series will be named in sequence using the new name you type. Example: If you type Birthday, the other files in the series will be named Birthday (1), Birthday (2), and so on. Let’s get to work!