Downloaded 261 times

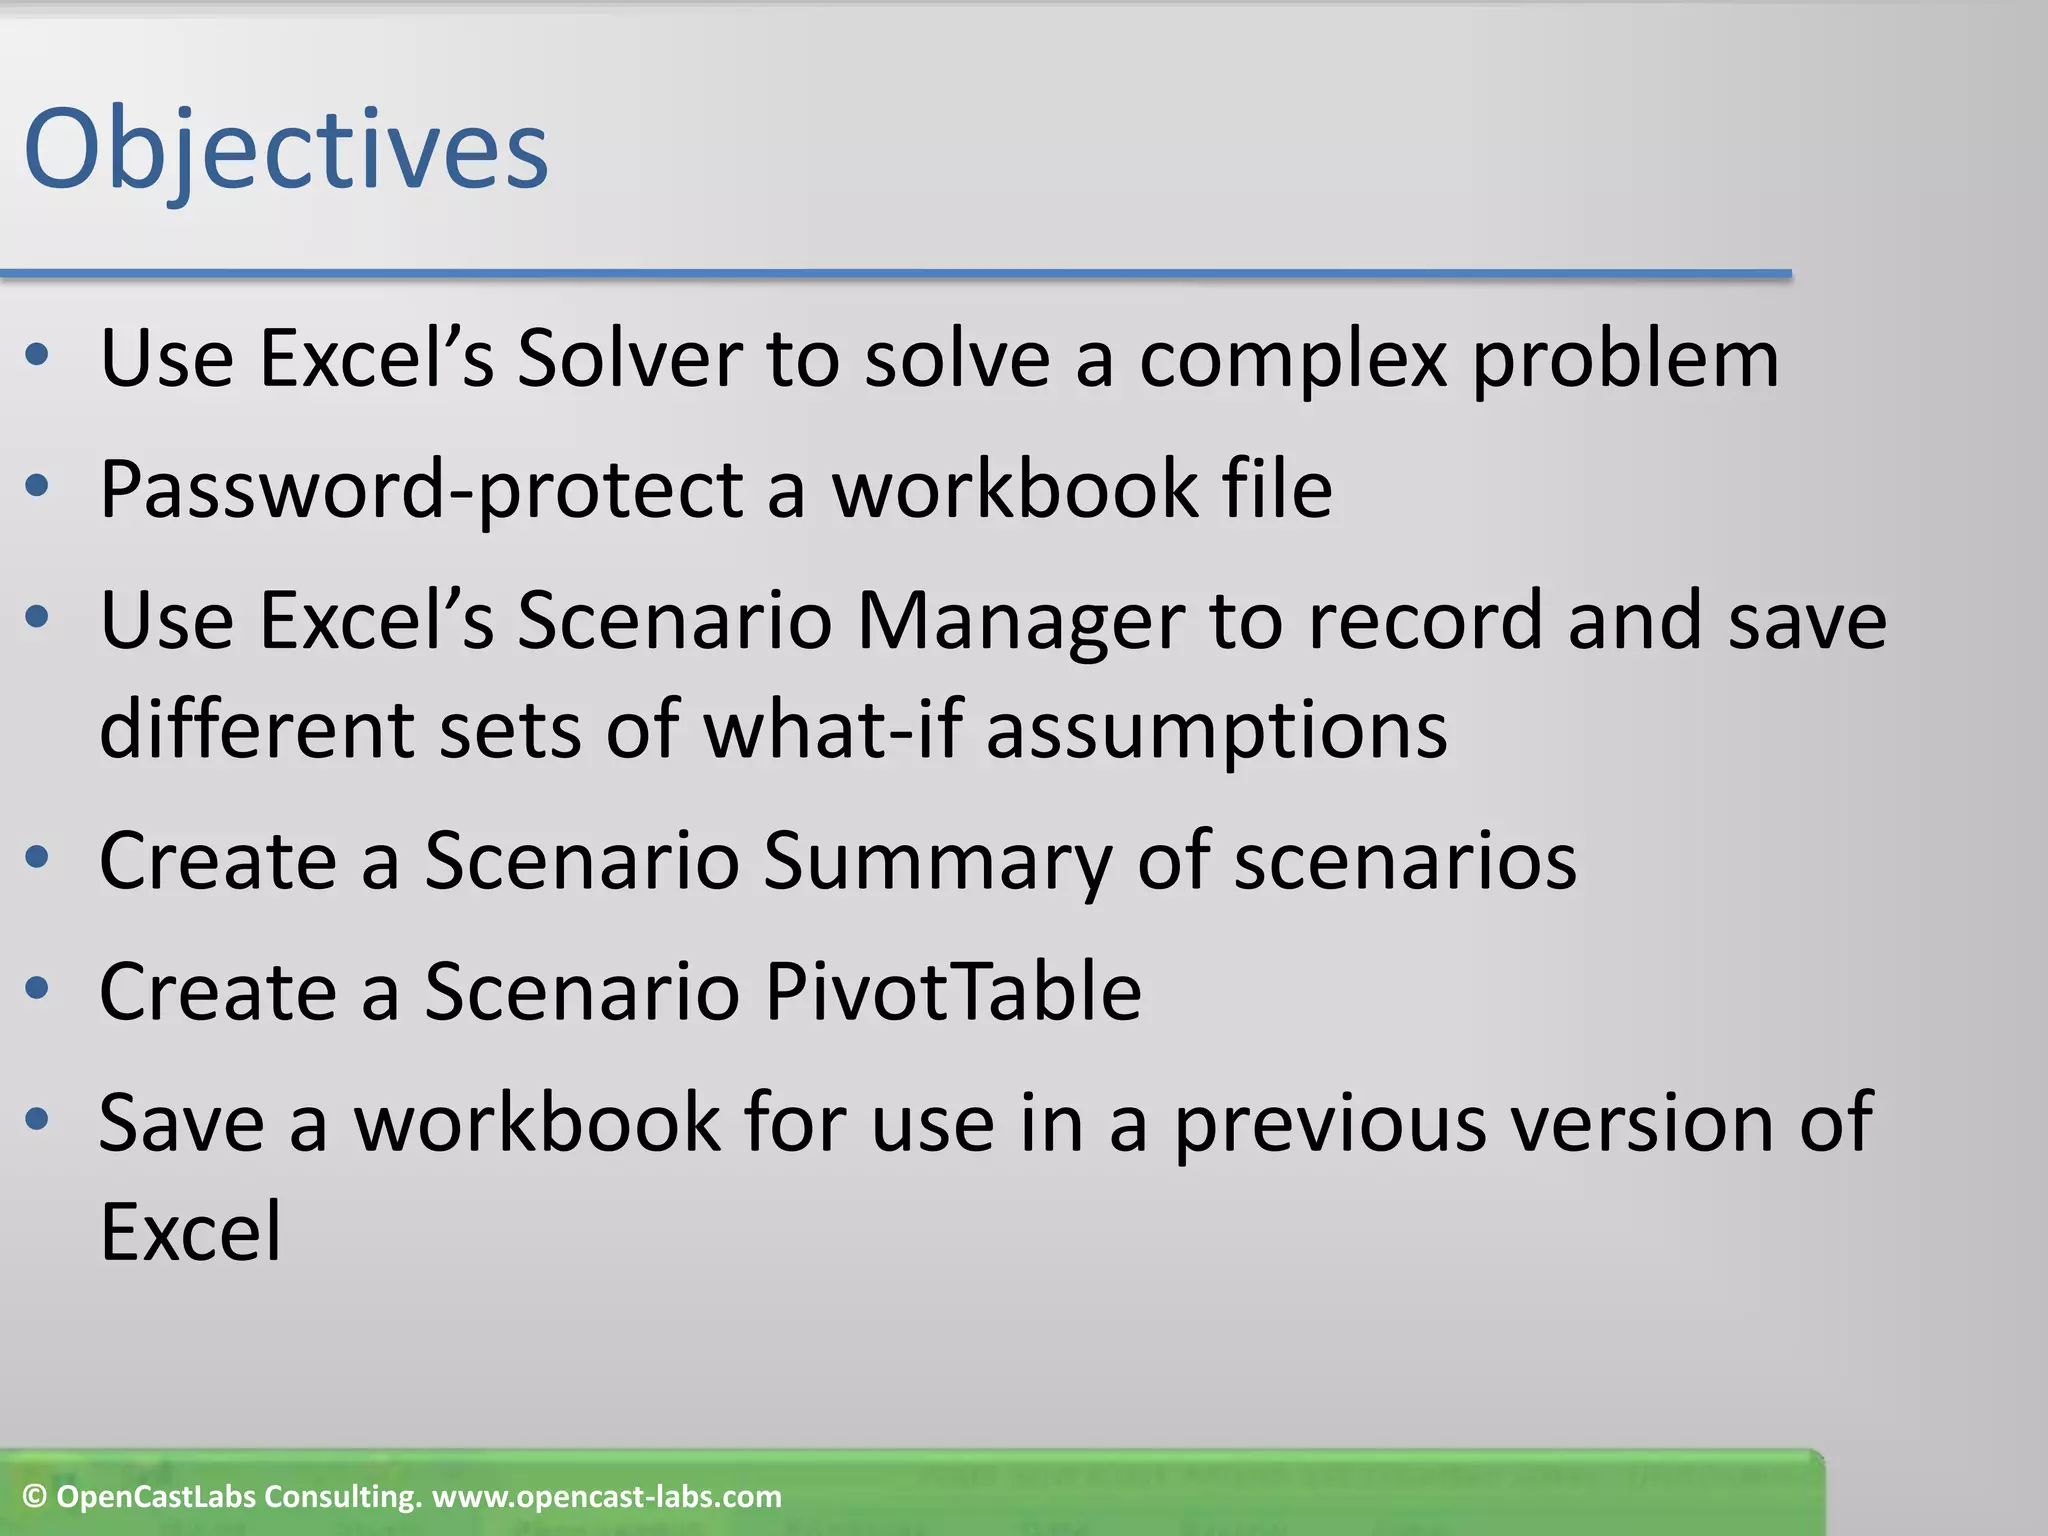
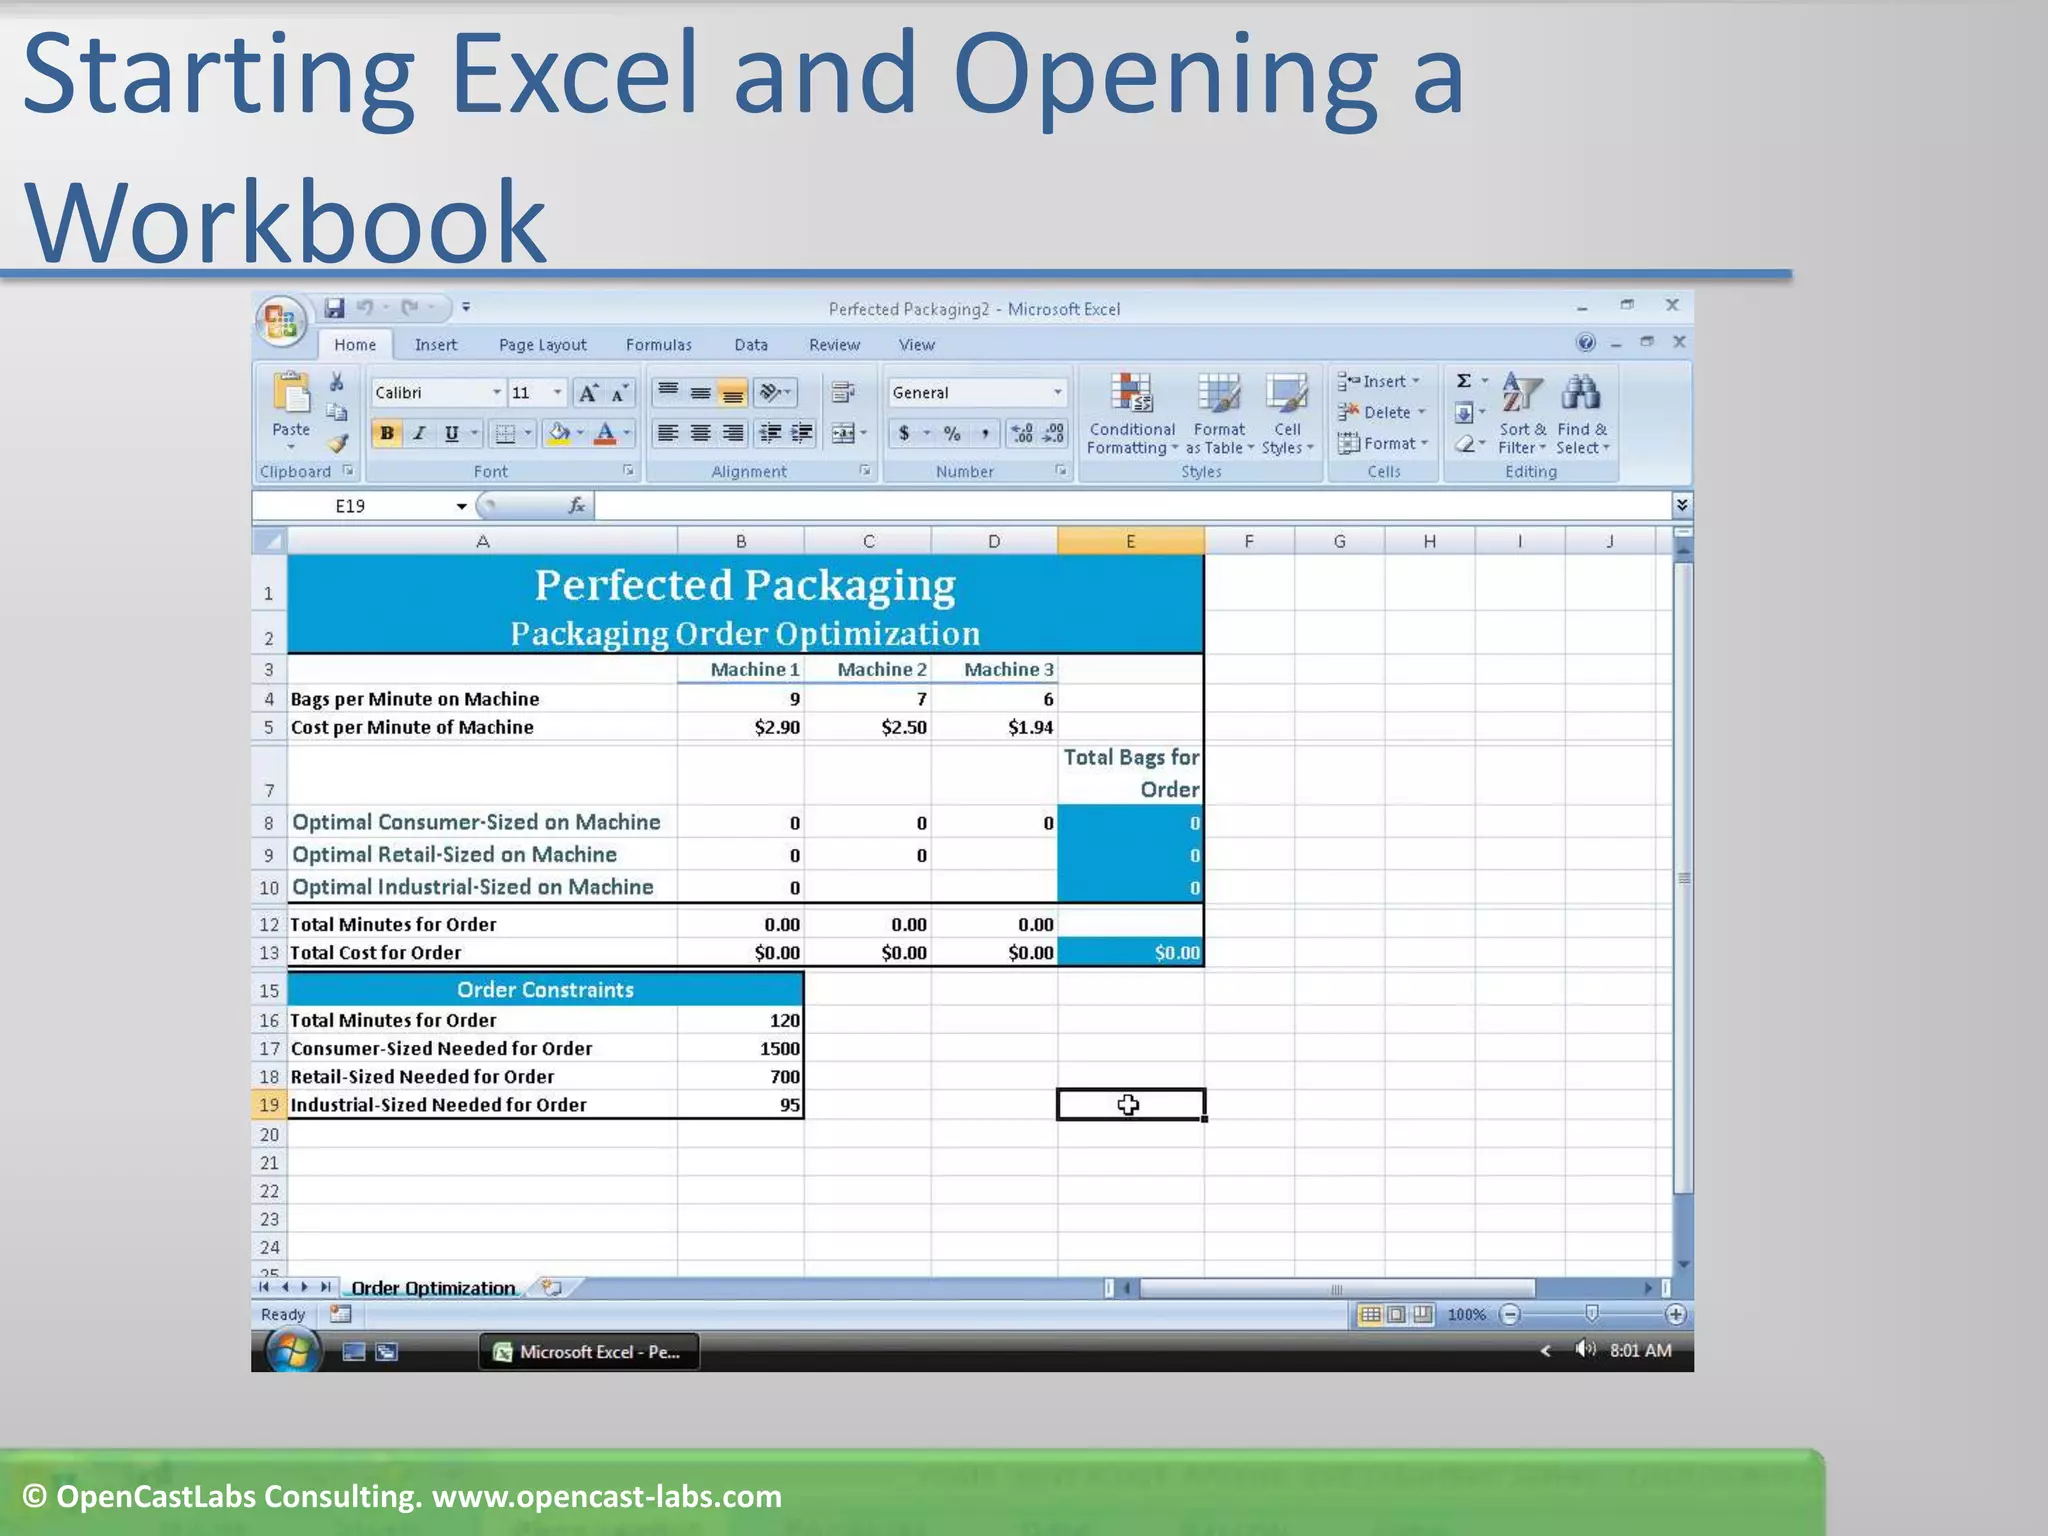
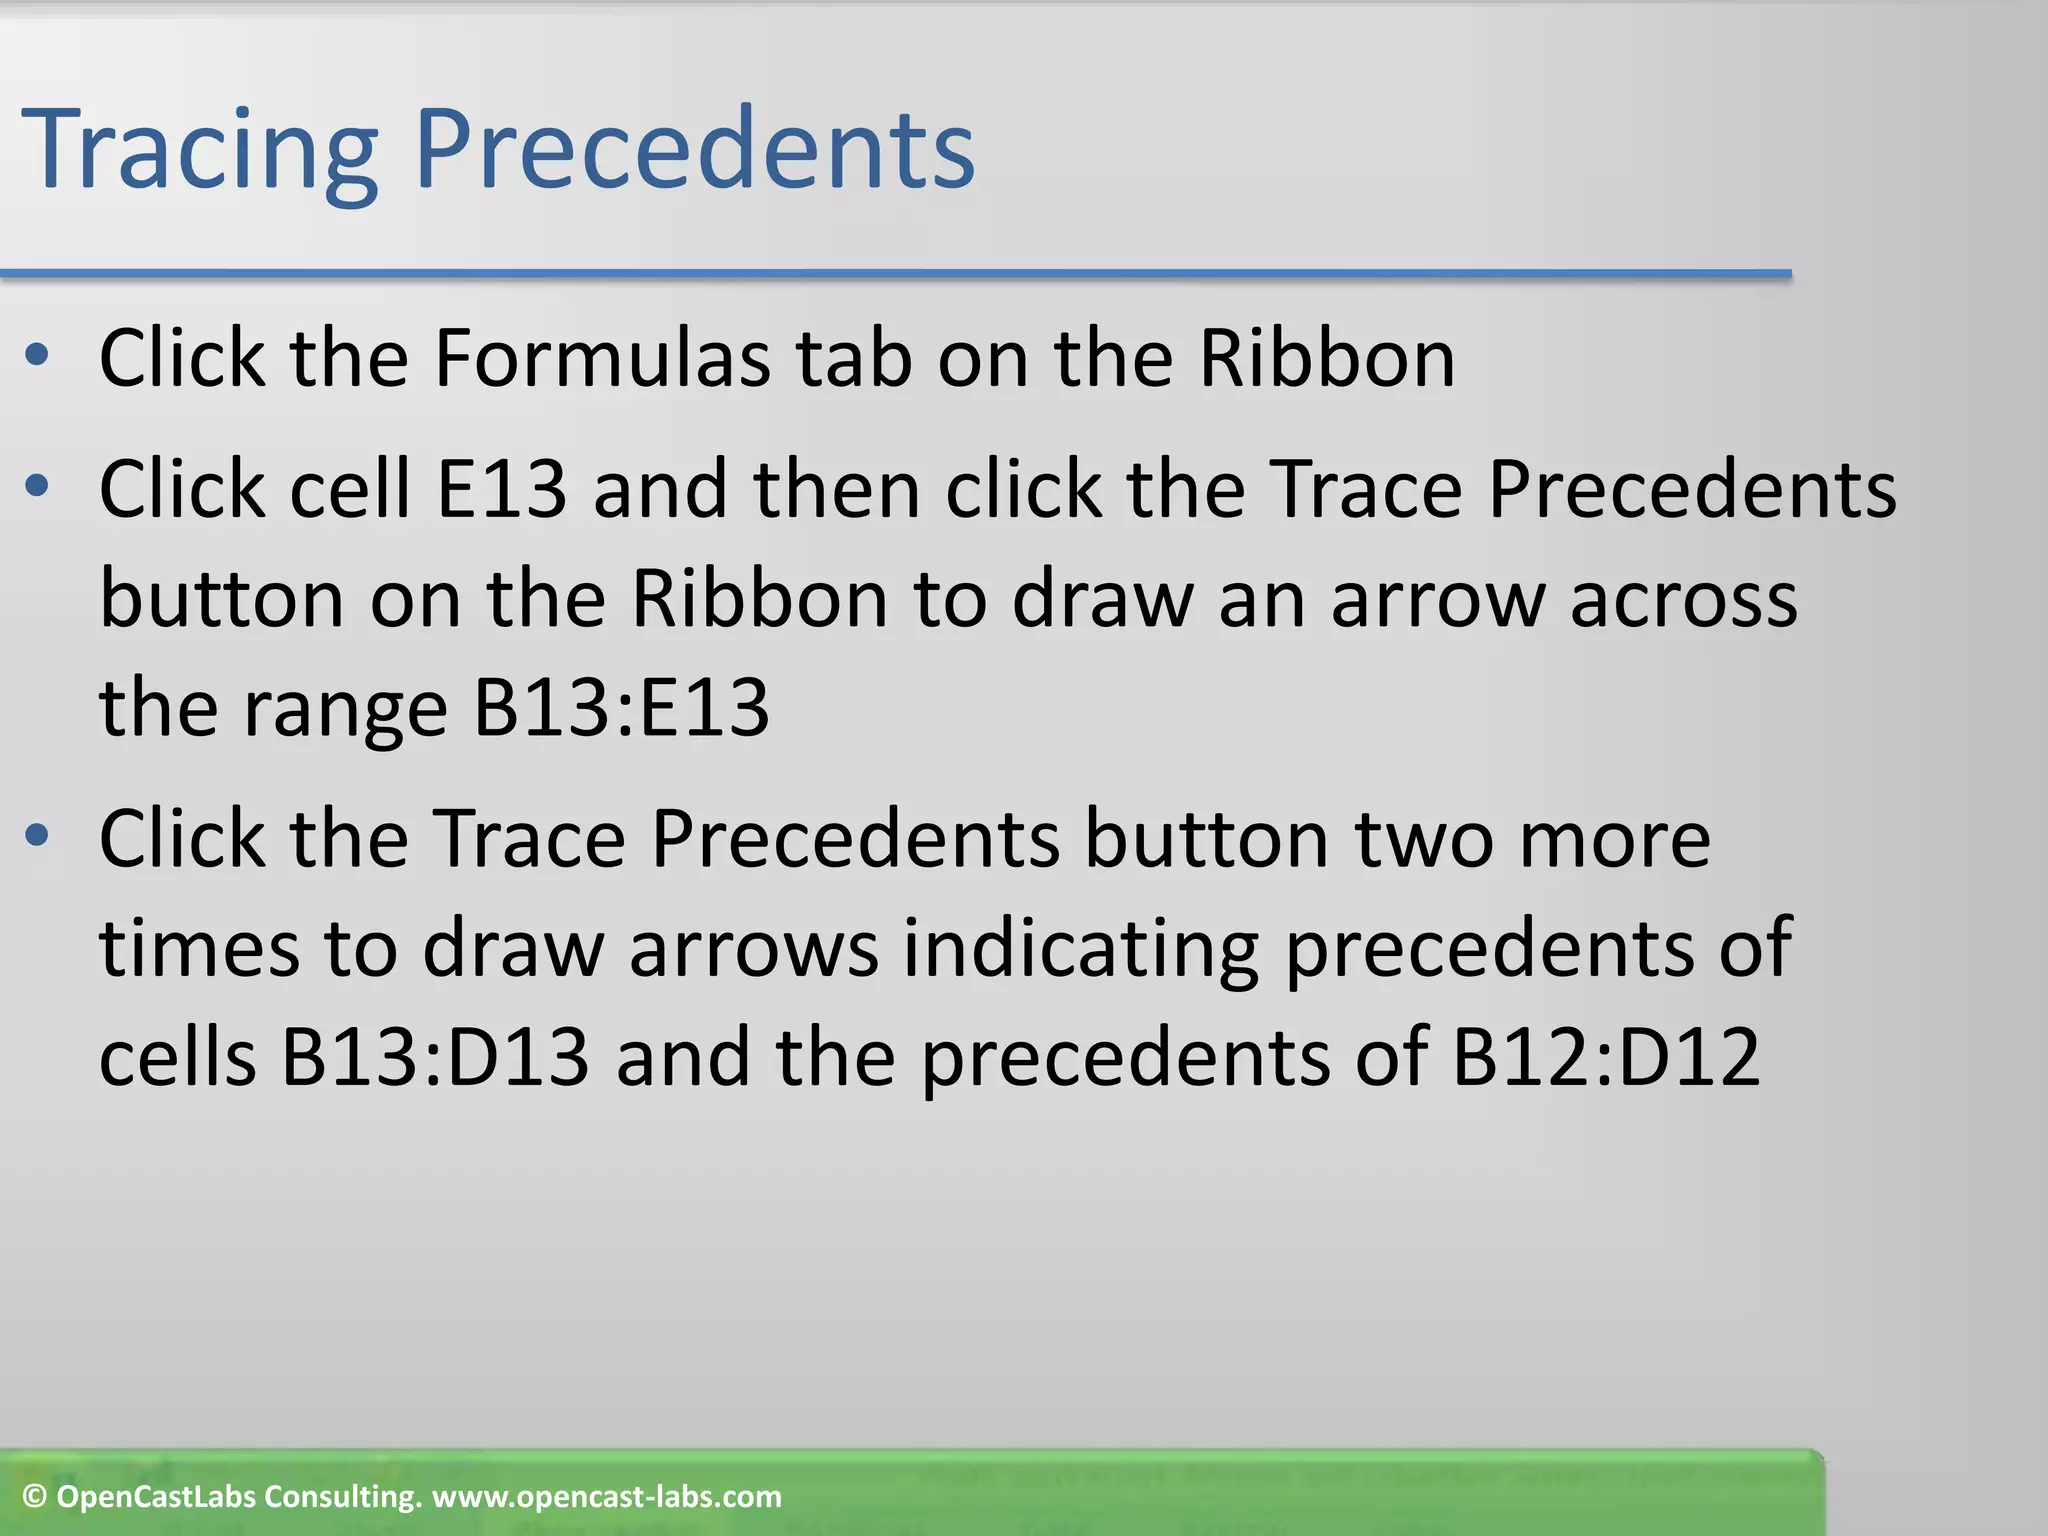


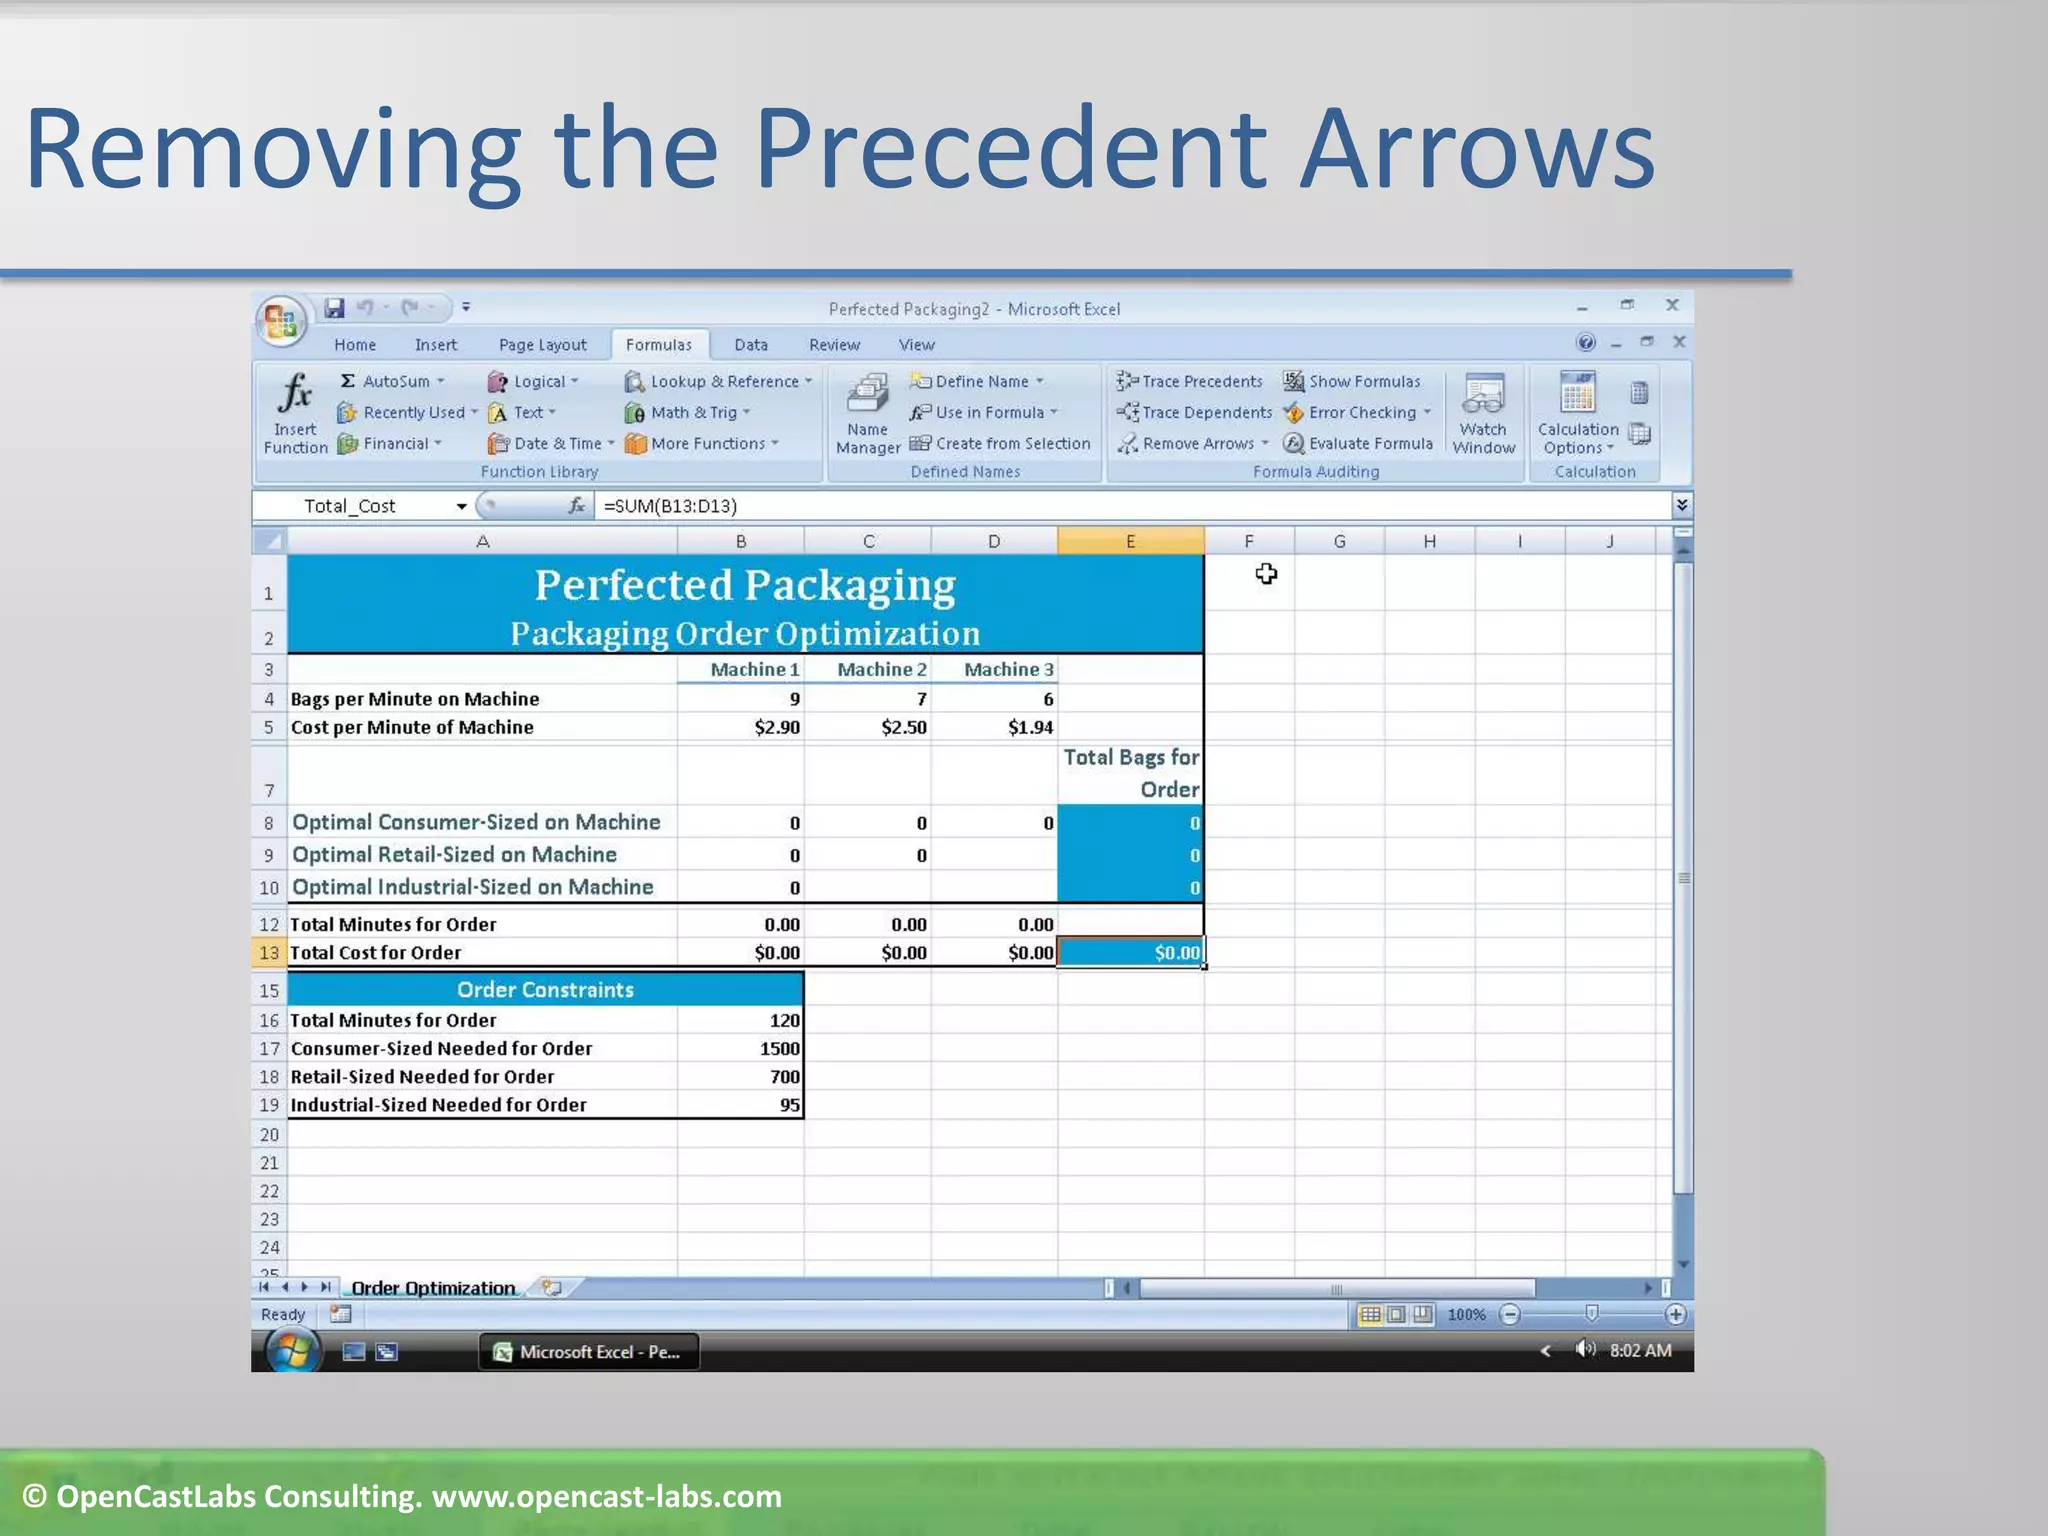

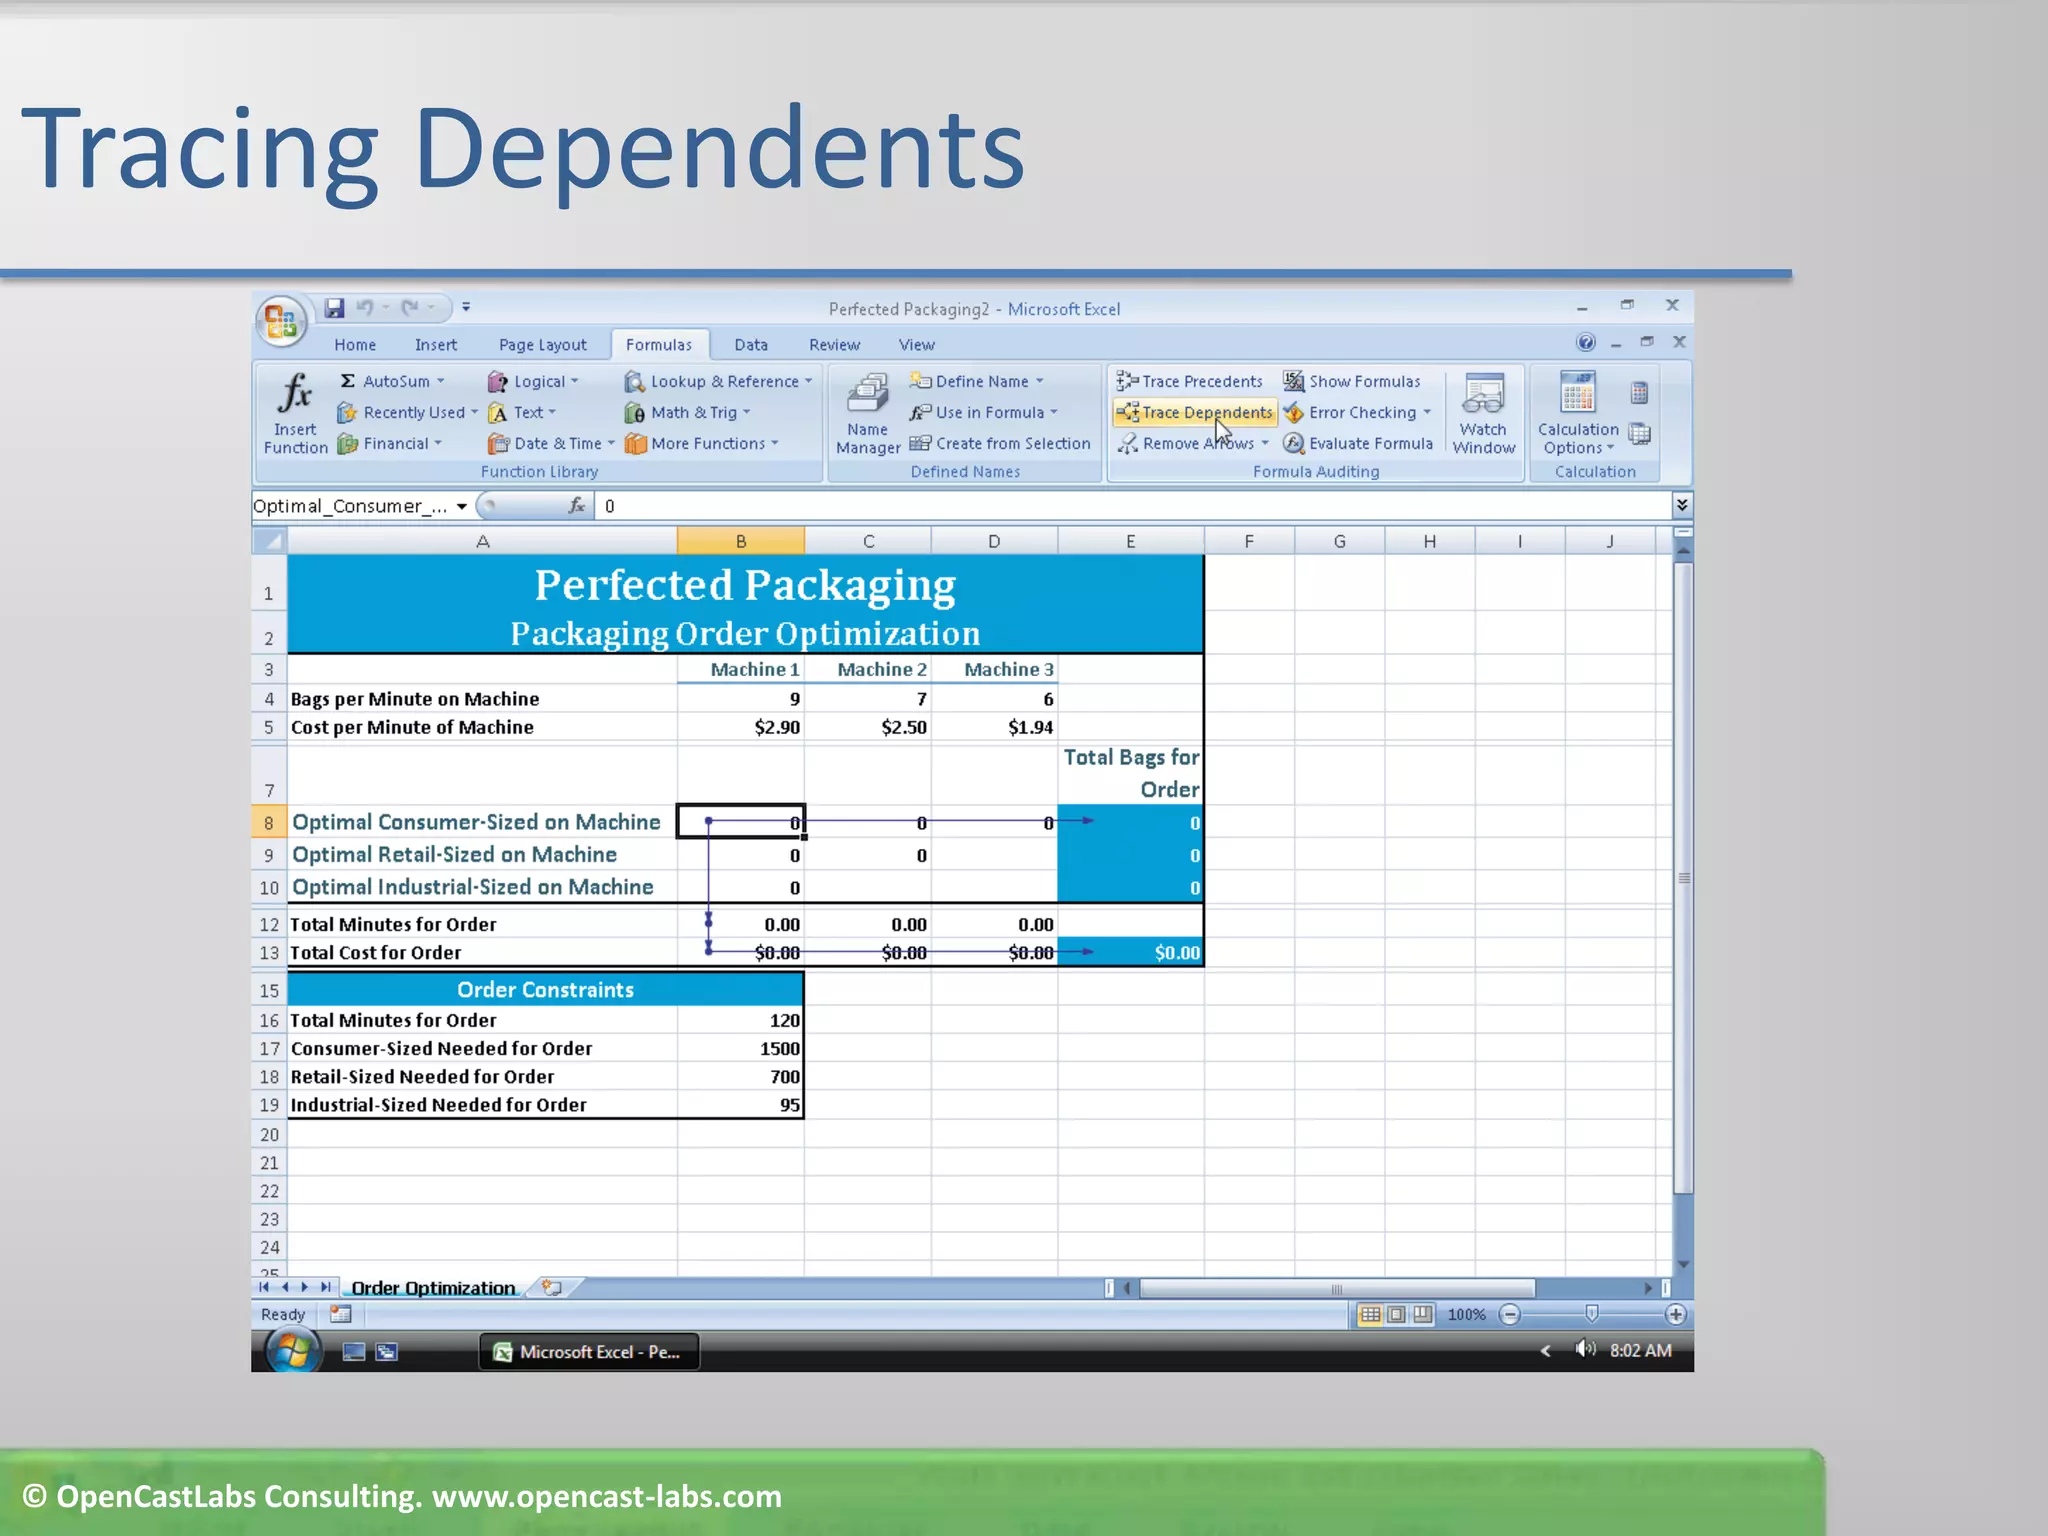
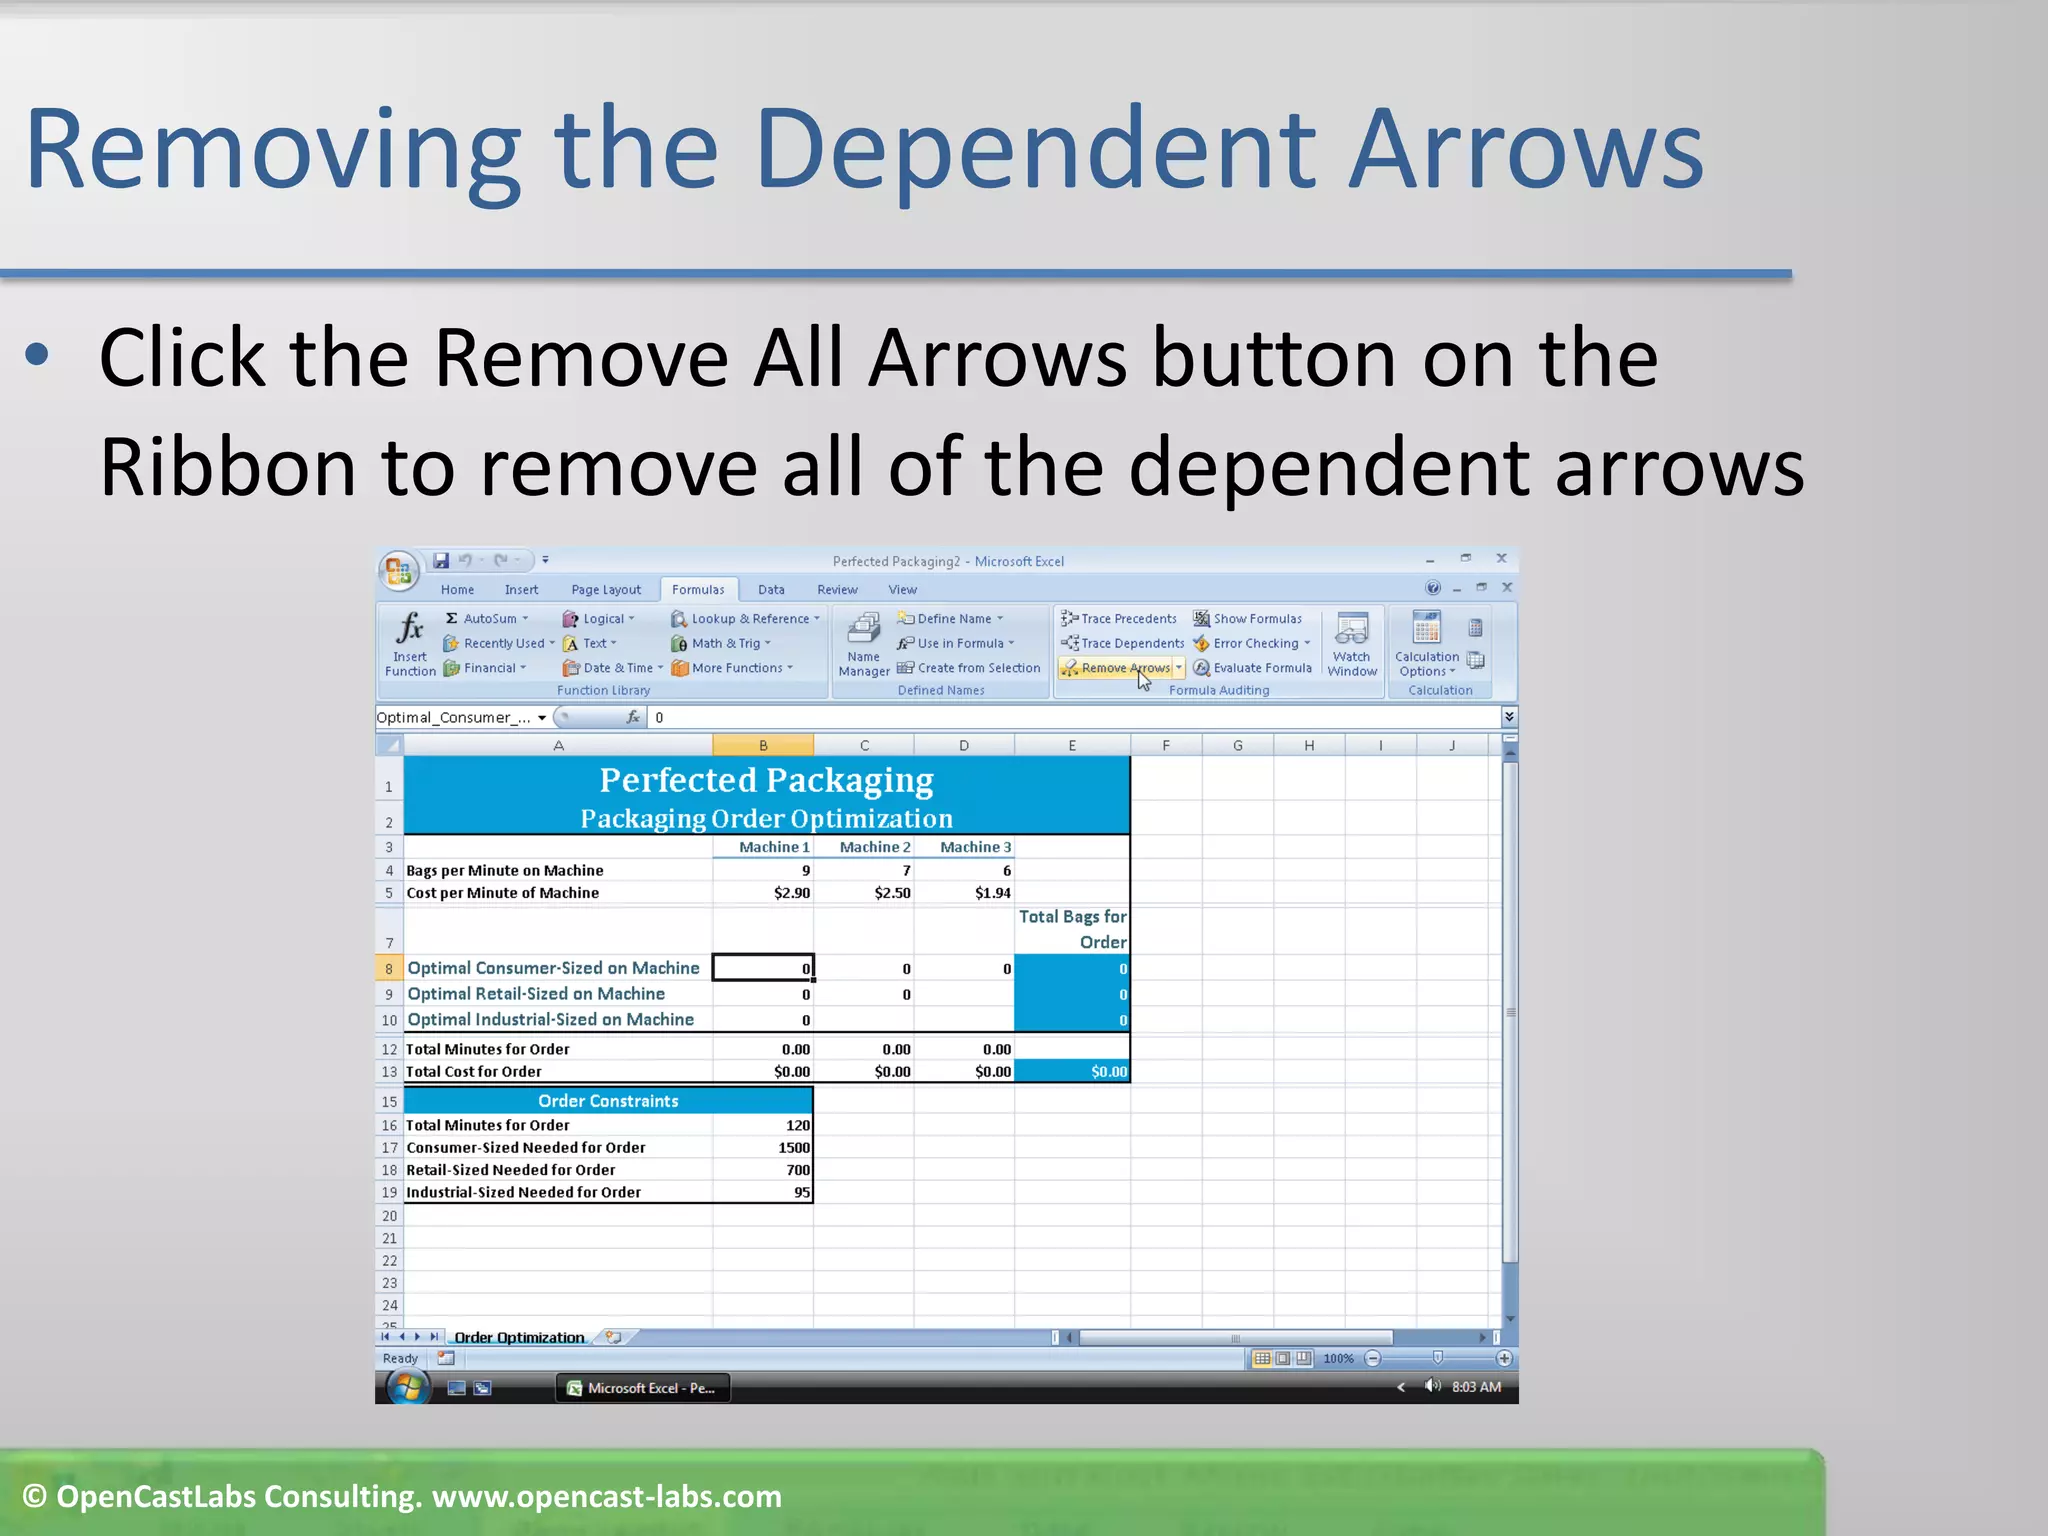
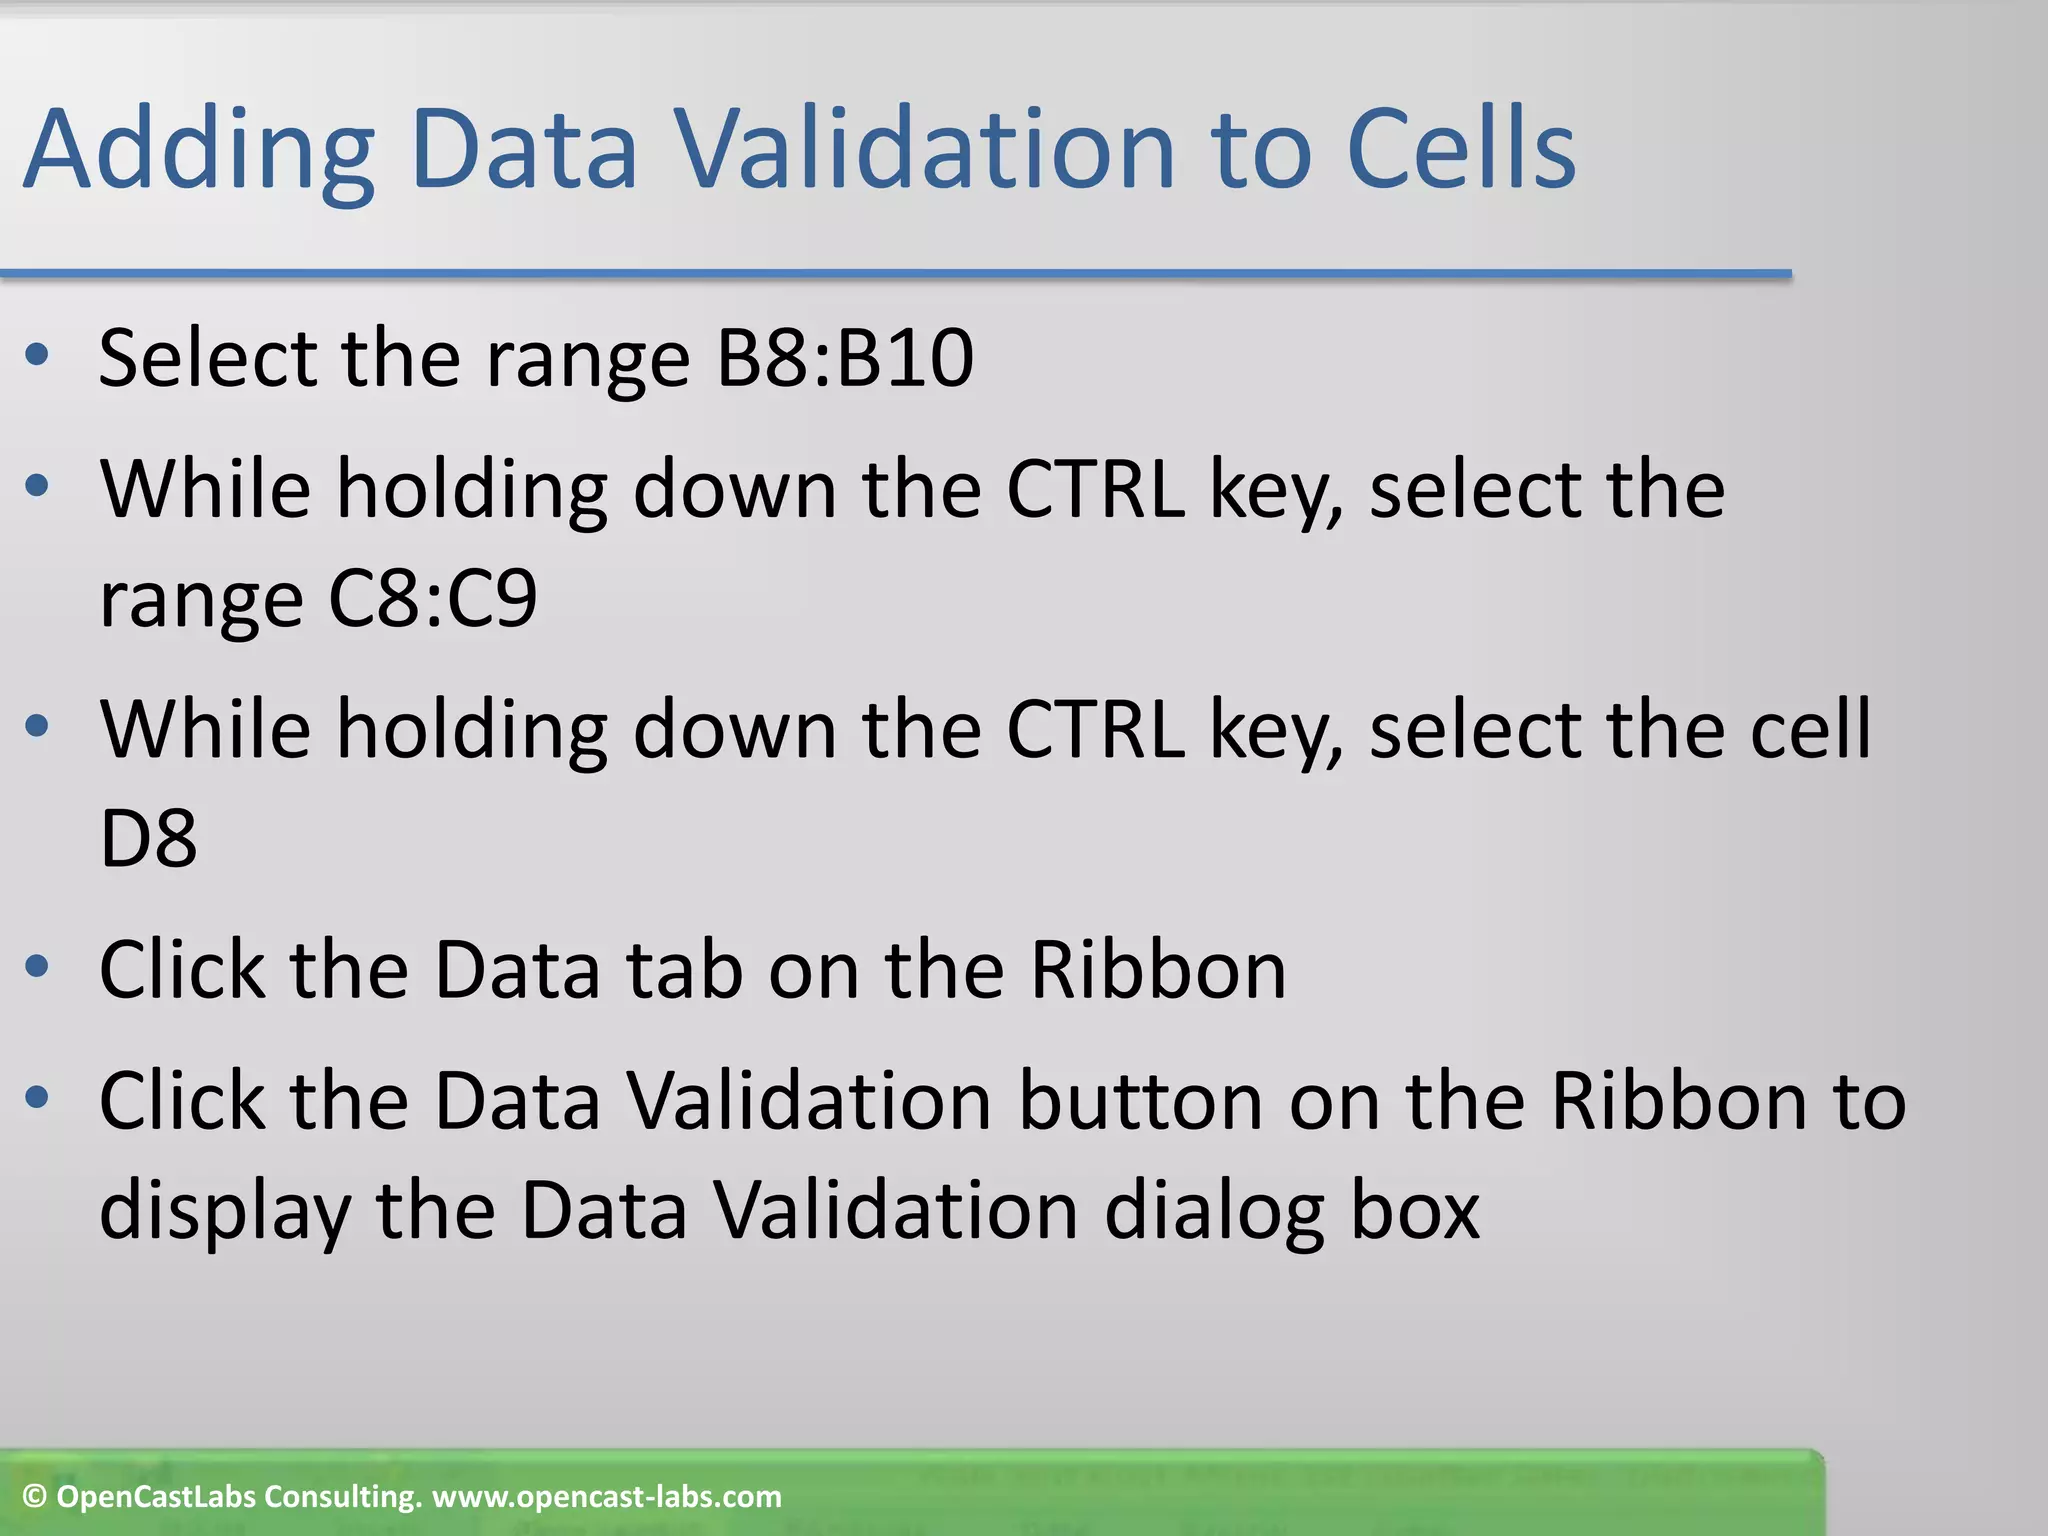

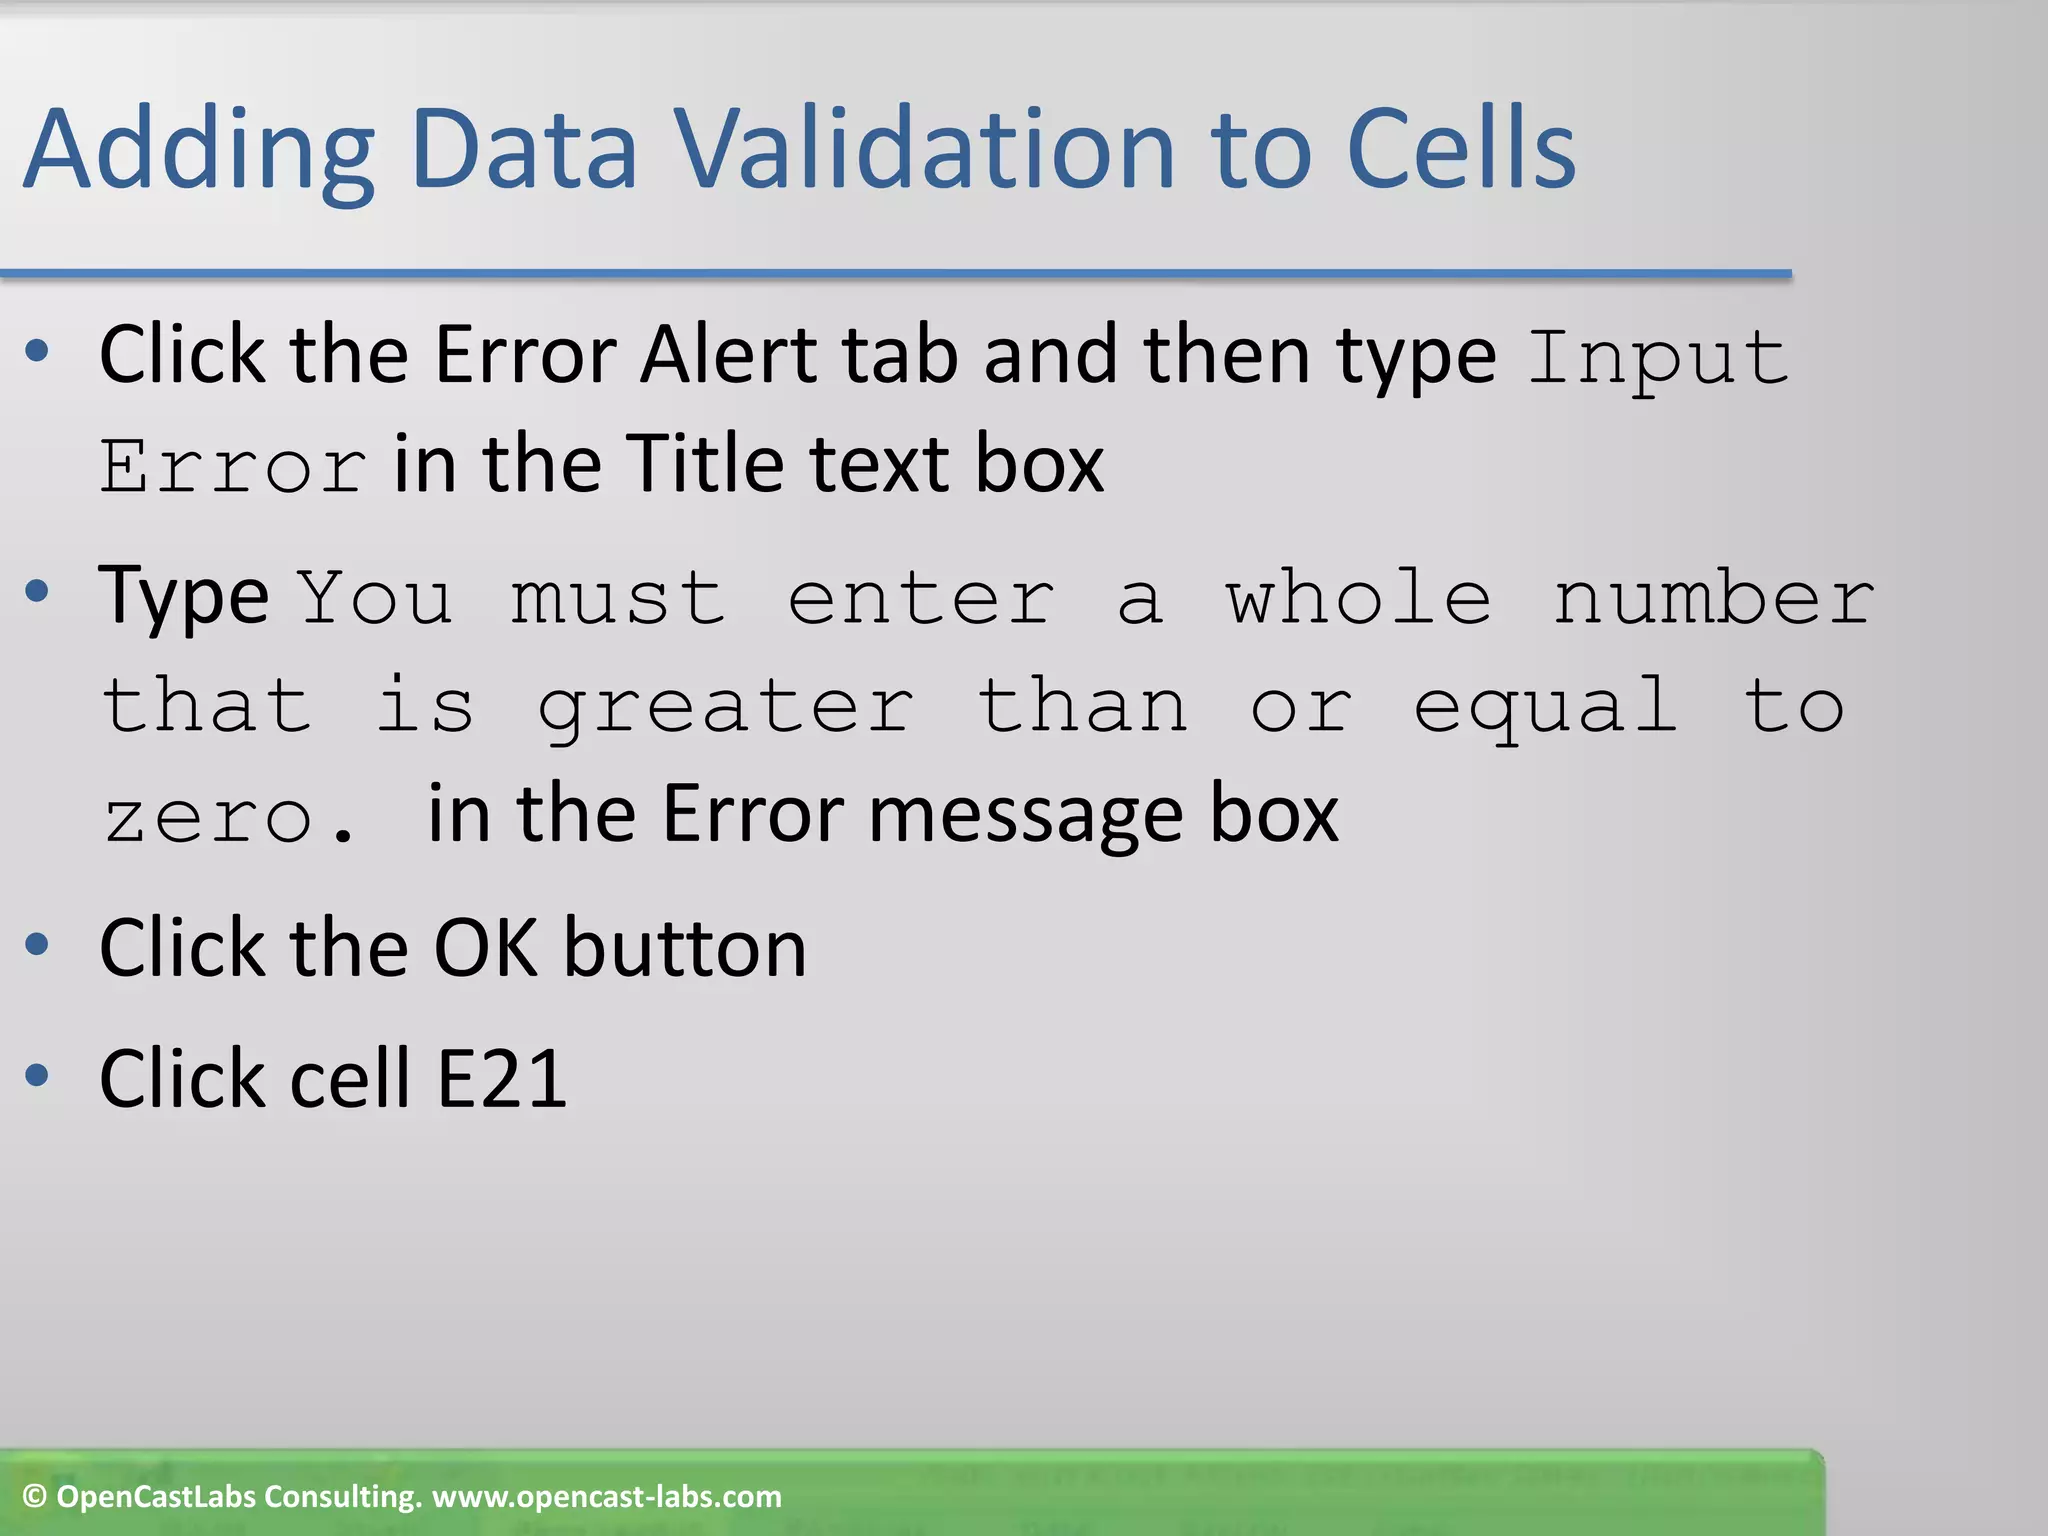
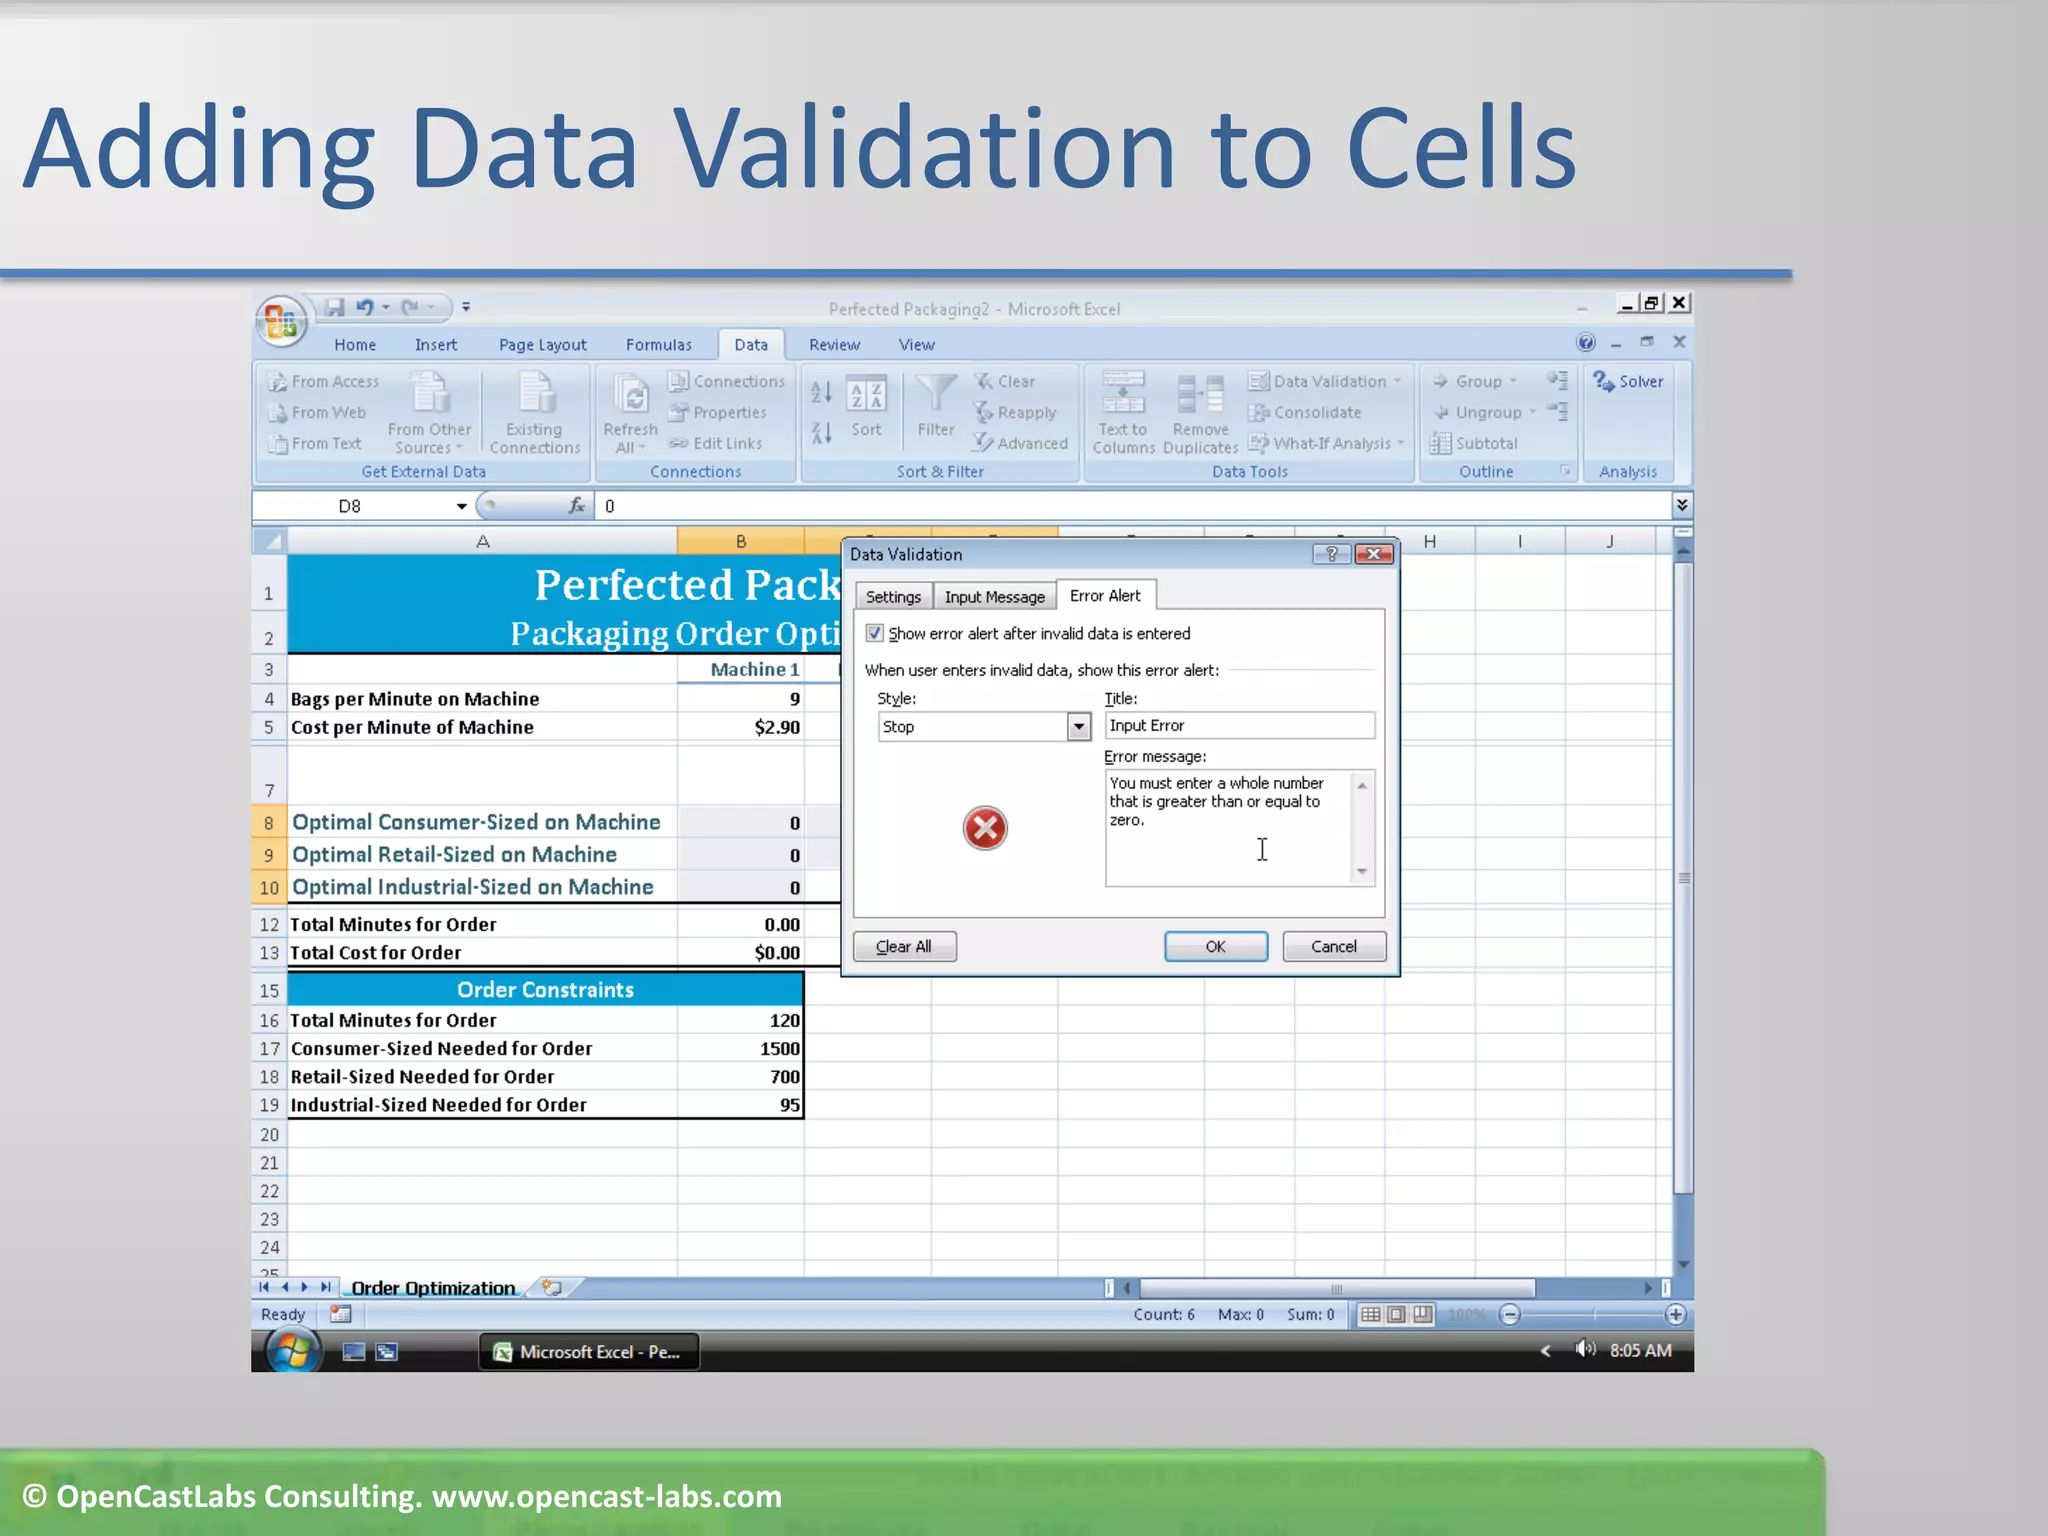
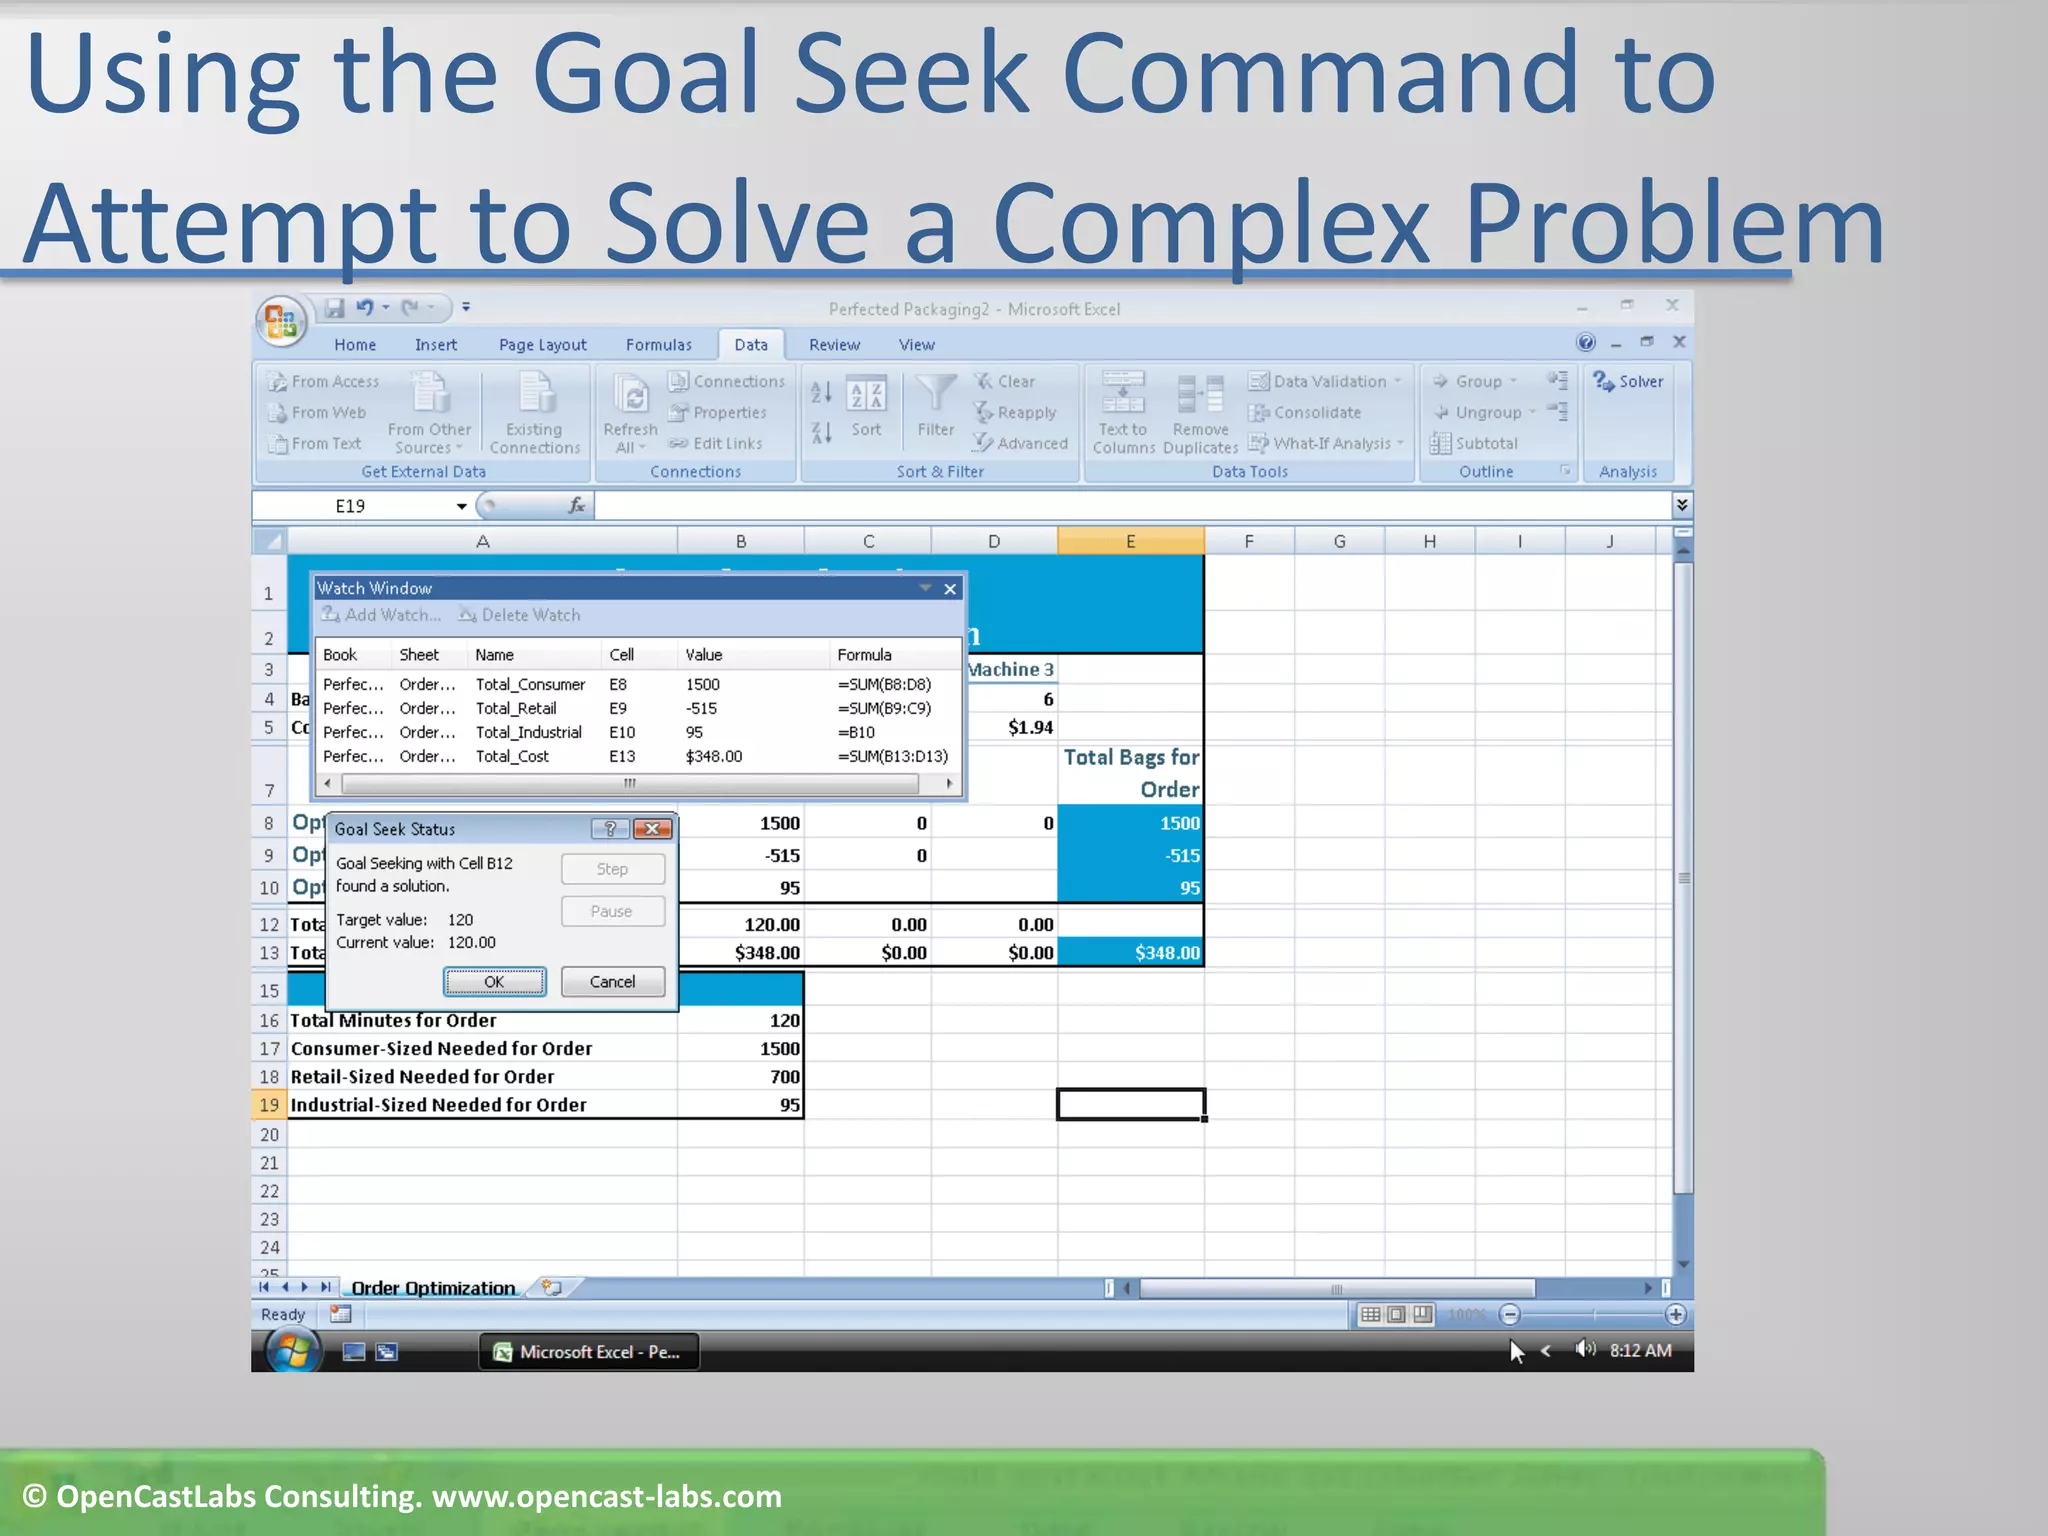
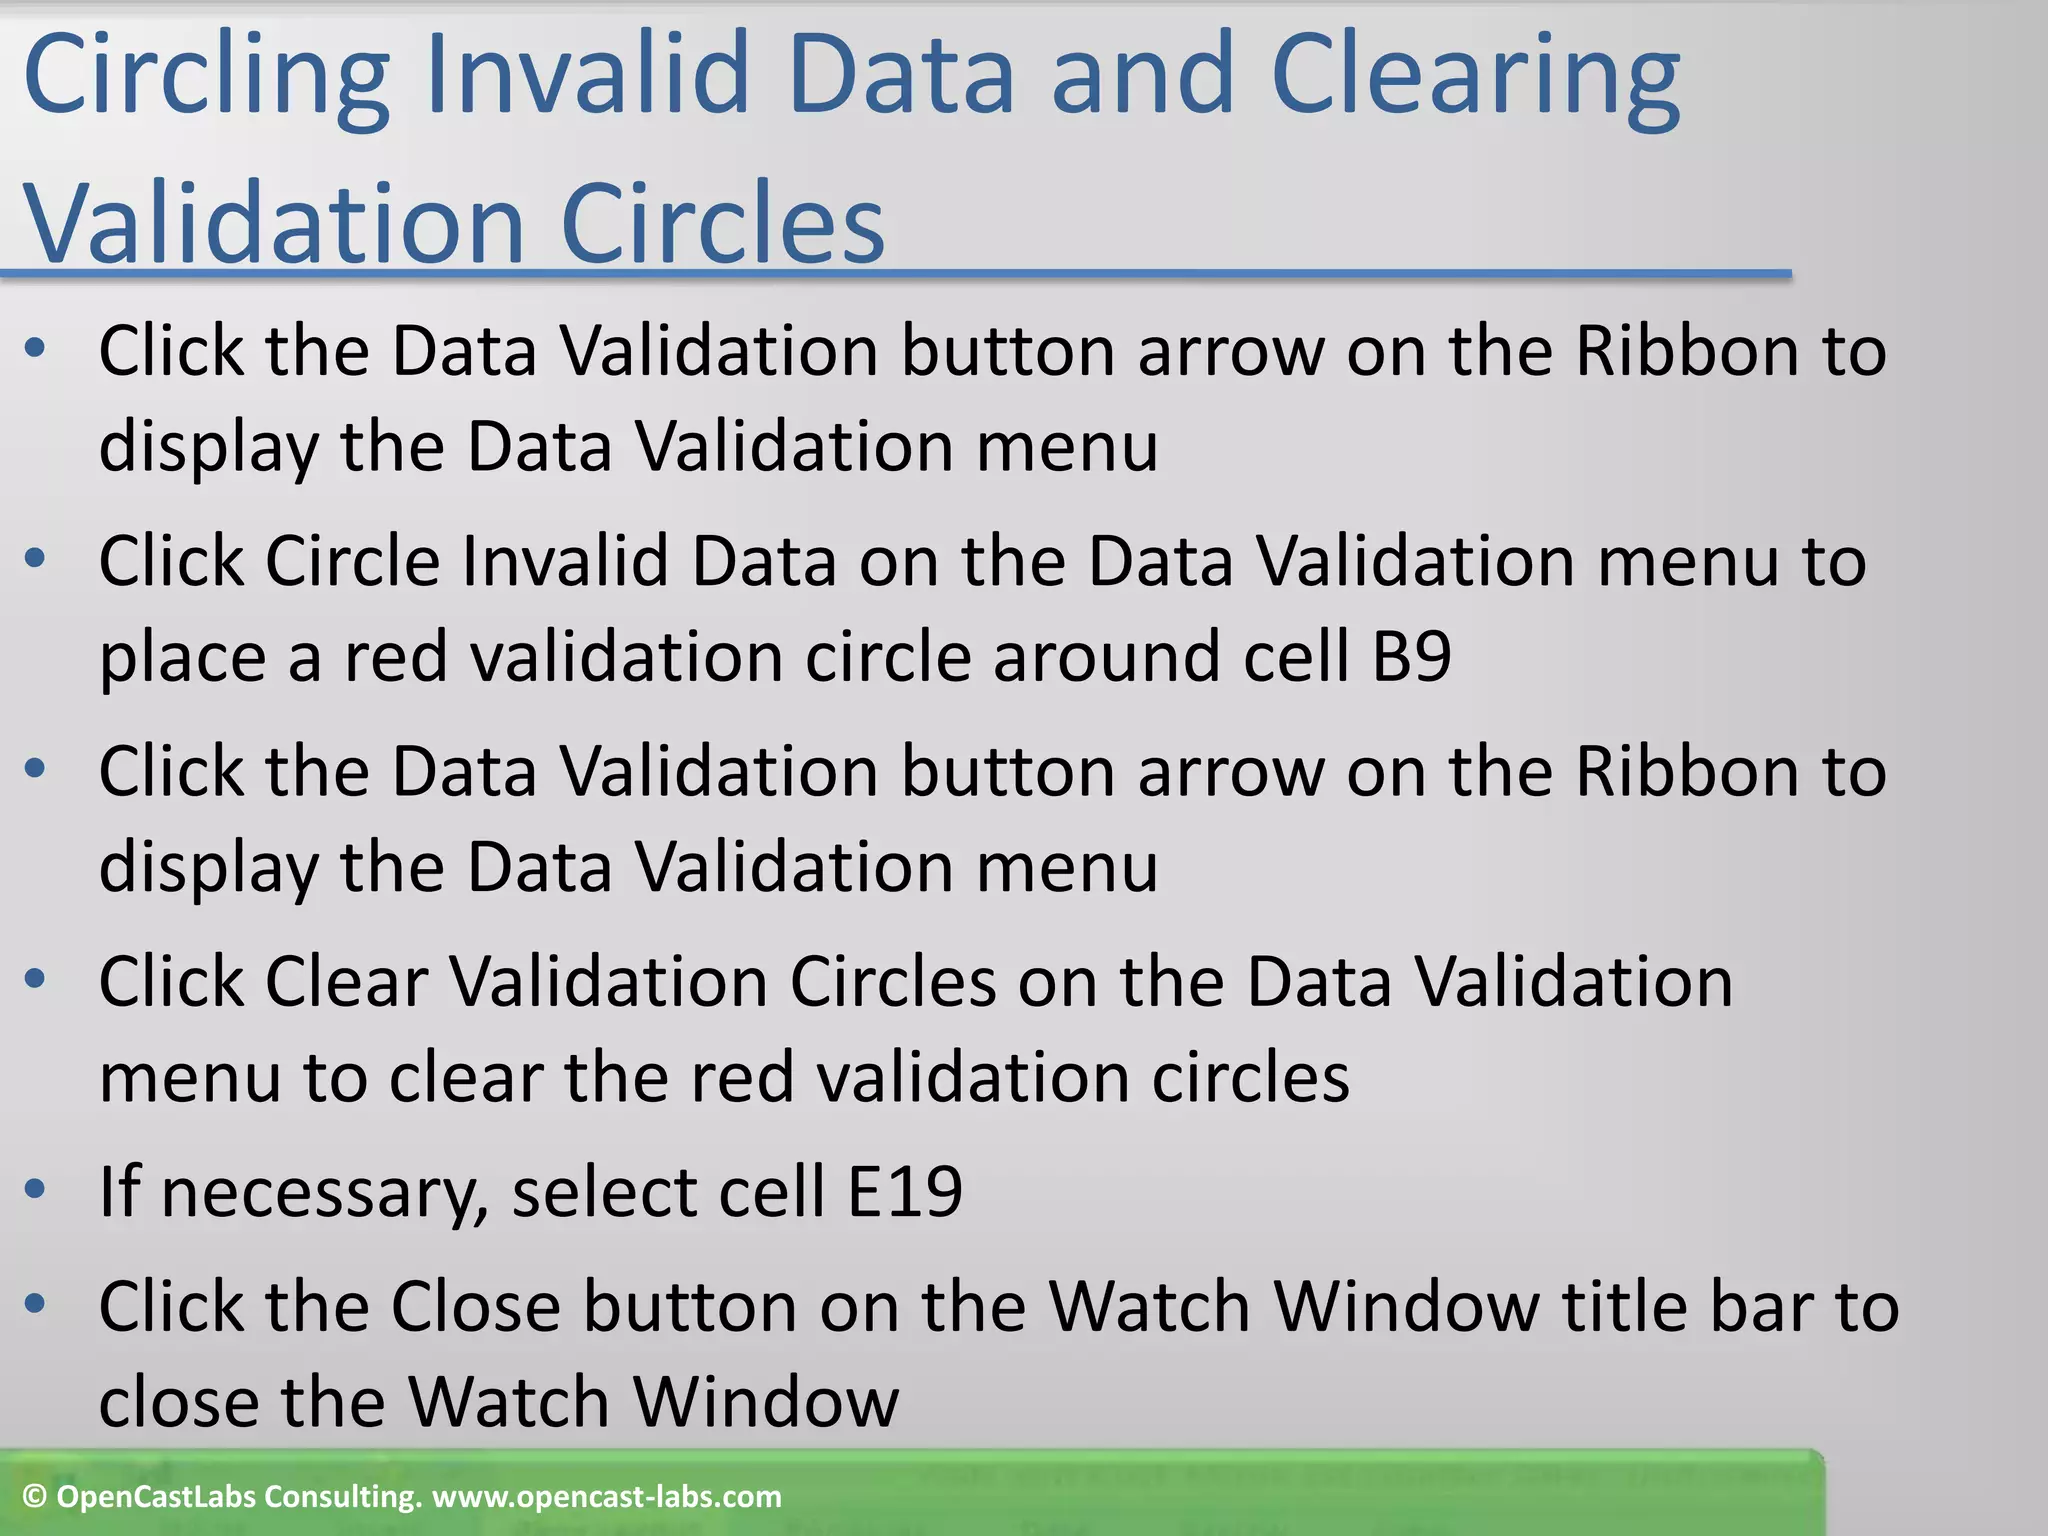
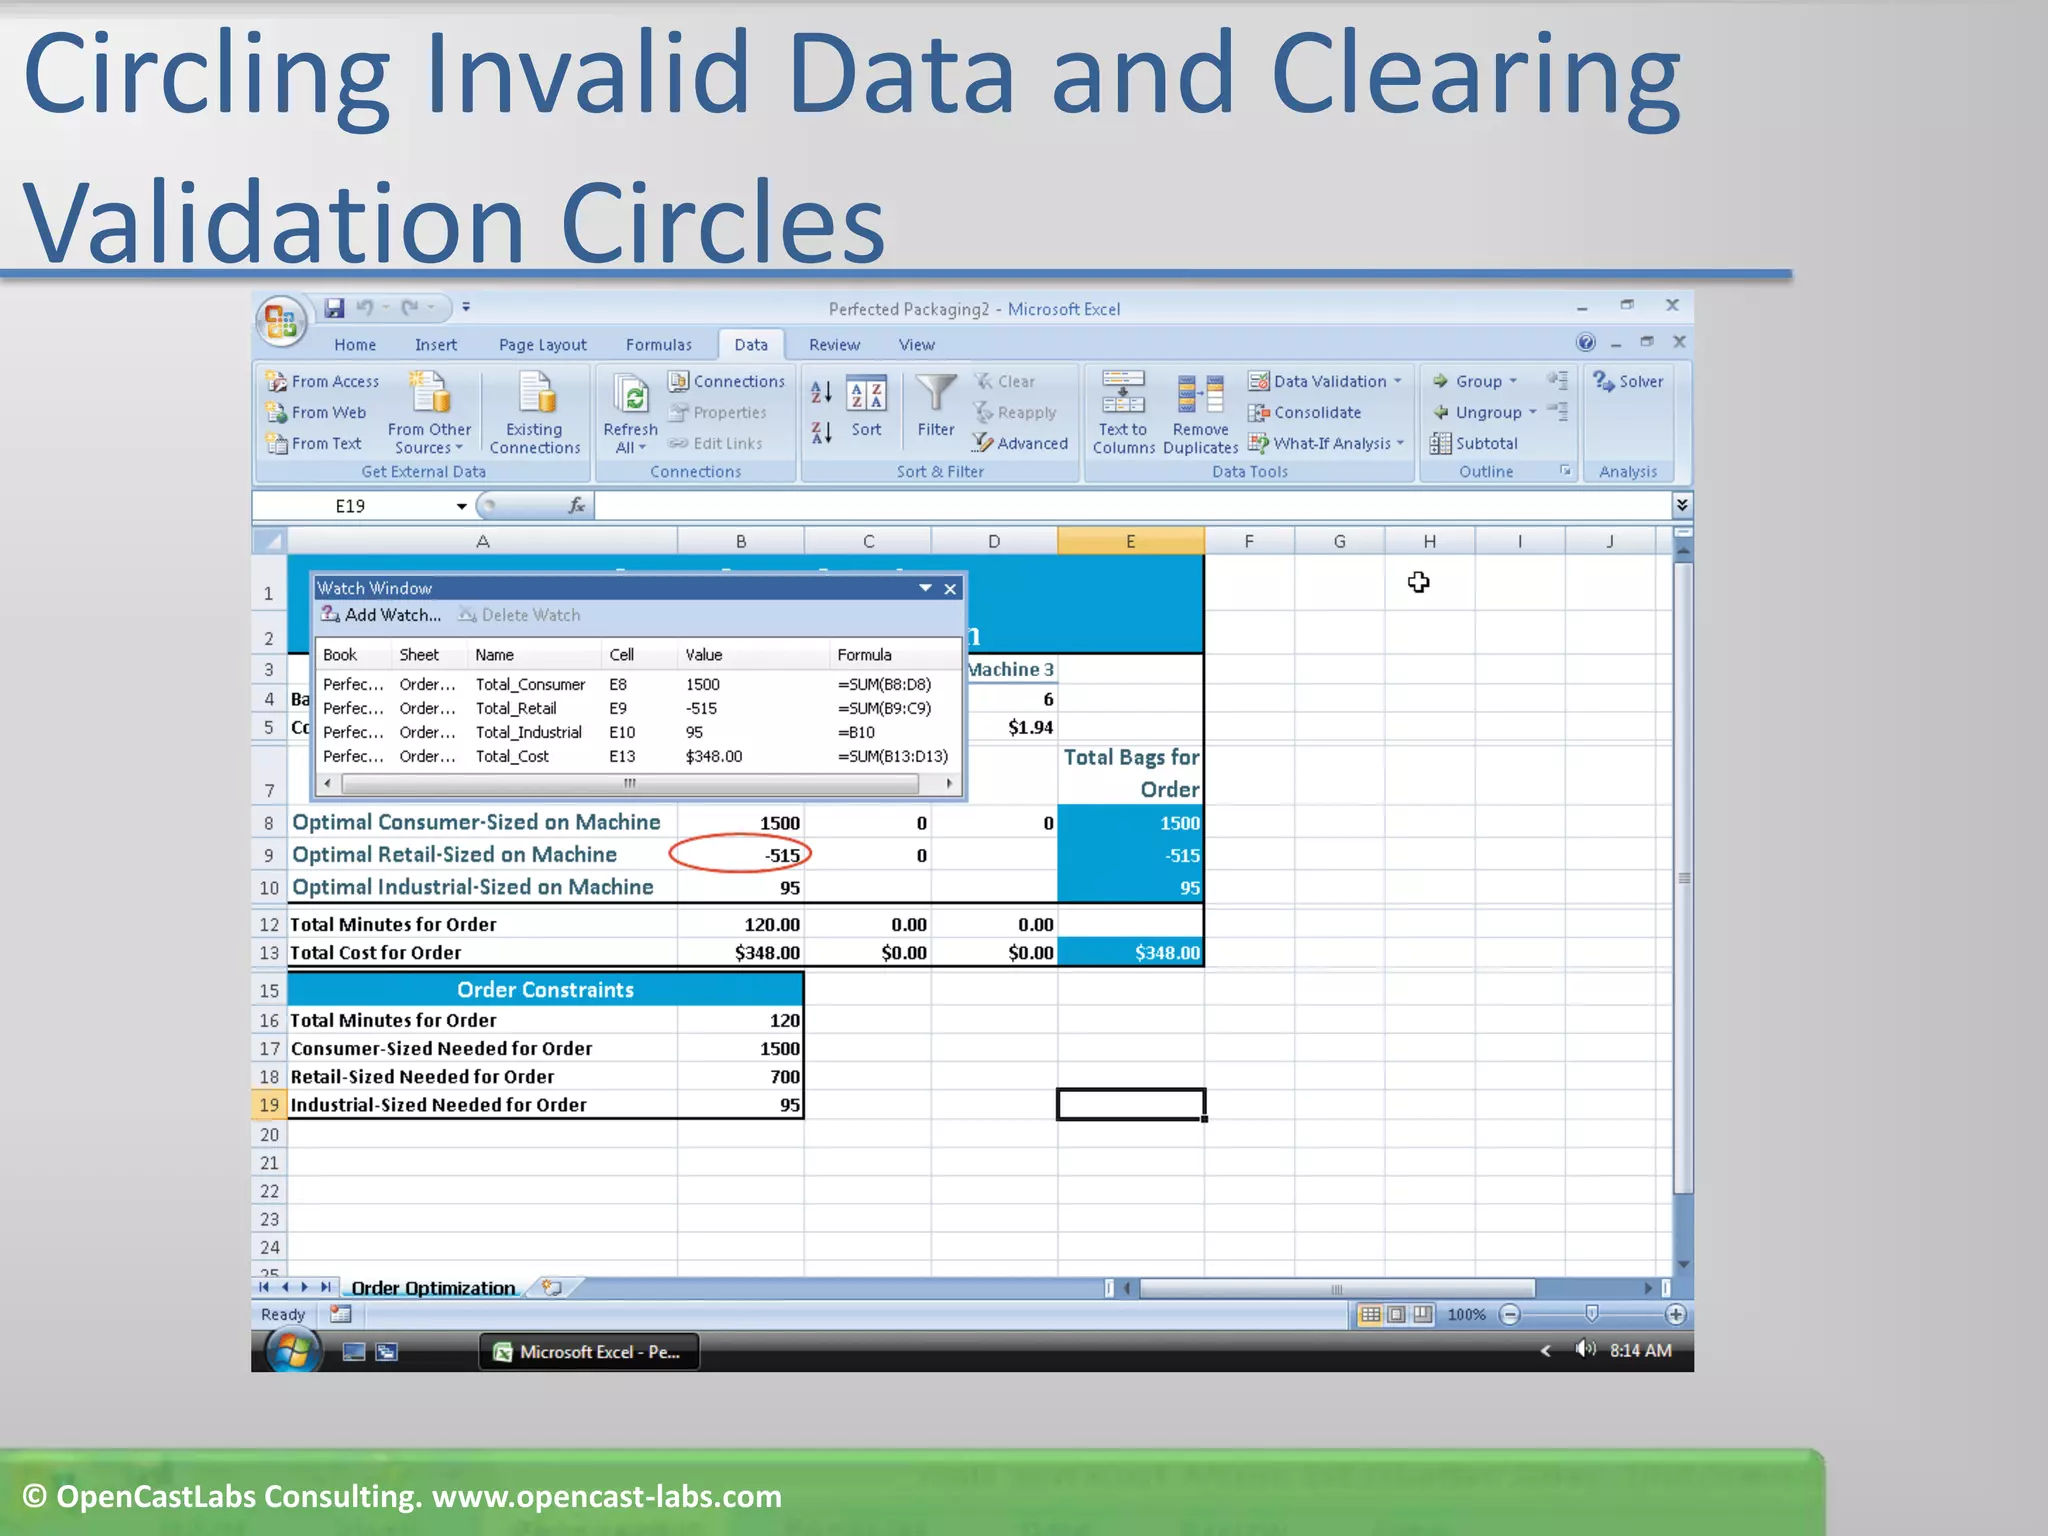
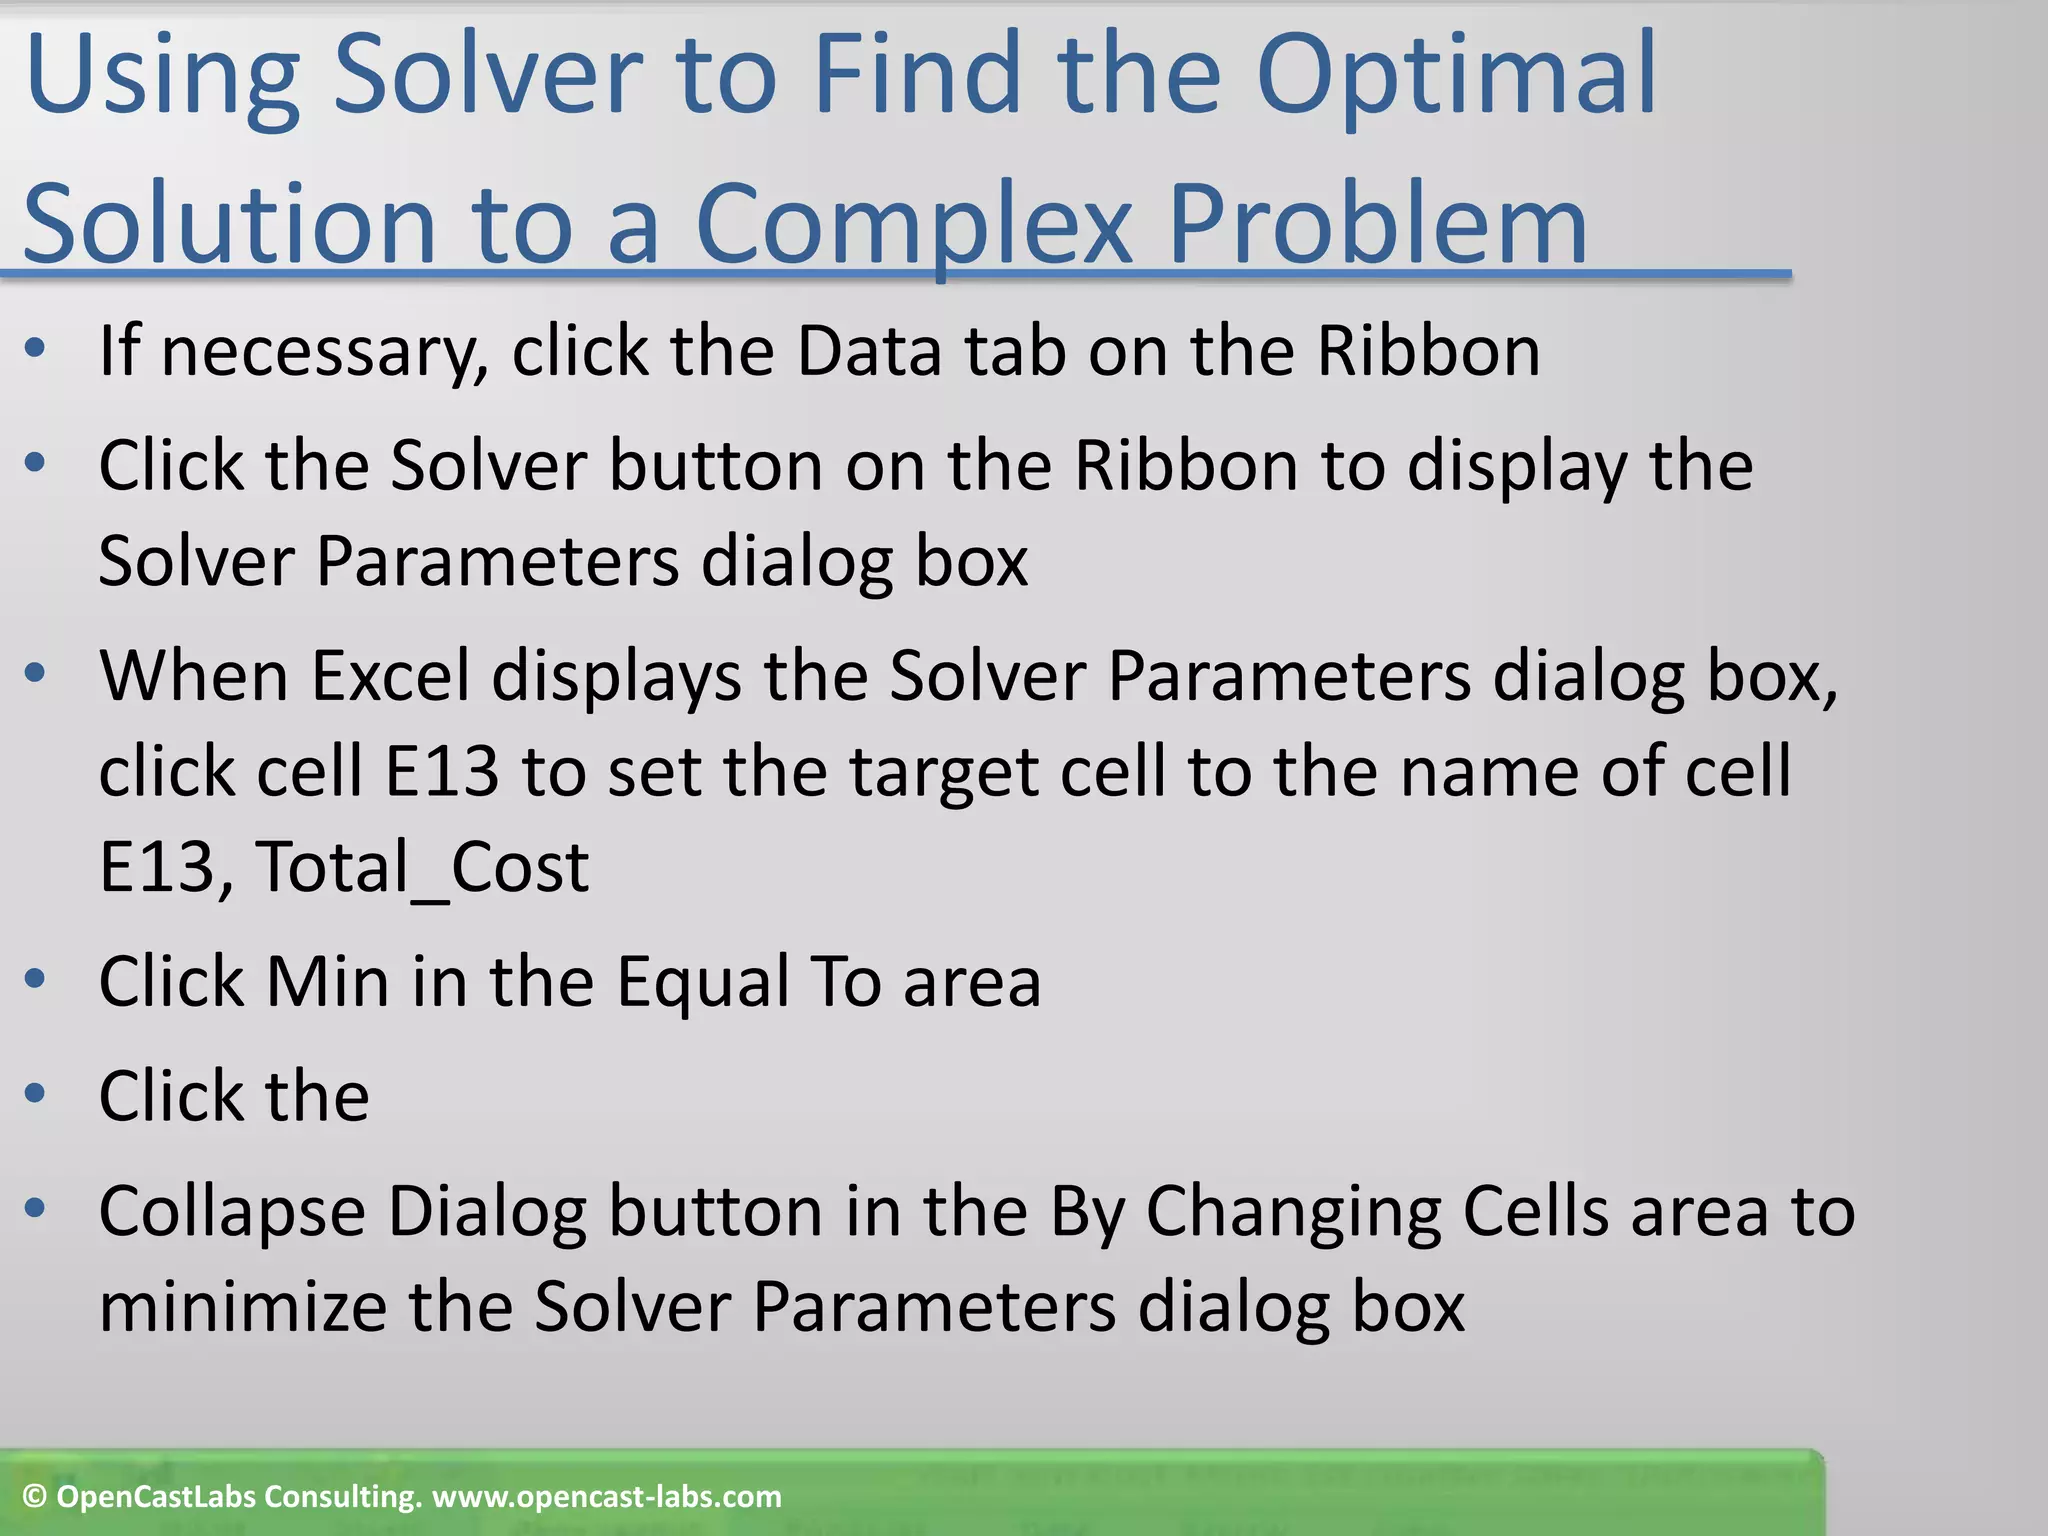
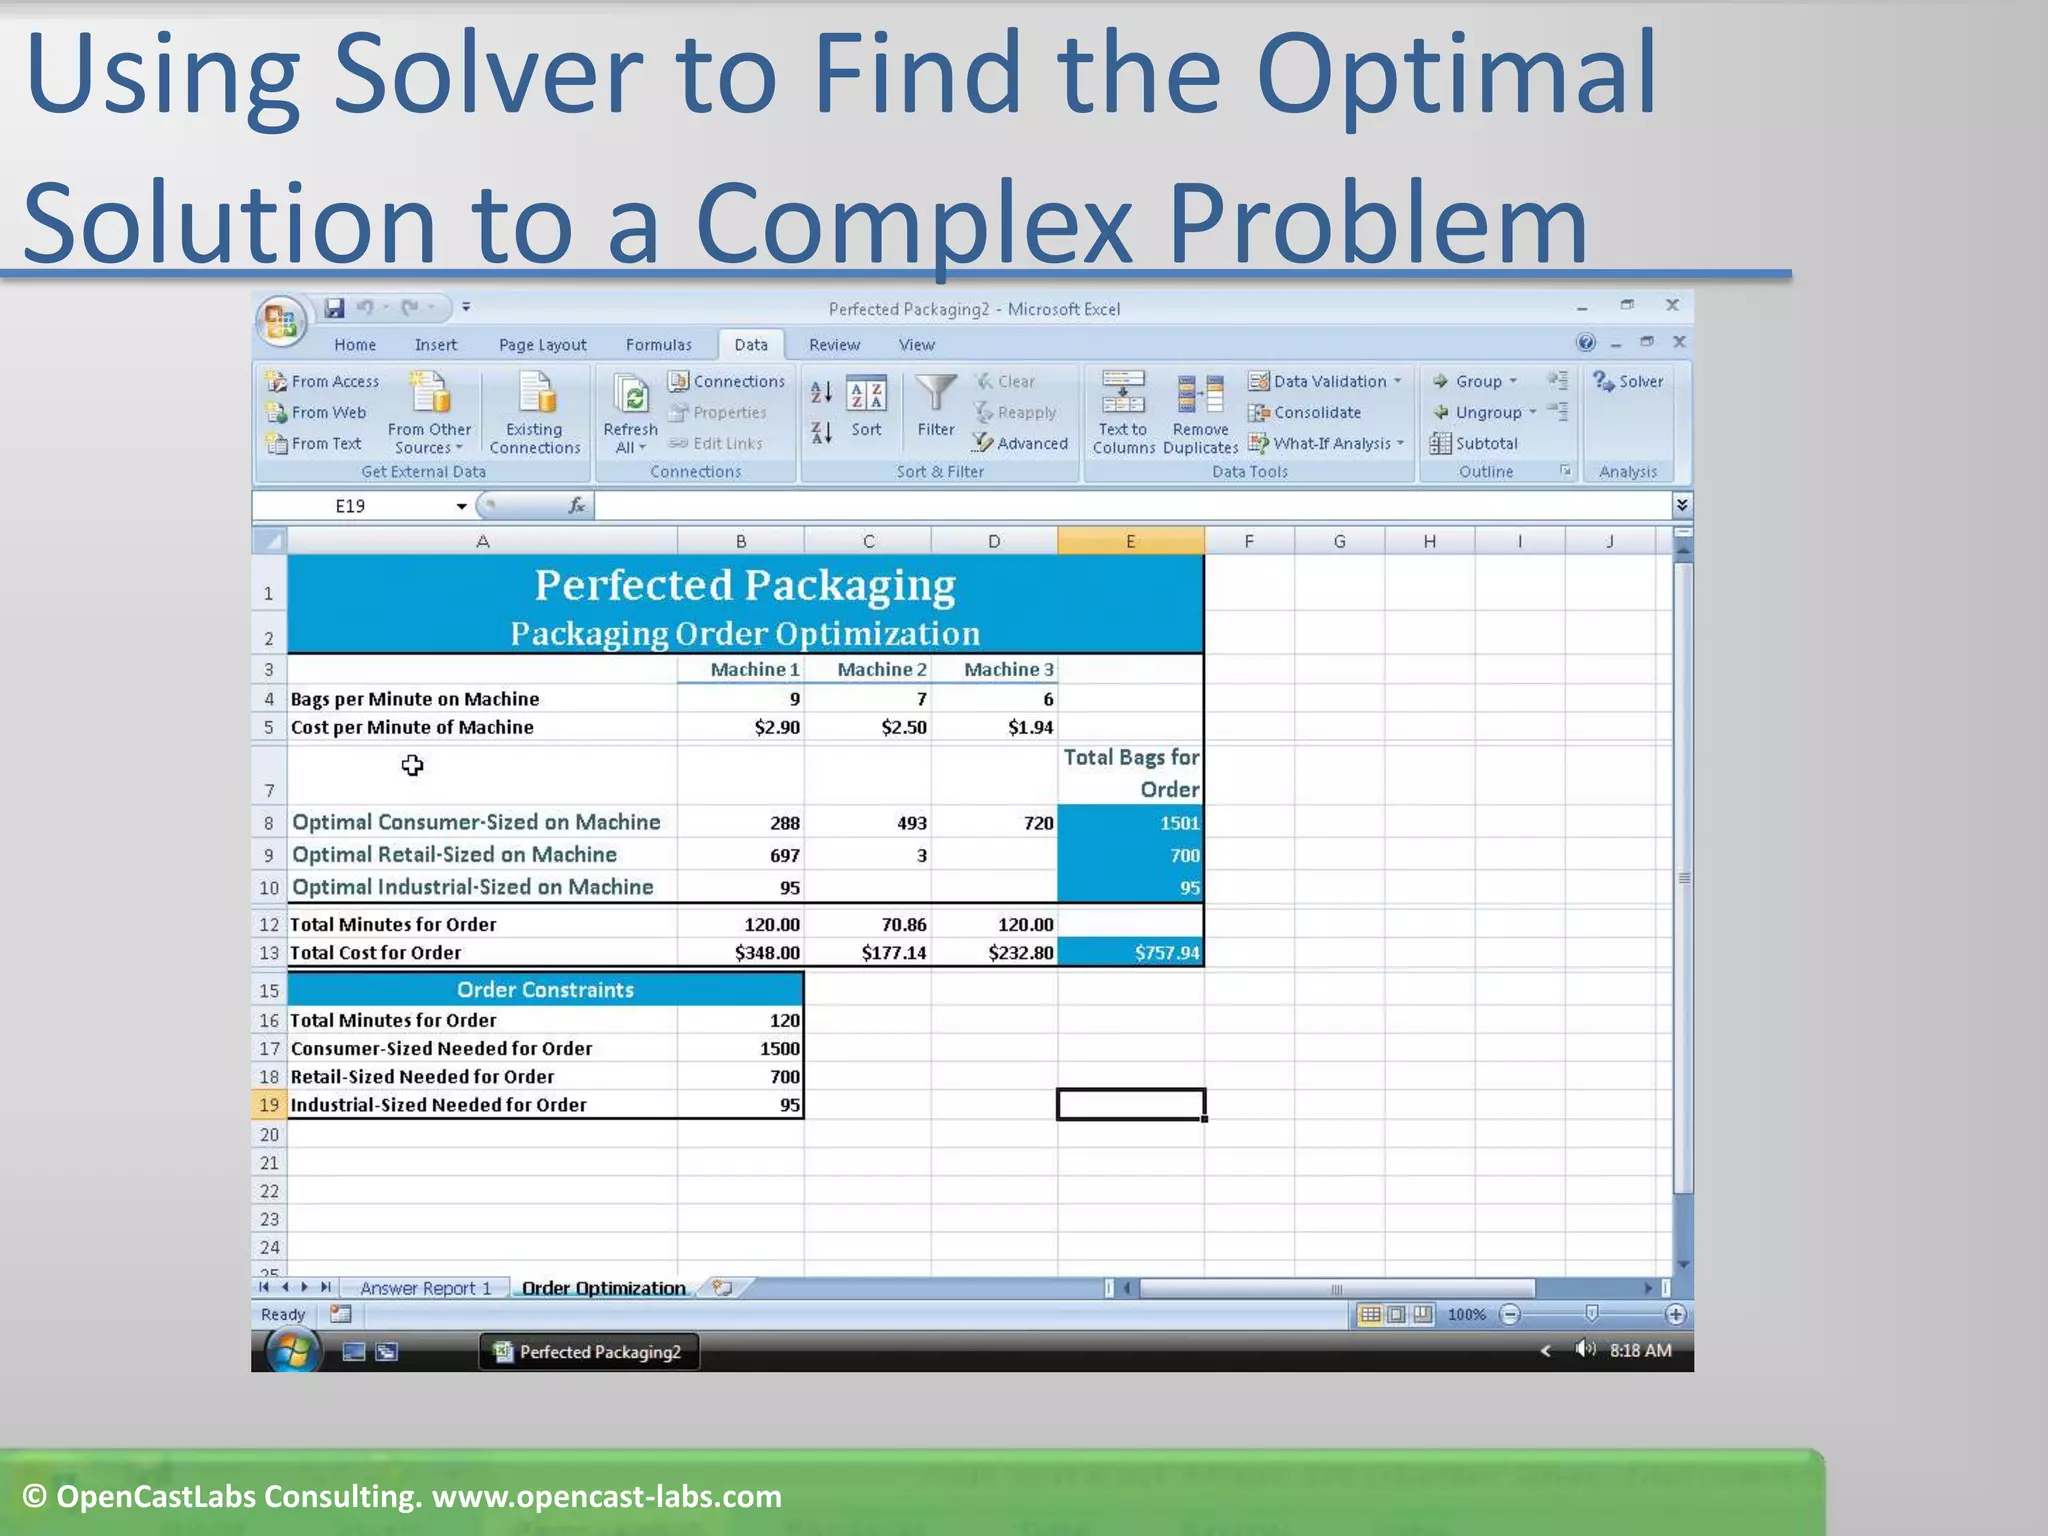
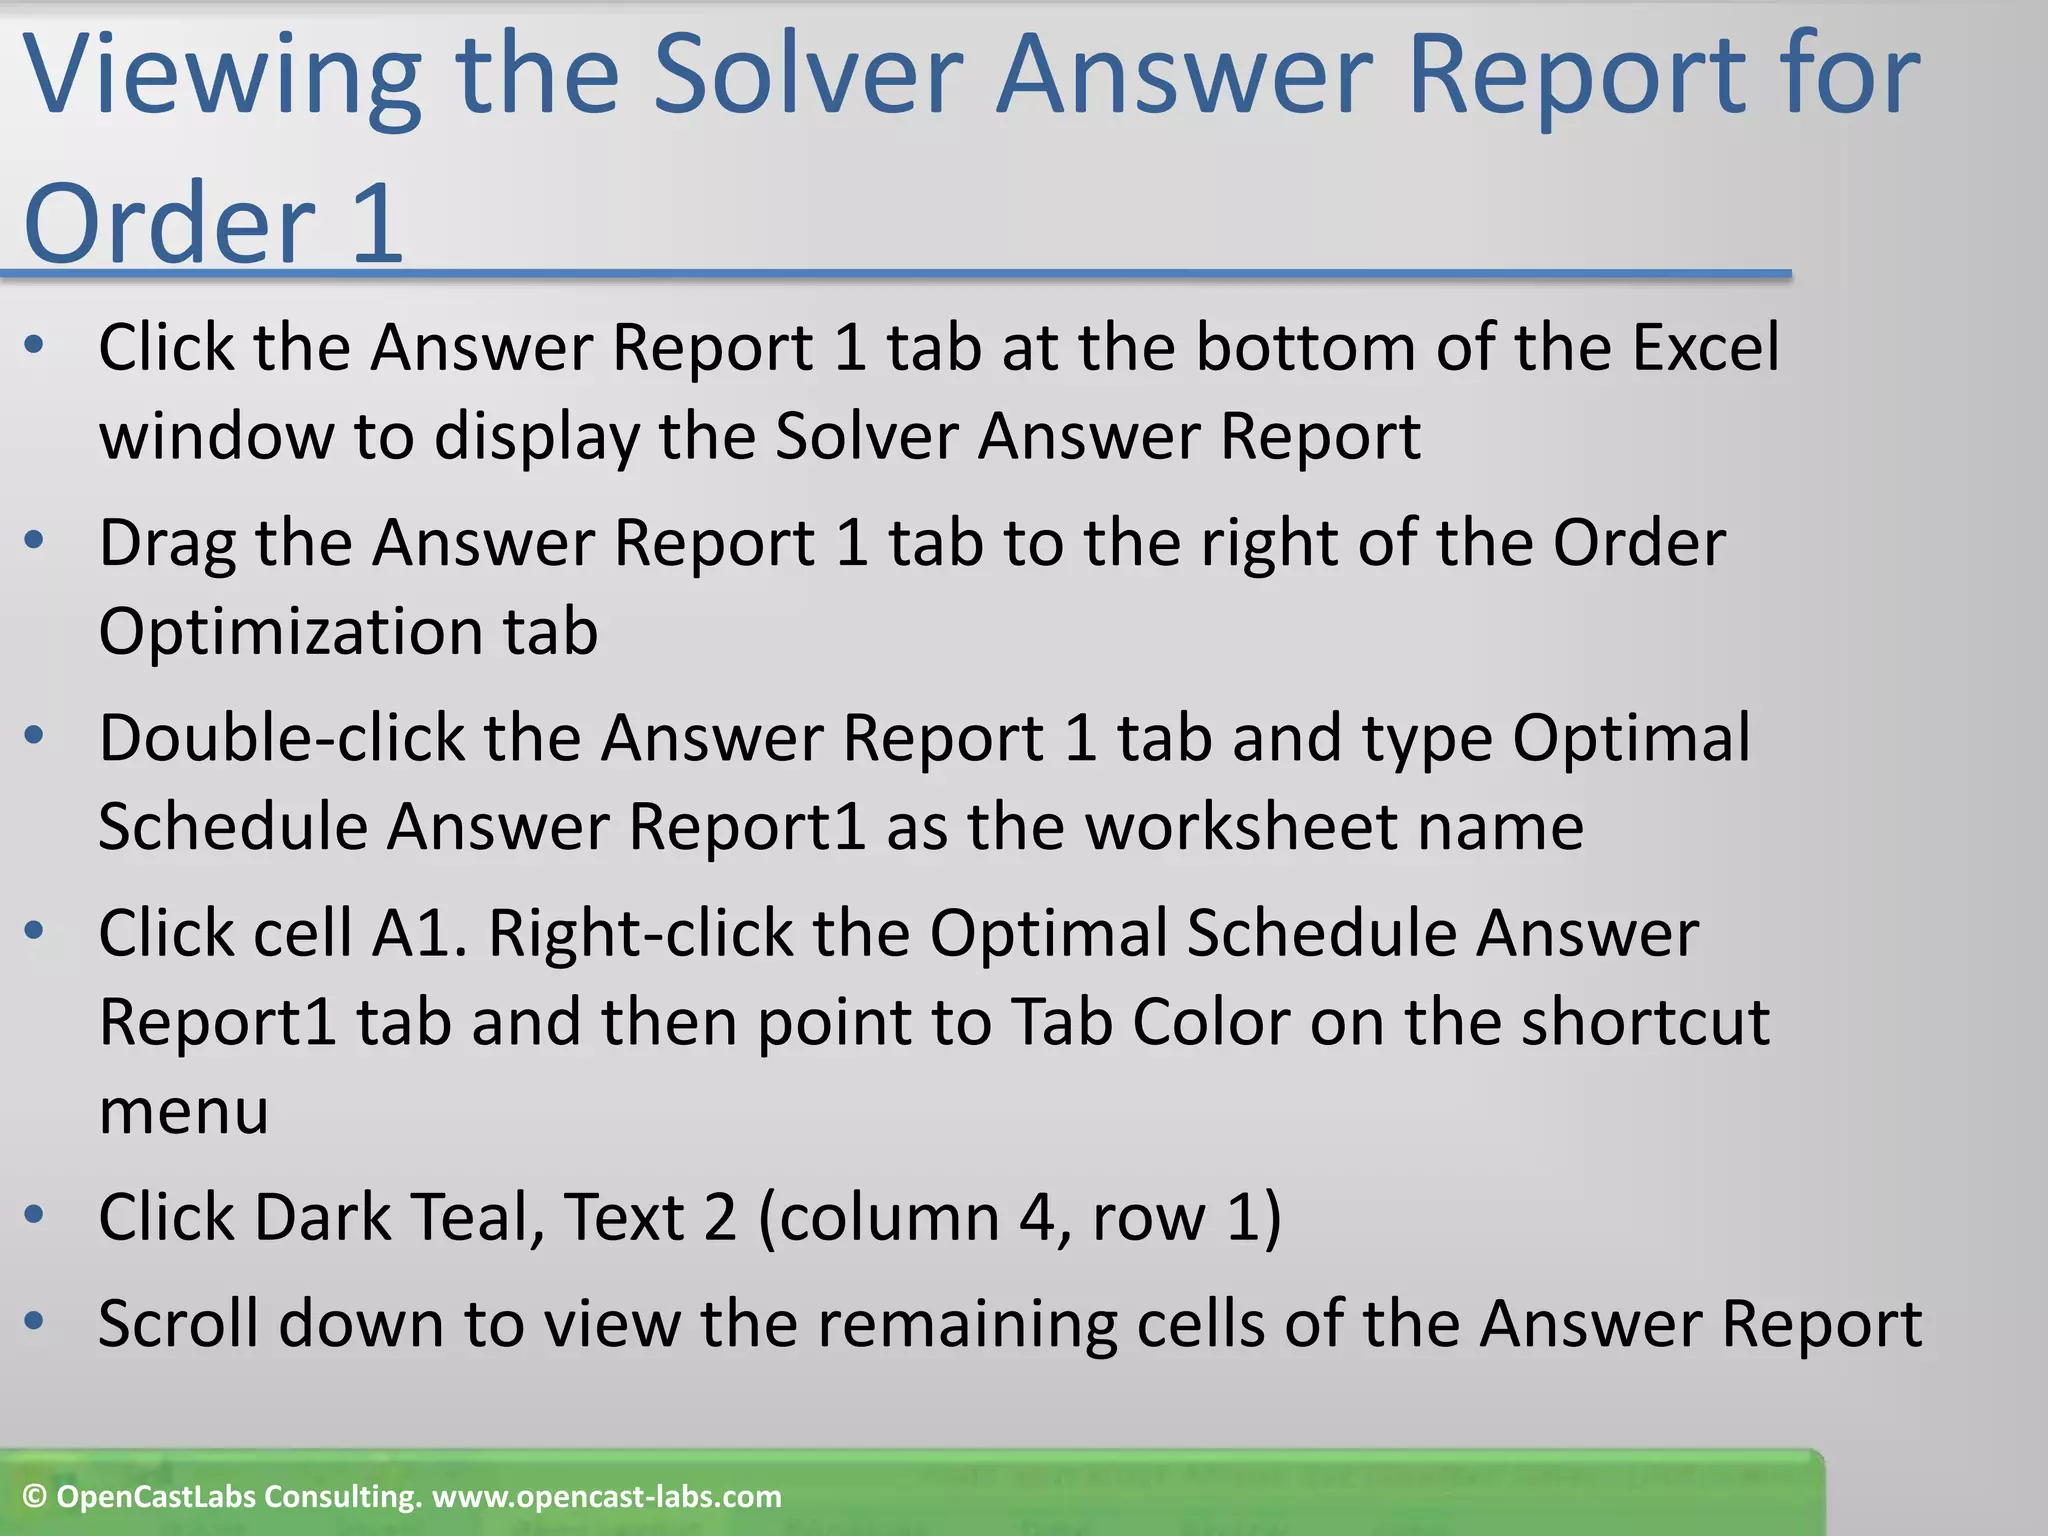
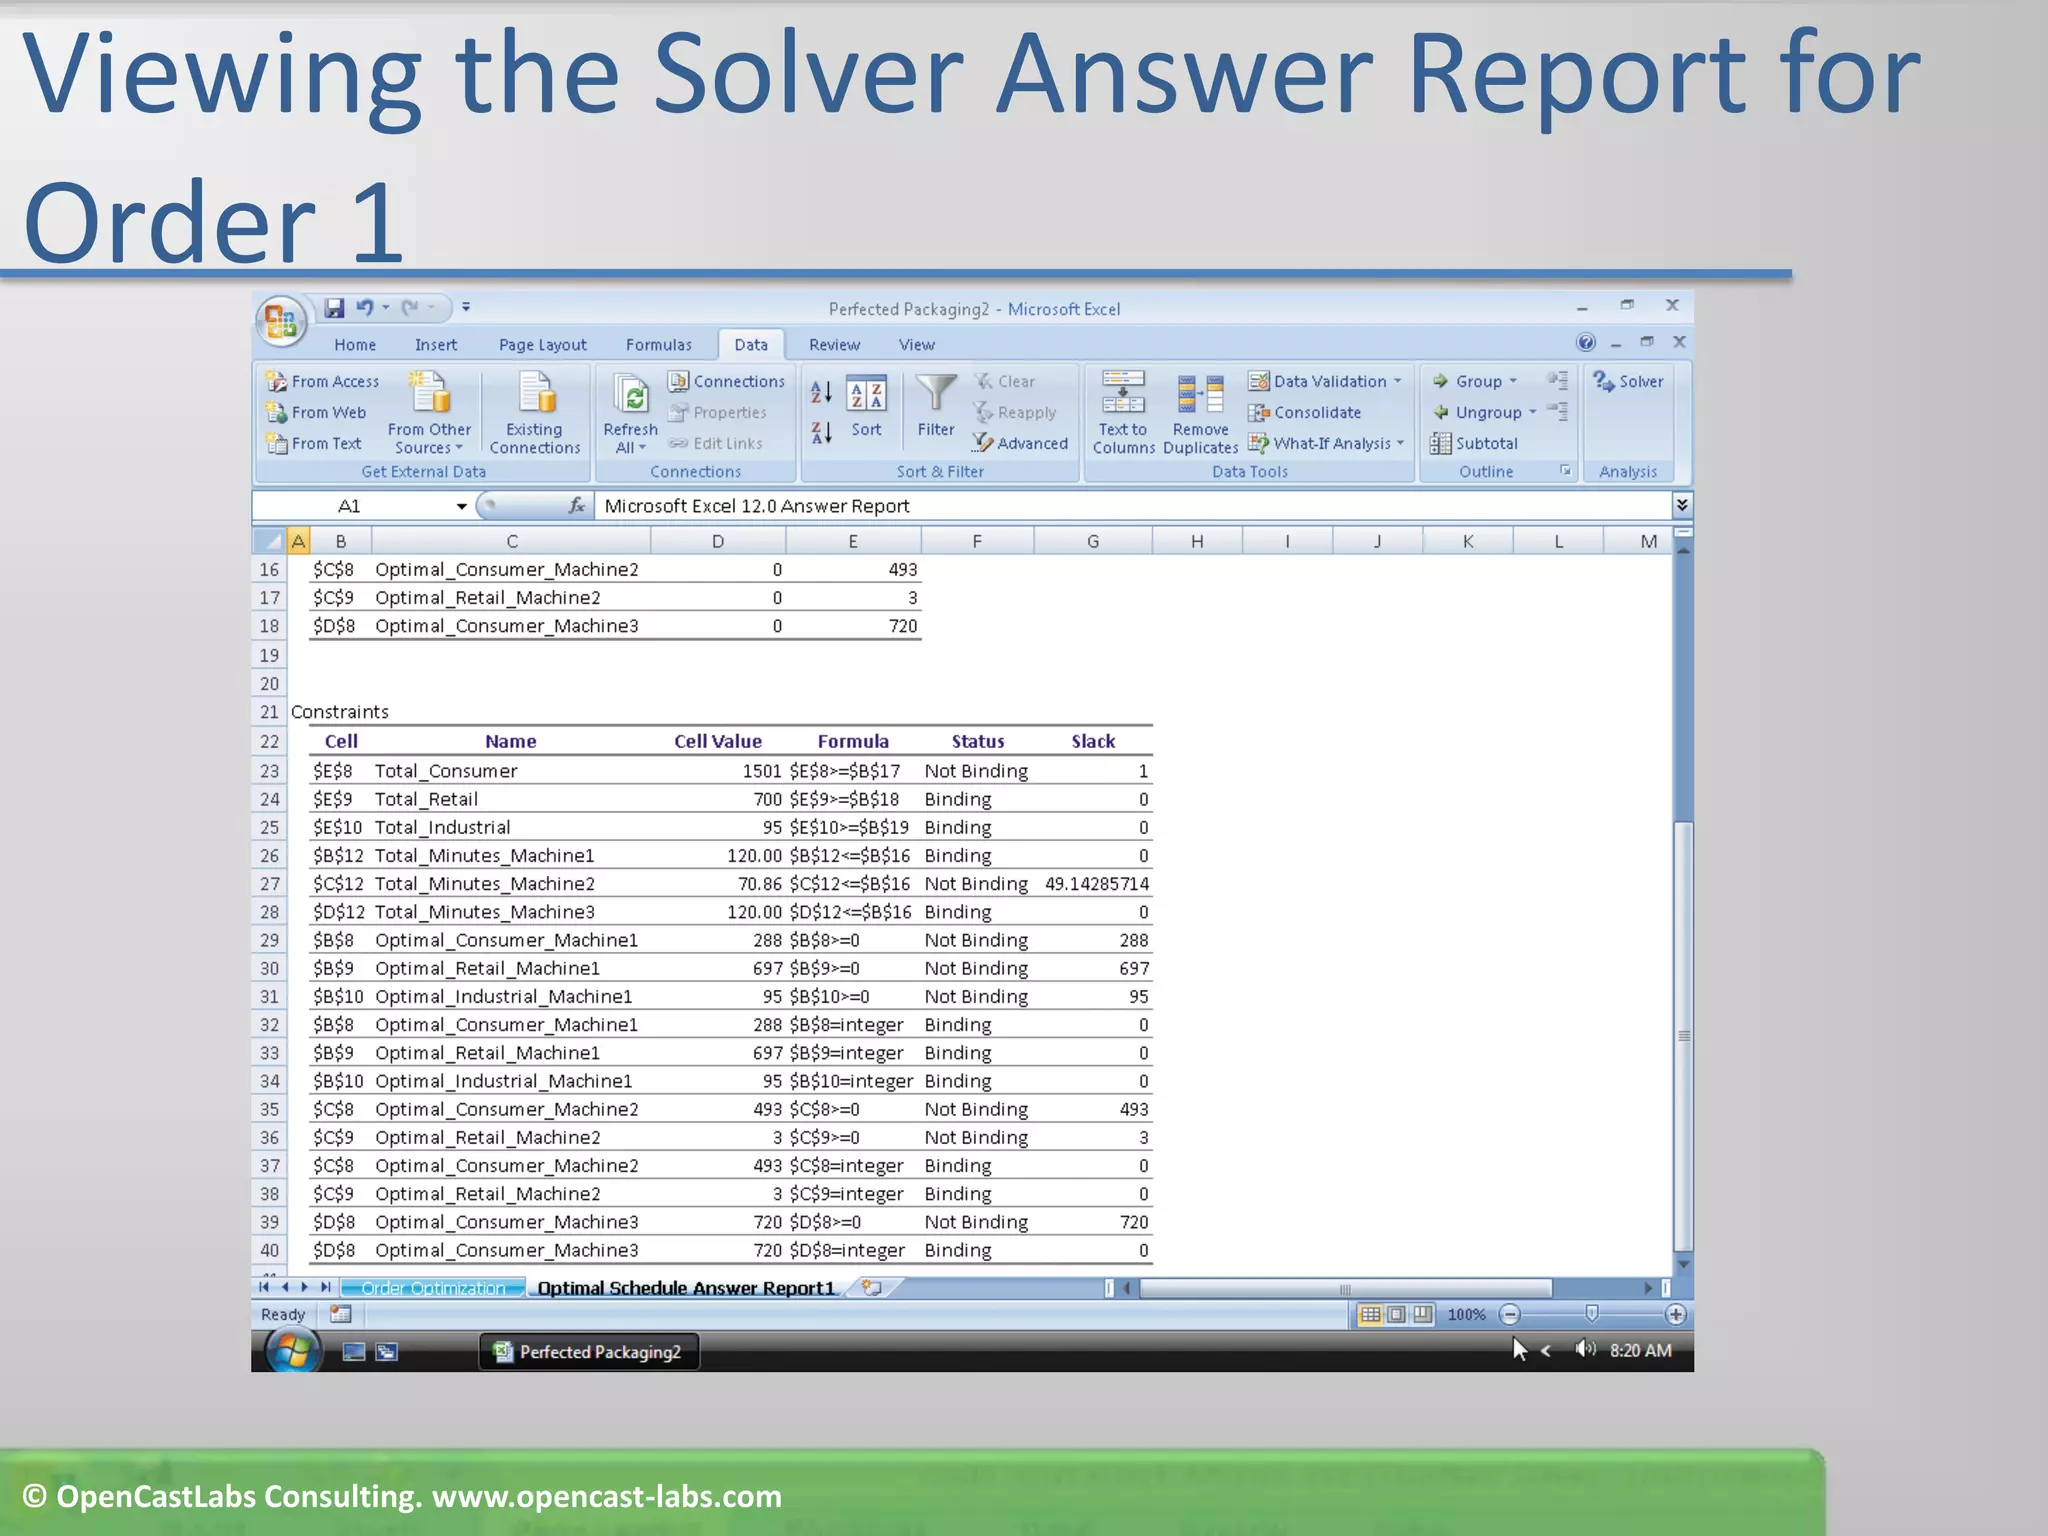
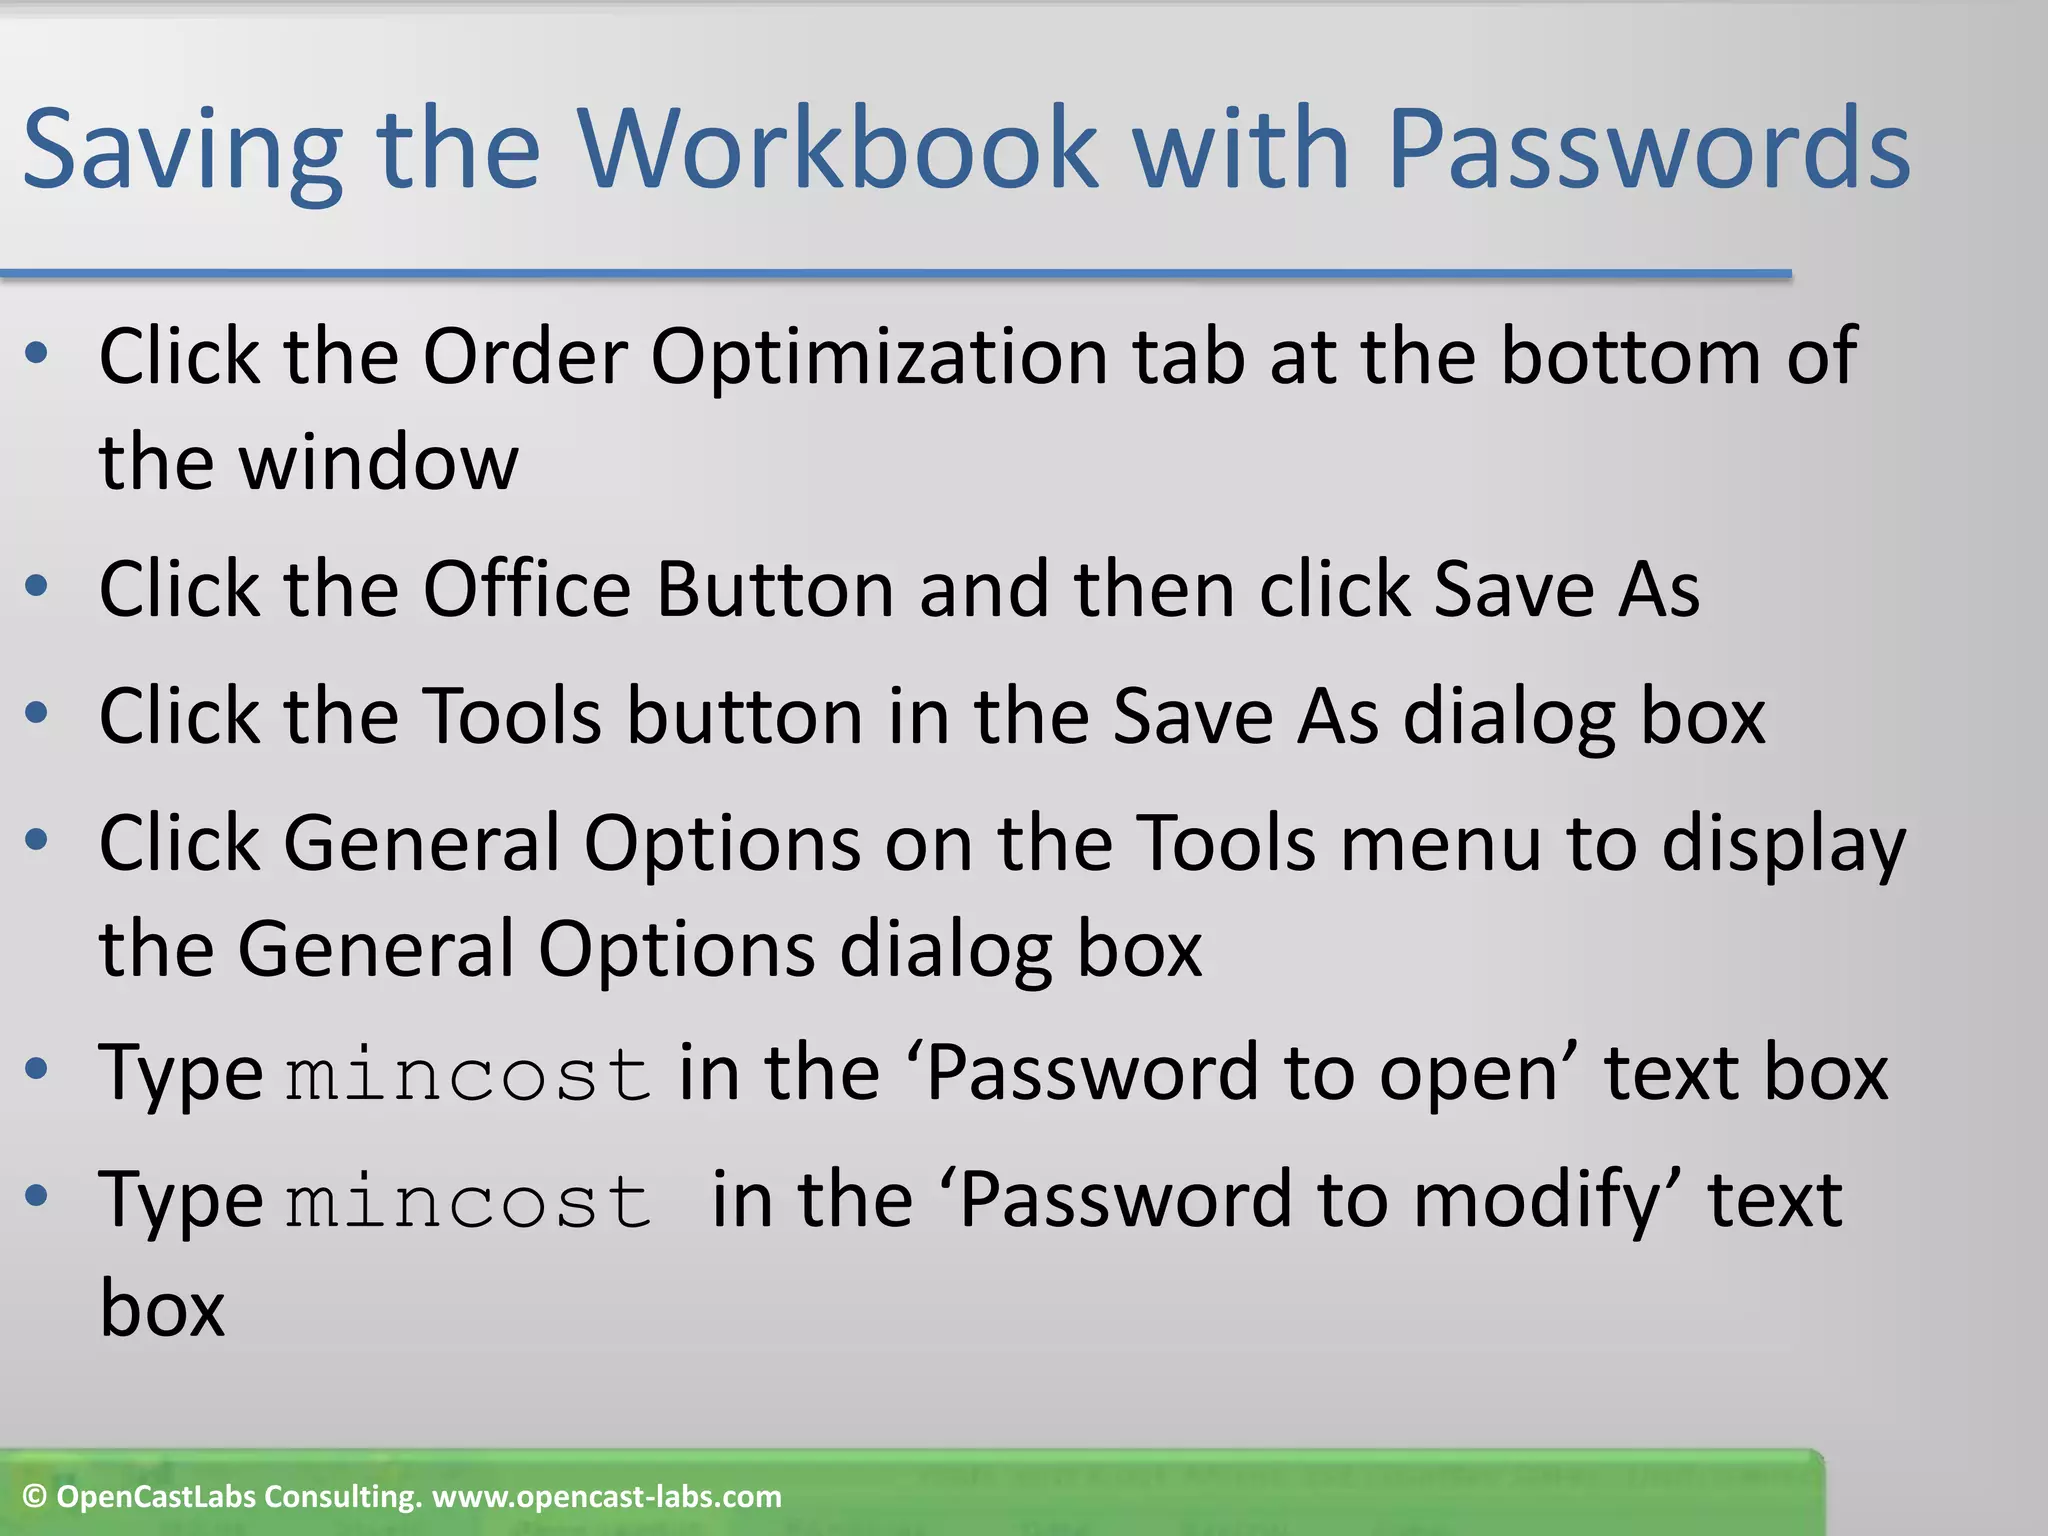


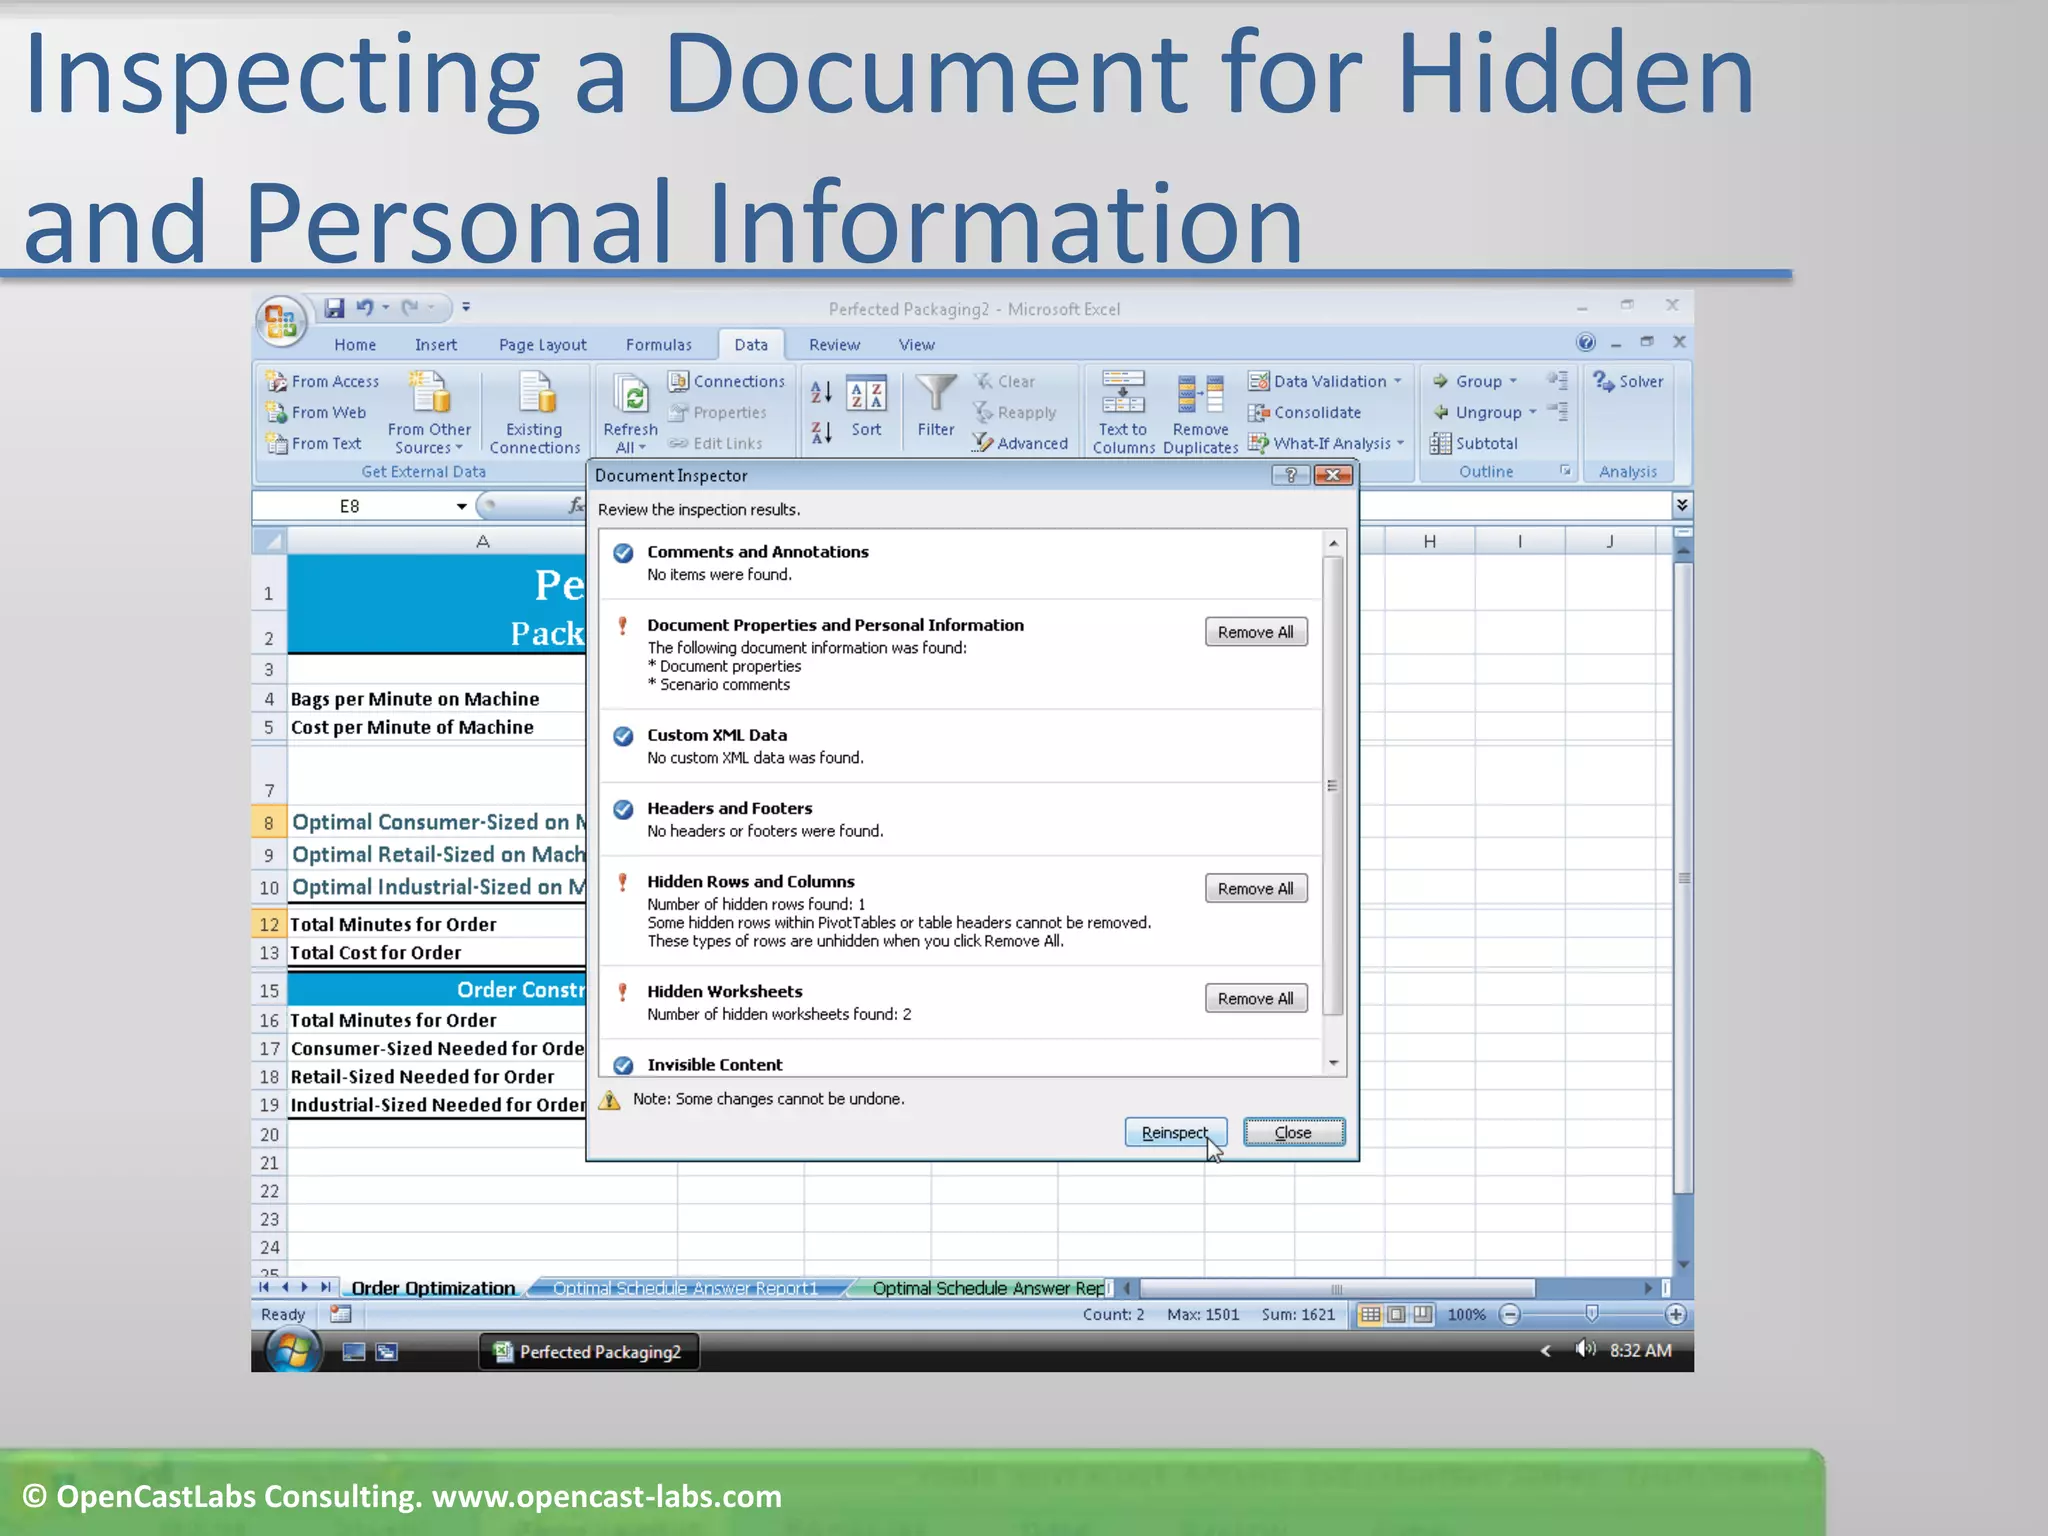
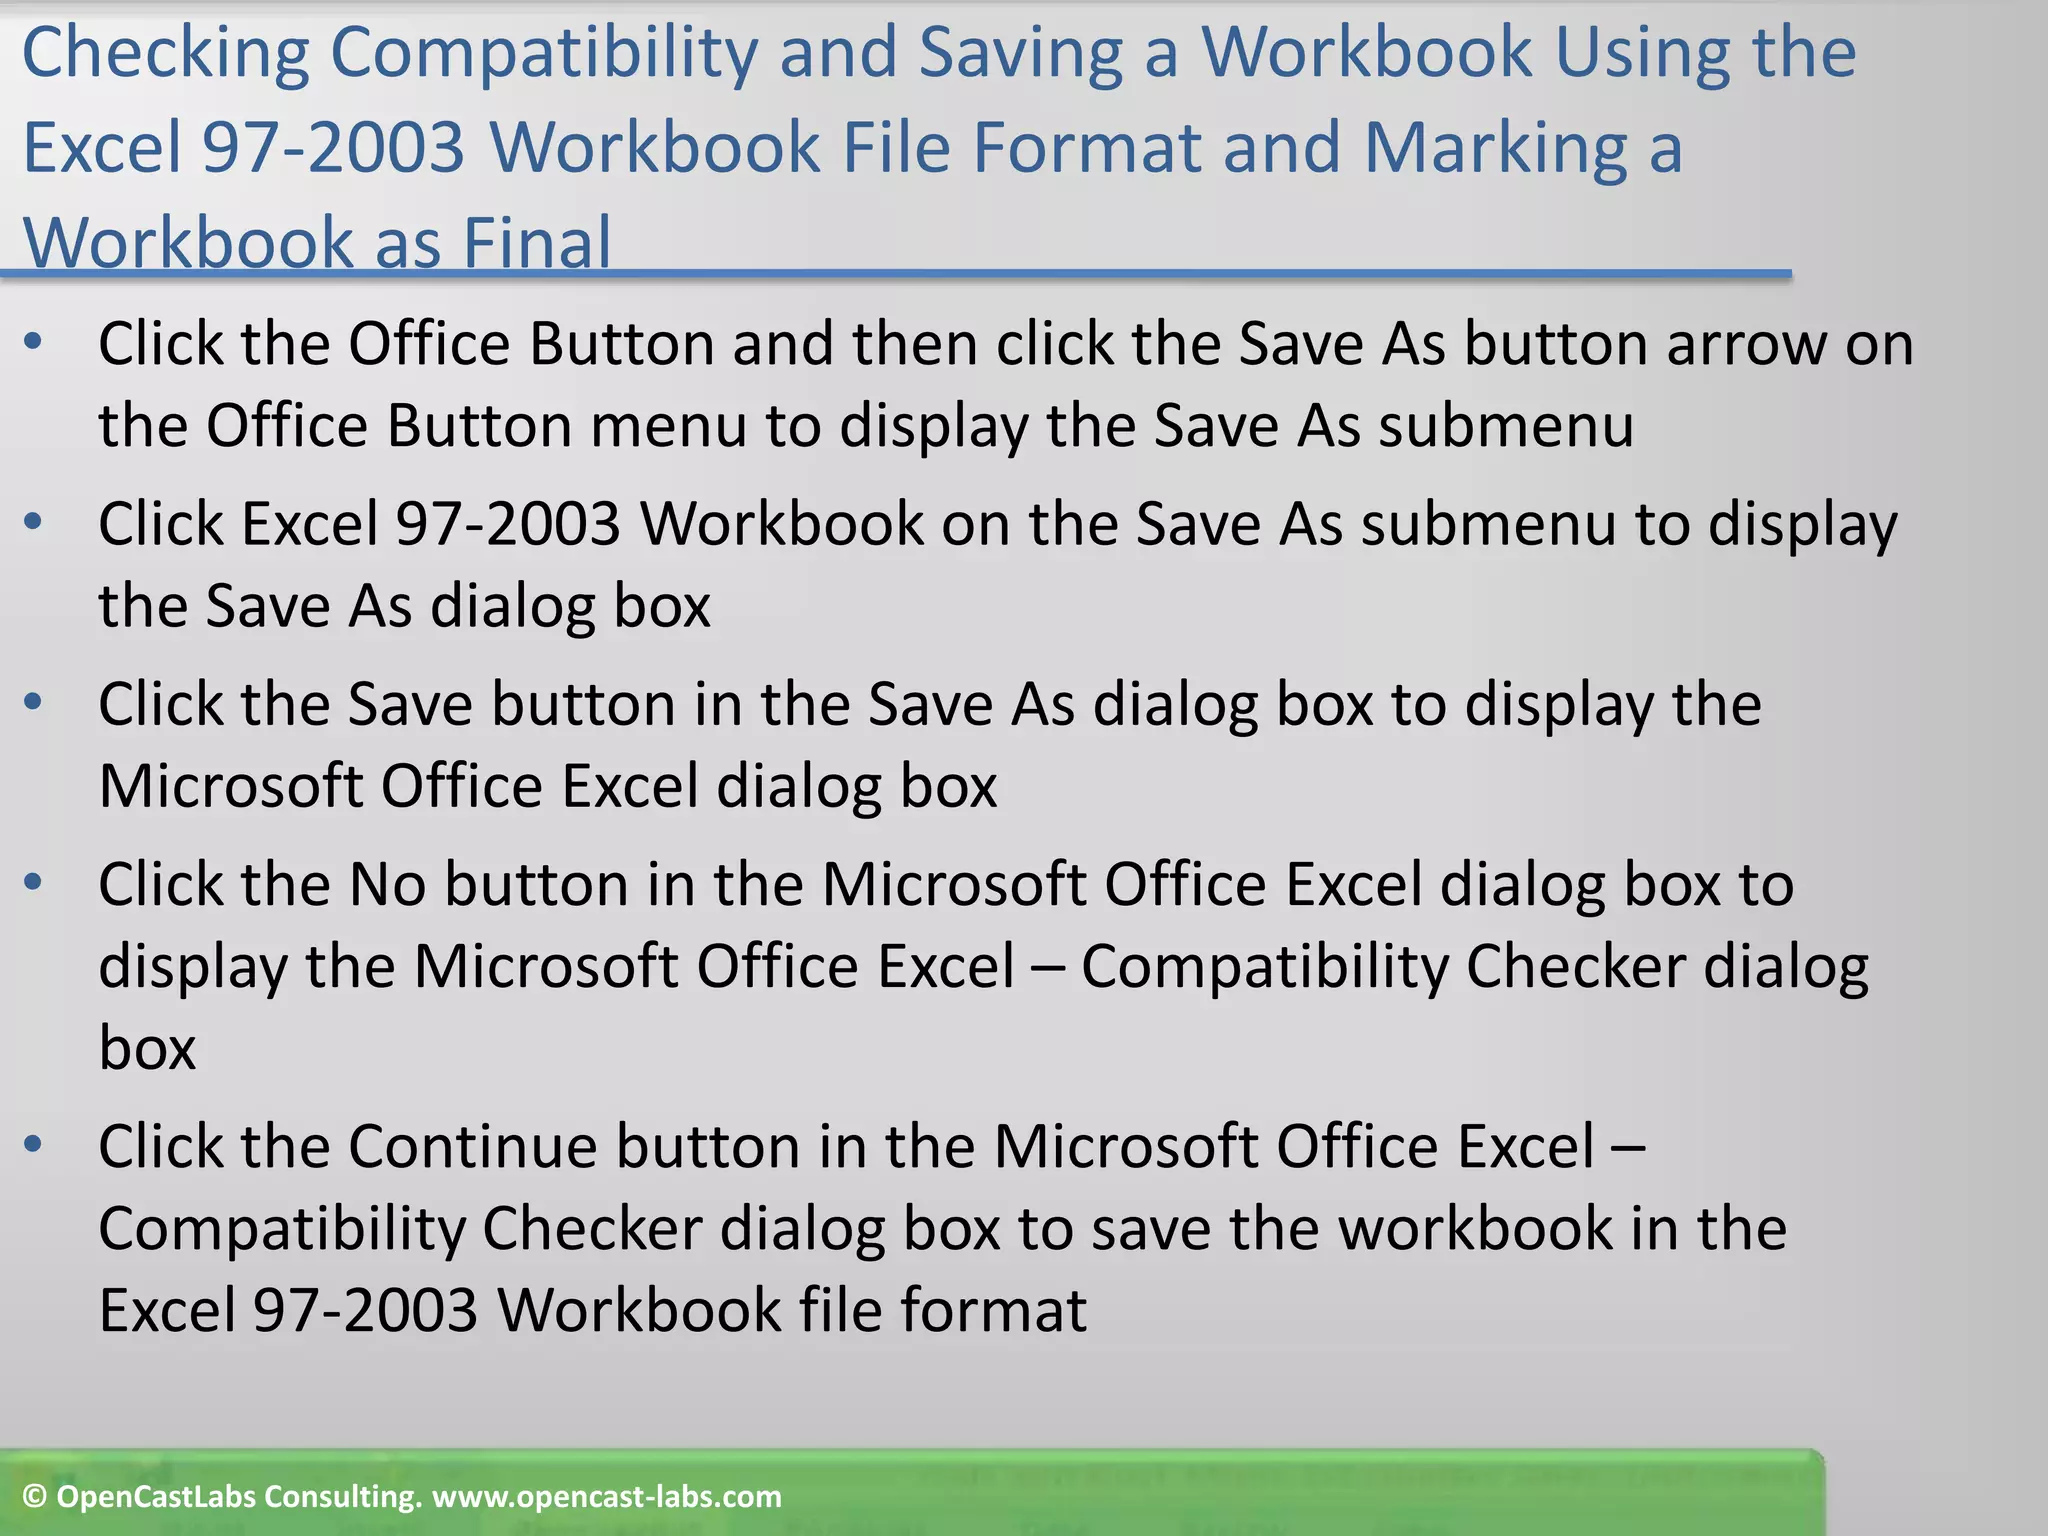
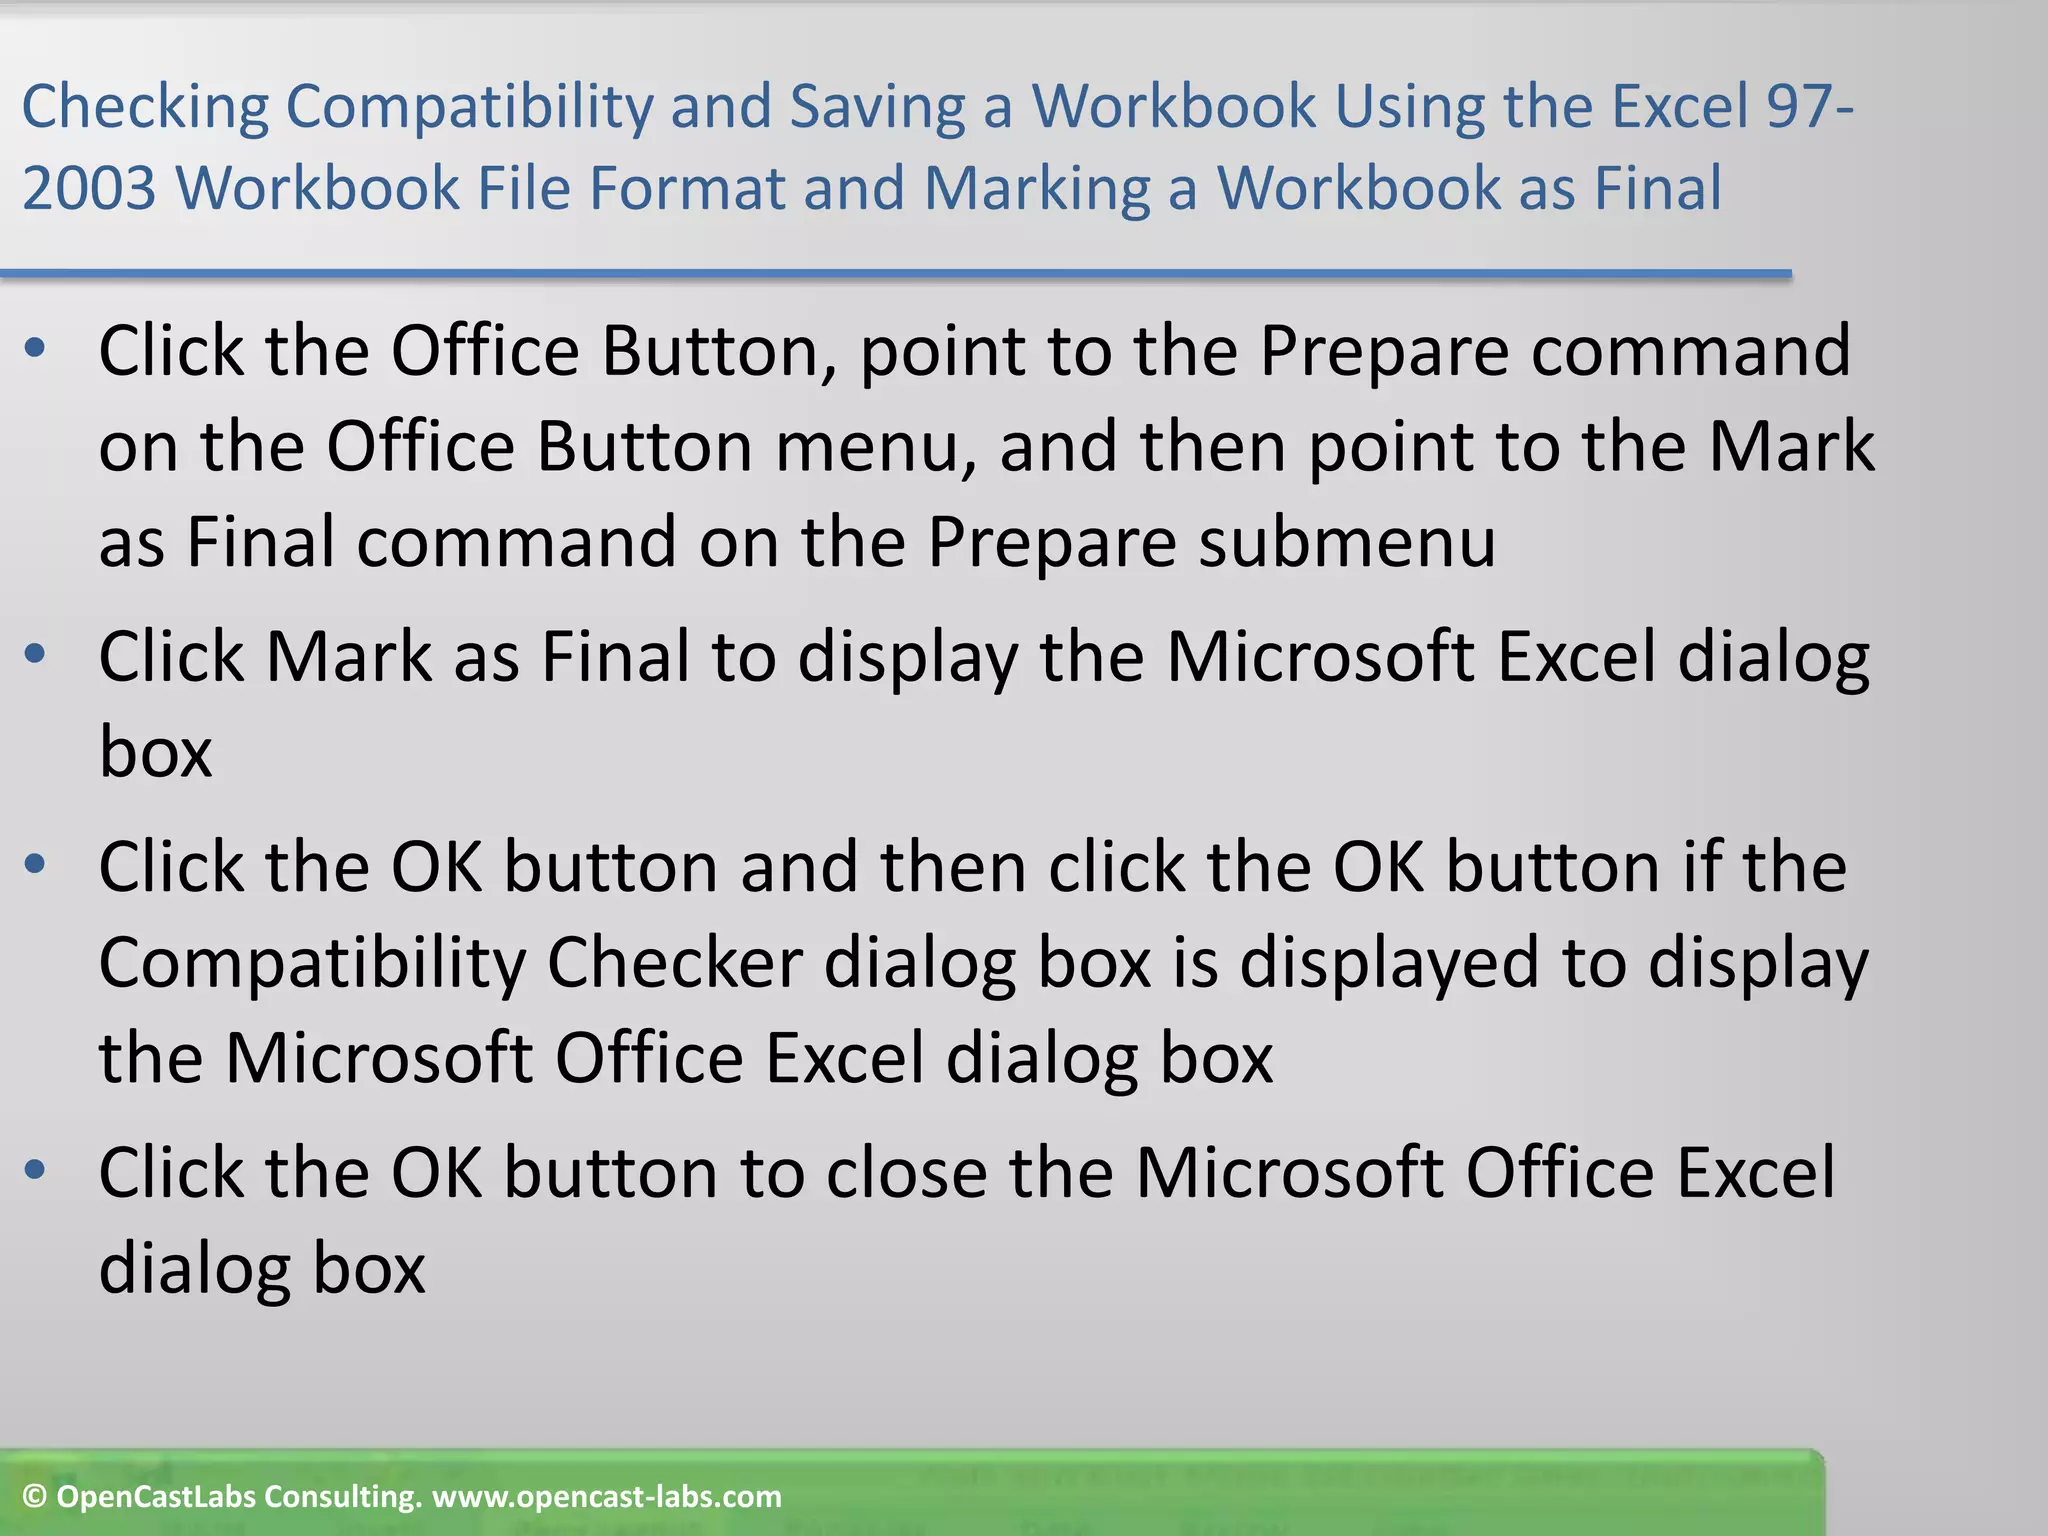

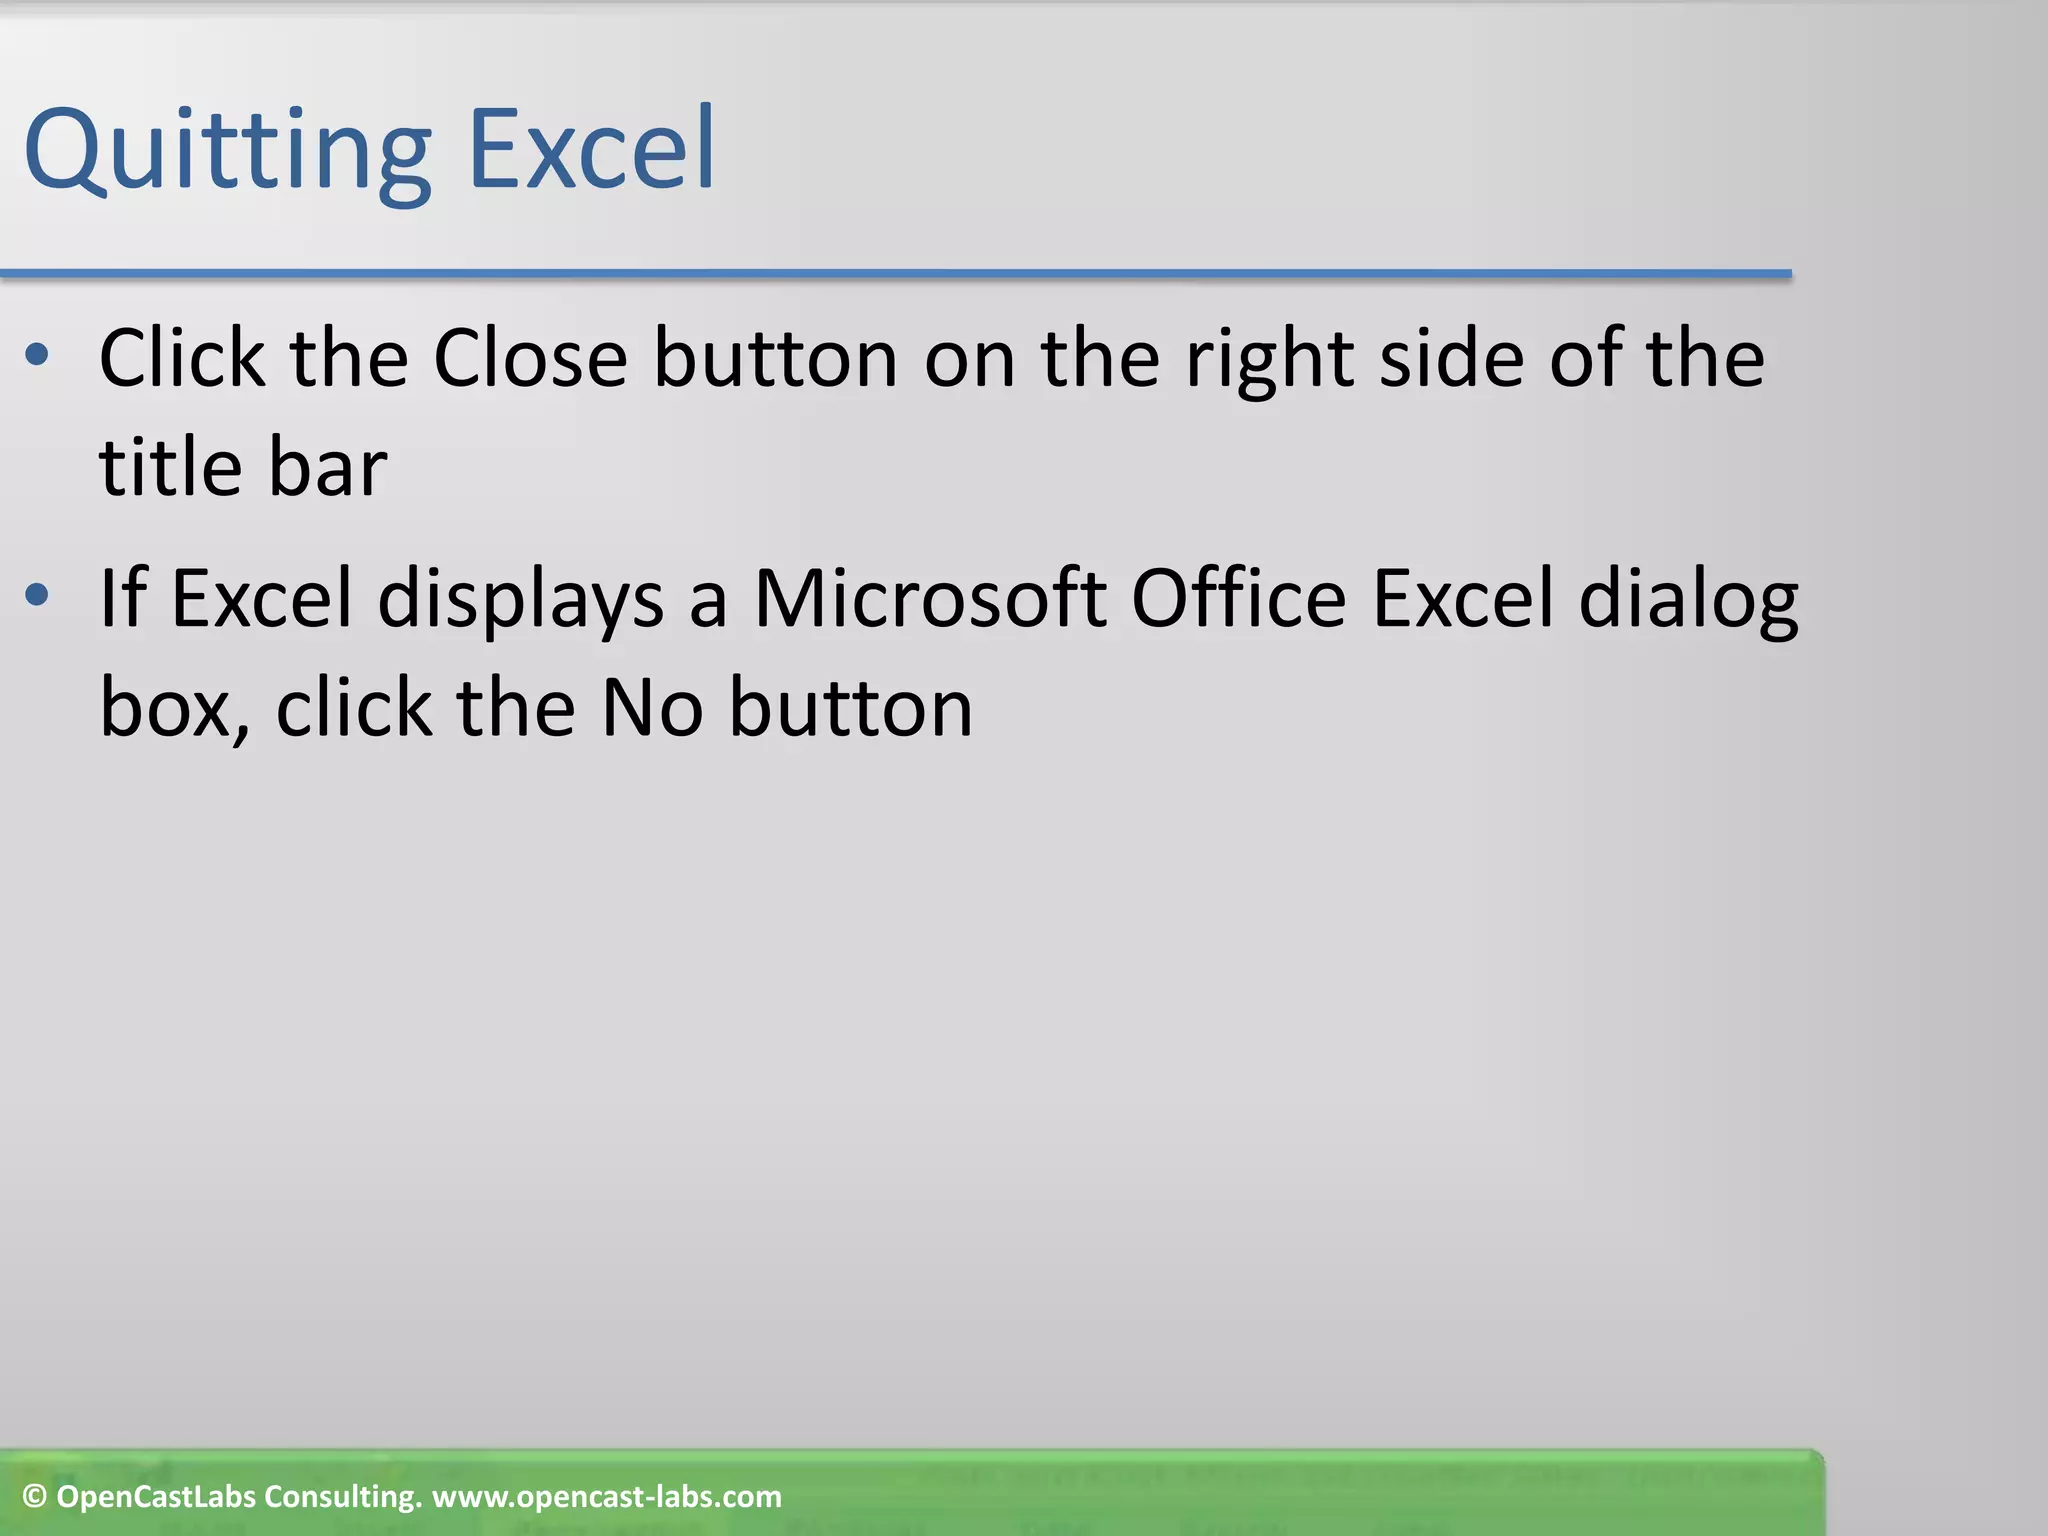


This document provides instructions for using various formula auditing, data validation, and complex problem solving tools in Excel Chapter 8. It describes how to trace precedents and dependents, add data validation rules, use trial and error and goal seeking to solve problems, circle invalid data, use the Solver tool to find optimal solutions, and add and remove watches in the Watch Window. The objectives are to analyze worksheets, establish data validation, propose problem solving strategies, and consider steps for finalizing workbooks.


![Coded Agents – with UiPath SDK + LangGraph [Virtual Hands-on Workshop]](https://cdn.slidesharecdn.com/ss_thumbnails/codedagentsdeck-251215155422-5497c599-thumbnail.jpg?width=640&height=640&fit=bounds)


