SlideShare a Scribd company logo
1 of 80
Excel Chapter 9 Importing Data, Working with Pivot Charts, PivotTables, and Trendlines
Objectives Import data from a text file, an Access database, a Web page, and a Word Document Transpose data while pasting it Convert text to columns Replicate formulas Explain sharing and collaboration techniques Insert, edit, and delete a comment © OpenCastLabs Consulting. www.opencast-labs.com
Objectives Track changes and share a workbook Accept and reject tracked changes made to a workbook Analyze worksheet data using a PivotTable and a PivotChart Compare and merge shared workbooks Analyze worksheet data using a trendline Save a custom view of a worksheet and format a worksheet background © OpenCastLabs Consulting. www.opencast-labs.com
Planning Ahead Analyze the existing workbook and the formats of the data to be imported Evaluate the various options Excel provides for collaboration Visualize your workbook in various PivotTable and PivotChart layouts Identify the trend or trends to analyze with a trendline Gather workbooks to be merged and then assess any differences in the workbooks that are in disagreement © OpenCastLabs Consulting. www.opencast-labs.com
Starting Excel and Opening a Workbook Start Excel Open the file FasToast Ovens Analysis from the Data Files for Students and then save the workbook using the file name, FasToast Ovens Analysis1. h If the Excel window is not maximized, double-click its title bar to maximize it If the worksheet window in Excel is not maximized, click the Maximize button next to theClose button on its title bar to maximize the worksheet within Excel © OpenCastLabs Consulting. www.opencast-labs.com
Starting Excel and Opening a Workbook © OpenCastLabs Consulting. www.opencast-labs.com
Importing data from a Text File into a Worksheet With the Repair Revenue Analysis worksheet active, if necessary, select cell A3 Click the Data tab on the Ribbon Click the From Text button on the Ribbon to display the Import Text File dialog box. If you have more than one Excel add-in installed, such as Solver, the From Text button may appear on a submenu that is displayed when you click the Get External Data button. The Get External Data group on the Ribbon may be collapsed to a single Get External Data button When Excel displays the Import Text File dialog box, select UDISK 2.0 (E:) in the Address bar to display the text files on drive E © OpenCastLabs Consulting. www.opencast-labs.com
Importing data from a Text File into a Worksheet Double-click the file name, FasTo Ovens North Dakota Revenue 2008, to display the Text Import Wizard - Step 1 of 3 dialog box Click the Next button to display the Text Import Wizard - Step 2 of 3 dialog box When Excel displays the Text ImportWizard - Step 2 of 3 dialog box, click Comma in the Delimiters area to display the data fields correctly in the Data preview area Click Tab in the Delimiters area to clear the check box Click the Next button to display the TextImport Wizard -Step 3 of 3 dialog box © OpenCastLabs Consulting. www.opencast-labs.com
Importing data from a Text File into a Worksheet Click the Finish button to display the Import Data dialog box Click the Properties button When Excel displays the External DataRange Properties dialog box, click ‘Adjust column width‘ in the ‘Data formatting and layout’ area to clear the check box Click the OK button When Excel displays the Import Data dialog box, click the OK button to import the data from the text file into the worksheet beginning at cell A3 © OpenCastLabs Consulting. www.opencast-labs.com
Importing data from a Text File into a Worksheet © OpenCastLabs Consulting. www.opencast-labs.com
Importing Data from an Access Table into a Worksheet Select cell A8 With the Data tab active, click the From Access button on the Ribbon to display the Select Data Source dialog box When Excel displays the Select Data Source dialog box, select UDISK 2.0 (E:) in the Address bar to display the Access database files on drive E Double-click the file name, FasToast Ovens South Dakota Revenue 2008 in the Name list to display the Import Data dialog box Click the OK button to import the data in the database to a table in the range A8:G13 © OpenCastLabs Consulting. www.opencast-labs.com
Importing Data from an Access Table into a Worksheet Right-click cell A8 and then point to the Table on the shortcut menu Click Convert to Range When Excel displays the Microsoft Office Excel dialog box, click the OK button to convert the table to a range Right-click the row heading for row 8 to display the shortcut menu Click Delete on the shortcut menu to delete row 8 © OpenCastLabs Consulting. www.opencast-labs.com
Importing Data from an Access Table into a Worksheet Drag through the column headings of column A through G in the column heading area to select the columns Double-click the column separator in the column headings area between columns A and B to change the widths of each column to best fit If necessary, click the Home tab on the Ribbon and then select the range A7:G7 Click the Format Painter button on the Ribbon and then drag though the range A8:G12 to copy the formats of the selected range to the range A8:G12 Select cell A13 © OpenCastLabs Consulting. www.opencast-labs.com
Importing Data from an Access Table into a Worksheet © OpenCastLabs Consulting. www.opencast-labs.com
Importing Data from a Web Page into a Worksheet With cell A13 selected, click the Data tab on the Ribbon Click the From Web button on the Ribbon to display the New Web Query dialog box When Excel displays the New Web Query dialog box, type e:asToastOvensNebr askaRevenue2008.htm in the Address bar and then click the Go button to display the Web page in the preview area Click the ‘Click to select this table’ arrow to select the HTML table containing the Nebraska repair revenue report Click the Import button to display the Import Data dialog box and display a marquee around cell A13 © OpenCastLabs Consulting. www.opencast-labs.com
Importing Data from a Web Page into a Worksheet Click the Properties button to display the External Data Range Properties dialog box When Excel displays the External Data Range Properties dialog box, click ‘Adjust column width‘ in the ‘Data formatting and layout’ area to clear the check box Click the OK button When Excel displays the Import Data dialog box, click the OK button to import the data from the Web page into the worksheet beginning at cell A13 Drag through the row 13 and 14 row headings and then right-click to display the shortcut menu Click Delete on the shortcut menu to delete rows 13 and 14, which contained the column headings from the Web Page © OpenCastLabs Consulting. www.opencast-labs.com
Importing Data from a Web Page into a Worksheet © OpenCastLabs Consulting. www.opencast-labs.com
Copying and Transposing Data from a Word Document to a Worksheet Click the Home tab on the Ribbon and then select cell A24 Start Word and then open the Word document named, FasToast Ovens Kansas Revenue 2008, from the Data Files for Students In Word, if necessary, click the Home tab on the Ribbon Drag through all of the cells in the second through last columns in the table in the Word document and then click the Copy button on the Ribbon to copy the contents of the table to the Office Clipboard Quit Word and, if necessary, click the FasToast Ovens Analysis1 workbook taskbar button to make it active Click the Paste button arrow on the Ribbon to display the Paste menu © OpenCastLabs Consulting. www.opencast-labs.com
Copying and Transposing Data from a Word Document to a Worksheet Click Paste Special on the Paste menu to display the Paste Special dialog box When the Paste Special dialog box appears, click Text in the As list Click the OK button in the Paste Special dialog box to paste the contents of the Office Clipboard to the range A24:E29 Select the range A24:E29 and then click the Copy button on the Ribbon Select cell A18 Click the Paste button arrow on the Ribbon and then point to Transpose on the Paste menu Click Transpose on the Paste menu to transpose and paste the copied cells to a range beginning with cell A18 © OpenCastLabs Consulting. www.opencast-labs.com
Copying and Transposing Data from a Word Document to a Worksheet © OpenCastLabs Consulting. www.opencast-labs.com
Converting Text to Columns If necessary, click the Home tab on the Ribbon Select the range A24:E29 and press the DELETE key to delete the range Select the range B18:F22 and then click the Cut button on the Ribbon to copy the range to the Office Clipboard Select cell C18 and then click the Paste button on the Ribbon Select the range C17:G17 and then click the Format Painter button on the Ribbon Select the range C18:G22 to copy the formats in range C17:G17 down to the corresponding columns of range C18:G22 © OpenCastLabs Consulting. www.opencast-labs.com
Converting Text to Columns Select the range A18:A22 and then click the Data tab on the Ribbon Click the Text to Columns button on the Ribbon to display the Convert Text to Columns Wizard - Step 1 of 3 dialog box Click the Next button to display the Convert Text to Columns Wizard - Step 2 of 3 dialog box When Excel displays the Convert Text to Columns Wizard - Step 2 of 3 dialog box, click Comma in the Delimiters area to display the data fields correctly in the Data preview area Click Tab in the Delimiters area to clear the check box Click the Finish button to close the Convert Text to Columns Wizard - Step 2 of 3 dialog box and separate the data in column A to two columns © OpenCastLabs Consulting. www.opencast-labs.com
Converting Text to Columns © OpenCastLabs Consulting. www.opencast-labs.com
Replicating Formulas Select the range H3:I3 Drag the fill handle down through row 22 to copy the two formulas to the range H4:I22 and display the new values for the Revenue per Repair Person 2007 and Revenue per Repair Person 2008 columns Click the Save button on the Quick Access Toolbar to save the workbook using the file name, FasToast Ovens Analysis1. © OpenCastLabs Consulting. www.opencast-labs.com
Replicating Formulas © OpenCastLabs Consulting. www.opencast-labs.com
Sharing a Workbook and Collaborate on a Workbook Click the Review tab on the Ribbon Click the Share Workbook button on the Ribbon to display the Share Workbook dialog box When Excel displays the Share Workbook dialog box, click ‘Allow changes by more than one user at the same time’ Click the OK button When Excel displays the Microsoft Office Excel dialog box, click the OK button to place the workbook in share mode © OpenCastLabs Consulting. www.opencast-labs.com
Sharing a Workbook and Collaborate on a Workbook If possible, have a classmate open a second copy of the workbook With a second copy of the workbook open, click the Share Workbook button on the Review tab on the Ribbon to display the Share Workbook dialog box, which lists all users who currently have the workbook open Click the OK button Ask the second workbook user to select G13, enter 183,540 as the new value, and then save the workbook Click the Save button on the Quick Access Toolbar to display the Microsoft Office Excel dialog box indicating that the workbook has been updated with changes saved by another user Click the OK button © OpenCastLabs Consulting. www.opencast-labs.com
Sharing a Workbook and Collaborate on a Workbook Point to the blue triangle in cell G13 to display the comment indicating the other user’s changes Ask the second user of the workbook to close the workbook Click the Review tab on the Ribbon and then click the Share Workbook button on the Ribbon to display the Share Workbook dialog box When Excel displays the Share Workbook dialog box, click ‘Allow changes by more than one user at the same time’ to clear the check box Click the OK button to stop sharing the workbook If Excel displays the Microsoft Office Excel dialog box, click the Yes button © OpenCastLabs Consulting. www.opencast-labs.com
Sharing a Workbook and Collaborate on a Workbook © OpenCastLabs Consulting. www.opencast-labs.com
Inserting a Comment Right-click cell E13 to display the shortcut menu Click Insert Comment on the shortcut menu to open a comment box next to the selected cell and display a comment indicator in the cell When Excel displays the comment box, enter the comment Click anywhere outside the comment box to close the comment box and display a red comment indicator in cell E13 Click the Save button on the Quick Access Toolbar © OpenCastLabs Consulting. www.opencast-labs.com
Inserting a Comment © OpenCastLabs Consulting. www.opencast-labs.com
Turning on Track Changes If necessary, click the Review tab on the Ribbon and then click the Track Changes button on the Ribbon to display the Track Changes menu Click Highlight Changes on the Track Changes menu to display the Highlight Changes dialog box When Excel displays the Highlight Changes dialog box, click ‘Track changes while editing’ If necessary, click all of the check boxes in the ‘Highlight which changes’ area to clear them Click the OK button When Excel displays the Microsoft Office Excel dialog box, click the OK button to save the workbook Close the workbook © OpenCastLabs Consulting. www.opencast-labs.com
Turning on Track Changes © OpenCastLabs Consulting. www.opencast-labs.com
Opening a Workbook and Reviewing Tracked Changes With Excel active, open the file, FasToast Ovens Analysis2, from the Data Files for Students Click the Review Tab on the Ribbon and then click the Track Changes button on the Ribbon to display the Track Changes menu Click Highlight Changes on the Track Changes menu When Excel displays the Highlight Changes dialog box, click When to clear the check box Click the OK button  Click the Show All Comments button on the Ribbon to display all comments Point to the blue triangle in cell G5 to display the comment box with information about the change made to the cell G5 © OpenCastLabs Consulting. www.opencast-labs.com
Opening a Workbook and Reviewing Tracked Changes Click the Track Changes button on the Ribbon to display the Track Changes menu Click Accept/Reject Changes on the Track Changes menu If necessary, when Excel displays the Select Changes to Accept or Reject dialog box, click all check boxes to clear them, indicating that all changes in the change history file should be reviewed Click the OK button to display the first tracked change Click the Accept button As Excel displays each change in the Accept or Reject Changes dialog box, click the Accept button. Right-click cell A18 and then click Delete Comment on the shortcut menu Right-click cell E13 and then click Delete Comment on the shortcut menu © OpenCastLabs Consulting. www.opencast-labs.com
Opening a Workbook and Reviewing Tracked Changes © OpenCastLabs Consulting. www.opencast-labs.com
Saving the Workbook with a New File Name Click the Office Button then click Save As on the Office Button menu When Excel displays the Save As dialog box, type FasToast Ovens Analysis3 in the File name text box Click the Save button in the Save As dialog box to save the workbook with the new file name © OpenCastLabs Consulting. www.opencast-labs.com
Turning Off Track Changes Click the Track Changes button on the Ribbon, and then click Highlight Changes on the Track Changes menu When Excel displays the Highlight Changes dialog box, click Track Changes while editing to clear the check box Click the OK button When Excel displays the Microsoft Office Excel dialog box asking if the workbook should be made exclusive, click the Yes button © OpenCastLabs Consulting. www.opencast-labs.com
Creating a PivotTable Select cell A3 and then click the Insert tab on the Ribbon Click the PivotTable button arrow on the Ribbon to display the PivotTable menu Click PivotTable to display the Create PivotTable dialog box Click the OK button to create the PivotTable on a new worksheet and display the PivotTable Field List pane © OpenCastLabs Consulting. www.opencast-labs.com
Creating a PivotTable © OpenCastLabs Consulting. www.opencast-labs.com
Adding Data to the PivotTable Drag the Shop Type field from the ‘Choose fields to add to report’ list to the Row Labels area to add the Shop Type field to the PivotTable Drag the State field from the ‘Choose fields to add to report’ list below the Shop Type button in the Row Labels area to add the State field to the PivotTable Drag the Revenue per Repair Person 2007 field to the Values area to add the field to column B of the PivotTable Drag the Revenue per Repair Person 2008 field to the Values area to add the field to column C of the PivotTable © OpenCastLabs Consulting. www.opencast-labs.com
Adding Data to the PivotTable © OpenCastLabs Consulting. www.opencast-labs.com
Changing the View of a PivotTable Drag the Shop Type button in the Row Labels area below the State button to group revenue by shop type, rather than by state Click the Sum of Revenue per Repair Person 2007 button arrow in the Values area to display the shortcut menu Click Remove Field on the shortcut menu to remove Sum of Revenue per Repair Person 2007 from the PivotTable Click the Undo button on the Quick Access Toolbar to undo the removal of Sum of Revenue per Repair Person 2007 column from the PivotTable Click the Row Labels AutoFilter button in cell A4 to display the Row Labels AutoFilter menu © OpenCastLabs Consulting. www.opencast-labs.com
Changing the View of a PivotTable When Excel displays the RowLabels AutoFilter menu, click the check boxes for Kansas and North Dakota to clear them Click the OK button to display only the Nebraska and South Dakota data in the PivotTable Click the Undo button on the Quick Access Toolbar to display the data for all states © OpenCastLabs Consulting. www.opencast-labs.com
Changing the View of a PivotTable © OpenCastLabs Consulting. www.opencast-labs.com
Filtering a PivotTable Using a Page Field Drag the State button in the Row Labels area to the Report Filter area in the PivotTable Field List pane to create a new page field in the PivotTable Click the State AutoFilter button in cell B1, click South Dakota on the AutoFilter menu, and then click the OK button to display totals for South Dakota © OpenCastLabs Consulting. www.opencast-labs.com
Filtering a PivotTable Using a Page Field © OpenCastLabs Consulting. www.opencast-labs.com
Formatting a PivotTable Double-click the Sheet1 tab Type PivotTable and then press the ENTER key. Select cell A4, right-click the PivotTable tab, and then point to Tab Color on the shortcut menu. Click Olive Green, Accent 3 (column 7, row 1) in the Theme Color area If necessary, select a cell in the PivotTable and then click the Design tab on the Ribbon © OpenCastLabs Consulting. www.opencast-labs.com
Formatting a PivotTable Click the PivotTable Styles More button to display the PivotTable Styles gallery Point to the Pivot Style Medium 11 PivotTable style in the PivotTable Styles gallery to view a preview of the style in the PivotTable Click the Pivot Style Medium 11 PivotTable style to apply the style to the PivotTable Right-click anywhere in cell B4 to display the shortcut menu Click Number Format on the shortcut menu to display the Format Cells dialog box © OpenCastLabs Consulting. www.opencast-labs.com
Formatting a PivotTable When Excel displays the Format Cells dialog box, if necessary, click Currency in the Category list, type 0 in the Decimal places box, and then click the OK button Right-click anywhere in cell C4 to display the shortcut menu Click Number Format on the shortcut menu to display the Format Cells dialog box When Excel displays the Format Cells dialog box, click Currency in the Category list, type 0 in the Decimal places box, and then click the OK button to format the numeric values in the PivotTable with the Currency style Select cell A9 to deselect the worksheet Click the Save button on the Quick Access toolbar to save the workbook © OpenCastLabs Consulting. www.opencast-labs.com
Formatting a PivotTable © OpenCastLabs Consulting. www.opencast-labs.com
Switching Summary Functions in a PivotTable Select cell B4 and then drag the State button in the Report Filter area above the Shop Type button in the Row Labels area Right-click cell B4 to display the shortcut menu Point to Summarize Data By on the shortcut menu Click Average on the Summarize Data By submenu to change the numbers in column B from sums to averages Right-click cell C4 to display the shortcut menu © OpenCastLabs Consulting. www.opencast-labs.com
Switching Summary Functions in a PivotTable Point to Summarize Data By on the shortcut menu Click Average on the Summarize Data By submenu to change the numbers in column C from sums to averages Click cell A19 to deselect the PivotTable and close the PivotTable Field List © OpenCastLabs Consulting. www.opencast-labs.com
Switching Summary Functions in a PivotTable © OpenCastLabs Consulting. www.opencast-labs.com
Creating a PivotChart, Changing the PivotChart Type, and Formatting the Chart Select cell A4 Click the Options tab on the Ribbon and then click the PivotChart button on the Ribbon to display the Insert Chart dialog box Click Clustered Cylinder (column 1, row 2) in the ‘Column chart type’ gallery Click the OK button to add the chart to the PivotTable worksheet With the chart selected, click the Move Chart button on the Ribbon to display the Move Chart dialog box When Excel displaysthe Move chart dialog box, click New sheet to select it and then type PivotChart in the New sheet text box © OpenCastLabs Consulting. www.opencast-labs.com
Creating a PivotChart, Changing the PivotChart Type, and Formatting the Chart Click the OK button Right-click the PivotChart tab and then point to Tab Color on the shortcut menu Click Purple, Accent 4 (column 8, row1) to change the color of the PivotChart sheet tab Click the Layout tab on the Ribbon and then click the Chart Title button on the Ribbon to display the Chart Title menu Point to Above Chart on the Chart Title menu Click Above Chart on the Chart Title menu When the title is placed above the chart, select the title text. Type FasToast Ovens Analysis and then click anywhere on the chart to add the title to the chart © OpenCastLabs Consulting. www.opencast-labs.com
Creating a PivotChart, Changing the PivotChart Type, and Formatting the Chart © OpenCastLabs Consulting. www.opencast-labs.com
Changing the View of a PivotChart Drag the Shop Type button in the Row Labels above the State button to group the data by state within shop type Click the PivotTable sheet tab © OpenCastLabs Consulting. www.opencast-labs.com
Changing the View of a PivotC hart © OpenCastLabs Consulting. www.opencast-labs.com
Closing the Workbook Click the workbook Close button When Excel displays the Microsoft Office Excel dialog box, click the Yes button © OpenCastLabs Consulting. www.opencast-labs.com
Comparing Workbooks Open the file, FasToast Ovens Travel Expenses, from the Data Files for Students Open the file, FasToast Ovens Travel Expenses Maura, from the Data Files for Students. Click the View tab on the Ribbon Click the View Side by Side button on the Ribbon to display the workbooks side by side. Depending on how previous Excel windows were arranged on your computer, the workbooks may appear next to each other left-to-right Use the scroll bar in the top window to scroll the FasToast Ovens Travel Expenses Maura worksheet © OpenCastLabs Consulting. www.opencast-labs.com
Comparing Workbooks Click the View Side by Side button on the Ribbon again Click the workbook Close Window button to close the FasToast Ovens Travel Expenses Maura workbook If Excel displays the Microsoft Office Excel dialog box, click the No button If necessary, click the Maximize button in the FasToast Ovens Travel Expenses window © OpenCastLabs Consulting. www.opencast-labs.com
Comparing Workbooks © OpenCastLabs Consulting. www.opencast-labs.com
Merging Workbooks Click the Customize Quick Access Toolbar button arrow next to the Quick Access Toolbar and then click More Commands on the Customize Quick Access Toolbar menu When the Excel Options dialog box appears, select All Commands in the ‘Choose commands from’ list  Scroll to the Compare and Merge Workbooks command in the list on the left and then select it Click the Add button to add the Compare and Merge Workbooks button to the list on the right side of the dialog box  Click the OK button to add the Compare and Merge Workbooks button to the Quick Access Toolbar © OpenCastLabs Consulting. www.opencast-labs.com
Merging Workbooks Click the Compare and Merge Workbooks button on the Quick Access Toolbar to display the Select Files to Merge Into Current Workbook dialog box Select UDISK 2.0 (E:) in the Address bar Click FasToast Ovens Travel Expenses Stanley, hold down the SHIFT key, and then click FasToast Ovens Travel Expenses Maura to select both files Click the OK button to merge the workbooks © OpenCastLabs Consulting. www.opencast-labs.com
Merging Workbooks © OpenCastLabs Consulting. www.opencast-labs.com
Turning Off Workbook Sharing and Saving the Workbook Click the Review tab on the Ribbon and then click the Share Workbook button on the Ribbon When Excel displays the Share Workbook dialog box, click ‘Allow changes by more than one user at the same time’ to clear the check box Click the OK button If Excel displays the Microsoft Office Excel dialog box, click the Yes button Click the Save button on the Quick Access Toolbar © OpenCastLabs Consulting. www.opencast-labs.com
Adding a Trendline to a Chart Select the chart by clicking the shaded area within the chart Click the Design tab on the Ribbon Click the Change Chart Type button on the Ribbon to display the Change Chart Type dialog box Click the Line with Markers chart type in the Change Chart Type dialog box © OpenCastLabs Consulting. www.opencast-labs.com
Adding a Trendline to a Chart Click the OK button to change the Travel Expenses chart to a line with markers chart With the chart selected, click the Layout tab on the Ribbon Click the Trendline button on the Ribbon to display the Trendline menu Click Linear Forecast Trendline to add a trendline to the chart with a 2-period forecast © OpenCastLabs Consulting. www.opencast-labs.com
Adding a Trendline to a Chart © OpenCastLabs Consulting. www.opencast-labs.com
Saving a Custom View of a Workbook Resize the FasToast Ovens Travel Expenses workbook window as shown in Figure 9–91 Click the View tab on the Ribbon Click the Custom Views button on the Ribbon to display the Custom Views dialog box Click the Add button to display the Add View dialog box Type Expenses in the Name text box © OpenCastLabs Consulting. www.opencast-labs.com
Saving a Custom View of a Workbook Click the OK button Click the Maximize button on the FasToast Ovens Travel Expenses workbook title bar Click the Custom Views button on the Ribbon to display the Custom Views dialog box Click Expenses in the Views list and then click the Show button to resize the workbook to the size saved in the Expenses view © OpenCastLabs Consulting. www.opencast-labs.com
Saving a Custom View of a Workbook © OpenCastLabs Consulting. www.opencast-labs.com
Formatting a Worksheet Background C  lick the Maximize button on the FasToast Ovens Travel Expenses workbook title bar C   lick the Page Layout tab on the Ribbon C  lick the Background button on the Ribbon to display the Sheet Background dialog box If necessary, select UDISK 2.0 (E:) in the Address bar  Click the file name, FasToast Travel © OpenCastLabs Consulting. www.opencast-labs.com
Formatting a Worksheet Background C   lick the Background button on the Ribbon to display the Sheet Background dialog box If necessary, select UDISK 2.0 (E:) in the Address bar C  lick the file name, FasToast Travel © OpenCastLabs Consulting. www.opencast-labs.com
Formatting a Worksheet Background © OpenCastLabs Consulting. www.opencast-labs.com
Quitting Excel Remove the Compare and Merge Workbooks button from the Quick Access Toolbar  Click the Close button on the right side of the title bar If Excel displays the Microsoft Office Excel dialog box, click the No button © OpenCastLabs Consulting. www.opencast-labs.com
Summary Import data from a text file, an Access database, a Web page, and a Word Document Transpose data while pasting it C  onvert text to columns Replicate formulas Explain sharing and collaboration techniques Insert, edit, and delete a comment © OpenCastLabs Consulting. www.opencast-labs.com
Summary Track changes and share a workbook Accept and reject tracked changes made to a workbook Analyze worksheet data using a PivotTable and a PivotChart Compare and merge shared workbooks Analyze worksheet data using a trendline Save a custom view of a worksheet and format a worksheet background © OpenCastLabs Consulting. www.opencast-labs.com
Excel Chapter 9 Complete

More Related Content

What's hot

Linking chart from excel with power point
Linking chart from excel with power pointLinking chart from excel with power point
Linking chart from excel with power pointSAMUEL BARNABAS IFITUMI
 
Access lesson 04 Creating and Modifying Forms
Access lesson 04 Creating and Modifying FormsAccess lesson 04 Creating and Modifying Forms
Access lesson 04 Creating and Modifying FormsAram SE
 
Gl13 m6-c1-presentation
Gl13 m6-c1-presentationGl13 m6-c1-presentation
Gl13 m6-c1-presentationTracie King
 
Pivot Table & Chart_Parakramesh Jaroli_Pacific University
Pivot Table & Chart_Parakramesh Jaroli_Pacific UniversityPivot Table & Chart_Parakramesh Jaroli_Pacific University
Pivot Table & Chart_Parakramesh Jaroli_Pacific UniversityParakramesh Jaroli
 
Exp2003 exl ppt_01
Exp2003 exl ppt_01Exp2003 exl ppt_01
Exp2003 exl ppt_01lonetree
 
Pivot Tables and Beyond Data Analysis in Excel 2013 - Course Technology Compu...
Pivot Tables and Beyond Data Analysis in Excel 2013 - Course Technology Compu...Pivot Tables and Beyond Data Analysis in Excel 2013 - Course Technology Compu...
Pivot Tables and Beyond Data Analysis in Excel 2013 - Course Technology Compu...Cengage Learning
 
Access lesson 03 Creating Queries
Access lesson 03 Creating QueriesAccess lesson 03 Creating Queries
Access lesson 03 Creating QueriesAram SE
 
Basic Access Notes
Basic Access NotesBasic Access Notes
Basic Access NotesPyi Soe
 
Access lesson 02 Creating a Database
Access lesson 02 Creating a DatabaseAccess lesson 02 Creating a Database
Access lesson 02 Creating a DatabaseAram SE
 
Common productivity tools: Advanced Word Processing Skills, Advanced Spreadsh...
Common productivity tools: Advanced Word Processing Skills, Advanced Spreadsh...Common productivity tools: Advanced Word Processing Skills, Advanced Spreadsh...
Common productivity tools: Advanced Word Processing Skills, Advanced Spreadsh...Edgar Dumalaog Jr.
 
Getting started with_microsoft_excel
Getting started with_microsoft_excelGetting started with_microsoft_excel
Getting started with_microsoft_excelPratiksha Mhatre
 
Intro to Excel Basics: Part I
Intro to Excel Basics: Part IIntro to Excel Basics: Part I
Intro to Excel Basics: Part ISi Krishan
 
Excel PowerPoint
Excel PowerPointExcel PowerPoint
Excel PowerPointnhumar
 

What's hot (20)

MS Access 2010 tutorial 4
MS Access 2010 tutorial 4MS Access 2010 tutorial 4
MS Access 2010 tutorial 4
 
Dynamic Chart Switcher
Dynamic Chart SwitcherDynamic Chart Switcher
Dynamic Chart Switcher
 
Excel chapter-6
Excel chapter-6Excel chapter-6
Excel chapter-6
 
Linking chart from excel with power point
Linking chart from excel with power pointLinking chart from excel with power point
Linking chart from excel with power point
 
Access lesson 04 Creating and Modifying Forms
Access lesson 04 Creating and Modifying FormsAccess lesson 04 Creating and Modifying Forms
Access lesson 04 Creating and Modifying Forms
 
Gl13 m6-c1-presentation
Gl13 m6-c1-presentationGl13 m6-c1-presentation
Gl13 m6-c1-presentation
 
Pivot Table & Chart_Parakramesh Jaroli_Pacific University
Pivot Table & Chart_Parakramesh Jaroli_Pacific UniversityPivot Table & Chart_Parakramesh Jaroli_Pacific University
Pivot Table & Chart_Parakramesh Jaroli_Pacific University
 
MS Access 2010 tutorial 5
MS Access 2010 tutorial 5MS Access 2010 tutorial 5
MS Access 2010 tutorial 5
 
Exp2003 exl ppt_01
Exp2003 exl ppt_01Exp2003 exl ppt_01
Exp2003 exl ppt_01
 
Pivot Tables and Beyond Data Analysis in Excel 2013 - Course Technology Compu...
Pivot Tables and Beyond Data Analysis in Excel 2013 - Course Technology Compu...Pivot Tables and Beyond Data Analysis in Excel 2013 - Course Technology Compu...
Pivot Tables and Beyond Data Analysis in Excel 2013 - Course Technology Compu...
 
Excel 2007 Get Started With Pivot Table Reports
Excel 2007  Get Started With  Pivot Table ReportsExcel 2007  Get Started With  Pivot Table Reports
Excel 2007 Get Started With Pivot Table Reports
 
Access lesson 03 Creating Queries
Access lesson 03 Creating QueriesAccess lesson 03 Creating Queries
Access lesson 03 Creating Queries
 
Access 2007
Access 2007Access 2007
Access 2007
 
Basic Access Notes
Basic Access NotesBasic Access Notes
Basic Access Notes
 
Access lesson 02 Creating a Database
Access lesson 02 Creating a DatabaseAccess lesson 02 Creating a Database
Access lesson 02 Creating a Database
 
Common productivity tools: Advanced Word Processing Skills, Advanced Spreadsh...
Common productivity tools: Advanced Word Processing Skills, Advanced Spreadsh...Common productivity tools: Advanced Word Processing Skills, Advanced Spreadsh...
Common productivity tools: Advanced Word Processing Skills, Advanced Spreadsh...
 
Getting started with_microsoft_excel
Getting started with_microsoft_excelGetting started with_microsoft_excel
Getting started with_microsoft_excel
 
Intro to Excel Basics: Part I
Intro to Excel Basics: Part IIntro to Excel Basics: Part I
Intro to Excel Basics: Part I
 
Excel chapter-4
Excel chapter-4Excel chapter-4
Excel chapter-4
 
Excel PowerPoint
Excel PowerPointExcel PowerPoint
Excel PowerPoint
 

Viewers also liked

Ecognition object base image classifications bangladesh
Ecognition object base image classifications bangladeshEcognition object base image classifications bangladesh
Ecognition object base image classifications bangladeshCresencio Turpo
 
Html interview-questions-and-answers
Html interview-questions-and-answersHtml interview-questions-and-answers
Html interview-questions-and-answersMohitKumar1985
 
Overview of Visual Studio Team System 2010
Overview of Visual Studio Team System 2010Overview of Visual Studio Team System 2010
Overview of Visual Studio Team System 2010joycsc
 
Image classification and land cover mapping
Image classification and land cover mappingImage classification and land cover mapping
Image classification and land cover mappingKabir Uddin
 
A Lap Around Visual Studio 2010
A Lap Around Visual Studio 2010A Lap Around Visual Studio 2010
A Lap Around Visual Studio 2010Abram John Limpin
 
Programming languages
Programming languagesProgramming languages
Programming languagesAsmasum
 
Lect 1. introduction to programming languages
Lect 1. introduction to programming languagesLect 1. introduction to programming languages
Lect 1. introduction to programming languagesVarun Garg
 
Multiple choice questions with answers
Multiple choice questions with answersMultiple choice questions with answers
Multiple choice questions with answersClassic Tech
 

Viewers also liked (11)

Ecognition object base image classifications bangladesh
Ecognition object base image classifications bangladeshEcognition object base image classifications bangladesh
Ecognition object base image classifications bangladesh
 
Html interview-questions-and-answers
Html interview-questions-and-answersHtml interview-questions-and-answers
Html interview-questions-and-answers
 
Overview of Visual Studio Team System 2010
Overview of Visual Studio Team System 2010Overview of Visual Studio Team System 2010
Overview of Visual Studio Team System 2010
 
Excel chapter-7
Excel chapter-7Excel chapter-7
Excel chapter-7
 
Javascript Question
Javascript QuestionJavascript Question
Javascript Question
 
Image classification and land cover mapping
Image classification and land cover mappingImage classification and land cover mapping
Image classification and land cover mapping
 
A Lap Around Visual Studio 2010
A Lap Around Visual Studio 2010A Lap Around Visual Studio 2010
A Lap Around Visual Studio 2010
 
Programming languages
Programming languagesProgramming languages
Programming languages
 
Lect 1. introduction to programming languages
Lect 1. introduction to programming languagesLect 1. introduction to programming languages
Lect 1. introduction to programming languages
 
Multiple choice questions with answers
Multiple choice questions with answersMultiple choice questions with answers
Multiple choice questions with answers
 
Bit%20 ch02
Bit%20 ch02Bit%20 ch02
Bit%20 ch02
 

Similar to Excel chapter-9

Eller Software Services has received contract revenue informatio.docx
Eller Software Services has received contract revenue informatio.docxEller Software Services has received contract revenue informatio.docx
Eller Software Services has received contract revenue informatio.docxbudabrooks46239
 
Excel Project 1 – MS Excel (Summer 2018) Use the project descripti.docx
Excel Project 1 – MS Excel (Summer 2018) Use the project descripti.docxExcel Project 1 – MS Excel (Summer 2018) Use the project descripti.docx
Excel Project 1 – MS Excel (Summer 2018) Use the project descripti.docxelbanglis
 
Excel Project 1 – MS Excel (Summer 2018) Use the project descripti.docx
Excel Project 1 – MS Excel (Summer 2018) Use the project descripti.docxExcel Project 1 – MS Excel (Summer 2018) Use the project descripti.docx
Excel Project 1 – MS Excel (Summer 2018) Use the project descripti.docxcravennichole326
 
Productivity programs excel assignment 1
Productivity programs excel assignment 1Productivity programs excel assignment 1
Productivity programs excel assignment 1Beth Ann Cueni
 
Excel ppt
Excel pptExcel ppt
Excel pptnhumar
 
Microsoft Office Excel
Microsoft Office ExcelMicrosoft Office Excel
Microsoft Office ExcelvirtualMaryam
 
Tableau online training
Tableau online trainingTableau online training
Tableau online trainingsuresh
 
CREATING A DATASET FROM EXCEL IN POWER BI REPORT BUILDER
CREATING A DATASET FROM EXCEL IN POWER BI REPORT BUILDERCREATING A DATASET FROM EXCEL IN POWER BI REPORT BUILDER
CREATING A DATASET FROM EXCEL IN POWER BI REPORT BUILDERSagarDuttPhuloria
 
Tableau online training || Tableau Server
Tableau online training || Tableau ServerTableau online training || Tableau Server
Tableau online training || Tableau ServerUnited Trainings
 
Tableau online training || Tableau Server
Tableau online training || Tableau ServerTableau online training || Tableau Server
Tableau online training || Tableau ServerUnited Trainings
 
Excel Project 2 – MS Excel Summer 2018 Use the project.docx
Excel Project 2 – MS Excel Summer 2018 Use the project.docxExcel Project 2 – MS Excel Summer 2018 Use the project.docx
Excel Project 2 – MS Excel Summer 2018 Use the project.docxelbanglis
 
Chapter 29Foundations of Family CareFamily DefinedT.docx
Chapter 29Foundations of Family CareFamily DefinedT.docxChapter 29Foundations of Family CareFamily DefinedT.docx
Chapter 29Foundations of Family CareFamily DefinedT.docxcravennichole326
 
Excel 2010
Excel 2010Excel 2010
Excel 2010nhumar
 
Gl2010 m9 ingrt-presentation
Gl2010 m9 ingrt-presentationGl2010 m9 ingrt-presentation
Gl2010 m9 ingrt-presentationTracie King
 
Excel Project 2 – MS Excel (Summer 2019) Use the pro.docx
Excel Project 2 – MS Excel (Summer 2019)  Use the pro.docxExcel Project 2 – MS Excel (Summer 2019)  Use the pro.docx
Excel Project 2 – MS Excel (Summer 2019) Use the pro.docxAASTHA76
 
Lesson 5 Basic Tutorial Data Analysis Software for Flow Cytometry
Lesson 5 Basic Tutorial Data Analysis Software for Flow CytometryLesson 5 Basic Tutorial Data Analysis Software for Flow Cytometry
Lesson 5 Basic Tutorial Data Analysis Software for Flow CytometryUttam Belbase
 
MS Excel Pivot Table Reports & Charts
MS Excel Pivot Table Reports & ChartsMS Excel Pivot Table Reports & Charts
MS Excel Pivot Table Reports & Chartsdnbakhan
 

Similar to Excel chapter-9 (20)

Eller Software Services has received contract revenue informatio.docx
Eller Software Services has received contract revenue informatio.docxEller Software Services has received contract revenue informatio.docx
Eller Software Services has received contract revenue informatio.docx
 
Template builder for word tutorial
Template builder for word tutorialTemplate builder for word tutorial
Template builder for word tutorial
 
Excel Project 1 – MS Excel (Summer 2018) Use the project descripti.docx
Excel Project 1 – MS Excel (Summer 2018) Use the project descripti.docxExcel Project 1 – MS Excel (Summer 2018) Use the project descripti.docx
Excel Project 1 – MS Excel (Summer 2018) Use the project descripti.docx
 
Excel Project 1 – MS Excel (Summer 2018) Use the project descripti.docx
Excel Project 1 – MS Excel (Summer 2018) Use the project descripti.docxExcel Project 1 – MS Excel (Summer 2018) Use the project descripti.docx
Excel Project 1 – MS Excel (Summer 2018) Use the project descripti.docx
 
Productivity programs excel assignment 1
Productivity programs excel assignment 1Productivity programs excel assignment 1
Productivity programs excel assignment 1
 
Excel ppt
Excel pptExcel ppt
Excel ppt
 
Microsoft Office Excel
Microsoft Office ExcelMicrosoft Office Excel
Microsoft Office Excel
 
Tableau online training
Tableau online trainingTableau online training
Tableau online training
 
CREATING A DATASET FROM EXCEL IN POWER BI REPORT BUILDER
CREATING A DATASET FROM EXCEL IN POWER BI REPORT BUILDERCREATING A DATASET FROM EXCEL IN POWER BI REPORT BUILDER
CREATING A DATASET FROM EXCEL IN POWER BI REPORT BUILDER
 
Tableau online training || Tableau Server
Tableau online training || Tableau ServerTableau online training || Tableau Server
Tableau online training || Tableau Server
 
Tableau online training || Tableau Server
Tableau online training || Tableau ServerTableau online training || Tableau Server
Tableau online training || Tableau Server
 
Excel Project 2 – MS Excel Summer 2018 Use the project.docx
Excel Project 2 – MS Excel Summer 2018 Use the project.docxExcel Project 2 – MS Excel Summer 2018 Use the project.docx
Excel Project 2 – MS Excel Summer 2018 Use the project.docx
 
Chapter 29Foundations of Family CareFamily DefinedT.docx
Chapter 29Foundations of Family CareFamily DefinedT.docxChapter 29Foundations of Family CareFamily DefinedT.docx
Chapter 29Foundations of Family CareFamily DefinedT.docx
 
Excel 2010
Excel 2010Excel 2010
Excel 2010
 
Gl2010 m9 ingrt-presentation
Gl2010 m9 ingrt-presentationGl2010 m9 ingrt-presentation
Gl2010 m9 ingrt-presentation
 
Excel Project 2 – MS Excel (Summer 2019) Use the pro.docx
Excel Project 2 – MS Excel (Summer 2019)  Use the pro.docxExcel Project 2 – MS Excel (Summer 2019)  Use the pro.docx
Excel Project 2 – MS Excel (Summer 2019) Use the pro.docx
 
MS Excel 2013
MS Excel 2013MS Excel 2013
MS Excel 2013
 
Lesson 5 Basic Tutorial Data Analysis Software for Flow Cytometry
Lesson 5 Basic Tutorial Data Analysis Software for Flow CytometryLesson 5 Basic Tutorial Data Analysis Software for Flow Cytometry
Lesson 5 Basic Tutorial Data Analysis Software for Flow Cytometry
 
MS Excel Pivot Table Reports & Charts
MS Excel Pivot Table Reports & ChartsMS Excel Pivot Table Reports & Charts
MS Excel Pivot Table Reports & Charts
 
Unit 010 Spreadsheets
Unit 010 SpreadsheetsUnit 010 Spreadsheets
Unit 010 Spreadsheets
 

More from OpenCastLabs Consulting

More from OpenCastLabs Consulting (6)

People & HR Analytics Course - OpenCastLabs Consulting.
People & HR Analytics Course - OpenCastLabs Consulting.People & HR Analytics Course - OpenCastLabs Consulting.
People & HR Analytics Course - OpenCastLabs Consulting.
 
Advanced excel training nairobi 18th & 19th
Advanced excel training   nairobi 18th & 19thAdvanced excel training   nairobi 18th & 19th
Advanced excel training nairobi 18th & 19th
 
OpenCastLabs Excel chapter-2
OpenCastLabs Excel chapter-2OpenCastLabs Excel chapter-2
OpenCastLabs Excel chapter-2
 
OpenCastLabs Excel chapter-1
OpenCastLabs Excel chapter-1OpenCastLabs Excel chapter-1
OpenCastLabs Excel chapter-1
 
Excel chapter-8
Excel chapter-8Excel chapter-8
Excel chapter-8
 
Customer Satisfaction Survey
Customer Satisfaction SurveyCustomer Satisfaction Survey
Customer Satisfaction Survey
 

Recently uploaded

Pigging Solutions Piggable Sweeping Elbows
Pigging Solutions Piggable Sweeping ElbowsPigging Solutions Piggable Sweeping Elbows
Pigging Solutions Piggable Sweeping ElbowsPigging Solutions
 
Kotlin Multiplatform & Compose Multiplatform - Starter kit for pragmatics
Kotlin Multiplatform & Compose Multiplatform - Starter kit for pragmaticsKotlin Multiplatform & Compose Multiplatform - Starter kit for pragmatics
Kotlin Multiplatform & Compose Multiplatform - Starter kit for pragmaticscarlostorres15106
 
SQL Database Design For Developers at php[tek] 2024
SQL Database Design For Developers at php[tek] 2024SQL Database Design For Developers at php[tek] 2024
SQL Database Design For Developers at php[tek] 2024Scott Keck-Warren
 
Unblocking The Main Thread Solving ANRs and Frozen Frames
Unblocking The Main Thread Solving ANRs and Frozen FramesUnblocking The Main Thread Solving ANRs and Frozen Frames
Unblocking The Main Thread Solving ANRs and Frozen FramesSinan KOZAK
 
Build your next Gen AI Breakthrough - April 2024
Build your next Gen AI Breakthrough - April 2024Build your next Gen AI Breakthrough - April 2024
Build your next Gen AI Breakthrough - April 2024Neo4j
 
CloudStudio User manual (basic edition):
CloudStudio User manual (basic edition):CloudStudio User manual (basic edition):
CloudStudio User manual (basic edition):comworks
 
Unleash Your Potential - Namagunga Girls Coding Club
Unleash Your Potential - Namagunga Girls Coding ClubUnleash Your Potential - Namagunga Girls Coding Club
Unleash Your Potential - Namagunga Girls Coding ClubKalema Edgar
 
Install Stable Diffusion in windows machine
Install Stable Diffusion in windows machineInstall Stable Diffusion in windows machine
Install Stable Diffusion in windows machinePadma Pradeep
 
APIForce Zurich 5 April Automation LPDG
APIForce Zurich 5 April  Automation LPDGAPIForce Zurich 5 April  Automation LPDG
APIForce Zurich 5 April Automation LPDGMarianaLemus7
 
"Federated learning: out of reach no matter how close",Oleksandr Lapshyn
"Federated learning: out of reach no matter how close",Oleksandr Lapshyn"Federated learning: out of reach no matter how close",Oleksandr Lapshyn
"Federated learning: out of reach no matter how close",Oleksandr LapshynFwdays
 
Human Factors of XR: Using Human Factors to Design XR Systems
Human Factors of XR: Using Human Factors to Design XR SystemsHuman Factors of XR: Using Human Factors to Design XR Systems
Human Factors of XR: Using Human Factors to Design XR SystemsMark Billinghurst
 
Designing IA for AI - Information Architecture Conference 2024
Designing IA for AI - Information Architecture Conference 2024Designing IA for AI - Information Architecture Conference 2024
Designing IA for AI - Information Architecture Conference 2024Enterprise Knowledge
 
Bluetooth Controlled Car with Arduino.pdf
Bluetooth Controlled Car with Arduino.pdfBluetooth Controlled Car with Arduino.pdf
Bluetooth Controlled Car with Arduino.pdfngoud9212
 
Dev Dives: Streamline document processing with UiPath Studio Web
Dev Dives: Streamline document processing with UiPath Studio WebDev Dives: Streamline document processing with UiPath Studio Web
Dev Dives: Streamline document processing with UiPath Studio WebUiPathCommunity
 
SIP trunking in Janus @ Kamailio World 2024
SIP trunking in Janus @ Kamailio World 2024SIP trunking in Janus @ Kamailio World 2024
SIP trunking in Janus @ Kamailio World 2024Lorenzo Miniero
 
Artificial intelligence in the post-deep learning era
Artificial intelligence in the post-deep learning eraArtificial intelligence in the post-deep learning era
Artificial intelligence in the post-deep learning eraDeakin University
 
Benefits Of Flutter Compared To Other Frameworks
Benefits Of Flutter Compared To Other FrameworksBenefits Of Flutter Compared To Other Frameworks
Benefits Of Flutter Compared To Other FrameworksSoftradix Technologies
 
Bun (KitWorks Team Study 노별마루 발표 2024.4.22)
Bun (KitWorks Team Study 노별마루 발표 2024.4.22)Bun (KitWorks Team Study 노별마루 발표 2024.4.22)
Bun (KitWorks Team Study 노별마루 발표 2024.4.22)Wonjun Hwang
 

Recently uploaded (20)

Pigging Solutions Piggable Sweeping Elbows
Pigging Solutions Piggable Sweeping ElbowsPigging Solutions Piggable Sweeping Elbows
Pigging Solutions Piggable Sweeping Elbows
 
Kotlin Multiplatform & Compose Multiplatform - Starter kit for pragmatics
Kotlin Multiplatform & Compose Multiplatform - Starter kit for pragmaticsKotlin Multiplatform & Compose Multiplatform - Starter kit for pragmatics
Kotlin Multiplatform & Compose Multiplatform - Starter kit for pragmatics
 
Hot Sexy call girls in Panjabi Bagh 🔝 9953056974 🔝 Delhi escort Service
Hot Sexy call girls in Panjabi Bagh 🔝 9953056974 🔝 Delhi escort ServiceHot Sexy call girls in Panjabi Bagh 🔝 9953056974 🔝 Delhi escort Service
Hot Sexy call girls in Panjabi Bagh 🔝 9953056974 🔝 Delhi escort Service
 
SQL Database Design For Developers at php[tek] 2024
SQL Database Design For Developers at php[tek] 2024SQL Database Design For Developers at php[tek] 2024
SQL Database Design For Developers at php[tek] 2024
 
Unblocking The Main Thread Solving ANRs and Frozen Frames
Unblocking The Main Thread Solving ANRs and Frozen FramesUnblocking The Main Thread Solving ANRs and Frozen Frames
Unblocking The Main Thread Solving ANRs and Frozen Frames
 
Build your next Gen AI Breakthrough - April 2024
Build your next Gen AI Breakthrough - April 2024Build your next Gen AI Breakthrough - April 2024
Build your next Gen AI Breakthrough - April 2024
 
CloudStudio User manual (basic edition):
CloudStudio User manual (basic edition):CloudStudio User manual (basic edition):
CloudStudio User manual (basic edition):
 
Unleash Your Potential - Namagunga Girls Coding Club
Unleash Your Potential - Namagunga Girls Coding ClubUnleash Your Potential - Namagunga Girls Coding Club
Unleash Your Potential - Namagunga Girls Coding Club
 
Install Stable Diffusion in windows machine
Install Stable Diffusion in windows machineInstall Stable Diffusion in windows machine
Install Stable Diffusion in windows machine
 
APIForce Zurich 5 April Automation LPDG
APIForce Zurich 5 April  Automation LPDGAPIForce Zurich 5 April  Automation LPDG
APIForce Zurich 5 April Automation LPDG
 
"Federated learning: out of reach no matter how close",Oleksandr Lapshyn
"Federated learning: out of reach no matter how close",Oleksandr Lapshyn"Federated learning: out of reach no matter how close",Oleksandr Lapshyn
"Federated learning: out of reach no matter how close",Oleksandr Lapshyn
 
Human Factors of XR: Using Human Factors to Design XR Systems
Human Factors of XR: Using Human Factors to Design XR SystemsHuman Factors of XR: Using Human Factors to Design XR Systems
Human Factors of XR: Using Human Factors to Design XR Systems
 
Designing IA for AI - Information Architecture Conference 2024
Designing IA for AI - Information Architecture Conference 2024Designing IA for AI - Information Architecture Conference 2024
Designing IA for AI - Information Architecture Conference 2024
 
Vulnerability_Management_GRC_by Sohang Sengupta.pptx
Vulnerability_Management_GRC_by Sohang Sengupta.pptxVulnerability_Management_GRC_by Sohang Sengupta.pptx
Vulnerability_Management_GRC_by Sohang Sengupta.pptx
 
Bluetooth Controlled Car with Arduino.pdf
Bluetooth Controlled Car with Arduino.pdfBluetooth Controlled Car with Arduino.pdf
Bluetooth Controlled Car with Arduino.pdf
 
Dev Dives: Streamline document processing with UiPath Studio Web
Dev Dives: Streamline document processing with UiPath Studio WebDev Dives: Streamline document processing with UiPath Studio Web
Dev Dives: Streamline document processing with UiPath Studio Web
 
SIP trunking in Janus @ Kamailio World 2024
SIP trunking in Janus @ Kamailio World 2024SIP trunking in Janus @ Kamailio World 2024
SIP trunking in Janus @ Kamailio World 2024
 
Artificial intelligence in the post-deep learning era
Artificial intelligence in the post-deep learning eraArtificial intelligence in the post-deep learning era
Artificial intelligence in the post-deep learning era
 
Benefits Of Flutter Compared To Other Frameworks
Benefits Of Flutter Compared To Other FrameworksBenefits Of Flutter Compared To Other Frameworks
Benefits Of Flutter Compared To Other Frameworks
 
Bun (KitWorks Team Study 노별마루 발표 2024.4.22)
Bun (KitWorks Team Study 노별마루 발표 2024.4.22)Bun (KitWorks Team Study 노별마루 발표 2024.4.22)
Bun (KitWorks Team Study 노별마루 발표 2024.4.22)
 

Excel chapter-9

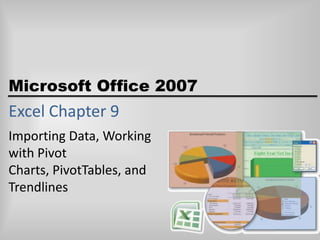
  • 1. Excel Chapter 9 Importing Data, Working with Pivot Charts, PivotTables, and Trendlines
  • 2. Objectives Import data from a text file, an Access database, a Web page, and a Word Document Transpose data while pasting it Convert text to columns Replicate formulas Explain sharing and collaboration techniques Insert, edit, and delete a comment © OpenCastLabs Consulting. www.opencast-labs.com
  • 3. Objectives Track changes and share a workbook Accept and reject tracked changes made to a workbook Analyze worksheet data using a PivotTable and a PivotChart Compare and merge shared workbooks Analyze worksheet data using a trendline Save a custom view of a worksheet and format a worksheet background © OpenCastLabs Consulting. www.opencast-labs.com
  • 4. Planning Ahead Analyze the existing workbook and the formats of the data to be imported Evaluate the various options Excel provides for collaboration Visualize your workbook in various PivotTable and PivotChart layouts Identify the trend or trends to analyze with a trendline Gather workbooks to be merged and then assess any differences in the workbooks that are in disagreement © OpenCastLabs Consulting. www.opencast-labs.com
  • 5. Starting Excel and Opening a Workbook Start Excel Open the file FasToast Ovens Analysis from the Data Files for Students and then save the workbook using the file name, FasToast Ovens Analysis1. h If the Excel window is not maximized, double-click its title bar to maximize it If the worksheet window in Excel is not maximized, click the Maximize button next to theClose button on its title bar to maximize the worksheet within Excel © OpenCastLabs Consulting. www.opencast-labs.com
  • 6. Starting Excel and Opening a Workbook © OpenCastLabs Consulting. www.opencast-labs.com
  • 7. Importing data from a Text File into a Worksheet With the Repair Revenue Analysis worksheet active, if necessary, select cell A3 Click the Data tab on the Ribbon Click the From Text button on the Ribbon to display the Import Text File dialog box. If you have more than one Excel add-in installed, such as Solver, the From Text button may appear on a submenu that is displayed when you click the Get External Data button. The Get External Data group on the Ribbon may be collapsed to a single Get External Data button When Excel displays the Import Text File dialog box, select UDISK 2.0 (E:) in the Address bar to display the text files on drive E © OpenCastLabs Consulting. www.opencast-labs.com
  • 8. Importing data from a Text File into a Worksheet Double-click the file name, FasTo Ovens North Dakota Revenue 2008, to display the Text Import Wizard - Step 1 of 3 dialog box Click the Next button to display the Text Import Wizard - Step 2 of 3 dialog box When Excel displays the Text ImportWizard - Step 2 of 3 dialog box, click Comma in the Delimiters area to display the data fields correctly in the Data preview area Click Tab in the Delimiters area to clear the check box Click the Next button to display the TextImport Wizard -Step 3 of 3 dialog box © OpenCastLabs Consulting. www.opencast-labs.com
  • 9. Importing data from a Text File into a Worksheet Click the Finish button to display the Import Data dialog box Click the Properties button When Excel displays the External DataRange Properties dialog box, click ‘Adjust column width‘ in the ‘Data formatting and layout’ area to clear the check box Click the OK button When Excel displays the Import Data dialog box, click the OK button to import the data from the text file into the worksheet beginning at cell A3 © OpenCastLabs Consulting. www.opencast-labs.com
  • 10. Importing data from a Text File into a Worksheet © OpenCastLabs Consulting. www.opencast-labs.com
  • 11. Importing Data from an Access Table into a Worksheet Select cell A8 With the Data tab active, click the From Access button on the Ribbon to display the Select Data Source dialog box When Excel displays the Select Data Source dialog box, select UDISK 2.0 (E:) in the Address bar to display the Access database files on drive E Double-click the file name, FasToast Ovens South Dakota Revenue 2008 in the Name list to display the Import Data dialog box Click the OK button to import the data in the database to a table in the range A8:G13 © OpenCastLabs Consulting. www.opencast-labs.com
  • 12. Importing Data from an Access Table into a Worksheet Right-click cell A8 and then point to the Table on the shortcut menu Click Convert to Range When Excel displays the Microsoft Office Excel dialog box, click the OK button to convert the table to a range Right-click the row heading for row 8 to display the shortcut menu Click Delete on the shortcut menu to delete row 8 © OpenCastLabs Consulting. www.opencast-labs.com
  • 13. Importing Data from an Access Table into a Worksheet Drag through the column headings of column A through G in the column heading area to select the columns Double-click the column separator in the column headings area between columns A and B to change the widths of each column to best fit If necessary, click the Home tab on the Ribbon and then select the range A7:G7 Click the Format Painter button on the Ribbon and then drag though the range A8:G12 to copy the formats of the selected range to the range A8:G12 Select cell A13 © OpenCastLabs Consulting. www.opencast-labs.com
  • 14. Importing Data from an Access Table into a Worksheet © OpenCastLabs Consulting. www.opencast-labs.com
  • 15. Importing Data from a Web Page into a Worksheet With cell A13 selected, click the Data tab on the Ribbon Click the From Web button on the Ribbon to display the New Web Query dialog box When Excel displays the New Web Query dialog box, type e:asToastOvensNebr askaRevenue2008.htm in the Address bar and then click the Go button to display the Web page in the preview area Click the ‘Click to select this table’ arrow to select the HTML table containing the Nebraska repair revenue report Click the Import button to display the Import Data dialog box and display a marquee around cell A13 © OpenCastLabs Consulting. www.opencast-labs.com
  • 16. Importing Data from a Web Page into a Worksheet Click the Properties button to display the External Data Range Properties dialog box When Excel displays the External Data Range Properties dialog box, click ‘Adjust column width‘ in the ‘Data formatting and layout’ area to clear the check box Click the OK button When Excel displays the Import Data dialog box, click the OK button to import the data from the Web page into the worksheet beginning at cell A13 Drag through the row 13 and 14 row headings and then right-click to display the shortcut menu Click Delete on the shortcut menu to delete rows 13 and 14, which contained the column headings from the Web Page © OpenCastLabs Consulting. www.opencast-labs.com
  • 17. Importing Data from a Web Page into a Worksheet © OpenCastLabs Consulting. www.opencast-labs.com
  • 18. Copying and Transposing Data from a Word Document to a Worksheet Click the Home tab on the Ribbon and then select cell A24 Start Word and then open the Word document named, FasToast Ovens Kansas Revenue 2008, from the Data Files for Students In Word, if necessary, click the Home tab on the Ribbon Drag through all of the cells in the second through last columns in the table in the Word document and then click the Copy button on the Ribbon to copy the contents of the table to the Office Clipboard Quit Word and, if necessary, click the FasToast Ovens Analysis1 workbook taskbar button to make it active Click the Paste button arrow on the Ribbon to display the Paste menu © OpenCastLabs Consulting. www.opencast-labs.com
  • 19. Copying and Transposing Data from a Word Document to a Worksheet Click Paste Special on the Paste menu to display the Paste Special dialog box When the Paste Special dialog box appears, click Text in the As list Click the OK button in the Paste Special dialog box to paste the contents of the Office Clipboard to the range A24:E29 Select the range A24:E29 and then click the Copy button on the Ribbon Select cell A18 Click the Paste button arrow on the Ribbon and then point to Transpose on the Paste menu Click Transpose on the Paste menu to transpose and paste the copied cells to a range beginning with cell A18 © OpenCastLabs Consulting. www.opencast-labs.com
  • 20. Copying and Transposing Data from a Word Document to a Worksheet © OpenCastLabs Consulting. www.opencast-labs.com
  • 21. Converting Text to Columns If necessary, click the Home tab on the Ribbon Select the range A24:E29 and press the DELETE key to delete the range Select the range B18:F22 and then click the Cut button on the Ribbon to copy the range to the Office Clipboard Select cell C18 and then click the Paste button on the Ribbon Select the range C17:G17 and then click the Format Painter button on the Ribbon Select the range C18:G22 to copy the formats in range C17:G17 down to the corresponding columns of range C18:G22 © OpenCastLabs Consulting. www.opencast-labs.com
  • 22. Converting Text to Columns Select the range A18:A22 and then click the Data tab on the Ribbon Click the Text to Columns button on the Ribbon to display the Convert Text to Columns Wizard - Step 1 of 3 dialog box Click the Next button to display the Convert Text to Columns Wizard - Step 2 of 3 dialog box When Excel displays the Convert Text to Columns Wizard - Step 2 of 3 dialog box, click Comma in the Delimiters area to display the data fields correctly in the Data preview area Click Tab in the Delimiters area to clear the check box Click the Finish button to close the Convert Text to Columns Wizard - Step 2 of 3 dialog box and separate the data in column A to two columns © OpenCastLabs Consulting. www.opencast-labs.com
  • 23. Converting Text to Columns © OpenCastLabs Consulting. www.opencast-labs.com
  • 24. Replicating Formulas Select the range H3:I3 Drag the fill handle down through row 22 to copy the two formulas to the range H4:I22 and display the new values for the Revenue per Repair Person 2007 and Revenue per Repair Person 2008 columns Click the Save button on the Quick Access Toolbar to save the workbook using the file name, FasToast Ovens Analysis1. © OpenCastLabs Consulting. www.opencast-labs.com
  • 25. Replicating Formulas © OpenCastLabs Consulting. www.opencast-labs.com
  • 26. Sharing a Workbook and Collaborate on a Workbook Click the Review tab on the Ribbon Click the Share Workbook button on the Ribbon to display the Share Workbook dialog box When Excel displays the Share Workbook dialog box, click ‘Allow changes by more than one user at the same time’ Click the OK button When Excel displays the Microsoft Office Excel dialog box, click the OK button to place the workbook in share mode © OpenCastLabs Consulting. www.opencast-labs.com
  • 27. Sharing a Workbook and Collaborate on a Workbook If possible, have a classmate open a second copy of the workbook With a second copy of the workbook open, click the Share Workbook button on the Review tab on the Ribbon to display the Share Workbook dialog box, which lists all users who currently have the workbook open Click the OK button Ask the second workbook user to select G13, enter 183,540 as the new value, and then save the workbook Click the Save button on the Quick Access Toolbar to display the Microsoft Office Excel dialog box indicating that the workbook has been updated with changes saved by another user Click the OK button © OpenCastLabs Consulting. www.opencast-labs.com
  • 28. Sharing a Workbook and Collaborate on a Workbook Point to the blue triangle in cell G13 to display the comment indicating the other user’s changes Ask the second user of the workbook to close the workbook Click the Review tab on the Ribbon and then click the Share Workbook button on the Ribbon to display the Share Workbook dialog box When Excel displays the Share Workbook dialog box, click ‘Allow changes by more than one user at the same time’ to clear the check box Click the OK button to stop sharing the workbook If Excel displays the Microsoft Office Excel dialog box, click the Yes button © OpenCastLabs Consulting. www.opencast-labs.com
  • 29. Sharing a Workbook and Collaborate on a Workbook © OpenCastLabs Consulting. www.opencast-labs.com
  • 30. Inserting a Comment Right-click cell E13 to display the shortcut menu Click Insert Comment on the shortcut menu to open a comment box next to the selected cell and display a comment indicator in the cell When Excel displays the comment box, enter the comment Click anywhere outside the comment box to close the comment box and display a red comment indicator in cell E13 Click the Save button on the Quick Access Toolbar © OpenCastLabs Consulting. www.opencast-labs.com
  • 31. Inserting a Comment © OpenCastLabs Consulting. www.opencast-labs.com
  • 32. Turning on Track Changes If necessary, click the Review tab on the Ribbon and then click the Track Changes button on the Ribbon to display the Track Changes menu Click Highlight Changes on the Track Changes menu to display the Highlight Changes dialog box When Excel displays the Highlight Changes dialog box, click ‘Track changes while editing’ If necessary, click all of the check boxes in the ‘Highlight which changes’ area to clear them Click the OK button When Excel displays the Microsoft Office Excel dialog box, click the OK button to save the workbook Close the workbook © OpenCastLabs Consulting. www.opencast-labs.com
  • 33. Turning on Track Changes © OpenCastLabs Consulting. www.opencast-labs.com
  • 34. Opening a Workbook and Reviewing Tracked Changes With Excel active, open the file, FasToast Ovens Analysis2, from the Data Files for Students Click the Review Tab on the Ribbon and then click the Track Changes button on the Ribbon to display the Track Changes menu Click Highlight Changes on the Track Changes menu When Excel displays the Highlight Changes dialog box, click When to clear the check box Click the OK button Click the Show All Comments button on the Ribbon to display all comments Point to the blue triangle in cell G5 to display the comment box with information about the change made to the cell G5 © OpenCastLabs Consulting. www.opencast-labs.com
  • 35. Opening a Workbook and Reviewing Tracked Changes Click the Track Changes button on the Ribbon to display the Track Changes menu Click Accept/Reject Changes on the Track Changes menu If necessary, when Excel displays the Select Changes to Accept or Reject dialog box, click all check boxes to clear them, indicating that all changes in the change history file should be reviewed Click the OK button to display the first tracked change Click the Accept button As Excel displays each change in the Accept or Reject Changes dialog box, click the Accept button. Right-click cell A18 and then click Delete Comment on the shortcut menu Right-click cell E13 and then click Delete Comment on the shortcut menu © OpenCastLabs Consulting. www.opencast-labs.com
  • 36. Opening a Workbook and Reviewing Tracked Changes © OpenCastLabs Consulting. www.opencast-labs.com
  • 37. Saving the Workbook with a New File Name Click the Office Button then click Save As on the Office Button menu When Excel displays the Save As dialog box, type FasToast Ovens Analysis3 in the File name text box Click the Save button in the Save As dialog box to save the workbook with the new file name © OpenCastLabs Consulting. www.opencast-labs.com
  • 38. Turning Off Track Changes Click the Track Changes button on the Ribbon, and then click Highlight Changes on the Track Changes menu When Excel displays the Highlight Changes dialog box, click Track Changes while editing to clear the check box Click the OK button When Excel displays the Microsoft Office Excel dialog box asking if the workbook should be made exclusive, click the Yes button © OpenCastLabs Consulting. www.opencast-labs.com
  • 39. Creating a PivotTable Select cell A3 and then click the Insert tab on the Ribbon Click the PivotTable button arrow on the Ribbon to display the PivotTable menu Click PivotTable to display the Create PivotTable dialog box Click the OK button to create the PivotTable on a new worksheet and display the PivotTable Field List pane © OpenCastLabs Consulting. www.opencast-labs.com
  • 40. Creating a PivotTable © OpenCastLabs Consulting. www.opencast-labs.com
  • 41. Adding Data to the PivotTable Drag the Shop Type field from the ‘Choose fields to add to report’ list to the Row Labels area to add the Shop Type field to the PivotTable Drag the State field from the ‘Choose fields to add to report’ list below the Shop Type button in the Row Labels area to add the State field to the PivotTable Drag the Revenue per Repair Person 2007 field to the Values area to add the field to column B of the PivotTable Drag the Revenue per Repair Person 2008 field to the Values area to add the field to column C of the PivotTable © OpenCastLabs Consulting. www.opencast-labs.com
  • 42. Adding Data to the PivotTable © OpenCastLabs Consulting. www.opencast-labs.com
  • 43. Changing the View of a PivotTable Drag the Shop Type button in the Row Labels area below the State button to group revenue by shop type, rather than by state Click the Sum of Revenue per Repair Person 2007 button arrow in the Values area to display the shortcut menu Click Remove Field on the shortcut menu to remove Sum of Revenue per Repair Person 2007 from the PivotTable Click the Undo button on the Quick Access Toolbar to undo the removal of Sum of Revenue per Repair Person 2007 column from the PivotTable Click the Row Labels AutoFilter button in cell A4 to display the Row Labels AutoFilter menu © OpenCastLabs Consulting. www.opencast-labs.com
  • 44. Changing the View of a PivotTable When Excel displays the RowLabels AutoFilter menu, click the check boxes for Kansas and North Dakota to clear them Click the OK button to display only the Nebraska and South Dakota data in the PivotTable Click the Undo button on the Quick Access Toolbar to display the data for all states © OpenCastLabs Consulting. www.opencast-labs.com
  • 45. Changing the View of a PivotTable © OpenCastLabs Consulting. www.opencast-labs.com
  • 46. Filtering a PivotTable Using a Page Field Drag the State button in the Row Labels area to the Report Filter area in the PivotTable Field List pane to create a new page field in the PivotTable Click the State AutoFilter button in cell B1, click South Dakota on the AutoFilter menu, and then click the OK button to display totals for South Dakota © OpenCastLabs Consulting. www.opencast-labs.com
  • 47. Filtering a PivotTable Using a Page Field © OpenCastLabs Consulting. www.opencast-labs.com
  • 48. Formatting a PivotTable Double-click the Sheet1 tab Type PivotTable and then press the ENTER key. Select cell A4, right-click the PivotTable tab, and then point to Tab Color on the shortcut menu. Click Olive Green, Accent 3 (column 7, row 1) in the Theme Color area If necessary, select a cell in the PivotTable and then click the Design tab on the Ribbon © OpenCastLabs Consulting. www.opencast-labs.com
  • 49. Formatting a PivotTable Click the PivotTable Styles More button to display the PivotTable Styles gallery Point to the Pivot Style Medium 11 PivotTable style in the PivotTable Styles gallery to view a preview of the style in the PivotTable Click the Pivot Style Medium 11 PivotTable style to apply the style to the PivotTable Right-click anywhere in cell B4 to display the shortcut menu Click Number Format on the shortcut menu to display the Format Cells dialog box © OpenCastLabs Consulting. www.opencast-labs.com
  • 50. Formatting a PivotTable When Excel displays the Format Cells dialog box, if necessary, click Currency in the Category list, type 0 in the Decimal places box, and then click the OK button Right-click anywhere in cell C4 to display the shortcut menu Click Number Format on the shortcut menu to display the Format Cells dialog box When Excel displays the Format Cells dialog box, click Currency in the Category list, type 0 in the Decimal places box, and then click the OK button to format the numeric values in the PivotTable with the Currency style Select cell A9 to deselect the worksheet Click the Save button on the Quick Access toolbar to save the workbook © OpenCastLabs Consulting. www.opencast-labs.com
  • 51. Formatting a PivotTable © OpenCastLabs Consulting. www.opencast-labs.com
  • 52. Switching Summary Functions in a PivotTable Select cell B4 and then drag the State button in the Report Filter area above the Shop Type button in the Row Labels area Right-click cell B4 to display the shortcut menu Point to Summarize Data By on the shortcut menu Click Average on the Summarize Data By submenu to change the numbers in column B from sums to averages Right-click cell C4 to display the shortcut menu © OpenCastLabs Consulting. www.opencast-labs.com
  • 53. Switching Summary Functions in a PivotTable Point to Summarize Data By on the shortcut menu Click Average on the Summarize Data By submenu to change the numbers in column C from sums to averages Click cell A19 to deselect the PivotTable and close the PivotTable Field List © OpenCastLabs Consulting. www.opencast-labs.com
  • 54. Switching Summary Functions in a PivotTable © OpenCastLabs Consulting. www.opencast-labs.com
  • 55. Creating a PivotChart, Changing the PivotChart Type, and Formatting the Chart Select cell A4 Click the Options tab on the Ribbon and then click the PivotChart button on the Ribbon to display the Insert Chart dialog box Click Clustered Cylinder (column 1, row 2) in the ‘Column chart type’ gallery Click the OK button to add the chart to the PivotTable worksheet With the chart selected, click the Move Chart button on the Ribbon to display the Move Chart dialog box When Excel displaysthe Move chart dialog box, click New sheet to select it and then type PivotChart in the New sheet text box © OpenCastLabs Consulting. www.opencast-labs.com
  • 56. Creating a PivotChart, Changing the PivotChart Type, and Formatting the Chart Click the OK button Right-click the PivotChart tab and then point to Tab Color on the shortcut menu Click Purple, Accent 4 (column 8, row1) to change the color of the PivotChart sheet tab Click the Layout tab on the Ribbon and then click the Chart Title button on the Ribbon to display the Chart Title menu Point to Above Chart on the Chart Title menu Click Above Chart on the Chart Title menu When the title is placed above the chart, select the title text. Type FasToast Ovens Analysis and then click anywhere on the chart to add the title to the chart © OpenCastLabs Consulting. www.opencast-labs.com
  • 57. Creating a PivotChart, Changing the PivotChart Type, and Formatting the Chart © OpenCastLabs Consulting. www.opencast-labs.com
  • 58. Changing the View of a PivotChart Drag the Shop Type button in the Row Labels above the State button to group the data by state within shop type Click the PivotTable sheet tab © OpenCastLabs Consulting. www.opencast-labs.com
  • 59. Changing the View of a PivotC hart © OpenCastLabs Consulting. www.opencast-labs.com
  • 60. Closing the Workbook Click the workbook Close button When Excel displays the Microsoft Office Excel dialog box, click the Yes button © OpenCastLabs Consulting. www.opencast-labs.com
  • 61. Comparing Workbooks Open the file, FasToast Ovens Travel Expenses, from the Data Files for Students Open the file, FasToast Ovens Travel Expenses Maura, from the Data Files for Students. Click the View tab on the Ribbon Click the View Side by Side button on the Ribbon to display the workbooks side by side. Depending on how previous Excel windows were arranged on your computer, the workbooks may appear next to each other left-to-right Use the scroll bar in the top window to scroll the FasToast Ovens Travel Expenses Maura worksheet © OpenCastLabs Consulting. www.opencast-labs.com
  • 62. Comparing Workbooks Click the View Side by Side button on the Ribbon again Click the workbook Close Window button to close the FasToast Ovens Travel Expenses Maura workbook If Excel displays the Microsoft Office Excel dialog box, click the No button If necessary, click the Maximize button in the FasToast Ovens Travel Expenses window © OpenCastLabs Consulting. www.opencast-labs.com
  • 63. Comparing Workbooks © OpenCastLabs Consulting. www.opencast-labs.com
  • 64. Merging Workbooks Click the Customize Quick Access Toolbar button arrow next to the Quick Access Toolbar and then click More Commands on the Customize Quick Access Toolbar menu When the Excel Options dialog box appears, select All Commands in the ‘Choose commands from’ list Scroll to the Compare and Merge Workbooks command in the list on the left and then select it Click the Add button to add the Compare and Merge Workbooks button to the list on the right side of the dialog box Click the OK button to add the Compare and Merge Workbooks button to the Quick Access Toolbar © OpenCastLabs Consulting. www.opencast-labs.com
  • 65. Merging Workbooks Click the Compare and Merge Workbooks button on the Quick Access Toolbar to display the Select Files to Merge Into Current Workbook dialog box Select UDISK 2.0 (E:) in the Address bar Click FasToast Ovens Travel Expenses Stanley, hold down the SHIFT key, and then click FasToast Ovens Travel Expenses Maura to select both files Click the OK button to merge the workbooks © OpenCastLabs Consulting. www.opencast-labs.com
  • 66. Merging Workbooks © OpenCastLabs Consulting. www.opencast-labs.com
  • 67. Turning Off Workbook Sharing and Saving the Workbook Click the Review tab on the Ribbon and then click the Share Workbook button on the Ribbon When Excel displays the Share Workbook dialog box, click ‘Allow changes by more than one user at the same time’ to clear the check box Click the OK button If Excel displays the Microsoft Office Excel dialog box, click the Yes button Click the Save button on the Quick Access Toolbar © OpenCastLabs Consulting. www.opencast-labs.com
  • 68. Adding a Trendline to a Chart Select the chart by clicking the shaded area within the chart Click the Design tab on the Ribbon Click the Change Chart Type button on the Ribbon to display the Change Chart Type dialog box Click the Line with Markers chart type in the Change Chart Type dialog box © OpenCastLabs Consulting. www.opencast-labs.com
  • 69. Adding a Trendline to a Chart Click the OK button to change the Travel Expenses chart to a line with markers chart With the chart selected, click the Layout tab on the Ribbon Click the Trendline button on the Ribbon to display the Trendline menu Click Linear Forecast Trendline to add a trendline to the chart with a 2-period forecast © OpenCastLabs Consulting. www.opencast-labs.com
  • 70. Adding a Trendline to a Chart © OpenCastLabs Consulting. www.opencast-labs.com
  • 71. Saving a Custom View of a Workbook Resize the FasToast Ovens Travel Expenses workbook window as shown in Figure 9–91 Click the View tab on the Ribbon Click the Custom Views button on the Ribbon to display the Custom Views dialog box Click the Add button to display the Add View dialog box Type Expenses in the Name text box © OpenCastLabs Consulting. www.opencast-labs.com
  • 72. Saving a Custom View of a Workbook Click the OK button Click the Maximize button on the FasToast Ovens Travel Expenses workbook title bar Click the Custom Views button on the Ribbon to display the Custom Views dialog box Click Expenses in the Views list and then click the Show button to resize the workbook to the size saved in the Expenses view © OpenCastLabs Consulting. www.opencast-labs.com
  • 73. Saving a Custom View of a Workbook © OpenCastLabs Consulting. www.opencast-labs.com
  • 74. Formatting a Worksheet Background C lick the Maximize button on the FasToast Ovens Travel Expenses workbook title bar C lick the Page Layout tab on the Ribbon C lick the Background button on the Ribbon to display the Sheet Background dialog box If necessary, select UDISK 2.0 (E:) in the Address bar Click the file name, FasToast Travel © OpenCastLabs Consulting. www.opencast-labs.com
  • 75. Formatting a Worksheet Background C lick the Background button on the Ribbon to display the Sheet Background dialog box If necessary, select UDISK 2.0 (E:) in the Address bar C lick the file name, FasToast Travel © OpenCastLabs Consulting. www.opencast-labs.com
  • 76. Formatting a Worksheet Background © OpenCastLabs Consulting. www.opencast-labs.com
  • 77. Quitting Excel Remove the Compare and Merge Workbooks button from the Quick Access Toolbar Click the Close button on the right side of the title bar If Excel displays the Microsoft Office Excel dialog box, click the No button © OpenCastLabs Consulting. www.opencast-labs.com
  • 78. Summary Import data from a text file, an Access database, a Web page, and a Word Document Transpose data while pasting it C onvert text to columns Replicate formulas Explain sharing and collaboration techniques Insert, edit, and delete a comment © OpenCastLabs Consulting. www.opencast-labs.com
  • 79. Summary Track changes and share a workbook Accept and reject tracked changes made to a workbook Analyze worksheet data using a PivotTable and a PivotChart Compare and merge shared workbooks Analyze worksheet data using a trendline Save a custom view of a worksheet and format a worksheet background © OpenCastLabs Consulting. www.opencast-labs.com
  • 80. Excel Chapter 9 Complete