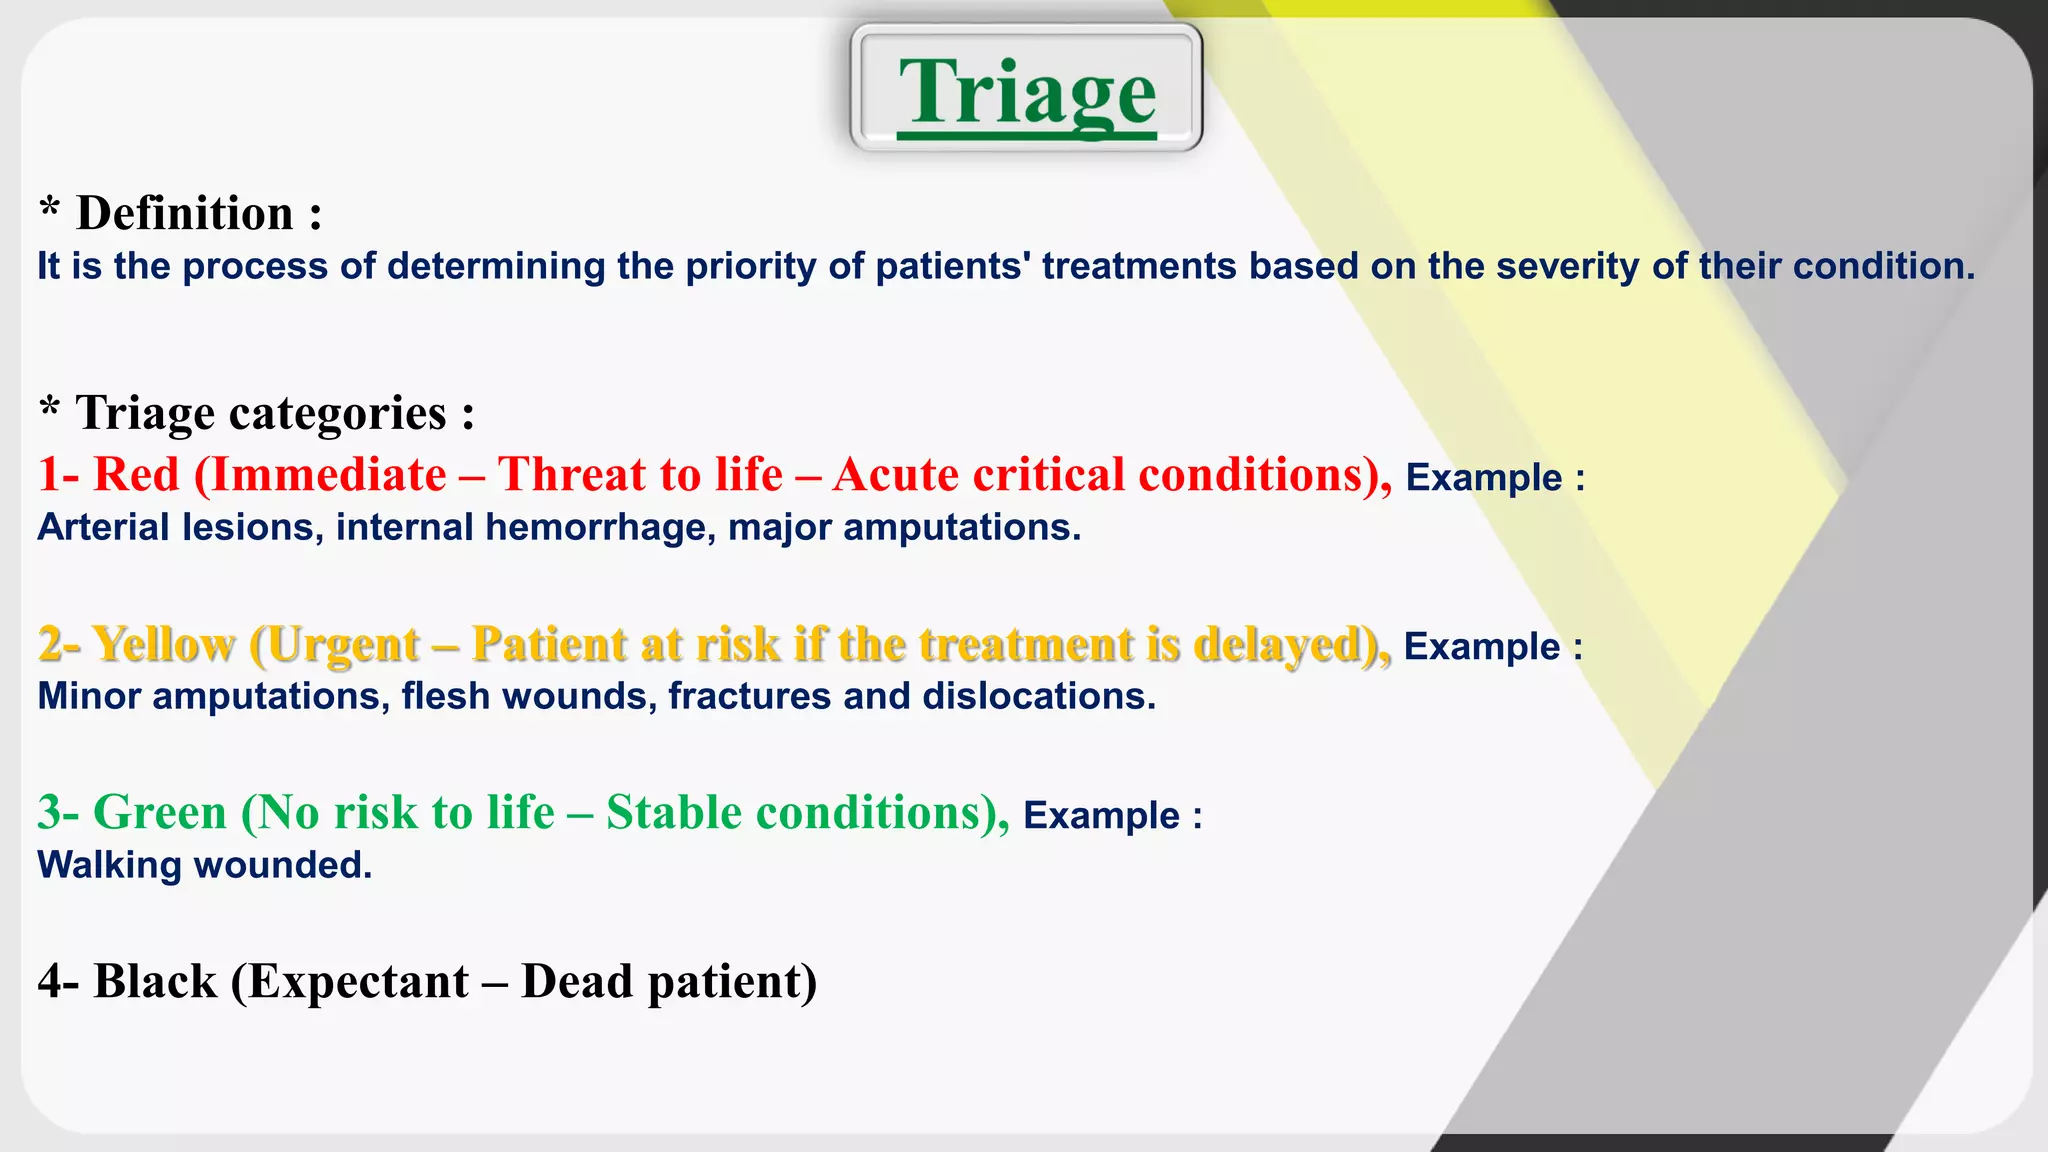
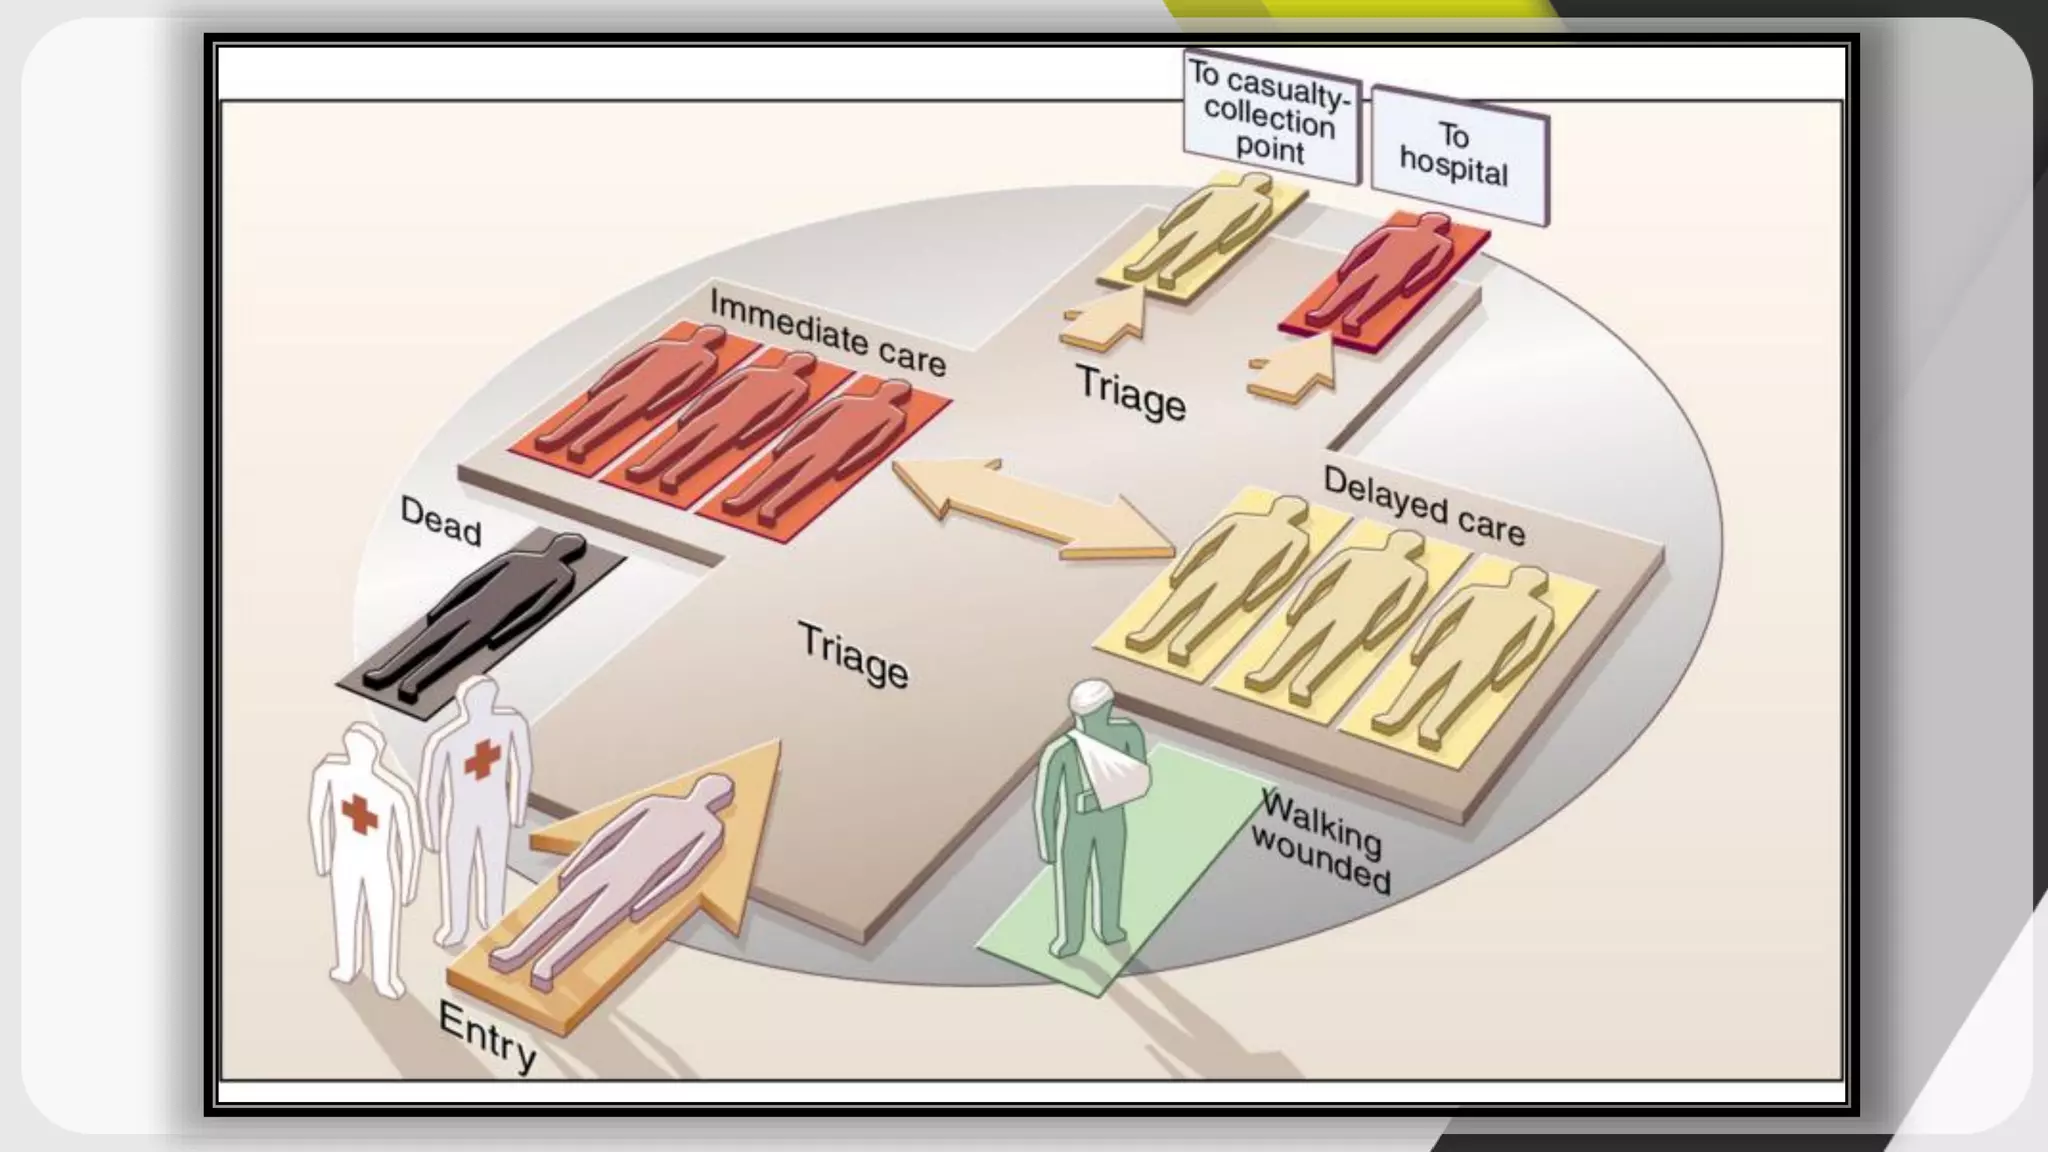
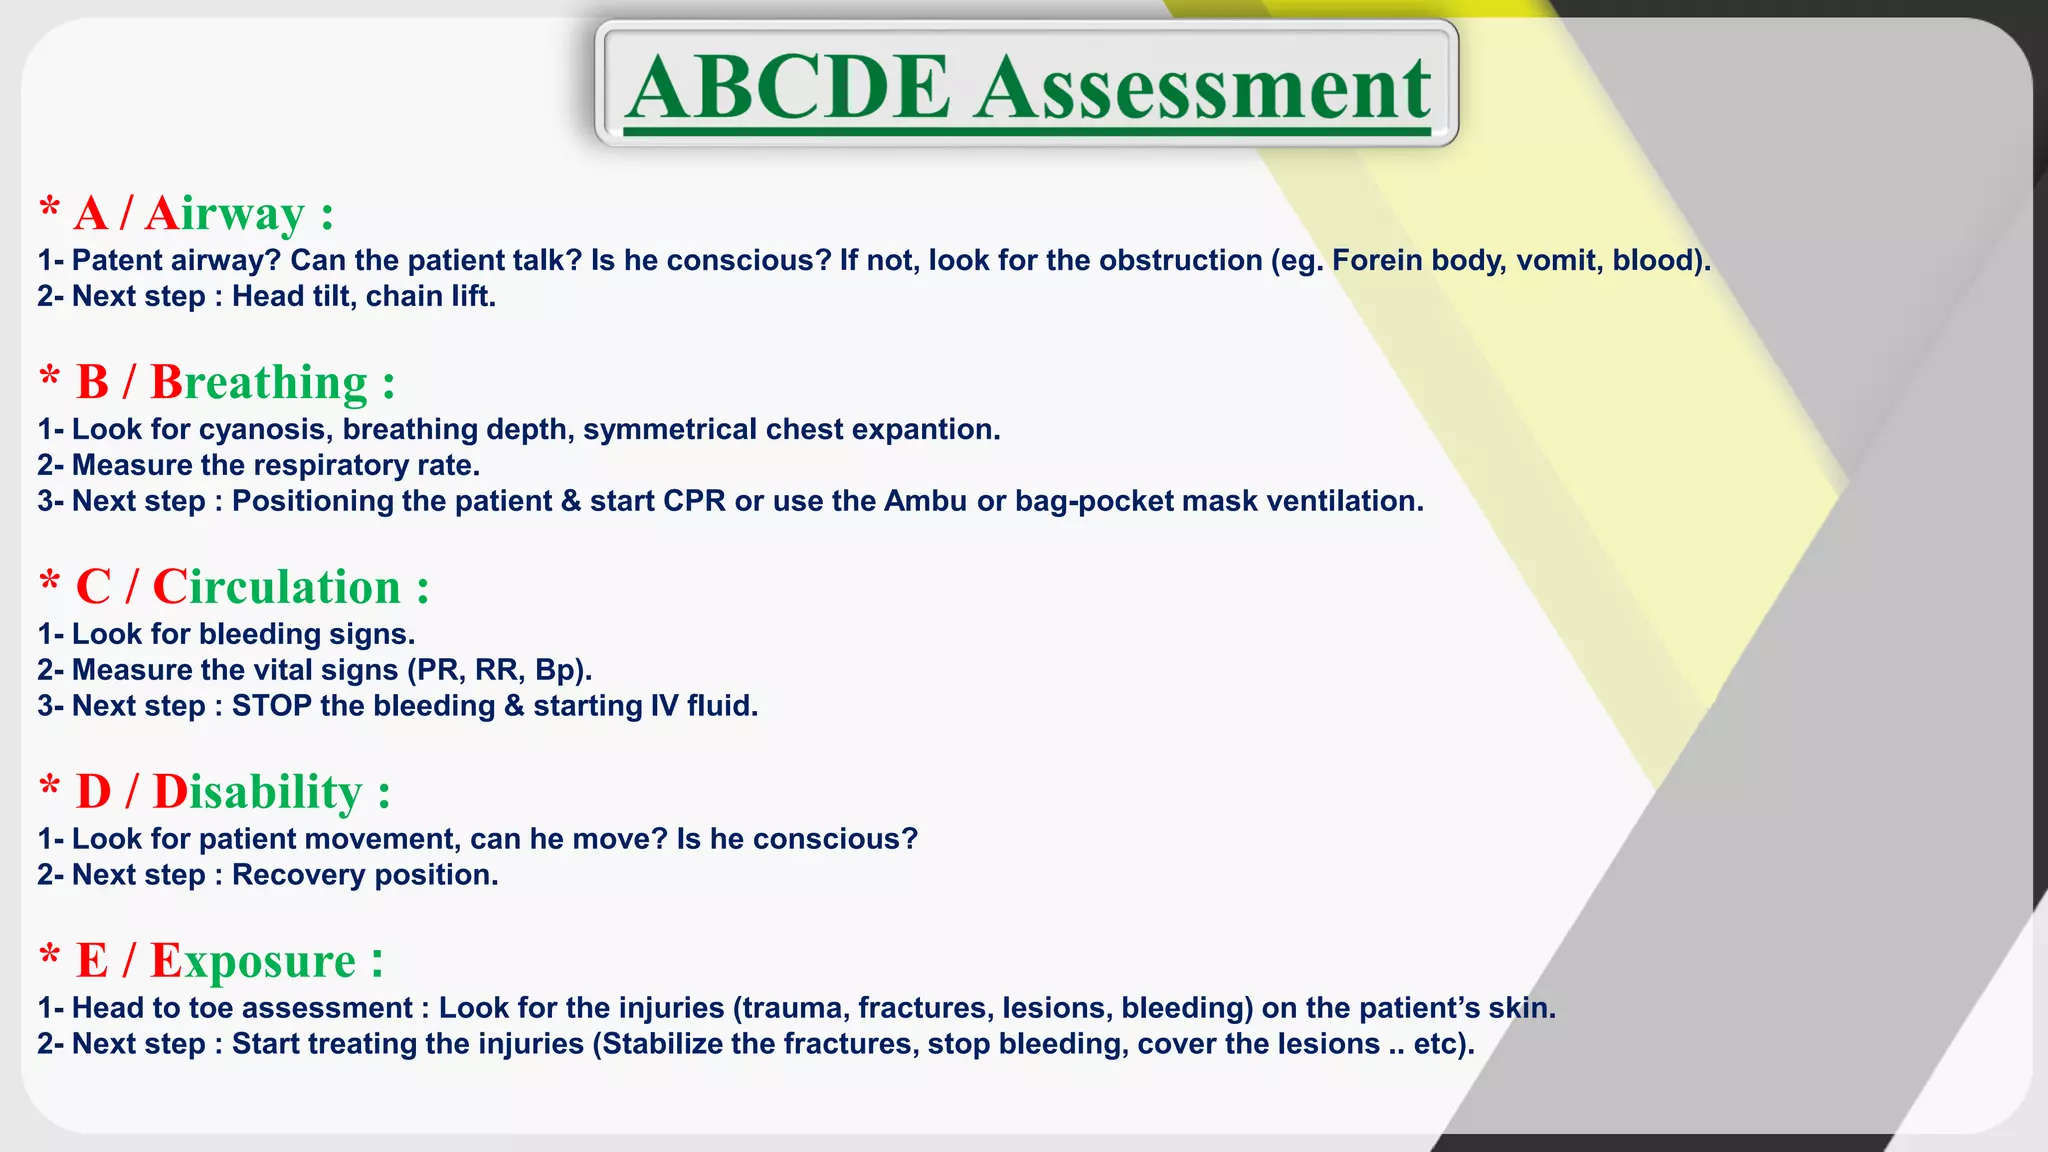
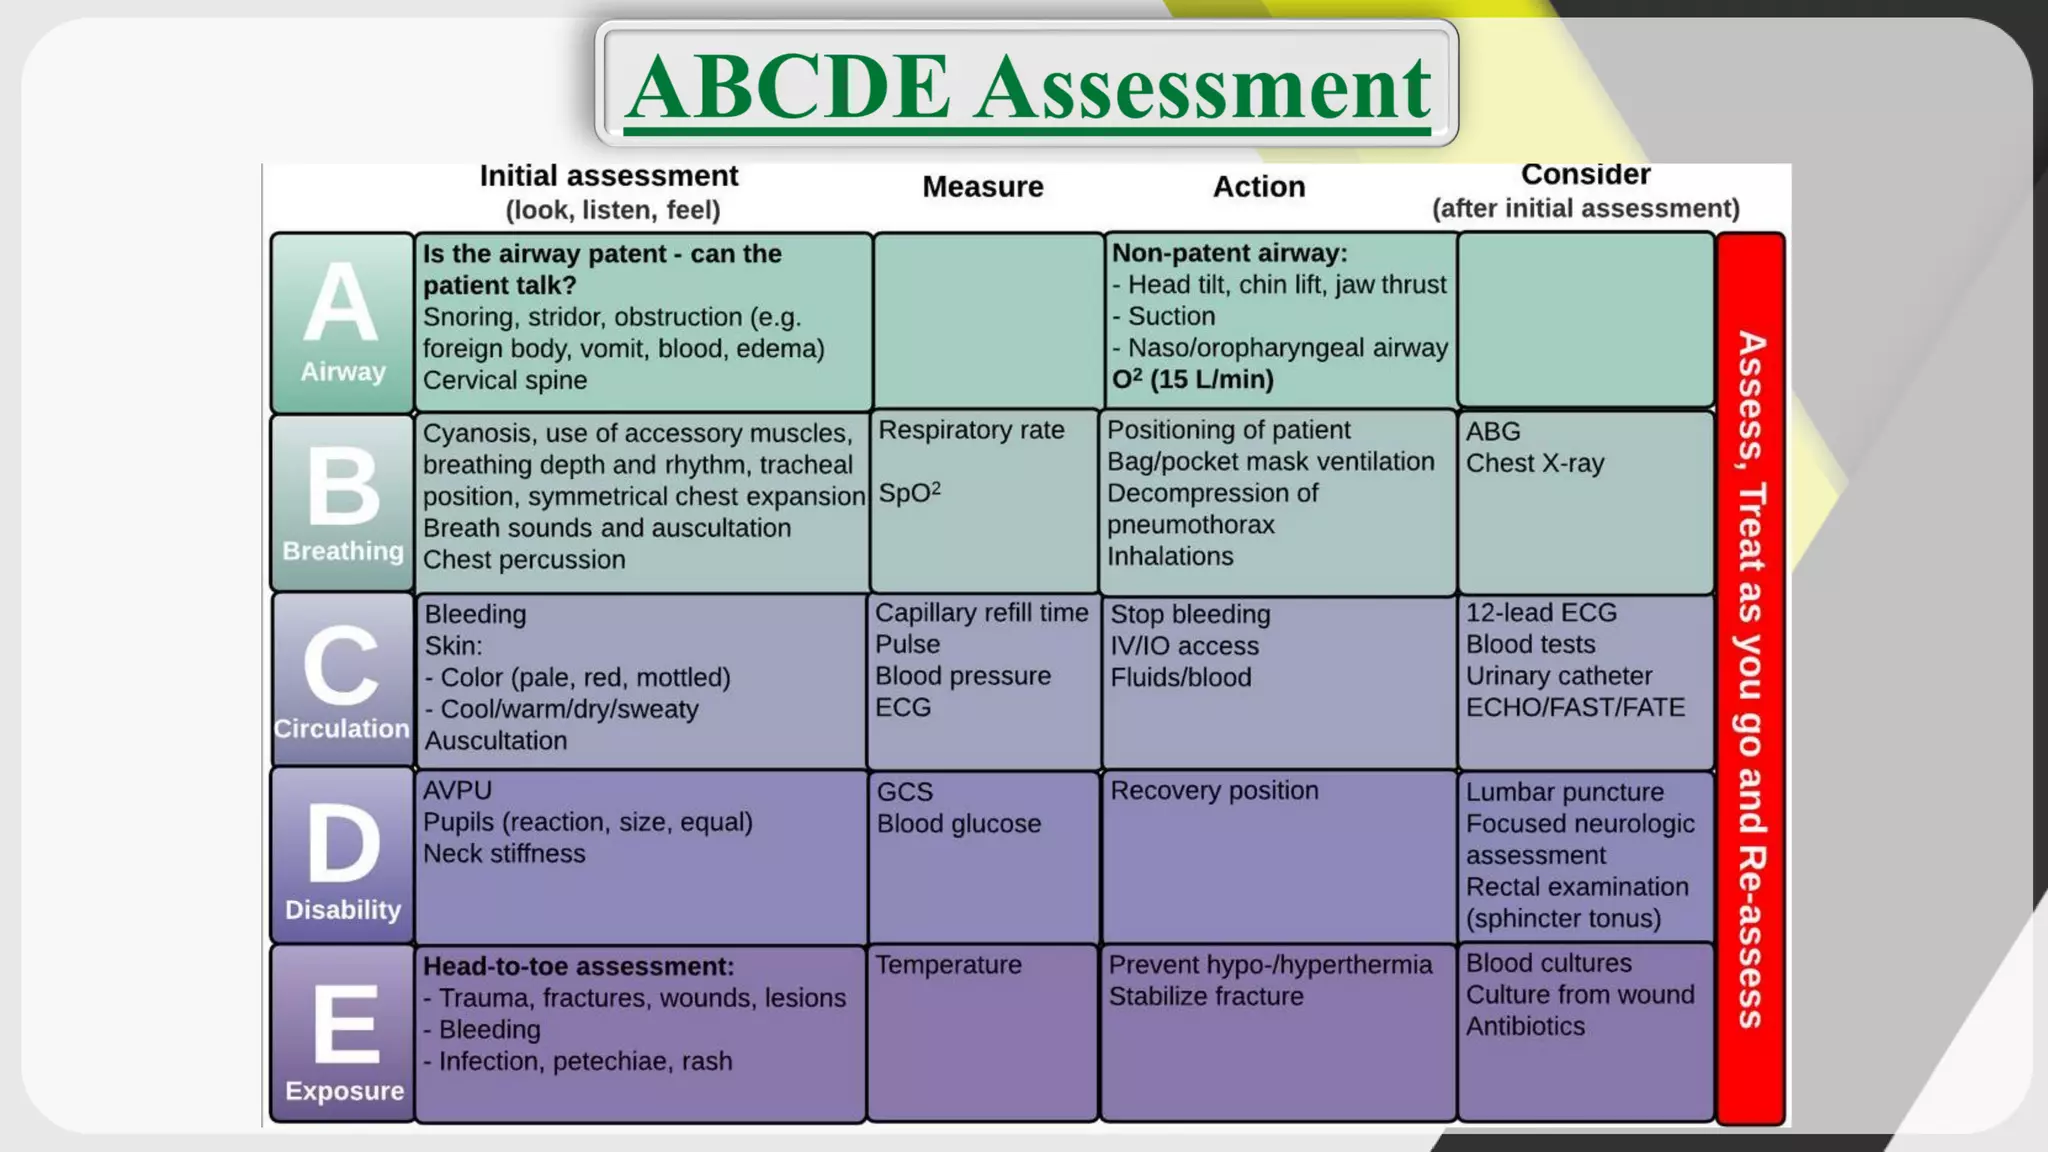
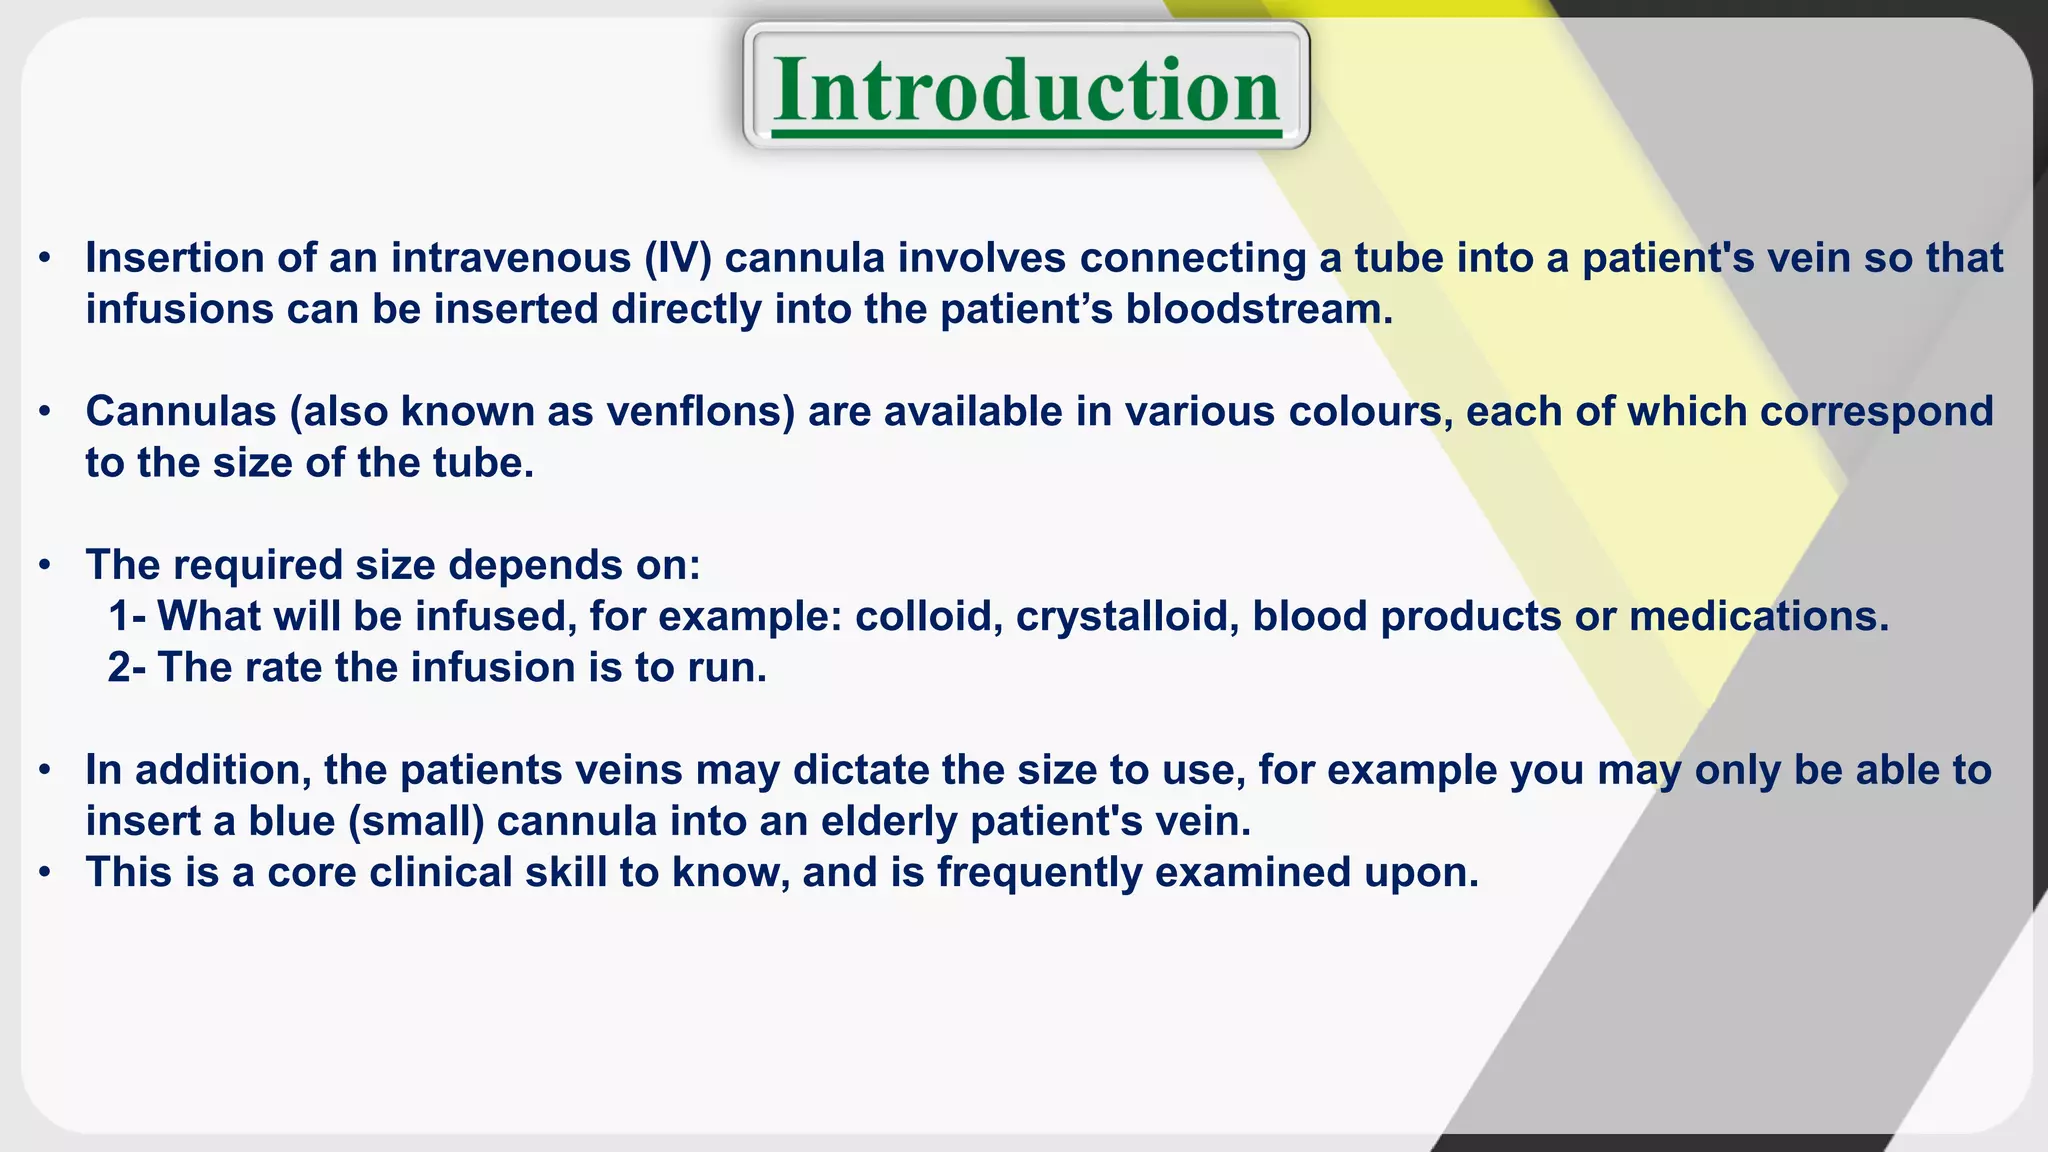
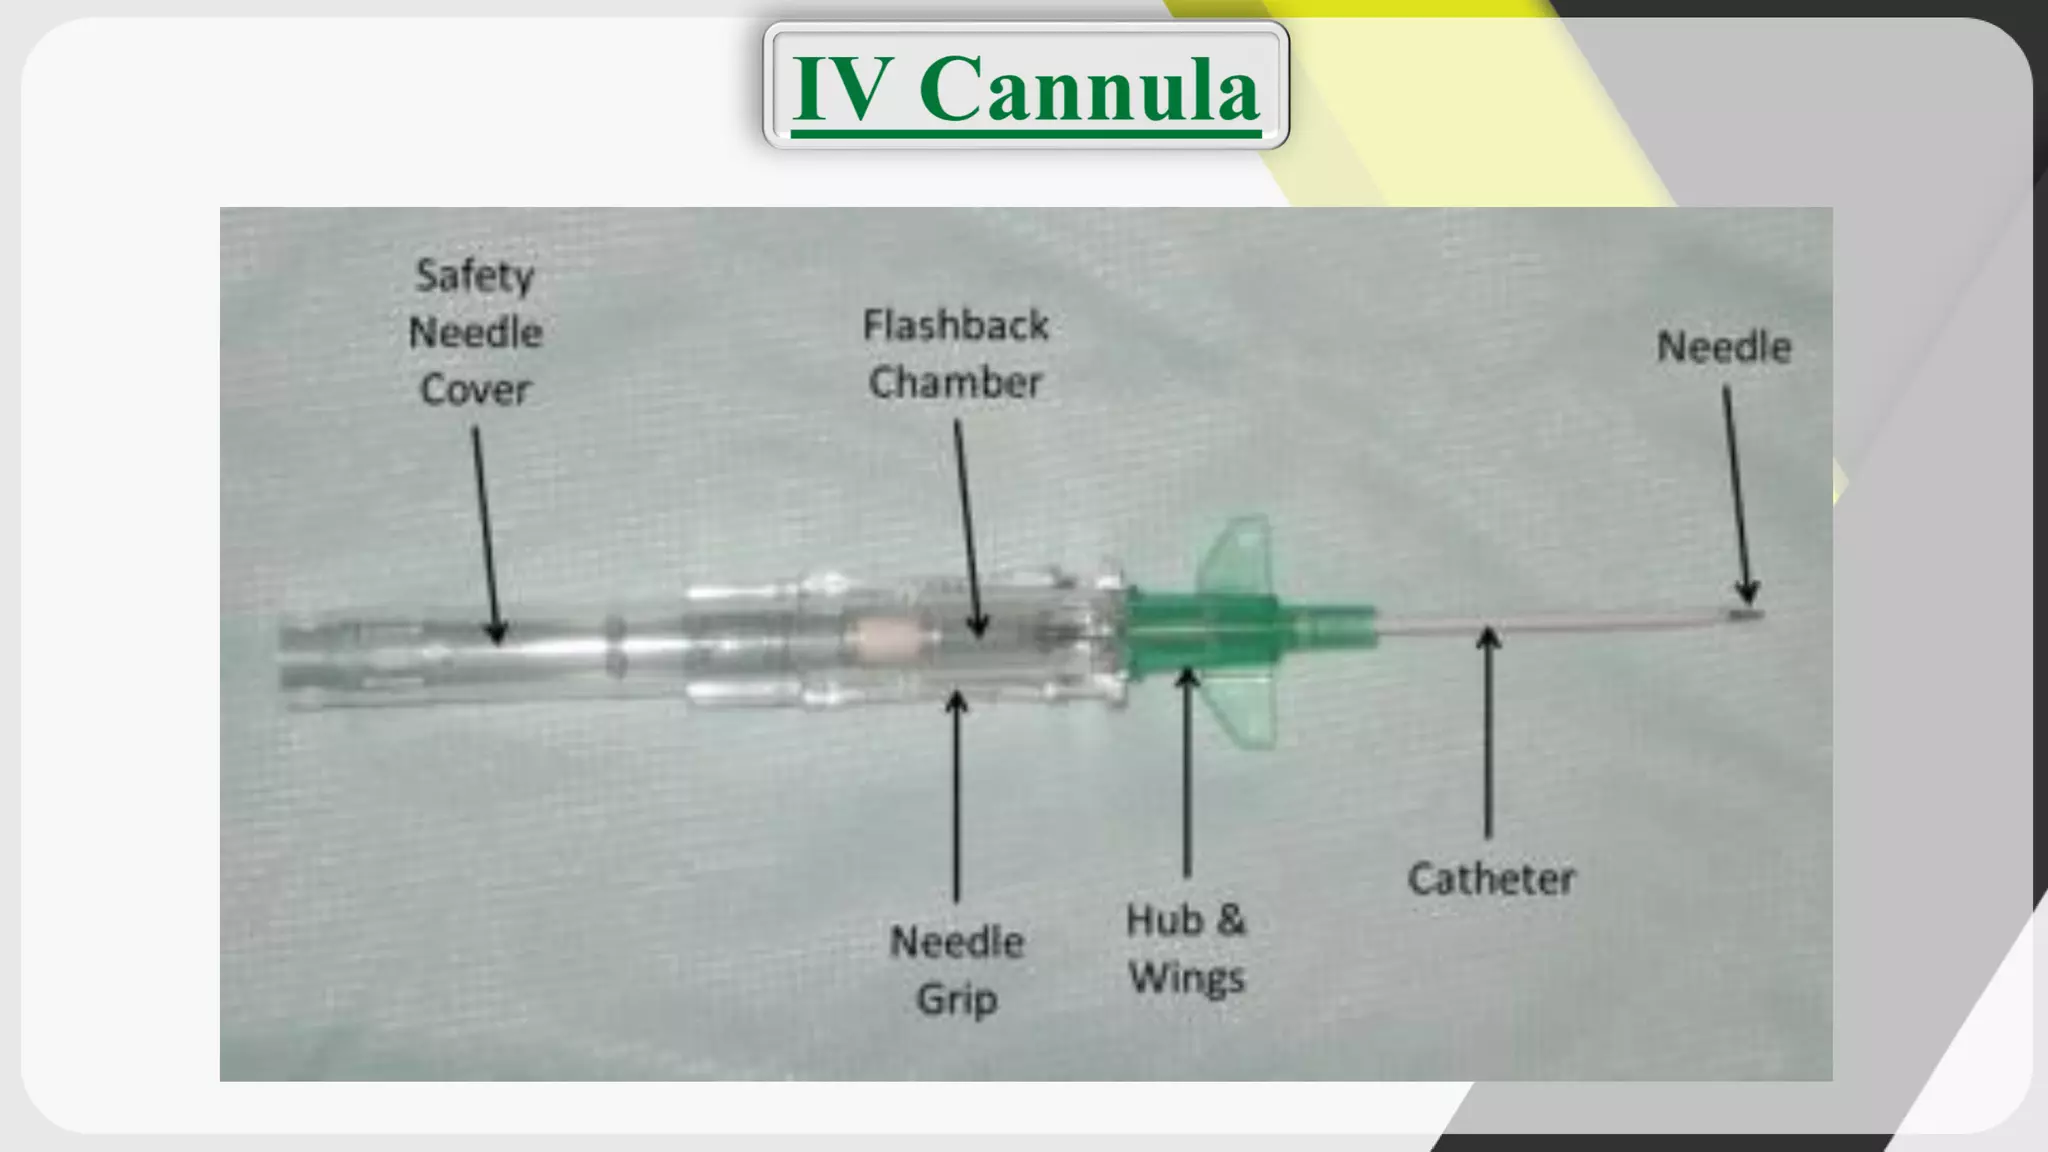
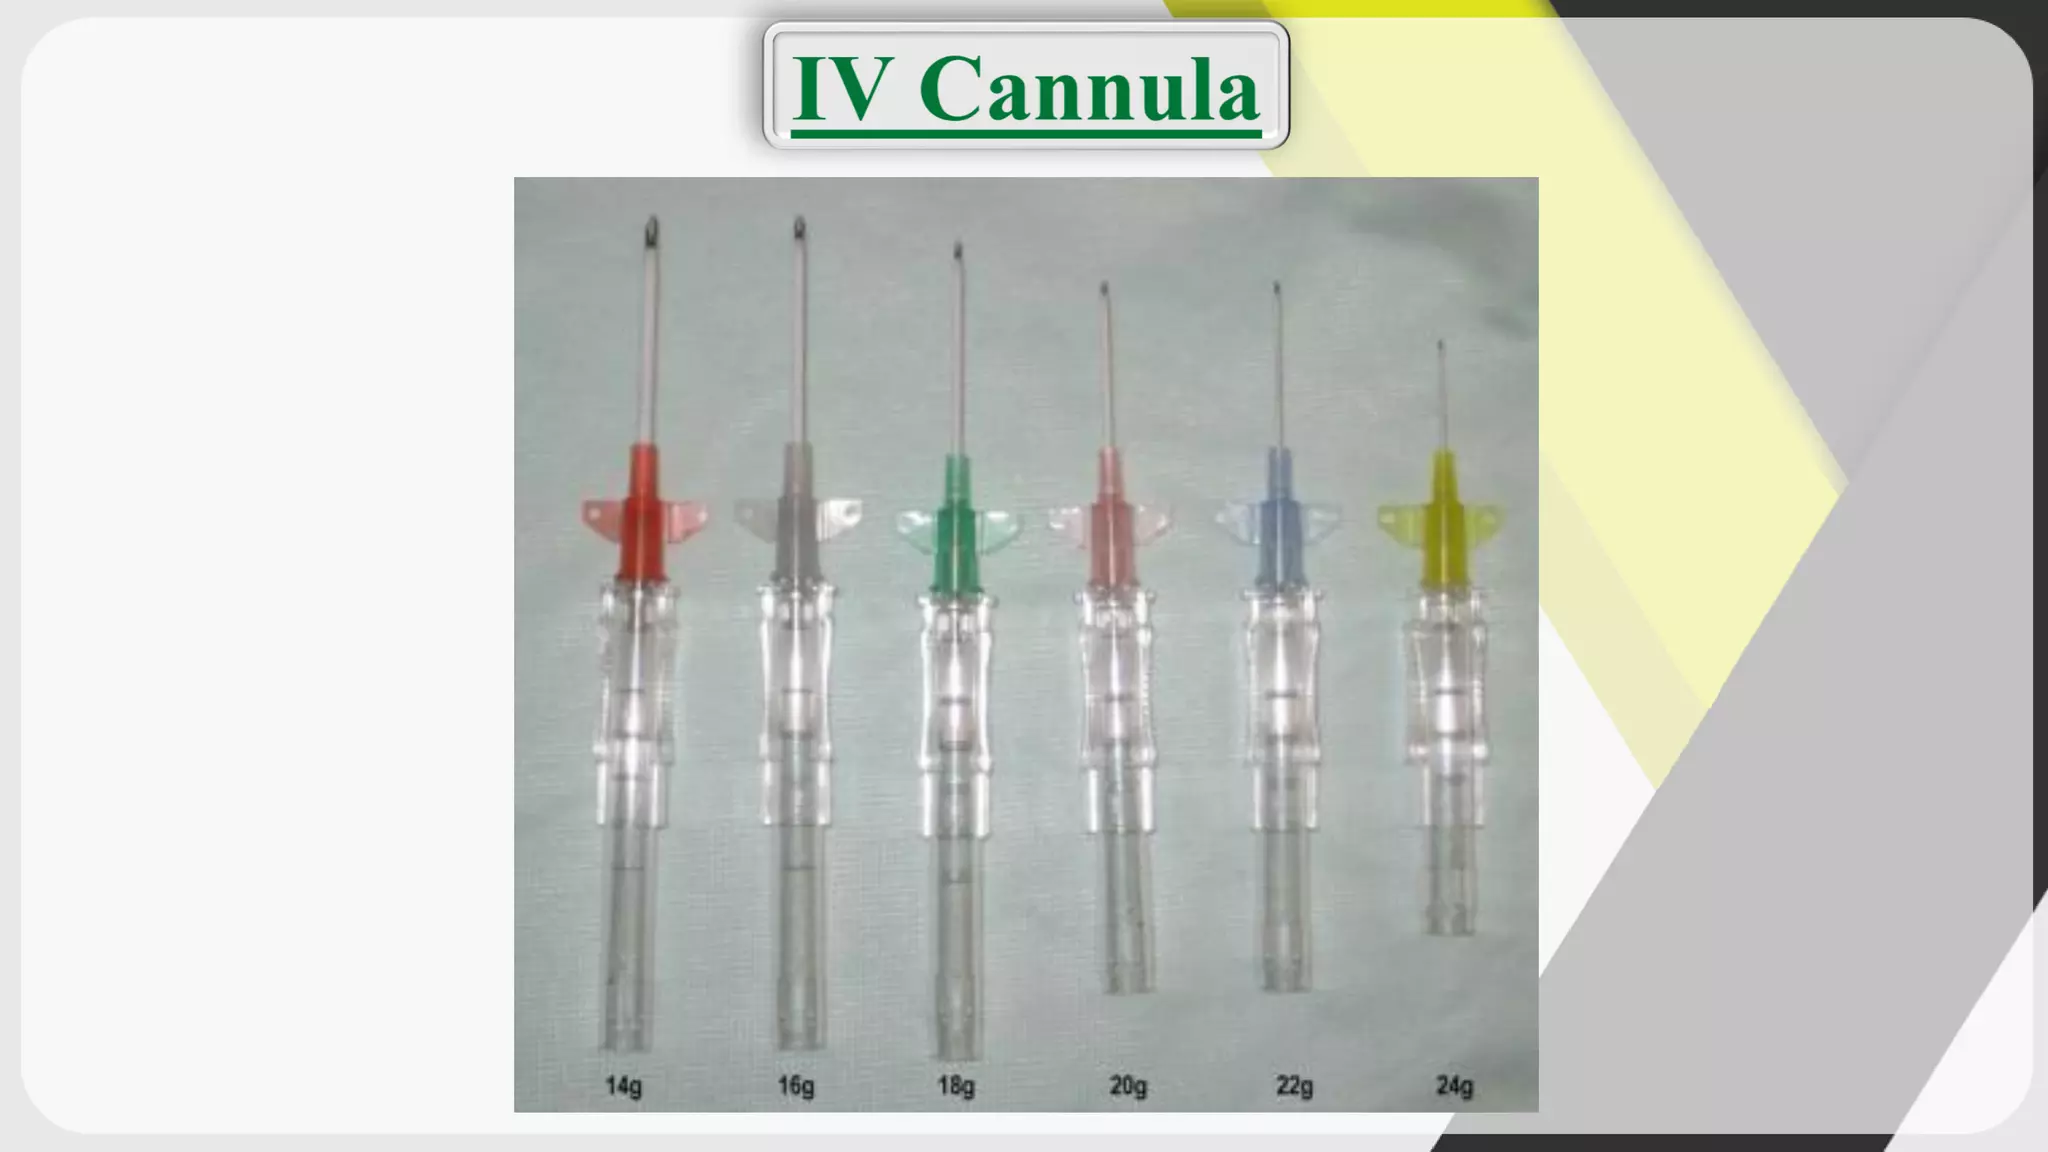
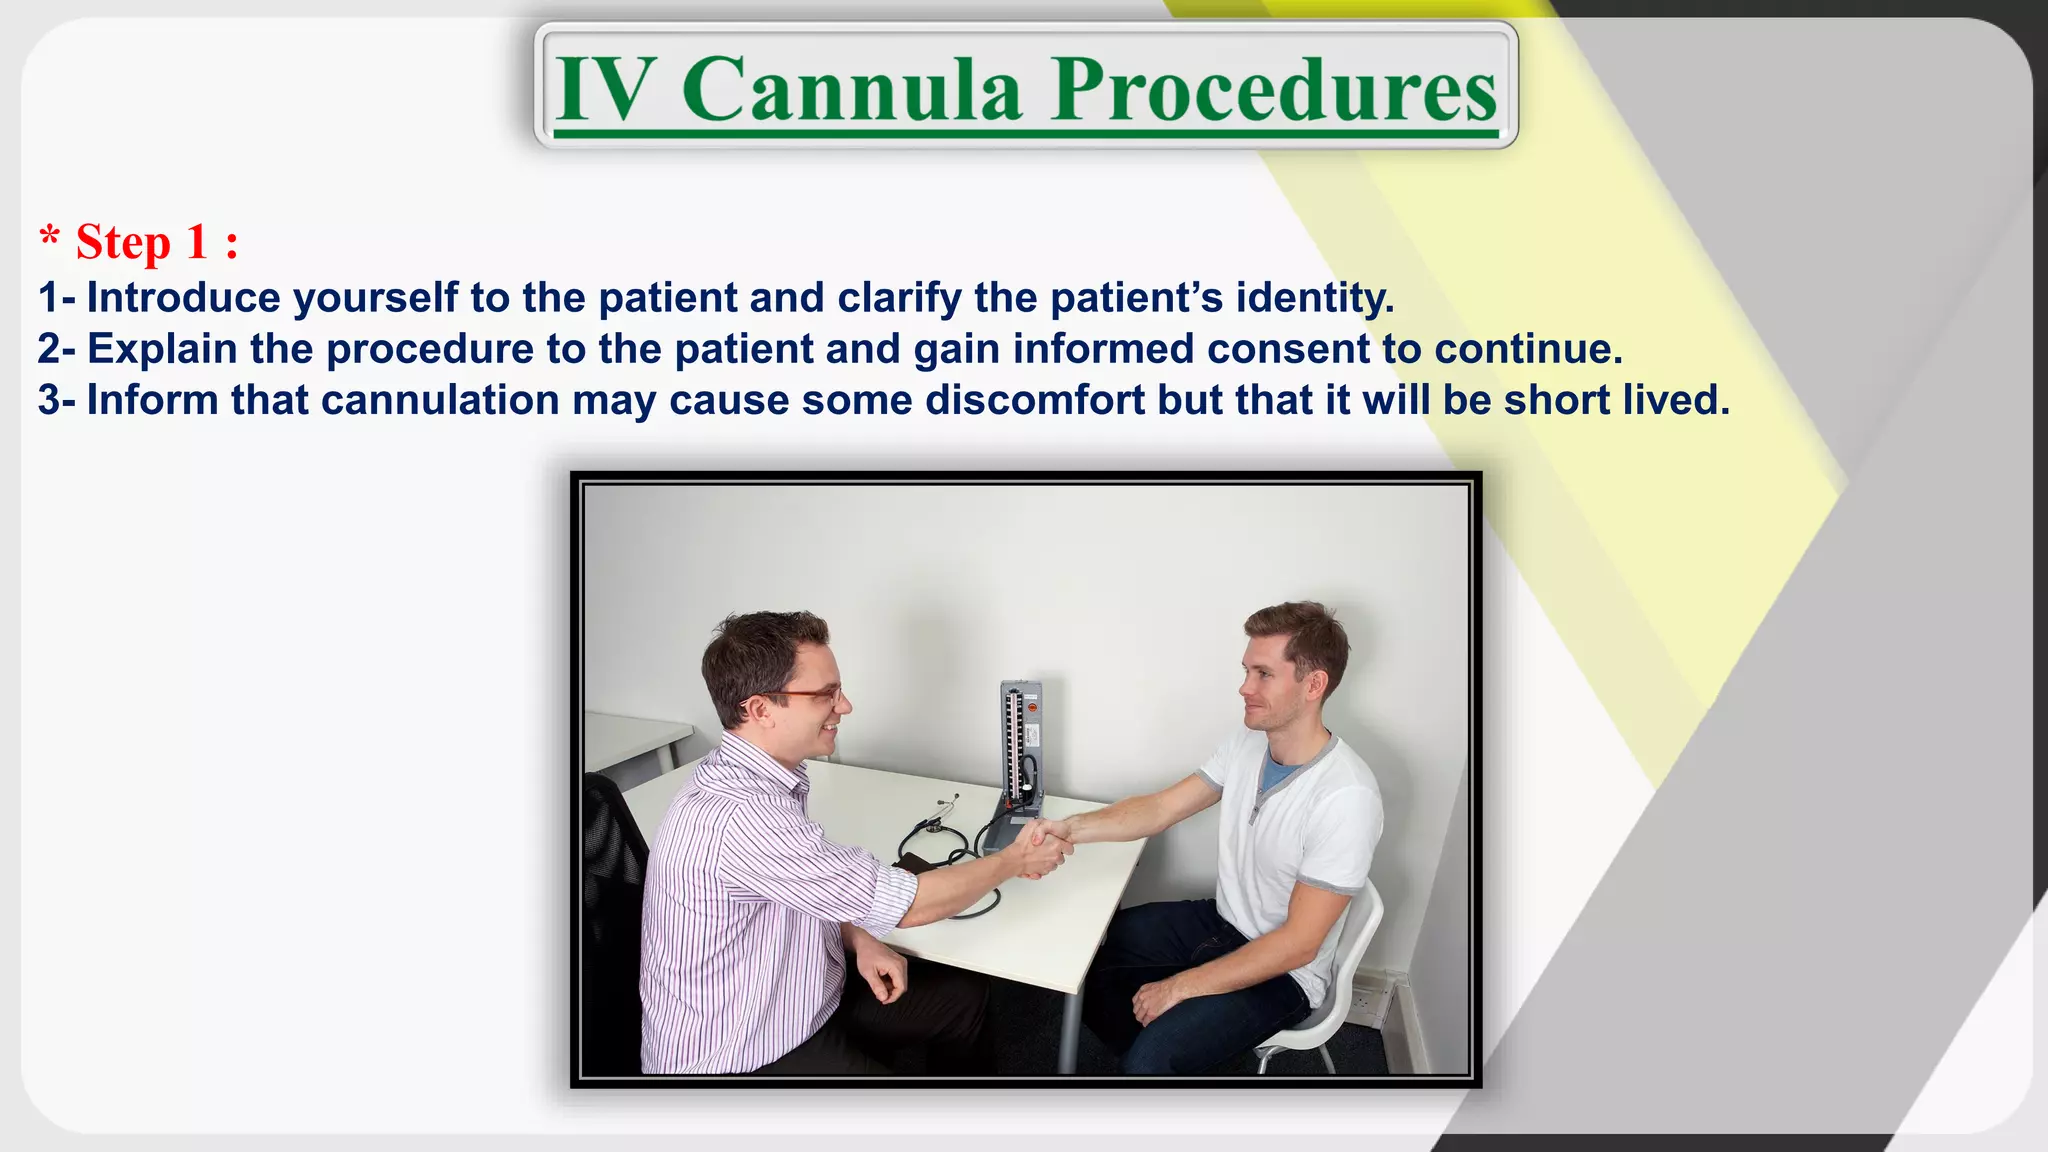
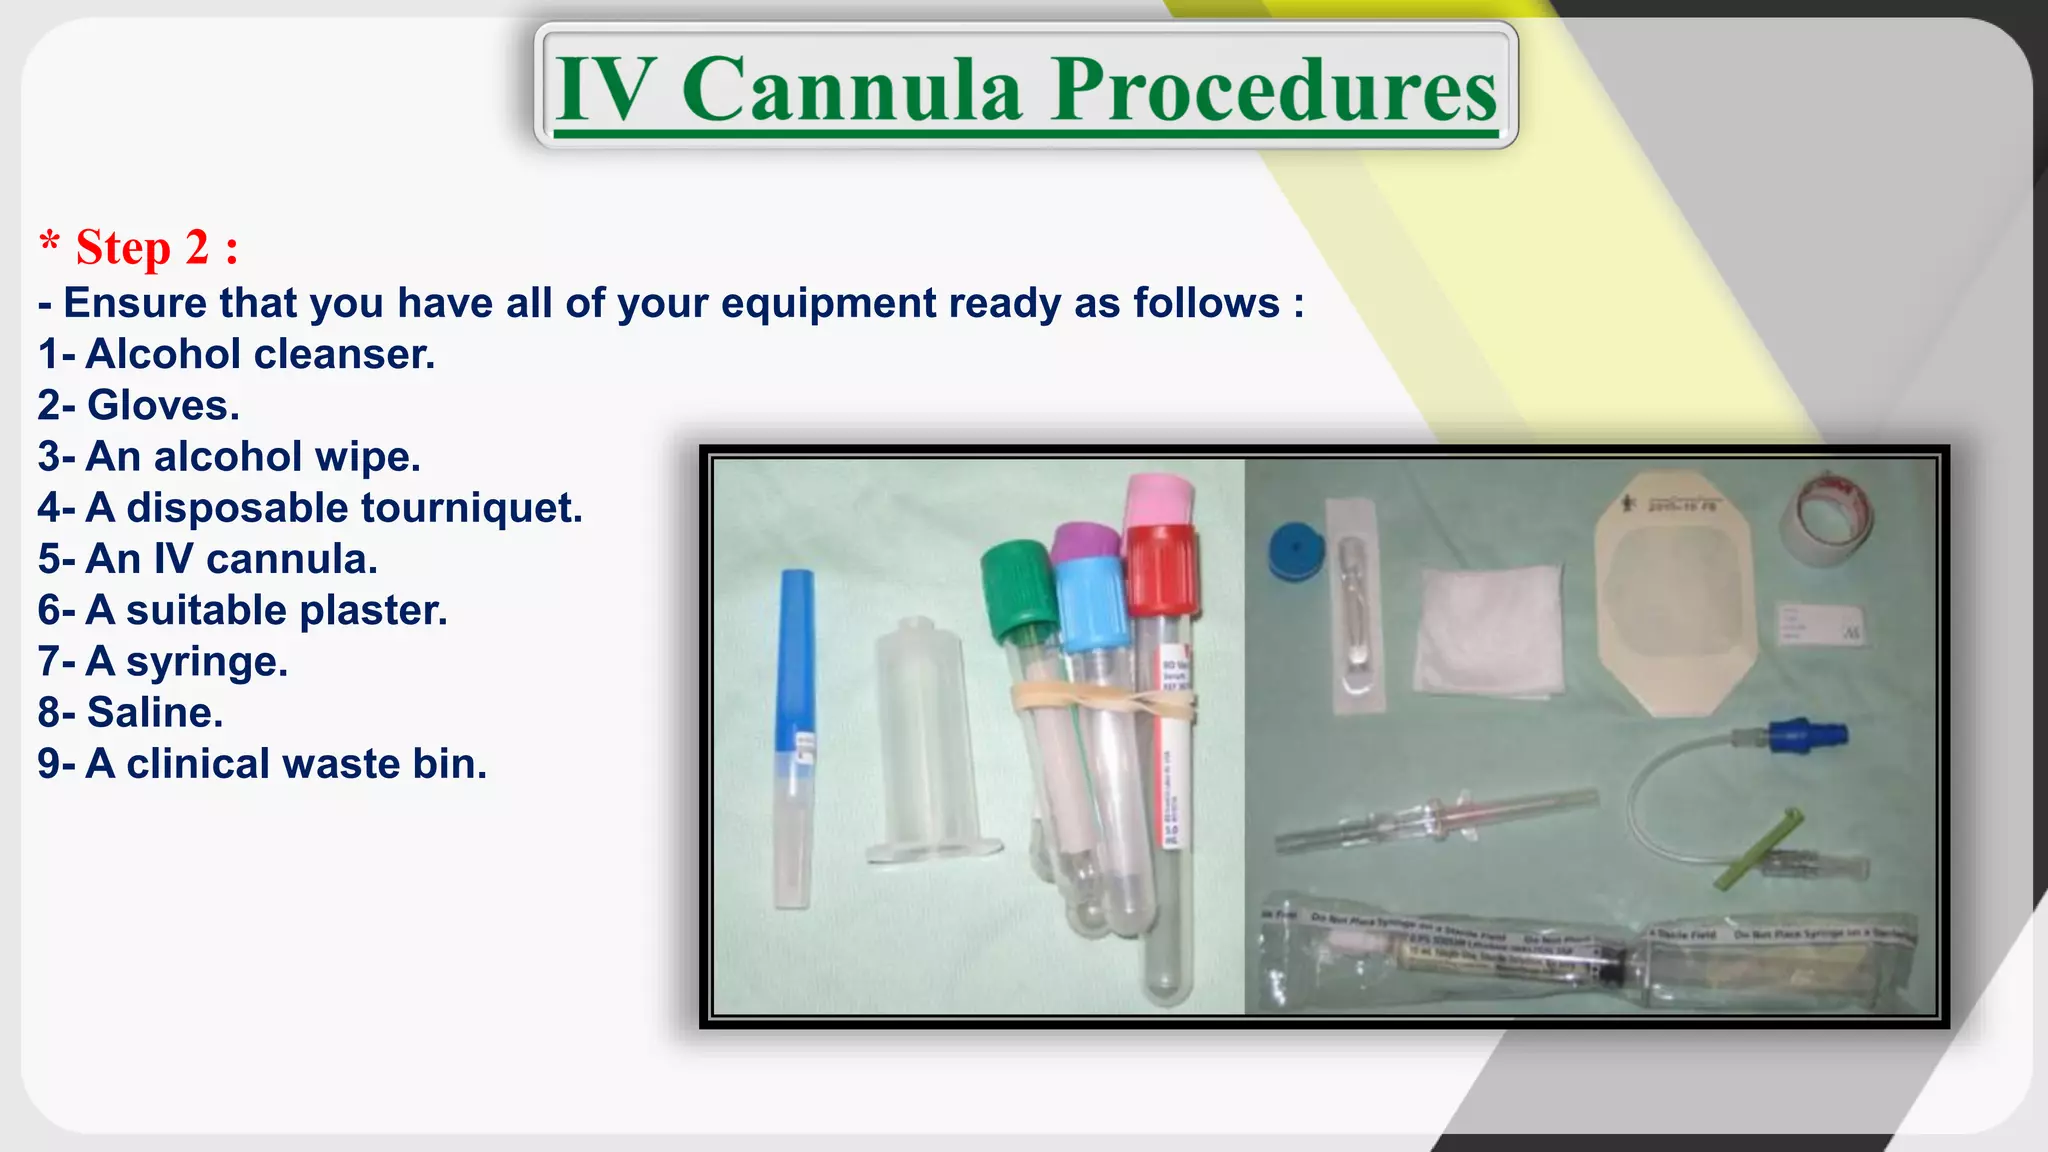
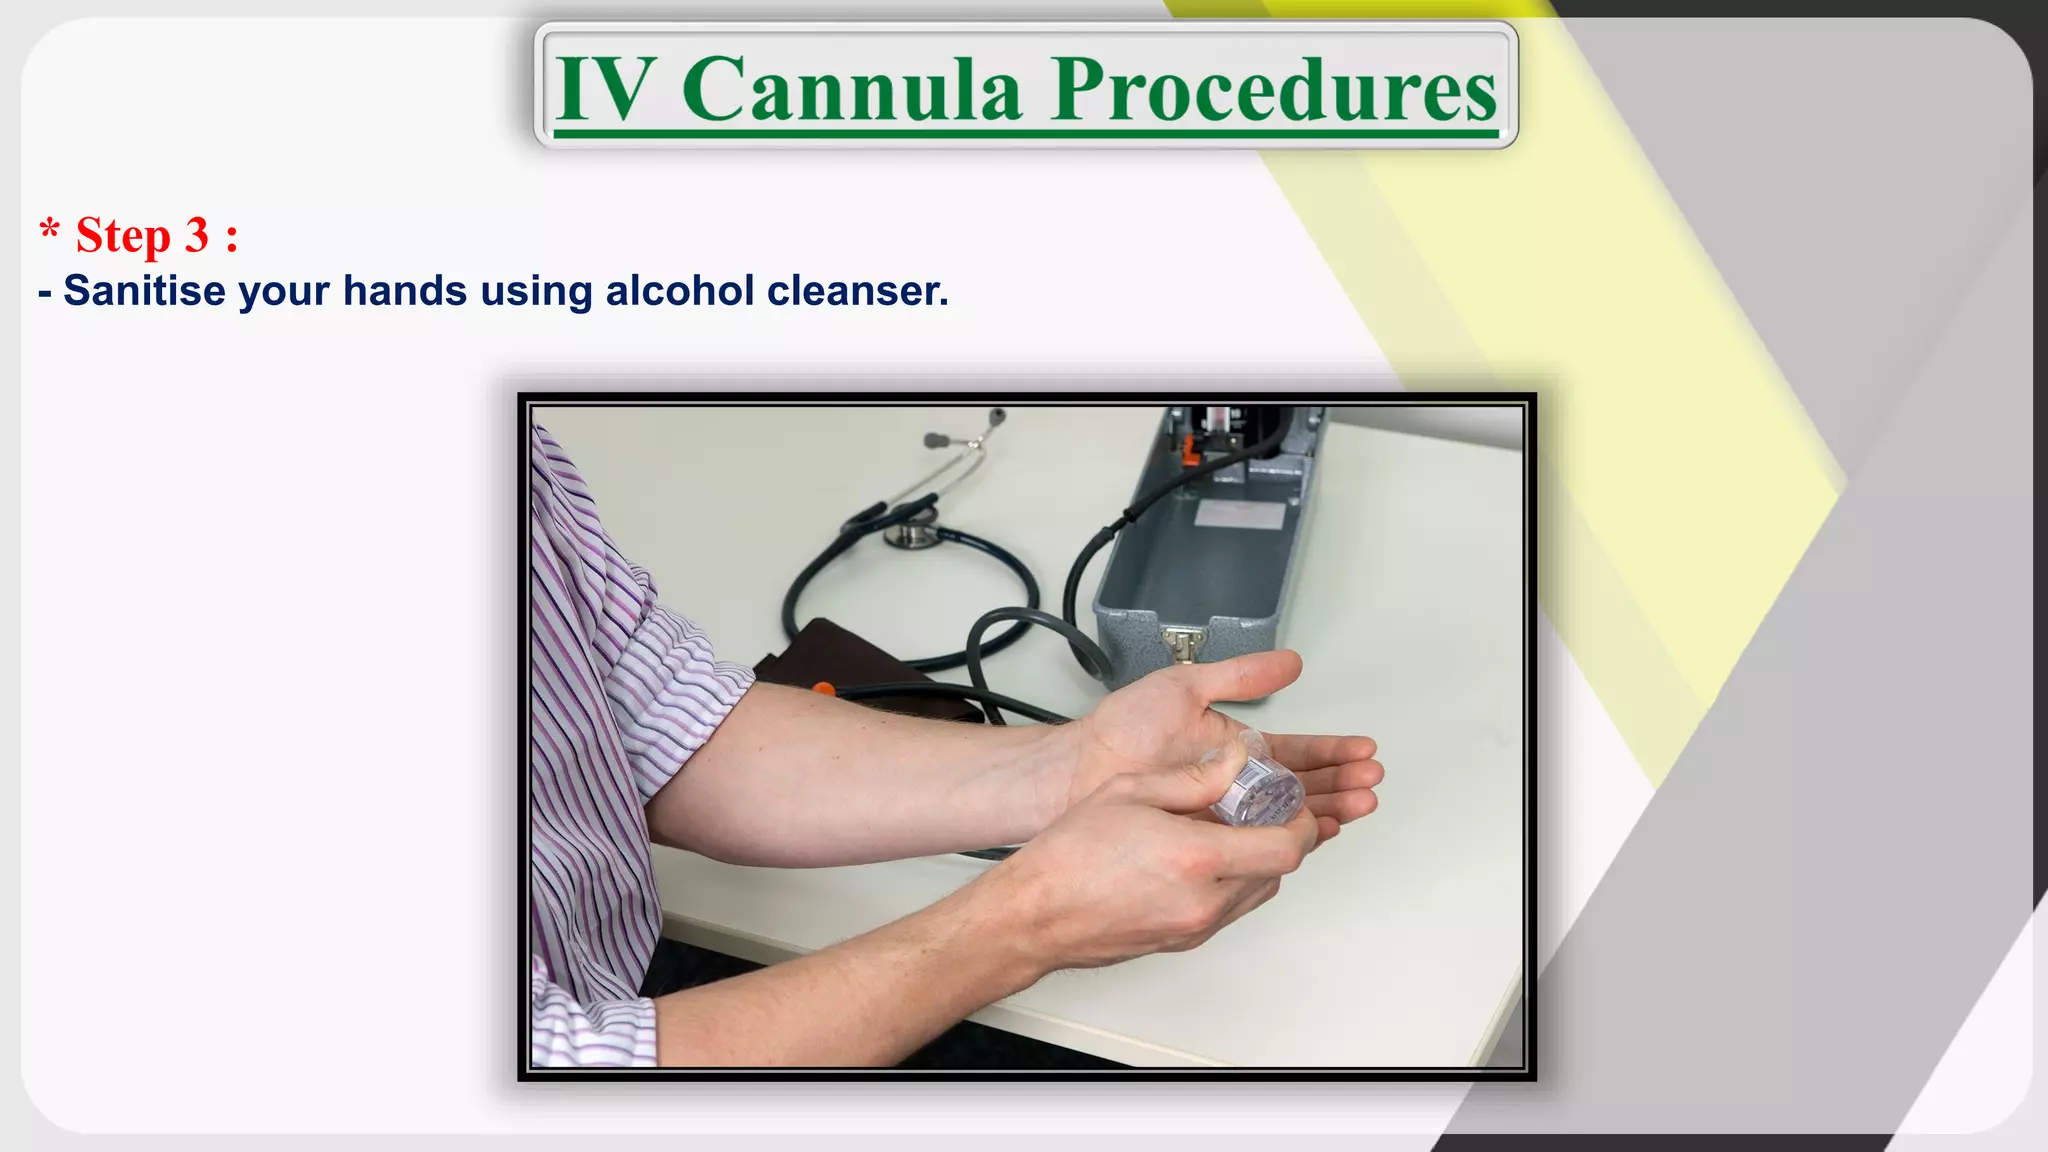
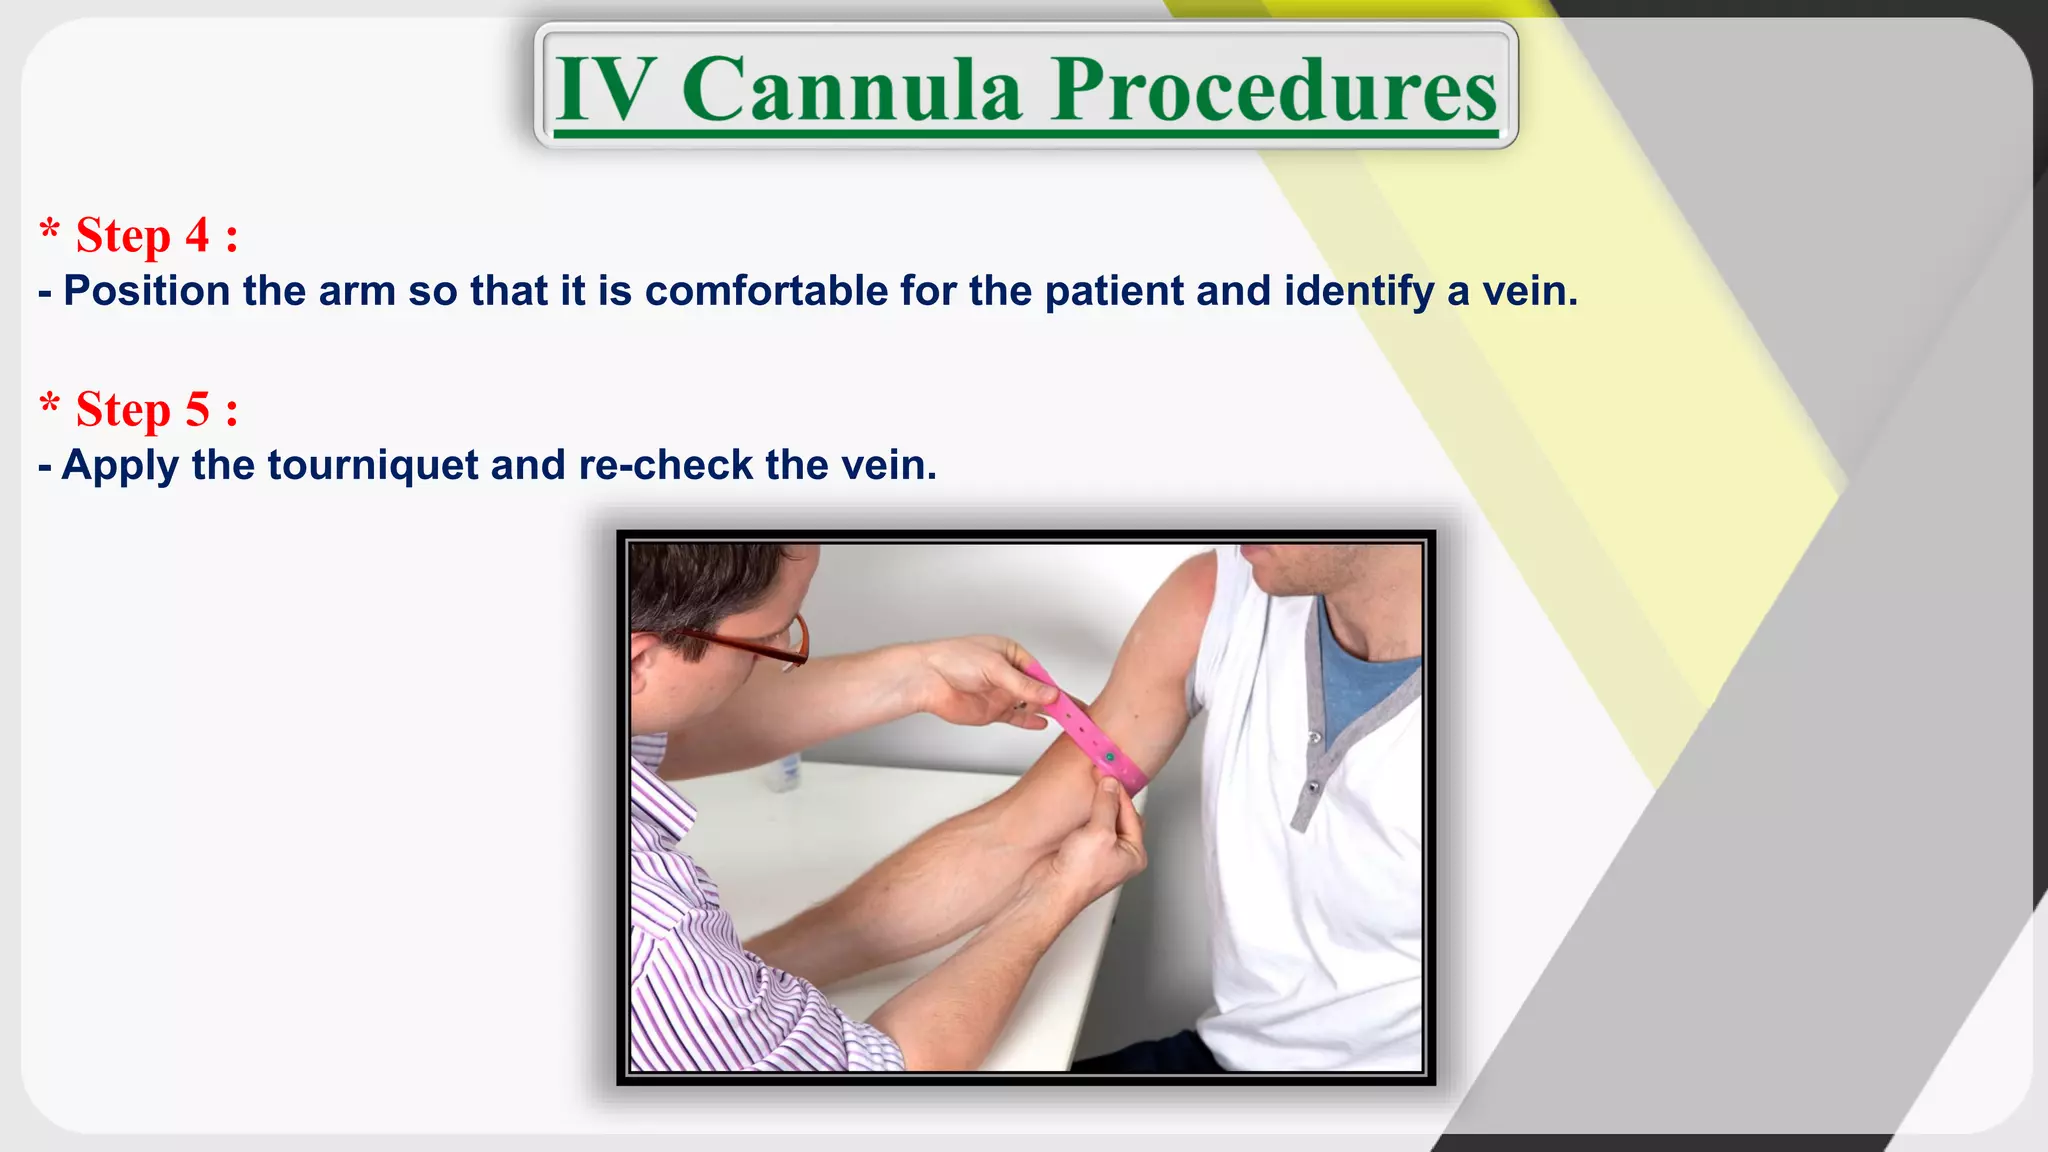
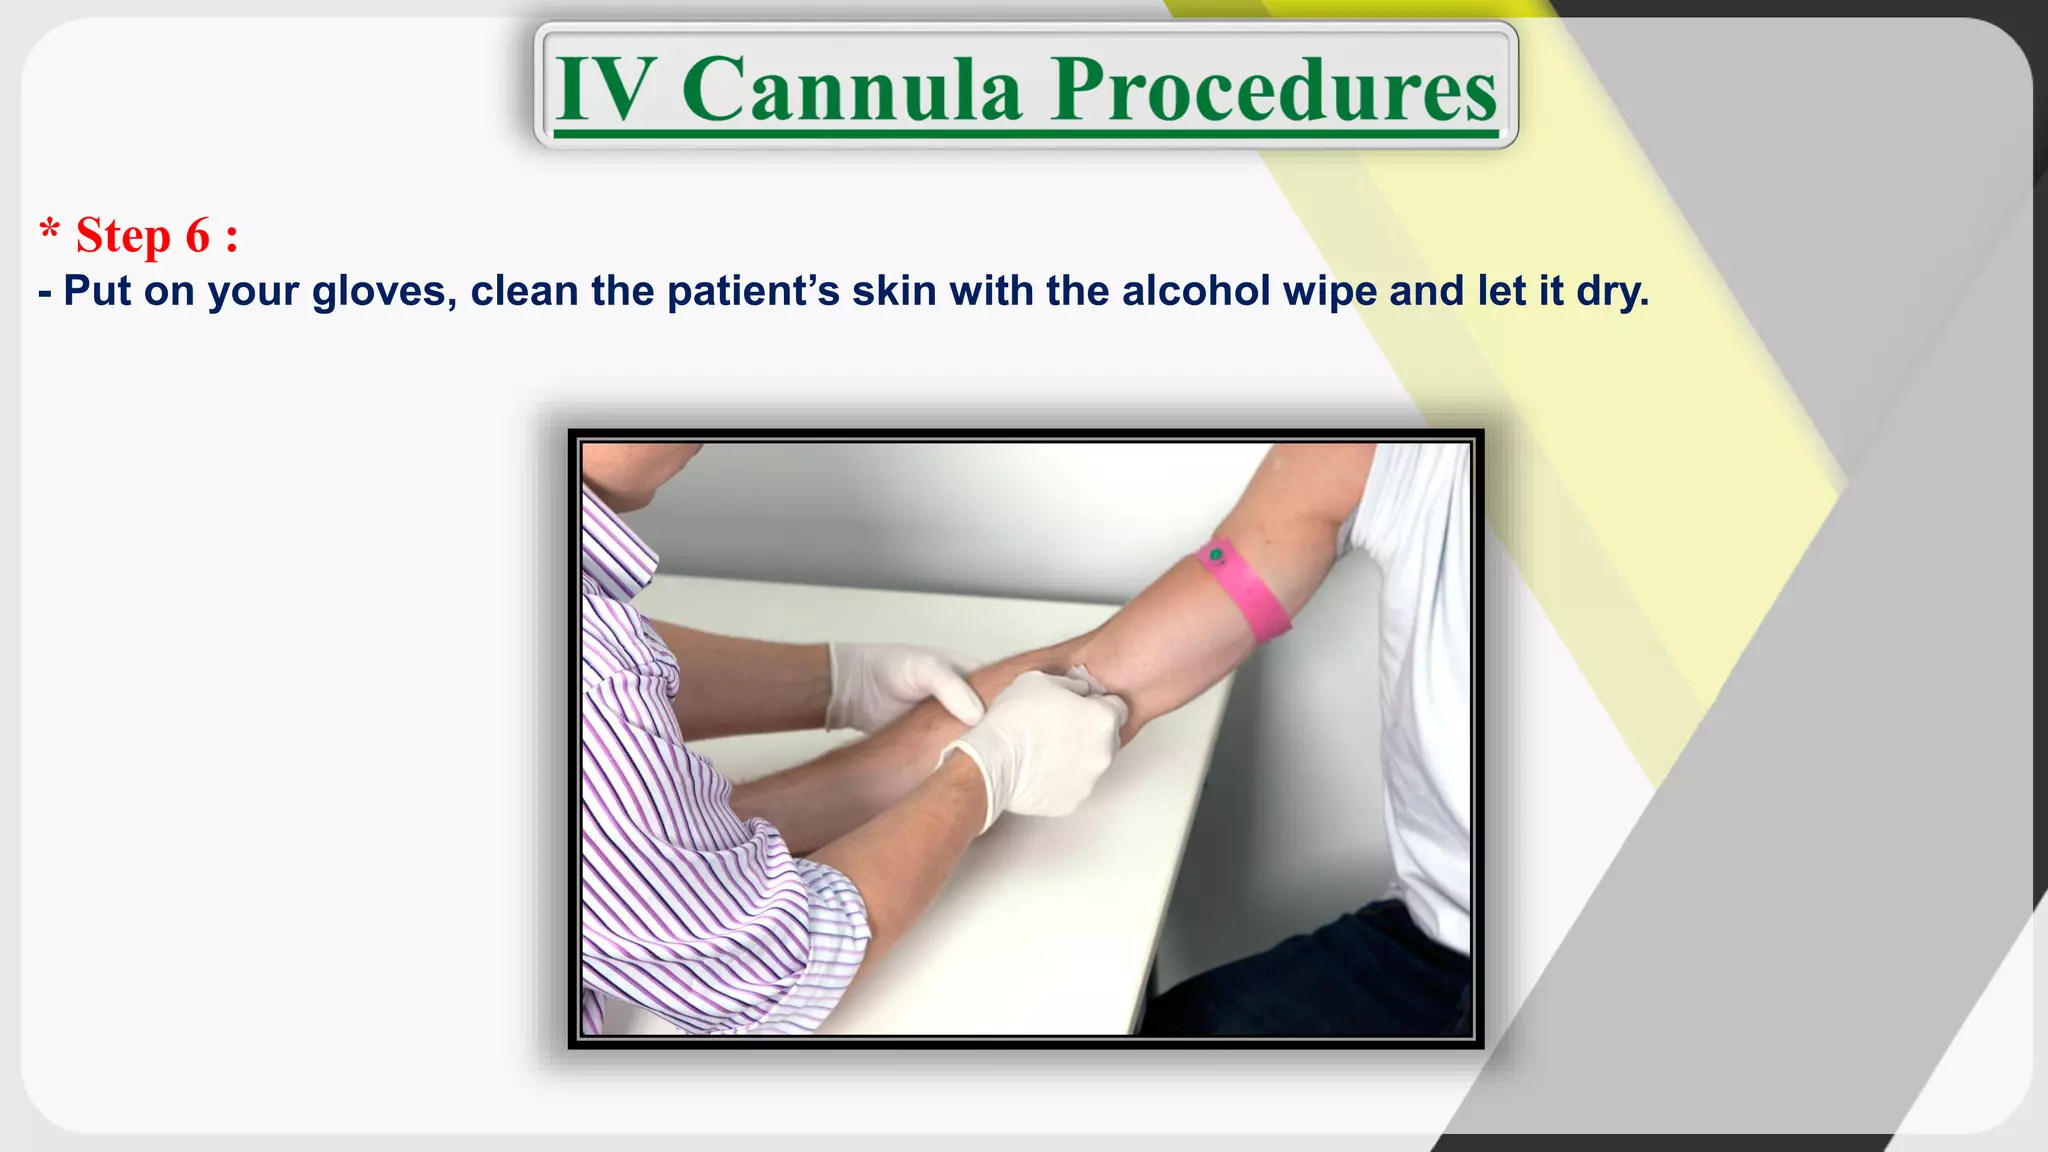
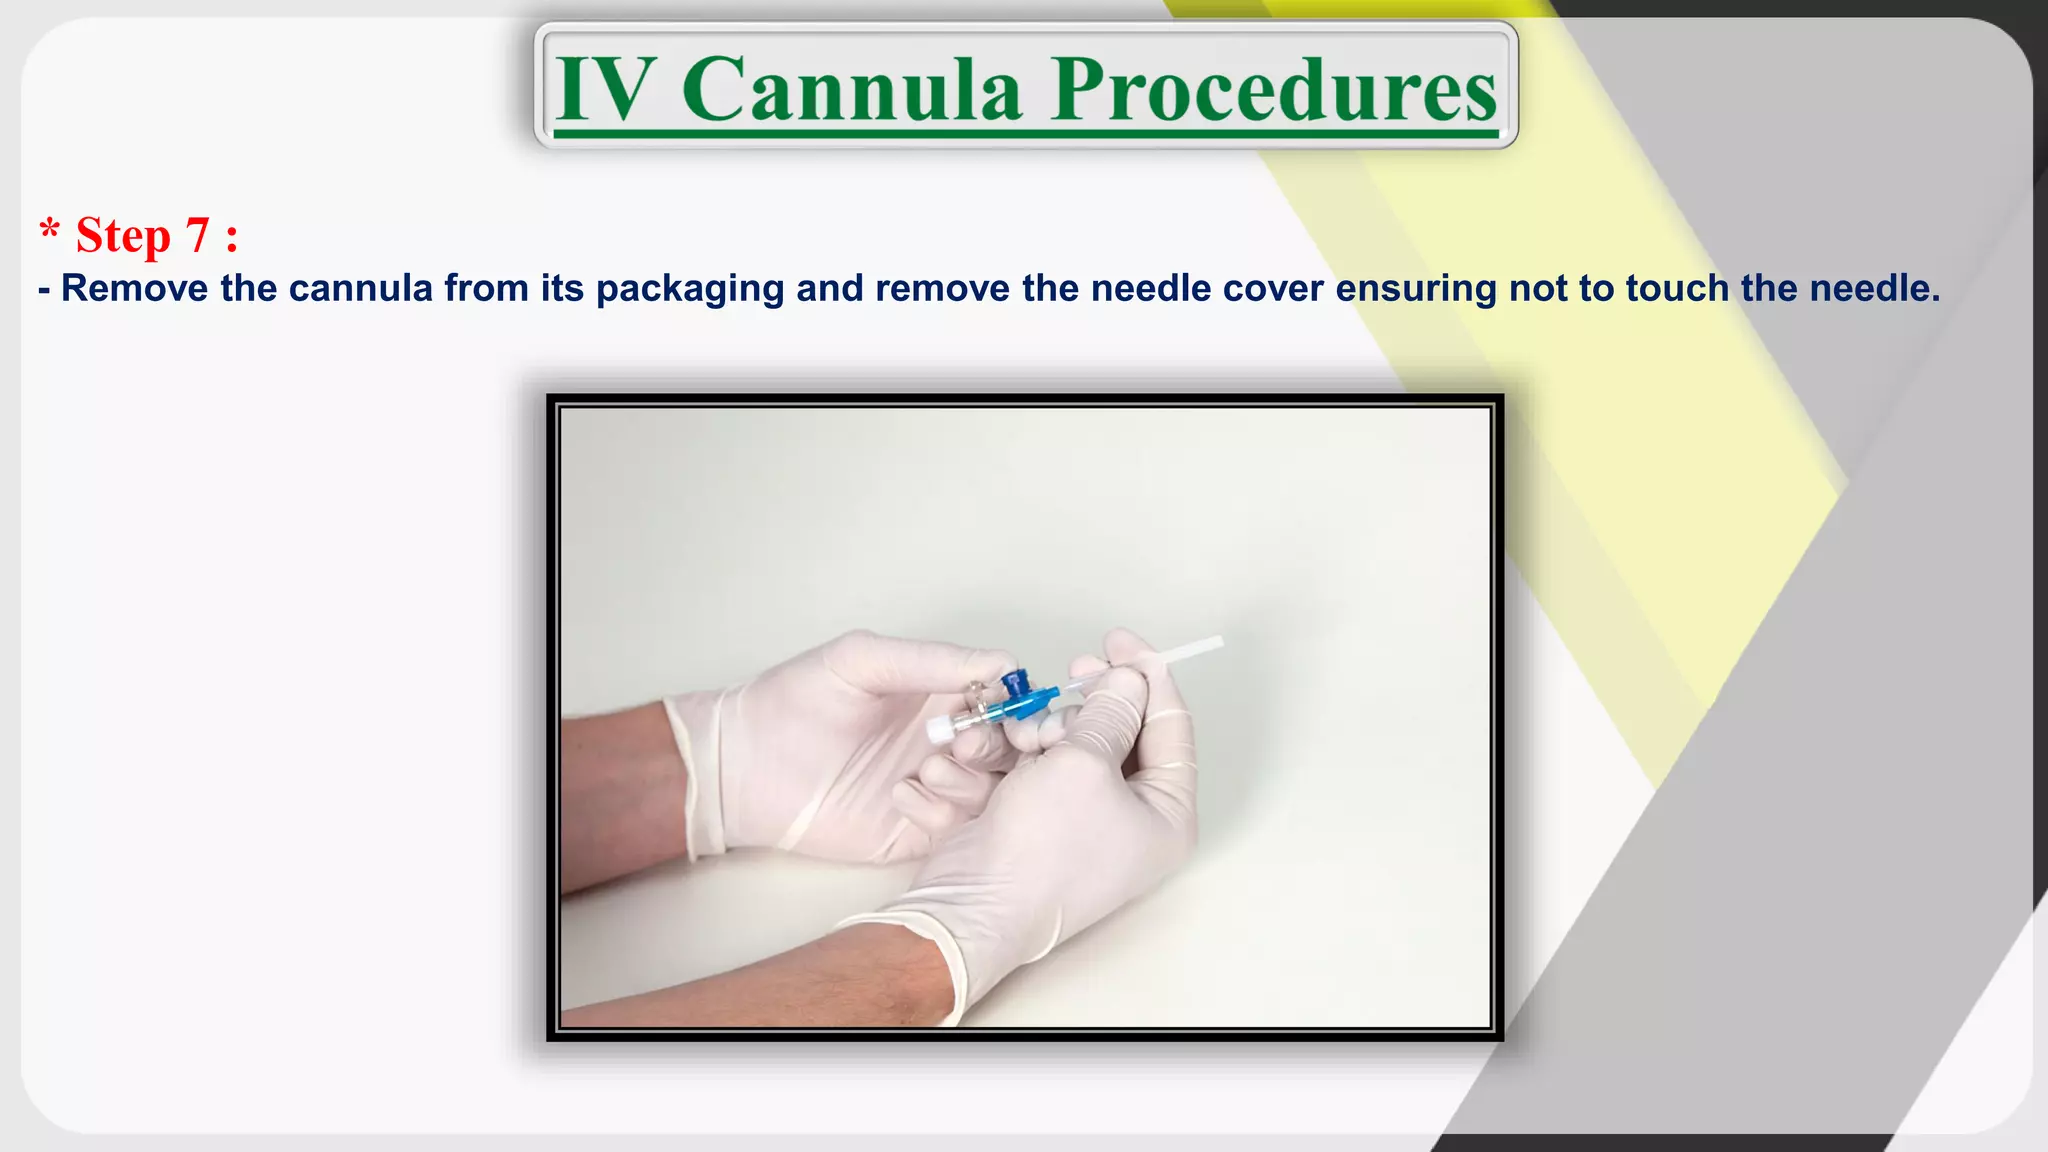
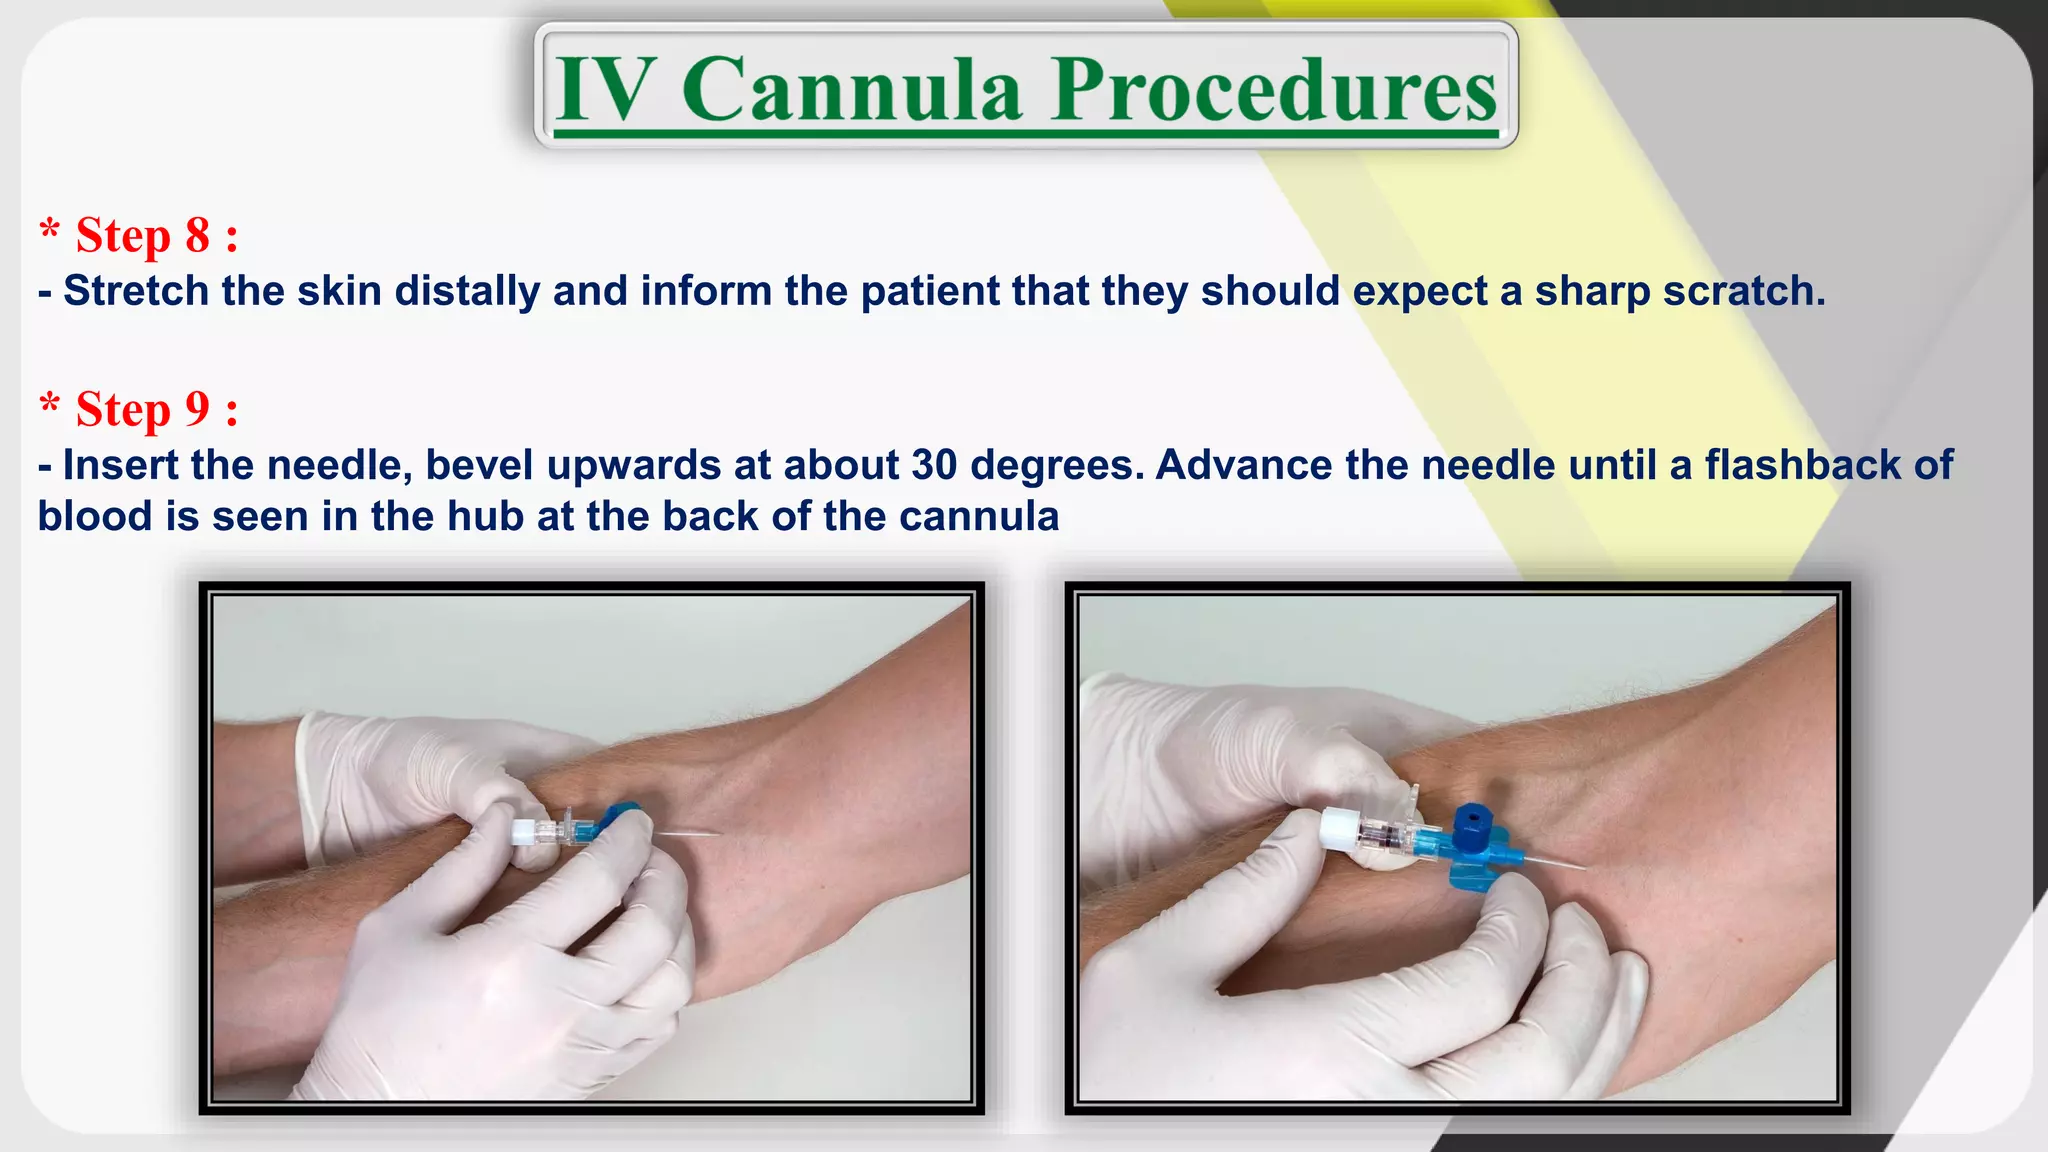
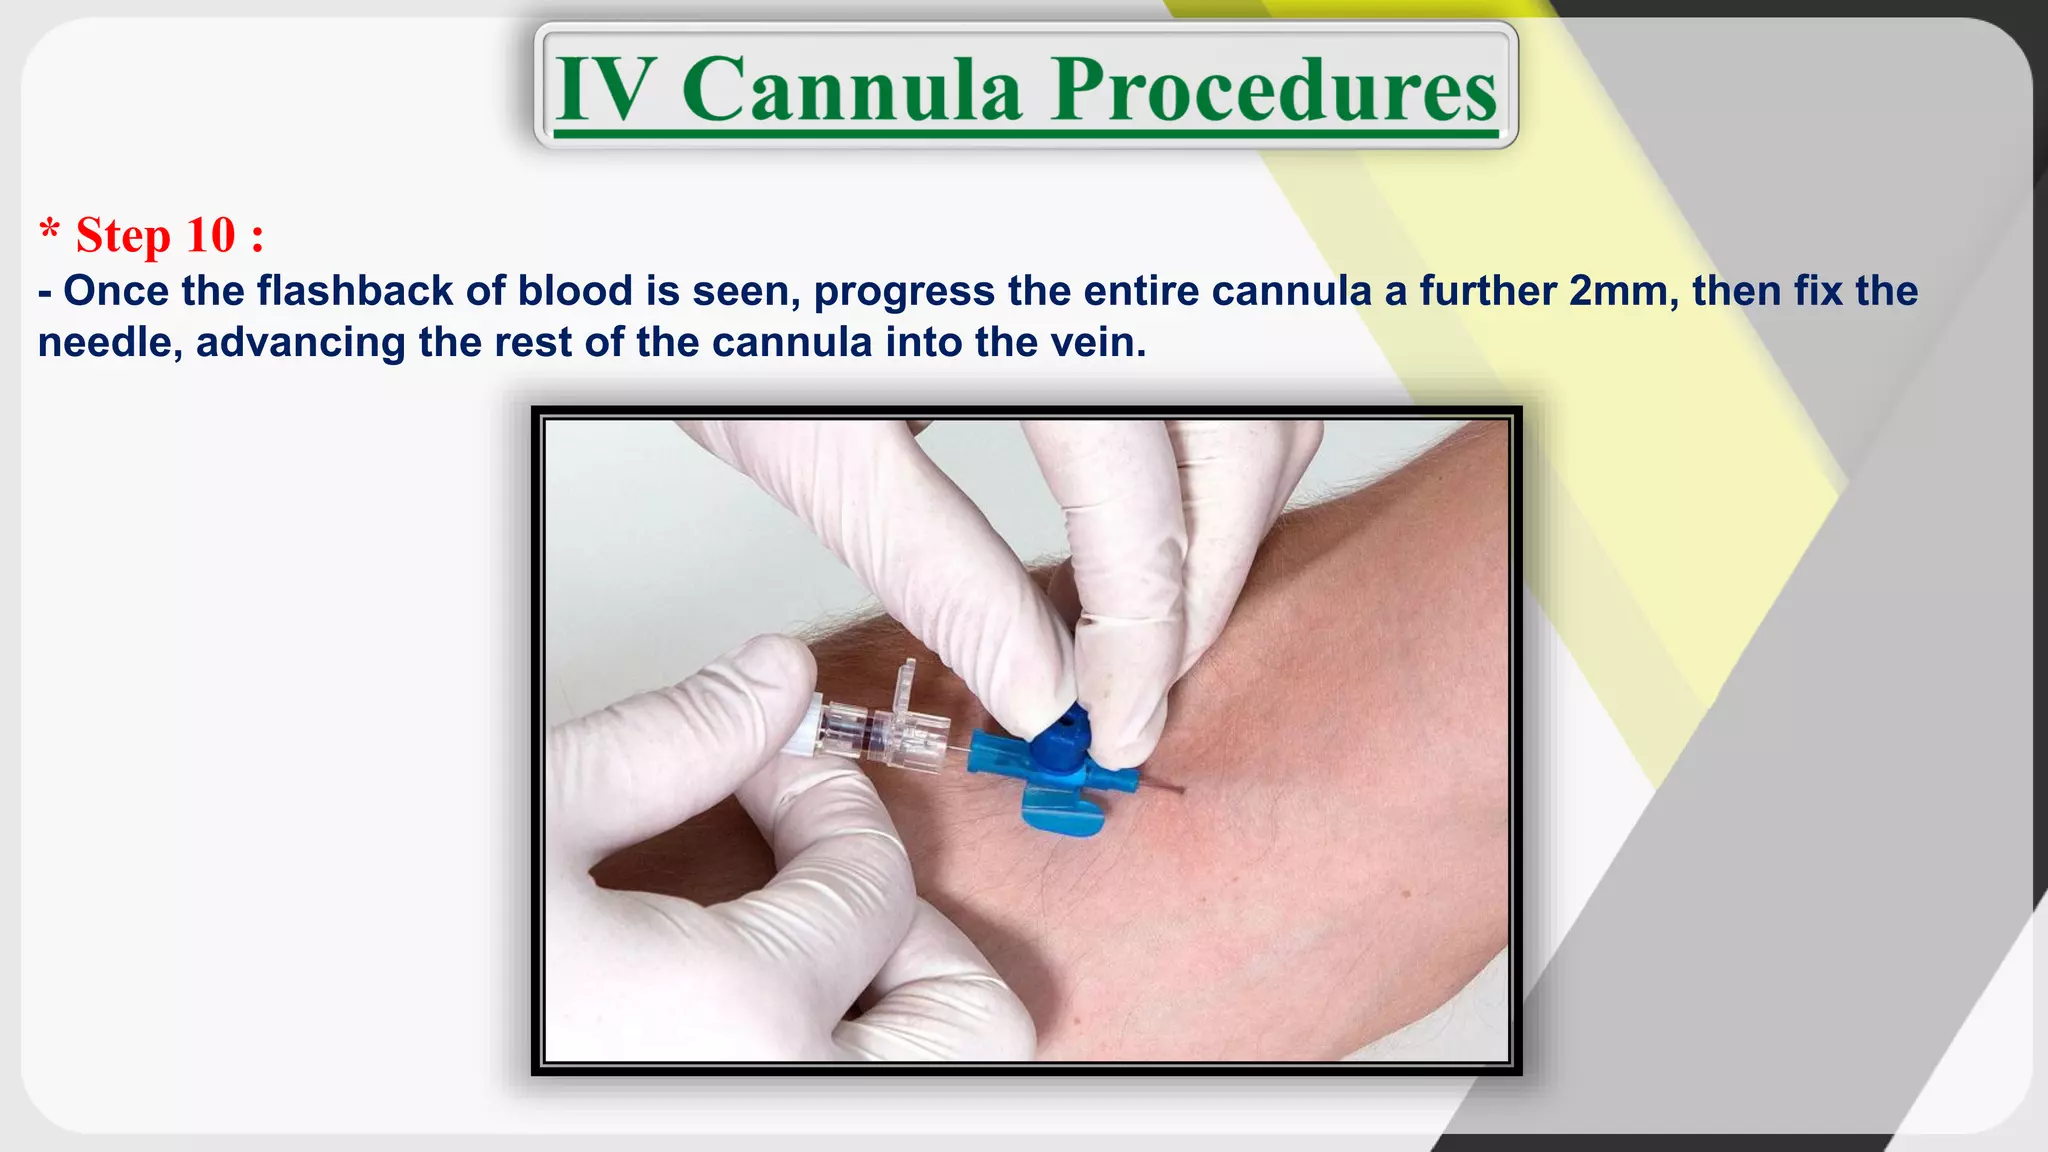
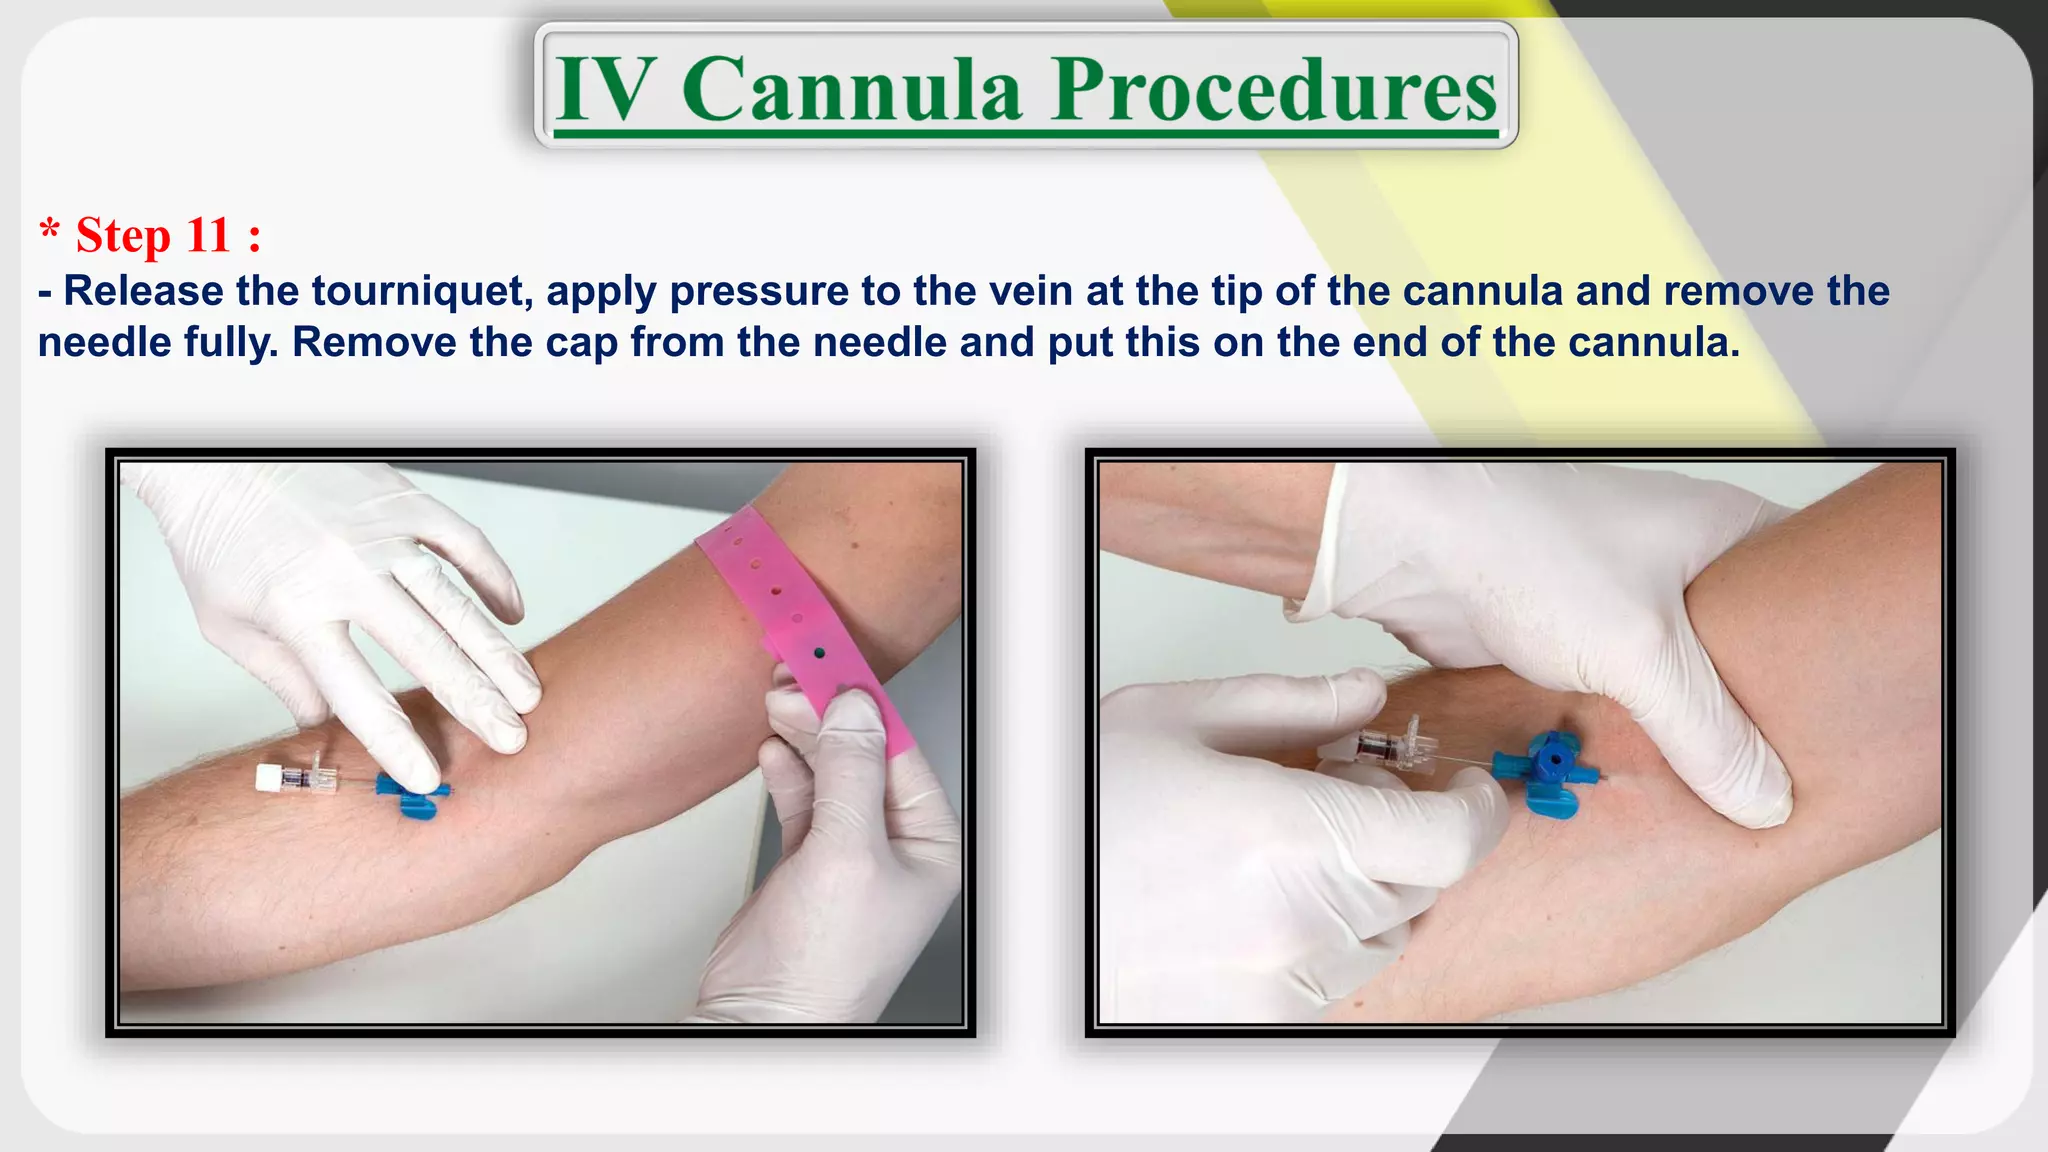
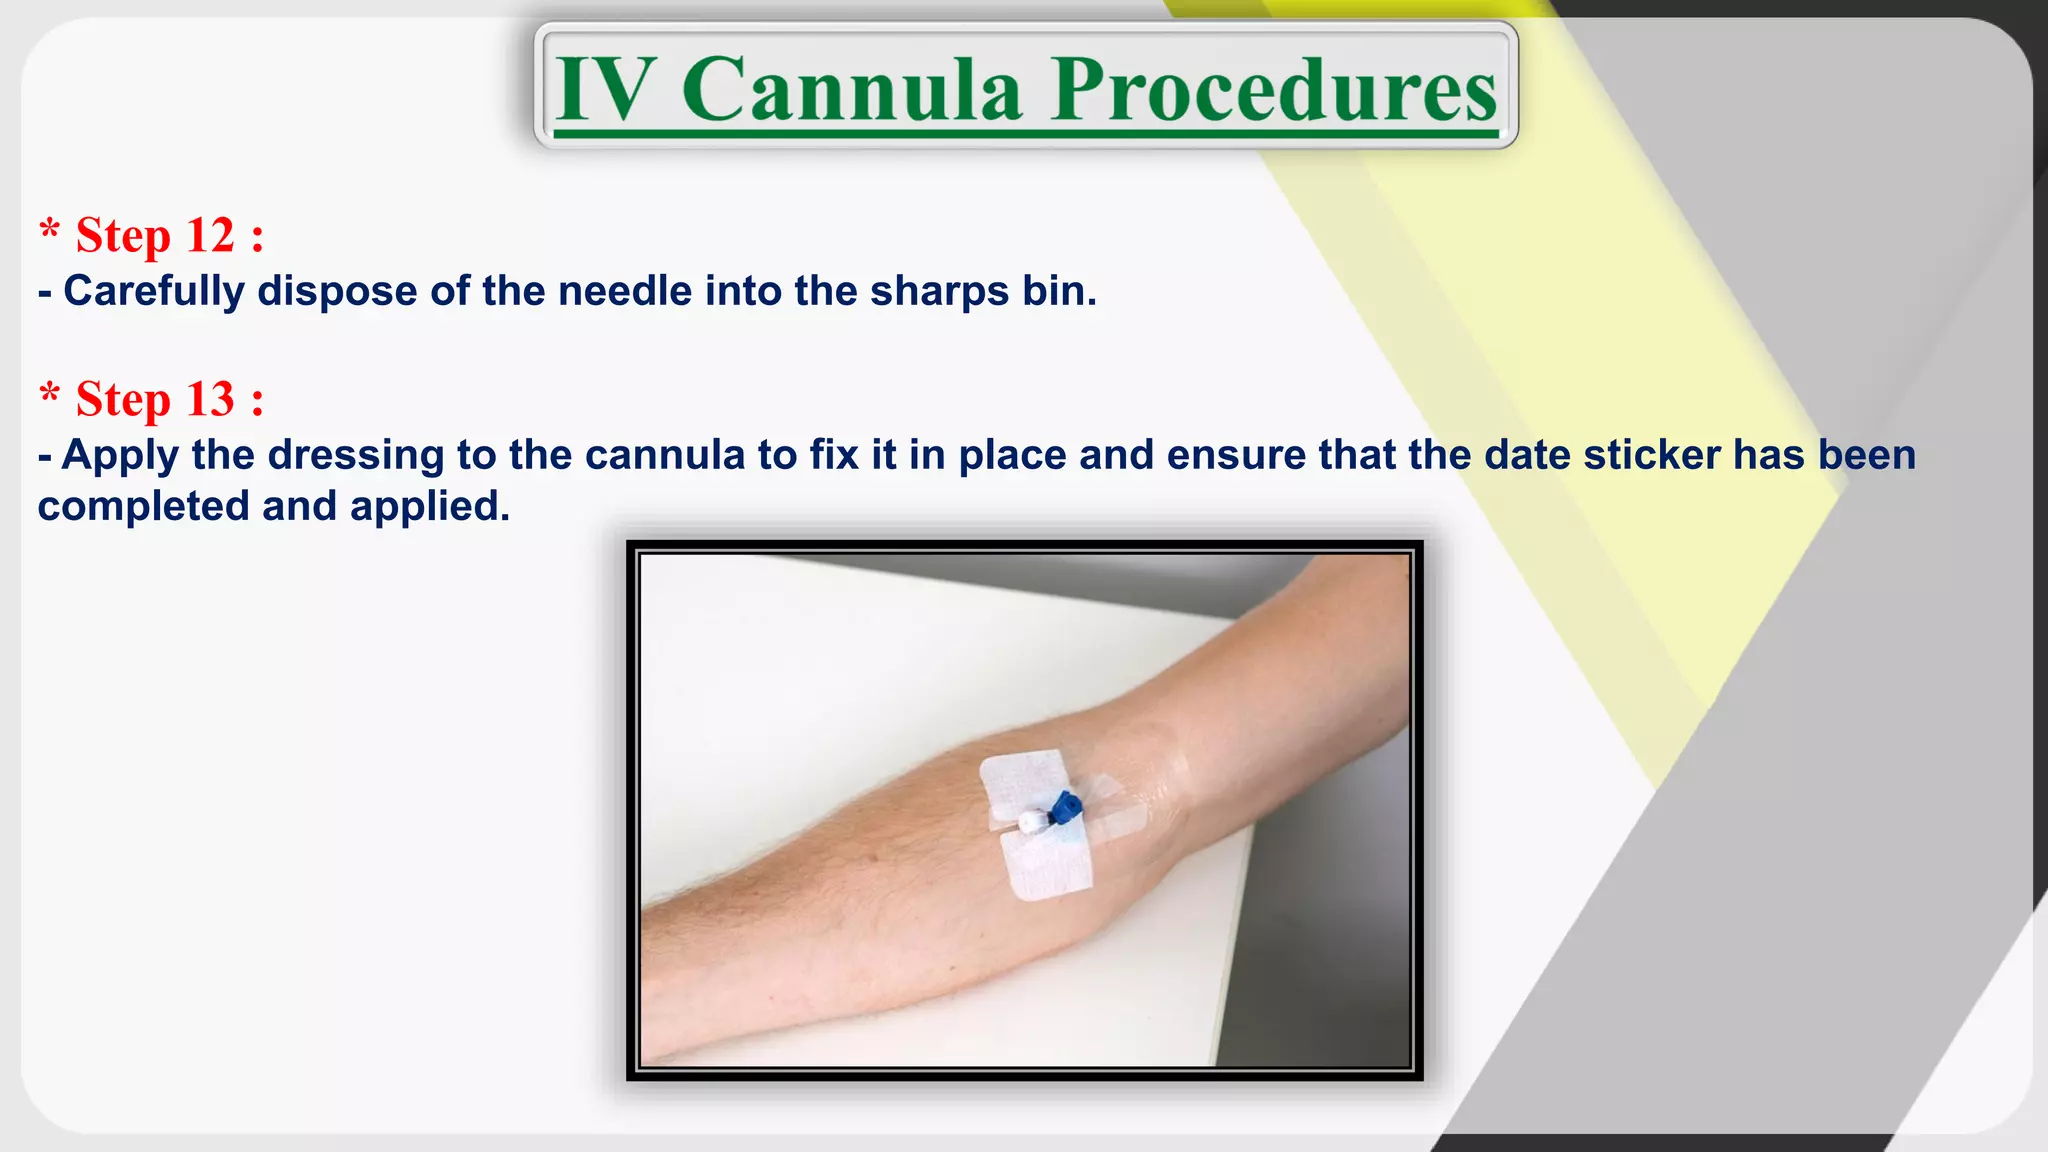
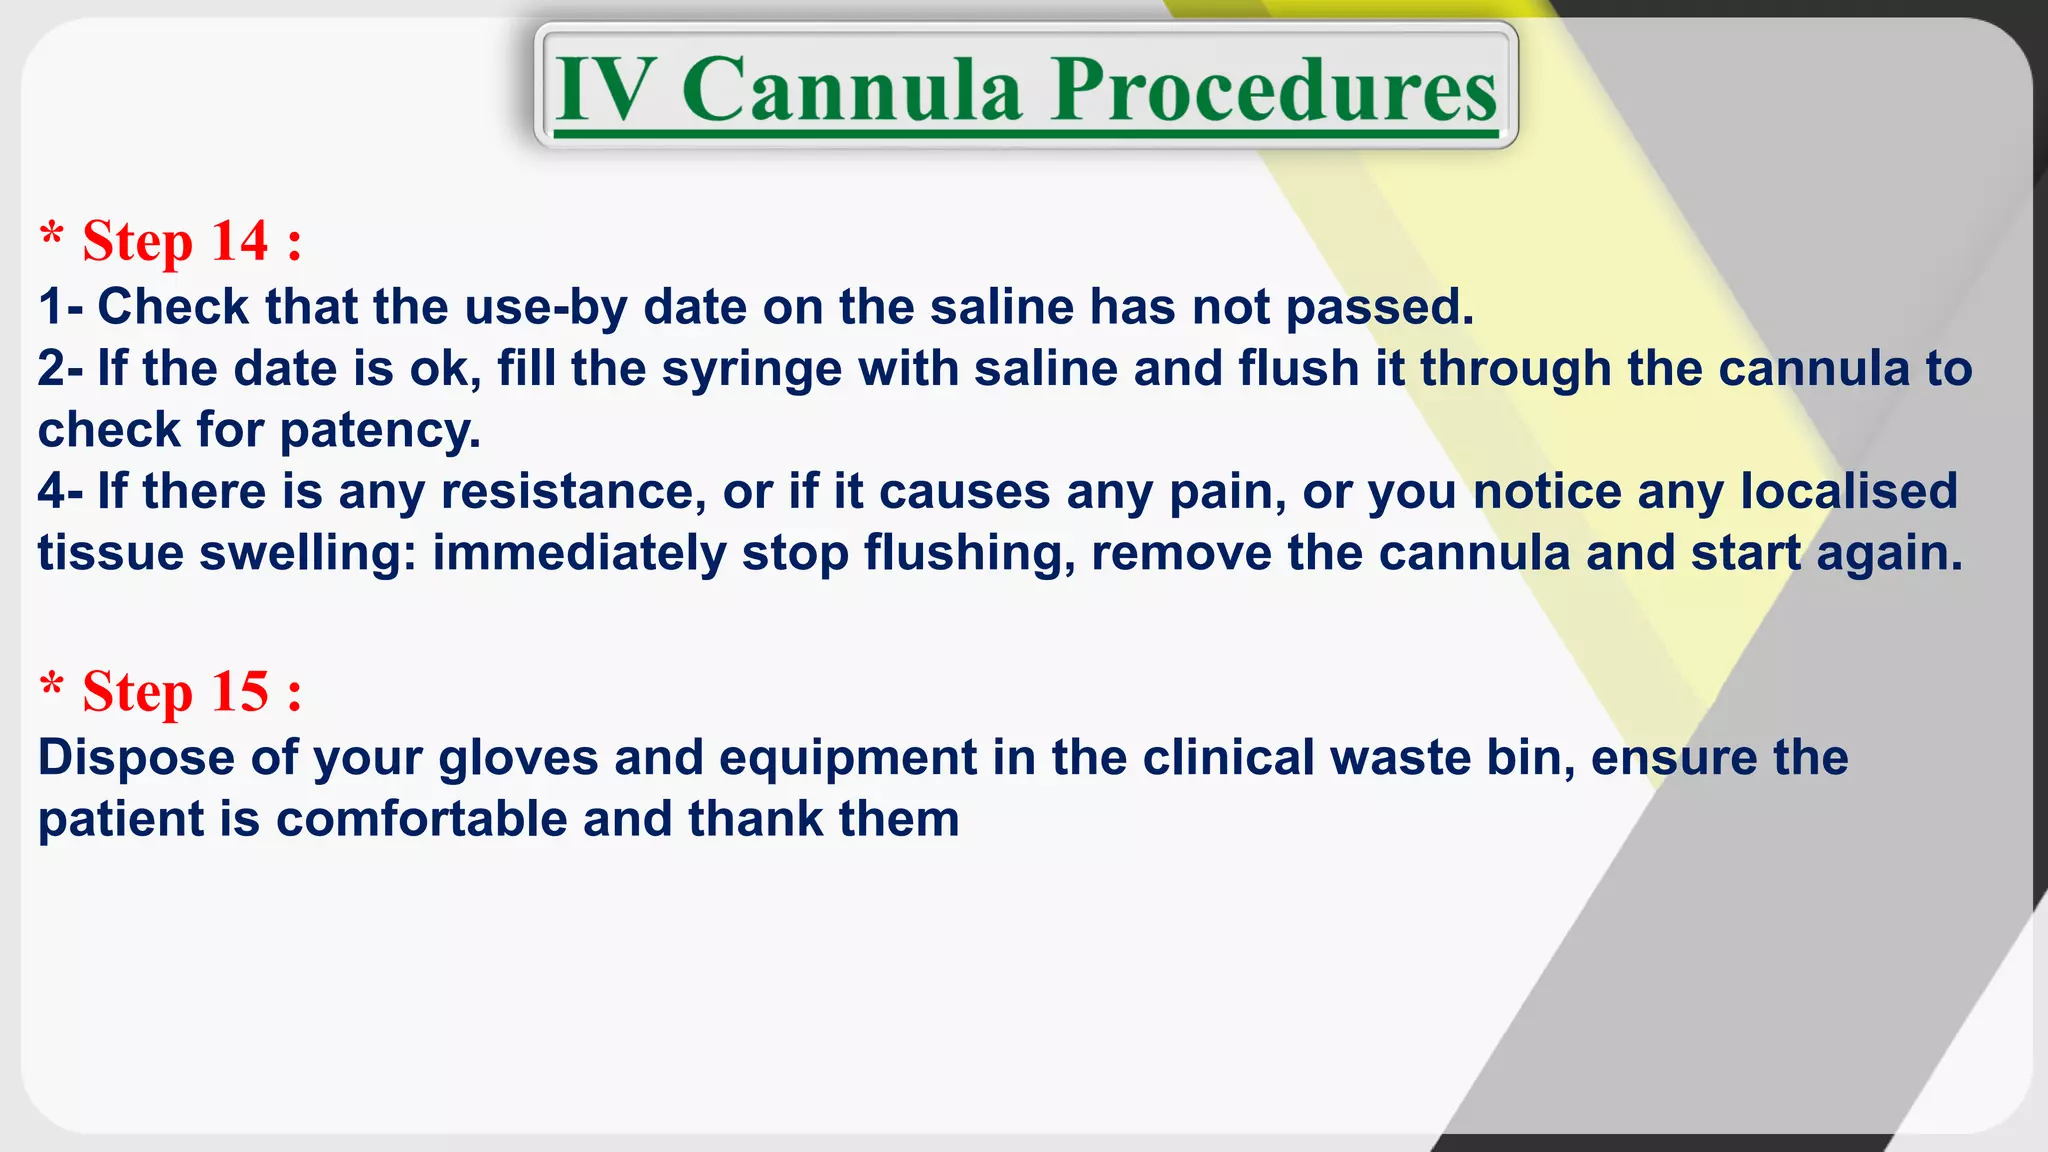
3. * Definition :
It is the process of determining the priority of patients' treatments based on the severity of their condition.
* Triage categories :
1- Red (Immediate ā Threat to life ā Acute critical conditions), Example :
Arterial lesions, internal hemorrhage, major amputations.
2- Yellow (Urgent ā Patient at risk if the treatment is delayed), Example :
Minor amputations, flesh wounds, fractures and dislocations.
3- Green (No risk to life ā Stable conditions), Example :
Walking wounded.
4- Black (Expectant ā Dead patient)
4.
5.
6. * A / Airway :
1- Patent airway? Can the patient talk? Is he conscious? If not, look for the obstruction (eg. Forein body, vomit, blood).
2- Next step : Head tilt, chain lift.
* B / Breathing :
1- Look for cyanosis, breathing depth, symmetrical chest expantion.
2- Measure the respiratory rate.
3- Next step : Positioning the patient & start CPR or use the Ambu or bag-pocket mask ventilation.
* C / Circulation :
1- Look for bleeding signs.
2- Measure the vital signs (PR, RR, Bp).
3- Next step : STOP the bleeding & starting IV fluid.
* D / Disability :
1- Look for patient movement, can he move? Is he conscious?
2- Next step : Recovery position.
* E / Exposure :
1- Head to toe assessment : Look for the injuries (trauma, fractures, lesions, bleeding) on the patientās skin.
2- Next step : Start treating the injuries (Stabilize the fractures, stop bleeding, cover the lesions .. etc).
7.
8.
9. ā¢ Insertion of an intravenous (IV) cannula involves connecting a tube into a patient's vein so that
infusions can be inserted directly into the patientās bloodstream.
ā¢ Cannulas (also known as venflons) are available in various colours, each of which correspond
to the size of the tube.
ā¢ The required size depends on:
1- What will be infused, for example: colloid, crystalloid, blood products or medications.
2- The rate the infusion is to run.
ā¢ In addition, the patients veins may dictate the size to use, for example you may only be able to
insert a blue (small) cannula into an elderly patient's vein.
ā¢ This is a core clinical skill to know, and is frequently examined upon.
10.
11.
12. * Step 1 :
1- Introduce yourself to the patient and clarify the patientās identity.
2- Explain the procedure to the patient and gain informed consent to continue.
3- Inform that cannulation may cause some discomfort but that it will be short lived.
13. * Step 2 :
- Ensure that you have all of your equipment ready as follows :
1- Alcohol cleanser.
2- Gloves.
3- An alcohol wipe.
4- A disposable tourniquet.
5- An IV cannula.
6- A suitable plaster.
7- A syringe.
8- Saline.
9- A clinical waste bin.
14. * Step 3 :
- Sanitise your hands using alcohol cleanser.
15. * Step 4 :
- Position the arm so that it is comfortable for the patient and identify a vein.
* Step 5 :
- Apply the tourniquet and re-check the vein.
16. * Step 6 :
- Put on your gloves, clean the patientās skin with the alcohol wipe and let it dry.
17. * Step 7 :
- Remove the cannula from its packaging and remove the needle cover ensuring not to touch the needle.
18. * Step 8 :
- Stretch the skin distally and inform the patient that they should expect a sharp scratch.
* Step 9 :
- Insert the needle, bevel upwards at about 30 degrees. Advance the needle until a flashback of
blood is seen in the hub at the back of the cannula
19. * Step 10 :
- Once the flashback of blood is seen, progress the entire cannula a further 2mm, then fix the
needle, advancing the rest of the cannula into the vein.
20. * Step 11 :
- Release the tourniquet, apply pressure to the vein at the tip of the cannula and remove the
needle fully. Remove the cap from the needle and put this on the end of the cannula.
21. * Step 12 :
- Carefully dispose of the needle into the sharps bin.
* Step 13 :
- Apply the dressing to the cannula to fix it in place and ensure that the date sticker has been
completed and applied.
22. * Step 14 :
1- Check that the use-by date on the saline has not passed.
2- If the date is ok, fill the syringe with saline and flush it through the cannula to
check for patency.
4- If there is any resistance, or if it causes any pain, or you notice any localised
tissue swelling: immediately stop flushing, remove the cannula and start again.
* Step 15 :
Dispose of your gloves and equipment in the clinical waste bin, ensure the
patient is comfortable and thank them
23. * Step 14 :
1- Check that the use-by date on the saline has not passed.
2- If the date is ok, fill the syringe with saline and flush it through the cannula to
check for patency.
4- If there is any resistance, or if it causes any pain, or you notice any localised
tissue swelling: immediately stop flushing, remove the cannula and start again.
* Step 15 :
Dispose of your gloves and equipment in the clinical waste bin, ensure the
patient is comfortable and thank them