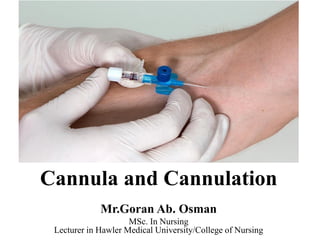
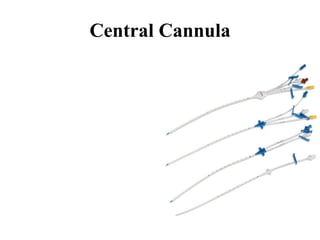
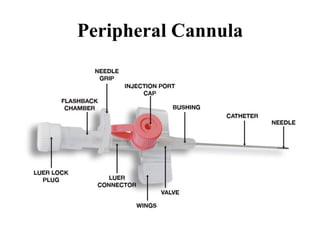
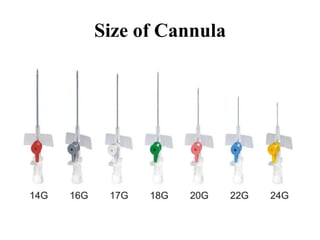
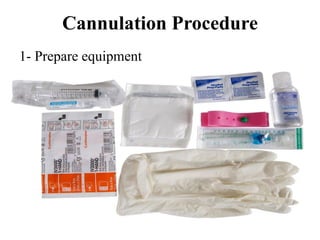
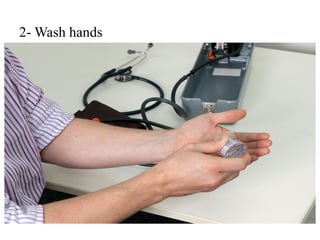
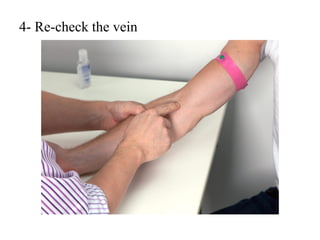
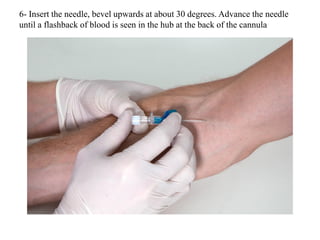
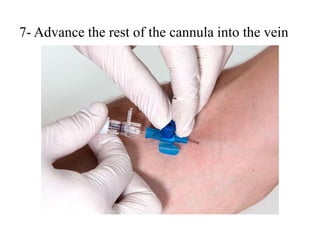
Cannula and Cannulation
Mr.Goran Ab. Osman
MSc. In Nursing
Lecturer in Hawler Medical University/College of Nursing
I.V cannulation
Intravenous (IV) cannulation is a technique in
which a cannula is placed inside a vein to
provide venous access.
Indications
– IV administration of fluid or blood or blood products
– IV administration of medications or chemotherapeutic
agents
– IV nutritional support
– IV administration of radiologic contrast agents for CT or
MRI
– Unable to take oral medication
– Blood sampling
Cannula
Cannula: A hollow tube with a sharp, retractable inner core
that can be inserted into a vein, an artery, or another body
cavity.
Types of Cannulation
– Central Venous Access
• Jugular vein.
• Sub-Clavicular vein.
• Femoral vein.
– Peripheral Venous Access
Central Cannula
Peripheral Cannula
Size of Cannula
Size & site
• Selection of Cannula & location based on:
– Vein accessibility
– Type of therapy (fluid, blood, irritant medications, ..)
– Rate and Volume to be infused.
– Patient condition.
– Patient preference (location)
Equipment
• Dressing Tray
• Non Sterile Gloves
• Cleaning Wipes
• Gauze swab
• IV cannula (separate slide)
• Tourniquet
• Alcohol wipes
• Saline flush and sterile syringe or fluid to be administered
• Sharps bin
Cannulation Preparation
• Give explanation
• Gain consent
• Position the patient appropriately and identify the
non-dominant hand / arm
• Support arm on pillow or in other suitable manner.
• Check for any contra-indications e.g. infection,
damaged tissue
Cannulation Procedure
1- Prepare equipment
2- Wash hands
3- Apply the tourniquet and re-check the vein.
4- Re-check the vein
5- Put on your gloves, clean the patient’s skin with the
alcohol wipe and let it dry.
6- Remove the needle cover
6- Insert the needle, bevel upwards at about 30 degrees. Advance the needle
until a flashback of blood is seen in the hub at the back of the cannula
7- Advance the rest of the cannula into the vein
8- Release the tourniquet
9- Remove the needle, Carefully dispose of the needle into the
sharps bin.
10- Apply the plaster to the cannula
11- Flush the cannula with 2-5 mls 0.9% Sodium
Chloride or attach an IV giving set and fluid
12- Document the procedure including
• Date & time
• Site and size of cannula
13- Review date (cannula should be in situ no longer
than 72 hours without appropriate risk assessment.)
14- Thank the patient
15- Clean up, dispose of rubbish
Lets practice……

Cannulation

  • 1.
    Cannula and Cannulation Mr.GoranAb. Osman MSc. In Nursing Lecturer in Hawler Medical University/College of Nursing
  • 2.
    I.V cannulation Intravenous (IV)cannulation is a technique in which a cannula is placed inside a vein to provide venous access.
  • 3.
    Indications – IV administrationof fluid or blood or blood products – IV administration of medications or chemotherapeutic agents – IV nutritional support – IV administration of radiologic contrast agents for CT or MRI – Unable to take oral medication – Blood sampling
  • 4.
    Cannula Cannula: A hollowtube with a sharp, retractable inner core that can be inserted into a vein, an artery, or another body cavity.
  • 5.
    Types of Cannulation –Central Venous Access • Jugular vein. • Sub-Clavicular vein. • Femoral vein. – Peripheral Venous Access
  • 6.
  • 7.
  • 8.
  • 9.
    Size & site •Selection of Cannula & location based on: – Vein accessibility – Type of therapy (fluid, blood, irritant medications, ..) – Rate and Volume to be infused. – Patient condition. – Patient preference (location)
  • 10.
    Equipment • Dressing Tray •Non Sterile Gloves • Cleaning Wipes • Gauze swab • IV cannula (separate slide) • Tourniquet • Alcohol wipes • Saline flush and sterile syringe or fluid to be administered • Sharps bin
  • 11.
    Cannulation Preparation • Giveexplanation • Gain consent • Position the patient appropriately and identify the non-dominant hand / arm • Support arm on pillow or in other suitable manner. • Check for any contra-indications e.g. infection, damaged tissue
  • 12.
  • 13.
  • 14.
    3- Apply thetourniquet and re-check the vein.
  • 15.
  • 16.
    5- Put onyour gloves, clean the patient’s skin with the alcohol wipe and let it dry.
  • 17.
    6- Remove theneedle cover
  • 18.
    6- Insert theneedle, bevel upwards at about 30 degrees. Advance the needle until a flashback of blood is seen in the hub at the back of the cannula
  • 20.
    7- Advance therest of the cannula into the vein
  • 21.
    8- Release thetourniquet
  • 22.
    9- Remove theneedle, Carefully dispose of the needle into the sharps bin.
  • 23.
    10- Apply theplaster to the cannula
  • 24.
    11- Flush thecannula with 2-5 mls 0.9% Sodium Chloride or attach an IV giving set and fluid 12- Document the procedure including • Date & time • Site and size of cannula 13- Review date (cannula should be in situ no longer than 72 hours without appropriate risk assessment.) 14- Thank the patient 15- Clean up, dispose of rubbish
  • 25.