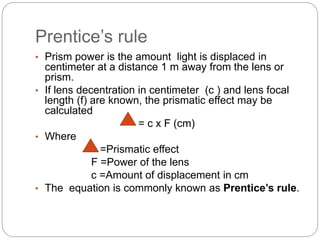
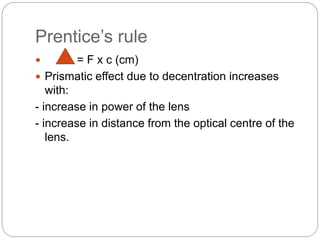
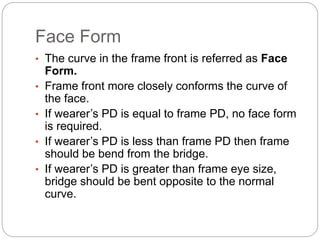
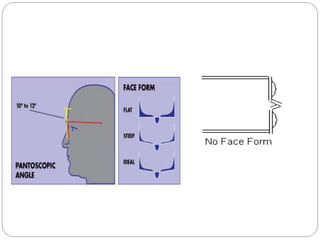
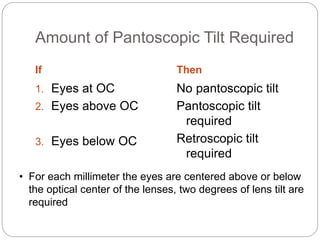
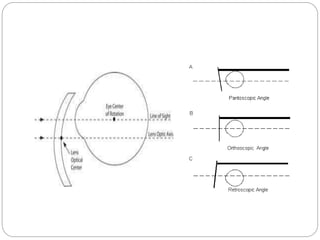
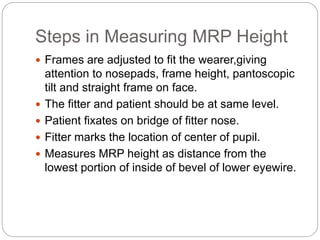
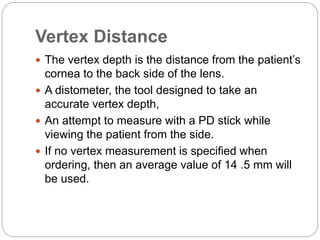
BEENISH LATIF
OPTOMETRIST
COAVS
Reference Point Placement,
Multifocal Height,
Blank Size Determination
Position of Frame
 Frame should be properly positioned for initial
measurements.
 With metal frames, nose pads adjust with correct
angle.
 There should be correct bifocal height, and bridge
size.
 With plastic frames, bridge size evaluation is
simple.
Optical Centering for Single Vision
Lenses
 Optical center of lens should line up with the pupil
of the eye.
 Optical center is major point of reference for
lenses.
 At the optical center there is no prismatic effect.
 Prismatic effect can be induced away from the
OC.
Prismatic Effect
 The optical center of lens has no prism.
 A lens prescription can require a certain amount
of prism.
 Major Reference Point( MRP ): is the point on
the lens where the prism is equal to that called for
by the prescription is called the Major Reference
Point
MRP
• When there is no prism in prescription, OC and
MRP are exactly the same point.
• When there is prism in prescription, OC and MRP
are on different locations.
• The MRP is in front of the line of sight of eye.
Whereas the optical center is some where else.
• MRP should be placed according to monocular
PDs than the binocular PDs if the lenses are of
different power.
Prentice’s rule
• Prism power is the amount light is displaced in
centimeter at a distance 1 m away from the lens or
prism.
• If lens decentration in centimeter (c ) and lens focal
length (f) are known, the prismatic effect may be
calculated
= c x F (cm)
• Where
=Prismatic effect
F =Power of the lens
c =Amount of displacement in cm
• The equation is commonly known as Prentice’s rule.
Prentice’s rule
 = F x c (cm)
 Prismatic effect due to decentration increases
with:
- increase in power of the lens
- increase in distance from the optical centre of the
lens.
Face Form
• The curve in the frame front is referred as Face
Form.
• Frame front more closely conforms the curve of
the face.
• If wearer’s PD is equal to frame PD, no face form
is required.
• If wearer’s PD is less than frame PD then frame
should be bend from the bridge.
• If wearer’s PD is greater than frame eye size,
bridge should be bent opposite to the normal
curve.
Amount of Face Form Required
If
1. PD=Eye size
+Bridge size
2. PD<Eye size
+Bridge size
3. PD>Eye size
+Bridge size
Then
No face form
Positive face form
Negative face form
Vertical displacement
• Pantoscopic tilt brings the optic axis of the lens in
line with the center of rotation of the eye—
improving visual comfort for the patient.
• With zero pantoscopic tilt, the lens optical center
and optical axis will pass through the center of
rotation of the eye only if the pupil is at the same
height.
• However, the pupil is rarely vertically centered
within the lens—it is generally positioned
approximately 5mm above the datum line, or
frame midline.
Pantoscopic Tilt
• For every 2 degrees of pantoscopic tilt added to the
frame front, the O.C. of the lens should be lowered
1mm.
• Most eyes sit about 5mm above the frame mid- line,
so it is important that the amount of pantoscopic tilt
needed, usually 5 to 15 degrees, is applied to the
frame prior to measurements being taken.
• The O.C. height ordered must factor in the degree of
tilt applied to the frame.
• If the frame is not pre-fit, the relative placement of the
segment, or O.C., will be misaligned with the line of
sight of the eye in the finished lens.
Pantoscopic Tilt
For each millimeter the eyes are centered above
or below the optical center of the lenses
two degrees of lens tilt are required
Amount of Pantoscopic Tilt Required
If Then
1. Eyes at OC
2. Eyes above OC
3. Eyes below OC
No pantoscopic tilt
Pantoscopic tilt
required
Retroscopic tilt
required
• For each millimeter the eyes are centered above or below
the optical center of the lenses, two degrees of lens tilt are
required
Steps in Measuring MRP Height
 Frames are adjusted to fit the wearer,giving
attention to nosepads, frame height, pantoscopic
tilt and straight frame on face.
 The fitter and patient should be at same level.
 Patient fixates on bridge of fitter nose.
 Fitter marks the location of center of pupil.
 Measures MRP height as distance from the
lowest portion of inside of bevel of lower eyewire.
Vertex Distance
 The vertex depth is the distance from the patient’s
cornea to the back side of the lens.
 A distometer, the tool designed to take an
accurate vertex depth,
 An attempt to measure with a PD stick while
viewing the patient from the side.
 If no vertex measurement is specified when
ordering, then an average value of 14 .5 mm will
be used.
Vertex Distance
 Vertex distances becomes of more concern in
high powered prescriptions.
Measuring for Multifocal Segment
heights
 Bifocal height:
Most bifocal heights will be less than half of the
frame B,
 Usually fall between 9 and 20 millimeters from the
bottom of the eyewire.
Segment height for bifocal
 Place yourself across from the patient and at the
exact same height as the patient.
 Ask the patient to put on his or her old pair of
glasses, if available, and note the position of the
segment.
 Does it appear high, low, If it appears high, be
sure to ask if the patient must lower his or her
head in order to see over it.
Segment height for bifocal
 If it appears low, ask them if they feel they have
to tilt their head back to read.
 Most people wearing lined multifocals have been
wearing them for years and will know exactly
what you are asking.
 Adjust the new frame so that it sits correctly on
the patient’s nose and is positioned where he or
she likes it.
Segment height for bifocal
 With the patient’s head in a relaxed position and
looking straight at you draw a line on the demo-
lens that matches the highest point of their lower
eyelid, which is where the top of the bifocal will
be.
 Remove the glasses and measure from the
lowest point in the eyewire to the top of the line.
 Record the measurement as the segment height,
or “seg” height.
 Take the binocular PD measurement
Segment height for Trifocals
 Most trifocal heights will be near or less than half
of the frame B.
 It usually fall between 14 and 25 millimeters from
the bottom of the eyewire.
 Place yourself across from the patient and at the
exact same height as the patient.
 Ask the patient to put on his or her old pair of
glasses and note the position of the segment.
Segment height for Trifocals
 Adjust the frame so that it sits correctly on the
patient’s nose and is positioned properly.
 With the patient’s head in a relaxed position and
looking straight at you,
 Draw a line on the demo-lens that matches the
bottom of their pupil, which is where the top of
the trifocal.
 Measure from the bottom of the eyewire to the
top of the line as seg” height.
Segment height for Trifocals
Segment height for Progressive
 Most progressive fitting heights will be more than
half of the frame B.
 It will usually fall between 15 and 25 millimeters
from the bottom of the eyewire.
Segment height for Progressive
 Place yourself across from the patient and at the
exact same height as the patient.
 If the patient has worn progressive lenses before,
ask them specifically if they have had problems in
the past with a segment being too high or too low.
 Adjust the frame so that it sits correctly on the
patient’s nose is in the position
 With relaxed position and looking straight at you,
on the demo-lens dot the very center of their
pupil.
 This is where the distance area of the progressive
lens will be placed.
 measure from the lowest point of the eyewire to
the dot. Record the measurement on your lab
order form as the fitting height, or “fit” height.
Determining Blank Size
 A lens blank is a lens before it is edged to fit into
the frame.
 It may be either finished or semifinished.
 A finished lens blank has the correct powers and
needs only to finished.
 A semifinished lens has one side finished and
other needs to be ground and polished to the
correct power.
Formula to find MBS
 Minimum blank size (MBS) for finished single
vision lenses can be find out as:
MBS = ED+2 (decentration per lens) +2
Where
MBS is minimum blank size
ED is effective diameter
Decentration per lens is the difference between
the frame GCD and the wearer’s PD, all divided
by 2
 Decentration per lens= (A+DBL)-PD/2
 Twice the decentration per lens equals total
decentration.
 Total decentration= (A+DBL)-PD
 MBS= ED+total decentration+2mm
Reference Point Placement,.ppt · version 1.ppt

Reference Point Placement,.ppt · version 1.ppt

  • 1.
    BEENISH LATIF OPTOMETRIST COAVS Reference PointPlacement, Multifocal Height, Blank Size Determination
  • 2.
    Position of Frame Frame should be properly positioned for initial measurements.  With metal frames, nose pads adjust with correct angle.  There should be correct bifocal height, and bridge size.  With plastic frames, bridge size evaluation is simple.
  • 3.
    Optical Centering forSingle Vision Lenses  Optical center of lens should line up with the pupil of the eye.  Optical center is major point of reference for lenses.  At the optical center there is no prismatic effect.  Prismatic effect can be induced away from the OC.
  • 4.
    Prismatic Effect  Theoptical center of lens has no prism.  A lens prescription can require a certain amount of prism.  Major Reference Point( MRP ): is the point on the lens where the prism is equal to that called for by the prescription is called the Major Reference Point
  • 5.
    MRP • When thereis no prism in prescription, OC and MRP are exactly the same point. • When there is prism in prescription, OC and MRP are on different locations. • The MRP is in front of the line of sight of eye. Whereas the optical center is some where else. • MRP should be placed according to monocular PDs than the binocular PDs if the lenses are of different power.
  • 6.
    Prentice’s rule • Prismpower is the amount light is displaced in centimeter at a distance 1 m away from the lens or prism. • If lens decentration in centimeter (c ) and lens focal length (f) are known, the prismatic effect may be calculated = c x F (cm) • Where =Prismatic effect F =Power of the lens c =Amount of displacement in cm • The equation is commonly known as Prentice’s rule.
  • 7.
    Prentice’s rule  =F x c (cm)  Prismatic effect due to decentration increases with: - increase in power of the lens - increase in distance from the optical centre of the lens.
  • 8.
    Face Form • Thecurve in the frame front is referred as Face Form. • Frame front more closely conforms the curve of the face. • If wearer’s PD is equal to frame PD, no face form is required. • If wearer’s PD is less than frame PD then frame should be bend from the bridge. • If wearer’s PD is greater than frame eye size, bridge should be bent opposite to the normal curve.
  • 10.
    Amount of FaceForm Required If 1. PD=Eye size +Bridge size 2. PD<Eye size +Bridge size 3. PD>Eye size +Bridge size Then No face form Positive face form Negative face form
  • 11.
    Vertical displacement • Pantoscopictilt brings the optic axis of the lens in line with the center of rotation of the eye— improving visual comfort for the patient. • With zero pantoscopic tilt, the lens optical center and optical axis will pass through the center of rotation of the eye only if the pupil is at the same height. • However, the pupil is rarely vertically centered within the lens—it is generally positioned approximately 5mm above the datum line, or frame midline.
  • 12.
    Pantoscopic Tilt • Forevery 2 degrees of pantoscopic tilt added to the frame front, the O.C. of the lens should be lowered 1mm. • Most eyes sit about 5mm above the frame mid- line, so it is important that the amount of pantoscopic tilt needed, usually 5 to 15 degrees, is applied to the frame prior to measurements being taken. • The O.C. height ordered must factor in the degree of tilt applied to the frame. • If the frame is not pre-fit, the relative placement of the segment, or O.C., will be misaligned with the line of sight of the eye in the finished lens.
  • 13.
    Pantoscopic Tilt For eachmillimeter the eyes are centered above or below the optical center of the lenses two degrees of lens tilt are required
  • 14.
    Amount of PantoscopicTilt Required If Then 1. Eyes at OC 2. Eyes above OC 3. Eyes below OC No pantoscopic tilt Pantoscopic tilt required Retroscopic tilt required • For each millimeter the eyes are centered above or below the optical center of the lenses, two degrees of lens tilt are required
  • 16.
    Steps in MeasuringMRP Height  Frames are adjusted to fit the wearer,giving attention to nosepads, frame height, pantoscopic tilt and straight frame on face.  The fitter and patient should be at same level.  Patient fixates on bridge of fitter nose.  Fitter marks the location of center of pupil.  Measures MRP height as distance from the lowest portion of inside of bevel of lower eyewire.
  • 17.
    Vertex Distance  Thevertex depth is the distance from the patient’s cornea to the back side of the lens.  A distometer, the tool designed to take an accurate vertex depth,  An attempt to measure with a PD stick while viewing the patient from the side.  If no vertex measurement is specified when ordering, then an average value of 14 .5 mm will be used.
  • 18.
    Vertex Distance  Vertexdistances becomes of more concern in high powered prescriptions.
  • 19.
    Measuring for MultifocalSegment heights  Bifocal height: Most bifocal heights will be less than half of the frame B,  Usually fall between 9 and 20 millimeters from the bottom of the eyewire.
  • 20.
    Segment height forbifocal  Place yourself across from the patient and at the exact same height as the patient.  Ask the patient to put on his or her old pair of glasses, if available, and note the position of the segment.  Does it appear high, low, If it appears high, be sure to ask if the patient must lower his or her head in order to see over it.
  • 21.
    Segment height forbifocal  If it appears low, ask them if they feel they have to tilt their head back to read.  Most people wearing lined multifocals have been wearing them for years and will know exactly what you are asking.  Adjust the new frame so that it sits correctly on the patient’s nose and is positioned where he or she likes it.
  • 22.
    Segment height forbifocal  With the patient’s head in a relaxed position and looking straight at you draw a line on the demo- lens that matches the highest point of their lower eyelid, which is where the top of the bifocal will be.  Remove the glasses and measure from the lowest point in the eyewire to the top of the line.
  • 23.
     Record themeasurement as the segment height, or “seg” height.  Take the binocular PD measurement
  • 24.
    Segment height forTrifocals  Most trifocal heights will be near or less than half of the frame B.  It usually fall between 14 and 25 millimeters from the bottom of the eyewire.  Place yourself across from the patient and at the exact same height as the patient.  Ask the patient to put on his or her old pair of glasses and note the position of the segment.
  • 25.
    Segment height forTrifocals  Adjust the frame so that it sits correctly on the patient’s nose and is positioned properly.  With the patient’s head in a relaxed position and looking straight at you,  Draw a line on the demo-lens that matches the bottom of their pupil, which is where the top of the trifocal.  Measure from the bottom of the eyewire to the top of the line as seg” height.
  • 26.
  • 27.
    Segment height forProgressive  Most progressive fitting heights will be more than half of the frame B.  It will usually fall between 15 and 25 millimeters from the bottom of the eyewire.
  • 28.
    Segment height forProgressive  Place yourself across from the patient and at the exact same height as the patient.  If the patient has worn progressive lenses before, ask them specifically if they have had problems in the past with a segment being too high or too low.  Adjust the frame so that it sits correctly on the patient’s nose is in the position
  • 29.
     With relaxedposition and looking straight at you, on the demo-lens dot the very center of their pupil.  This is where the distance area of the progressive lens will be placed.  measure from the lowest point of the eyewire to the dot. Record the measurement on your lab order form as the fitting height, or “fit” height.
  • 31.
    Determining Blank Size A lens blank is a lens before it is edged to fit into the frame.  It may be either finished or semifinished.  A finished lens blank has the correct powers and needs only to finished.  A semifinished lens has one side finished and other needs to be ground and polished to the correct power.
  • 32.
    Formula to findMBS  Minimum blank size (MBS) for finished single vision lenses can be find out as: MBS = ED+2 (decentration per lens) +2 Where MBS is minimum blank size ED is effective diameter Decentration per lens is the difference between the frame GCD and the wearer’s PD, all divided by 2
  • 33.
     Decentration perlens= (A+DBL)-PD/2  Twice the decentration per lens equals total decentration.  Total decentration= (A+DBL)-PD  MBS= ED+total decentration+2mm