Downloaded 158 times


![10Installing and Basic Usage
Virtual Lab
Accessing the environment
From there, you can jump to the nodes: node2 and node3
[root@lab-1-node1 ~]# ssh lab-1-node2
The password is opennebula](https://image.slidesharecdn.com/opennebulatutorial5-171212143600/85/OpenNebula-5-4-Hands-on-Tutorial-10-320.jpg)

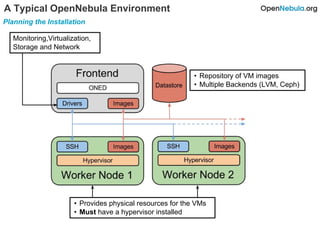
![16Installing and Basic Usage
Virtual Lab
Inspecting the environment - OpenNebula Configuration
Configuration changes:
--- /etc/one/oned.conf.orig
+++ /etc/one/oned.conf
@@ -82 +82 @@
-DB = [ BACKEND = "sqlite" ]
+DB = [ BACKEND="mysql", SERVER="localhost", PORT=3306,
USER="oneadmin", PASSWD="oneadmin", DB_NAME="opennebula" ]
--- /etc/one/sched.conf.orig
+++ /etc/one/sched.conf
@@ -74 +74 @@
-SCHED_INTERVAL = 30
+SCHED_INTERVAL = 5](https://image.slidesharecdn.com/opennebulatutorial5-171212143600/85/OpenNebula-5-4-Hands-on-Tutorial-16-320.jpg)
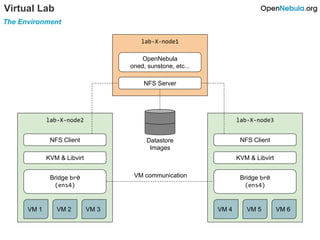
![17Installing and Basic Usage
Virtual Lab
Inspecting the environment - OpenNebula Configuration
Configuration changes:
--- /etc/one/vmm_exec/vmm_exec_kvm.conf.orig
+++ /etc/one/vmm_exec/vmm_exec_kvm.conf
@@ -37 +37 @@
-DISK = [ driver = "raw" , cache = "none"]
+DISK = [ driver = "raw", cache = "unsafe", total_iops_sec =
"50" ]
--- /etc/one/onegate-server.conf.orig
+++ /etc/one/onegate-server.conf
@@ -27 +27 @@
-:host: 127.0.0.1
+:host: 192.168.0.1](https://image.slidesharecdn.com/opennebulatutorial5-171212143600/85/OpenNebula-5-4-Hands-on-Tutorial-17-320.jpg)
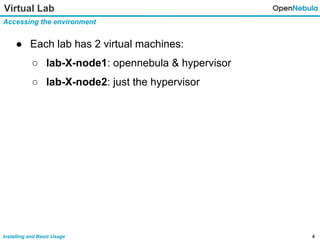
![20Installing and Basic Usage
CLI
OpenNebula Interfaces
Hands on (node1)
Overview of the CLI (as oneadmin)
# su - oneadmin
$ oneuser show
$ oneuser –h
$ one[TAB]
All the CLI commands should
be executed as the oneadmin
user. Remember to switch to
the oneadmin user always!](https://image.slidesharecdn.com/opennebulatutorial5-171212143600/85/OpenNebula-5-4-Hands-on-Tutorial-20-320.jpg)
![21Installing and Basic Usage
CLI
OpenNebula Interfaces
$ one[TAB]
oneuser Manage Users oneimage Manage Images
onegroup Manage Groups onetemplate Manage Templates
oneacl Manage ACLs onevm Manage VMs
onehost Manage Hosts oneacct Accounting Tool
onecluster Manage Clusters onemarket Marketplace Tool
onevnet Manage Networks onedb DB Tool
onedatastore Manage Datastores oneflow Manage flows (services)
oneshowback Showback onemarketapp Import marketapps
onevdc Manage VDCs onevrouter Manage virtual routers
onevcenter Import vCenter reources onesecgroup Manage sec. groups
onezone Manage zones](https://image.slidesharecdn.com/opennebulatutorial5-171212143600/85/OpenNebula-5-4-Hands-on-Tutorial-21-320.jpg)


OpenNebula can provide virtual infrastructure for virtual machines (VMs) and consists of a typical environment with: - A frontend node running OpenNebula services and a hypervisor for VMs. - Additional backend nodes running just hypervisors for VMs and sharing storage and networks. - VMs communicate via a shared bridge and private network. The tutorial covers installing OpenNebula on a lab environment with two backend nodes, configuring hosts, images, networks and templates. It then demonstrates basic usage like deploying VMs, managing their life cycle and contextualization using groups, quotas and different user views.


