Downloaded 12 times
![6Installing and Basic Usage
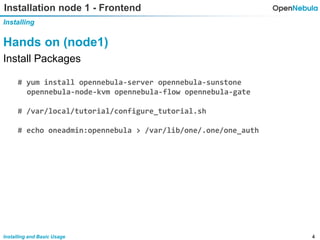
Installation node 1 - Frontend
Installing
Hands on (node1)
Overview of the CLI (as oneadmin)
# su - oneadmin
$ oneuser show
$ oneuser –h
$ one[TAB]](https://image.slidesharecdn.com/02-tutorial-160426091027/85/TechDay-April-Tutorial-6-320.jpg)
![7Installing and Basic Usage
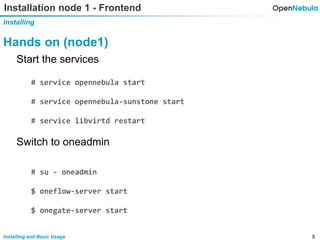
Installation node 1 - Frontend
Installing
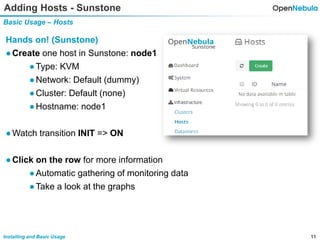
Hands on (node1) !
OpenNebula CLI Commands
$ one[TAB]
oneuser Manage Users oneimage Manage Images
onegroup Manage Groups onetemplate Manage Templates
oneacl Manage ACLs onevm Manage VMs
onehost Manage Hosts oneacct Accounting Tool
onecluster Manage Clusters onemarket Marketplace Tool
onevnet Manage Networks onedb DB Tool
onedatastore Manage Datastores](https://image.slidesharecdn.com/02-tutorial-160426091027/85/TechDay-April-Tutorial-7-320.jpg)
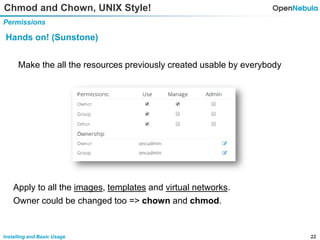
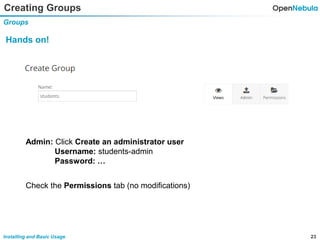
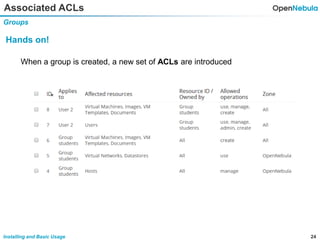
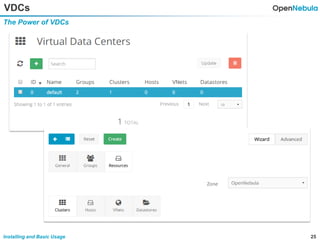
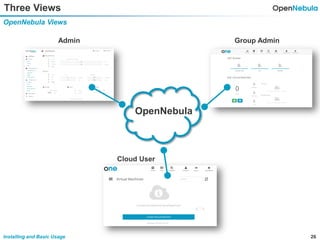
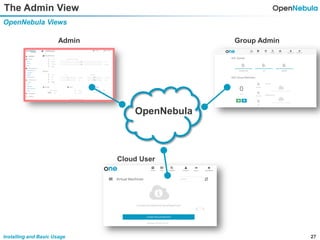
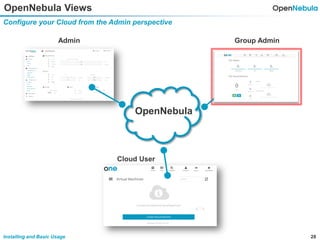
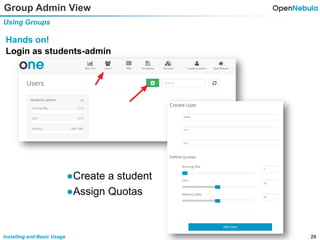
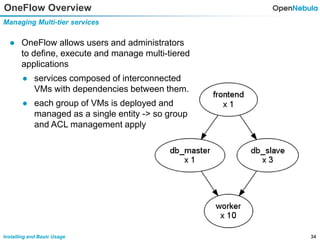


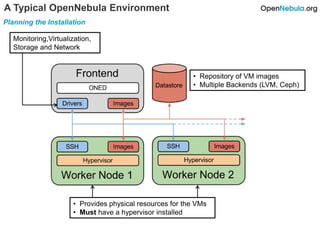
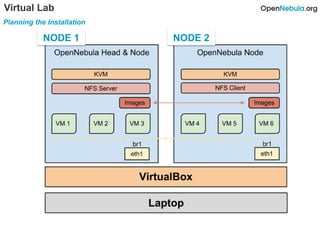
This document provides an overview of installing and using OpenNebula. It describes setting up a typical OpenNebula environment with multiple backends and a hypervisor. It then walks through installing OpenNebula on two nodes, configuring passwordless SSH, adding hosts, images, networks, templates, and instantiating VMs. It also covers basic VM actions, contextualization, permissions, groups, and the different views in OpenNebula. Finally, it introduces OneFlow for managing multi-tier applications and services, including life cycle strategies, auto-scaling based on metrics and schedules, and manually scaling services.


